
April’s Island Batik Challenge

 Last month, for the Island Batik challenge, I HAD to use the “Glorified 9 Patch” Accuquilt Go! die. And, I made the quilt on the right. You can read more about it on THIS POST. I enjoyed making the blocks SEW much! I knew I wanted to use the die again to make another quilt that was totally different! I think I achieved that goal!
As I was making the March quilt, I thought about April’s challenge to do a Creative Border or Binding. The idea to use the “big curve” portion of the die came to life when I thought it would make for a creative, curved border.
It was a little unsettling to have those pieces on the outside of the quilt with nothing to piece and match up to the notches. (Well, duh, that was the idea, right?)
I used Hobbs Heirloom Permium Cotton Batting that was a dream to free motion quilt with. I also used Schmetz Microtex 80/12 which goes through the batik and batting with ease.


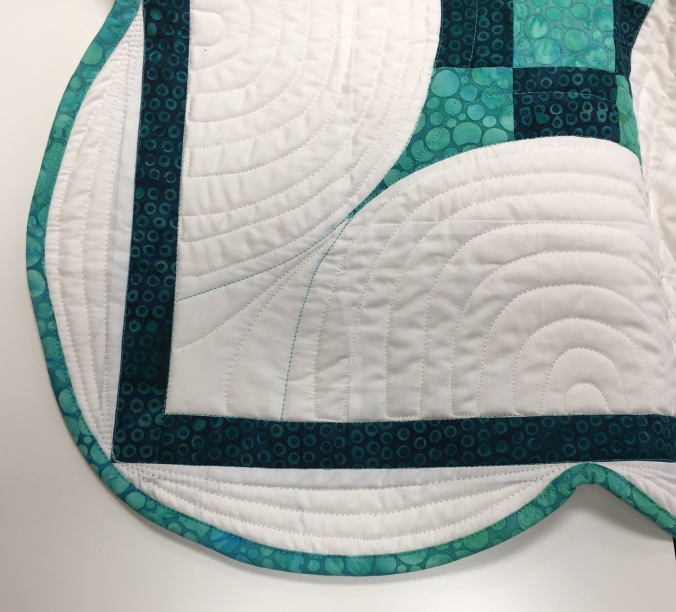
I started out quilting the quilt with Aurifil #1148: a pretty teal that I received from Island Batik last year. It was perfect for outlining the colourful blocks and completing the circles. (You can see a little of it at the corner on the picture below.) Then I started to do the freemotion quilting to fill in the circles. Oh MY … talk about a disaster … then I decided to try pebbles … still disastrous … then I decided I HAD to take all of the free motion quilting out. That took a bit of time! Actually – a lot of time! A couple of evenings at least!
Once all free motion teal was removed, I switched to Aurifil #2309, an off white. It was perfect! You can see the quilting, but not all the mistakes! I know, I know … if you look closely, you can still see the mistakes …
I made the bias binding according to one website, but I won’t tell you which one because the measurements were so very misleading. I ended up with enough bias binding to use on 3, yes 3 quilts. In the end, I guess that’s better than not having enough binding, right?
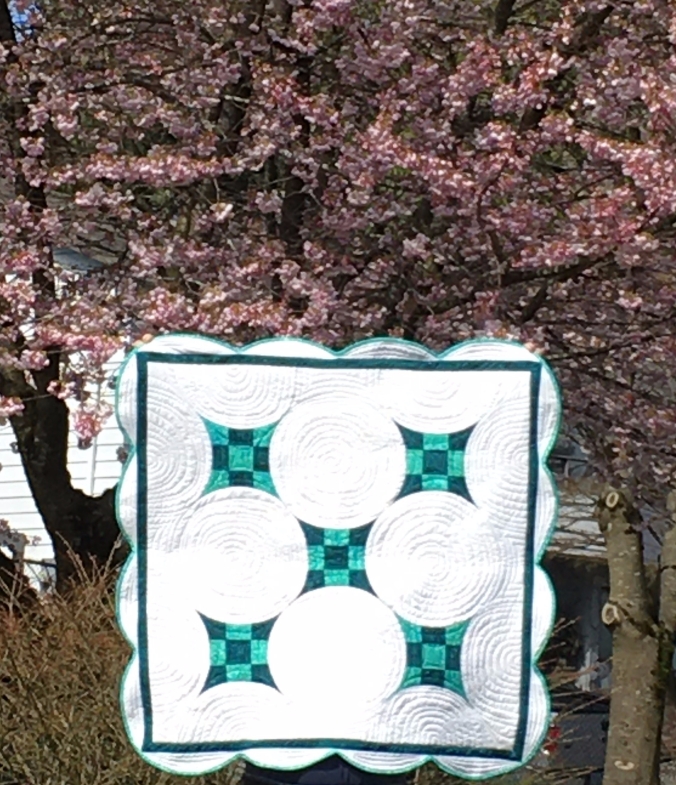
I LOVE the vibrant colours of the Island Batik fabrics in this quilt! Since we’re social isolating, all the pictures were taken in my front yard. Spring is just starting to show it’s pretty hopeful self! The hyacinths smell heavenly and the tree with the pink blossoms is alive with the buzzing of bees!

Disclaimer: The products featured in this Blog post were given to me by Island Batik, and their co-sponsers Aurifil, Hobbs Batting, Schmetz Needles & AccuQuilt!
One who sleeps under a quilt is covered by LOVE!
Happy Quilting!
Gail
*****************************

I love all the curves in this quilt! I’ve also learned the merits of using thread that blends for the quilting. It hides all those imperfections, that only, the makers see. Have a fabulous day!
LikeLiked by 1 person
Hi Jennifer!
Yes, I know that thread that blends is way better – but I wanted to be brave and show off some quilting! 🙂 Obviously, I won’t be doing that again! I do have too many imperfections!
Happy Quilting! 🙂
LikeLike
Pingback: First Monday in April Report | Quilting Gail
This is beautiful – what a inspired design! I’m sorry that you had to spend so much time unpicking but the final quilting sets it off beautifully!
LikeLiked by 1 person
Hi Raewyn,
Thank you!
Sometimes it’s worth taking out the horrid stuff … and the end results are SEW much better! 🙂
LikeLike
What a pretty little quilt!
LikeLiked by 1 person
LOVE it, Gail! The circular quilting is perfect between the 9 patches, and the scalloped border is the perfect edge. It’s lovely!!
LikeLiked by 1 person
Thanks, Karen! 🙂
LikeLike
Hi Gail! Great idea to use that die cutter for a scalloped edge. It looks just perfect as does your quilting. I’d say you got the circle quilting down pat. ~smile~ Roseanne
LikeLiked by 1 person
Thanks, Roseanne! It worked out pretty good, if I say so myself! 🙂
LikeLike
Great idea to use the die to get the creative outside edge! I love the quilting you did on this. Now, about the bias…I always found those charts to be off for bias binding, I wonder if there is a “right one” out there?
LikeLiked by 1 person
Hi Kathleen!
Thank you!!
Well, if there is a “right” chart for bias – we’ll have to post it on our blogs!!!! I don’t mind having a bit of extra binding, but enough for 3 trips + around the quilt was WAY too much!
Happy Quilting! 🙂
LikeLike
So pretty! The teals are beautiful and I absolutely LOVE your circle quilting! Lovely, lovely, lovely!!!
LikeLiked by 1 person
Thank you so much, Emily! 🙂
LikeLike
Good job, Gail. That is certainly a creative border. Did you have to hand cut the backing and batting after you quilted it?
I started quilting my current quilt with a pale variegated thread. but on my “feather” you can see the “oops” moments. I decided to leave it in because I didn’t want to spend two evenings pulling out tiny stitches.
LikeLiked by 1 person
Hi Gene,
Once I had all the quilting done (down to the dark border), I then trimmed the scallop edge, the batting and backing very carefully. I sewed the bias binding to the back and folded it over to the front (which is my usual). I stitched it down on the front. I then quilted the scallops. In hindsight- I think it would have been better to do all the quilting before I added the binding as there is one area I really had to manipulate the fabric to avoid puckers. Ah … live and learn! right? 🙂
LikeLike
Oh my! That’s beautiful!
I love the simplicity of the circles.
I’ve wanted to try a scalloped edge (and prairie points too) but haven’t been able to because every time I think I can slow down and take on a challenge someone has a milestone birthday or a baby (so there’s always a deadline).
Was it hard to put on the binding?
Cheers
Terry
LikeLiked by 1 person
Hi Terry!
Thank you!
The binding was actually pretty easy. When it’s bias it’s easy to manipulate it around the curves and in the tight areas. It takes a little longer than straight binding, but it’s just as easy!
Happy Quilting! 🙂
LikeLike
That’s a beautiful quilt! Glorified 9-Patch is one of my favorite blocks. I think the large-scalloped border is perfect and the quilting shows off the curves perfectly. Great job!
LikeLiked by 1 person
Thank you very much, Sue!
LikeLike
Beautiful! So vibrant and springy looking. You do such a good job with quilting and you did a good job with the curbed border. I give you an A+!
LikeLiked by 1 person
That was supposed to be curved border, sorry not the curb.
LikeLiked by 1 person
🙂
LikeLike
Thanks, Gretchen!!!
LikeLike