This month’s challenge is to make something of our own choosing. I had SEW many ideas! The hardest part was choosing exactly what I wanted to do! I often do at least one extra Island Batik project each month, but this is a little different. I didn’t want the project to be suggested for a blog hop, but I wanted it to be something I’ve been wanting to do! SEW, I decided to do 2 different projects.
#1 Bargello Quilt
I was given a 2 1/2” strip set of Prairie Dreams. Isn’t it beautiful???? Island Batik also included 2 yards of Chalk and 2 yards of Slate.
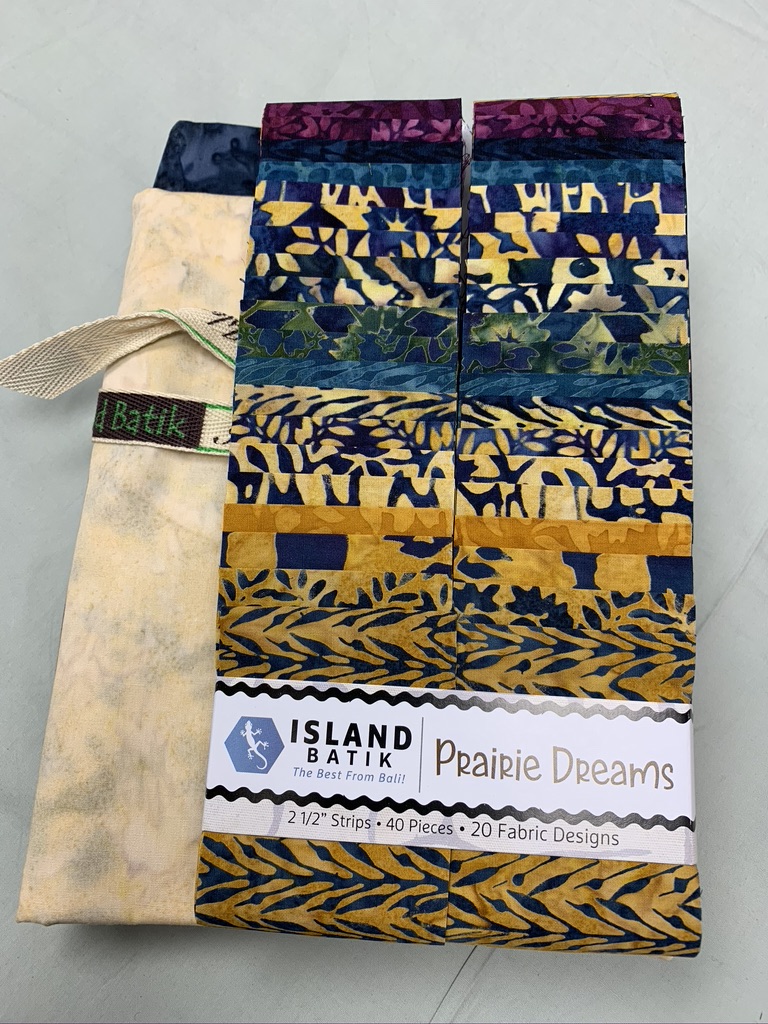
Prairie Dreams is available at: Creekside Quilts OR and JellyRollFabric.Net
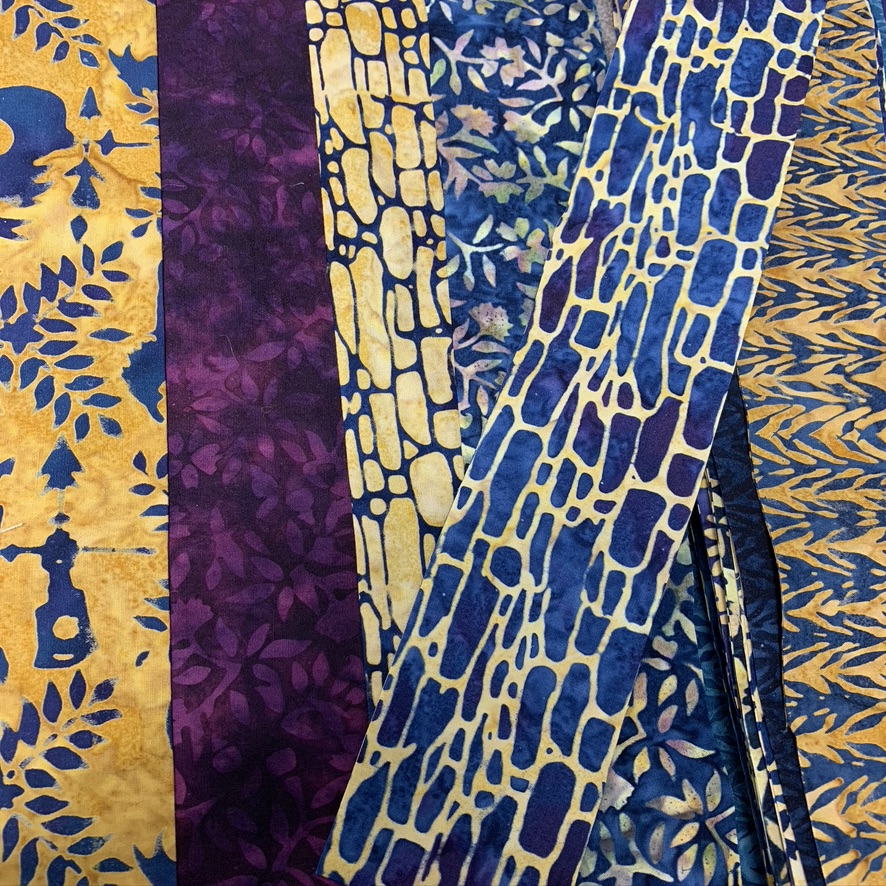
I had recently seen a number of different bargello quilts. I wanted it to have a random, scrappy look, so I arranged the strips in a manner that I thought was fun. I added (2) 2 1/2” strips of Chalk and a 6 1/2” strip of Slate. Sorry, I forgot to take a picture of all the strips sewn together.
Here’s a picture of some of the strips at the beginning.
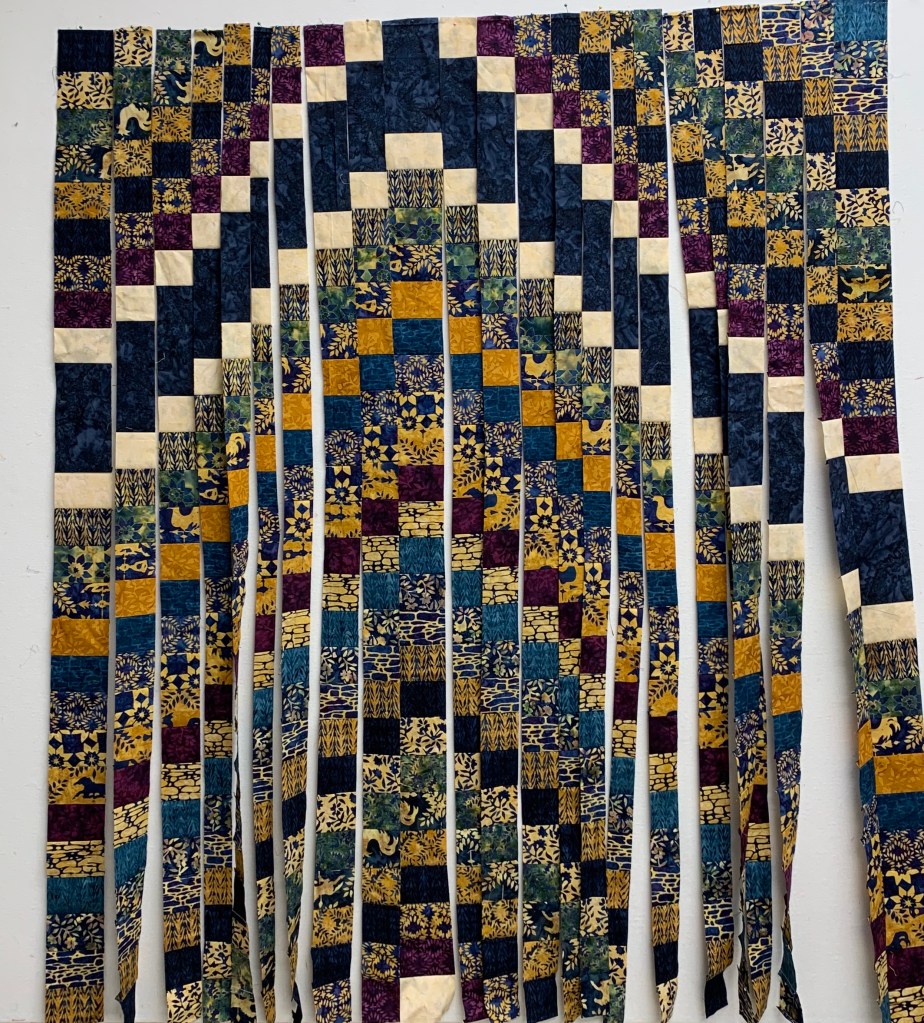
The strips were sewn into a loop. Then, I cut strips of various widths from 3″ to 1.” Then I arranged them on the design board, and “unstitched” one portion of each loop. Amazingly, I only had to re-sew one strip where I “unstitched” the wrong one!
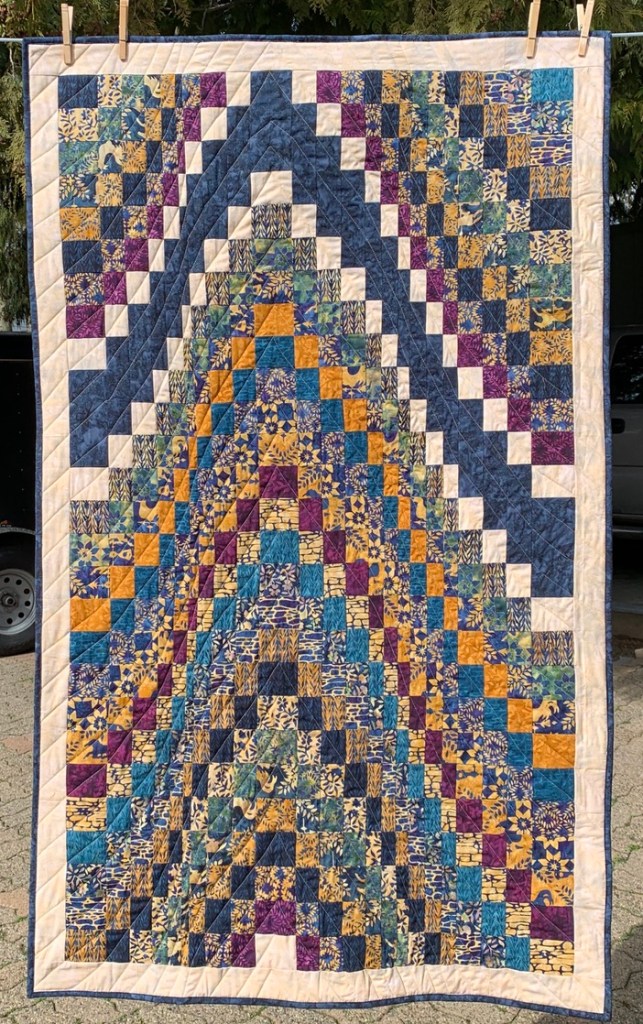
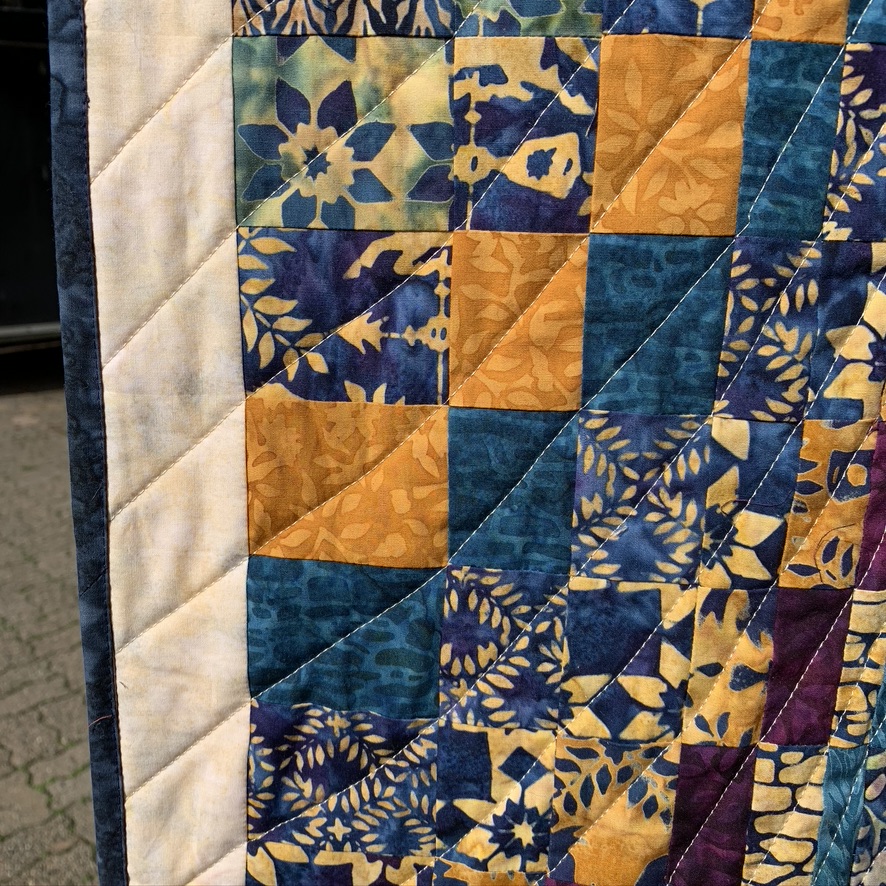
Here’s a close-up of the walking foot quilting. I just did a ‘straight-ish’ line through each block.
If I was to make this quilt again, I would make the smallest cut 1 1/2” or 2″. The 1″ cuts were a bit small (for me!)
Quilt Stats:
- Size: 36″x 58″
- Quilted: Walking Foot with Aurifil 2600
- Hobbs Batting 80/20 is in the middle
- Binding: Island Batik “Slate”, Thread: Aurifil 2785
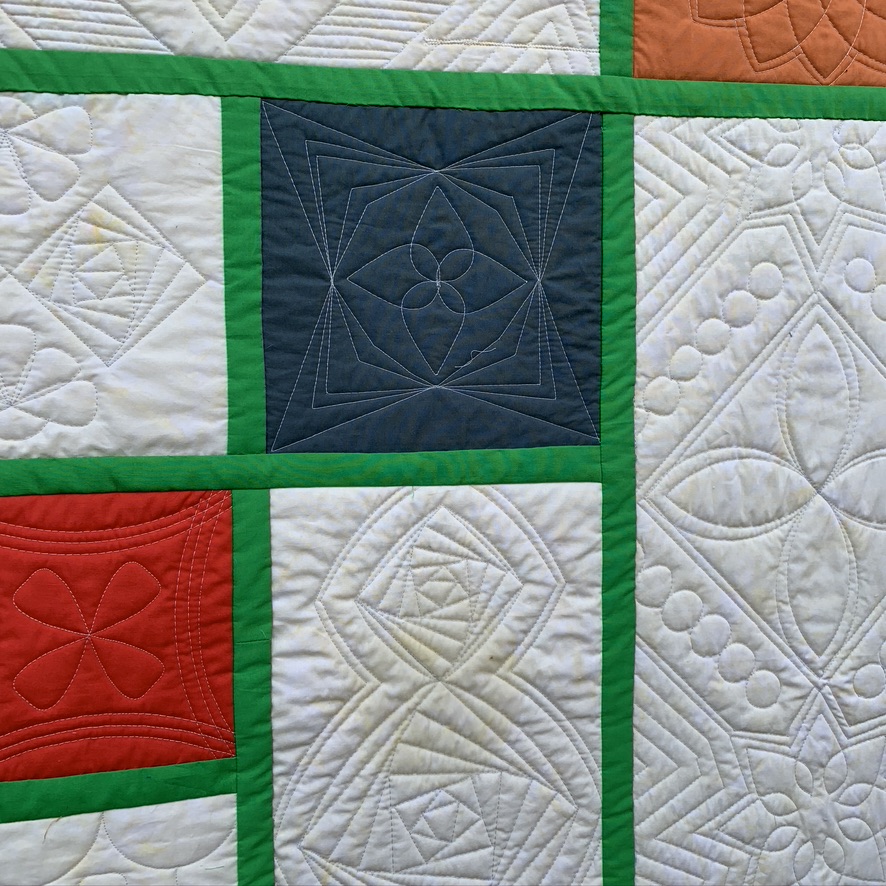
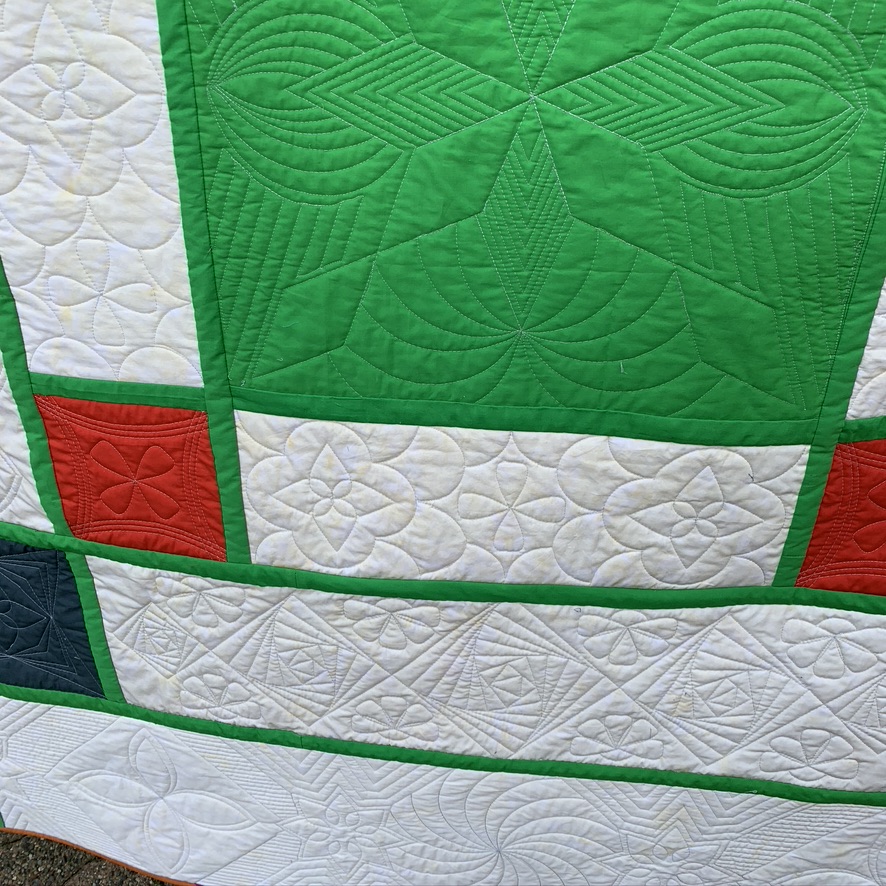
#2 Ruler Quilting
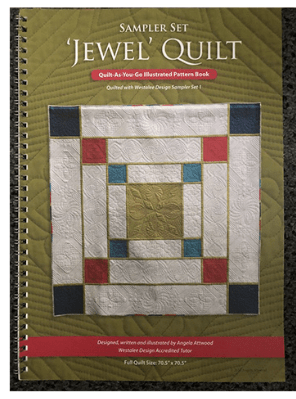
I’ve been wanting to improve my ruler quilting and have had the Jewel Quilt book for quite some time with good intentions to follow the book’ ‘s directions and make this quilt.
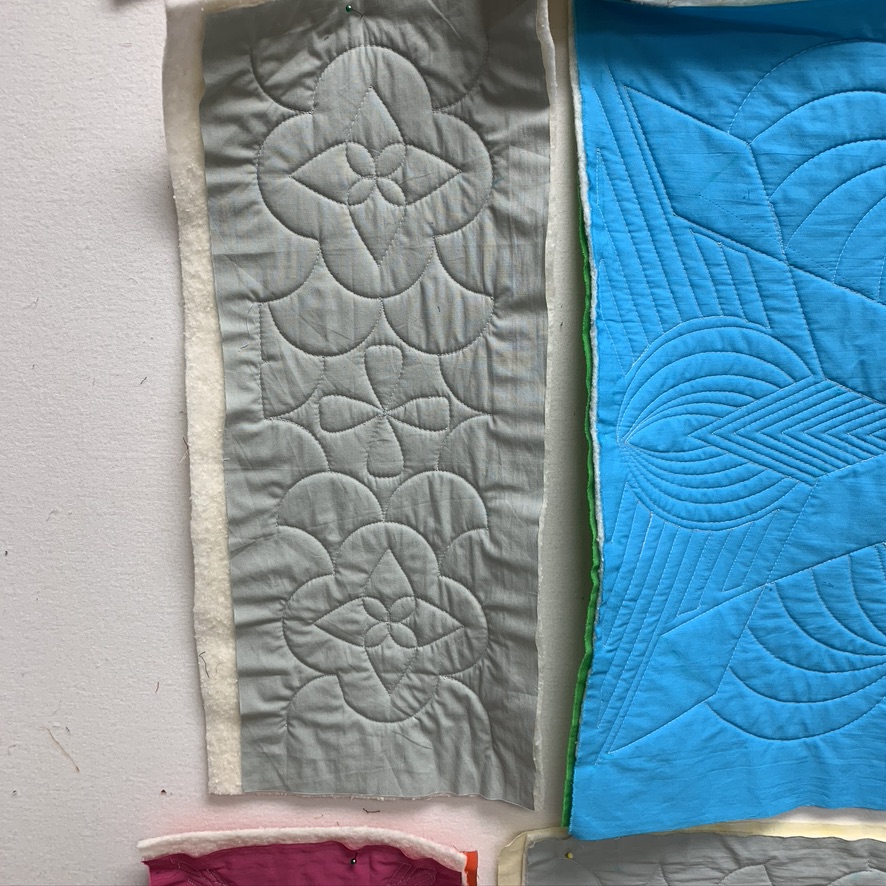
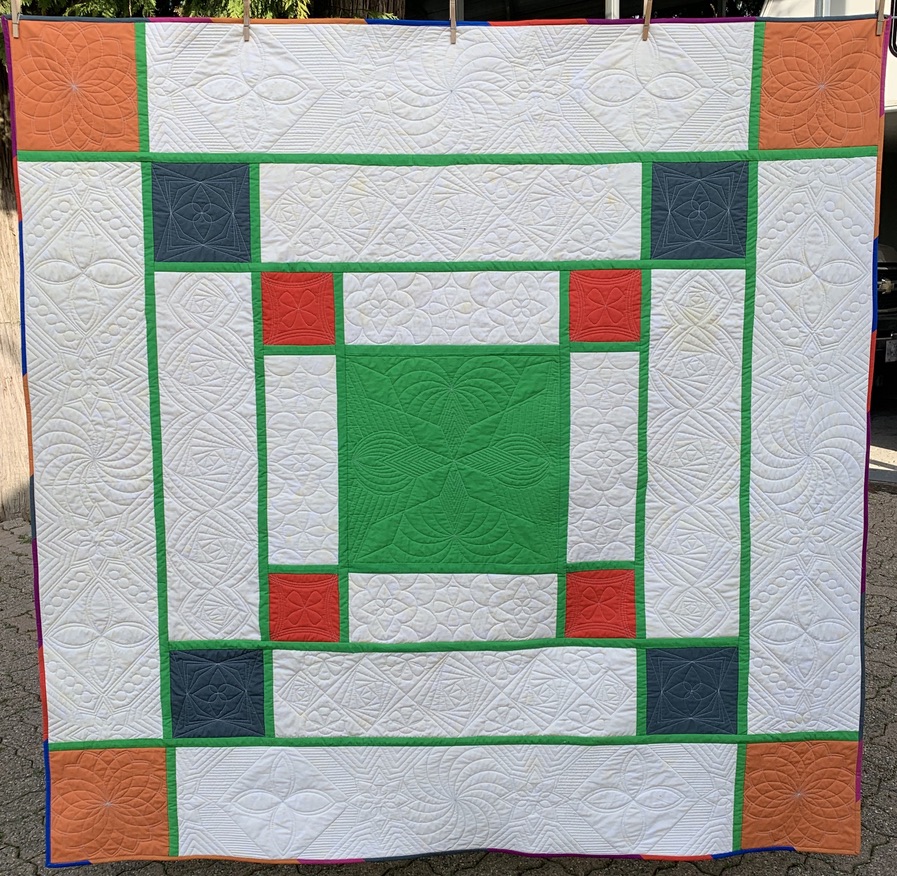
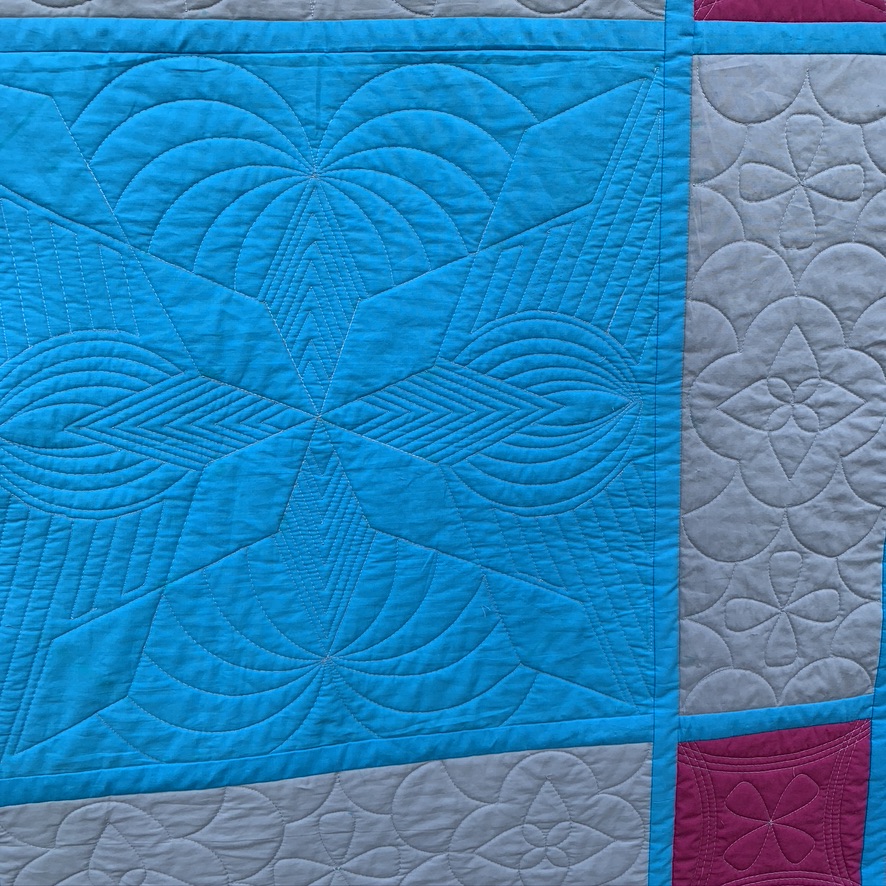
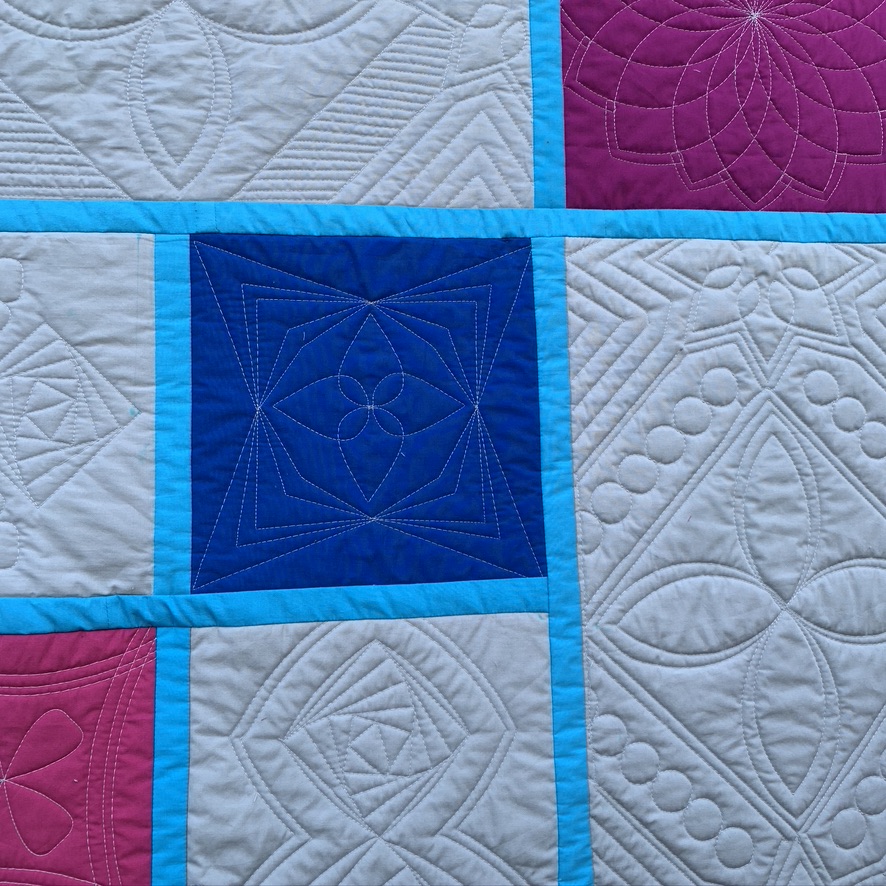
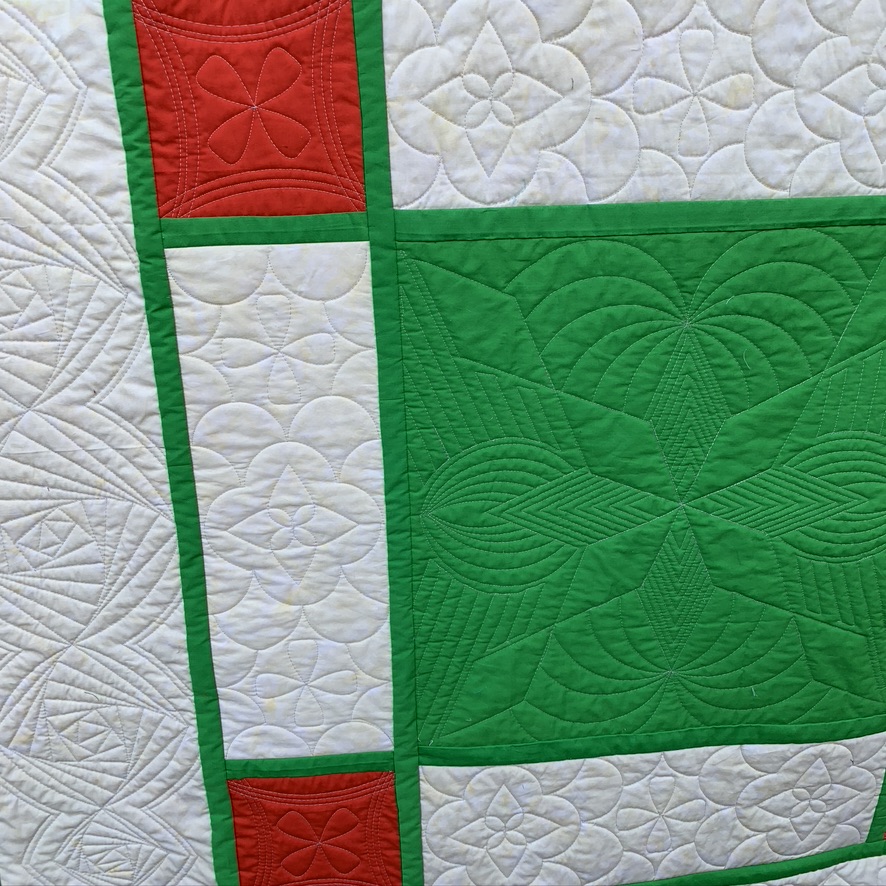
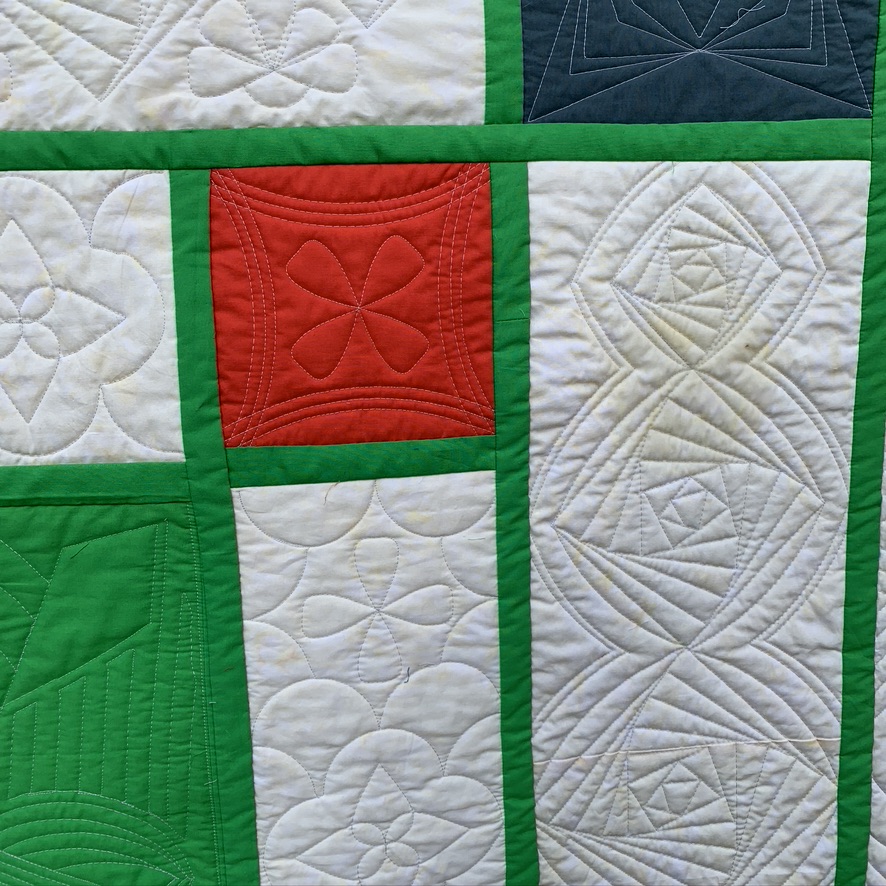
Prepping the fabric: I started out by cutting all of the fabric, using Island Batik solids with a different colour-way for each side of the quilt. Ghost is the only ‘non-solid’ that I used, but it reads as a solid. Then I sandwiched them with Hobbs Batting 80/20.
| Side #1 | Side # 2 |
| grey | ghost |
| turquoise | green |
| pink | red |
| cobalt | dark grey |
| fuchsia | orange |
After sandwiching each of the segments, I pressed them on both sides using my Prairie Spirit Alpacas pressing mat. It made them super smooth!
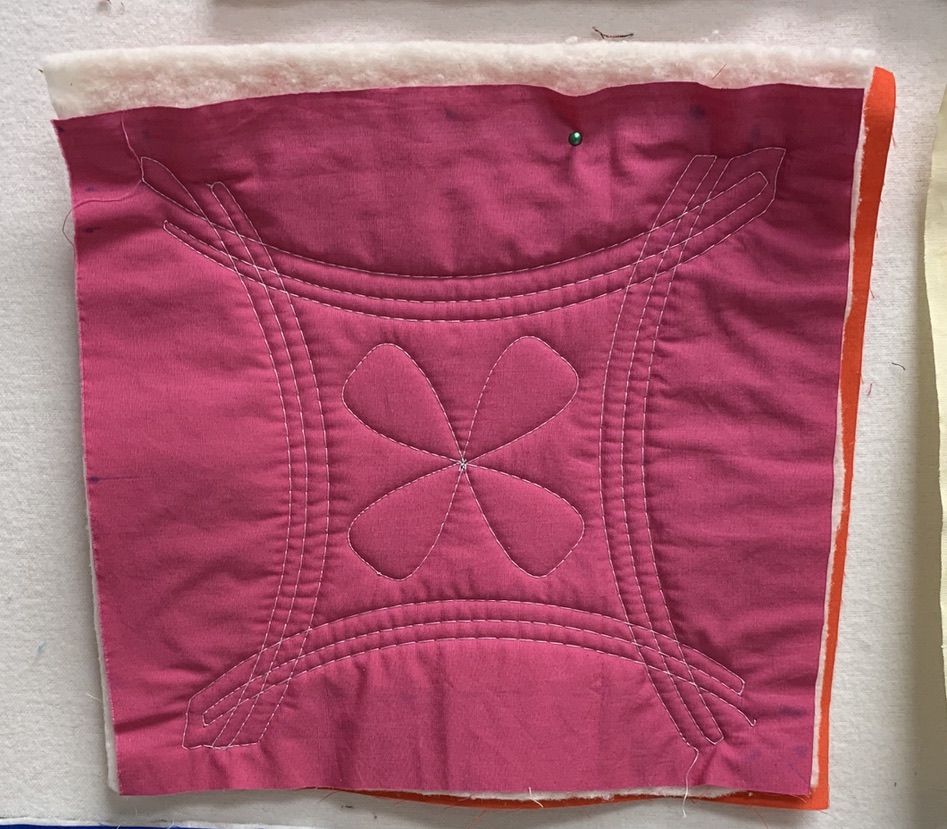
Marking the blocks: I tested a water soluble marker and then marked the blocks.

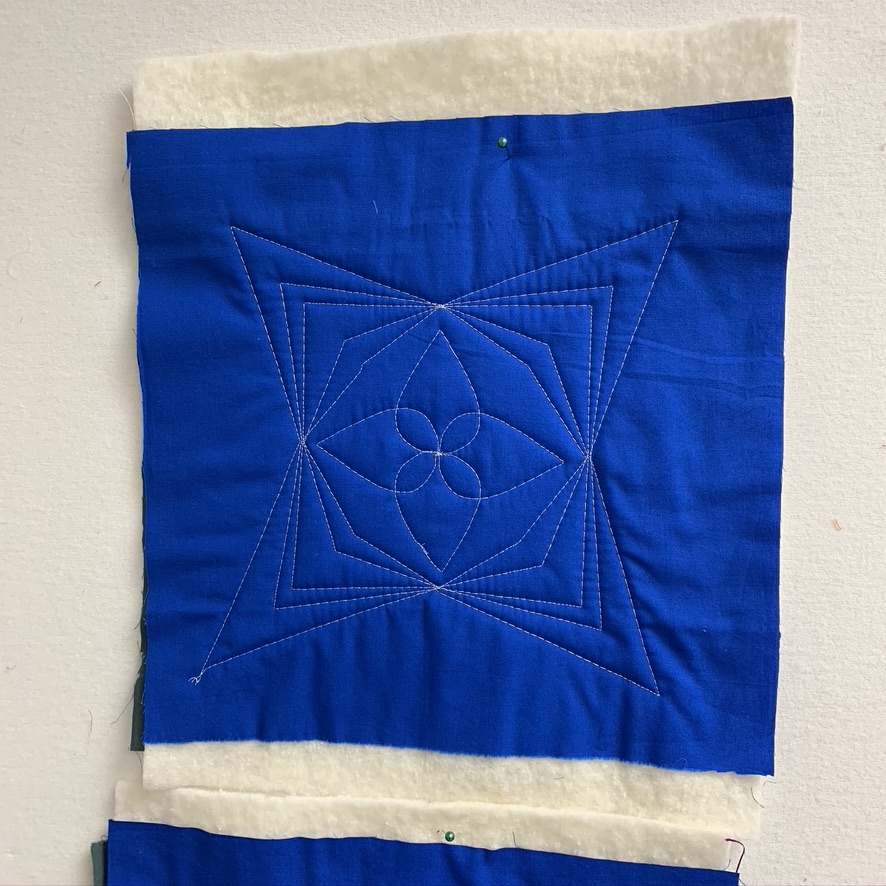
Here’s a picture of some of the first individual blocks in progress:
This project used a LOT of thread. No, not a full cone, but I use this thread a LOT … it’s my favourite go-to and it goes with just about every single fabric!
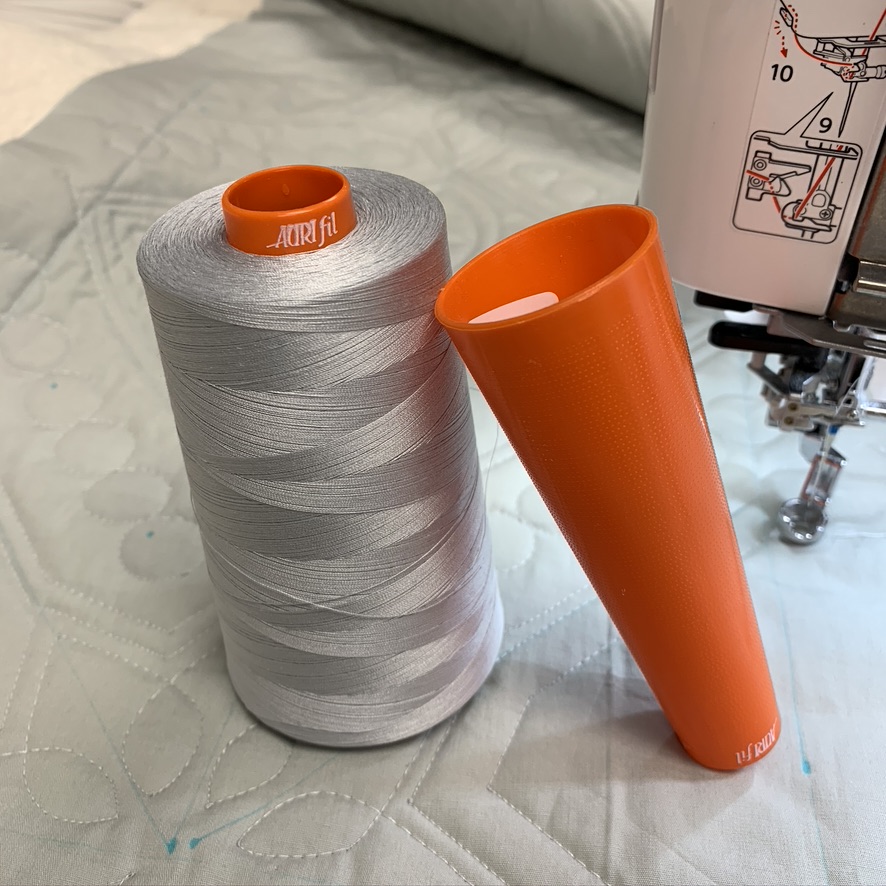
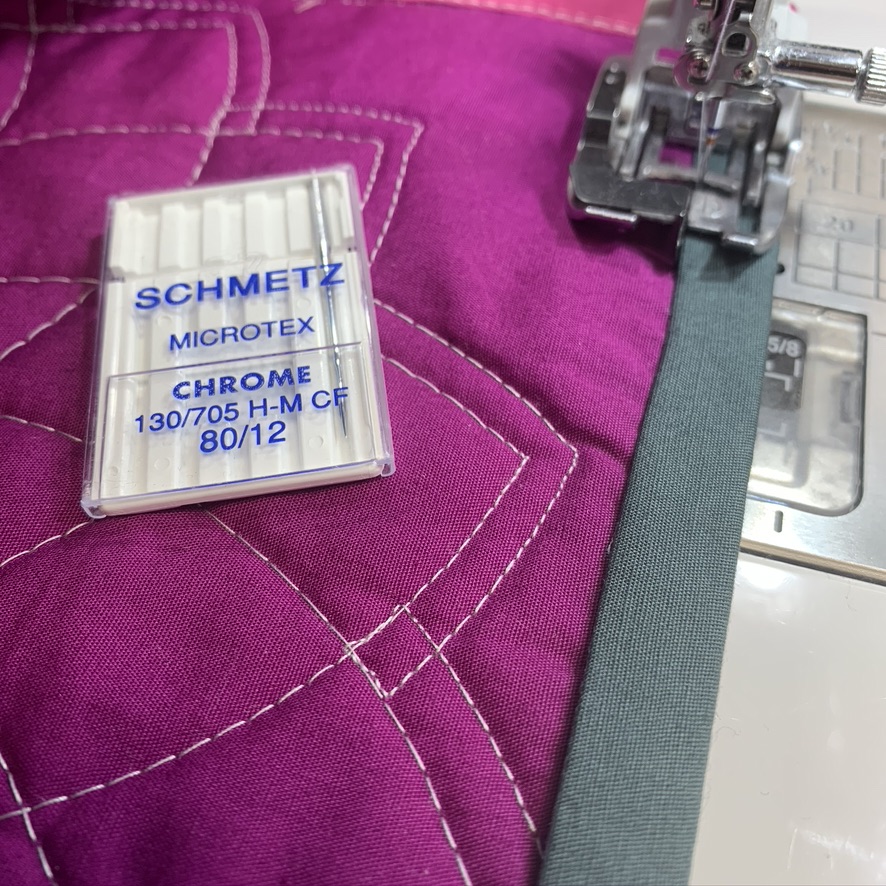
I used Aurifil Thread #2600, Dove Grey for all of the quilting. Schmetz Needles: 2 Microtex 80/12 were used for the quilting and binding. Why 2, you ask? Because about 3/4 of the way through, I could hear that ‘thud’ that indicates you need a new needle.
It was actually pretty easy to use the rulers on the small pieces. Sort of like your sample sandwiches when you’re learning to quilt. HOWEVER, once the blocks were quilted, they needed to be assembled in a quilt-as-you-go manner. This involved HAND sewing. UGGG!!!! My hands can only handle hand sewing for about 15 minutes – so sewing the blocks together took a LONG time.
Here is a picture of the scrappy binding being sewn on … only one Schmetz Needles Microtex Chrome 80/12 left … guess I might need to go shopping! (grin)
Here is the finish on one side … If you look closely at the grey segments, you’ll notice that the upper and lower segments are slightly different than the right and left segments. I had to add some variety!
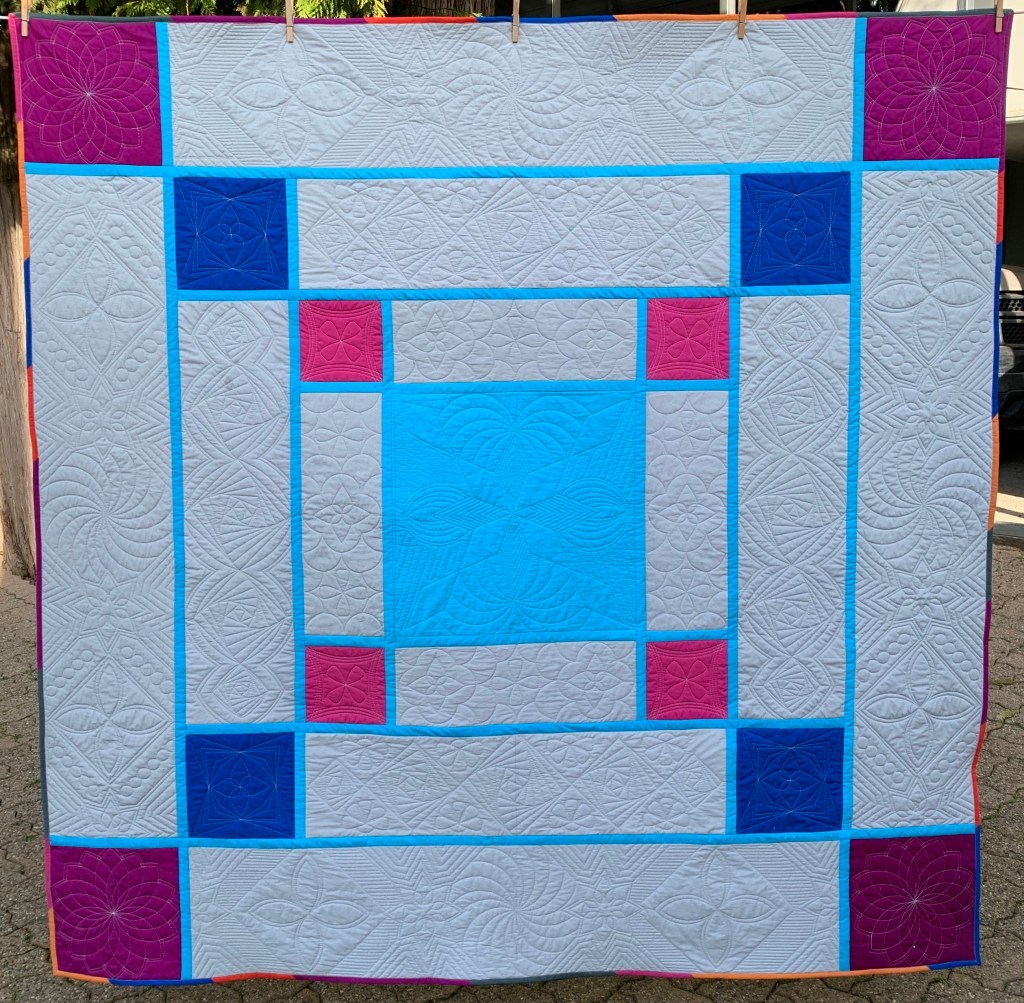
And the finish on the opposite side. It’s totally reversible!
And some close up pictures!
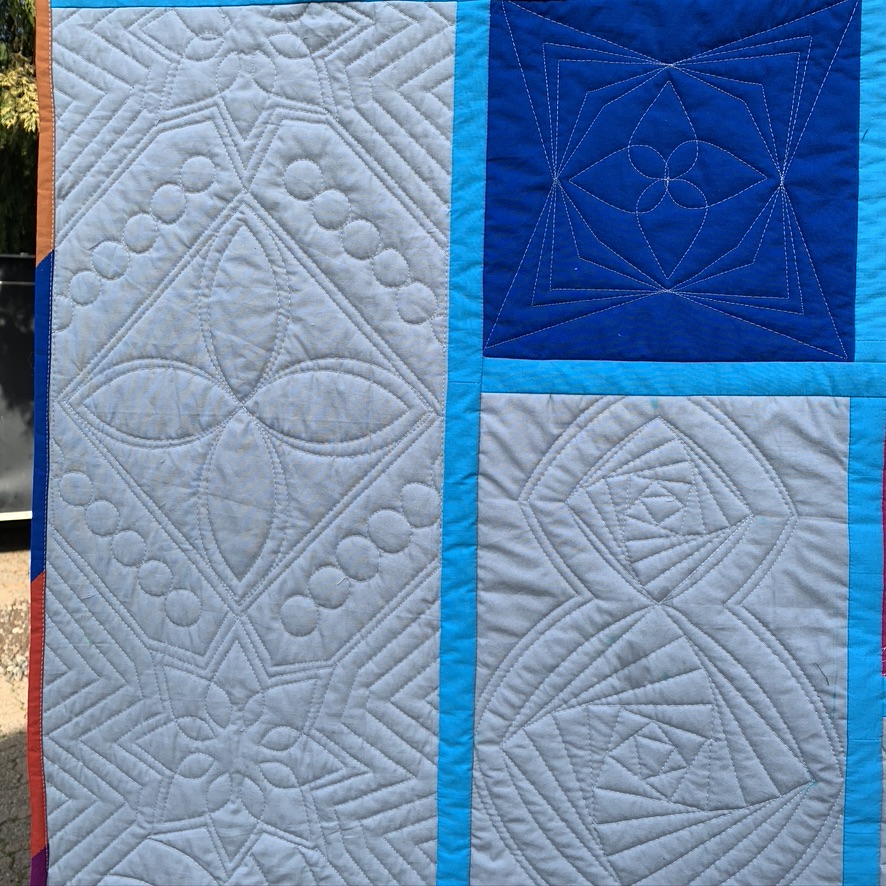
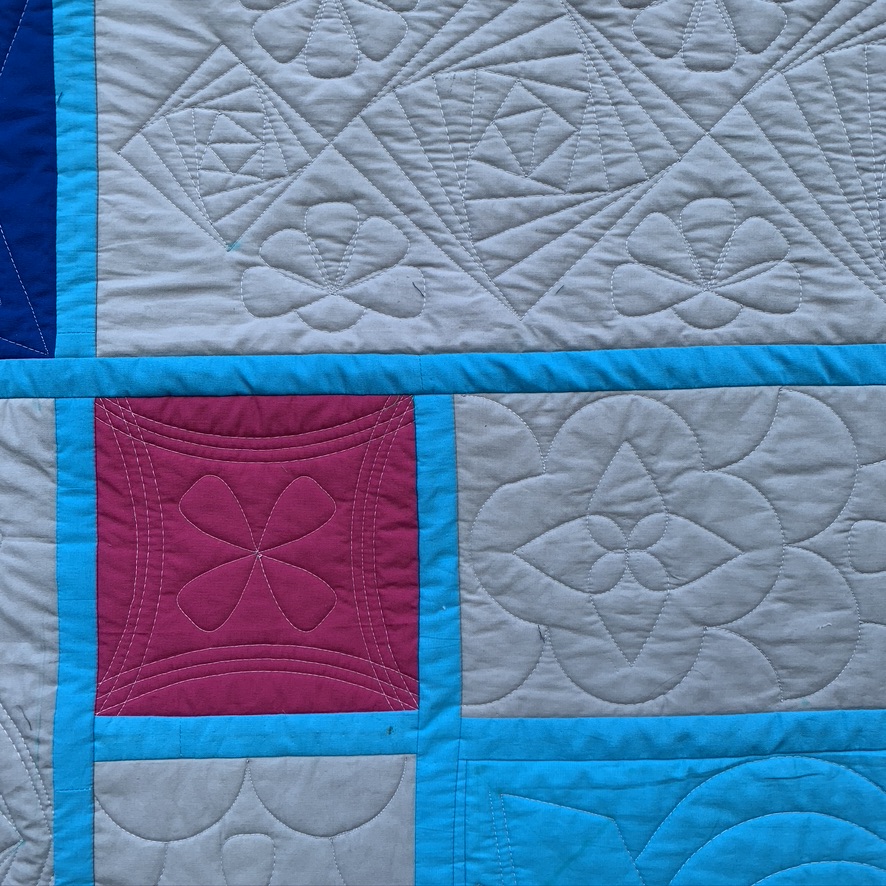
I must admit, that I’m totally amazed that I quilted this quilt!!! It was certainly easier to do once I marked the fabrics. Generally, I’m a “no Mark” person and a “just go for it” person. But, it was certainly worth it!!
Thank you!
Disclosure: The fabrics, batting, thread and needles were generously supplied by the following companies: Thank you, Island Batik, Aurifil Thread, Hobbs Batting, Schmetz Needles, & Prairie Spirit Alpacas!!


I’ve only made one bargello type but really enjoyed the movement in the final result. Your “Jewel” quilt is amazing! I love that it is reversible and totally different in the colour choices. Beautiful work!
LikeLiked by 1 person
Thanks Elita! The bargello was very quick to make … the Jewel quilt was not … but it wasn’t hard to do! 🙂
LikeLike
Both projects look absolutely fantastic. These are two different styles that are on my bucket list to try too.
LikeLiked by 1 person
Thanks, Anorina! Can’t wait to see your creations each month!
LikeLike
Pingback: March Island Batik Ambassador Challenge – Lana Russel
So much to love in your presentation and I would say your ruler skills got a work out but, you nailed it. Beautiful and inspiring.
LikeLiked by 1 person
Thanks, Kathrie! It was actually a lot of fun to do the ruler quilting!
LikeLike
Gorgeous bargello and Jewel quilts. ‘Love how Jewel is reversible, and those vivid colors in both quilts. Excellent work.
LikeLiked by 1 person
Thanks, Danice! It was totally fun to make! (except for the hand sewing!). 🙂
LikeLike
Fabulous quilts! Love the bargello…have only helped people make them, never made my own…one day. Love the two-sided ruler work quilt you did! I did a FMQ quilt that was similar, but I didn’t make it two sides….this is so much fun to see both, a little different but so well done.
LikeLiked by 1 person
Hi Kathleen! Well, I think you need to make your own bargello! So, so easy! 🙂
LikeLike
Hi Gail! WOWEE! Your quilting is amazing. This quilt is an amazing finish. I’ve never tried the Chrome needle – I’ve been using the coated one for appliqué. And Dove Grey really is the best color thread. I find it goes with just everything and doesn’t stand out too much. {{Hugs}} ~smile~ Roseanne
LikeLiked by 1 person
Hi Roseanne! Schmetz sent us the chrome ones … they are great!
Hugs back at ya!
LikeLike
I am in awe of the quilting on the second project!! I have never done a QAYG project but what a fantastic way to put together a reversible quilt like this. It is beautiful Gail!
LikeLiked by 1 person
Thanks, Bernie!
LikeLike
Gail, I love both your quilts!! The bargello is beautiful. I agree the 1″ seems so small in a quilt like this. Larger pieces are so much easier to deal with! Your quilting on the second quilt is wonderful! You did a great job with your ruler work…and I love that it’s reversible!
LikeLiked by 1 person
Thanks, Brenda! I’m thinking that the ruler working quilt will be a keeper! 🙂
LikeLiked by 1 person
Wow, Gail! You’ve certainly been busy! Both quilts are equally gorgeous. I love the look of the bargello quilt in those fabrics and your quilting on the second project is amazing!!! Love it!
LikeLiked by 1 person
Thank you very much, Jennifer!
LikeLike
Awesome quilting! The designs look so good, and I’m sure you’re thrilled. Great idea to work on that, and the ability to assemble after (even if your fingers hurt). Bargello is beautiful, too.
LikeLiked by 1 person
Thanks Maryellen! It was a LOT of fun to do the quilting!!! And I think the fabrics for the bargello are awesome – and that makes the quilt!
LikeLike
Amazing quilts both of them. I really like how you made the bargello quilts from the jelly roll. The fabrics are unique that they have contrast within each print and together are really beautiful blend of colors as you assembled them together with the solids. . And I truly admire your ruler work. I never thought of doing it as quilt as you go method. And despite the difficulties your fingers have, your finished project is just fantastic. Wow!!!!!
LikeLiked by 1 person
Thank you very much, Debbie! The pattern for the ruler quilting was a Quilt as You Go and it was so easy to handle the smaller pieces!
LikeLike
What a beautiful bargello quilt. I would say that the 1″ is also too skinny for me too! You did a great job on the quilting project. It really is pretty on both sides! I’d assume you’d need to be careful of thread nests on the bobbin side?
LikeLiked by 1 person
Hi Sue! I had no problem at all with thread nests. I ALWAYS pull the bobbin thread to the top and that seems to eliminate nests! 🙂
LikeLike
How beautiful! Fantastic quilting.
LikeLiked by 1 person
Thanks, Susan!
LikeLike
wow your two quilts are gorgeous. I especially love the quilting on the second. Really gives it dimension. thanks for sharing.
LikeLiked by 1 person
Thanks Lori! They were both fun to make! (except for the hand sewing for the sashing!! 🙂
LikeLike