Woohoo!!! I’m so excited that this UFO is done, DONE, DONE!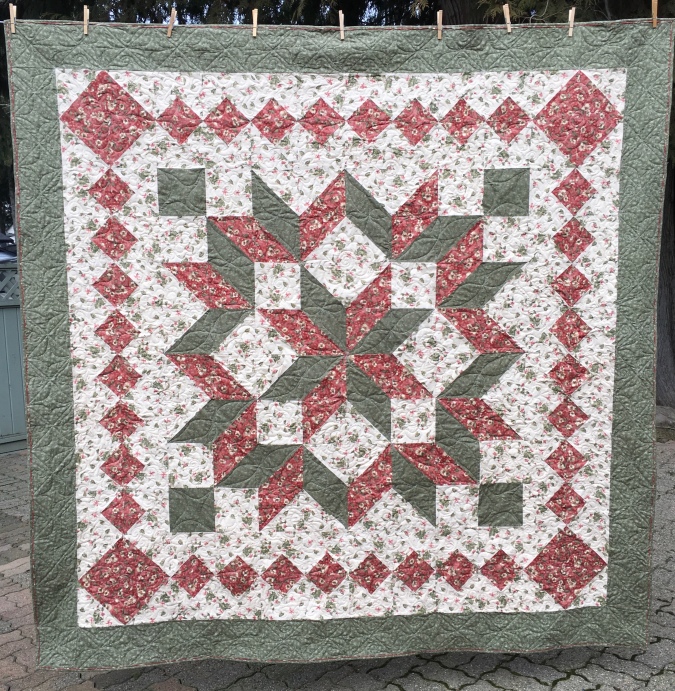
Month: February 2019
A Super Fun Class
It was super fun, mostly because I came home with a FINISHED project!!!
We had homework to do before the class … the homework took a LOT of time … like hours and hours and hours … We had all bought the pattern prior to the class, sew we knew what to do for homework … the pattern is “Jelly Roll Rug Pattern” by Roma Lamson for R.J. Designs …
I already showed you my pile of 2 ½” strips and the start of the rope we had to make. Our teacher, Dawn, had 2 beautiful rugs done and now that I’m home, I realized that I forgot to take pictures of them!!! groan!!!


My strips were cut from my stash of mostly Kansas Troubles fabric. I told one lady that I have STABLE. She looked at me weird … then I explained it meant STash Accumulation Beyond Life Expectancy! Then she laughed! And the batting was all Hobbs 80/20 leftovers from the sides of quilts that I have made. Dawn suggested cutting them 2 ¼” wide … which made it WAY easier than the strips that were 2 ½” wide! (Hmmm, maybe, just maybe, I had a whole wack of strips that were cut at 2 ½” and I didn’t take the time to cut them down to 2 ¼” …)
Here is my finished Jelly Roll Rug.

New project reality!
 OK … in my last post, I talked about how I was going to follow along with Caroline and watch her tutorial videos to make a wonderful zippered bag. Reality set in and I thought, “Who are you kidding???? You can’t start ANOTHER new project. SEW … the zippered bag was not started … I didn’t even pull fabric to do one. However, you can. You can see the first video HERE. The videos will be on Youtube and I can watch them in the future when I’m ready to make a zippered bag!
52 Blocks 52 Weeks
I have caught up: Blocks 5 & 6 are done! It is fun making these little 6″ blocks. They don’t take to long at all. Except for the neutral, I’m only using blue fabric that is in my blue scrap bag … So far, the bag is still full! (Do completing blocks 5 & 6 make for a “Friday Finish?”
Jelly Roll Rug
I signed up to take a class with the guild tomorrow! The lady teaching it is an awesome teacher, so she will help my rug making to be successful. I went to my tote of Kansas Troubles, and along with a few reproduction fabrics, I made my own jelly roll. Except for the dark for the final round, the fabrics are all mixed up. I’m using stash and that makes me happy!
Happy Quilting!
Gail
*********************************************************
Linking to:
- Happy Needle and Thread @ My Quilt Infatuation
- Muv / Free Motion Mavericks @ Lixxie Lenard Vintage Sewing
- Can I get a Whoop Whoop? @ Confessions of a Fabric Addict
- Finished or Not Friday @ Busy Hands Quilts
- Sherry @ Powered by Quilting
- TGIFF @ Alycia Quilts
Colour bleeding
I haven’t had a lot of issues with colour bleeding. But I have had a few.
I posted in Oct. 2016 HERE about how the label bled really bad … so bad that I could see it moving quickly and without thinking too much, I cut it out really fast! I was using a solid green of my grandmother’s fabric … the green went into recycling. It did not have a long life in my sewing room! I ended up fixing the disastrous corner and you can read about it HERE. Continue reading
My Progress Report – Feb 17
Design Wall
Piecing:
- Block 5 of CQA’s #52blocks52weeks block is NOT done … not cut out … I should do that soon, before I have 20 blocks that I need to catch up on.
- Good Fortune: Starting to web the centre of the quilt. The purple HST for one of the pieced borders is in progress


Sewing with Friends
Sewing with friends is always fun!
There were 4 of us sewing today.
Linda worked on a BOM lotto for the guild. I think this block is really really cute!
- EDIT: This block was designed by Melva Nolan and is available in Quiltmaker’s 100 Blocks, Vol. 8, Winter 2013.
 Continue reading
An OLD UFO is finished!
But it’s not MY UFO. I have never made a lone star quilt.

Woohoo! My first UFO finish of 2019!
That’s right, I finished a UFO!!!
This one has been sandwiched since the fall and I finished quilting it yesterday!

Magnificent Mini

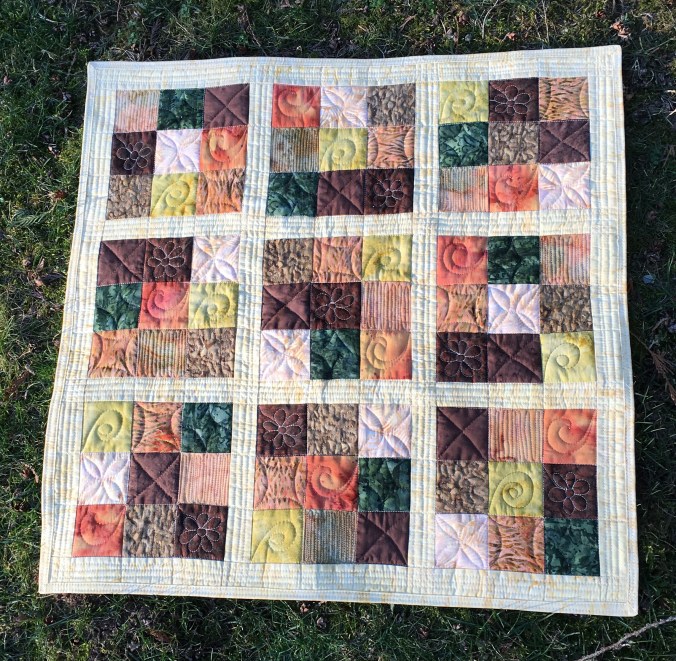
This is our Island Batik February challenge. We were instructed to use any Island Batik fabric in our box, but not the “surprise” fabric. It was to be smaller than 24″ x 24″. Once I decided what to do for my mini … the rest was easy. Decision: A smalll Sudoku Quilt!

For my mini, I needed 9 fabrics plus a background. I received 8 wonderful fall colours. I added a vibrant green from a stash builder’s roll. And I used the neutral fabric for the sashing, border and back (the yummy butter fabric).
The next step was to cut all of the 2 ½” squares. I used the GO Cutter to do this … Once the strips were cut, I lined them up on the GO cutter and the squares were ALL cut all at once as they went through the cutter!!! (Sorry, I didn’t take a picture of this! But it was pretty quick work!)
I found a Sudoku puzzle and wrote it out so that I would have an easy visual to use.


I have numbered pins, but they are scattered all over … SEW, I took a piece of selvage with the coloured dots on the side. I cut the dots individually and stuck a pin through them. It made it easy to keep track of which colour was which number!
I then began sewing … one block at a time. No rushing this one. I would have had a lot of ripping to do if I did. As I finished a block, I added the sashing to the left of the block.
The corners were able to be twirled or swirled, but it took me a bit to figure it out. (I LOVE twirling where the seams meet – it makes it sew smooth when free motion quilting!)


The blocks were all joined together … and I checked carefully to ensure they were all in the correct placement. The quilt was sandwiched with Hobbs 80/20 batting, using a spray baste.
I started quilting on my domestic machine. I used Aurifil thread 50 wt (top & bobbin).  I stitched in the ditch along each seam and extended out into the borders. In the sashing, I sewed wonky ¼” seams. (I call them wonky because they were not all perfectly straight! grin!) I thought I was done quilting, until I looked at it closely and saw that the 2 brown fabrics, although quite different, read almost the same colour. As well, one of the oranges had a lot of green in it, and definitely did not read the same colour throughout. No Problem! I decided to just quilt a tiny motif in each block to hopefully define each colour … Thankfully, I have lots of Aurifil thread in many colours … SEW that was easy. Then I had to decide which motif to use. Eventually, they all spoke to me and soon it was done! This little mini measures 22″ x 22″.
The wind is blowing up to 90 km gusts today, so it was hard to get a picture without the quilt being blown away.
I tried to be a bit artistic with my photos … The one on the tree (left) is the closest to the true colours … the right and bottom one are both washed out a bit.

Tiny motif’s in each 2″ square

On the huge boulders on the side of our yard.
Can you see the tiny motifs in the 2″ squares?
If you want to see the Magniifcent Minis that are already posted, go to these blogs:
- Clever Chameleon
- Adventurous Applique and Quilting
- Little Bunny Quilts
- Carolina Asmussen
- Creative Blonde
- Gene Black, Creative Soul
- Pretty Piney
- Free Motion by the River
There will be many many more minis being posted during the rest of the month. You don’t want to miss them! There is a tab at the top of my blog that lists all the 2019 Island Batik Ambassadors. If you go to each of their blogs and “follow” each one, you will ensure that you don’t miss a single post of all of their creations!
Disclaimer: The products featured in this Blog post were given to me by Island Batik, and their program partners: Aurifil, Hobbs Batting & AccuQuilt!
Happy Quilting!
Gail
*********************************************************
Linking to:
- Caroline @ SewCanShe
- Tish @ Tish’s Adventures in Wonderland
- So Scrappy Saturdays @ So Scrappy
I almost forgot!
January Report

Yes, I’ve been so busy with writing about being an Island Batik Ambassador, the Turnabout Patchwork blog hop & the Daisy Chain mystery writing about PHD in 2019 just slipped my mind, or more accurately, got put on the back burner.
The Turnabout Patchwork blog hop is still happening: Continue reading
Daisy Chain Mystery Quilt Along
Remember … 
I said that I I was joining Little Bunny Quilts in doing the Daisy Chain Mystery Quilt Along?
The Fabric Requirements came out on Feb 4.
Here are the fabrics that I have chosen:

ME? oh YEAH!!!
Guess what ???????????????
I was chosen to be an Island Batik Ambassador! WooHoo!!!!!!!!!!!!!!!
You can see their official announcement HERE.
Can you tell HOW EXCITED I AM????
SEW … how did this come about, you ask?
Turnabout Patchwork Blog Hop … my turn
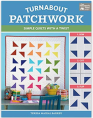
The author is Teresa Mairal Barreu. She’s an Australian author and blogs at Sewn Up … you can see her blog HERE.
If you want to order this book: Check out Teresa’s blog on THIS PAGE. Continue reading
