I am NOT an artist – as far as drawing and thread painting goes. Nope, not me! So, this was a very challenging and intimidating challenge for me to attempt!
I started with an idea … and started it and … it sat, because it wasn’t quite right …
I had this circle on the design wall for the longest time … I had cut 2 wedges out of each of the Deco Revival fabric package that I was sent in my July Island Batik box. Many of the pieces were directional and I needed to piece them to get the wedges to go in the direction I wanted.
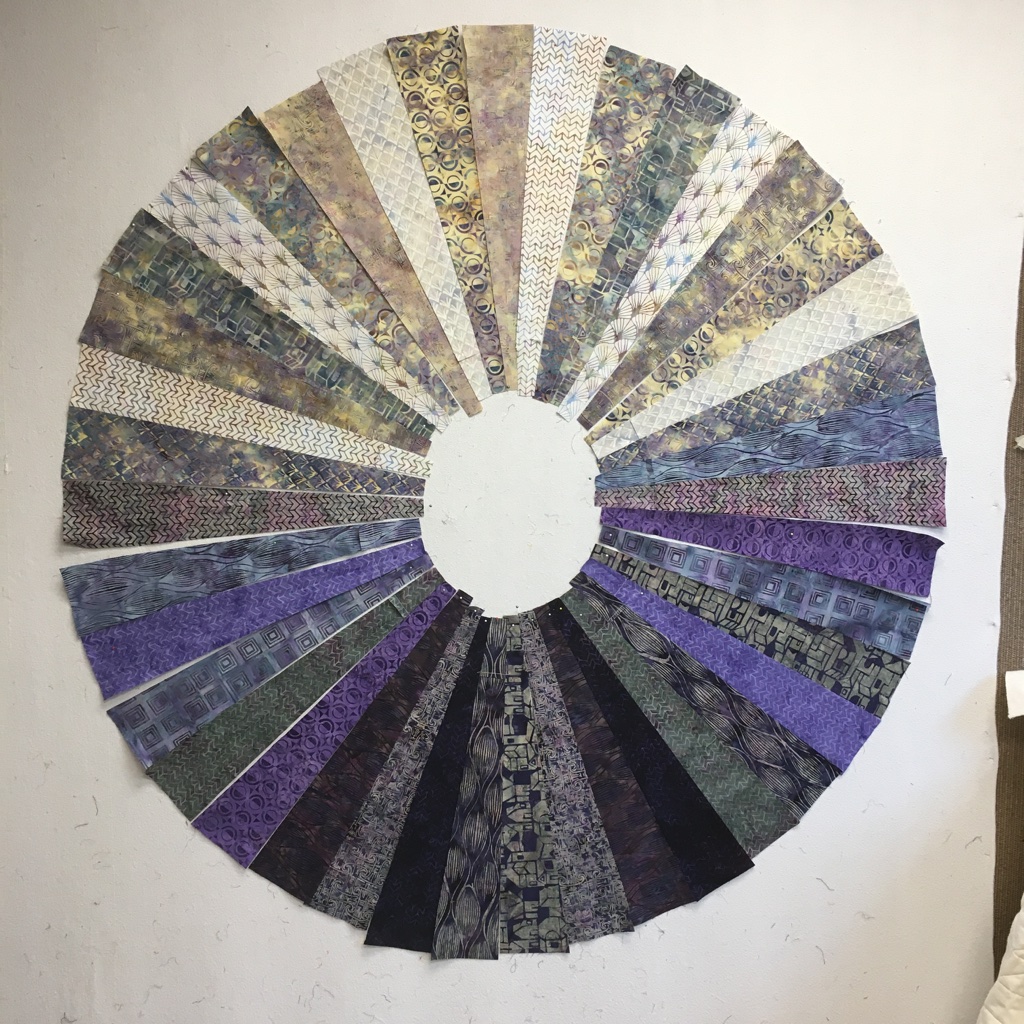
I hesitated in piecing the wedges together, because I just wasn’t sure … and so they sat some more, were rearranged a few times and sat … and sat …
I had NO problems at all with the fabrics … I love them, but my idea … parts of it were good … parts of it were not …
So, the wedges sat.
By the way …. this fabric should be in quilt stores now … make sure you ask for it!

I had been thinking about my time in Africa last September and how I loved seeing the elephants and was in awe seeing them in the wild! I wanted to add an elephant in the centre, but what I started with wasn’t going to work.
And so the wedges sat!
The picture below was taken in Etosha National Park in Namibia. (A small country on the African west coast, about a 90 minute plane ride north of Cape Town, South Africa).

So, my circle sat and sat and sat on the design wall. Finally at 3 am one sleepless night, the perfect solution hit me … elephant and zendoodle … that’s a type of thread painting – right?
I have a beautiful grey Island Batik solid … that can be my elephant … and the border …
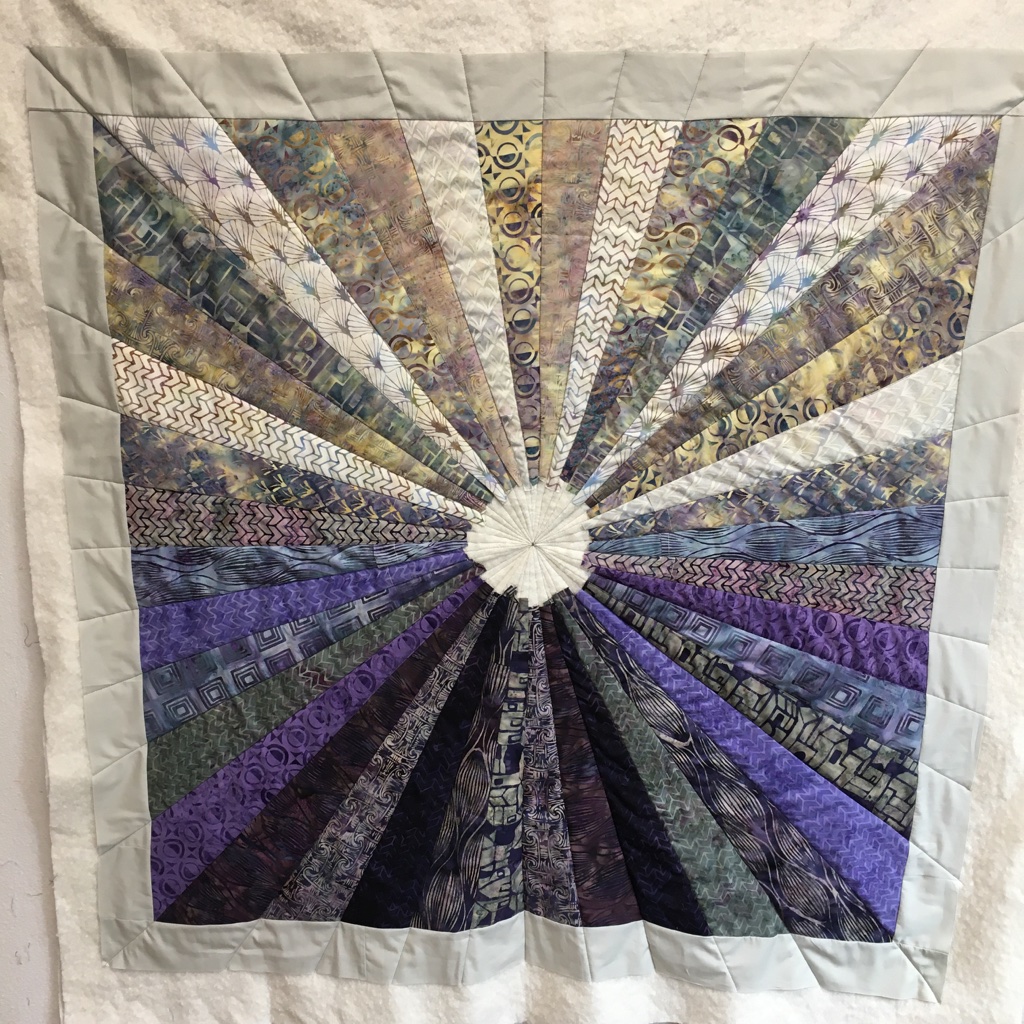
The wedges were quickly stitched together, the border added and the base quilting done.
I stitched the wedges in the ditch and with straight or wavy lines with various colours of Aurifil thread …
- #2000 (light beige) for the wedges to the top
- #2600 (light grey) for the top 5 wedges on each side
- #2793 (dark blue) for the bottom 5 wedges on each side
- #4225 (purple) for the bottom wedges.
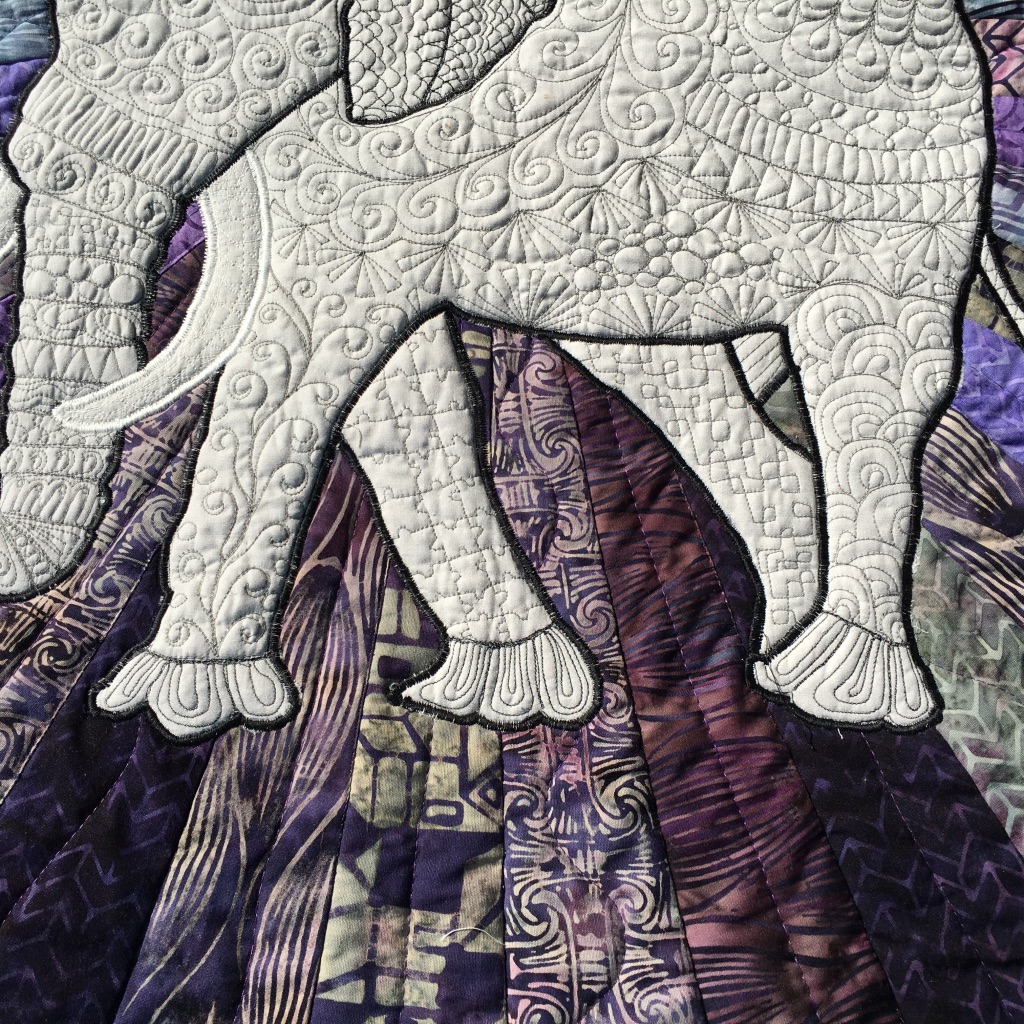
I found a colouring page of an elephant and traced it on to the grey fabric. I made sure I had the eye and the ear placement and the rest I left.
I then spray basted the grey fabric onto Hobbs 80/20 batting and started stitching … I used Aurifil black #2682 to outline the body, and then did the ear and eye. The rest of the elephant was zen-doodled with Aurifil dark grey #5004. I wanted white for the tusks and used Aurifil white #2021.
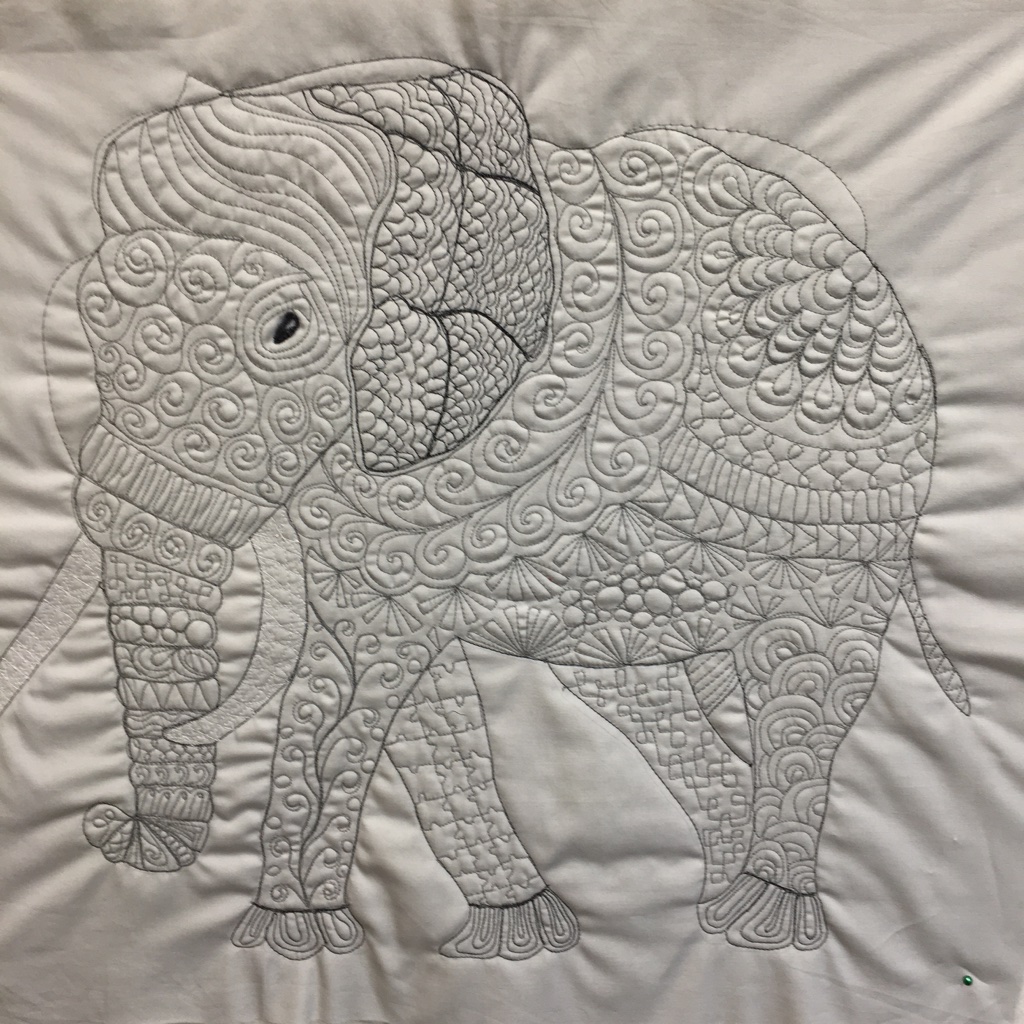
Many of the doodle patterns that I used were from when I did Helen Godden’s flower power quilt. (See HERE) You can see most of them in the lower body and legs.
I had a LOT of fun doing this and was sort of sad when it was finished.
Then I carefully trimmed the elephant and placed it on the circle. I use Elmer’s purple disappearing glue to stick it on. Using the black thread, I satin stitched the outside and a few defining parts of the elephant. I used the white thread to outline the tusks. I had to go over the tusks twice to cover up the black thread I had used to outline the elephant.

I used Hobbs 80/20 for the elephant (traupanto) and also on the whole quilt. This piece measures 36″ x 36″.
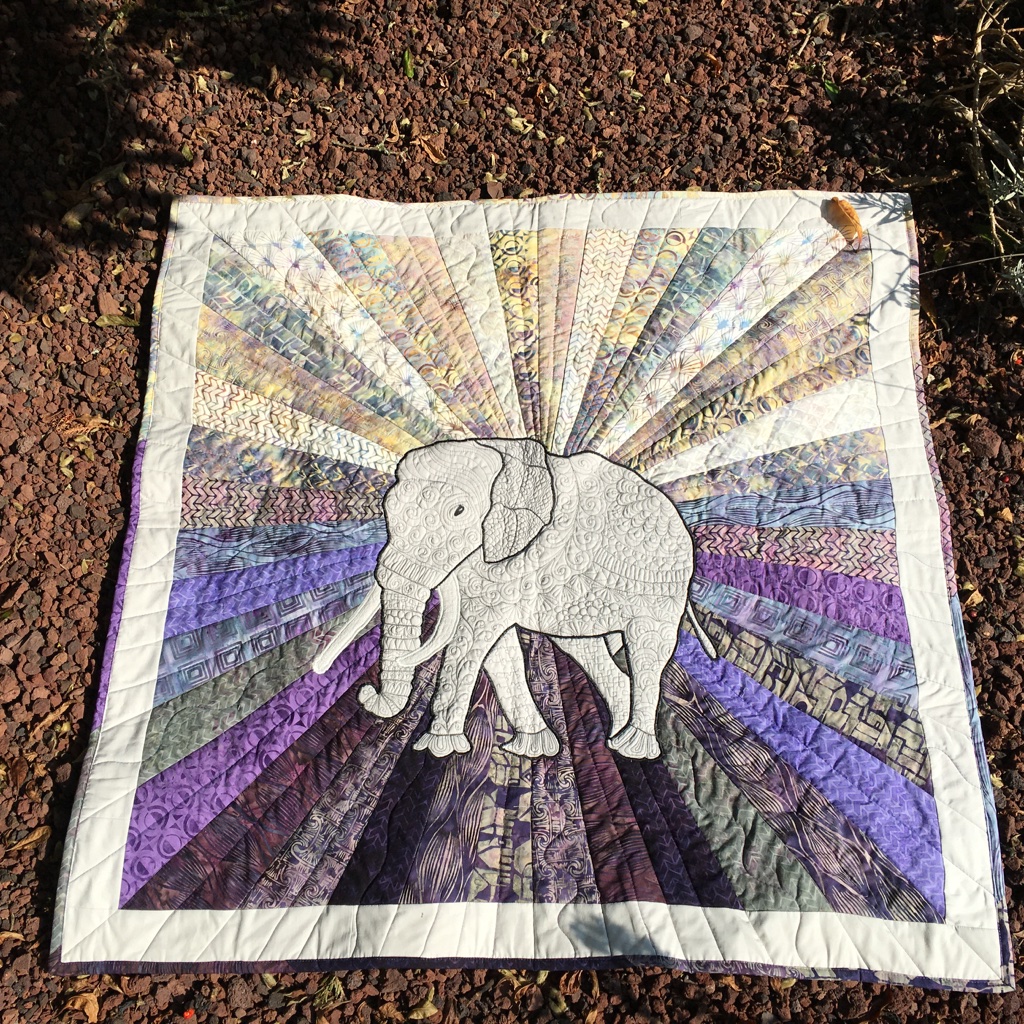
The binding is scrappy, with the light pieces on top portions and the darker pieces on the lower portion.
Thank you
Disclaimer: All products used for this wall hanging were generously provided by Island Batik and the industry partners: Hobbs batting, Aurifil and Schmetz needles. Thank you!

One who sleeps under a quilt is covered by LOVE!
Happy Quilting!
Gail
*****************************

Hi Gail, stop saying that you’re not an artist – you did create a piece of art with your skills and your passions. It looks amazing.
LikeLiked by 1 person
Thanks Andrée!
I guess it’s when I compare myself to others that I figure I’m not an artist. I need to quit comparing and just continue to admire other’s work!
Happy Quilting! 🙂
LikeLike
Pingback: Nothing much to show | Quilting Gail
Wow! Love the elephant. Waiting for inspiration can be very frustrating, but it feels so good when you get the perfect solution to a problem.
LikeLiked by 1 person
Thanks, Kathy!
LikeLike
OMG, Gail: this is beautiful! I’d love to know how closely you trimmed the fabric around your elephant when you cut him out from the grey? The wedges, combined with your fabulous quilting, really make him the focus. Wow.
LikeLiked by 1 person
Hi Karen!
I trimmed the elephant at about 1/8″ … and then I had to widen the satin stitch … in some areas I trimmed a bit wider than an 1/8th and I did some micro trimming after the fact … but I much preferred where I was more accurate at 1/8″. It was all eyeballed … no measuring.
I’m glad you like the quilt! 🙂
LikeLike
I love how your quilt turned out! The zentangle on the elephant is so whimsical and fun. It must have been an amazing trip. Have a great day!
LikeLiked by 1 person
Thanks, Jennifer! It was fun to do!
Happy Quilting! 🙂
LikeLike
Pingback: What’s Happening in the Studio? Monday, Oct. 5 | Quilting Gail
I love your elephant and the detail work.
LikeLiked by 1 person
Thanks, Denise!
LikeLike
Wow, the best ideas seem to come in the wee hours of the night. That quilt is amazing.
LikeLiked by 1 person
Thank you!
Yes, the wee hours of the night are a very creative time for a lot of people!
Happy Quilting! 🙂
LikeLike
WOW Gail! I hope this came out as you vision because it sure is beautiful. The background is so inspired and your quilting really brings this lovely elephant to life. The satin stitch really does the job of highlighting the piece, too. Really great job and I sure did enjoy reading about the whole process. Thanks for sharing that with all of us. ~smile~ Roseanne
LikeLiked by 1 person
Thanks, Roseanne!
I do LOVE the background fabric!!! It is really great to work with! (Of course, all Island Batik fabric is great!)
I’m glad that you enjoyed reading how it all came about!
Happy Quilting! 🙂
LikeLike
Beautiful! Job well done!
LikeLiked by 1 person
Thanks, Rhonda! 🙂
LikeLike
OMG — I love it Gail…your elephant surround by rays is stunning! The quilting is stunning – I’ve never tried trapunto free hand only with the embroidery machine– was it difficult? The fabric is gorgeous I’ll need to get some to add to my batik collection♥
LikeLiked by 1 person
Hi Karla,
The trapunto was not hard … mostly because the elephant was quilted on extra batting and then layered on top of the rays. The purple disappearing glue held it in place and then the satin stitch did the final work!
Happy Quilting! 🙂
LikeLike
I would definitely say that you were up to the challenge! You did a beautiful job. Thanks for sharing the steps and your thoughts. You should be proud of that one!
LikeLiked by 1 person
Thanks Pamela!
I am quite pleased with my elephant! 🙂
LikeLike
Wonderful! It is always a great bonus when the mind’s image and the final product come together. Thanks for sharing the process including the “sitting” part.
Connie
LikeLiked by 1 person
Hi Connie,
Yes, sometimes ideas need to sit and stew for awhile before they become a reality!
Happy Quilting! 🙂
LikeLike
This is amazing. Love it. Great job with the threads.
LikeLiked by 1 person
Thanks, Michelle! It was a lot of fun … once I knew what I was doing and where I was headed!
Happy Quilting! 🙂
LikeLike
That is absolutely awesome! You give me hope for my project, which is just in the thinking mode for right now 🙂
LikeLiked by 1 person
Hi Pamela!
Thank you!
Good luck with your thinking mode! Hopefully it doesn’t happen in the wee hours of the night!
Happy Quilting! 🙂
LikeLike
Great project, and so much fun to see how you planned it, and the designs you used.
LikeLiked by 1 person
Thanks, Maryellen!
I’m glad you enjoyed reading the post!
Happy Quilting! 🙂
LikeLike
I love it, Gail! Great job!
LikeLiked by 1 person
Thanks, Brenda!
LikeLike
I absolutely love how this turned out. And hearing about the creative process is always a nice bonus. Love, love your zendoodled elephant! This is really beautiful.
LikeLiked by 1 person
Thanks, Emily!
I’m glad you love my elephant! You were a great support for me during the process!
Happy Quilting! 🙂
LikeLiked by 1 person
You did a great job. I love the background and the elephant is fabulous. I have one of Helen’s projects to do, but I think it will be a little bit before I get to it.
LikeLiked by 1 person
Thank you, Kathleen!
Helen’s projects are a great learning experience! (Well, at least for me!)
Happy Quilting! 🙂
LikeLike
I love the “ZenDoodle/Threadpainting” – it is an interesting take on the theme.
LikeLiked by 1 person
Thanks, Gene!
I’m not very talented when it comes to thread painting … but zendoodling – I can do!
Happy Quilting! 🙂
LikeLike
Incredible in its finished state! Very fascinating that you allowed us through the process. Now something I could never DUP might be attainable. Would be fun to try! Thanks again!!
LikeLiked by 1 person
Thank you!
I think you can do it … it will just take a little patience and a LOT of practice!
Happy Quilting! 🙂
LikeLike
I just LOVE ❤️ this. Back ground is perfect for all those zen doodles.
LikeLiked by 1 person
Thanks, Sally! I appreciate your encouragement! 🙂
LikeLike