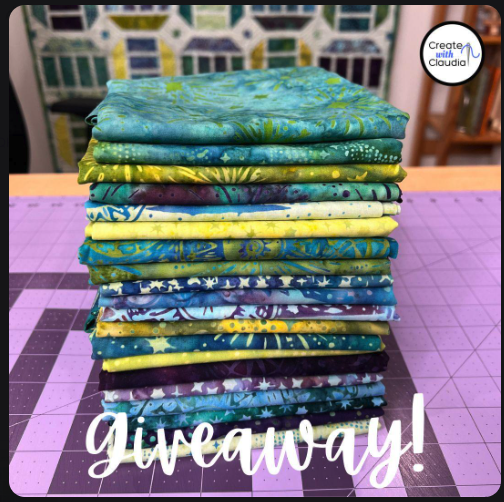
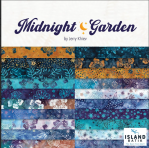
Lunar Glow is a Signature collection by Jerry Khiev of Lumin Fabrics for Claudia of Create with Claudia. It’s an absolutely gorgeous collection!
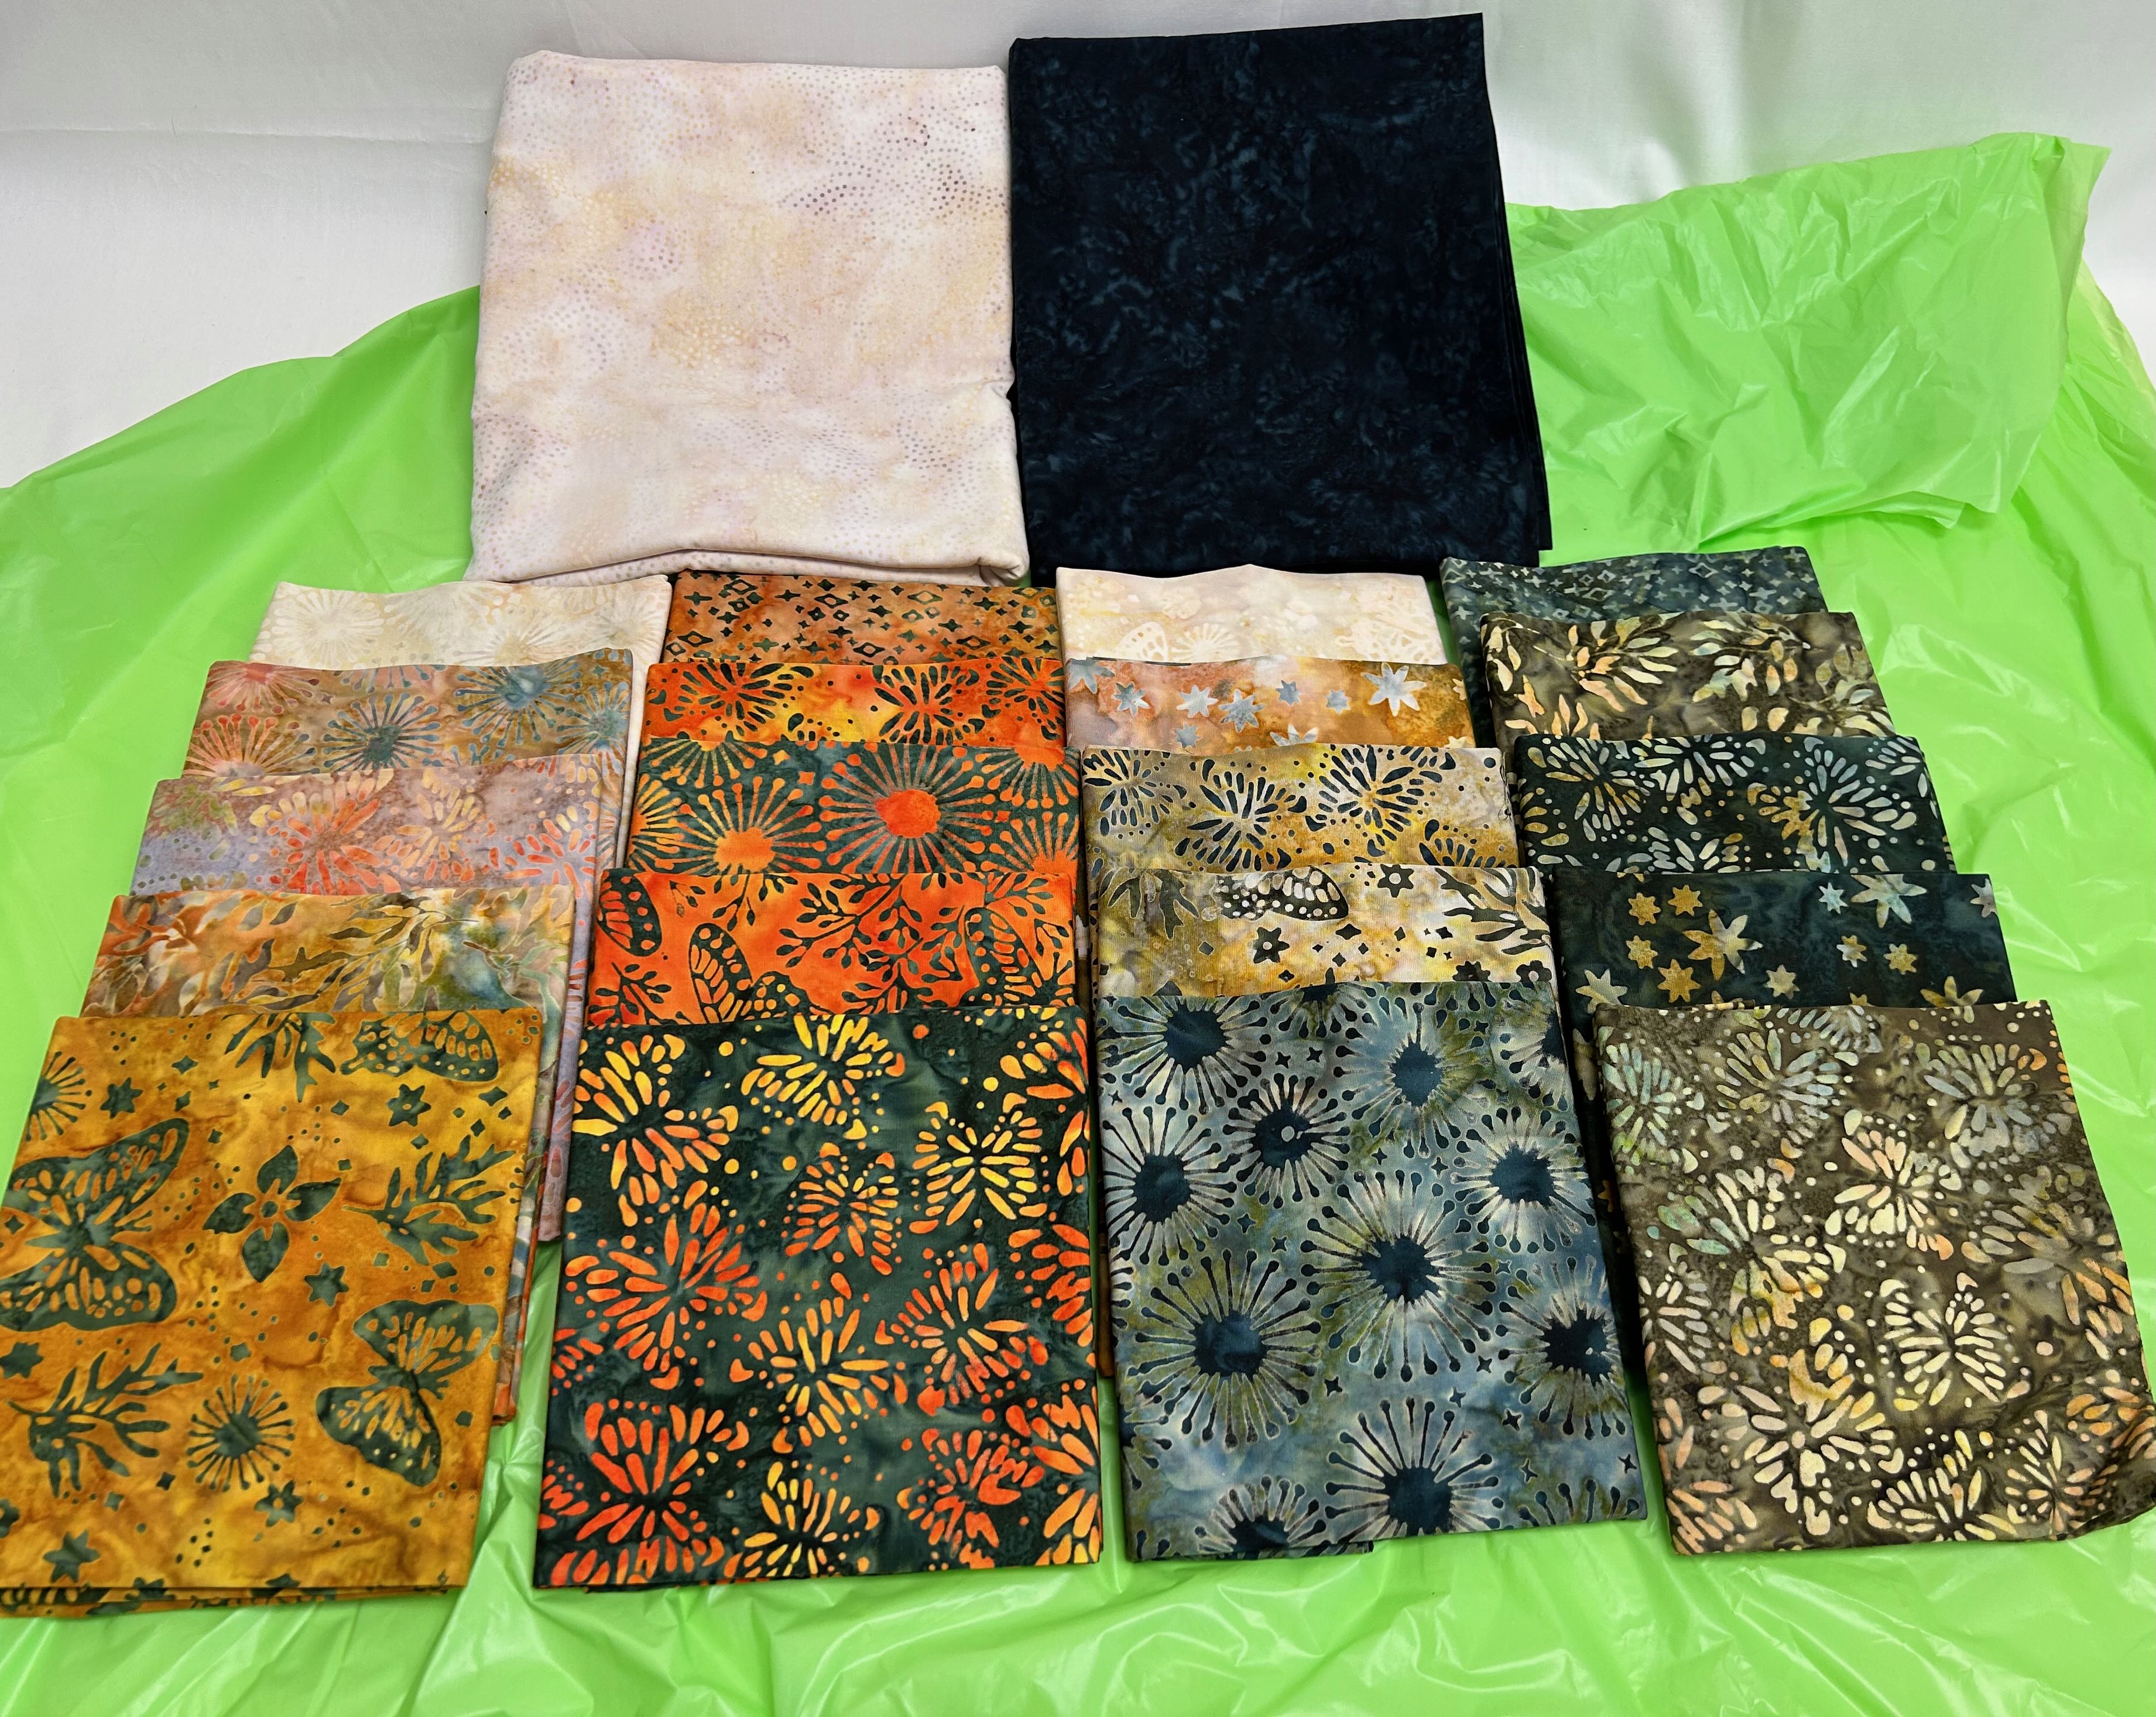
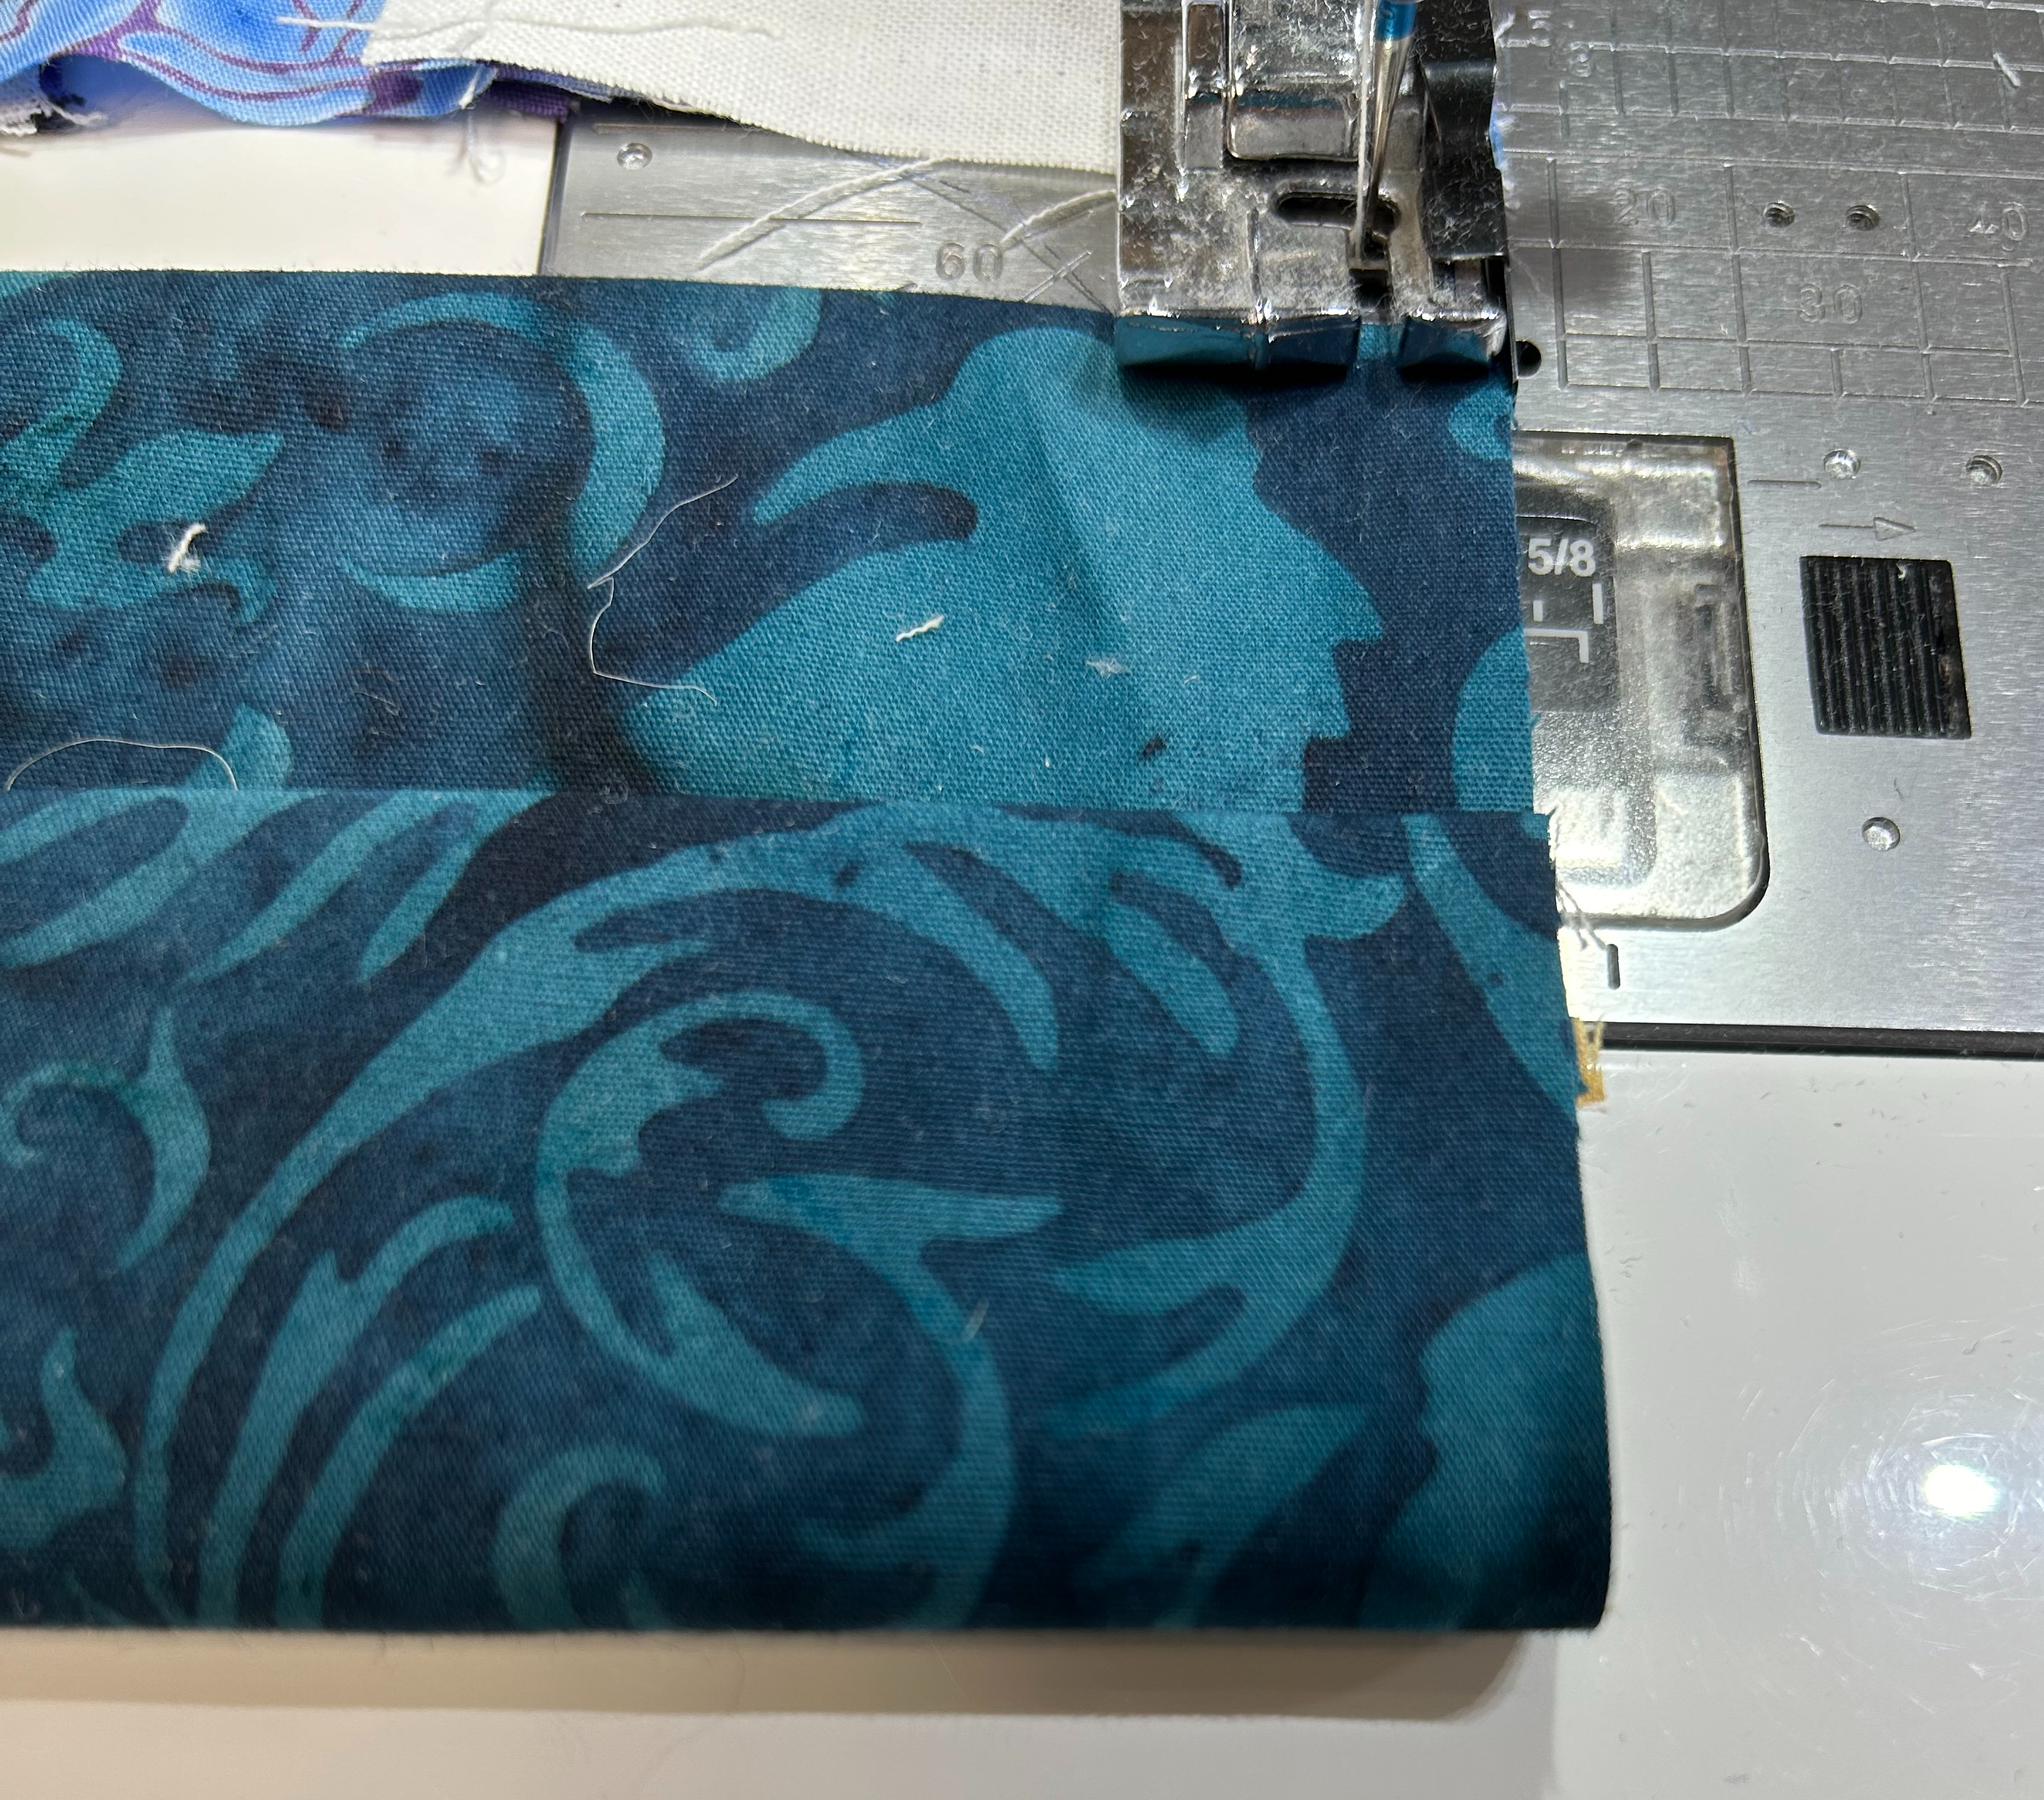
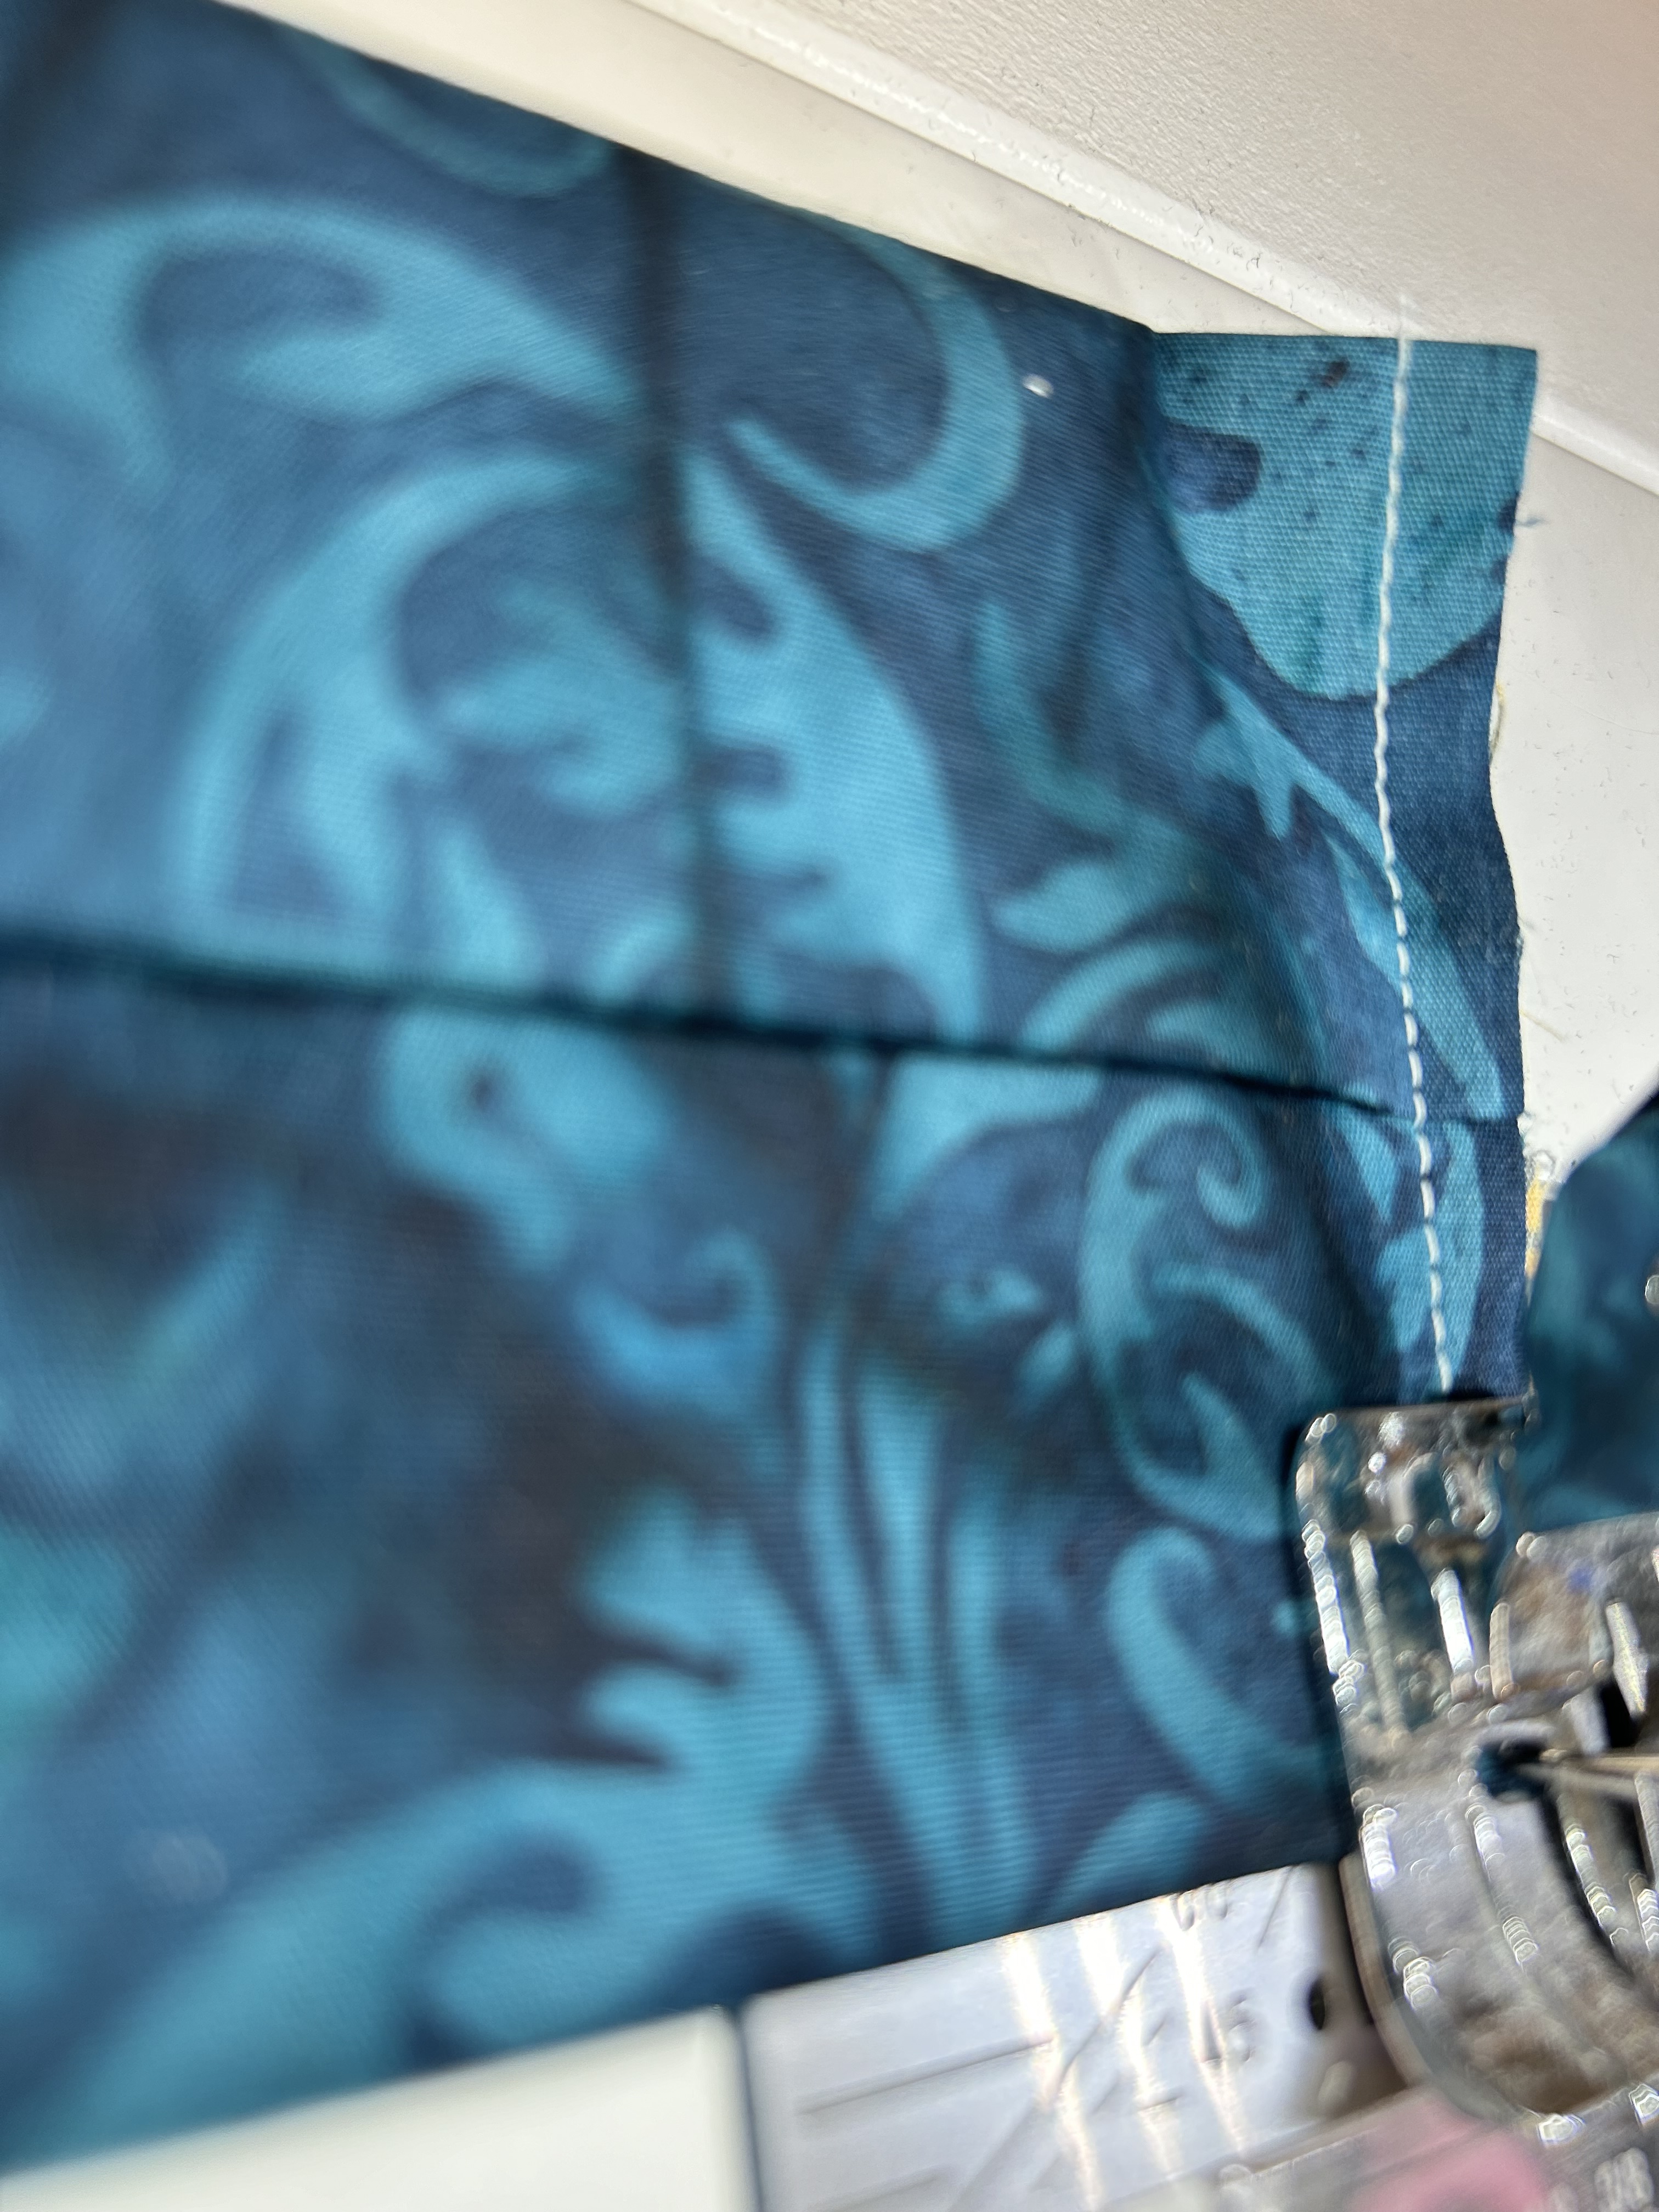
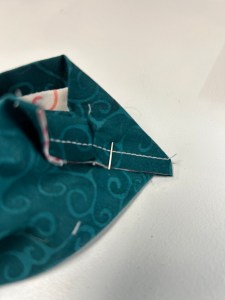
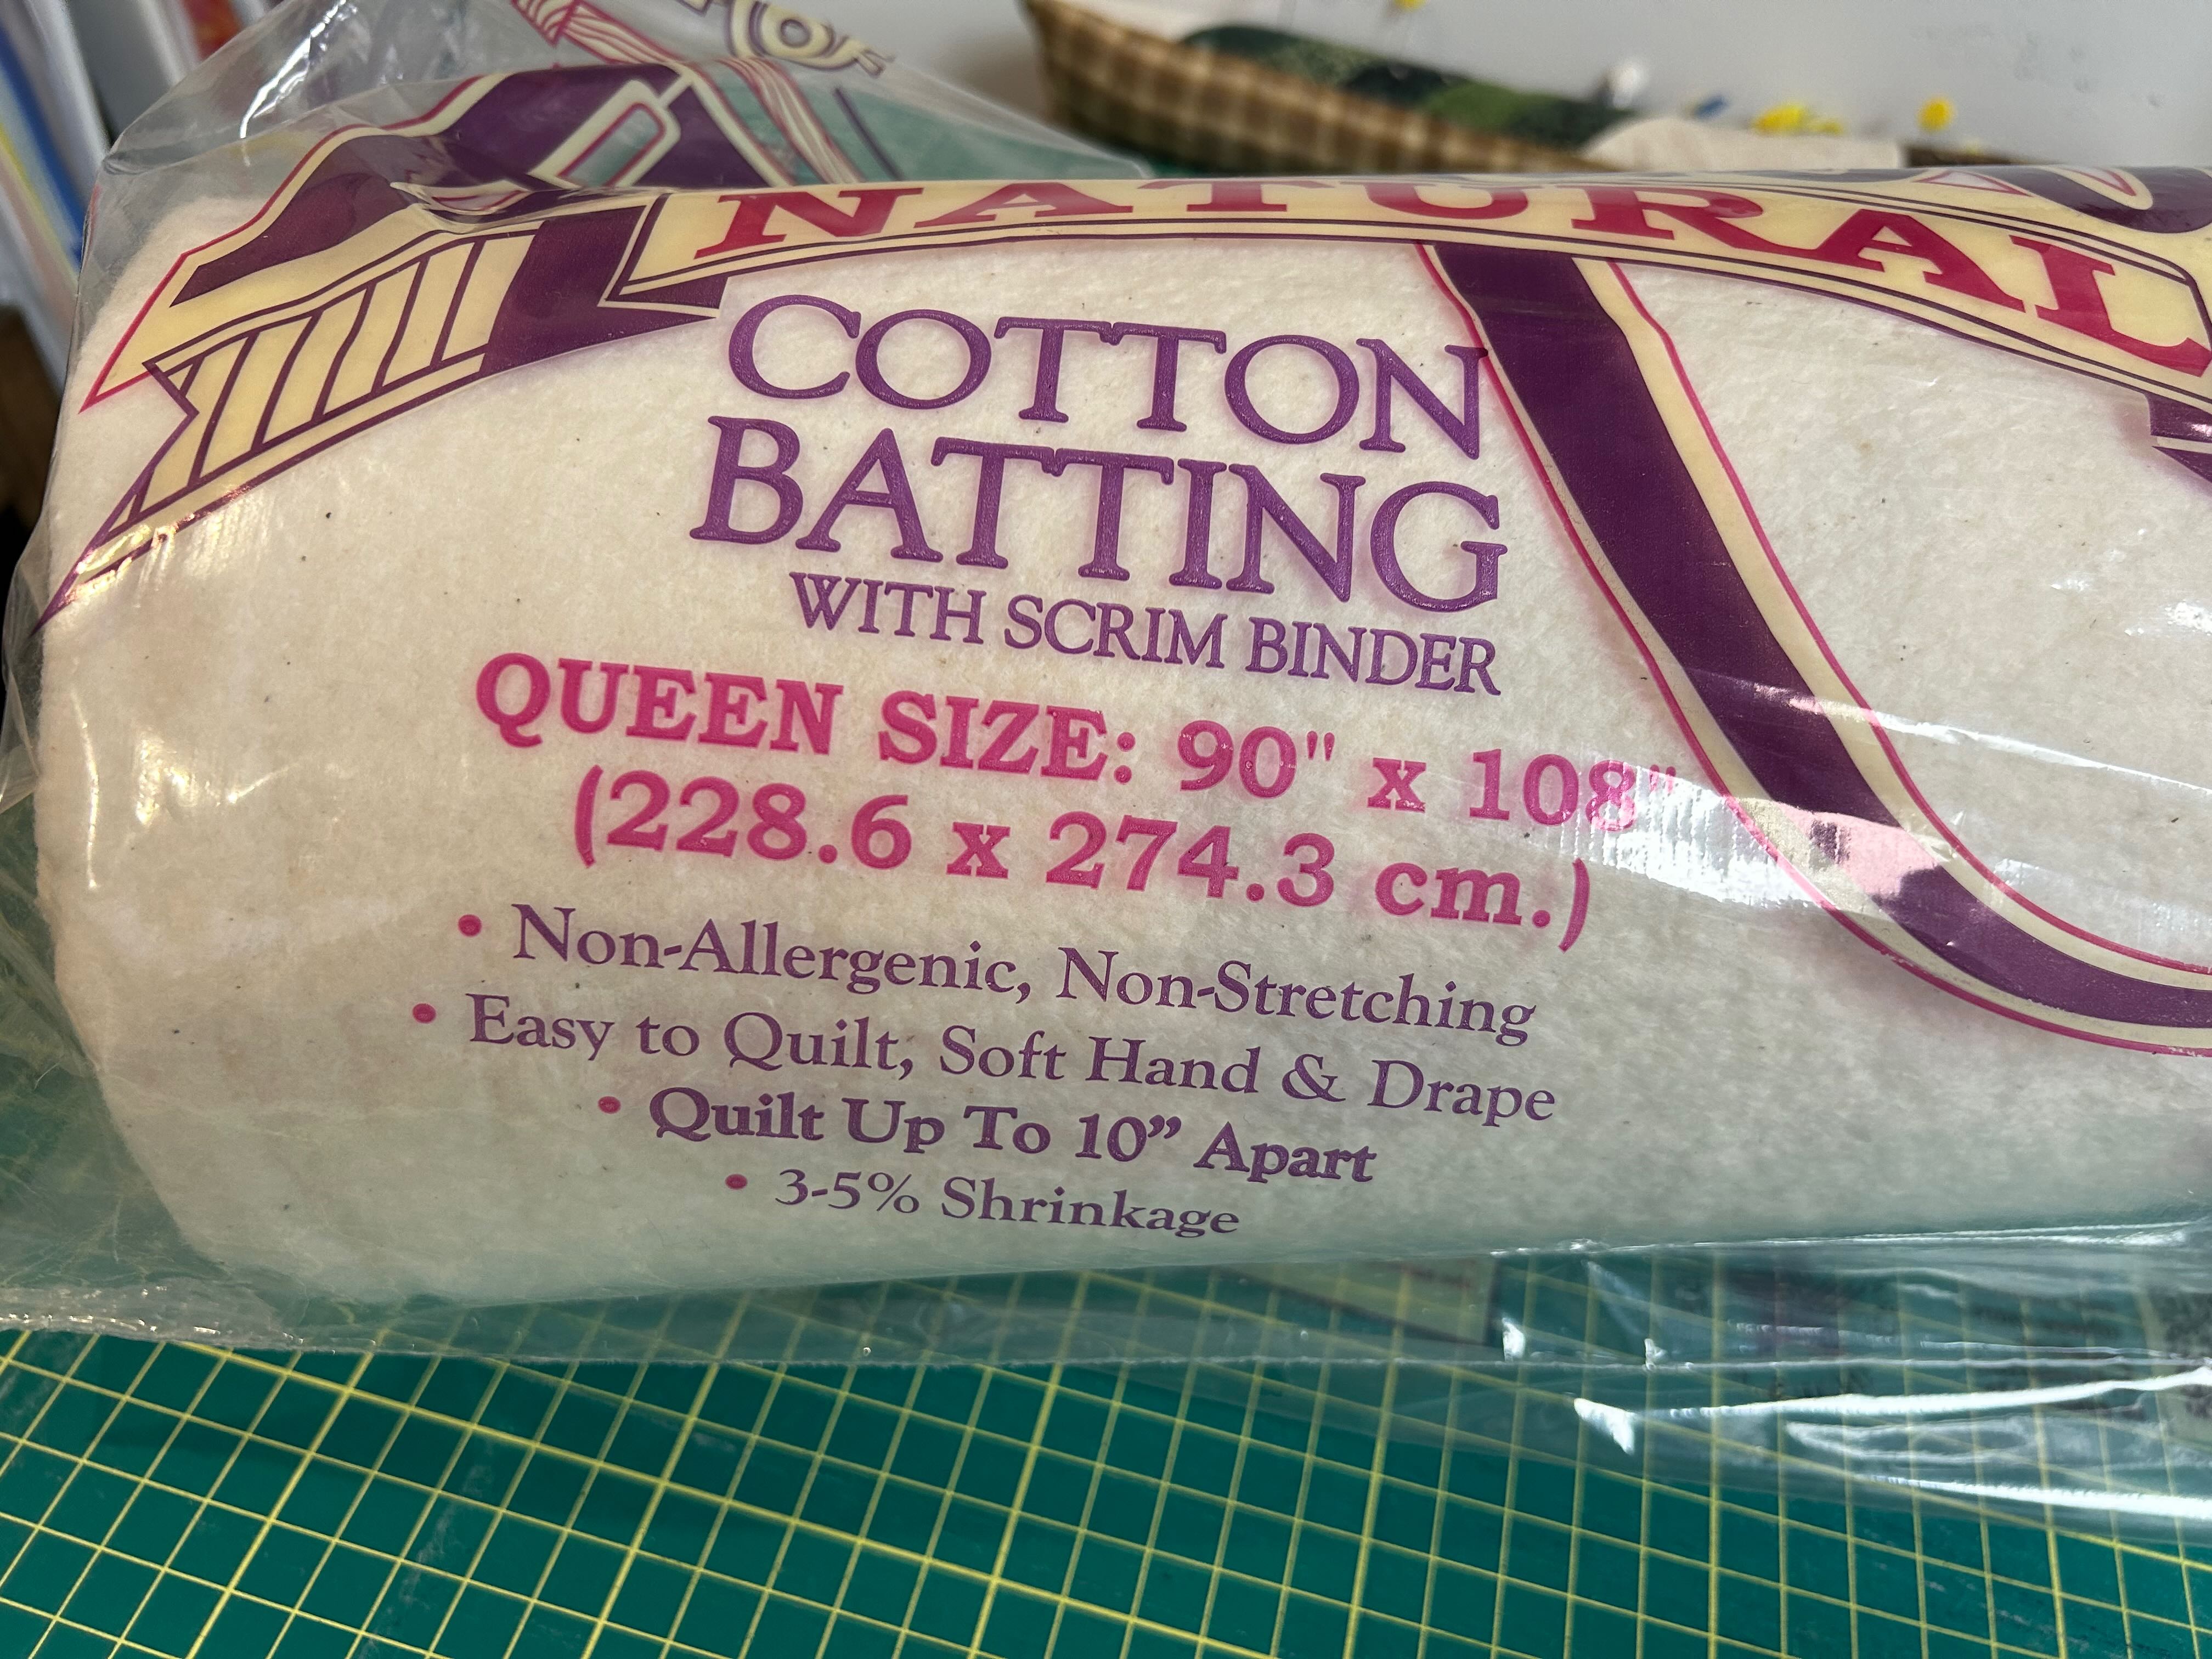
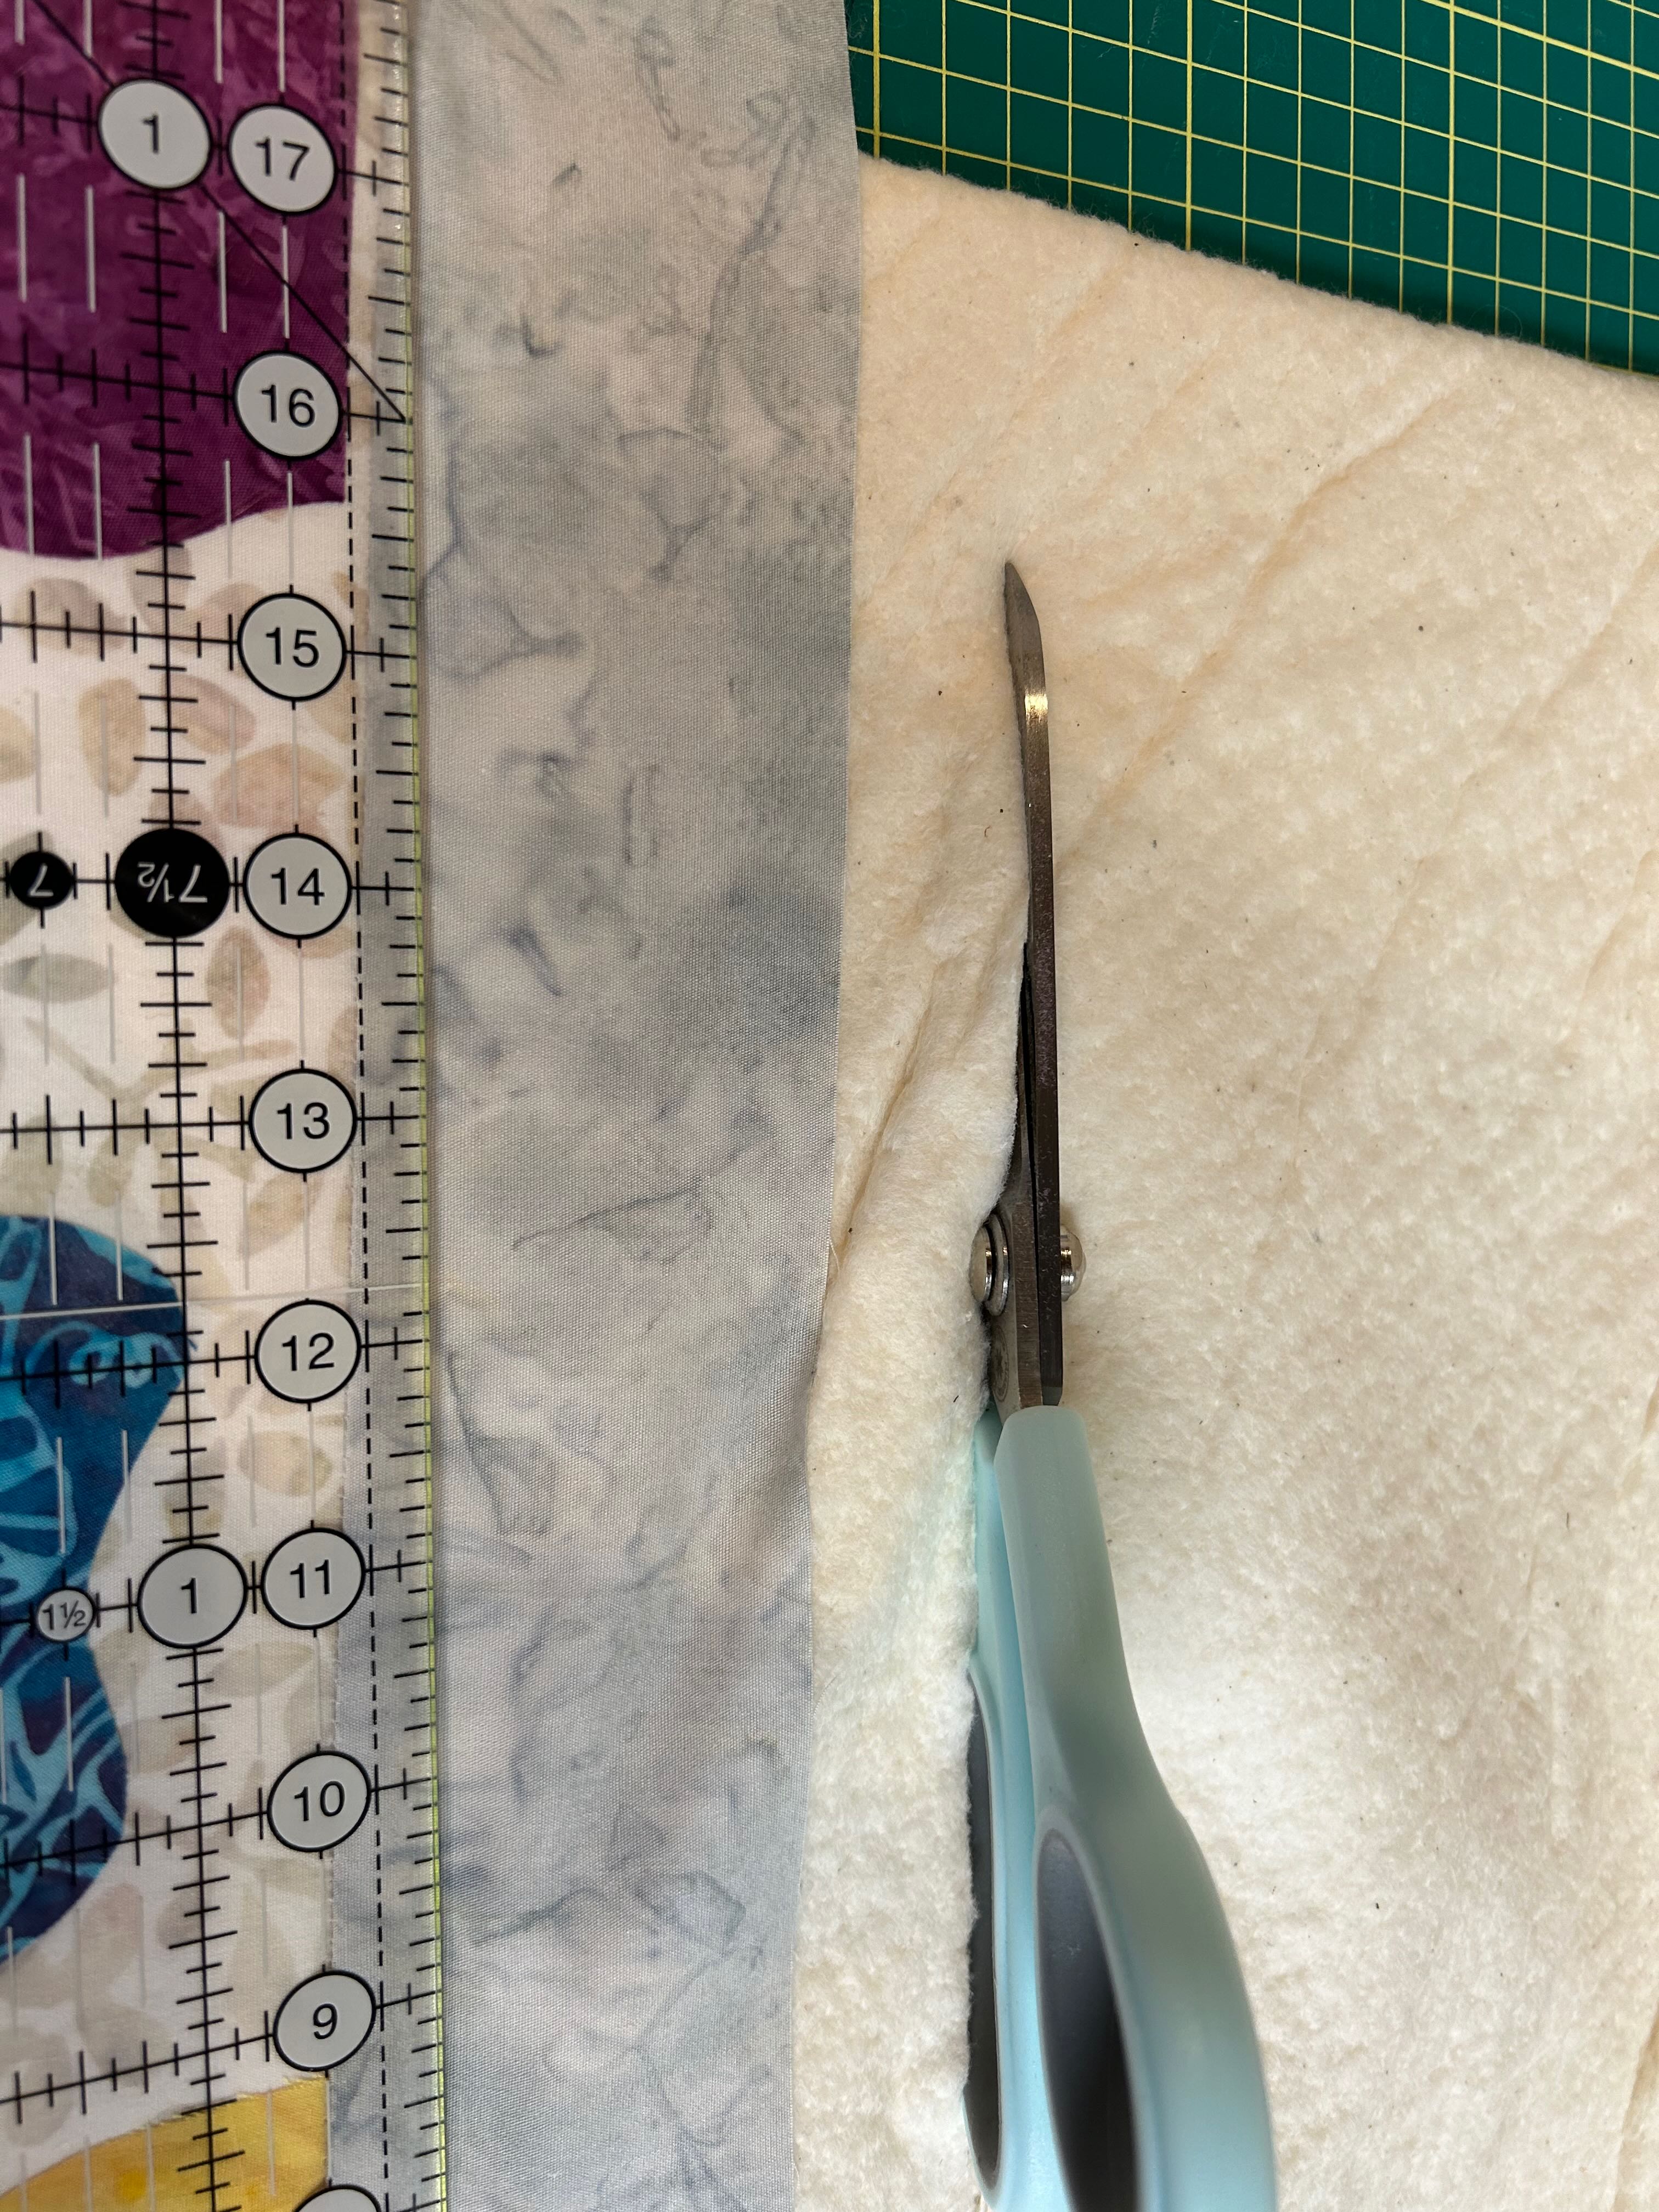
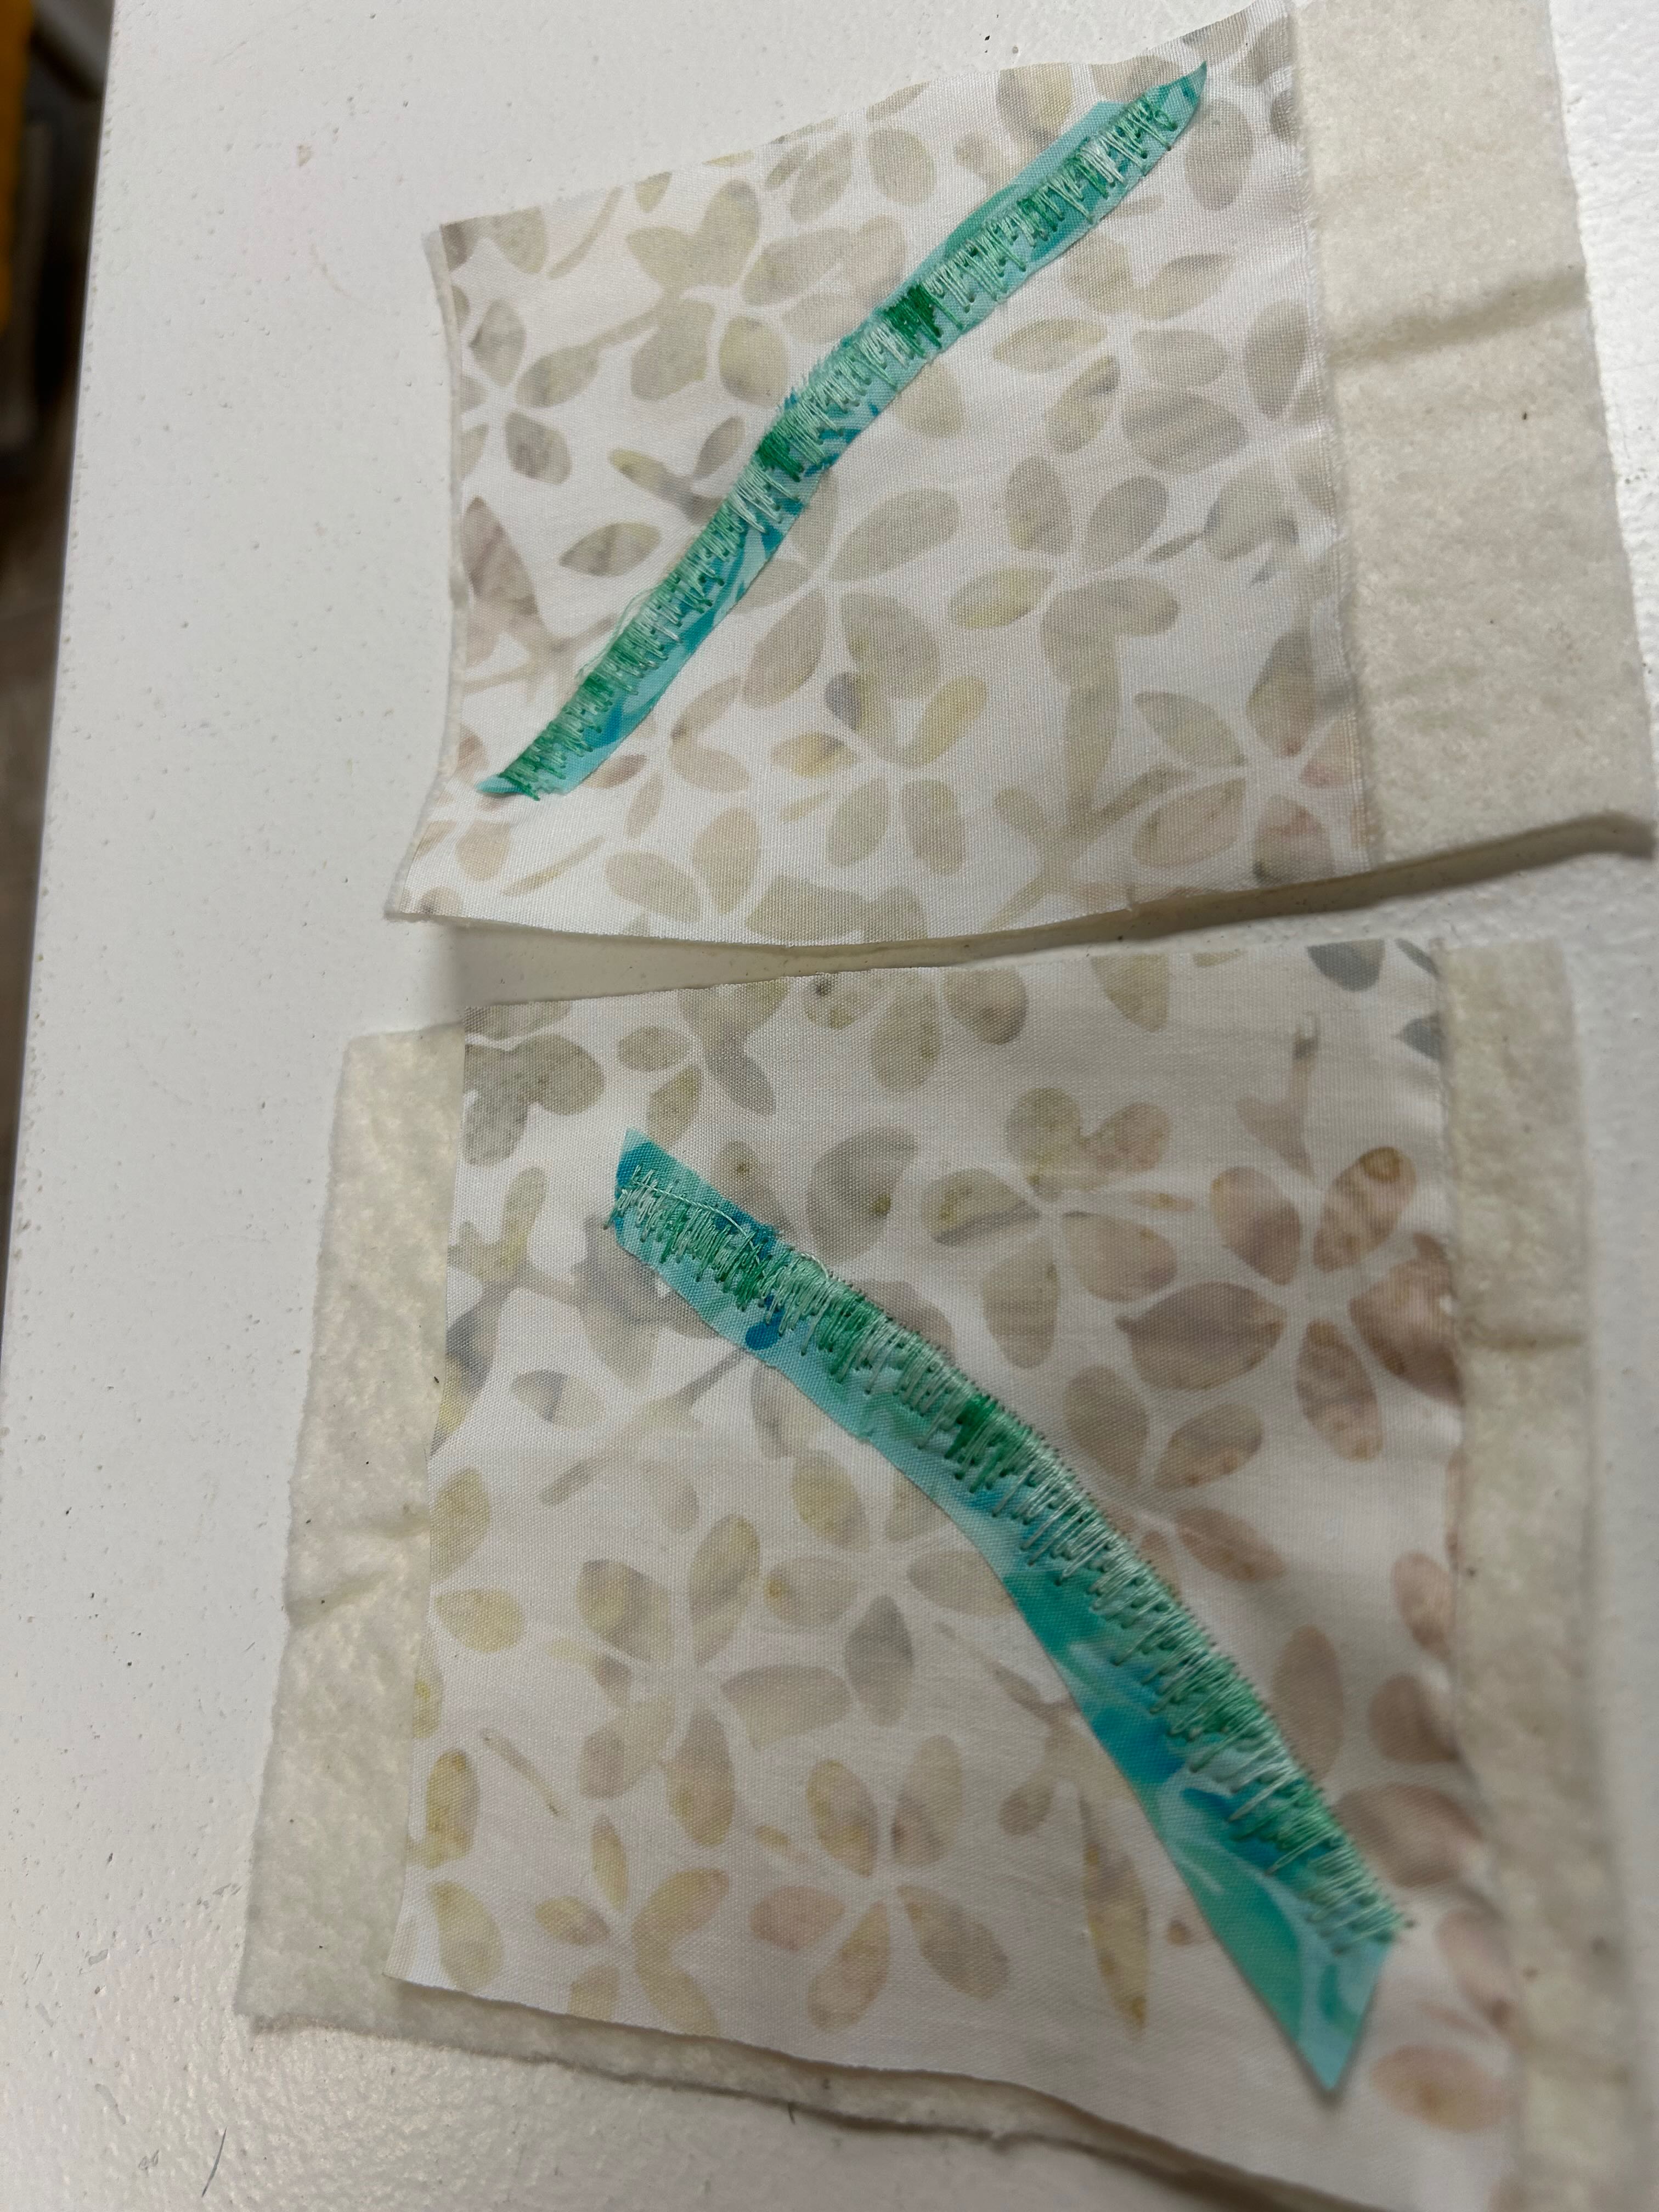
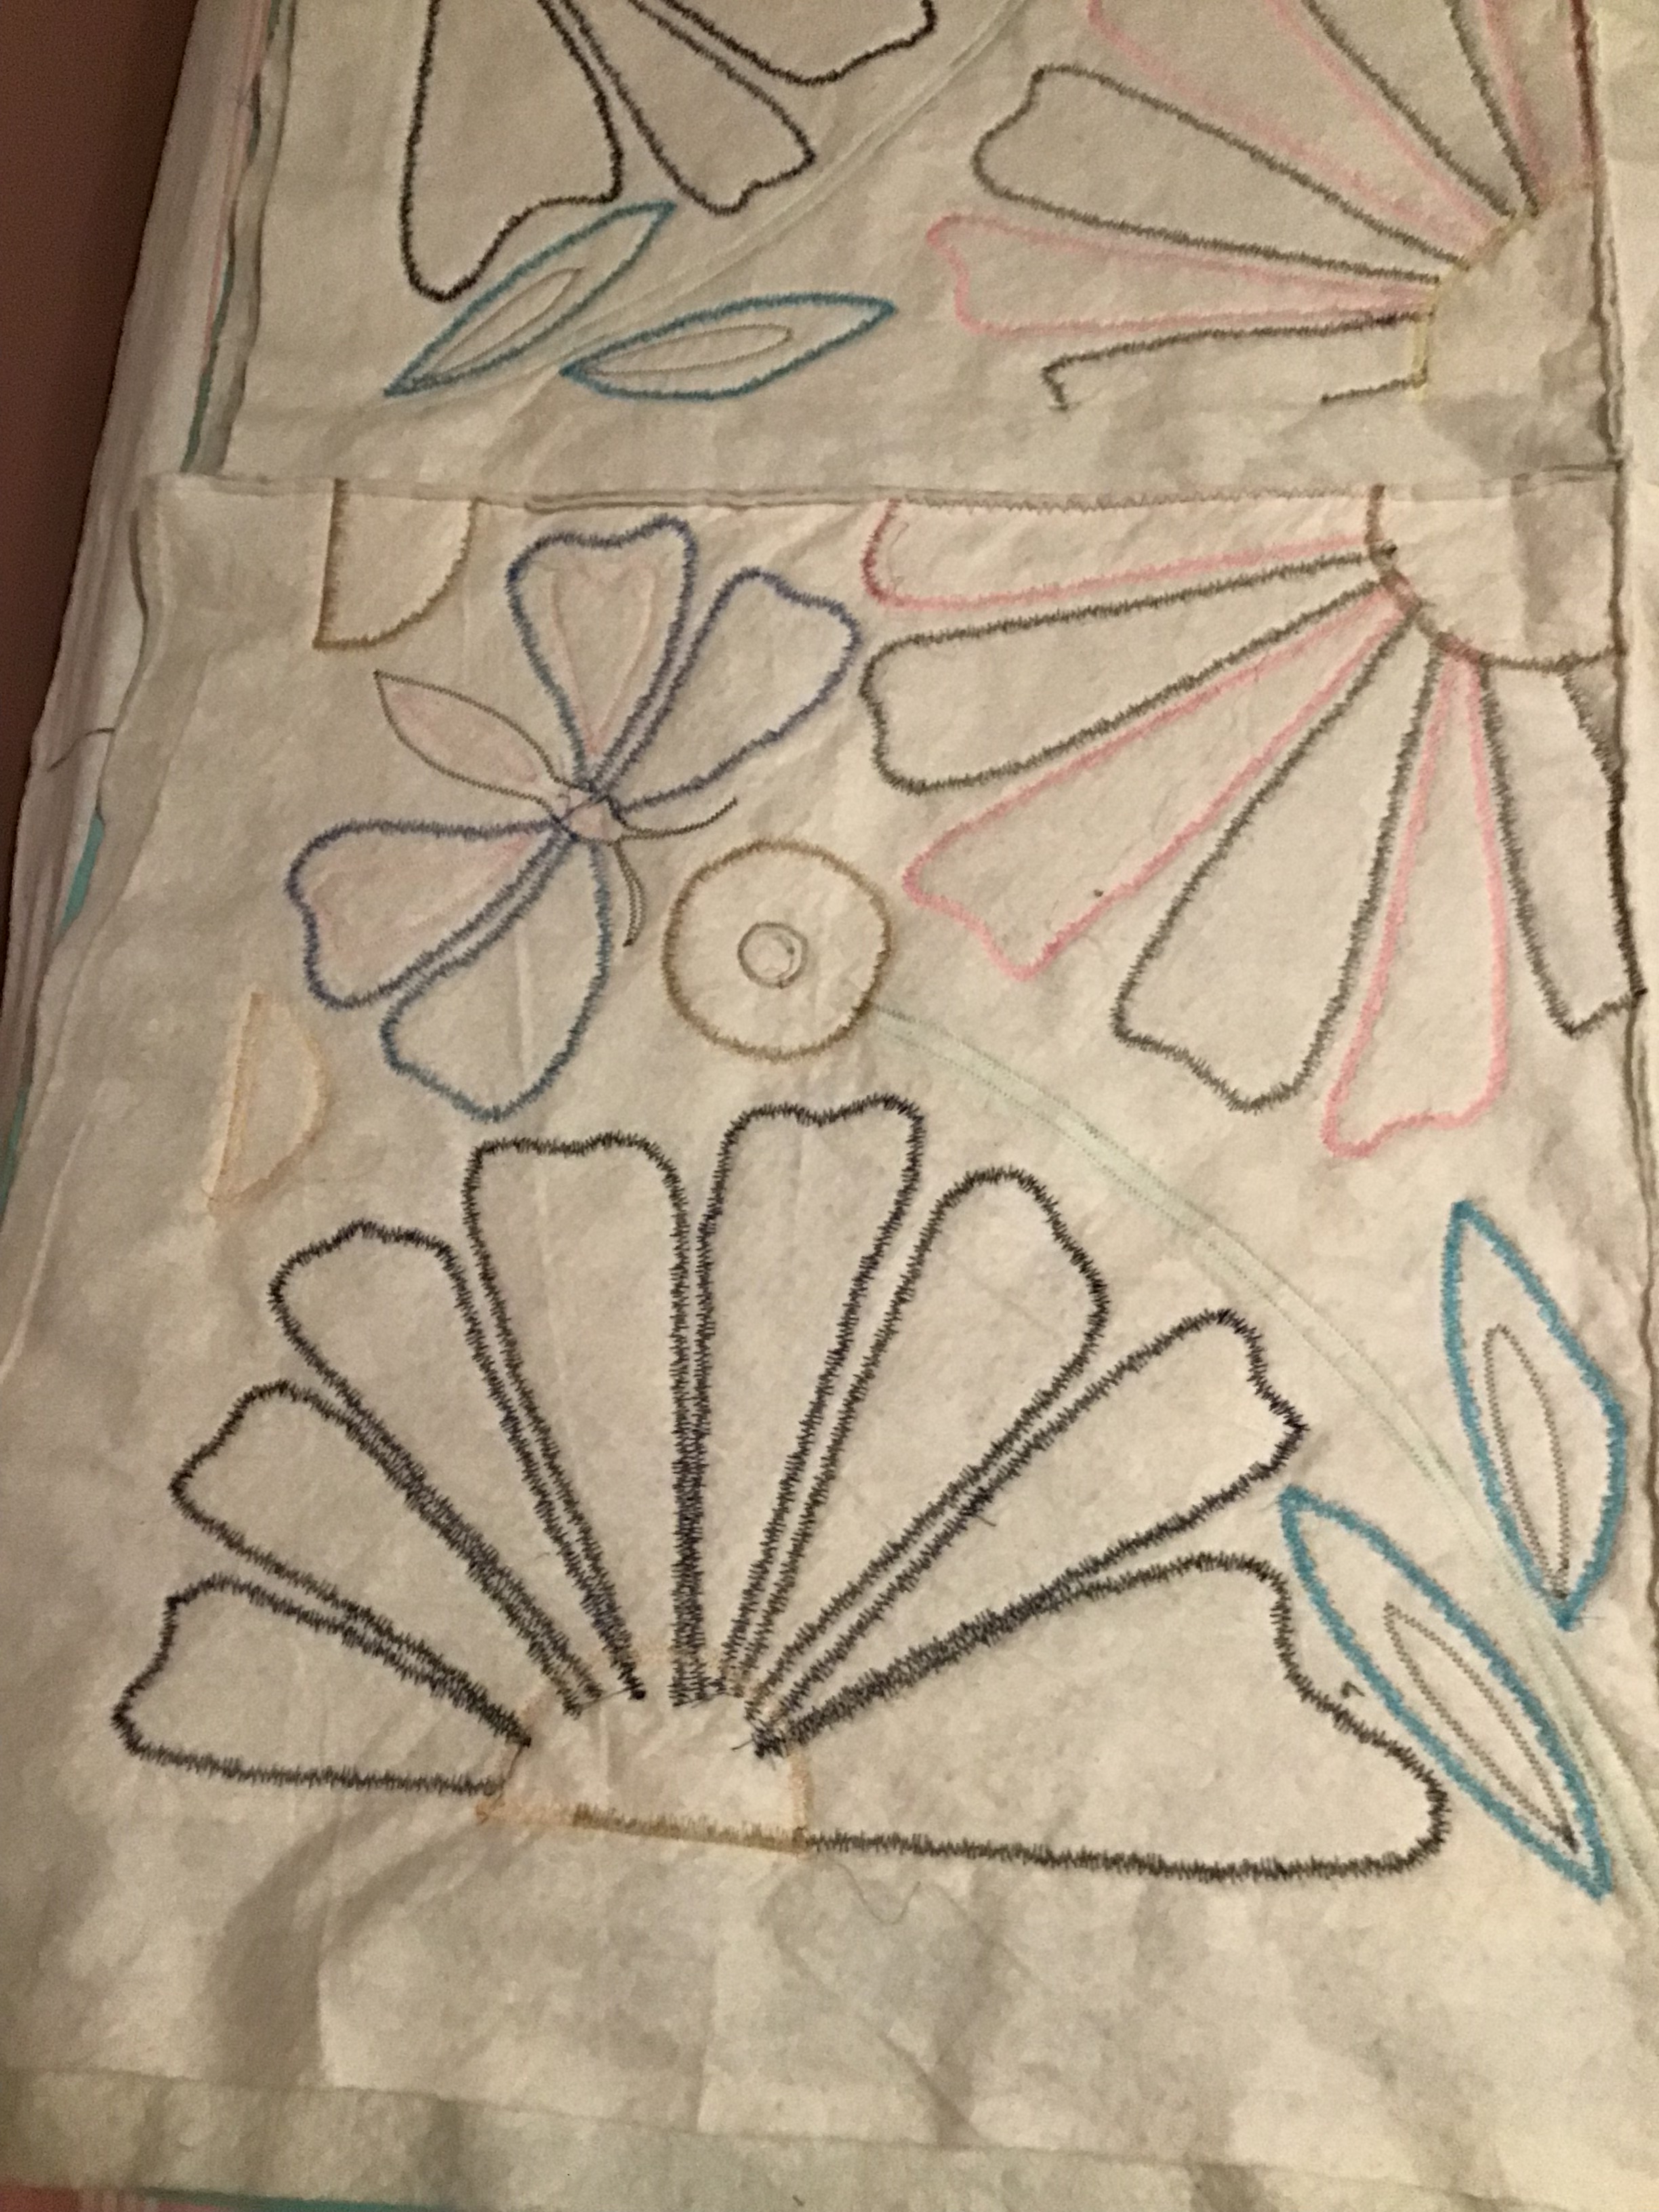
Claudia sent me enough fabric to make 2 medium sized Clam-Up bags. However, I discovered that with some strategic cutting, I was able to cut out 4 bags: X-small, small, medium and large. The fabrics on the left and centre were intended for the outside of the bags, while the fabric on the left was for the lining.
These are the 3 fabrics I chose:
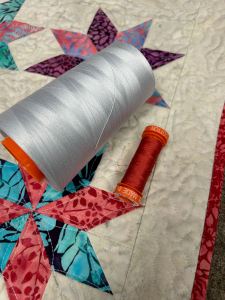
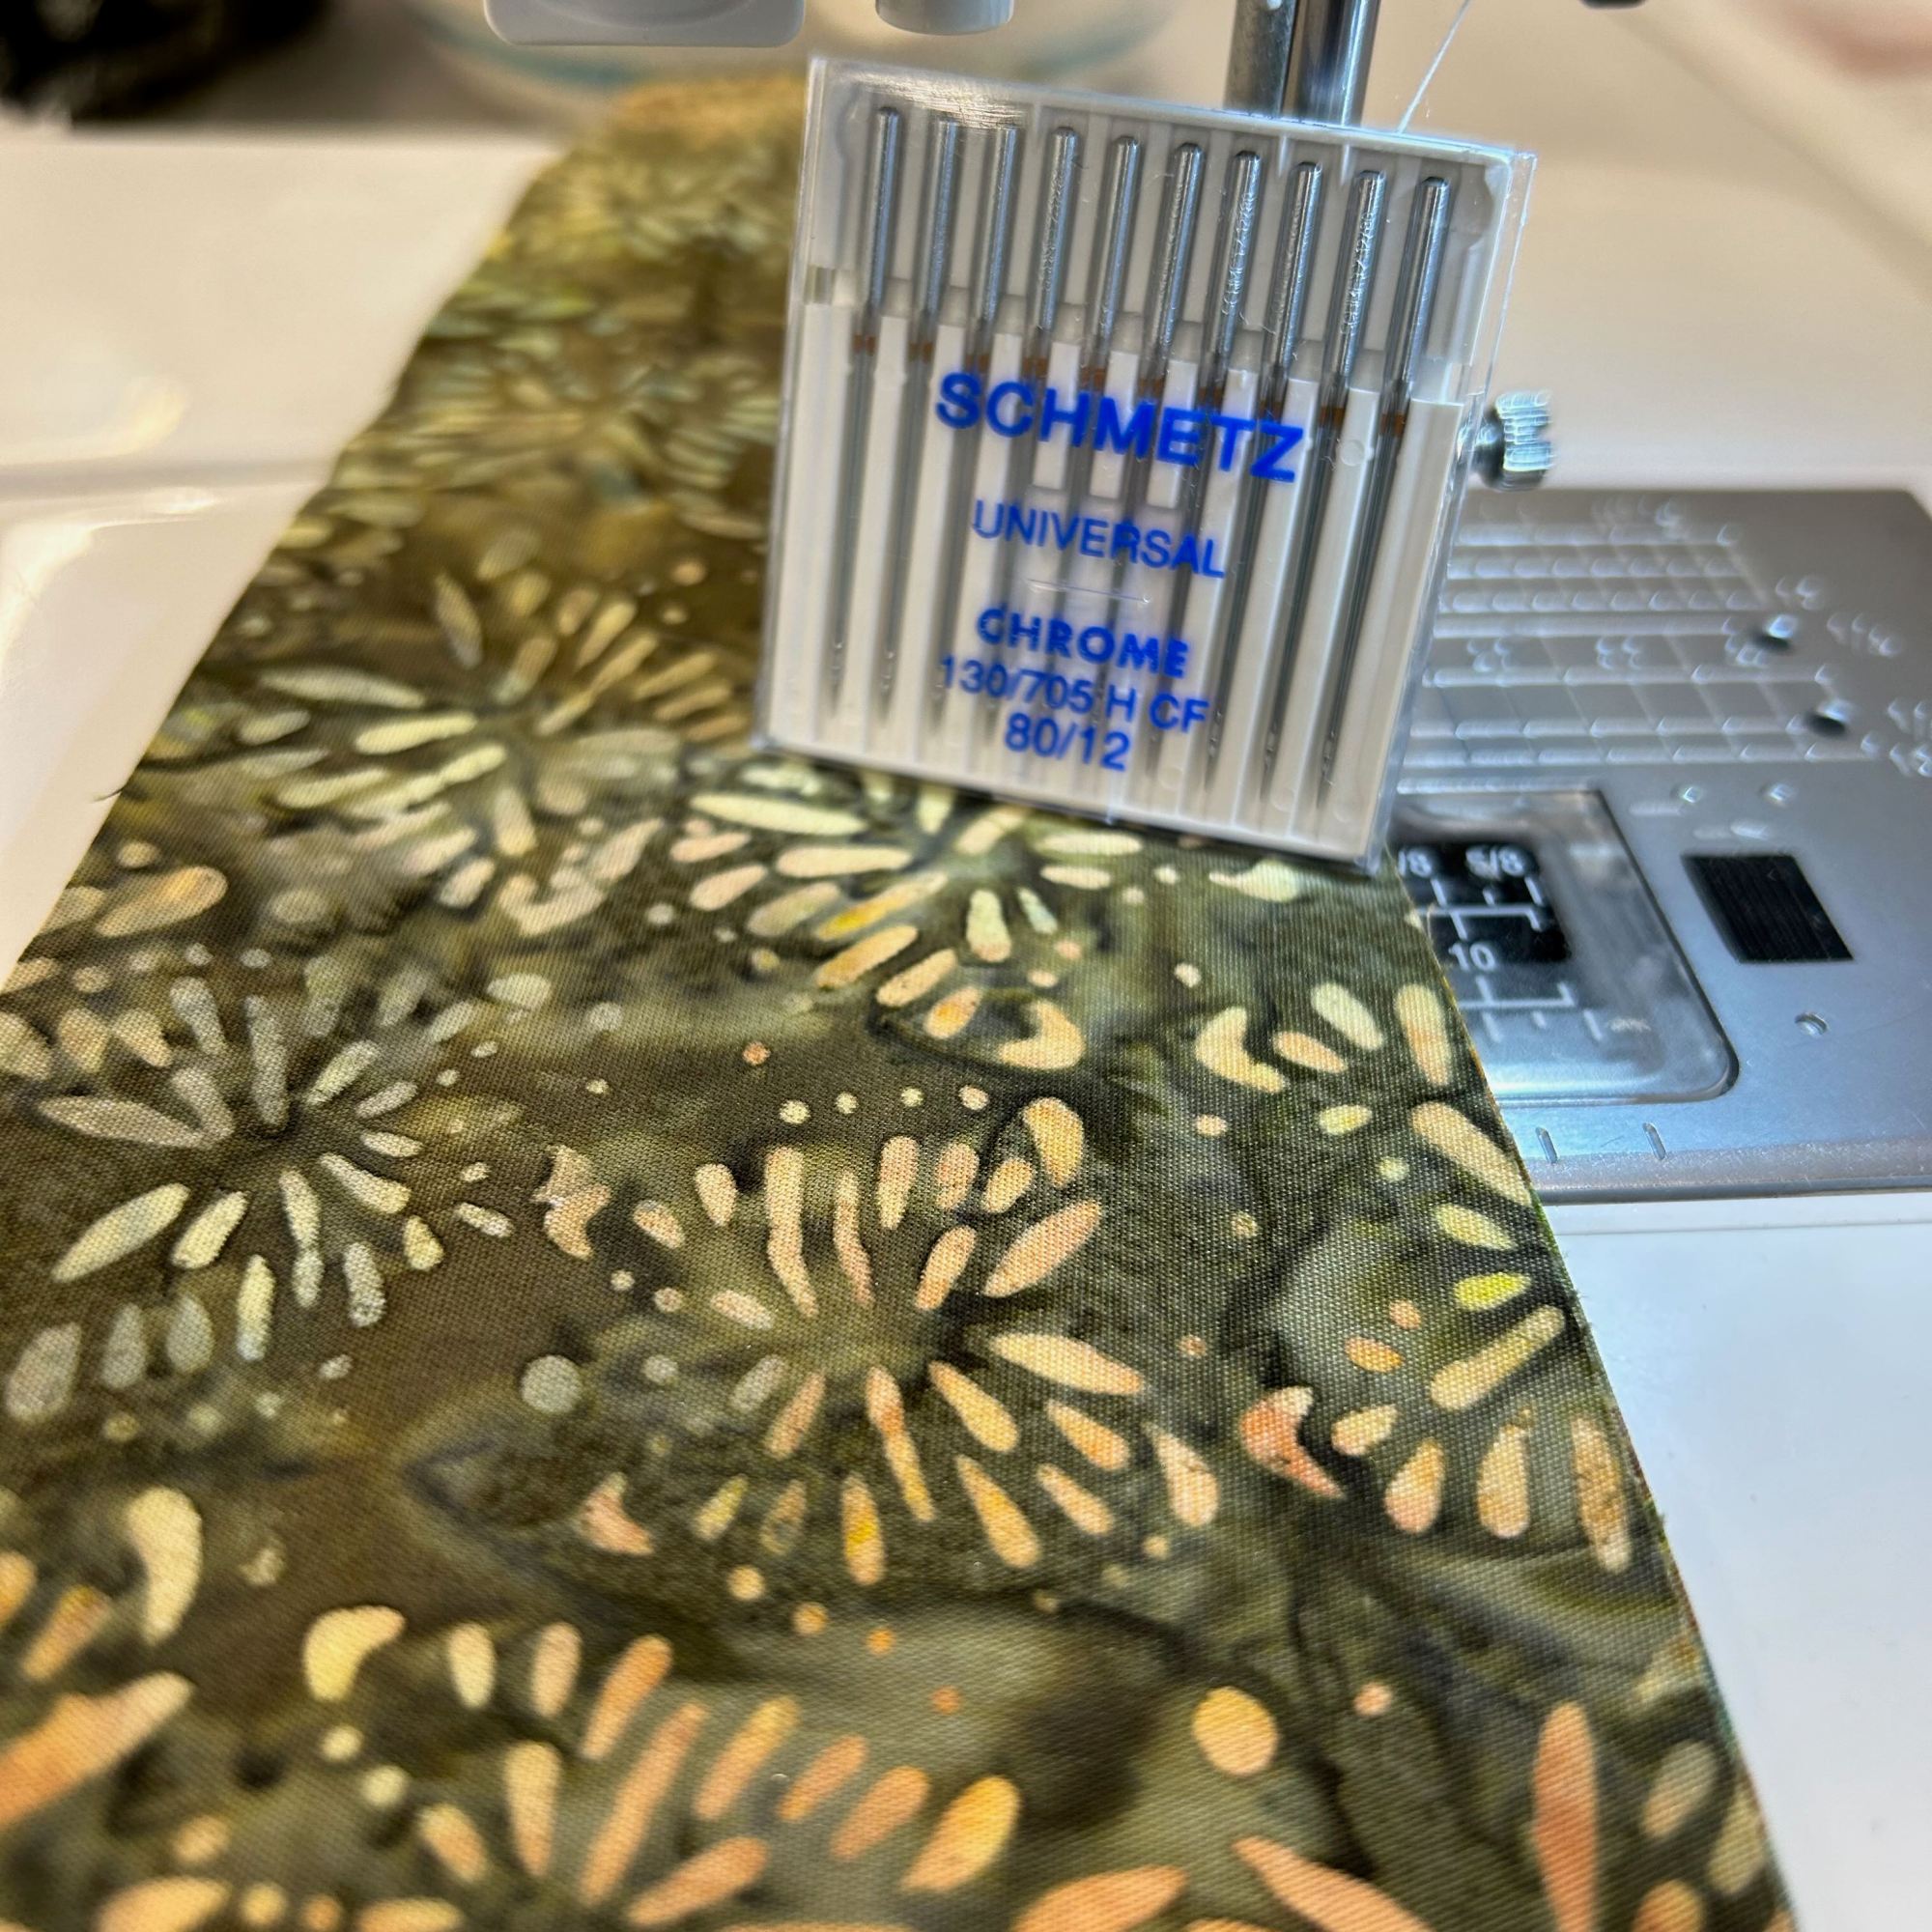
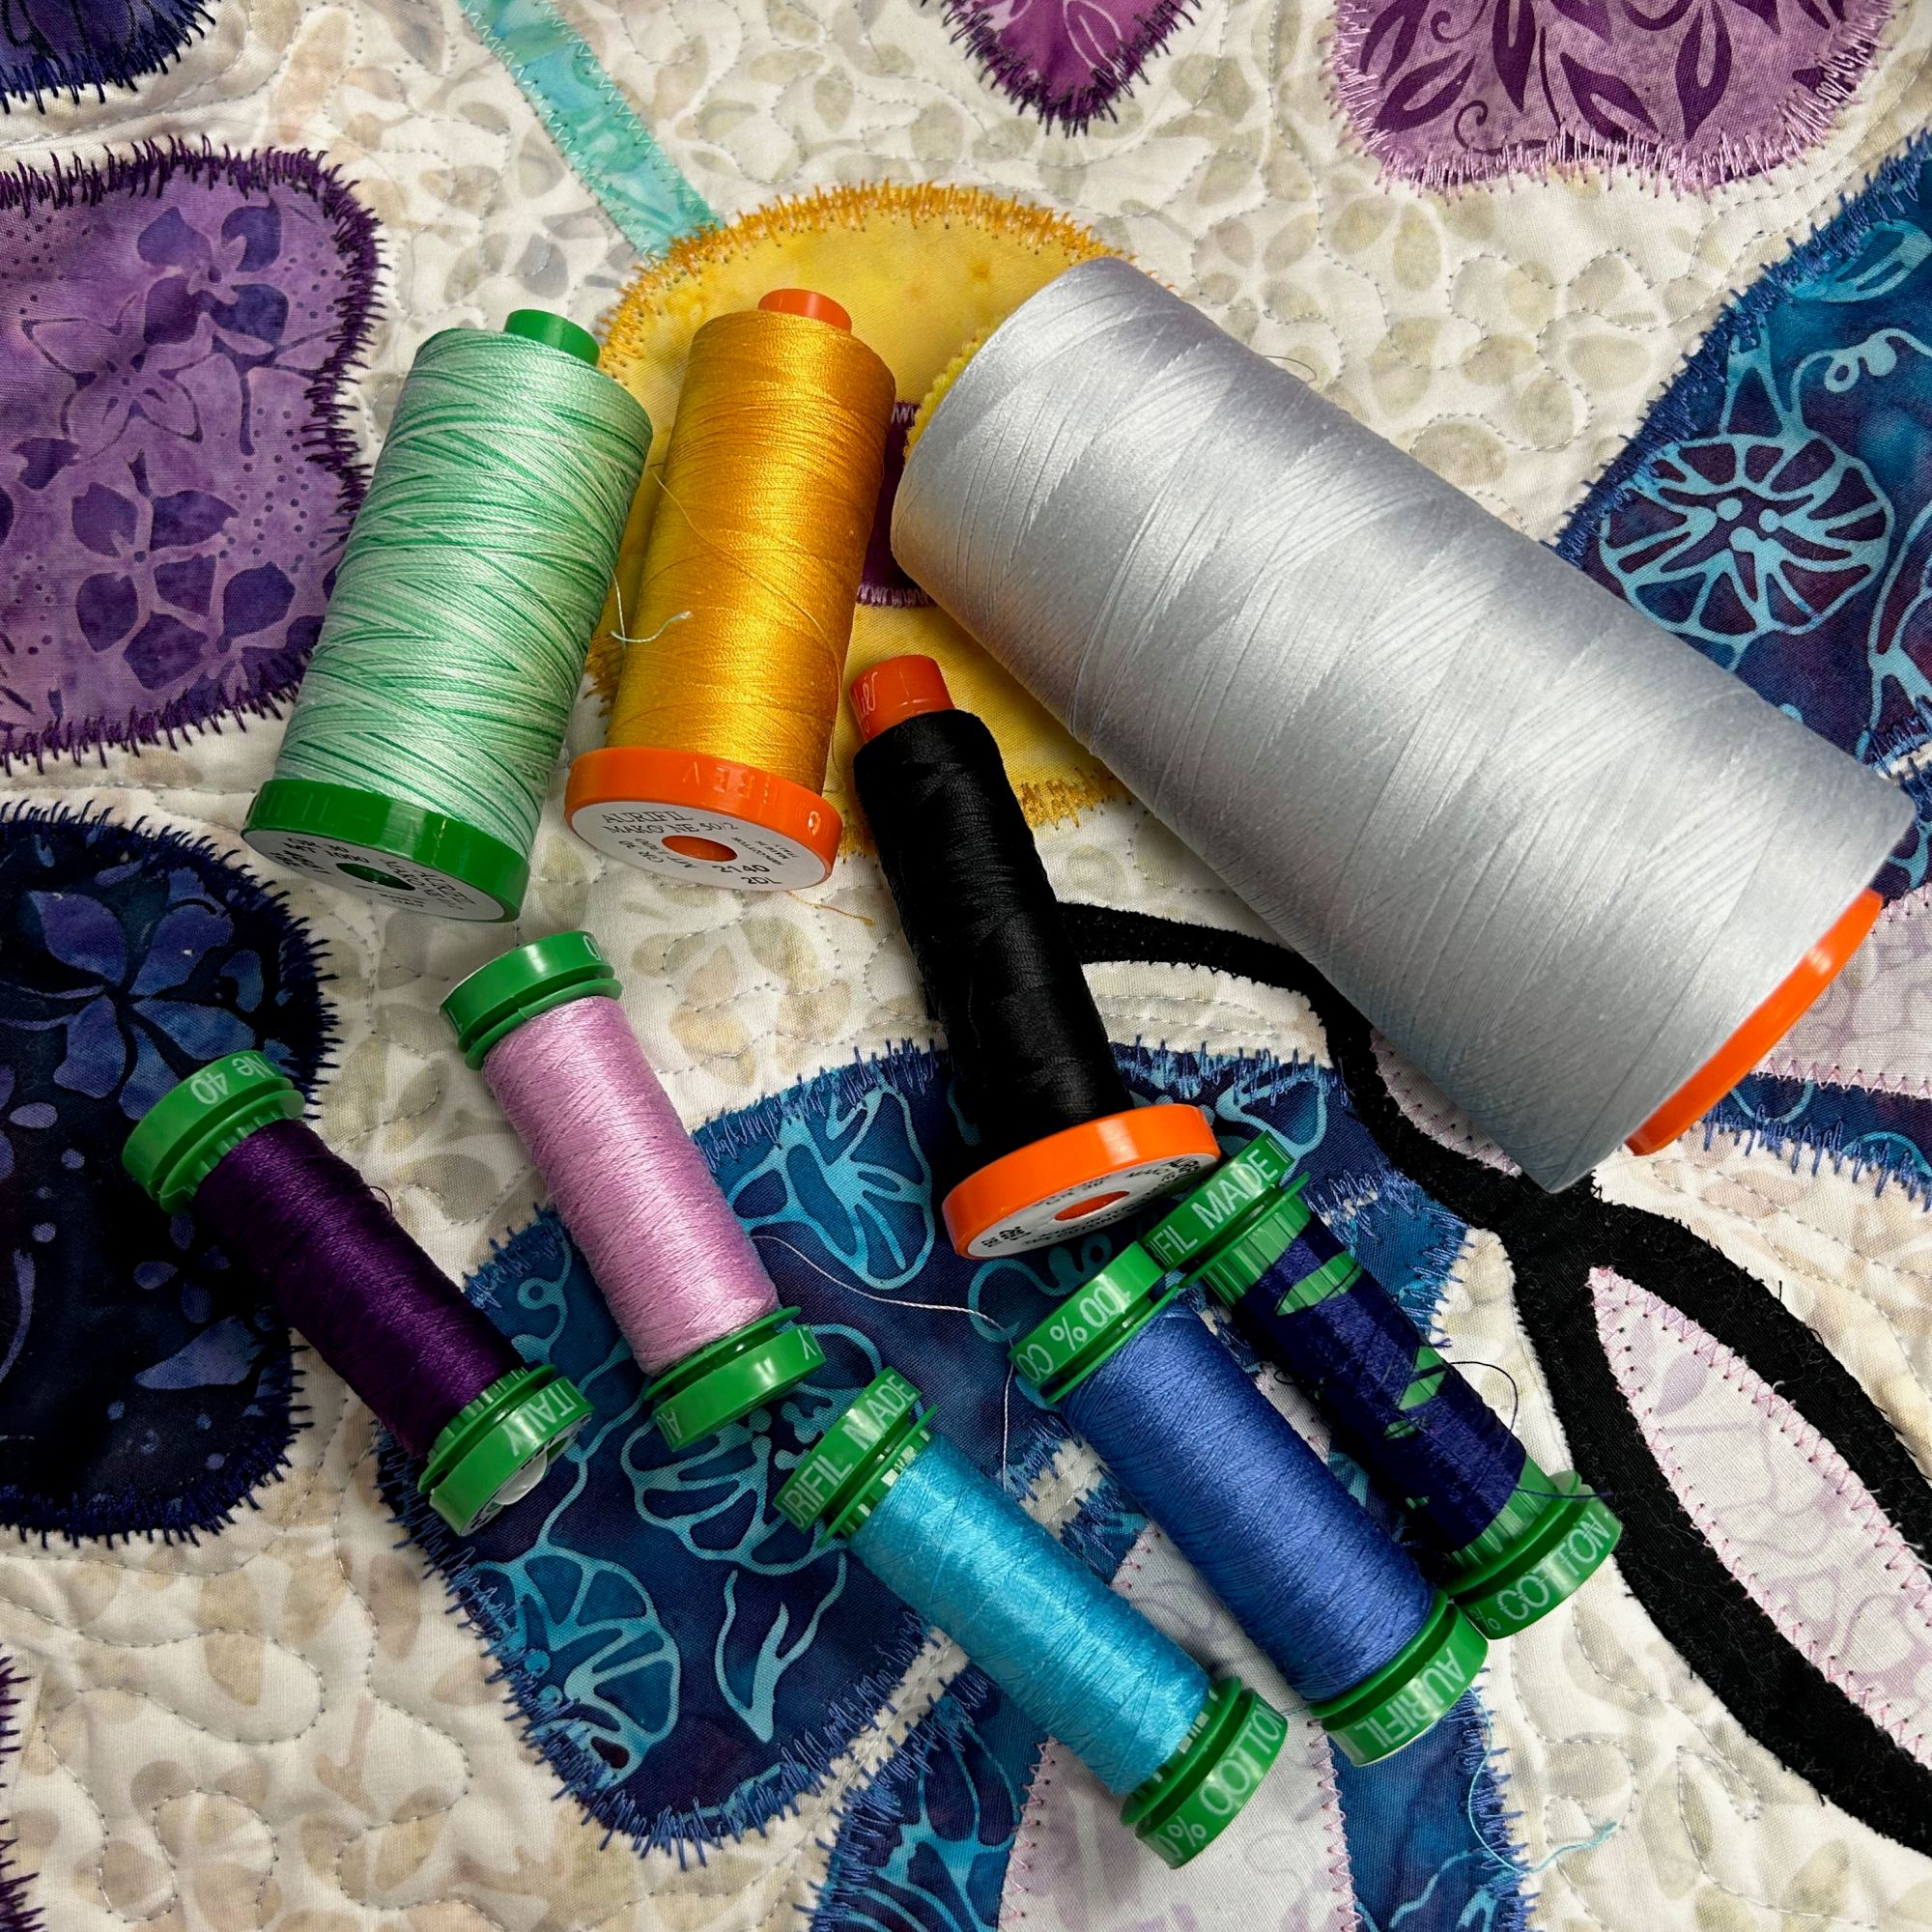
Aurifil #2600 (Dove grey) was used for the uneven straight line quilting and #2815 (Teal) was used for the construction.
And Claudia is having a give-away … be sure to visit her and enter the give-away!!
Don’t Forget!
I am now a Silly Moon affiliate! So what does that mean? When you use my affiliate code Quiltinggail2024 at Silly Moon, you will receive 10% off your order and I will receive a small commission.
Here is a list of the participating Blog Hoppers and make sure you visit Jennifer’s blog to have an opportunity to win a Fat Quarter Pack of this beautiful fabric!
I am now a Silly Moon affiliate! So what does that mean? When you use my affiliate code Quiltinggail2024 at Silly Moon, you will receive 10% off your order and I will receive a small commission.
Here’s what Island Batik told us about this challenge:
Project Type: Quilt
Size: Lap or larger
Fabric: Must use Summer 2025 fabric bundle
Must use as many collection SKUs as possible
Technique: Traditionally pieced and any other technique you want to include – applique, foundation pieced if applicable. Must use a minimum of 5 different blocks in your quilt
Four Patch Quilt Block
Nine Patch Quilt Block
Half Square Triangle Block
Quarter Square Triangle Block
Friendship Star Block
Flying Geese Quilt Block
Variable Star Quilt Block
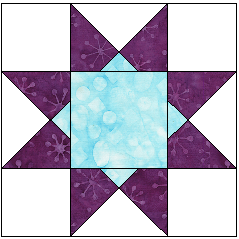
Ohio Star Quilt Block
Nine Patch Chain Quilt Block
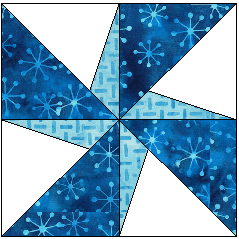
Pinwheel Mosaic Quilt Block
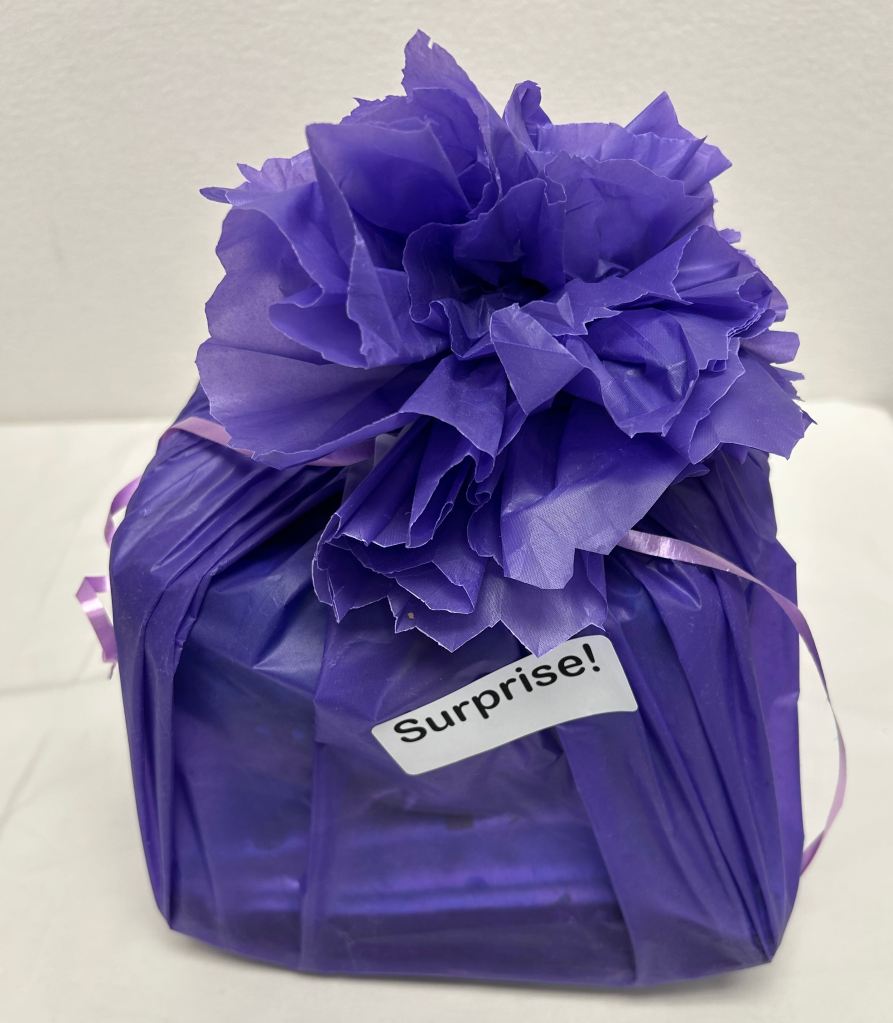
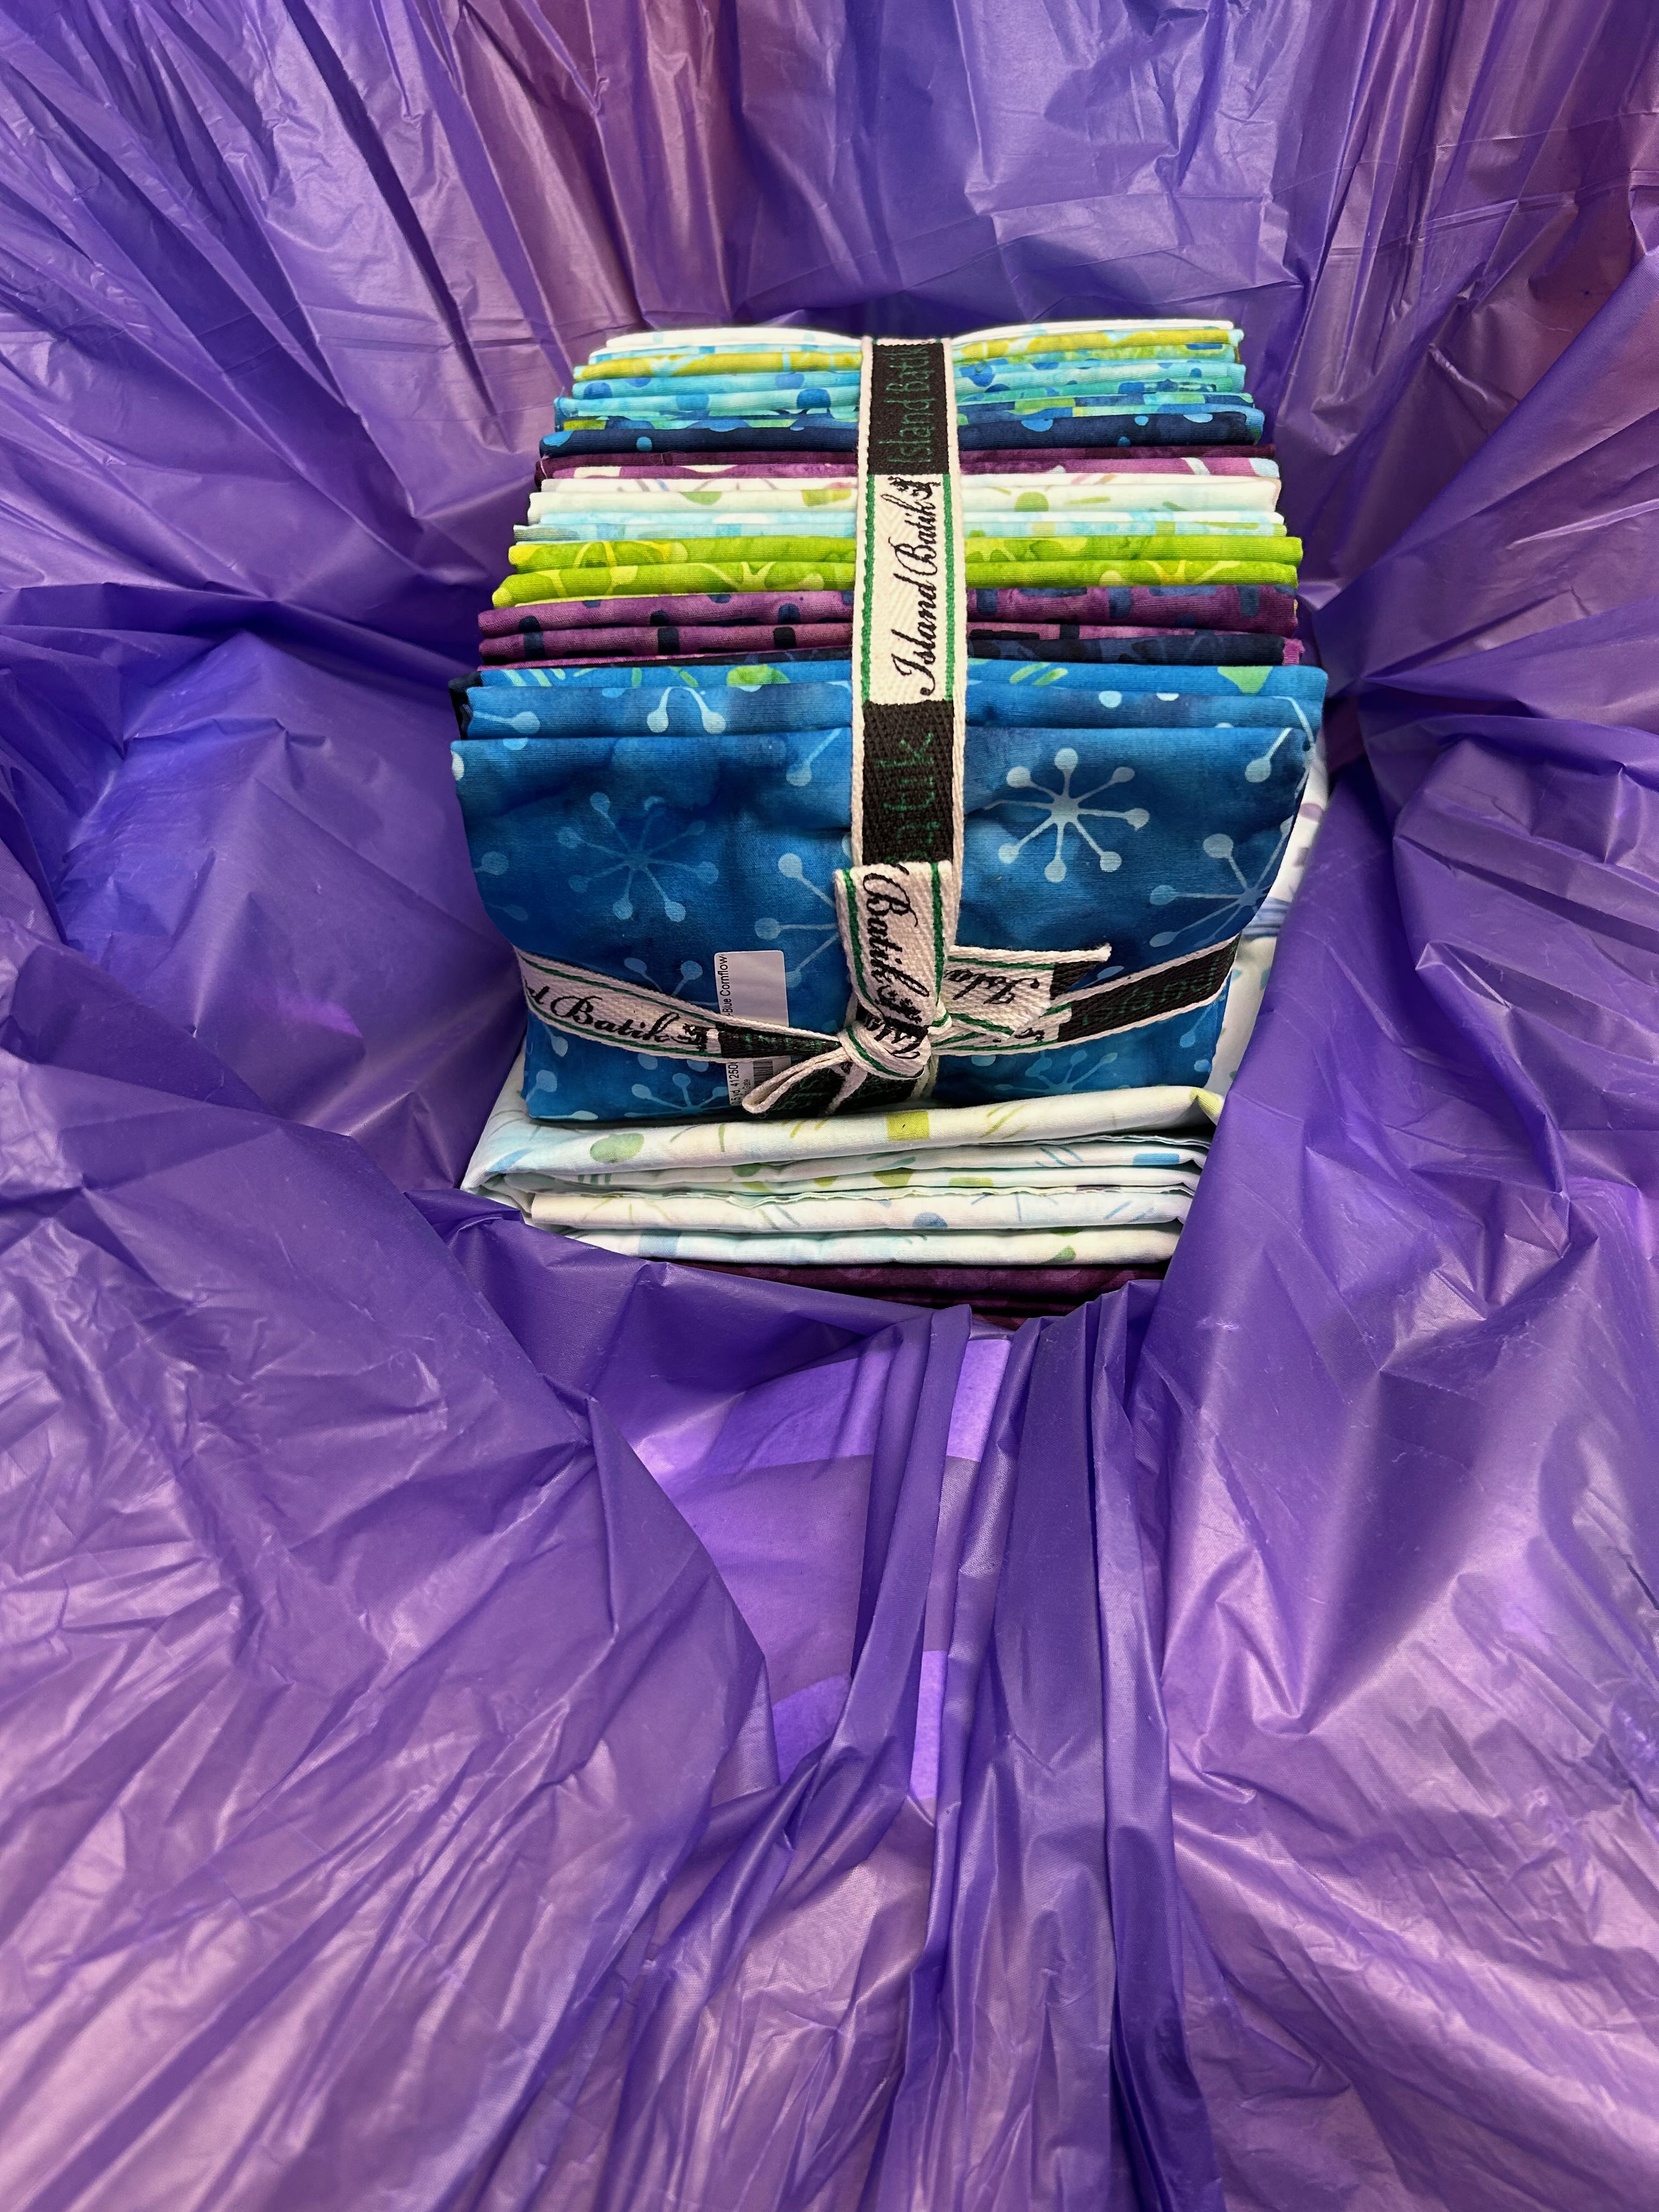
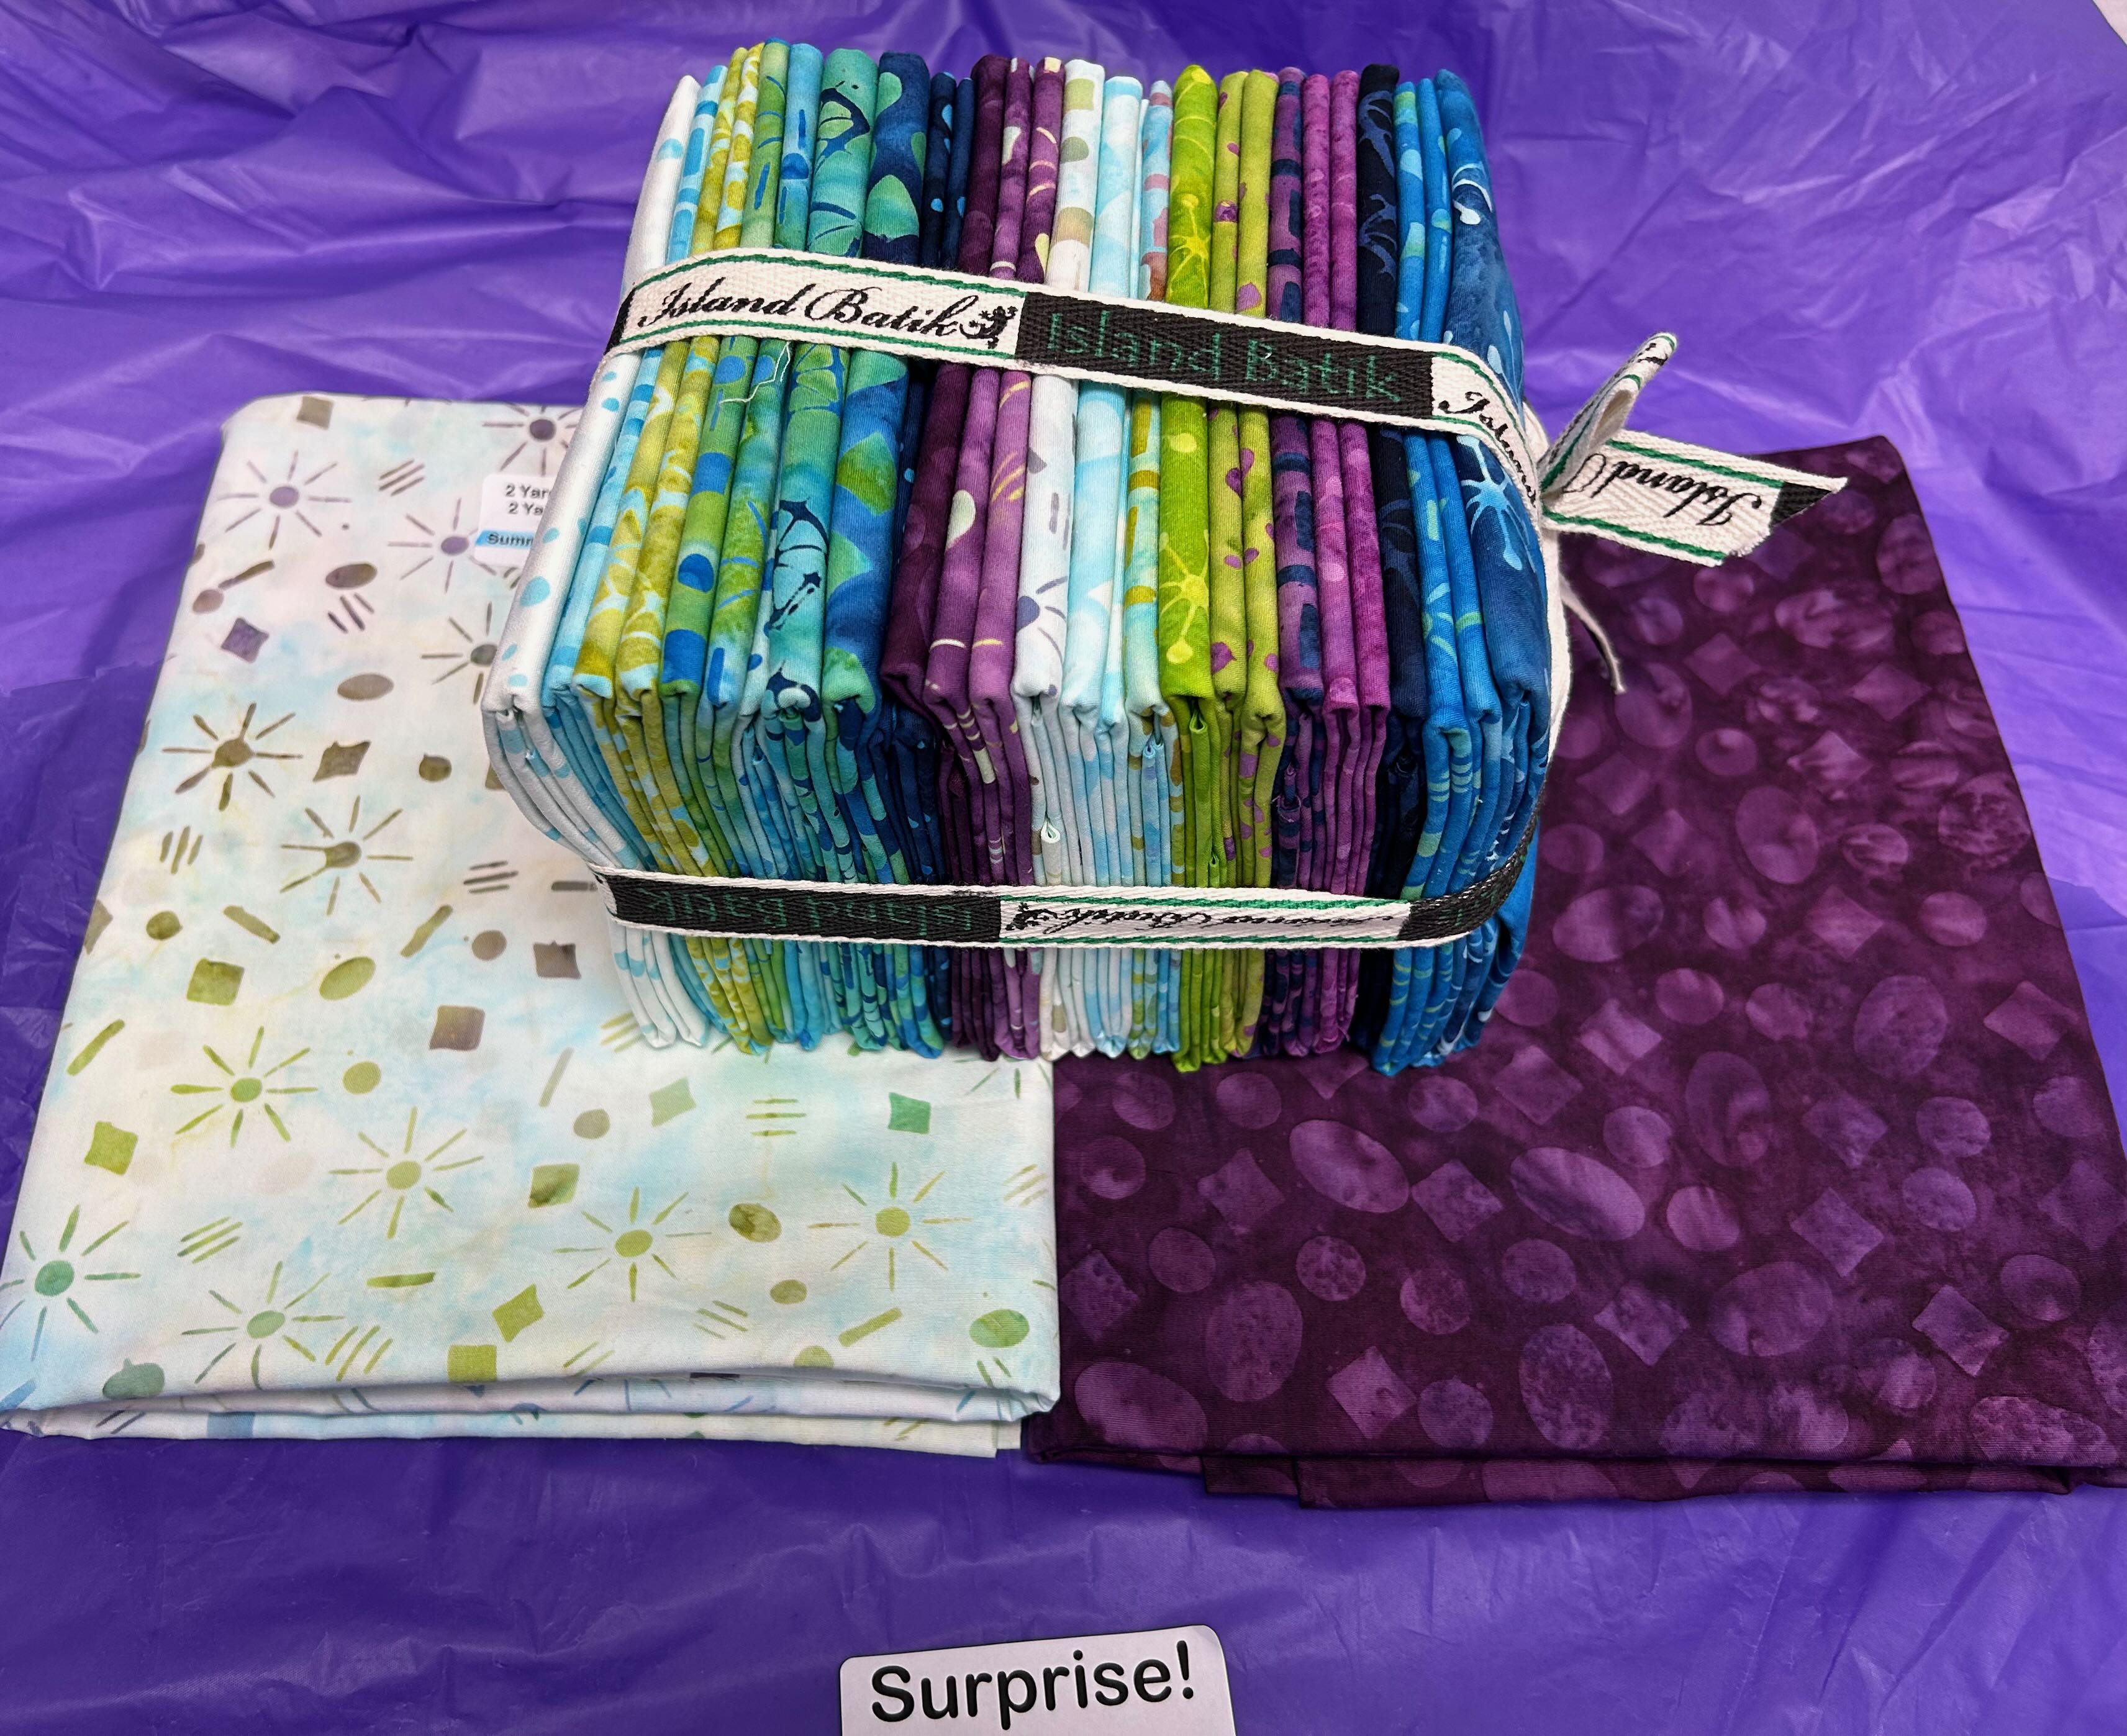
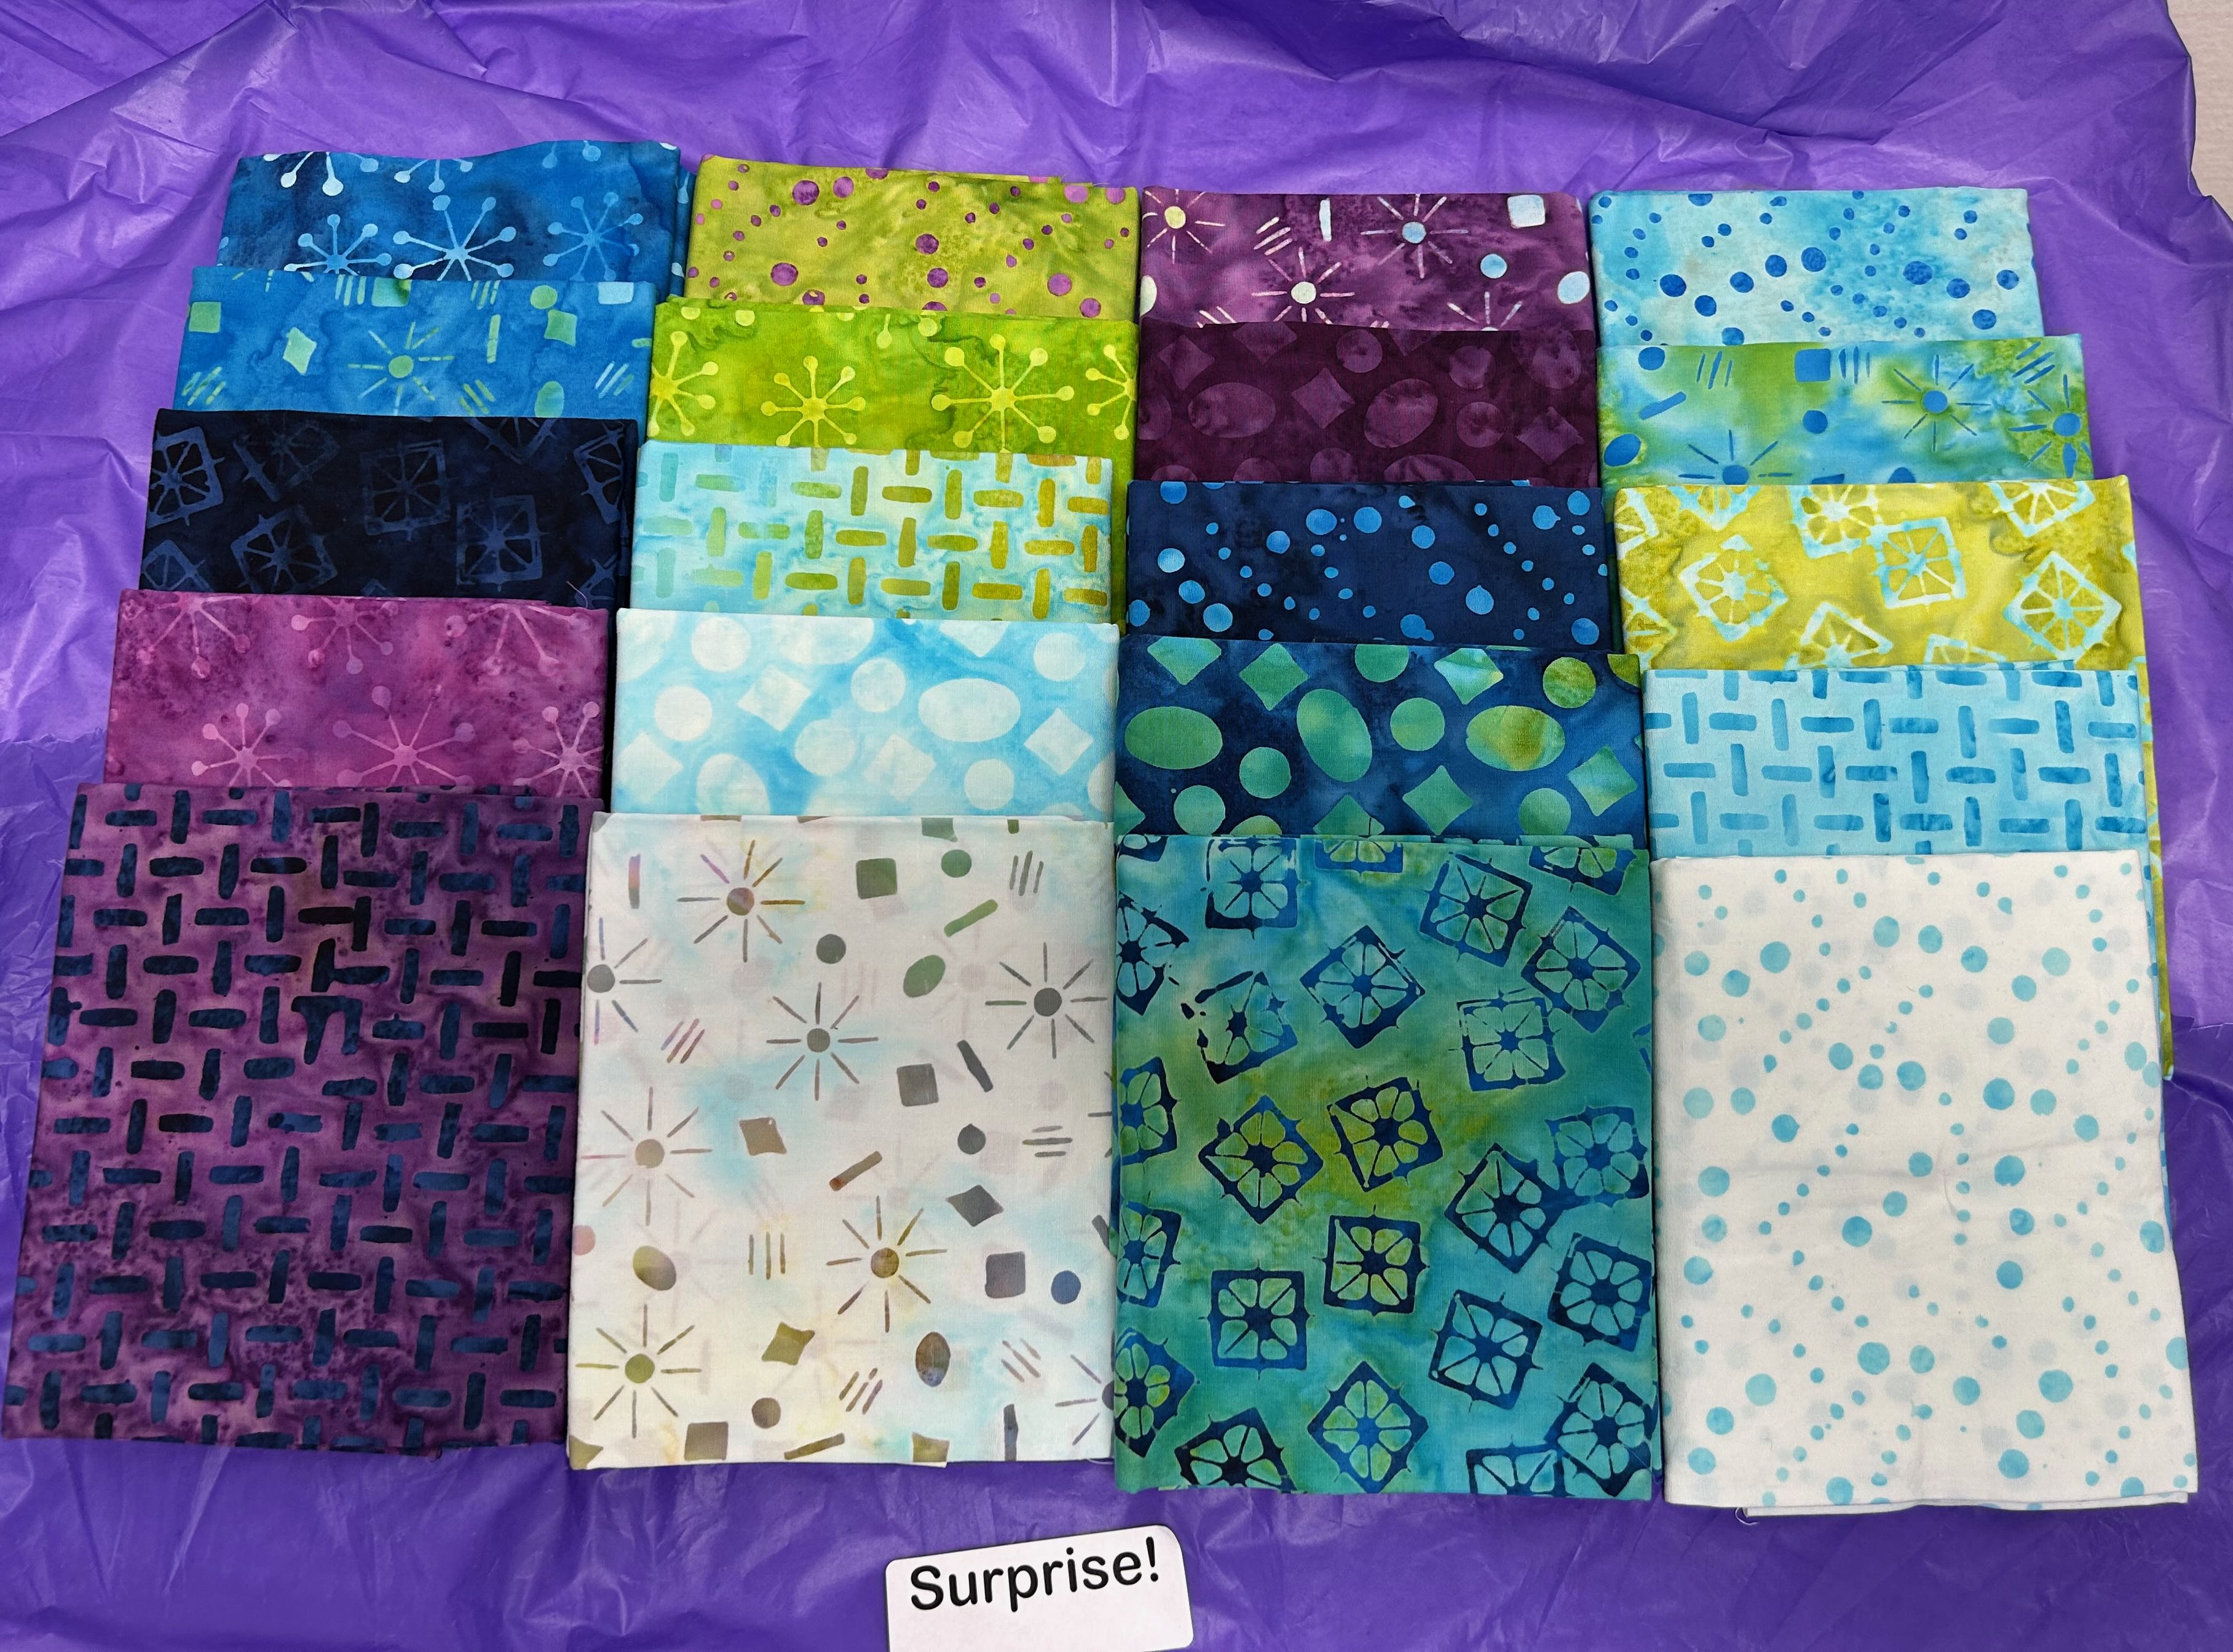
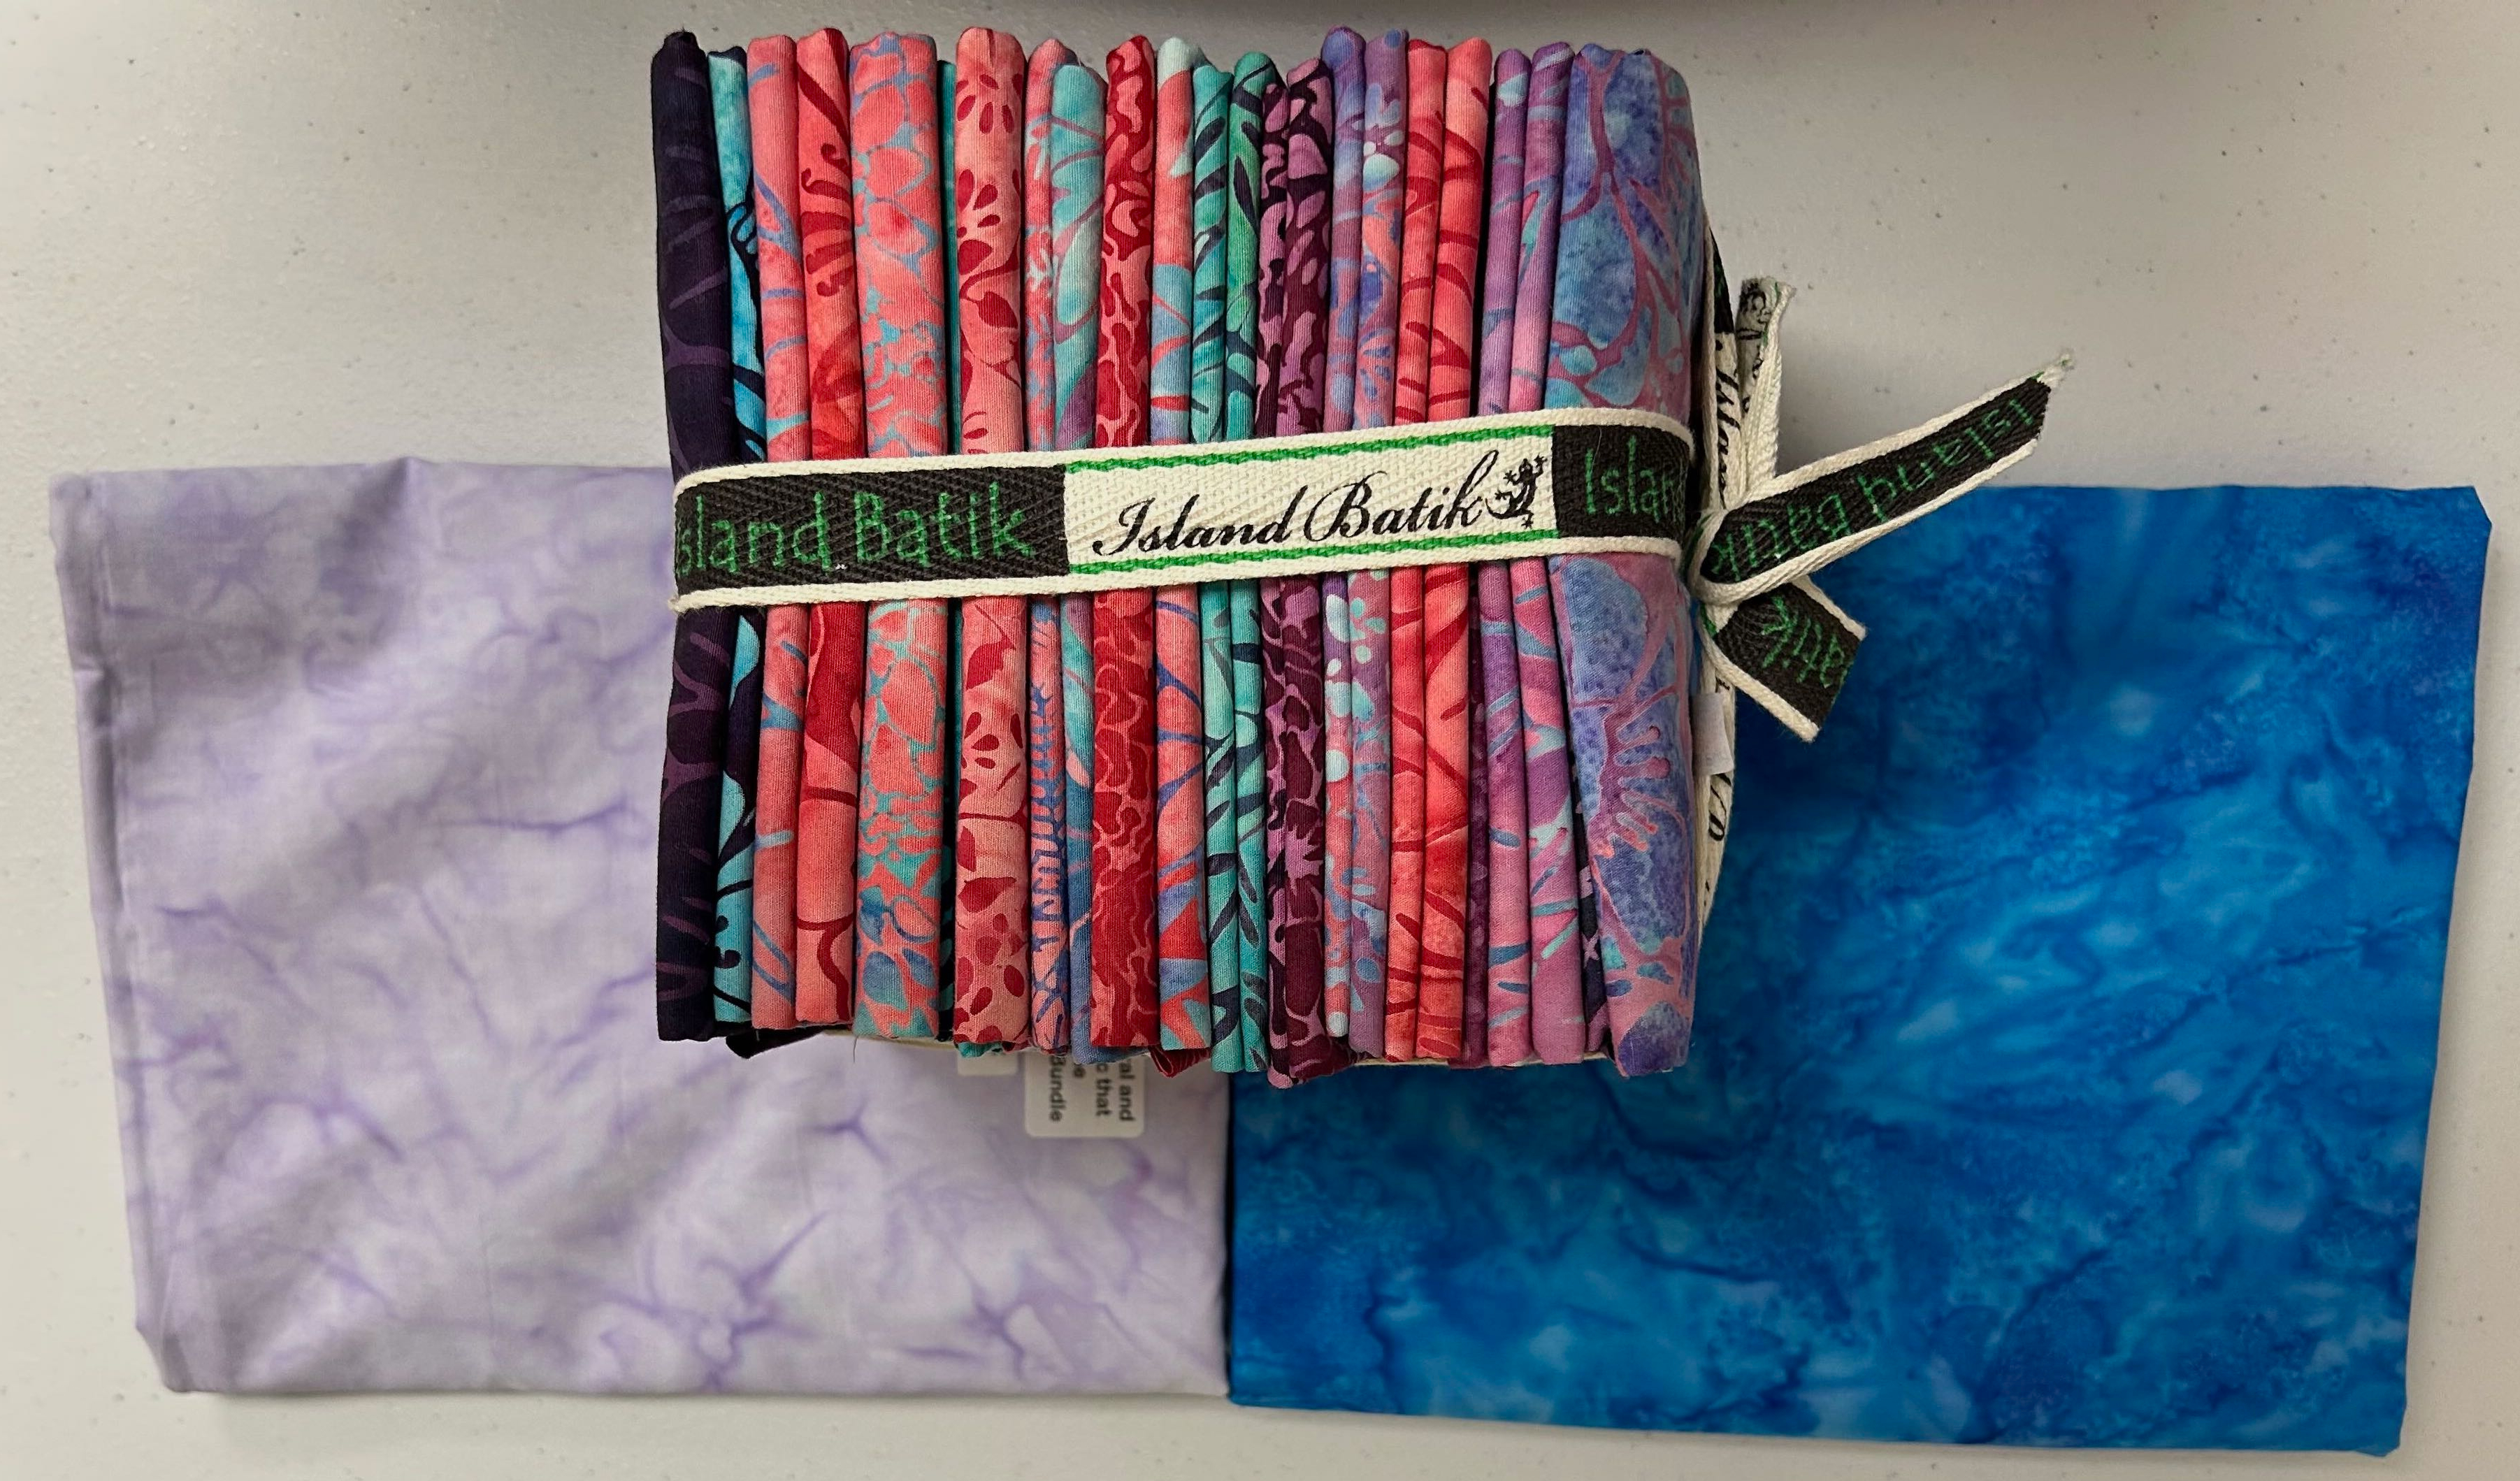
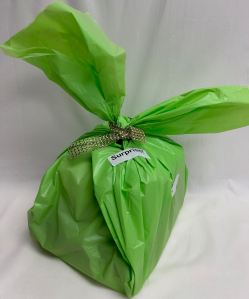
I received a “Surprise” package that contained my Summer ’25 bundle. I hadn’t looked it up, so it was a total surprise to me when I opened it!
Here’s what I found when I opened the Surprise bundle:
Isn’t it gorgeous?? This collection is Garden Gate (a Kate Colleran original) and the 2 yard accompanying fabrics are Sparkles-Multi Pink Yellow and Gravel-Purple Regal, both from the collection.
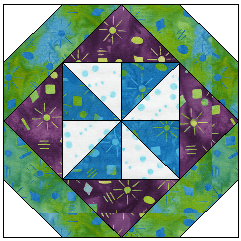
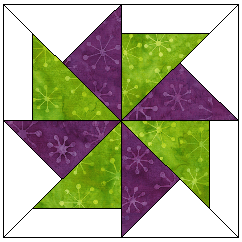
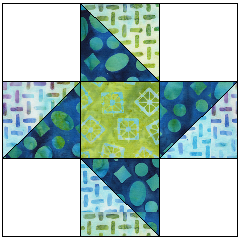
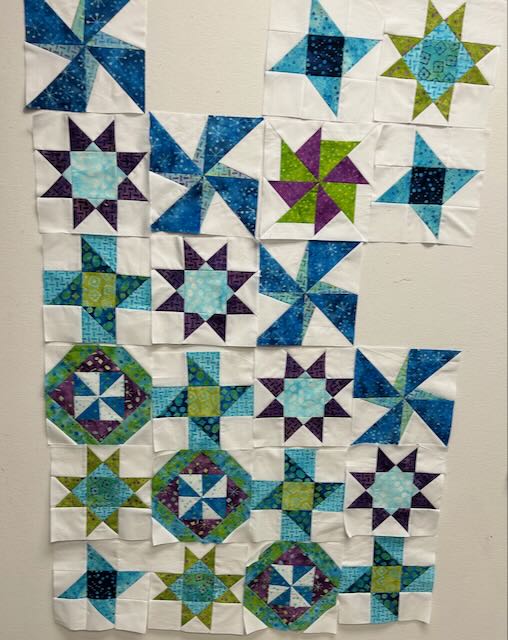
I planned the quilt in EQ8. The blocks I chose to make: All of them are 9″ square, except for the 9 patch that finishes at 3″ square.
Friendship Star
Pinwheel Mosaic (paper pieced)
Pinwheel (paper pieced)
Friendship Star Variation
Double Pinwheel Whirls (paper pieced)
Ohio Star
Ohio Star Variation (paper pieced)
9 patch
along with a tiny 9 patch as corner stones:
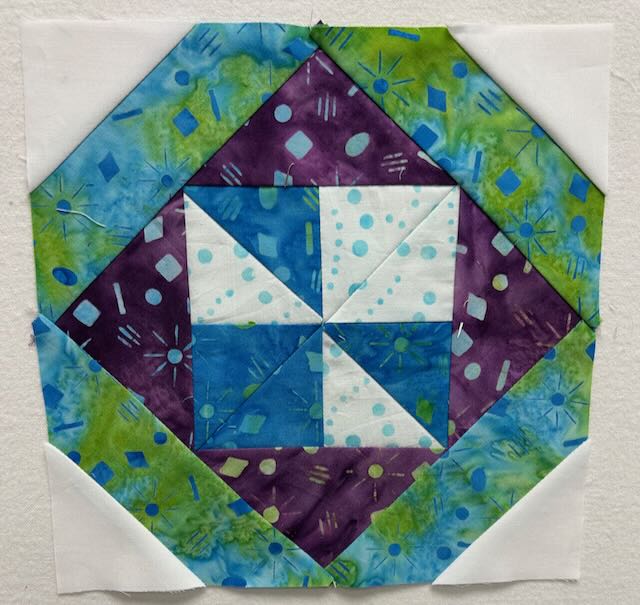
And yes, there was an “Opps” block … I wasn’t following the colours on the paper piecing … this was suppose to be a pinwheel in the centre …
Here’s a picture of the layout on the design wall before I had all the blocks made:
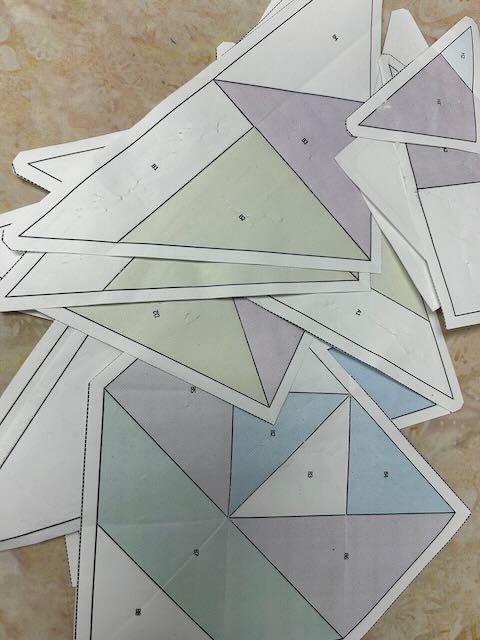
When I paper pieced, I printed out one set templates for each block and re-used them. I paper piece without sewing on the papers.
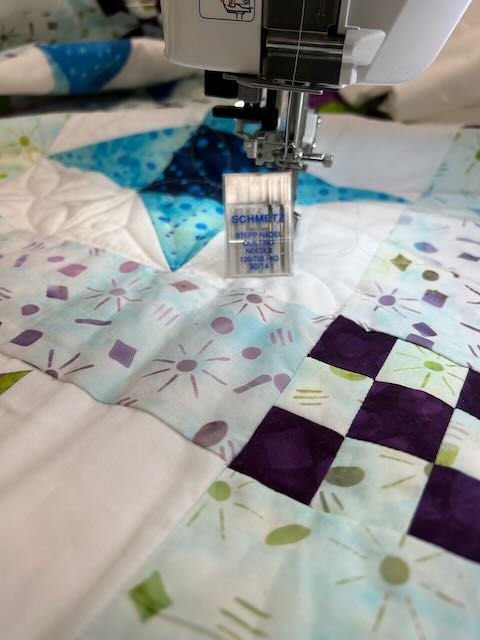
Quilting in progress on my domestic machine (Janome M7).
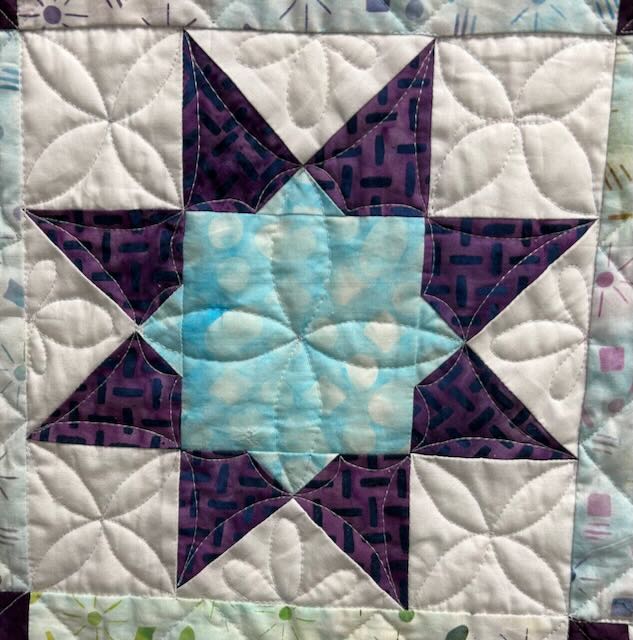
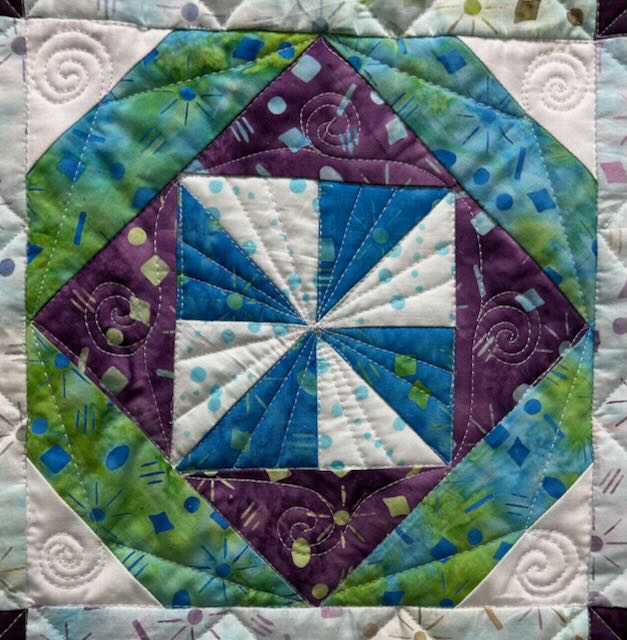
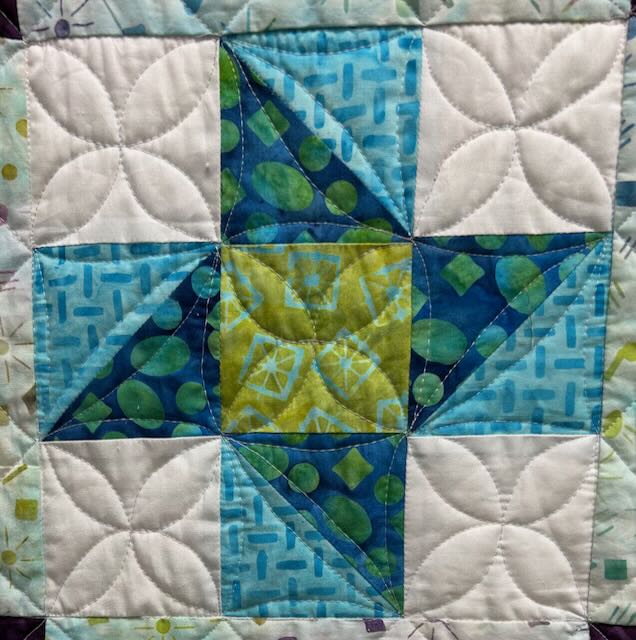
And without further rambling, here is the finished quilt:
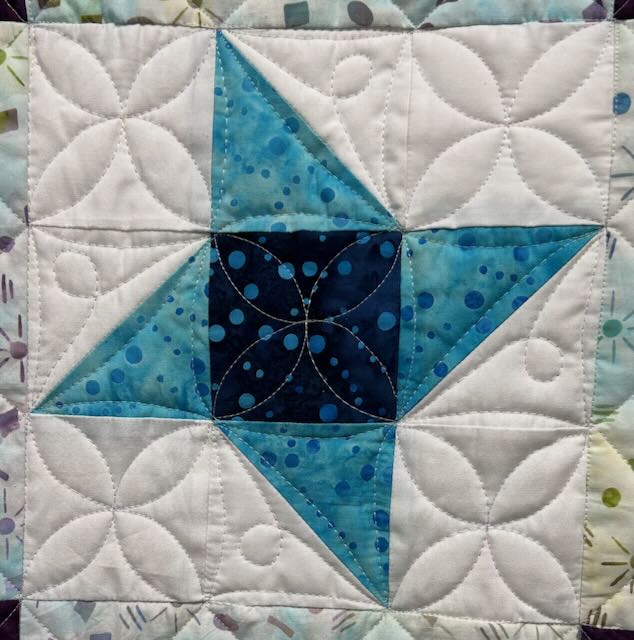
And closeups of the custom quilting of each block:
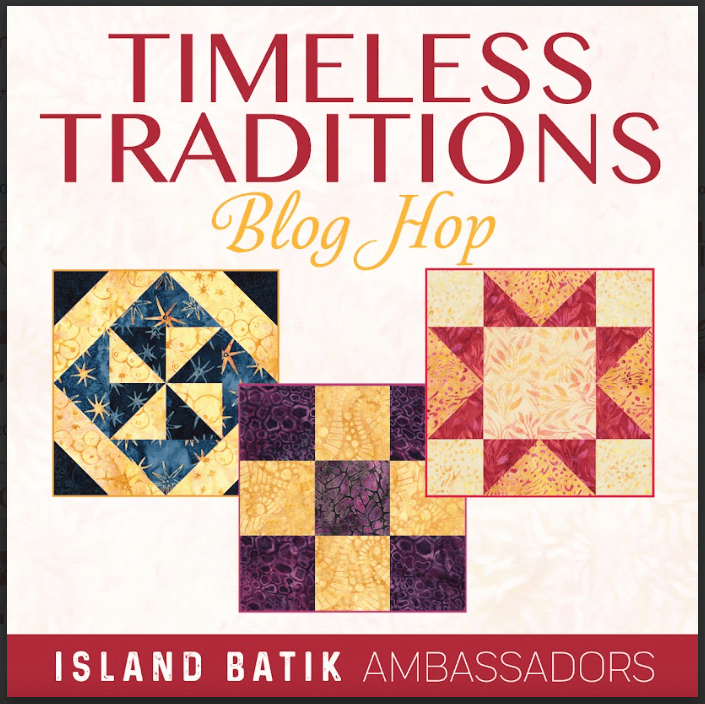
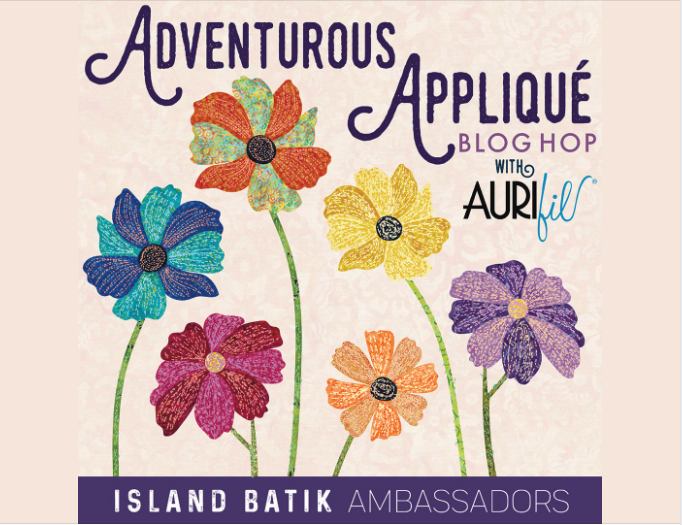
Island Batik (Lumin Fabrics) is hosting the Summer 2025 Blog Hop, featuring all of the new collections! Each one is gorgeous!! Make sure that you follow each of the ambassadors and see the quilt that they made for the Timeless Traditions Blog Hop!
I am now a Silly Moon affiliate! So what does that mean? When you use my affiliate code Quiltinggail2024 at Silly Moon, you will receive 10% off your order and I will receive a small commission.
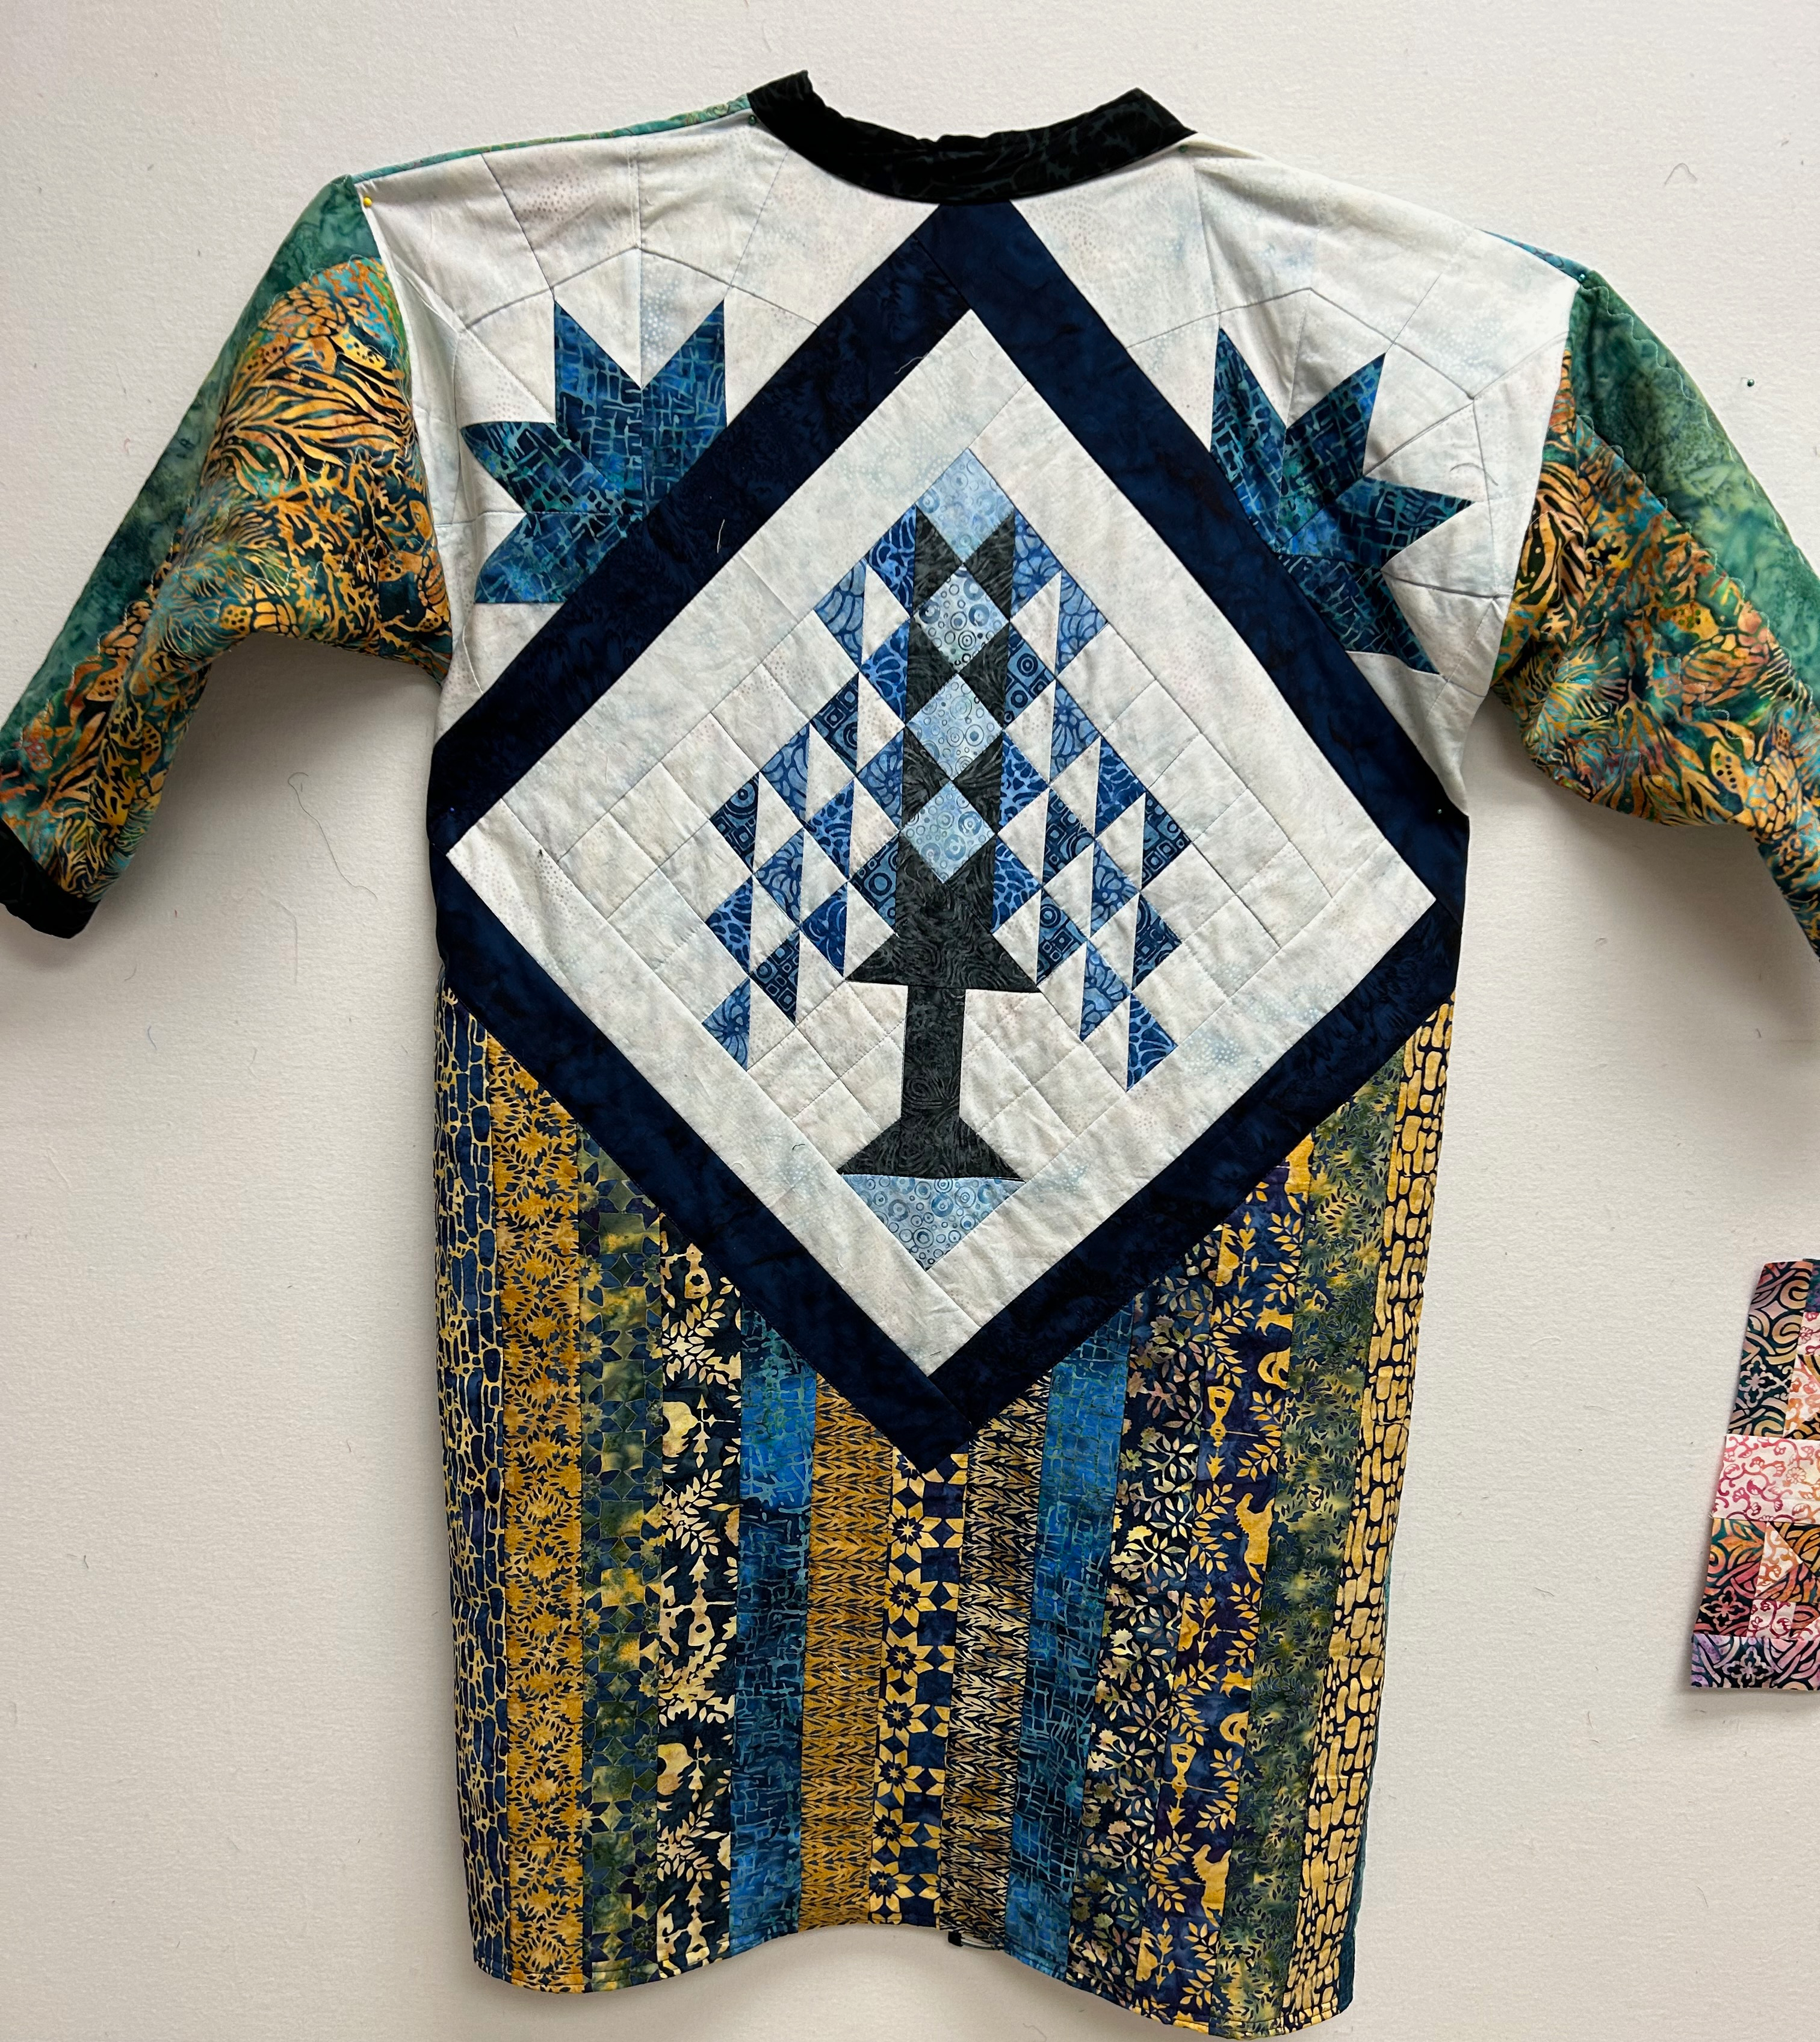
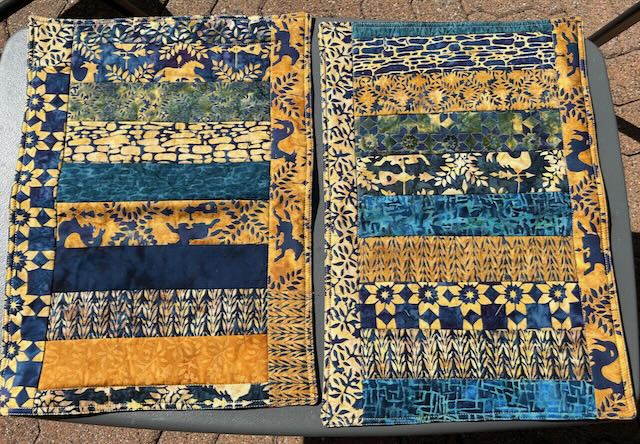
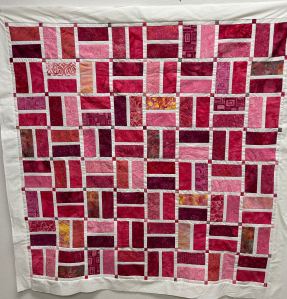
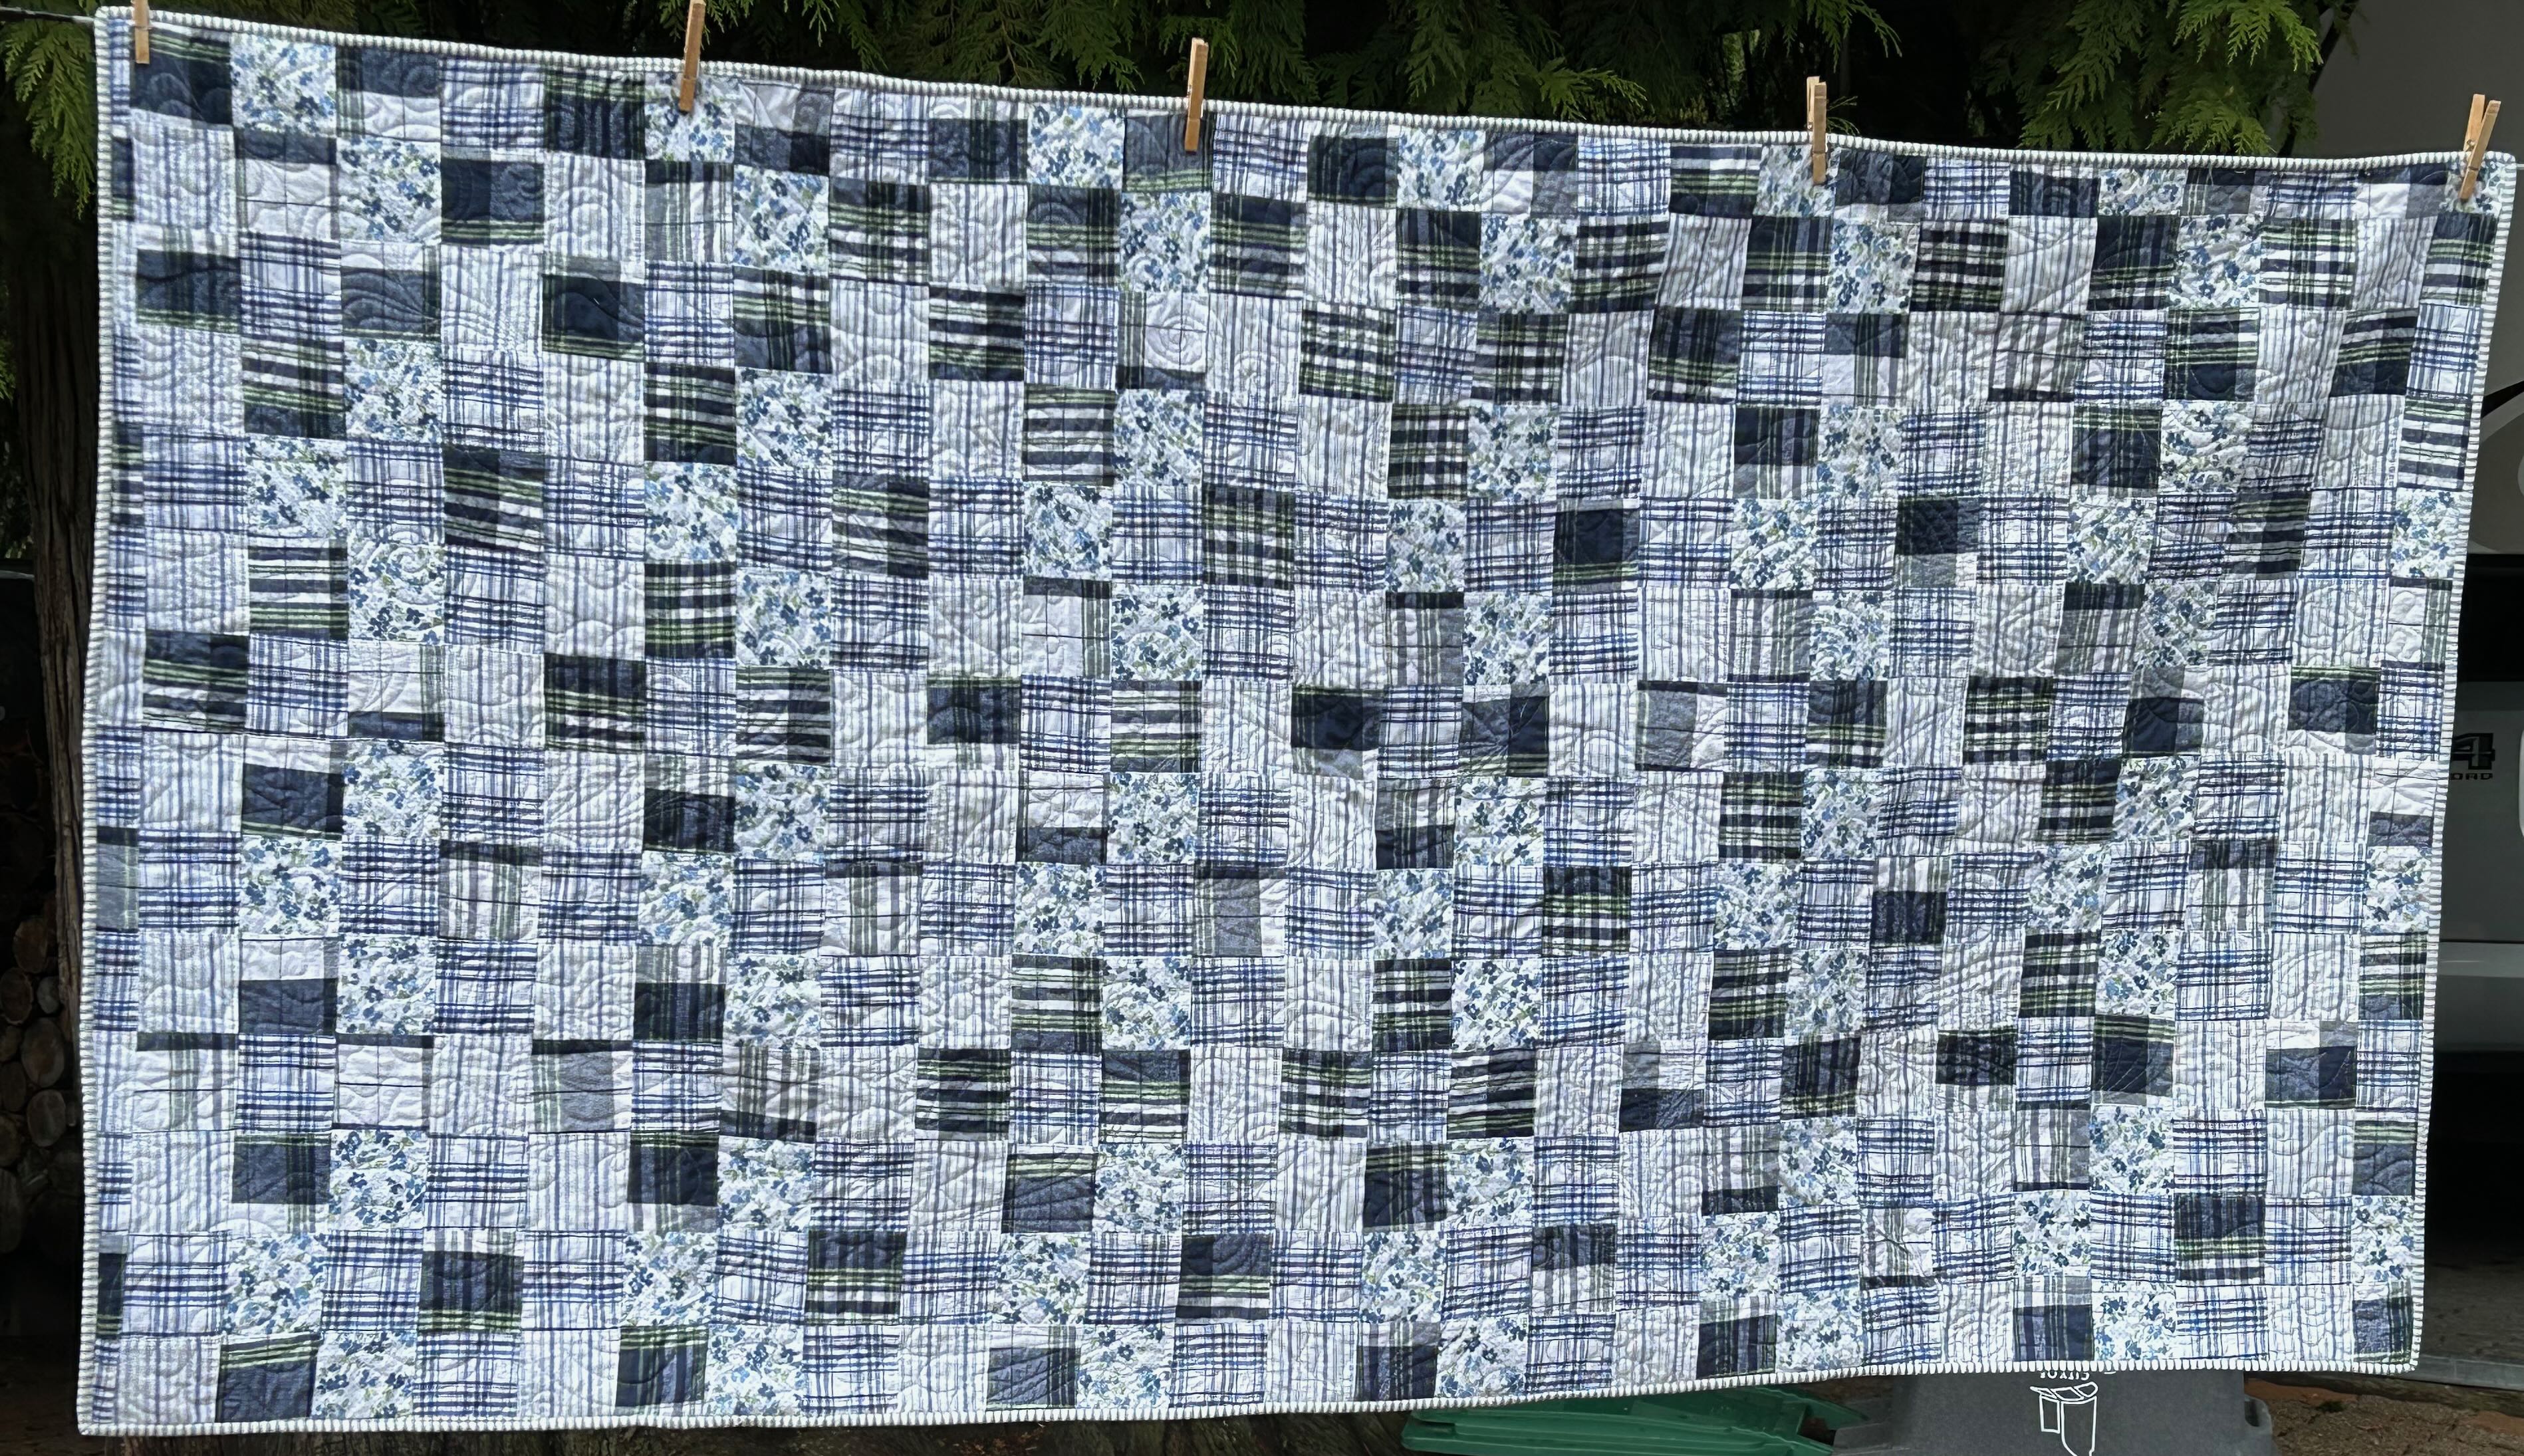
Every year, just before Christmas, the Boundary Bay Quilt Guild collects placemats for Meals on Wheels. I try to participate … This year, I’ve used up some ‘left-overs’ from projects to make the placemats. These are from an Island Batik strip pack called Prairie Dreams that I received 2 years ago. First I made a bargello quilt using the strips (see HERE) and then I used some on the bottom of a robe (THIS POST).
There was STILL some left over, so I made these place mats. They are backed with different Christmas Fabric. There are leftover pieces of Hobbs 80/20 batting in the middle and they are pieced and quilted with Aurifil thread. There was STILL some left over, so I made these place mats. They are backed with different Christmas Fabric. There are leftover pieces of Hobbs 80/20 batting in the middle and they are pieced and quilted with Aurifil thread. There was STILL some left over, so I made these place mats. They are backed with different Christmas Fabric. There are leftover pieces of Hobbs 80/20 batting in the middle and they are pieced and quilted with Aurifil thread.
These will double as an everyday placemat and a Christmas placemat.
Blog Hoppers
Visit all the other blog hoppers to see what their “Christmas in July” projects are!
I am now a Silly Moon affiliate! So what does that mean? When you use my affiliate code Quiltinggail2024 at Silly Moon, you will receive 10% off your order and I will receive a small commission.
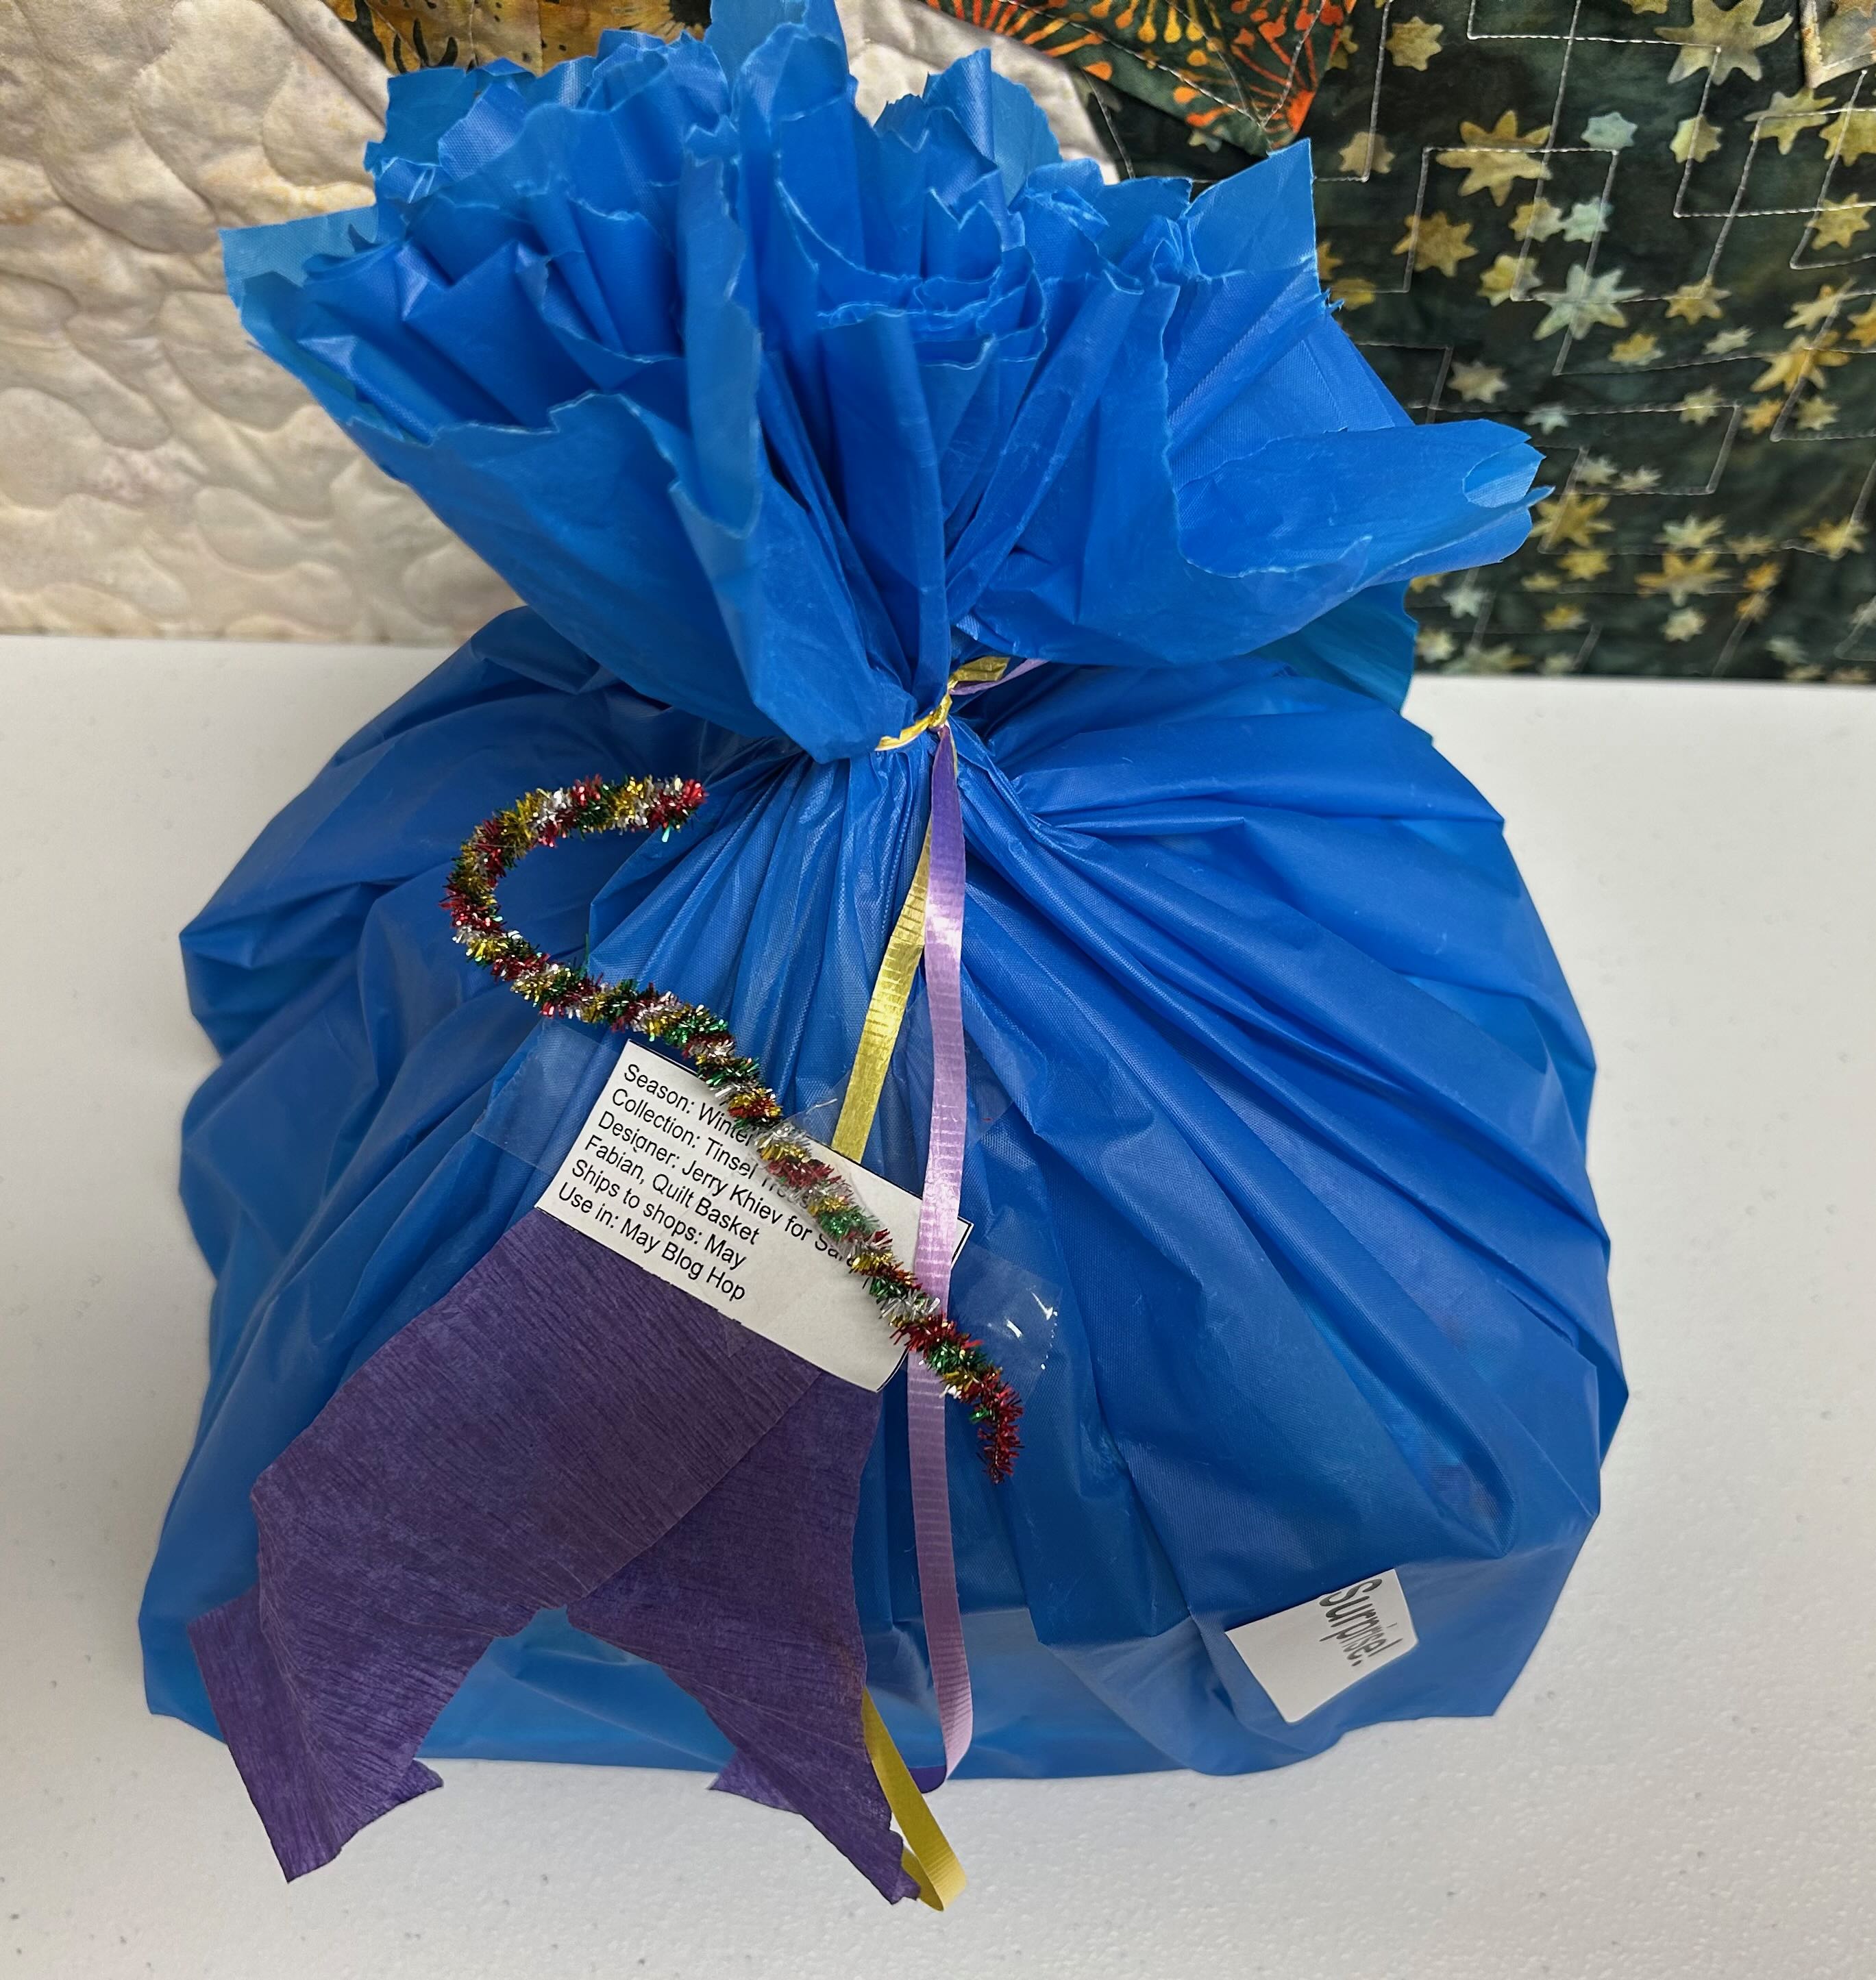
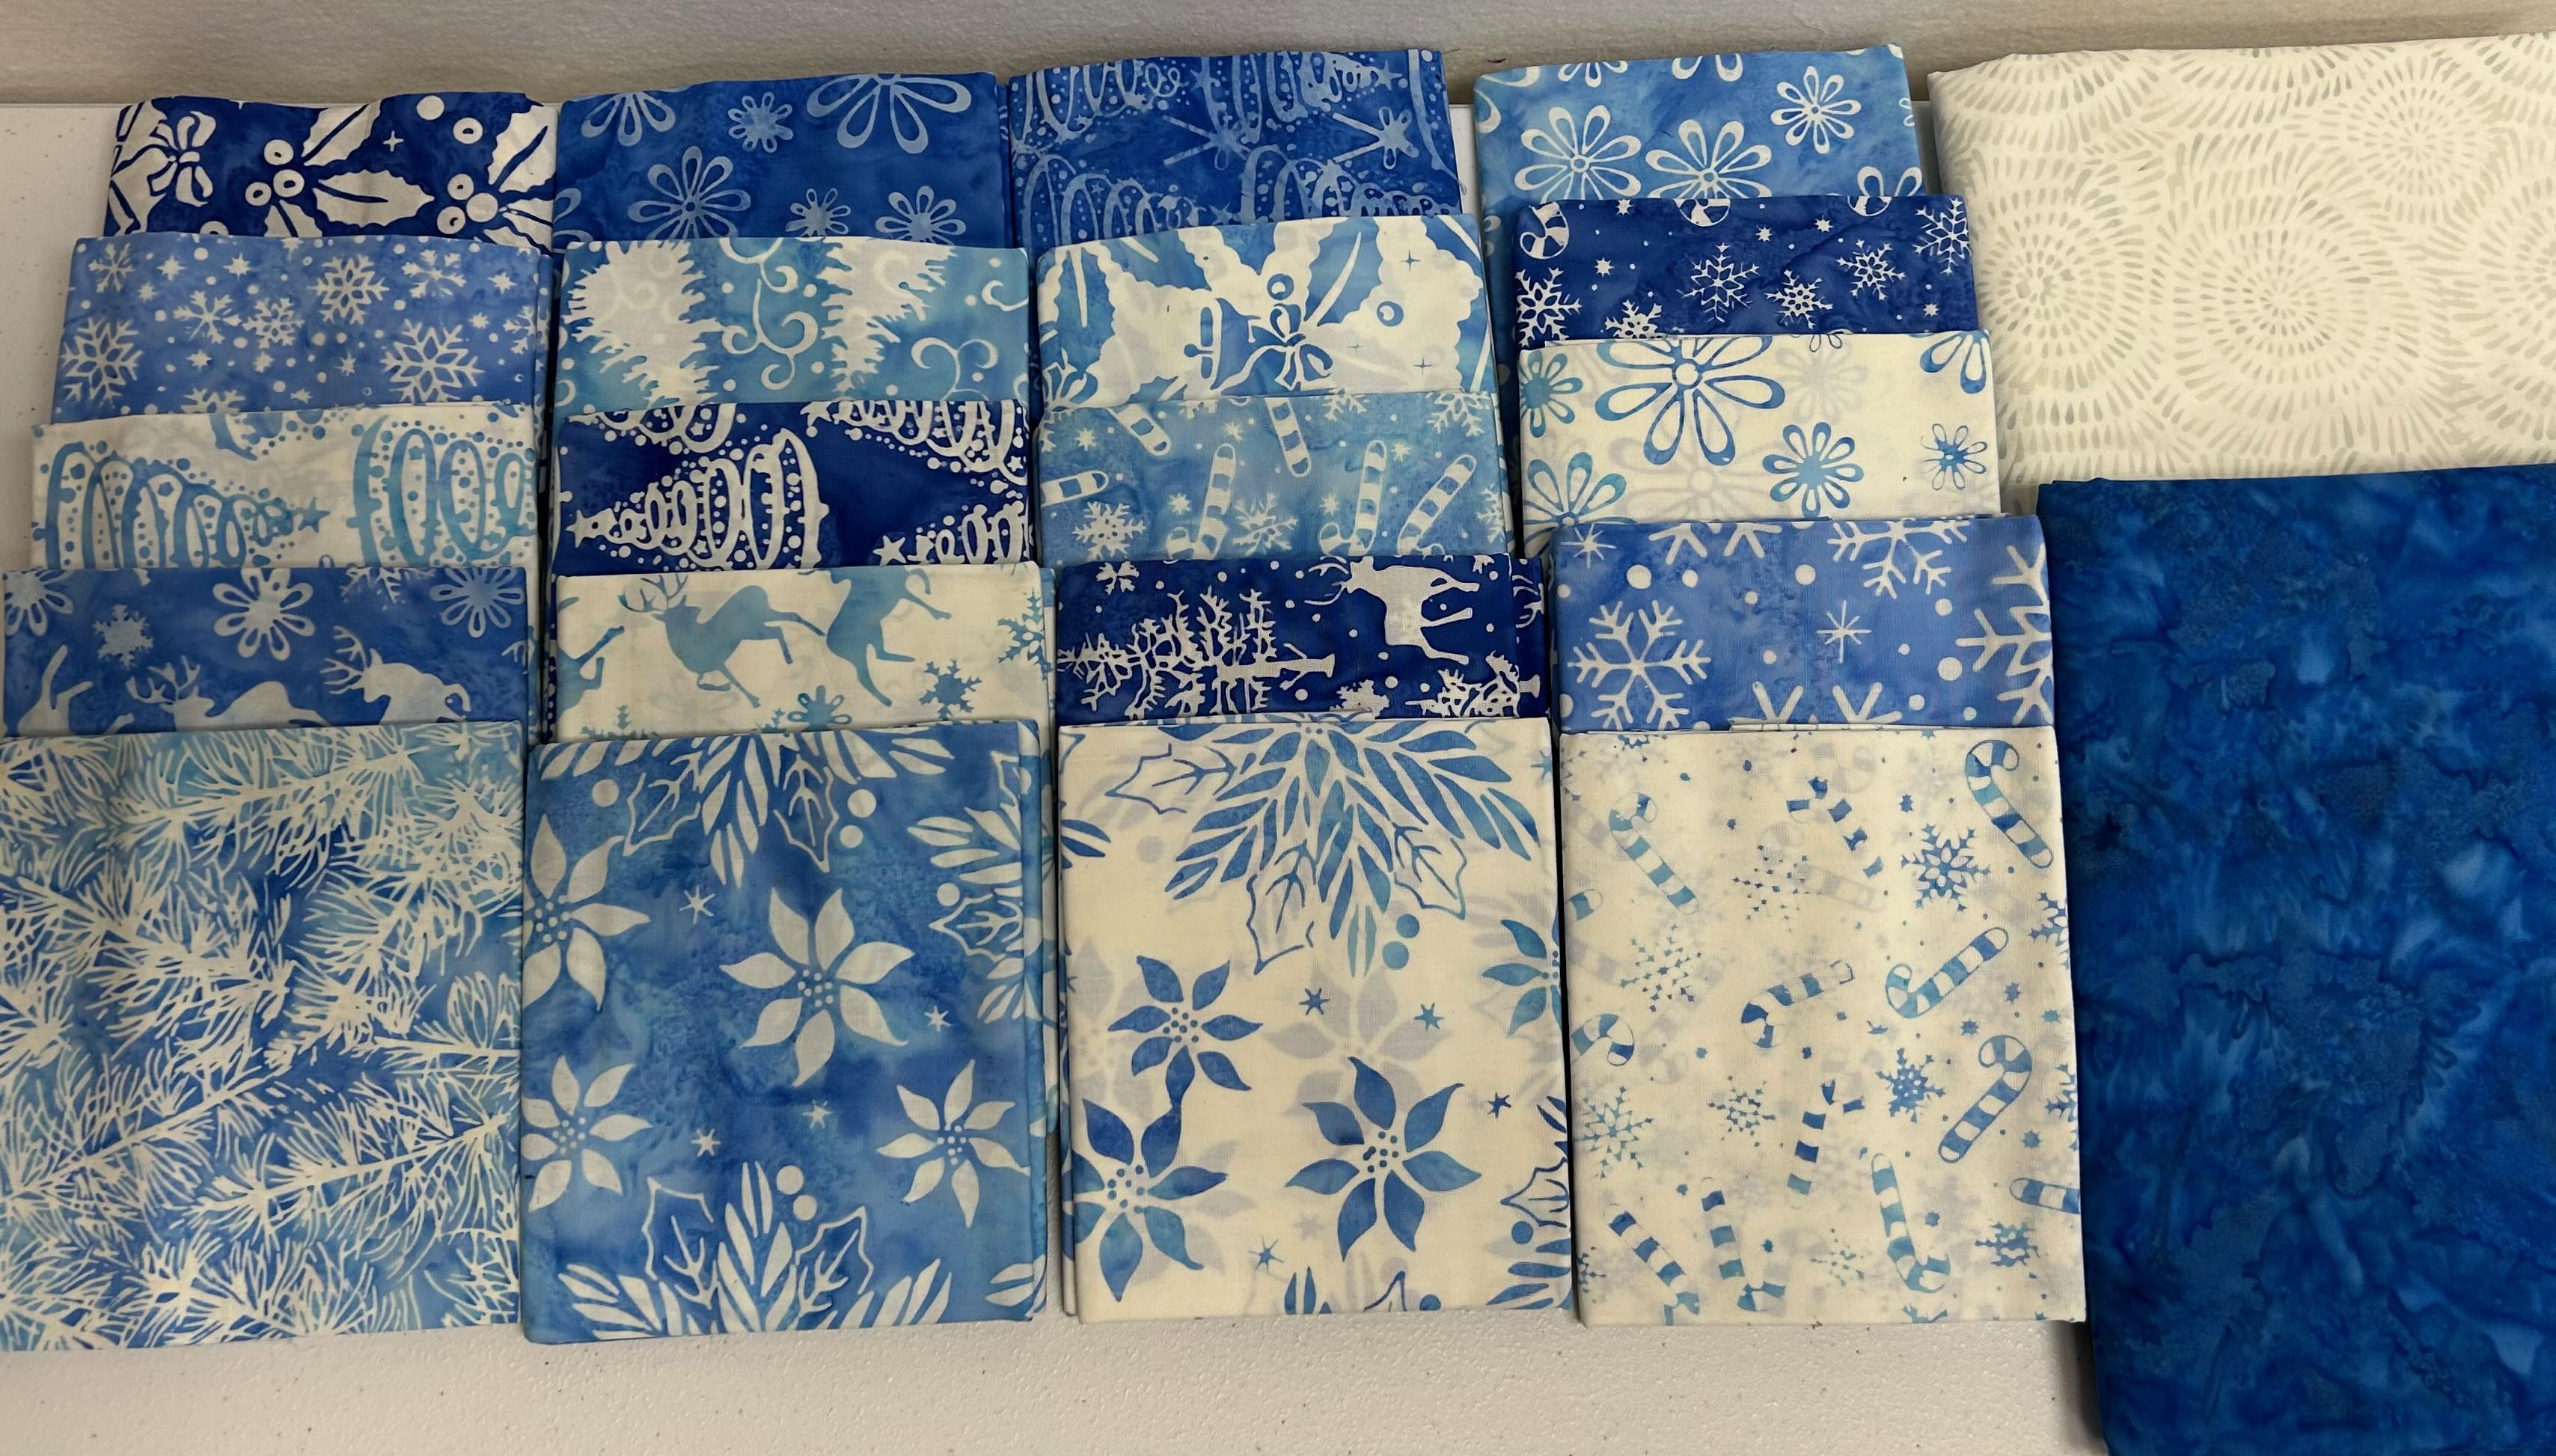
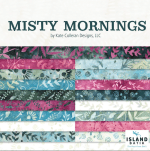
I received the blue wrapped “Surprise” package in my January box. I didn’t look at the label and was very pleasantly surprised when I saw what was in the bundle!!! It’s Tinsel Treasures, designed by Jerry Khiev. It is accompanied by 2 yards of Cornflower (blue) and 2 yards of Coconut. I was excited to get started on this quilt! Isn’t it a beautiful collection? (Tinsel Treasures is a signature collection designed by Jerry Khiev for Sarah Fabian of Quilt Basket)
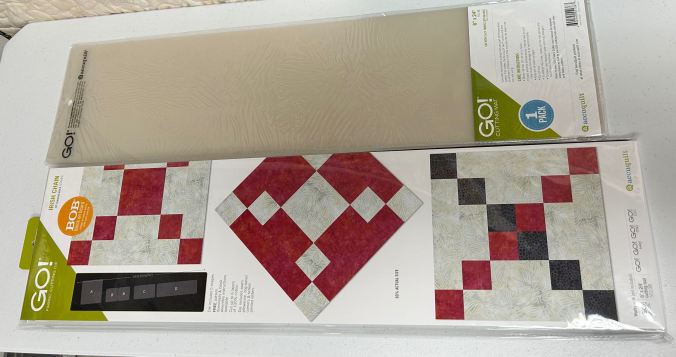
Each ambassador received the 10″ Irish Chain BOB (Block on Board) Accuquilt die. (You can purchase it HERE)
After searching various Irish chain patterns, I decided on the “GO! Scrappy Irish Chain Throw.” It’s a free pattern from Accuquilt and it’s also on the die packaging. You can get it HERE.
I started by dividing the collection into light (with white background), medium blue and dark blue. I chose the “Pine Needles Long-Blu” to be the binding.
Using the die, I started cutting each of the pieces for the main blocks. Each of the rectangles and squares have the corners notched. This made sewing the pieces together so EASY!!!
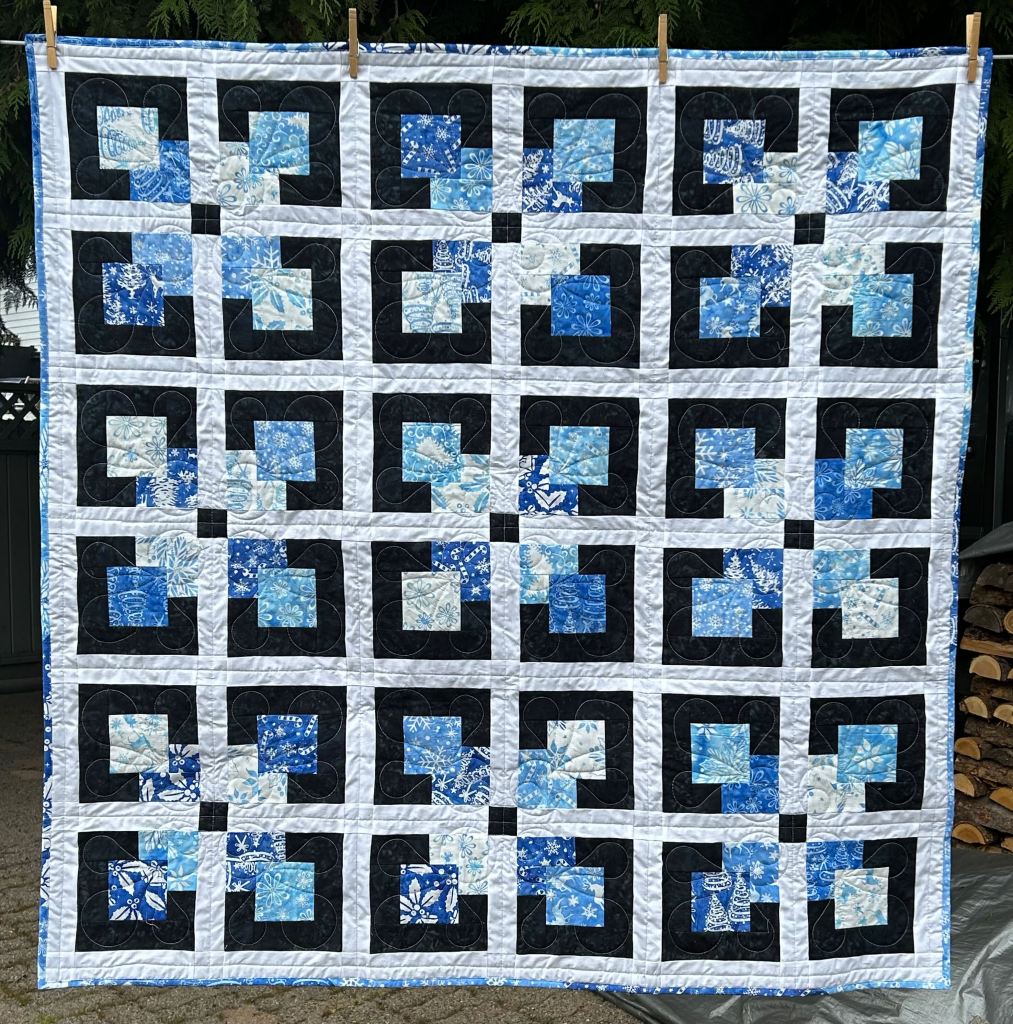
A decision was made to use Island Batik’s solid white for the sashing and the Dark Blue fabrics for the cornerstones. Wanting the quilt to be a little bigger, I opted to put an extra row of sashing on the top, bottom and each side.
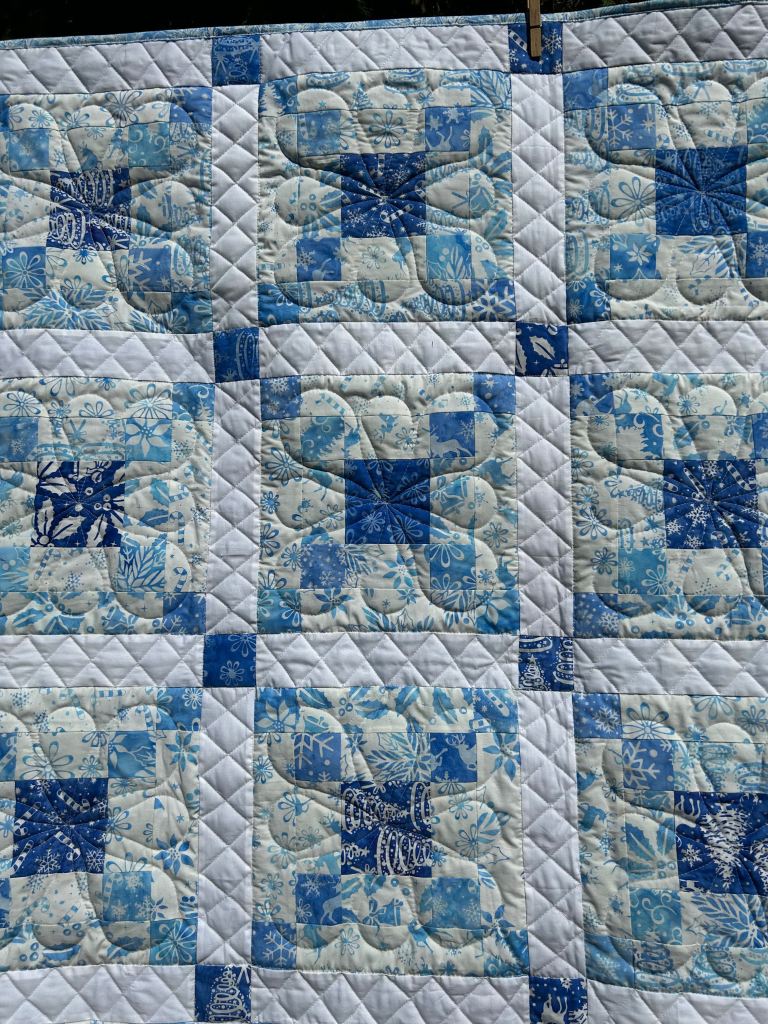
A close up of the quilting:
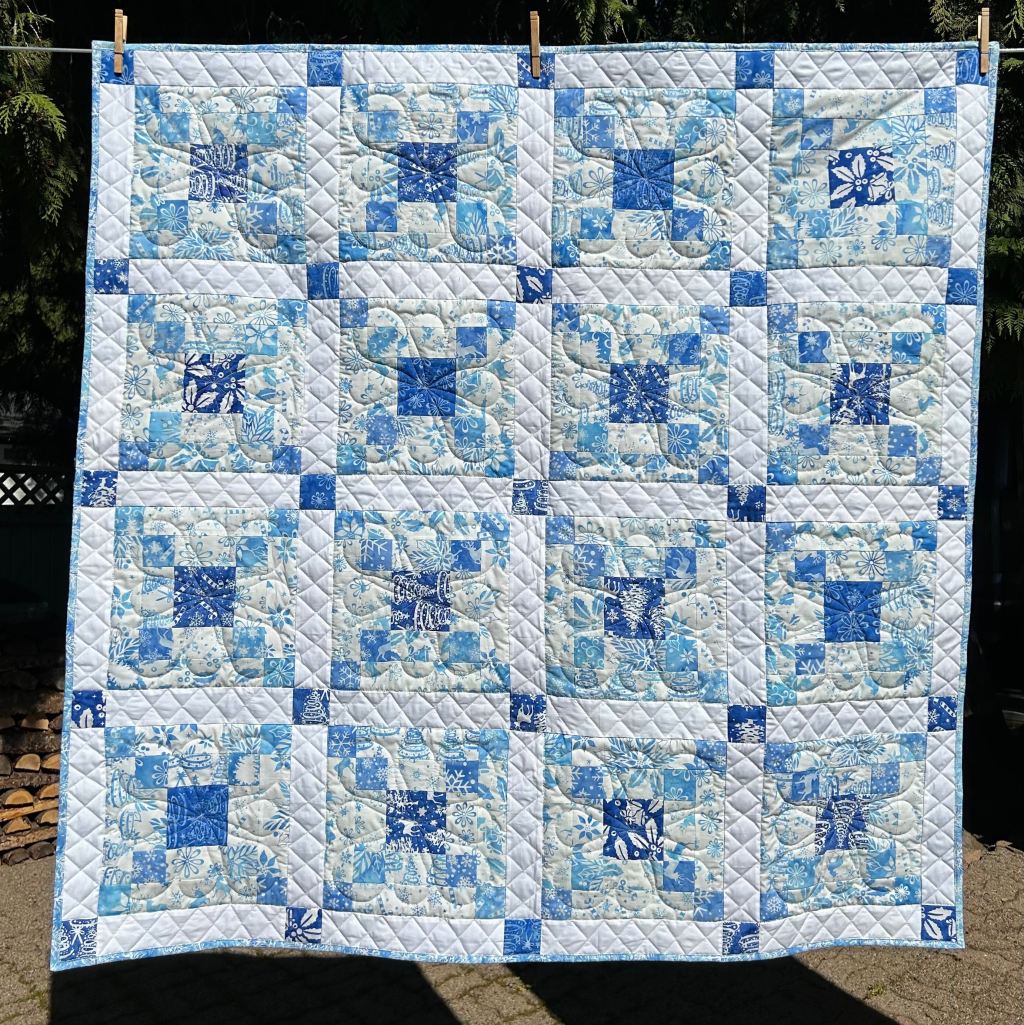
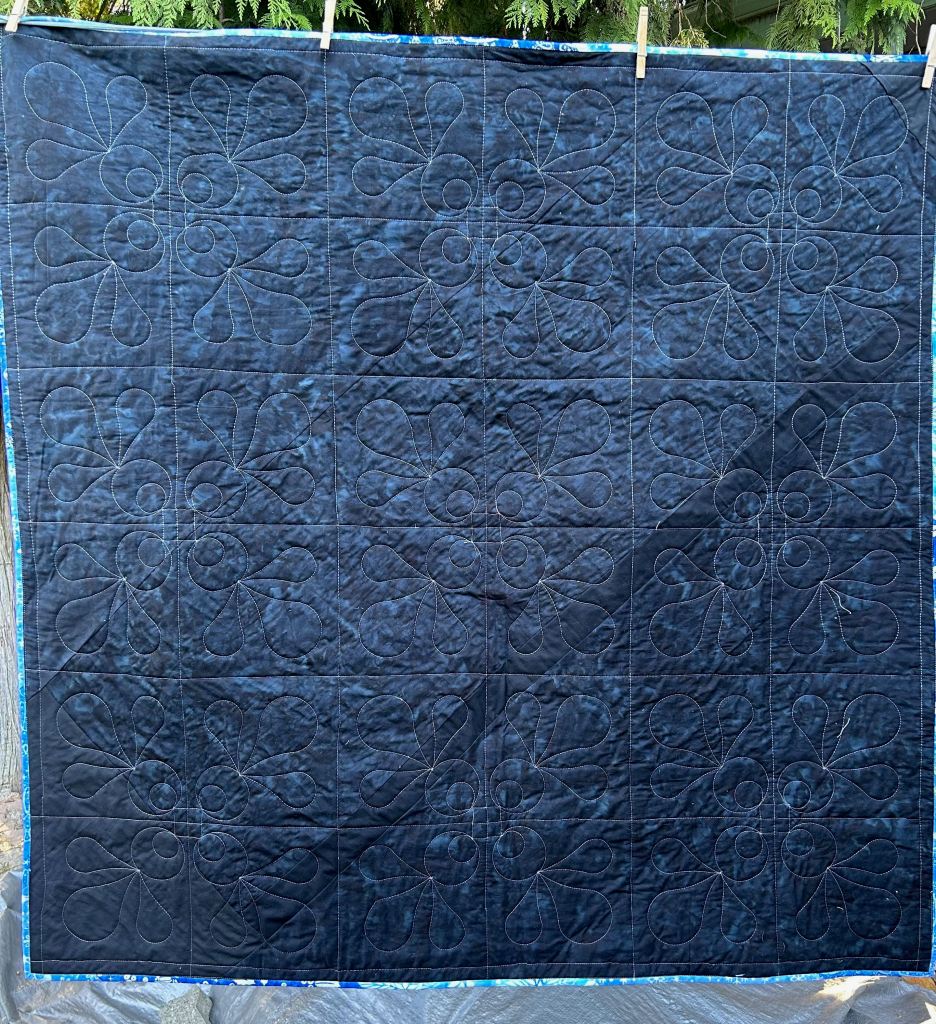
A picture of the back: I did the ‘magic’ sew a rectangle 4 blocks by 8 blocks, cut it and re-sew and you end up with the blocks on point.
Quilt Stats:
Size: 60″ square
Fabric: Island Batik: “Tinsel Treasures” by by Jerry Khiev for Sarah Fabian of Quilt Basket along with Island Batik’s solid white.
The Irish Cain Accuquilt die actually has a LOT of versatility!
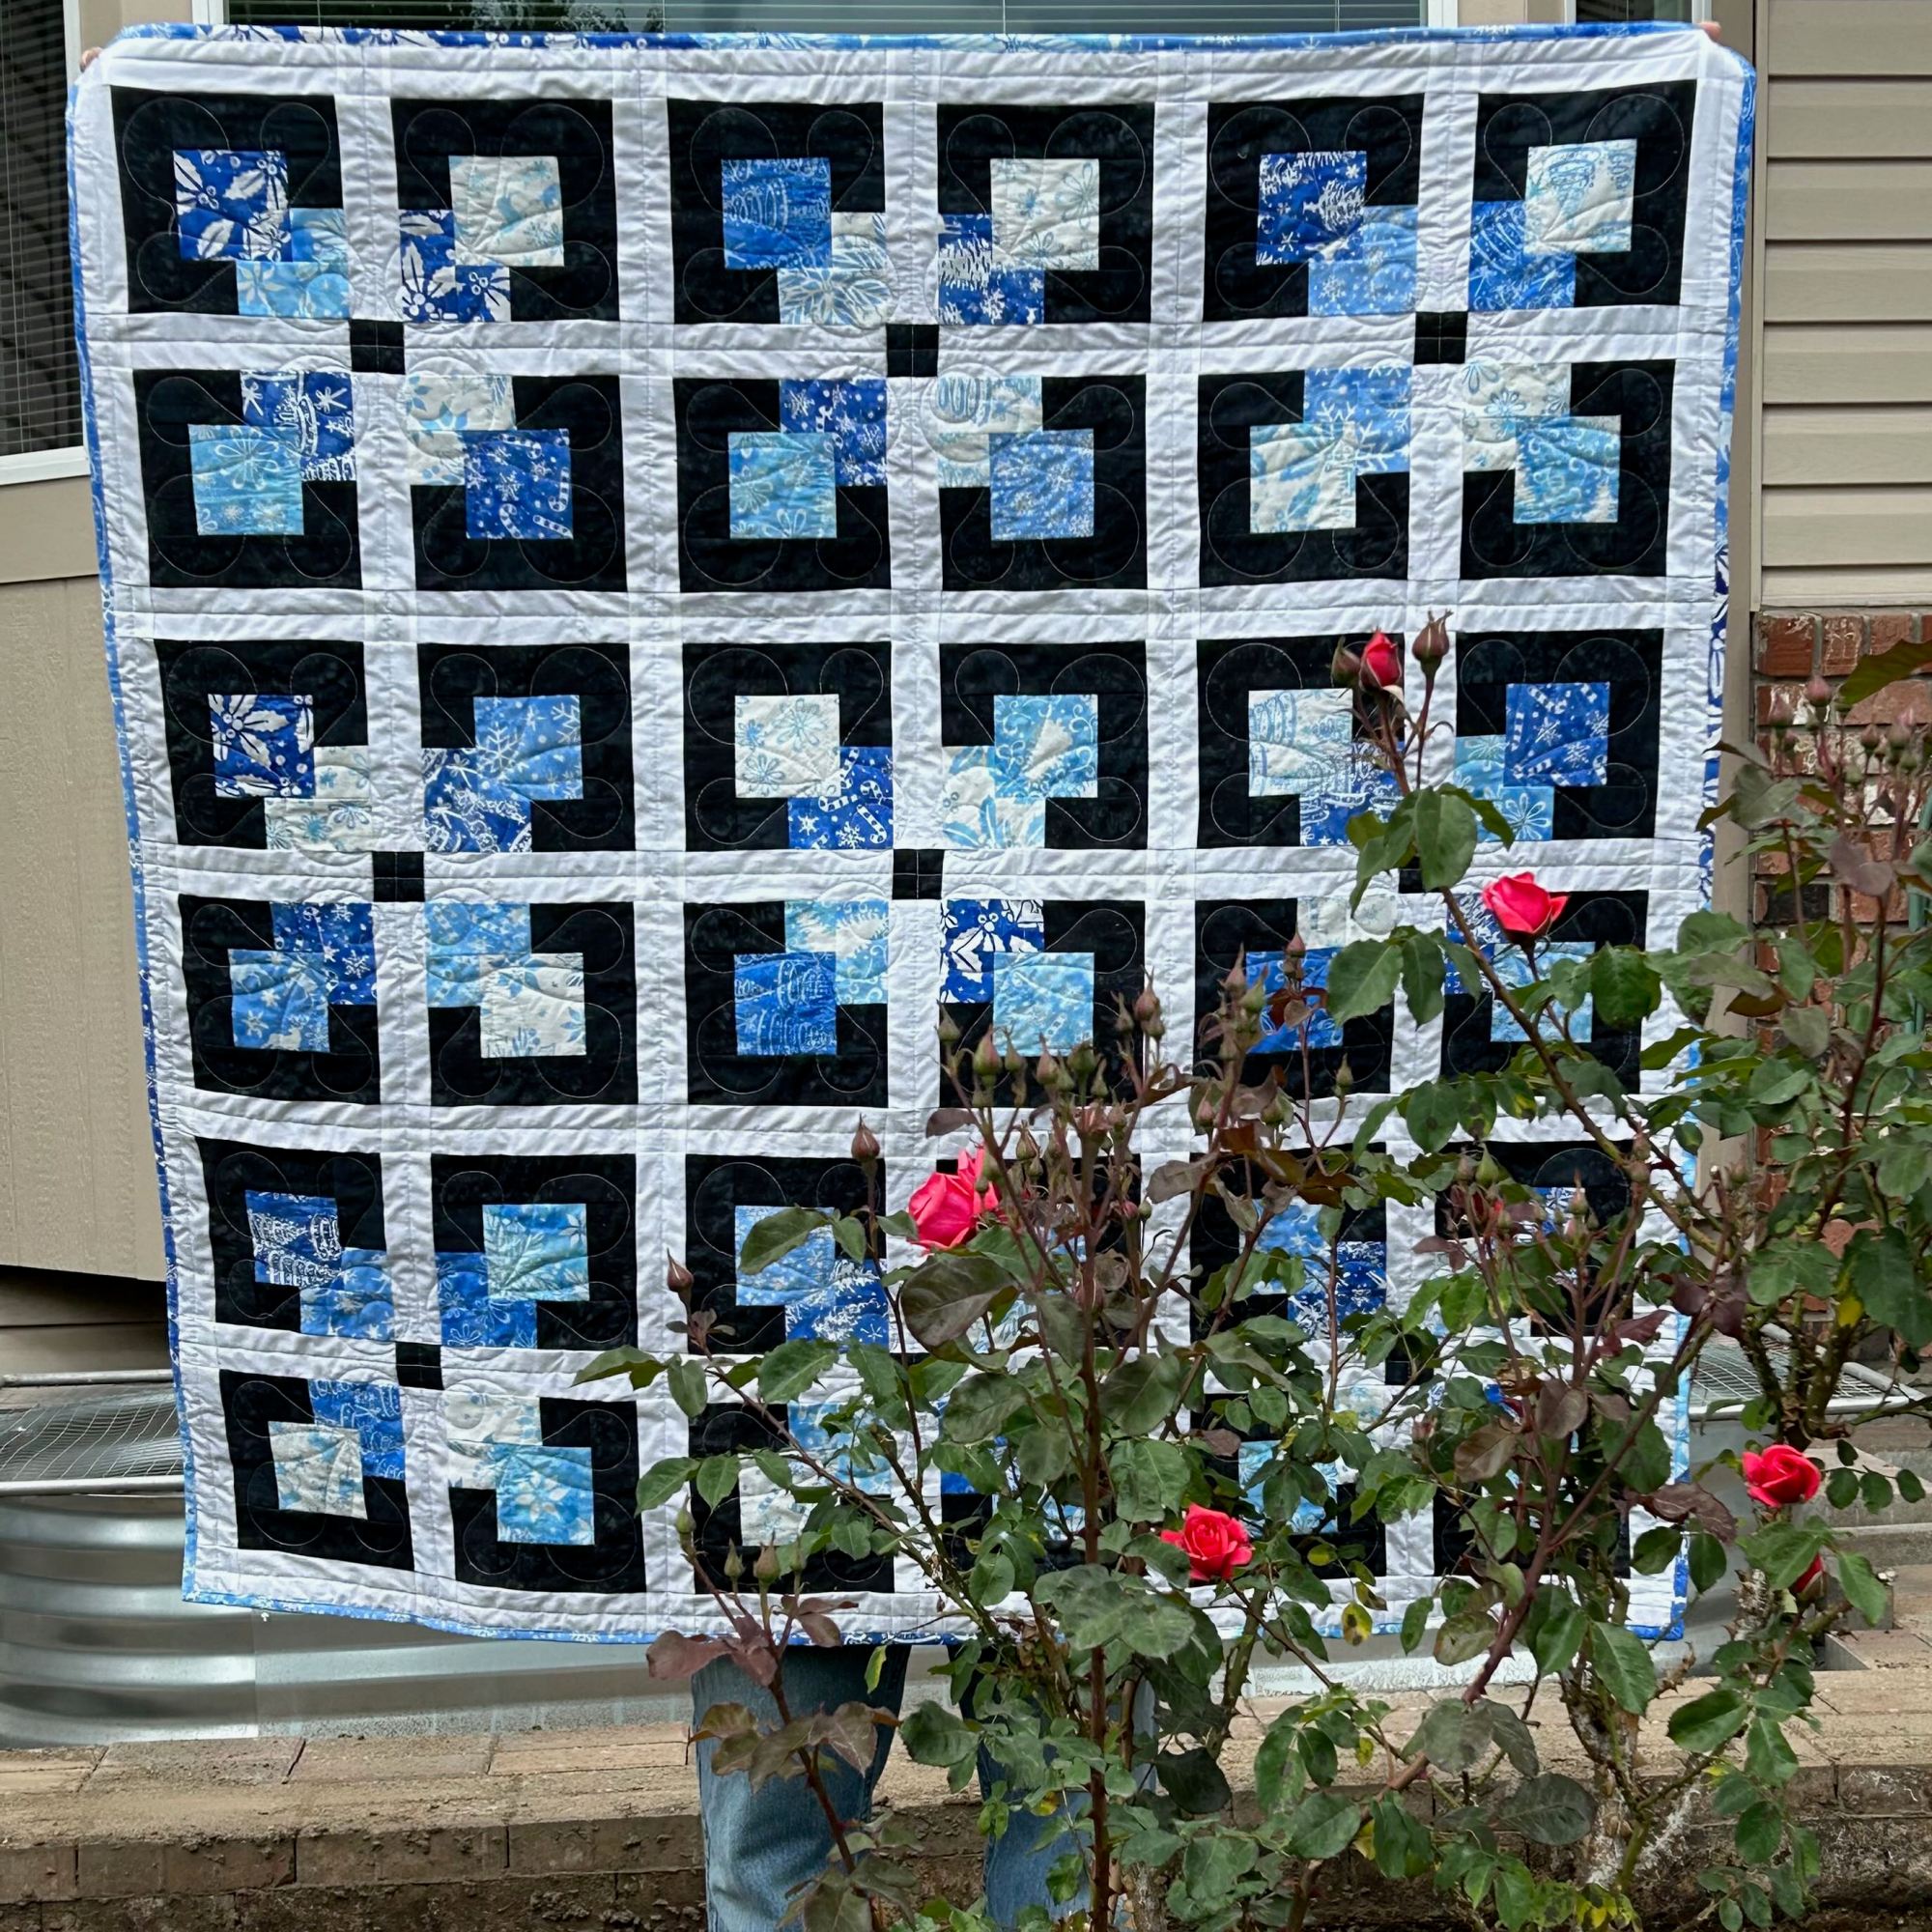
For my second quilt using the Irish Chain Accuquilt die, I was inspired by a quilt on THIS VIDEO (around 39:30) and there is a free pattern HERE (designed by Barbara G Harper).
In the middle picture, you can see the back of a block … and if you look closely, you can see where the corners are trimmed at a slight angle. This made strip piecing a dream, lining up those corners! And it reduces a bit of the bulk.
The dark blue is ‘Midnight Blue’ from the Brilliant Blues collection and the sashing is Island Batik’s solid white. The binding is scraps from the medium and dark fabrics in the collection.
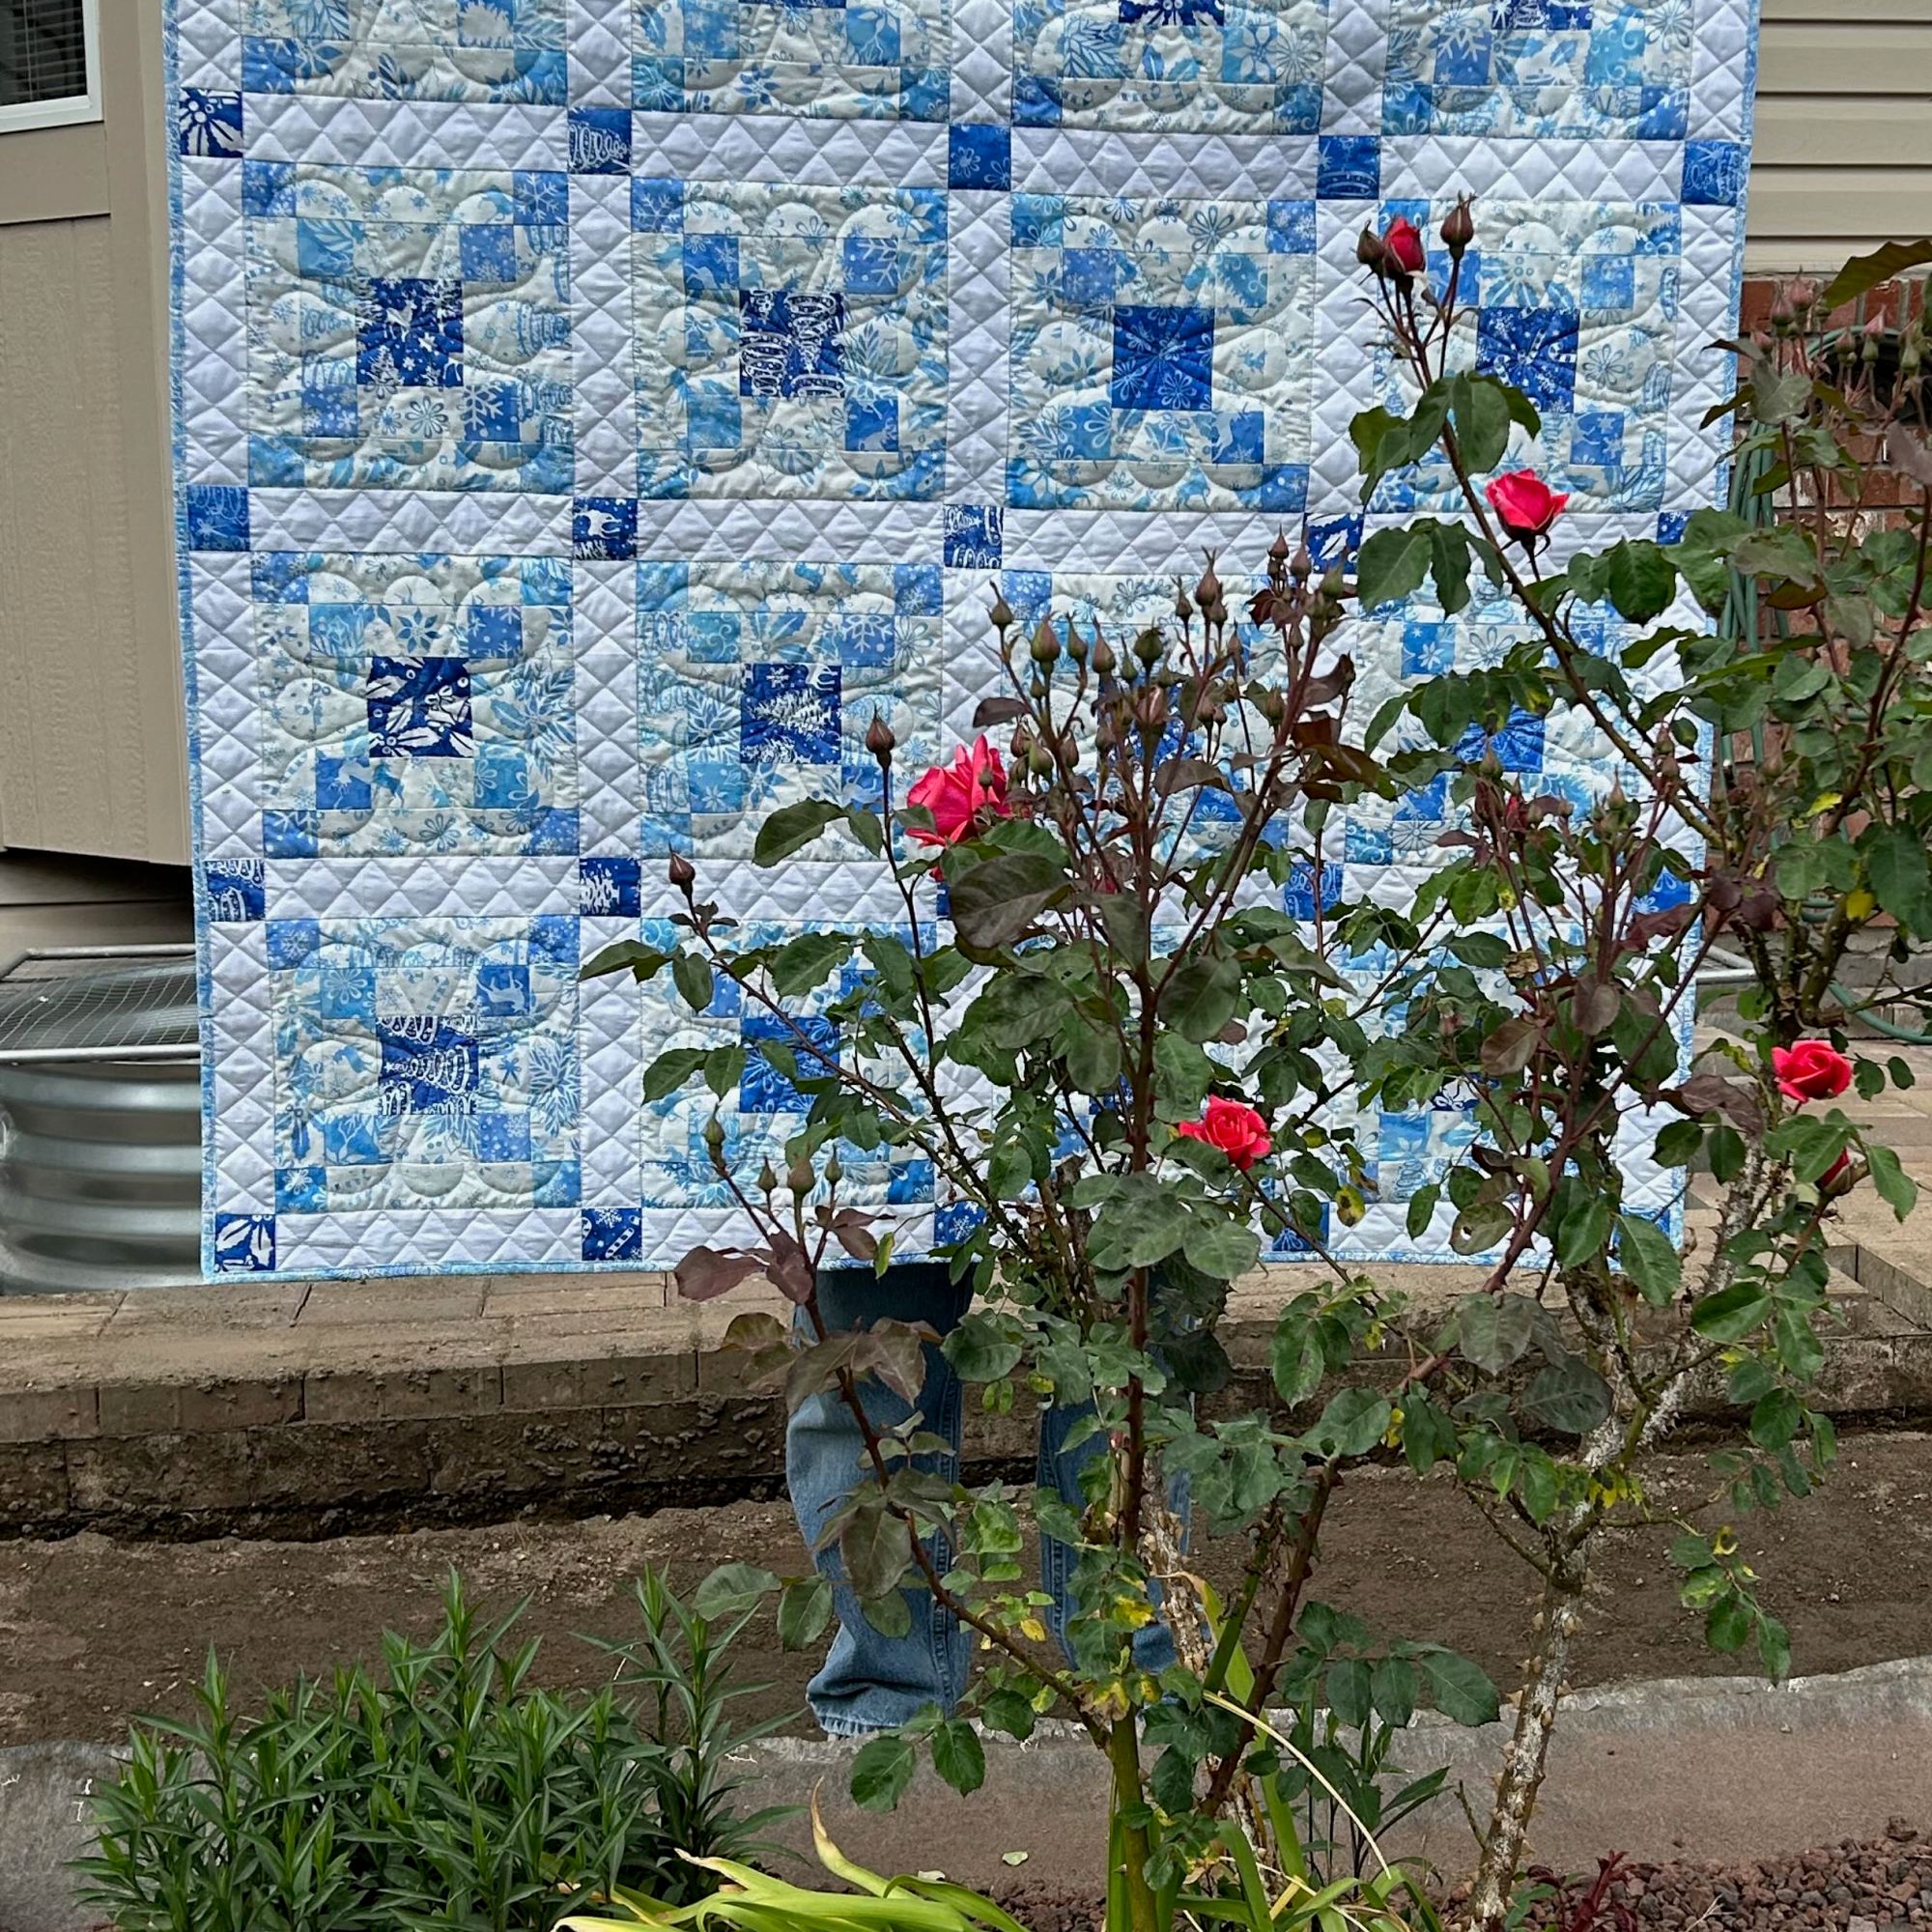
Here’s a picture of the quilting on the back. I didn’t have enough of the Midnight Blue, so I added a diagonal piece of solid black as well as on the top right & bottom left corners.
Quilt Stats:
Size: 60″ square
Fabric: Island Batik: “Tinsel Treasures” by by Jerry Khiev for Sarah Fabian of Quilt Basket
Hobbs Batting: Heirloom 80/20 Black. (I wanted to make the white solid less bright, but it didn’t work! Island Batik is such a great fabric that even black batting doesn’t dull the colours!)
I am now a Silly Moon affiliate! So what does that mean? When you use my affiliate code Quiltinggail2024 at Silly Moon, you will receive 10% off your order and I will receive a small commission.
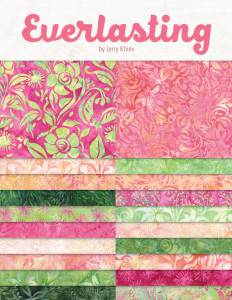
Way back in early December, Jennifer asked if I’d be interested in participating in a blog hop in early March. One look at this BEAUTIFUL fabric collection and I knew I HAD to say “YES!”
I went to EQ8 and started designing … all these pretty fabrics will make a very pretty quilt!
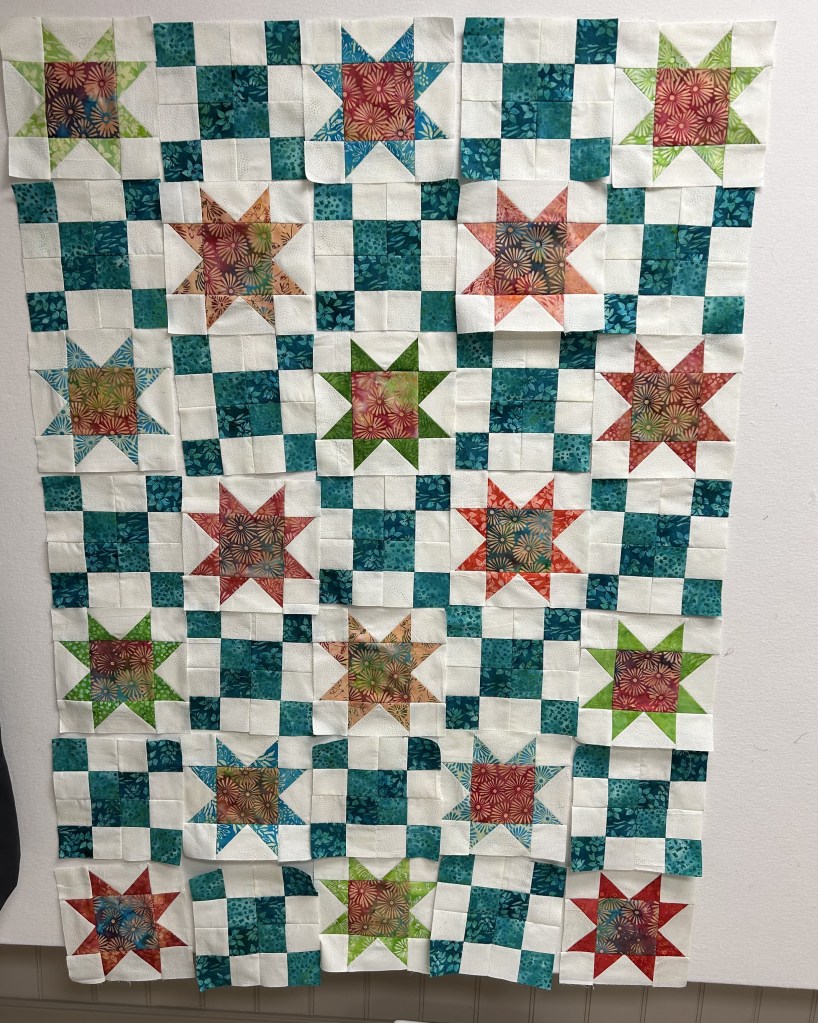
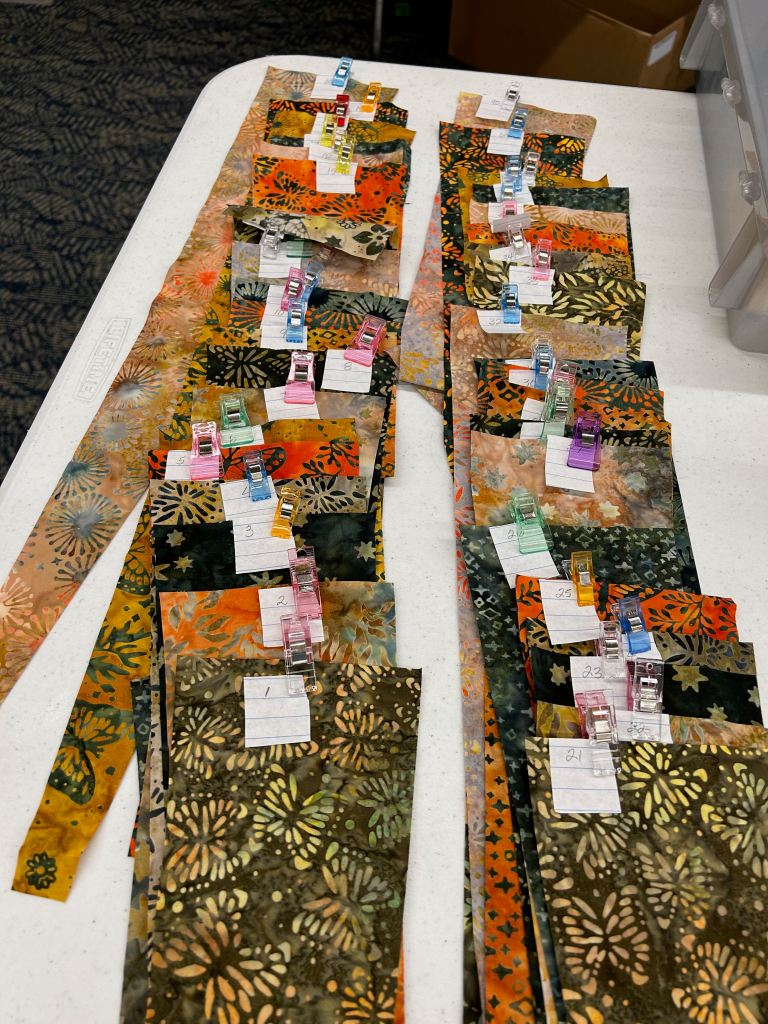
Unfortunately, I enjoyed sewing this quilt together so much that I forgot to take many progress pictures! Here are the blocks on my design wall:
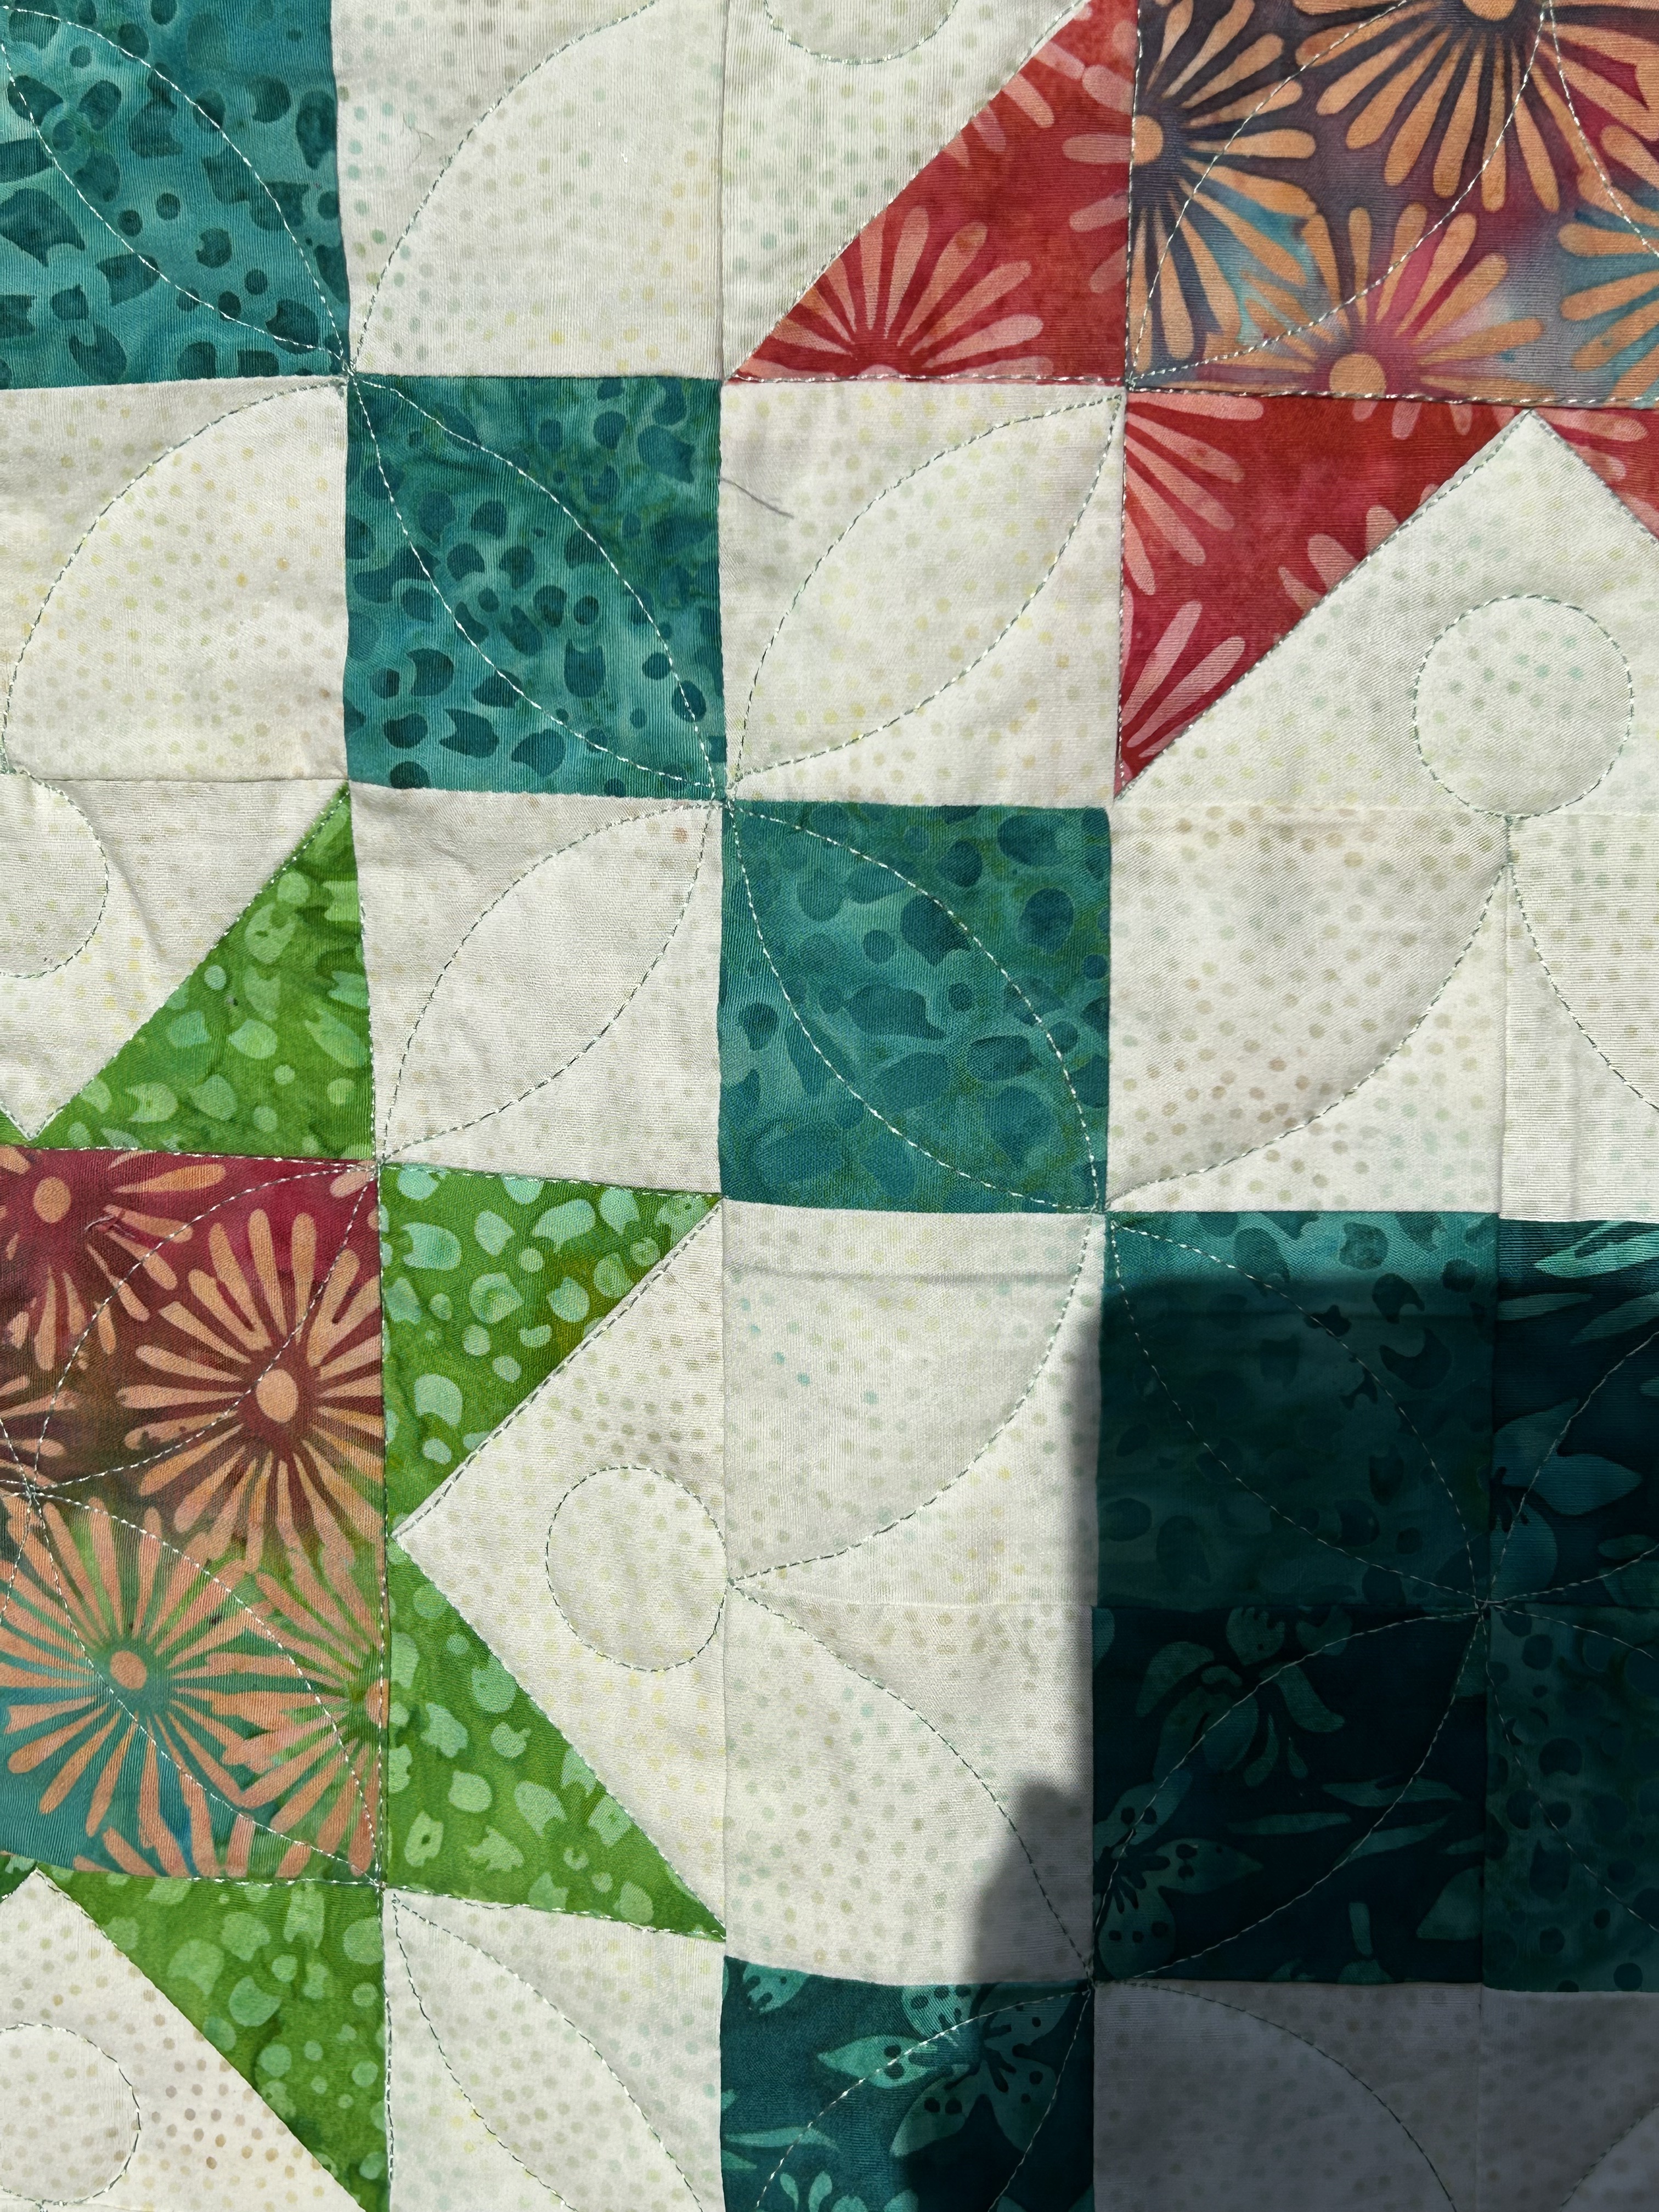
A Close-up of the quilting:
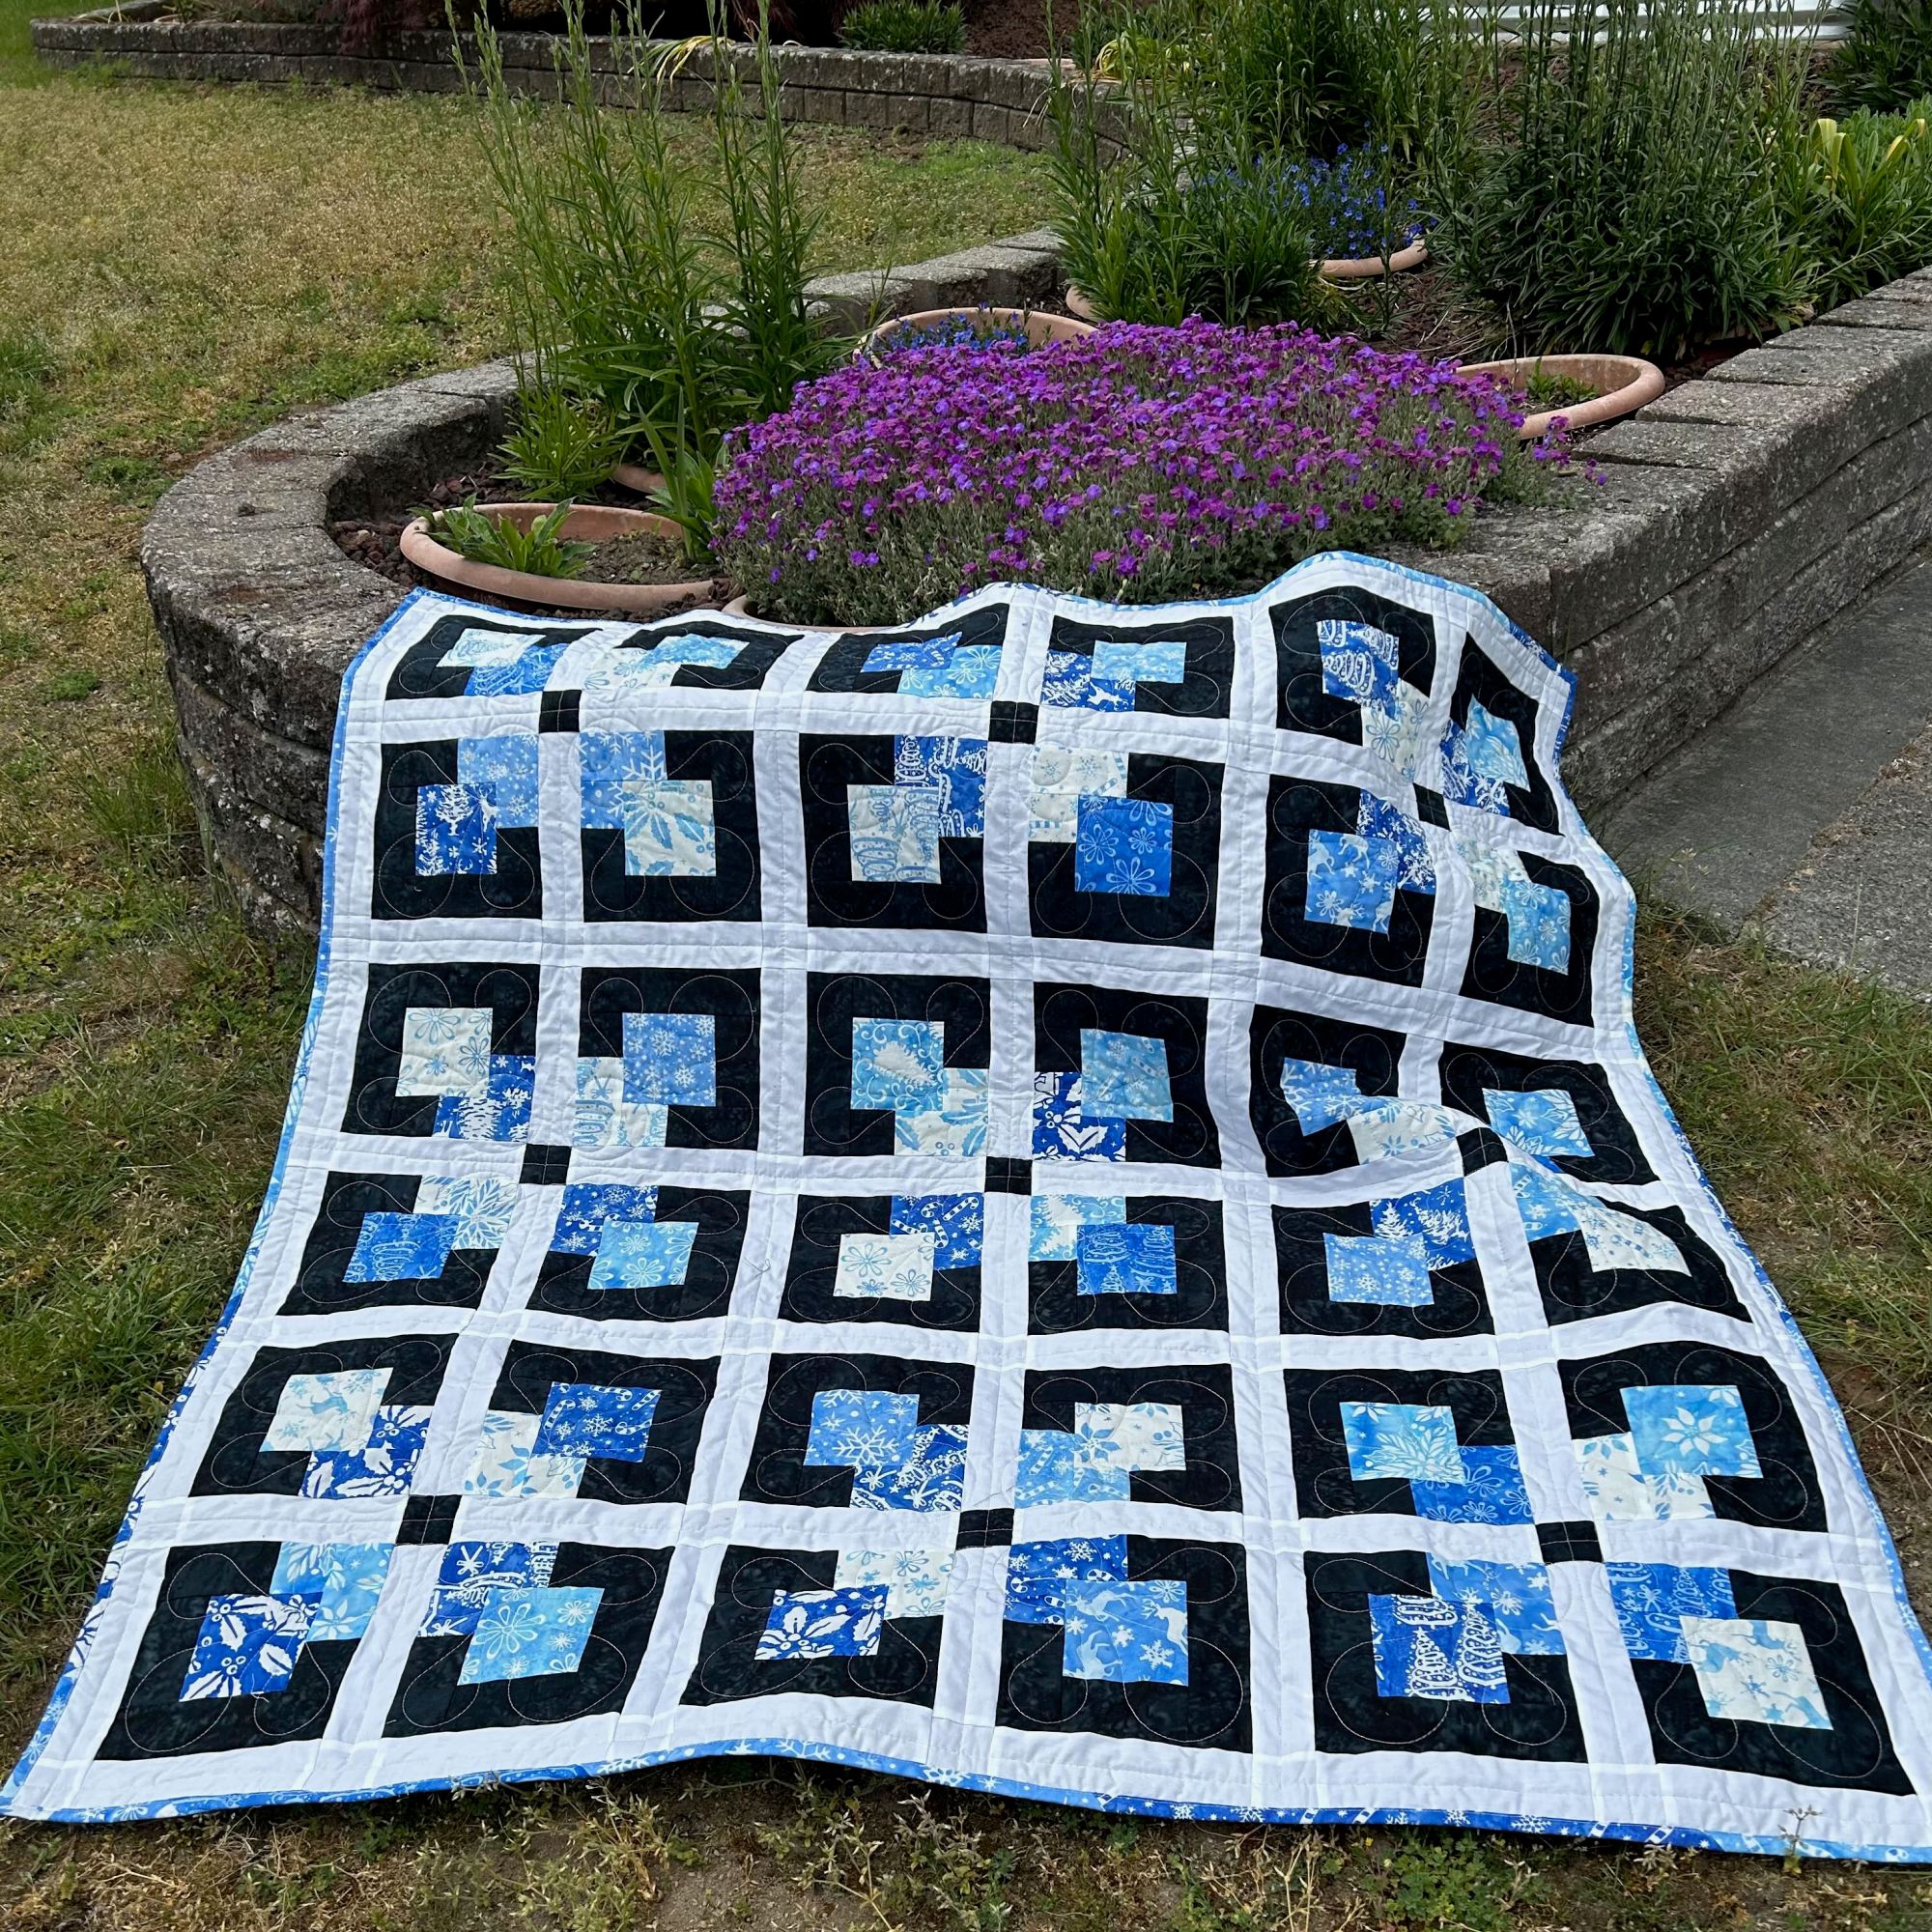
The finished quilt:
Quilt Stats:
Size: 44″ x 58″
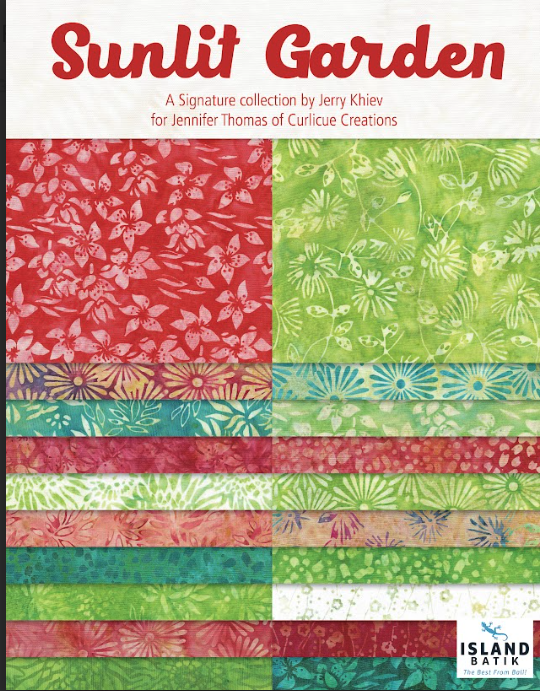
Fabric: Island Batik: “Sunlit Garden” by Jerry Khiev for Jennifer Thomas, paired with Eggwhite (an Island Batik neutral that is available all the time)
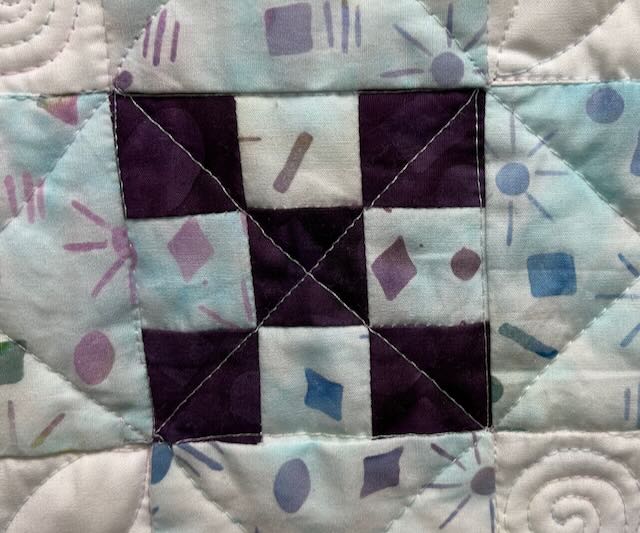
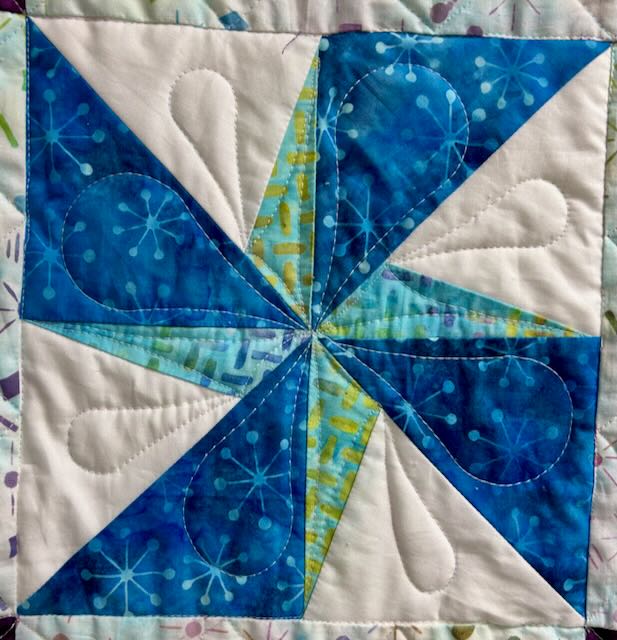
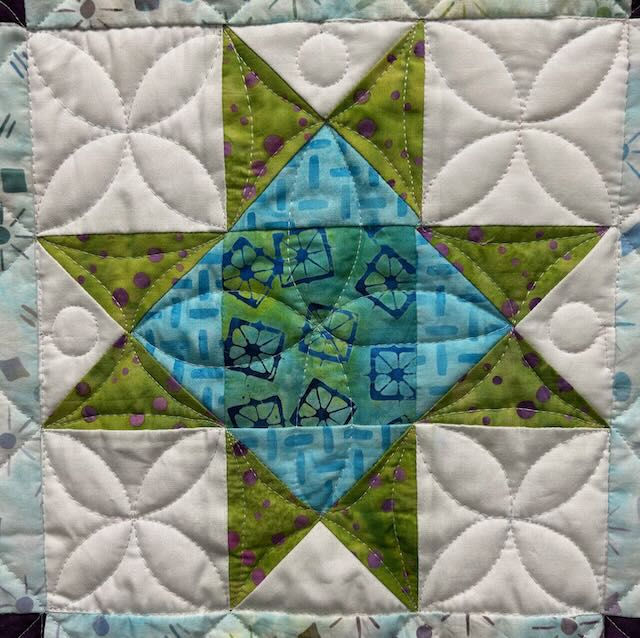
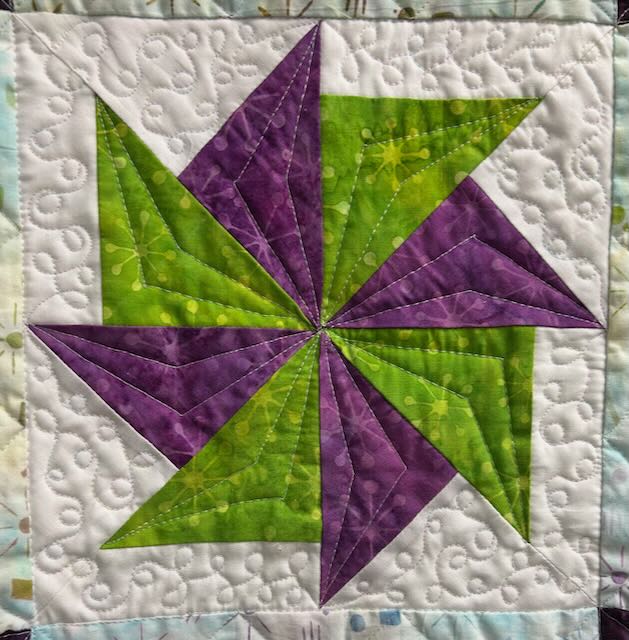
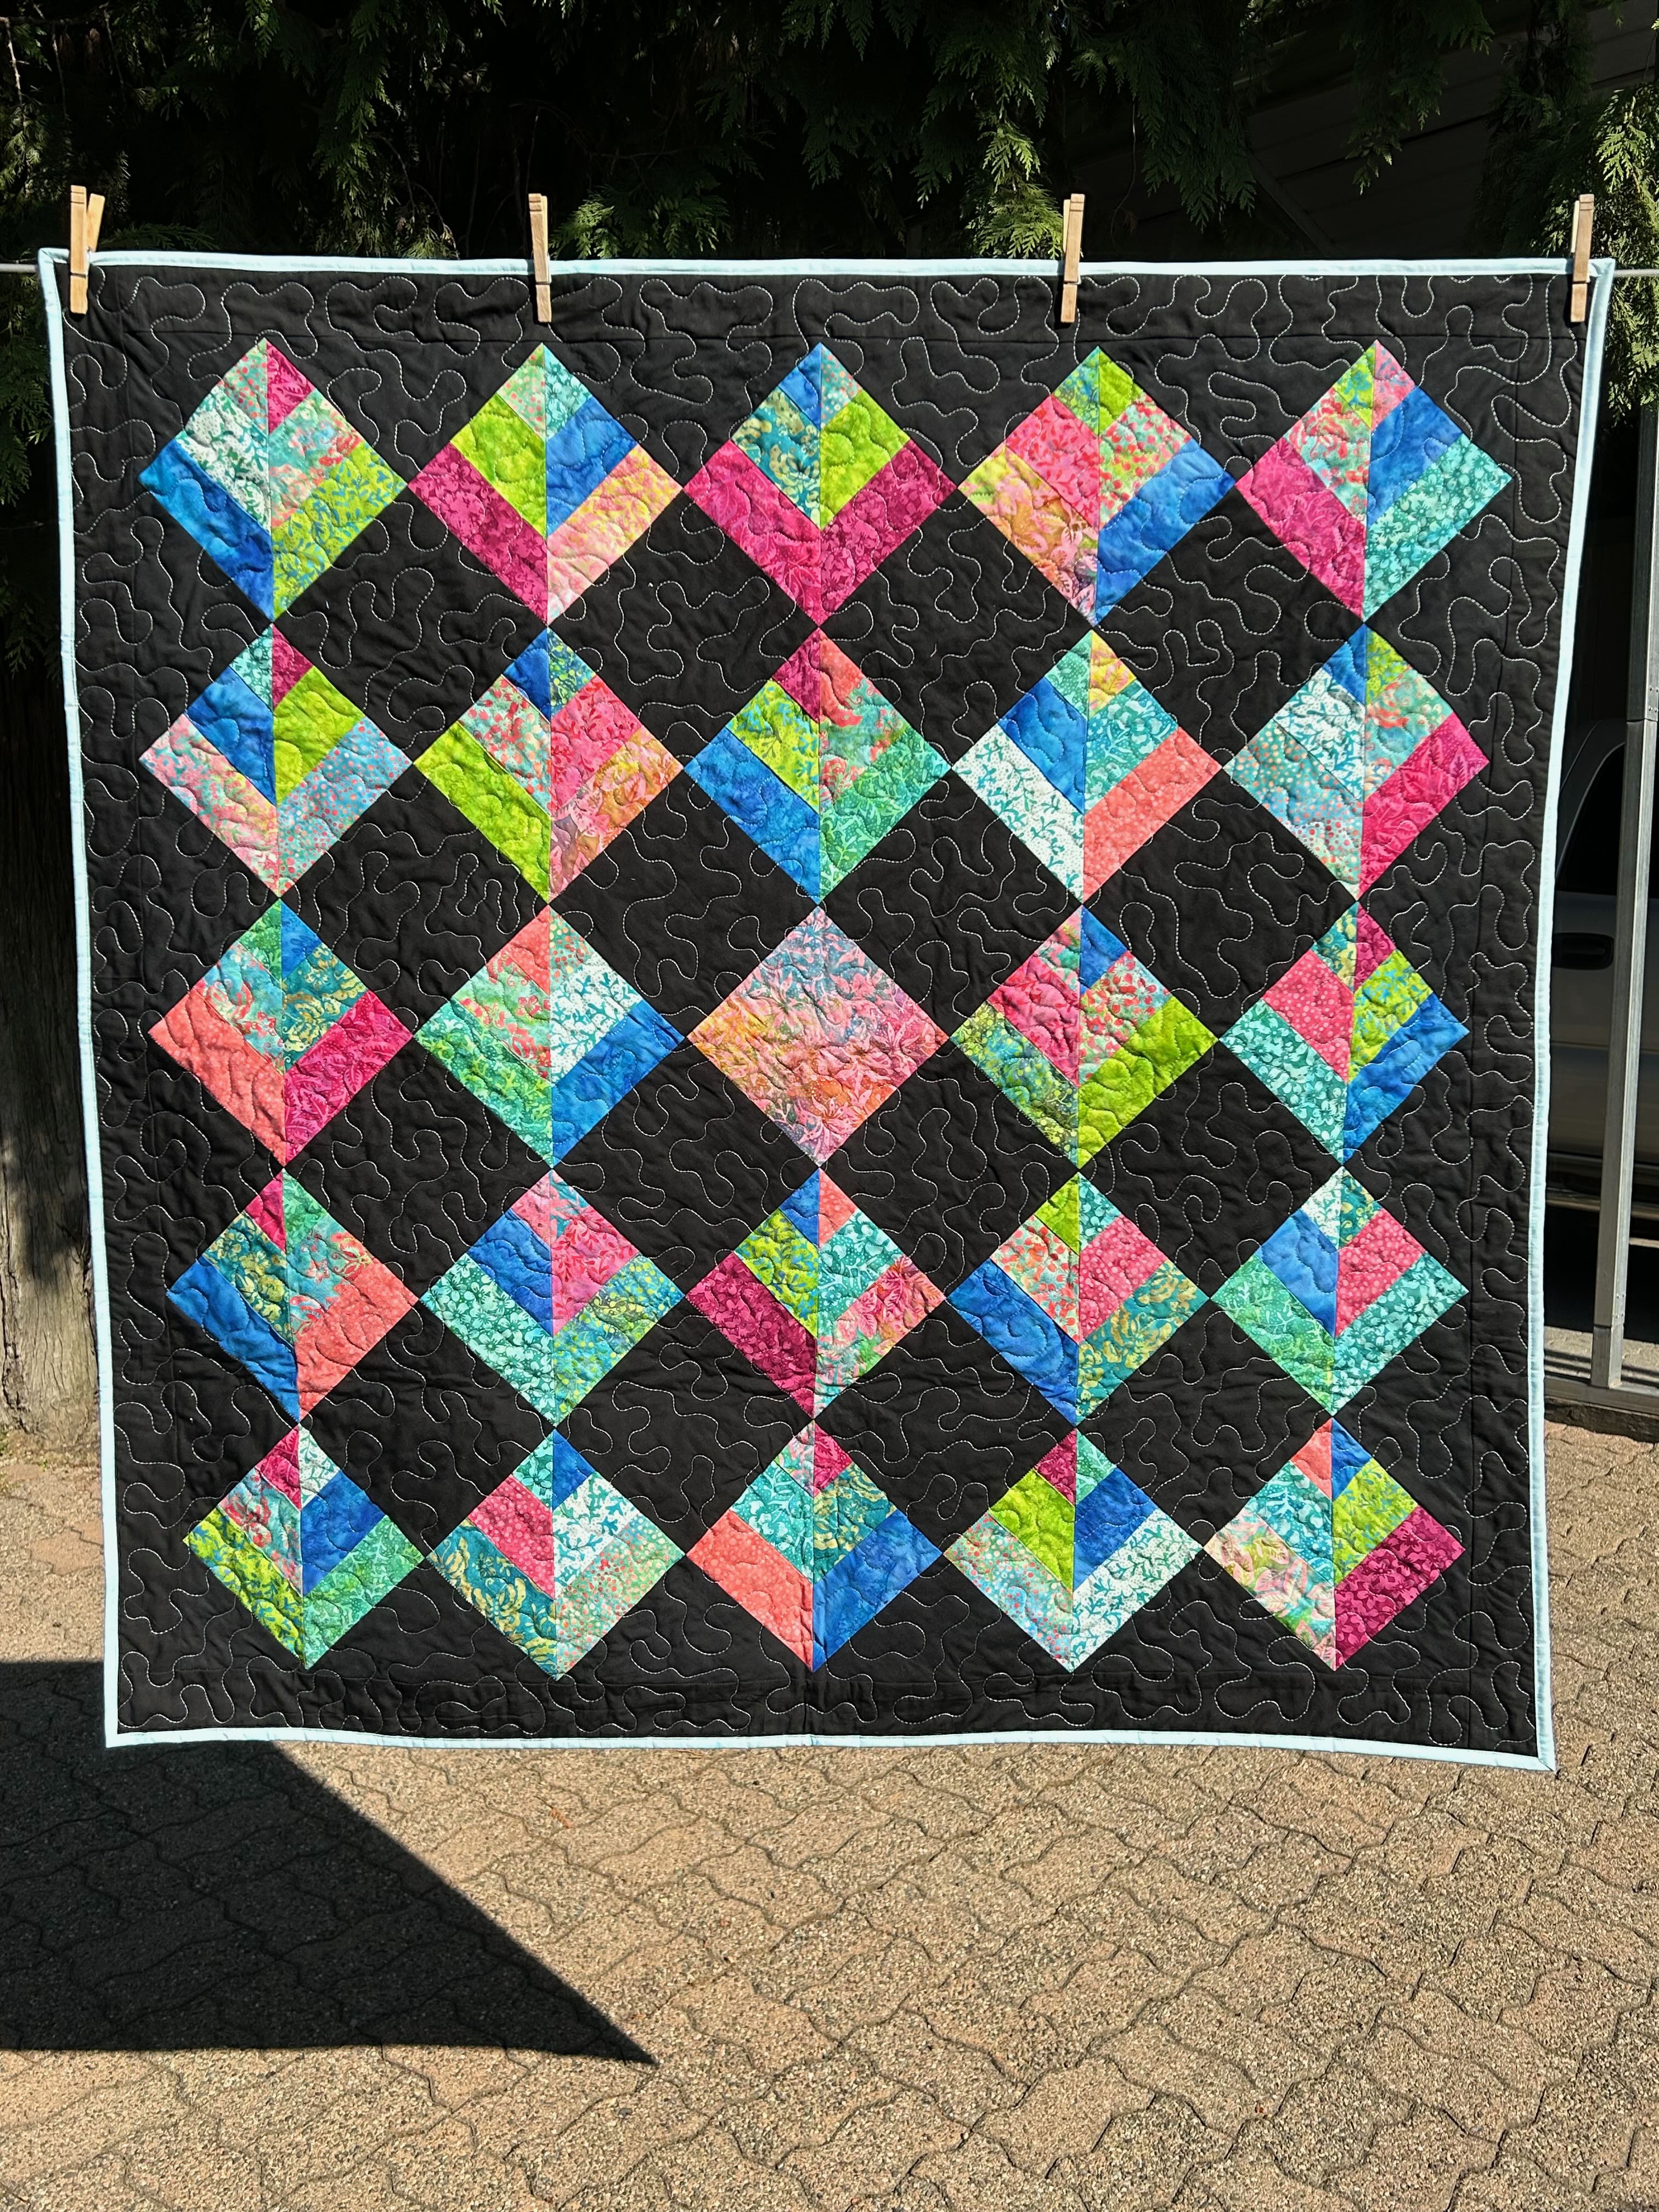
When Claudia asked if I would make something with her signature fabric, I could not resist the opportunity to work with gorgeous fabric collection, and immediately said “yes.” I downloaded the fabric images into EQ8 and played with the fabrics and several different blocks. I used “Almond” for the background. This was the result:
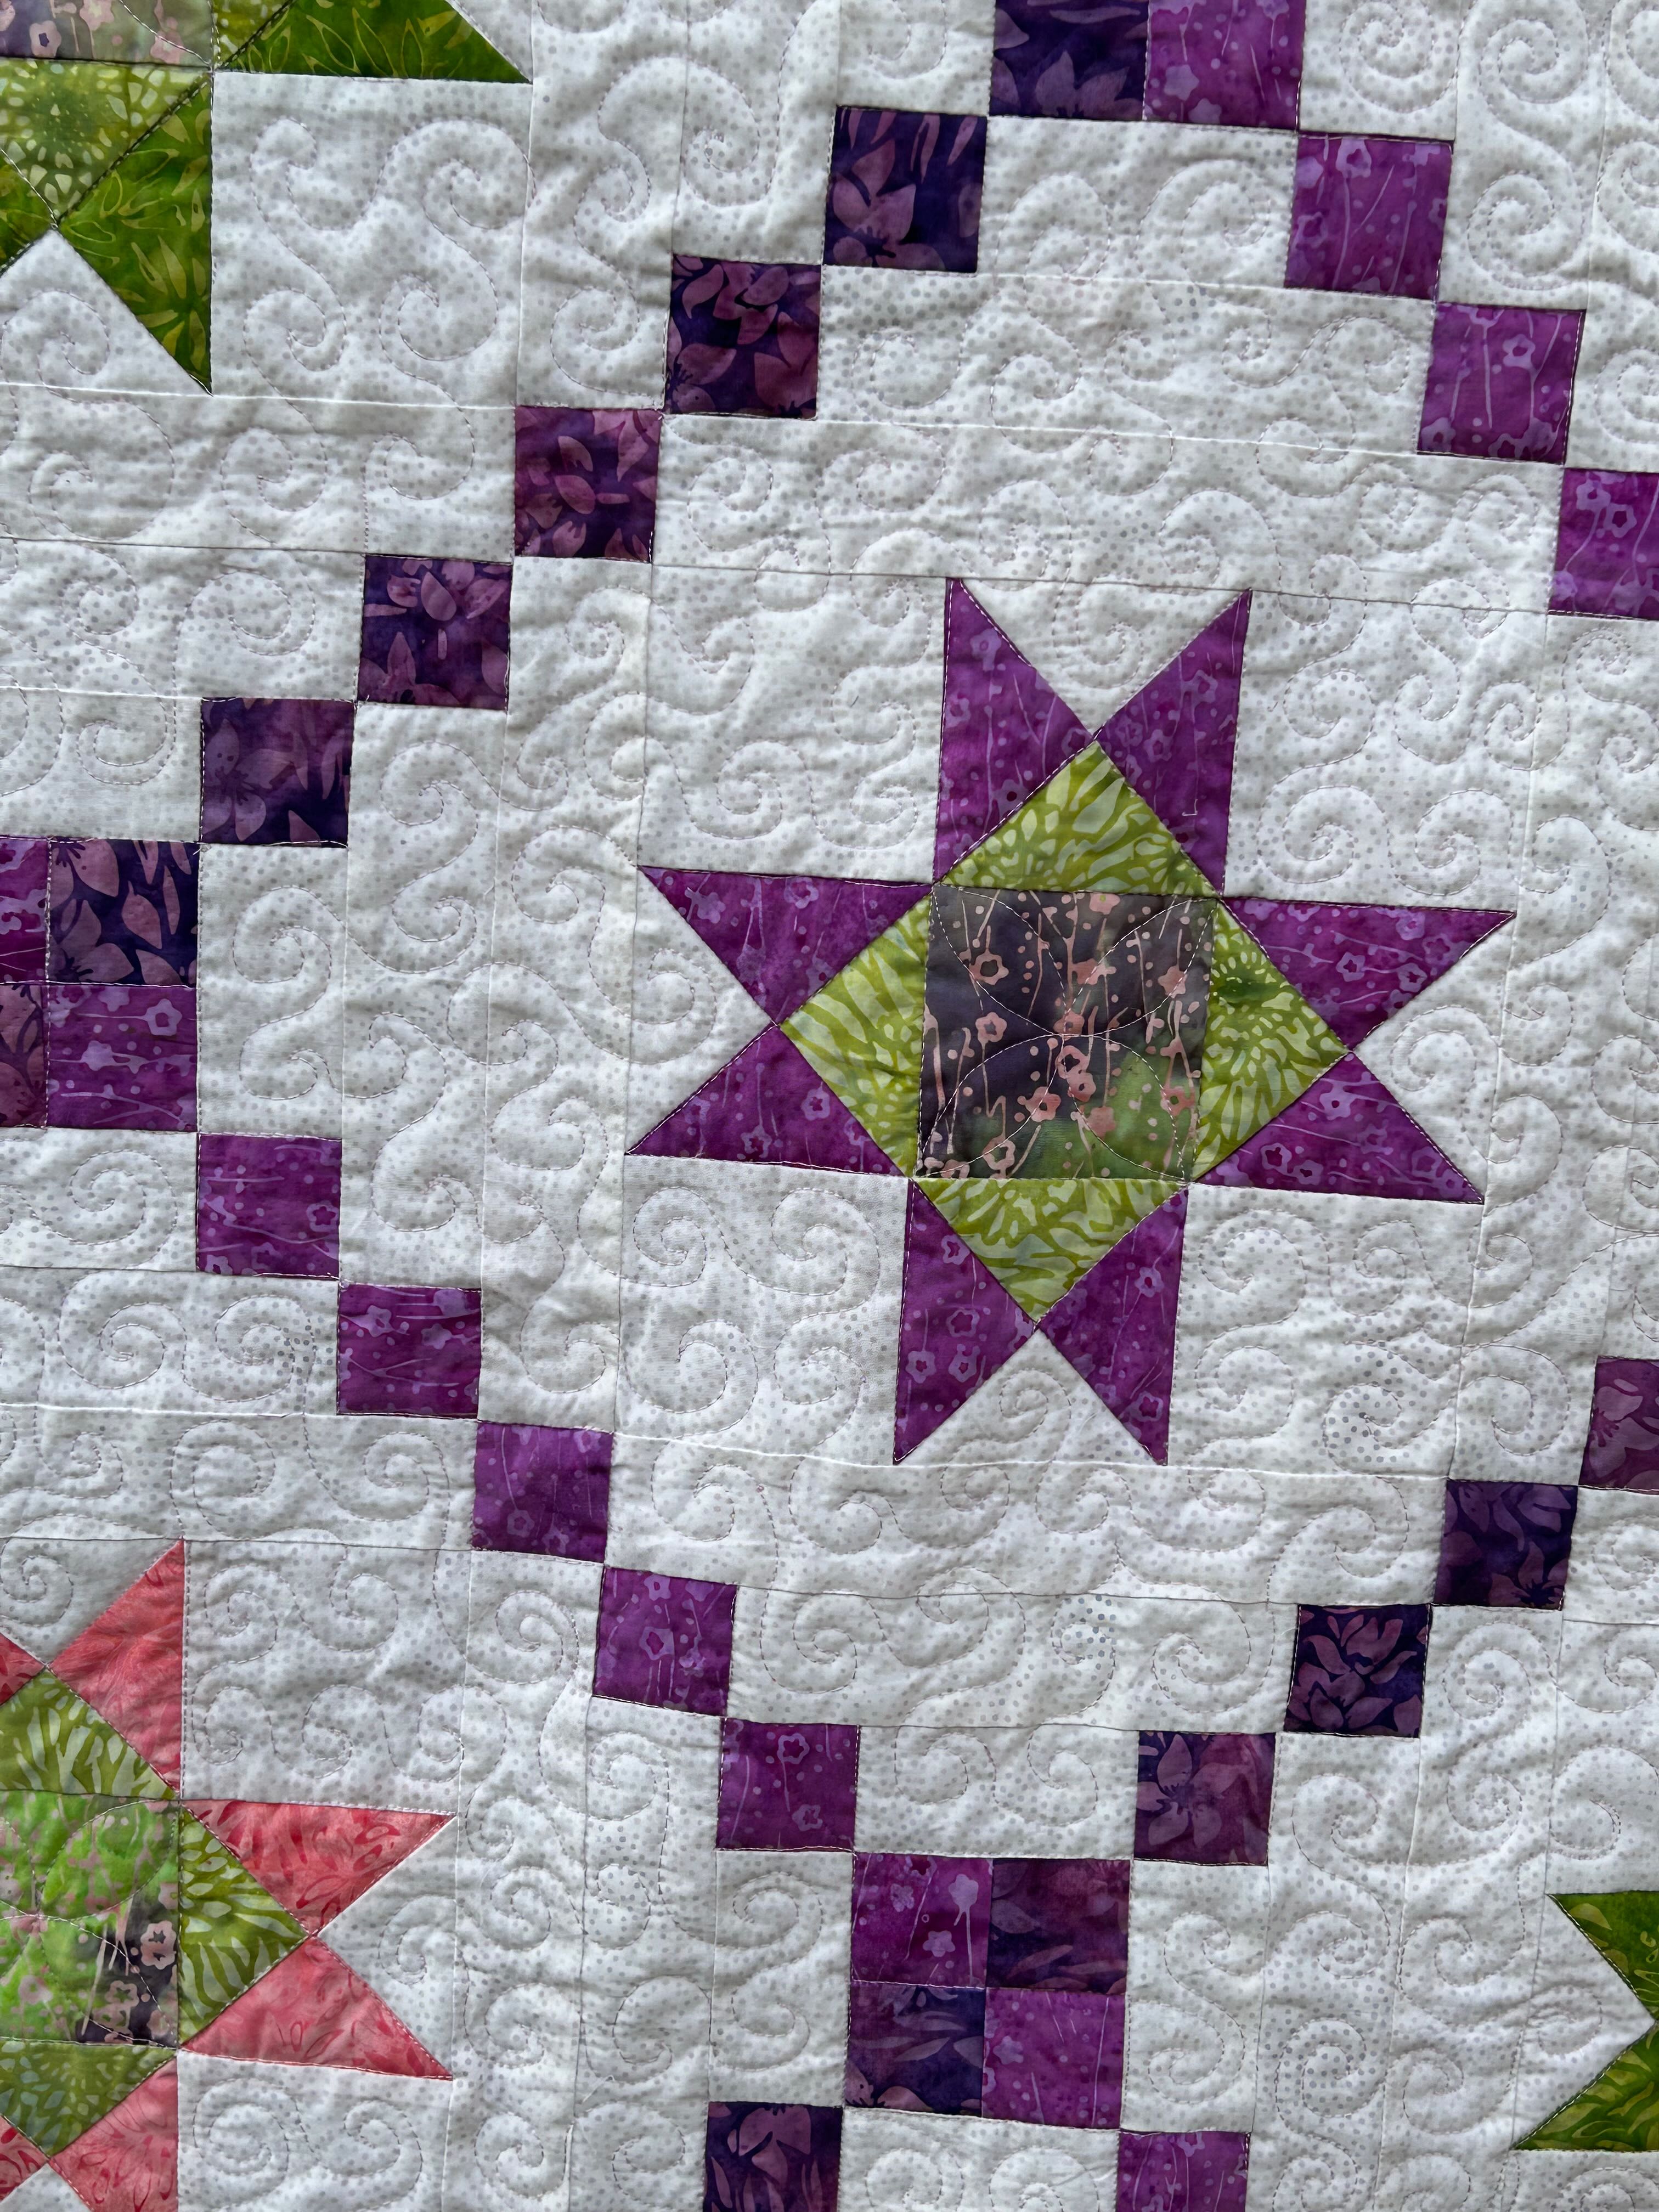
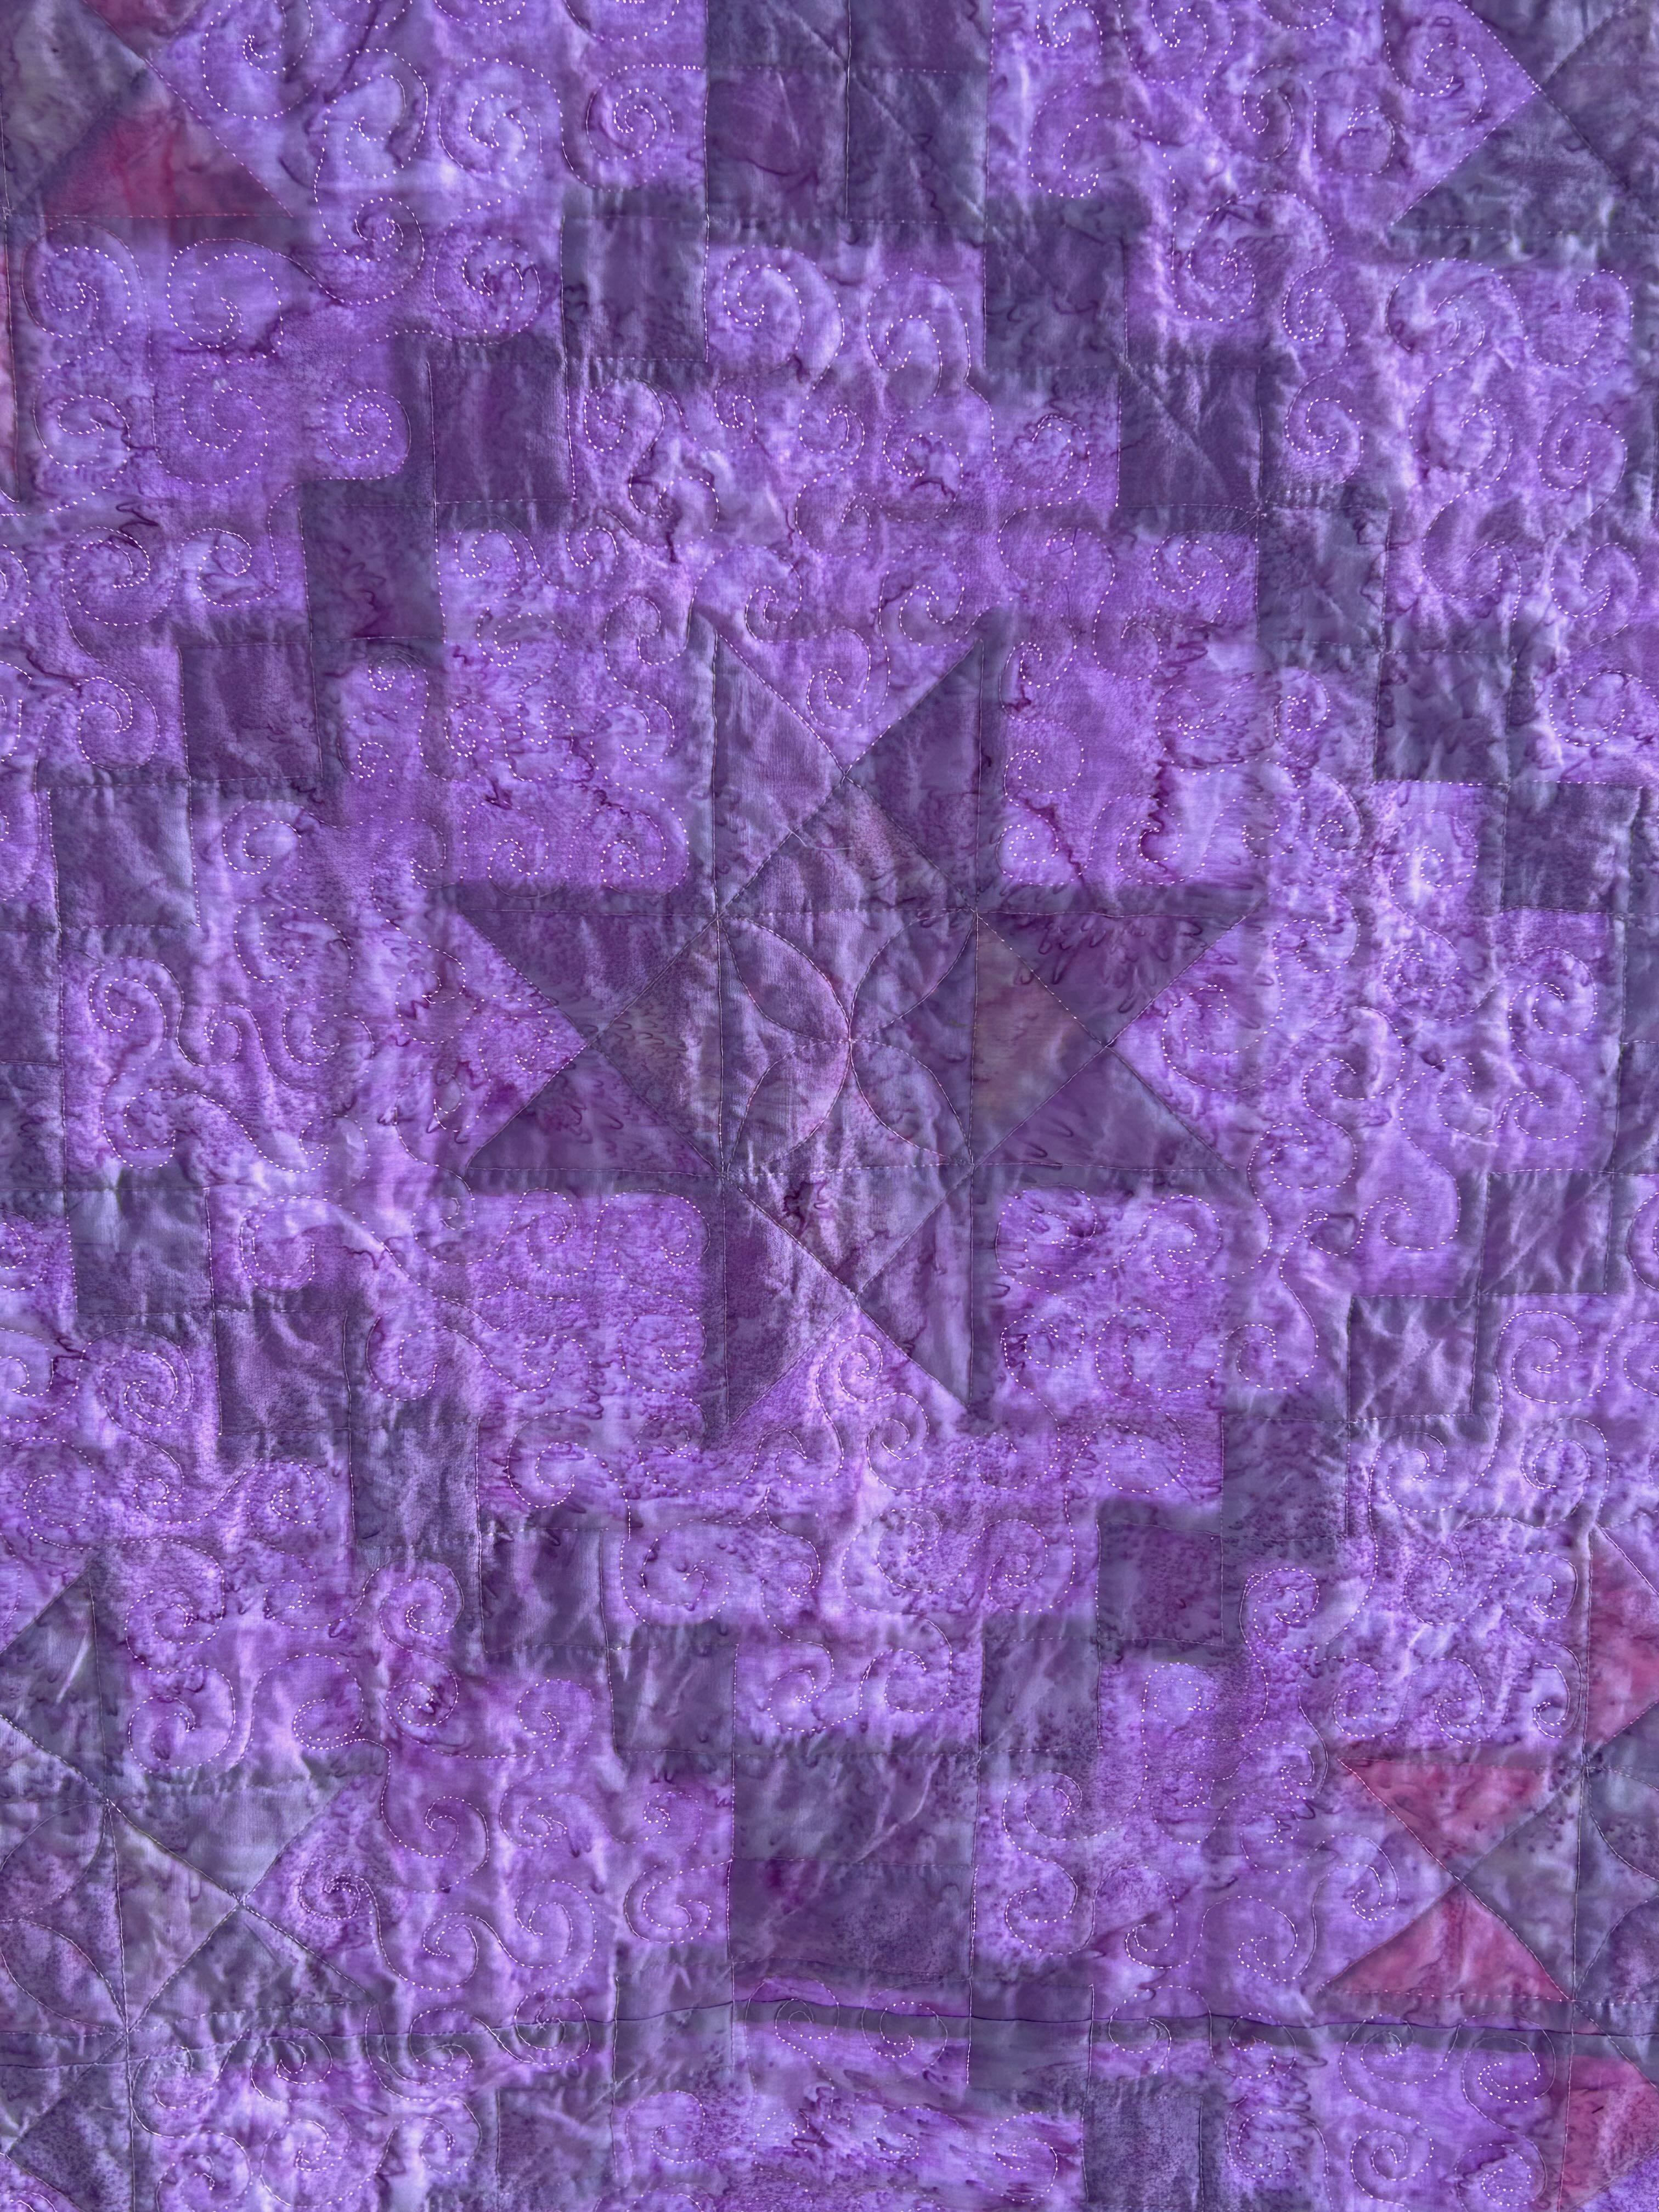
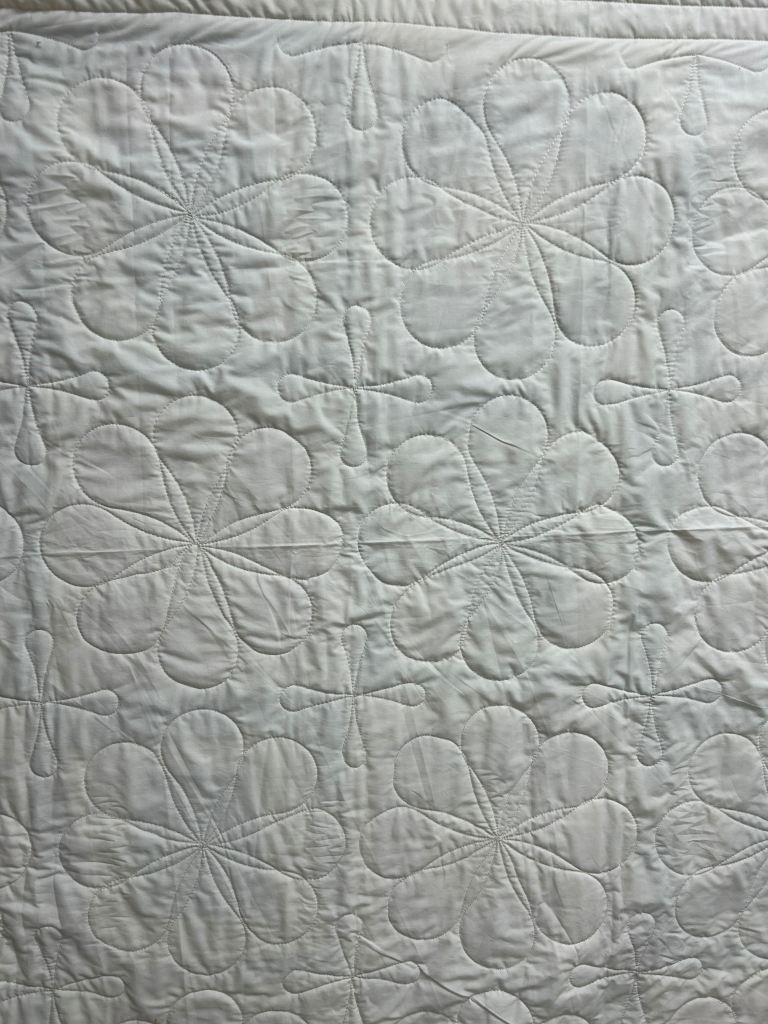
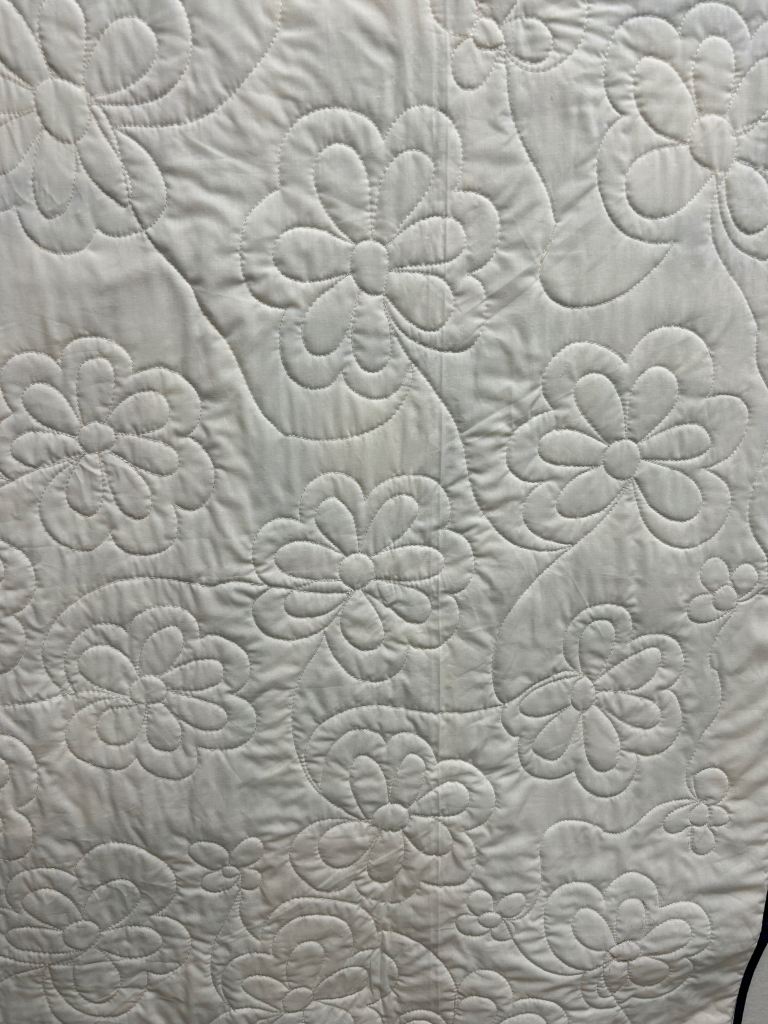
Here’s a close-up of one of the quilted blocks and the back of one block in the sunshine! The backing is “Lavender” (part of the Island Batik “Playful Purples” collection). I used Silly Moon‘s “Rocket” to outline the chain and star blocks and the 3″ Beanie in the centre of the stars. The background was filled in with swirls.
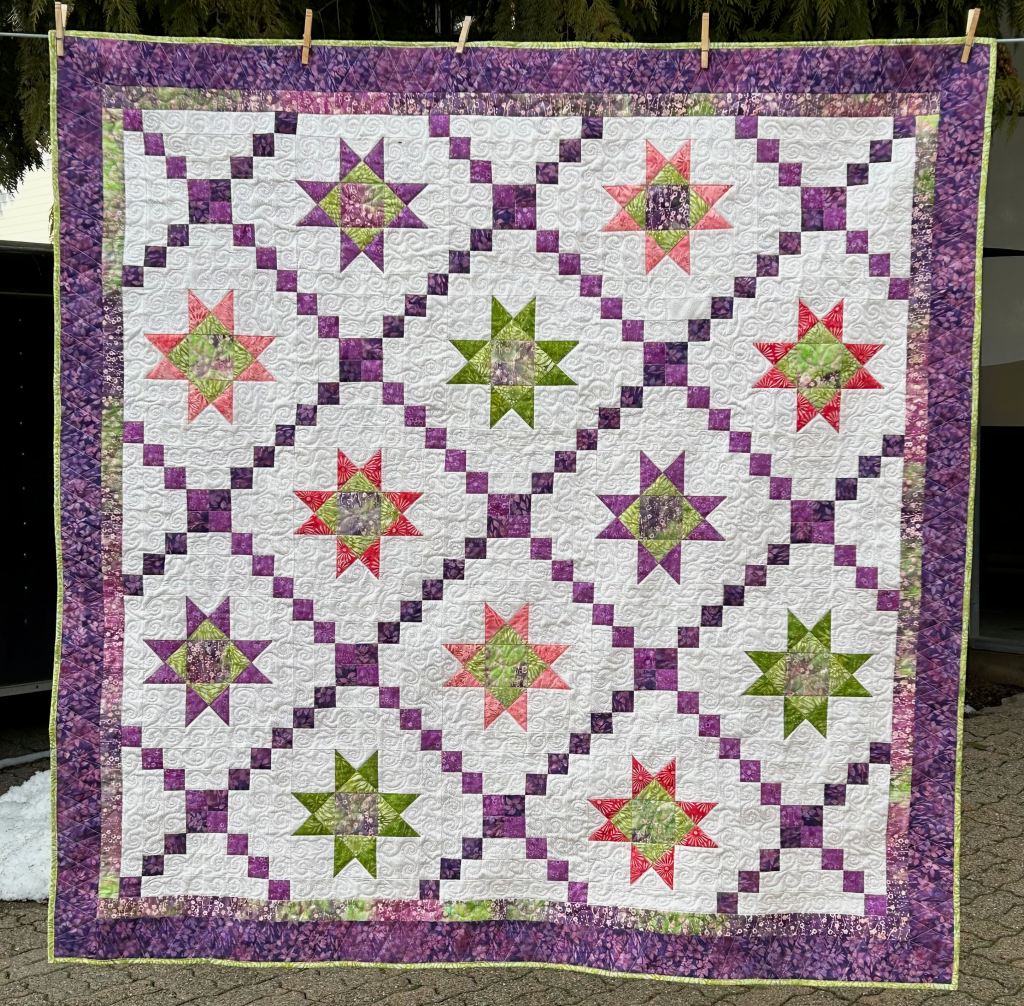
And a picture of the finished quilt:
Quilt Stats:
Size: 60″ x 60″
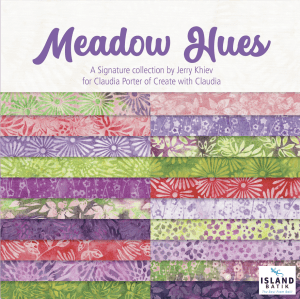
Fabric: Island Batik: Meadow Hues (by Jerry Khiev, signature collection for Claudia Porter) with Almond and Lavender
I am now a Silly Moon affiliate! So what does that mean? When you use my affiliate code Quiltinggail2024 at Silly Moon, you will receive 10% off your order and I will receive a small commission.
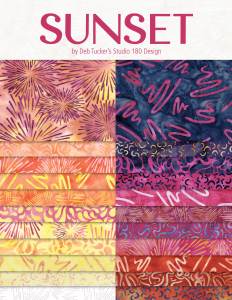
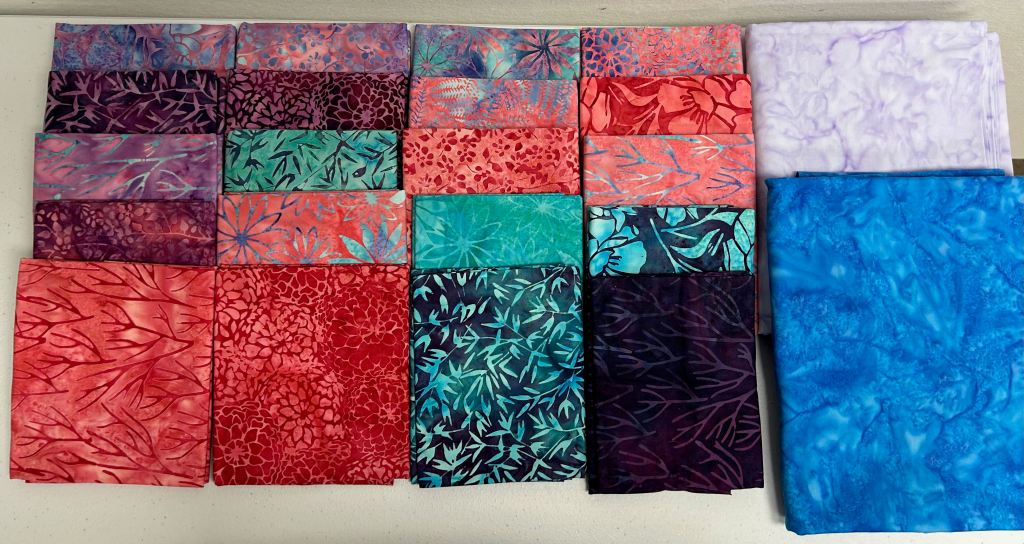
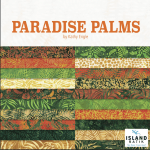
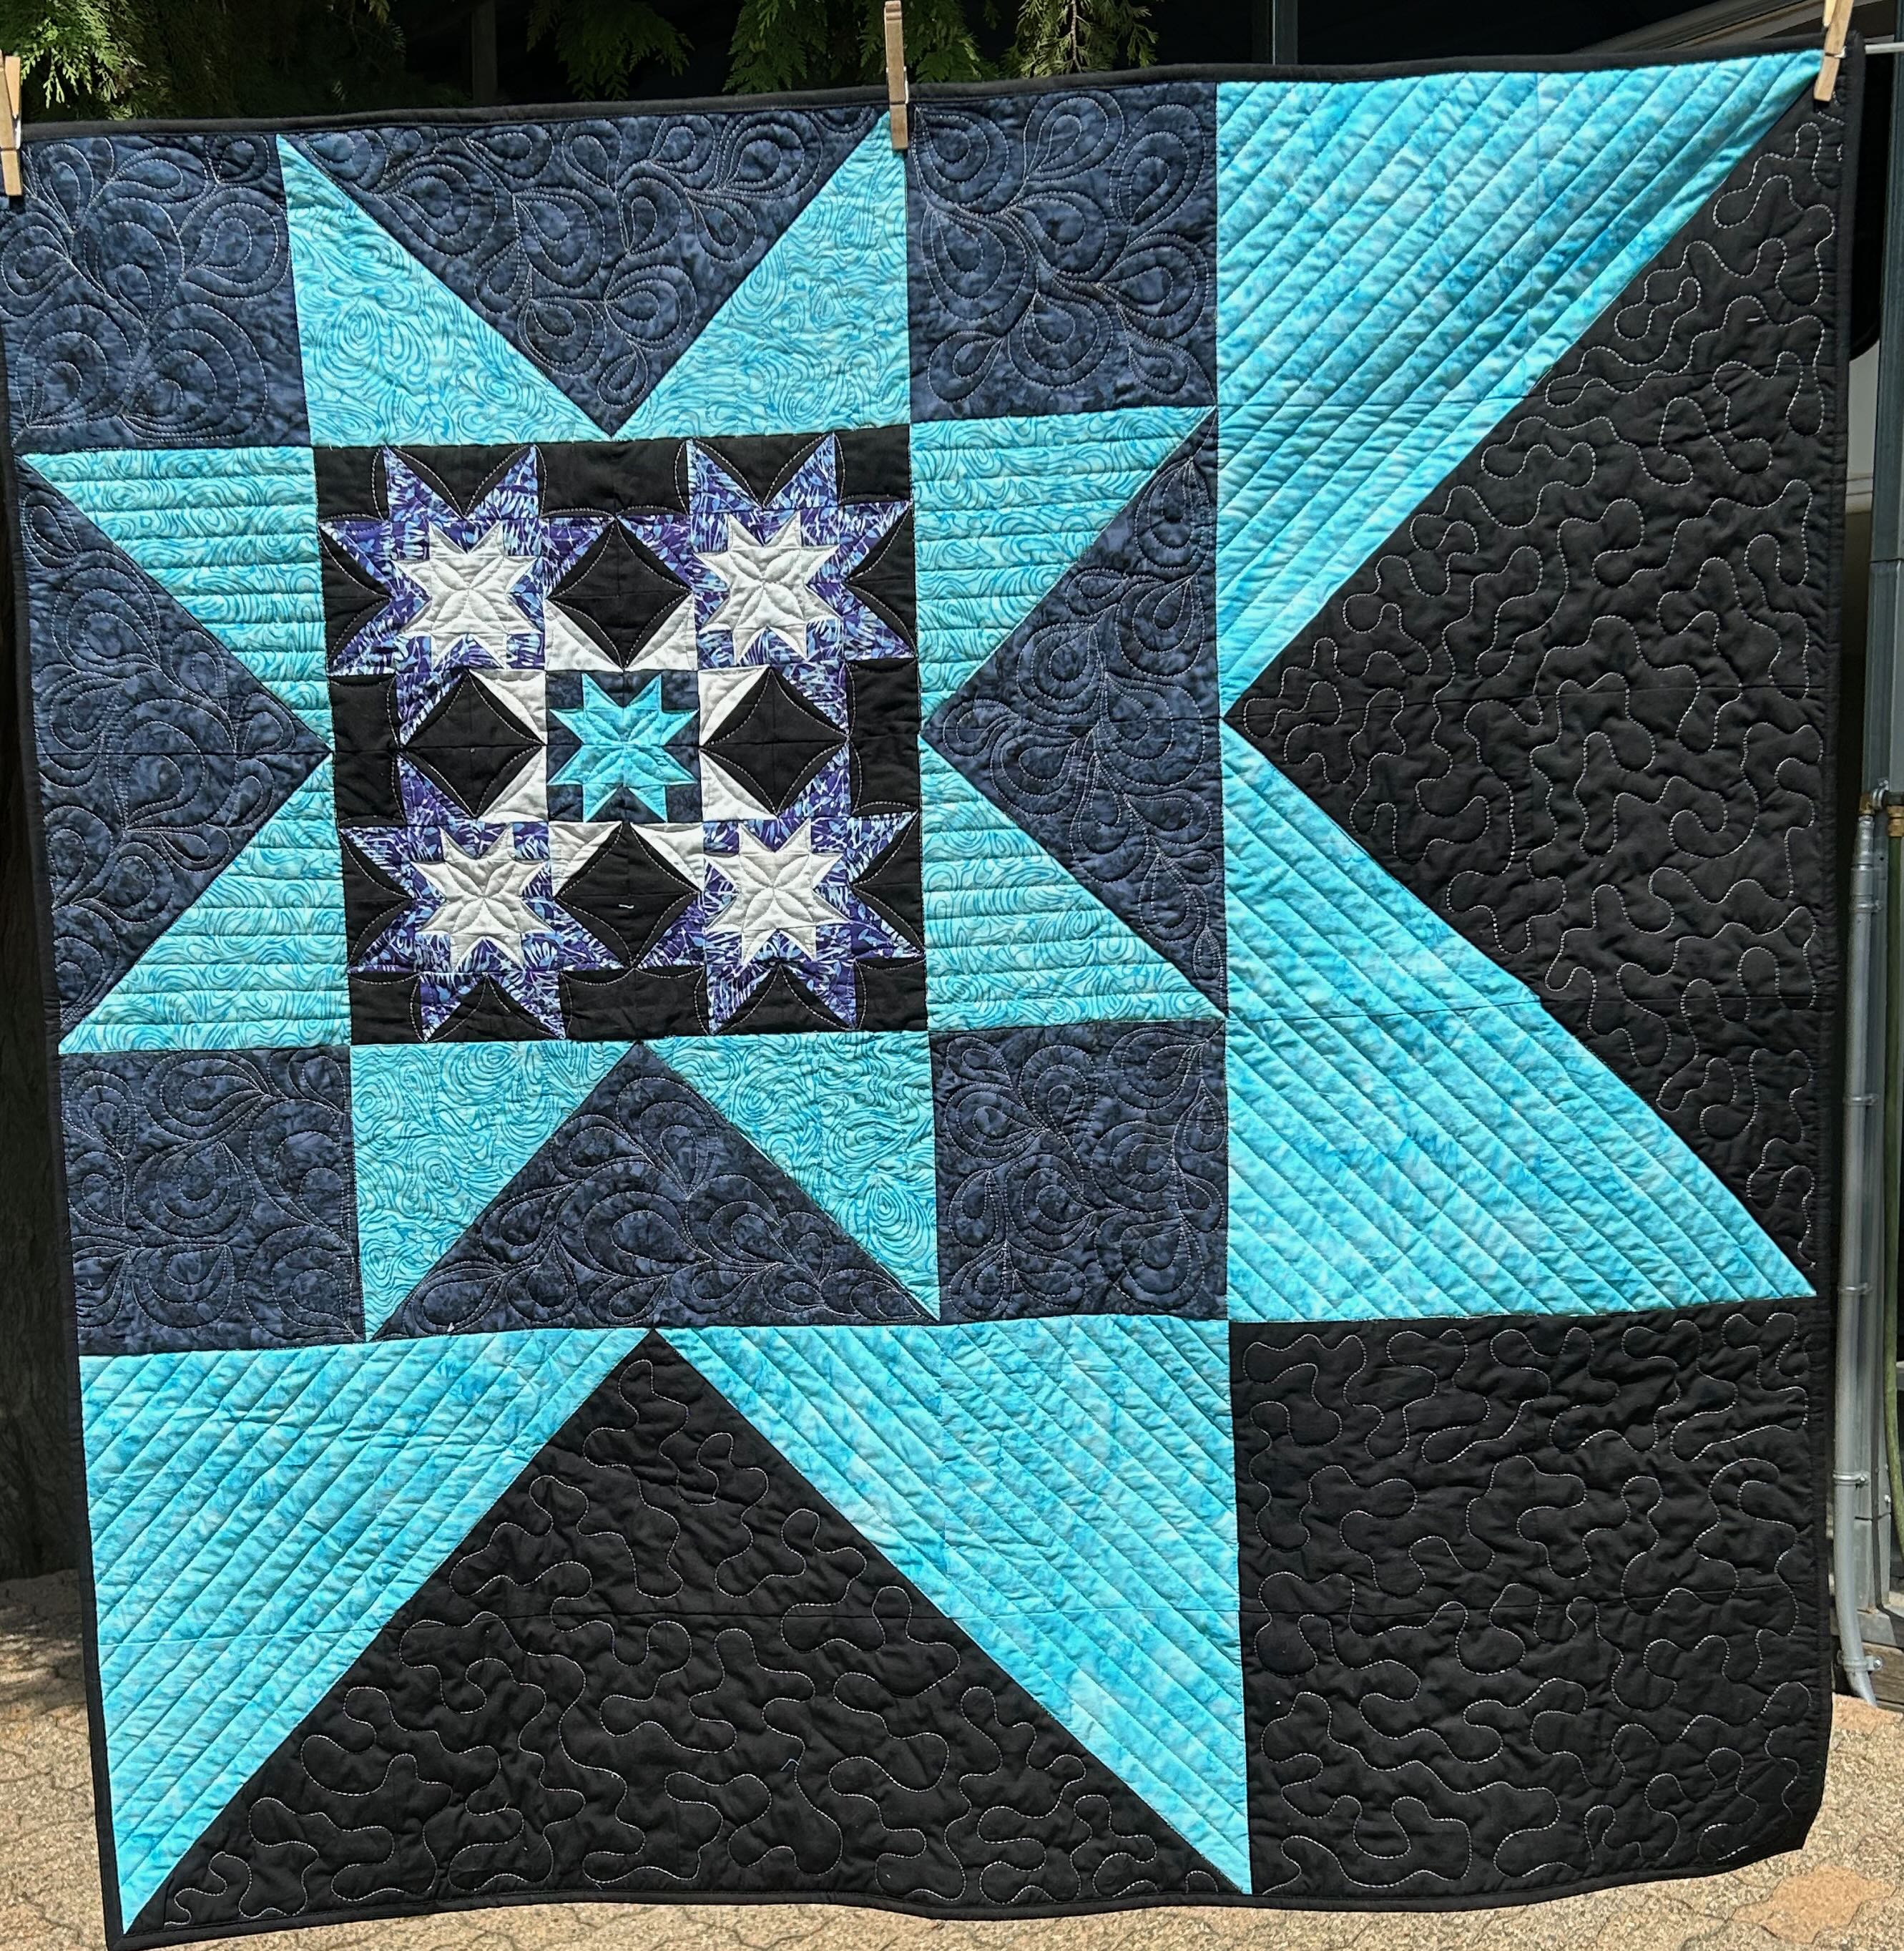
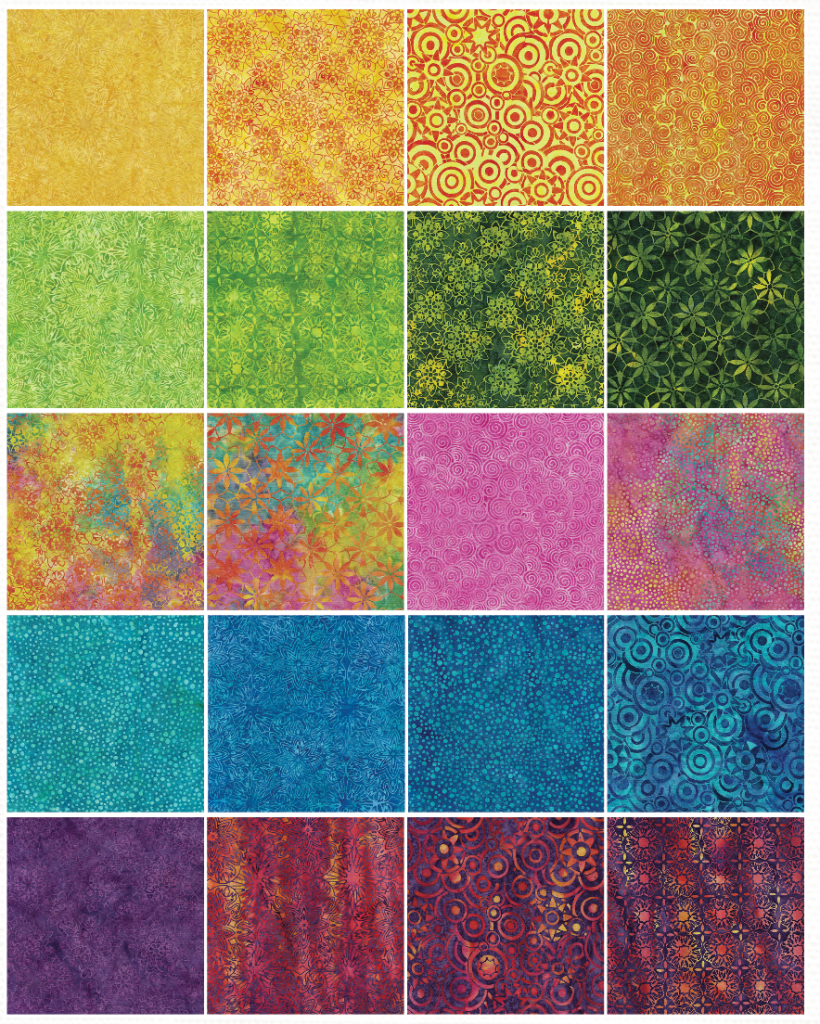
I was sent the beautiful collection called “Radiant Burst” by Jerry Khiev. This fabric will be shipping to stores this month!
Here’s some of the instructions that we were given:
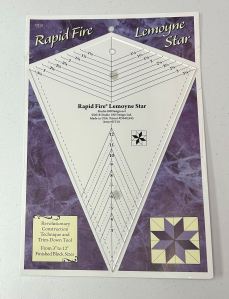
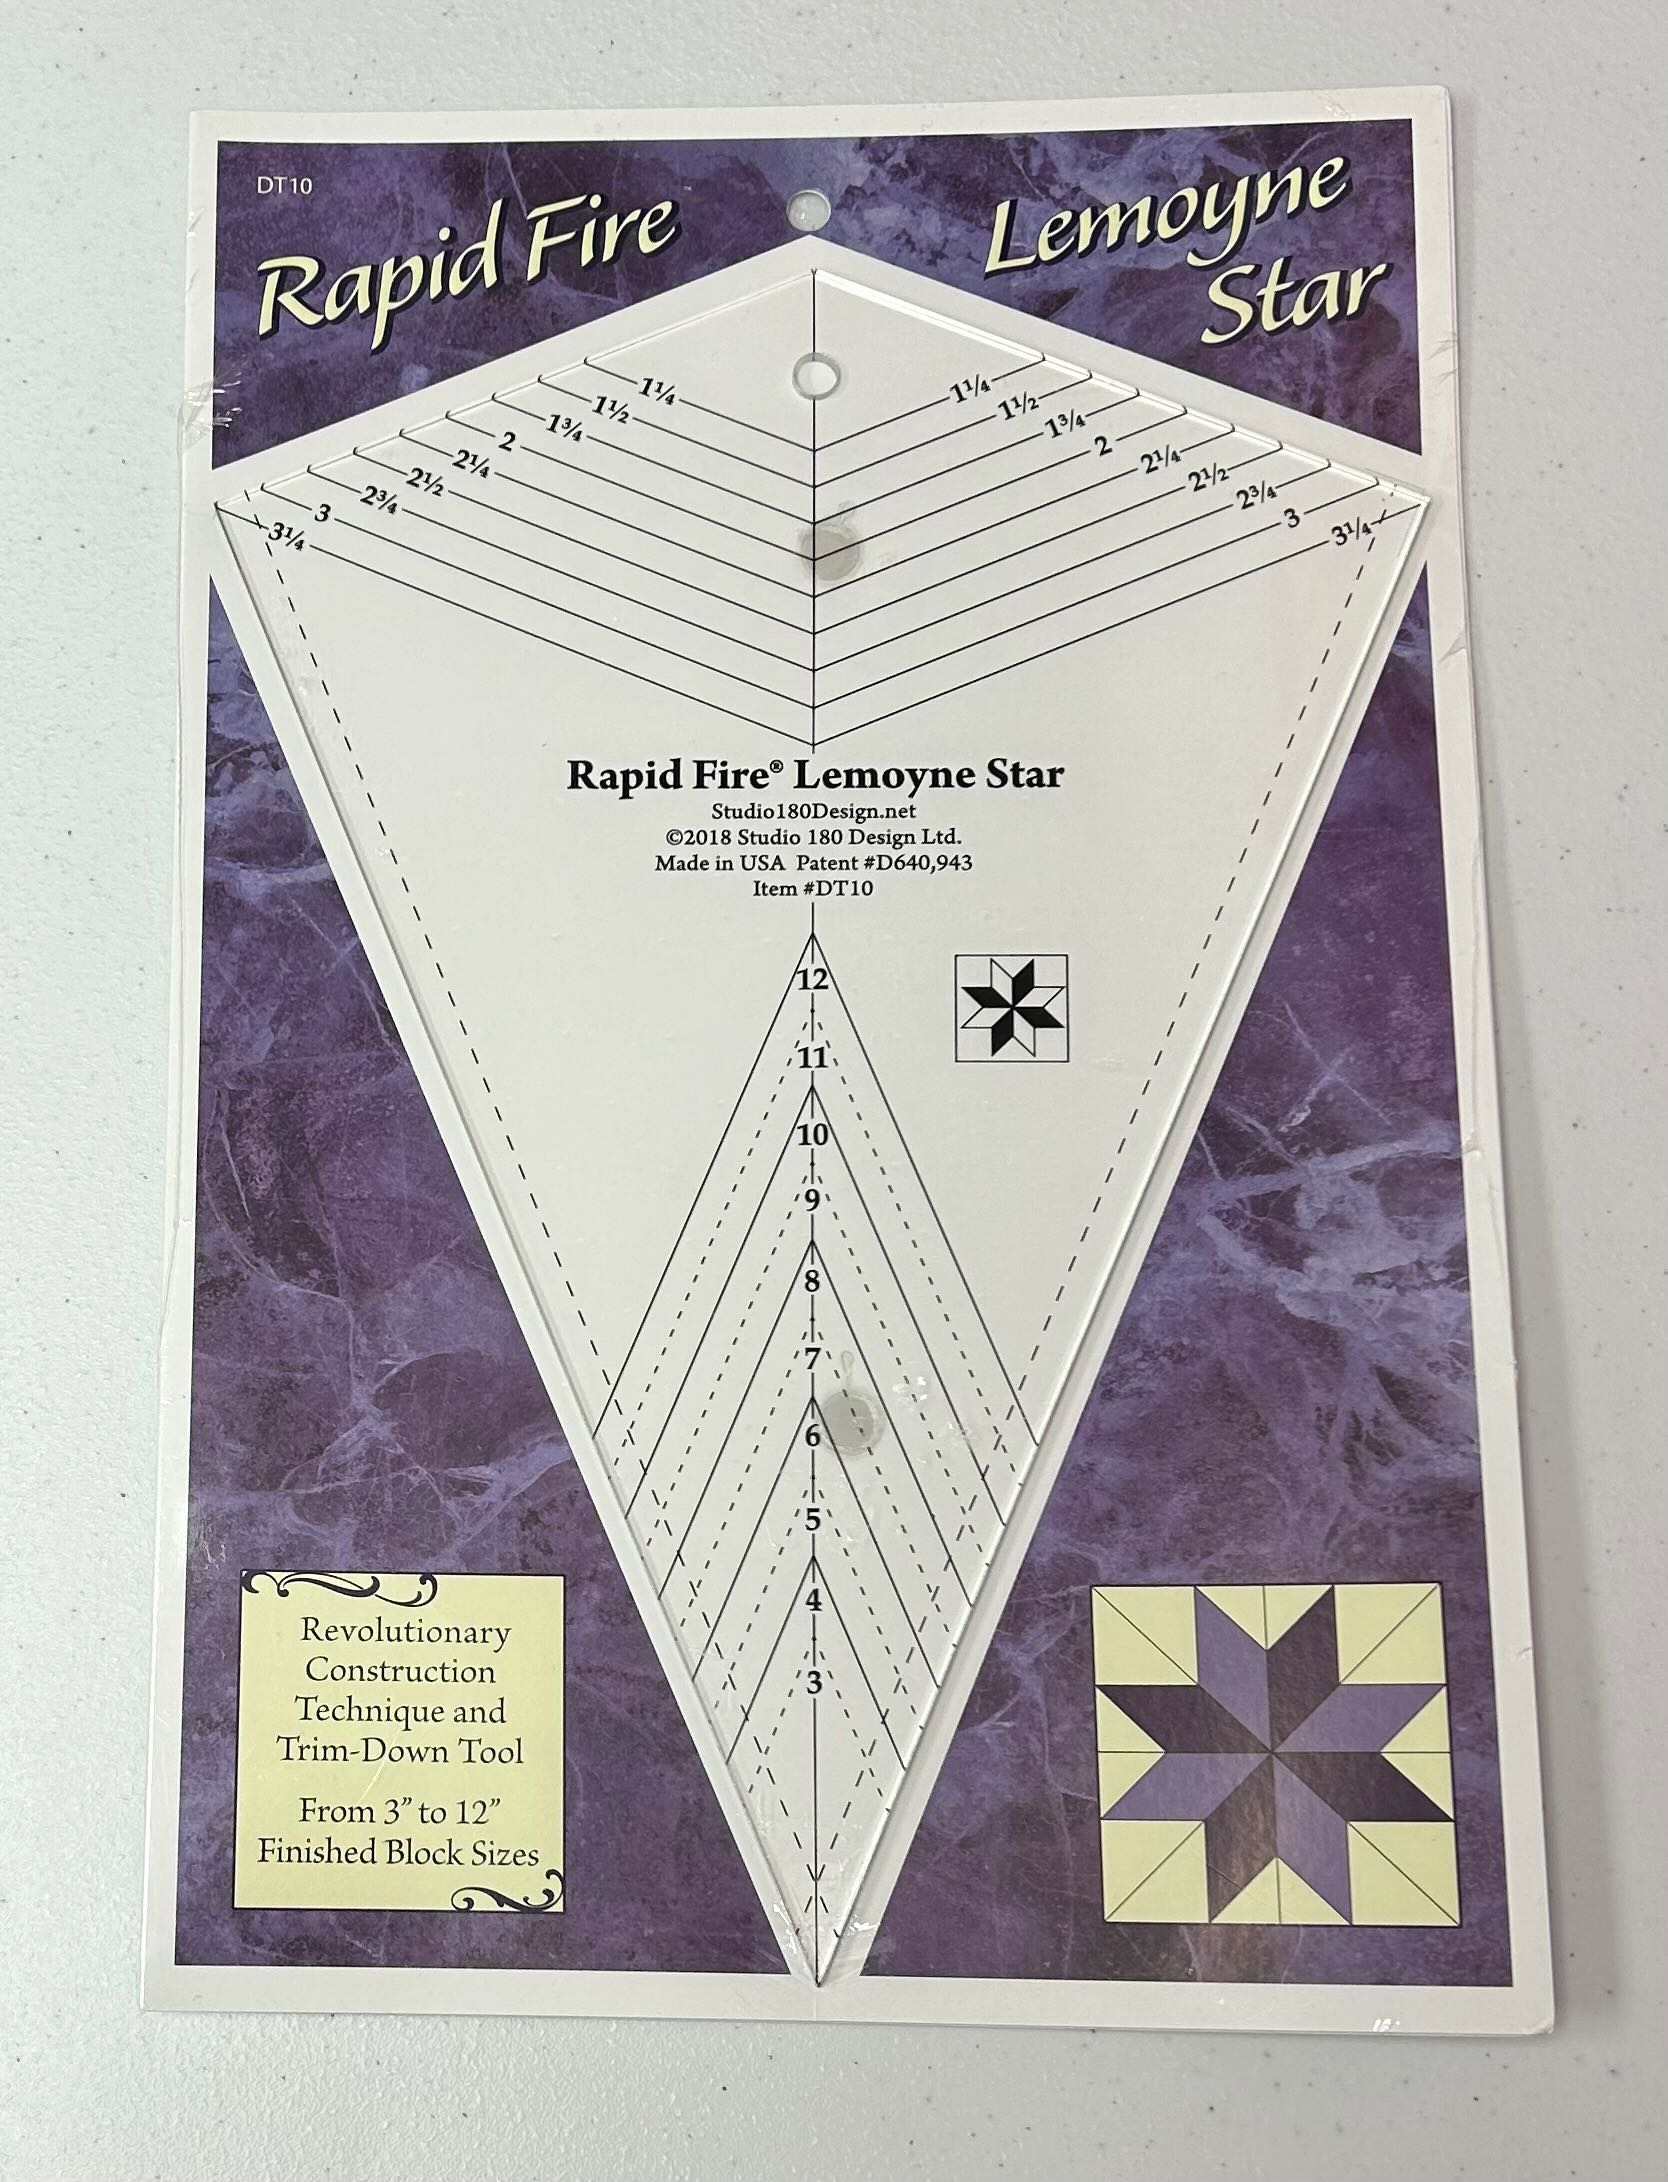
Project Type: Table Runner or Bed Runner Size: Runner Fabric: Must use Fall 2024 fabric bundle (see the season of your collection bundle on the sticker!) Must use as many collection SKUs as possible Pick any size unit that you want to work with Must use at least 12 units total, made with the Studio 180 Design tool you received. (If you received a Rapid Fire® Lemoyne Star or Wedge Star tool you only need to make at least 3 full blocks for your project)
I received the Rapid Fire® Lemoyne Star tool to use with my Radiant Burst collection! Studio 180 has free Downloads on how to use the tools and links to instructional videos where Deb Tucker explains the process very clearly!! By following the instructions (either by video or paper) it makes the process of using the tools easy. Please note: I did say EASY, not fast and quick!
Since I am not a precision quilter, I’m always amazed at how great the units and blocks turn out when I use a Studio 180 tool!
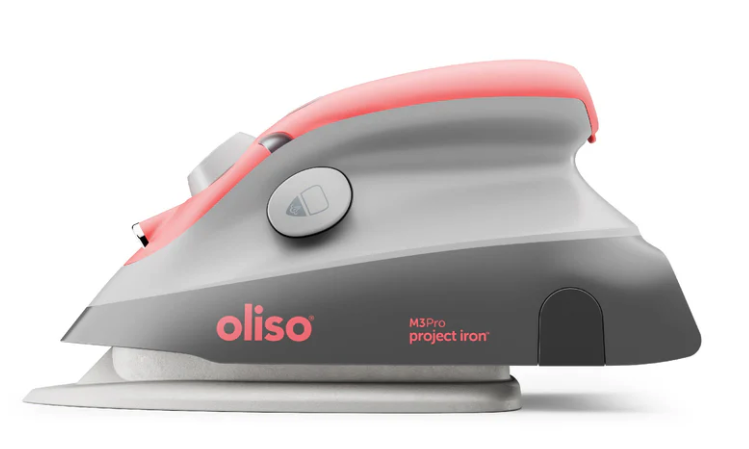
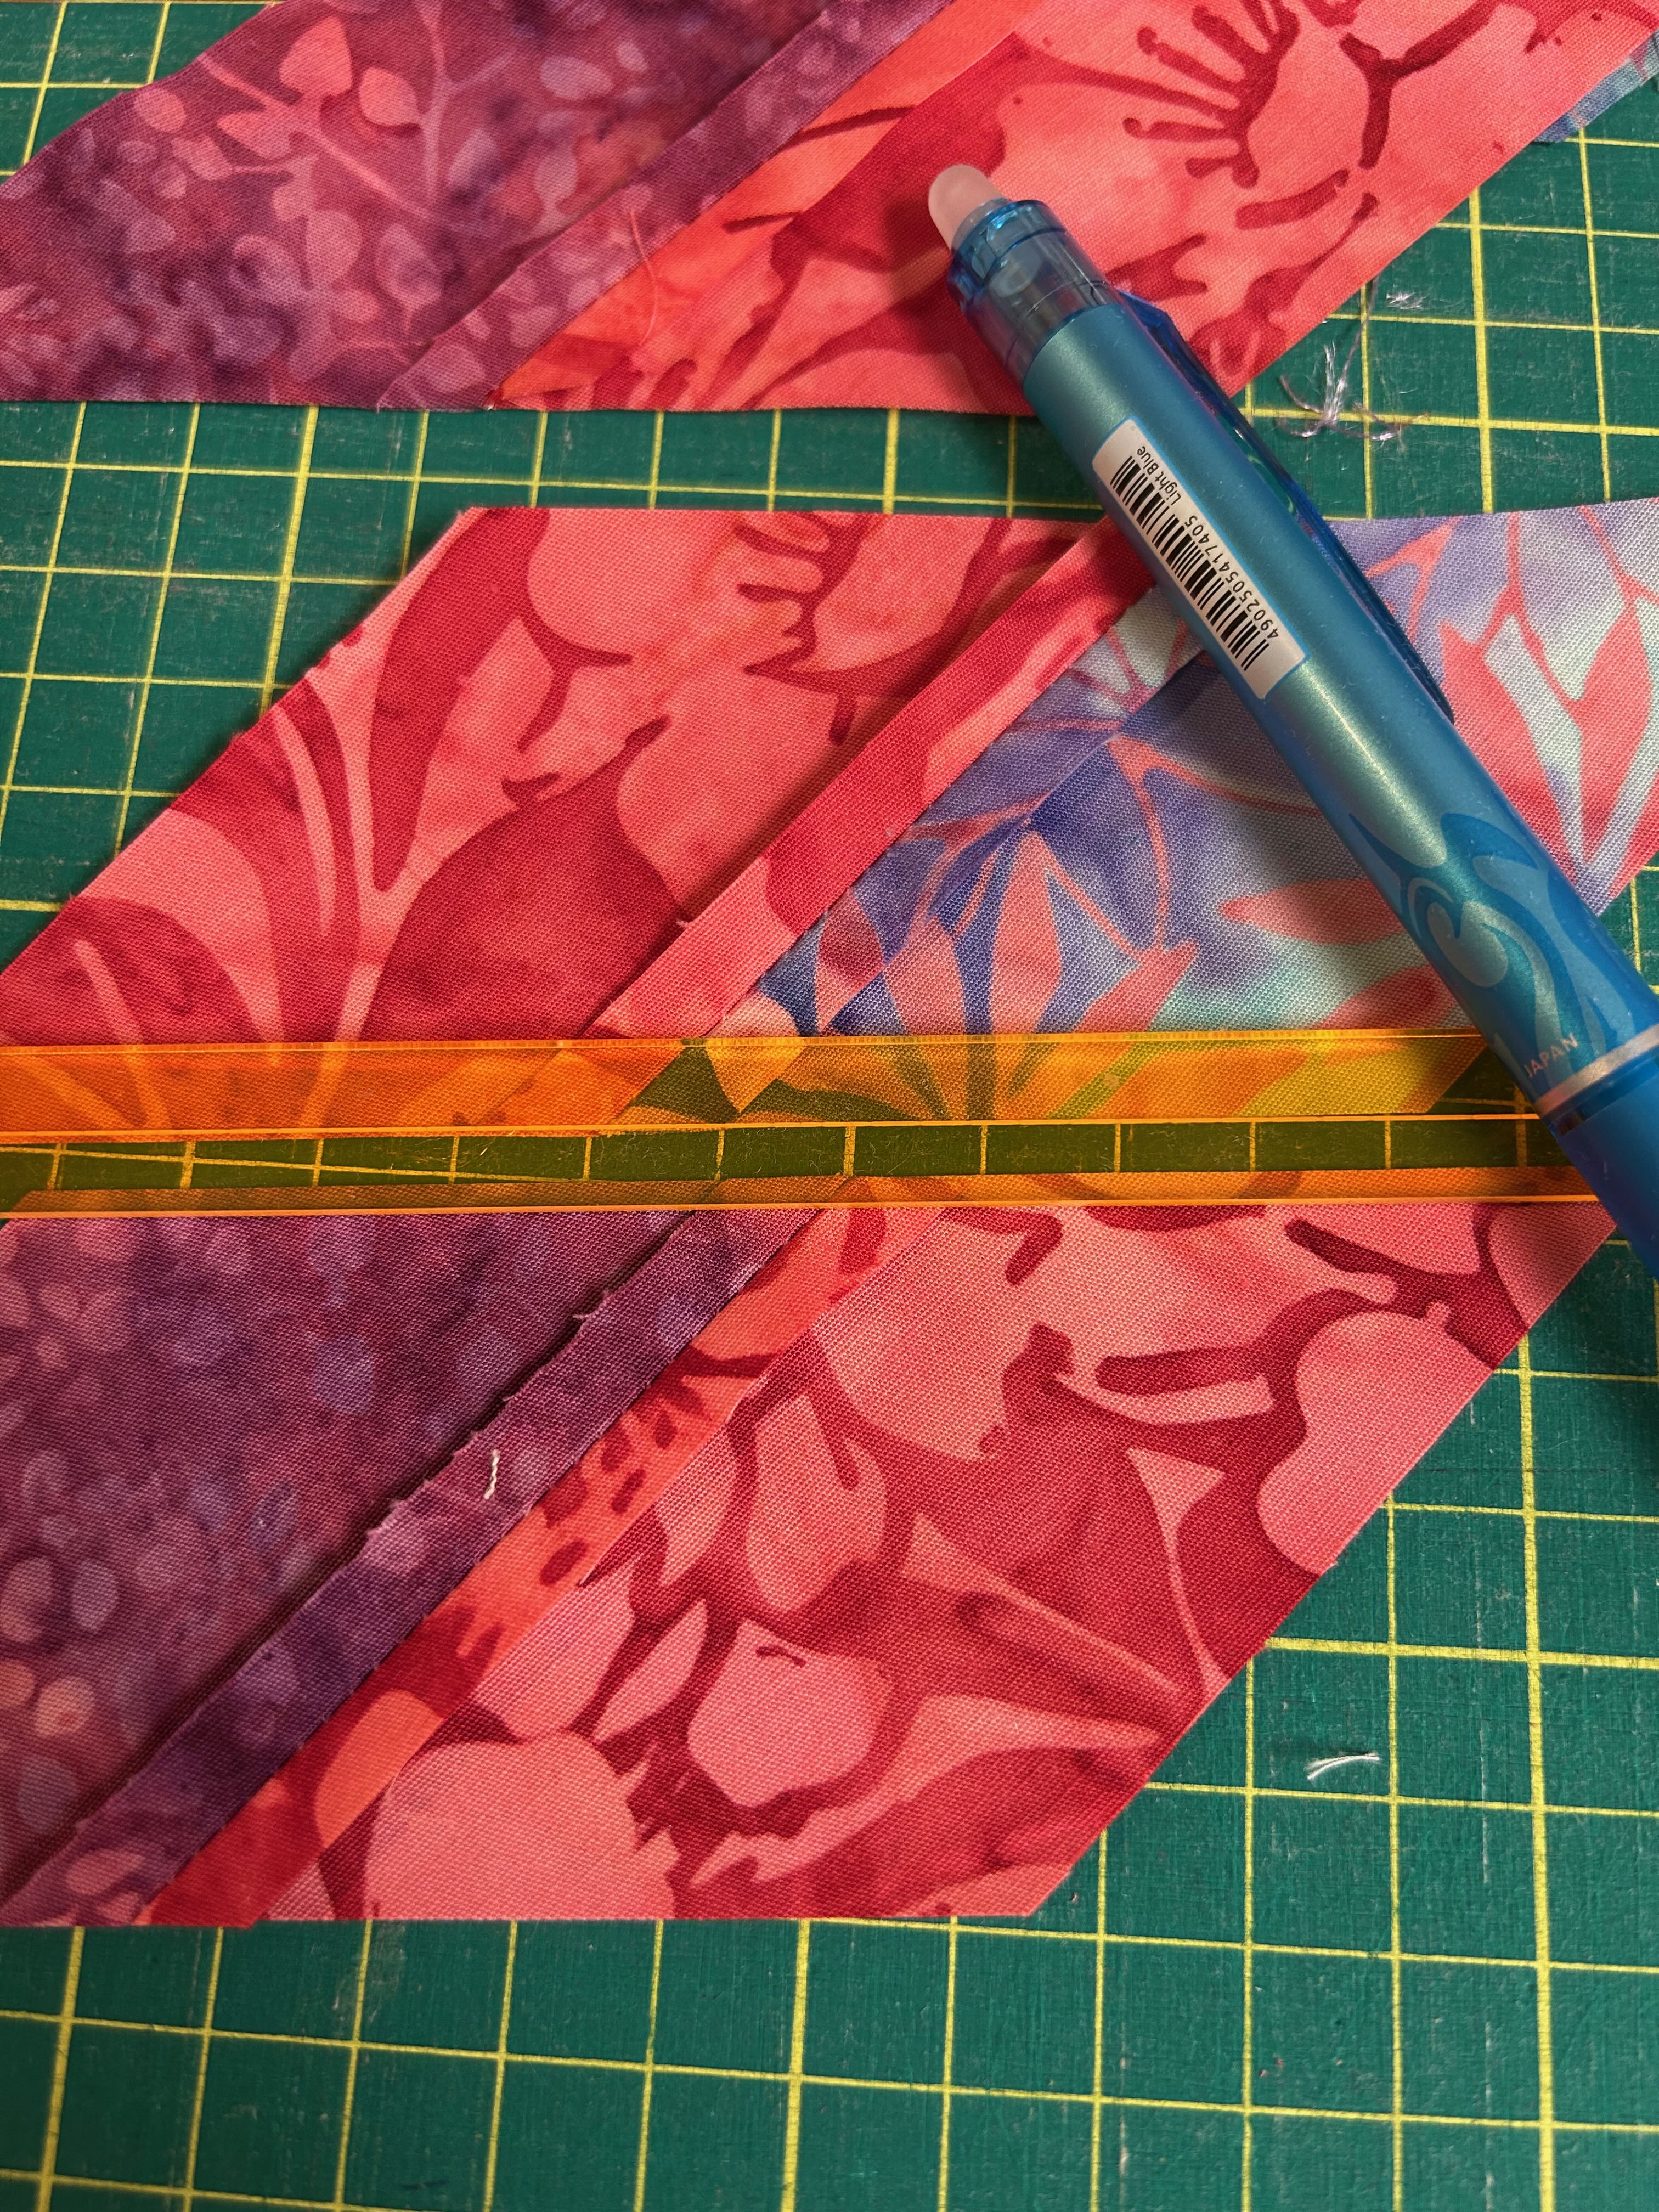
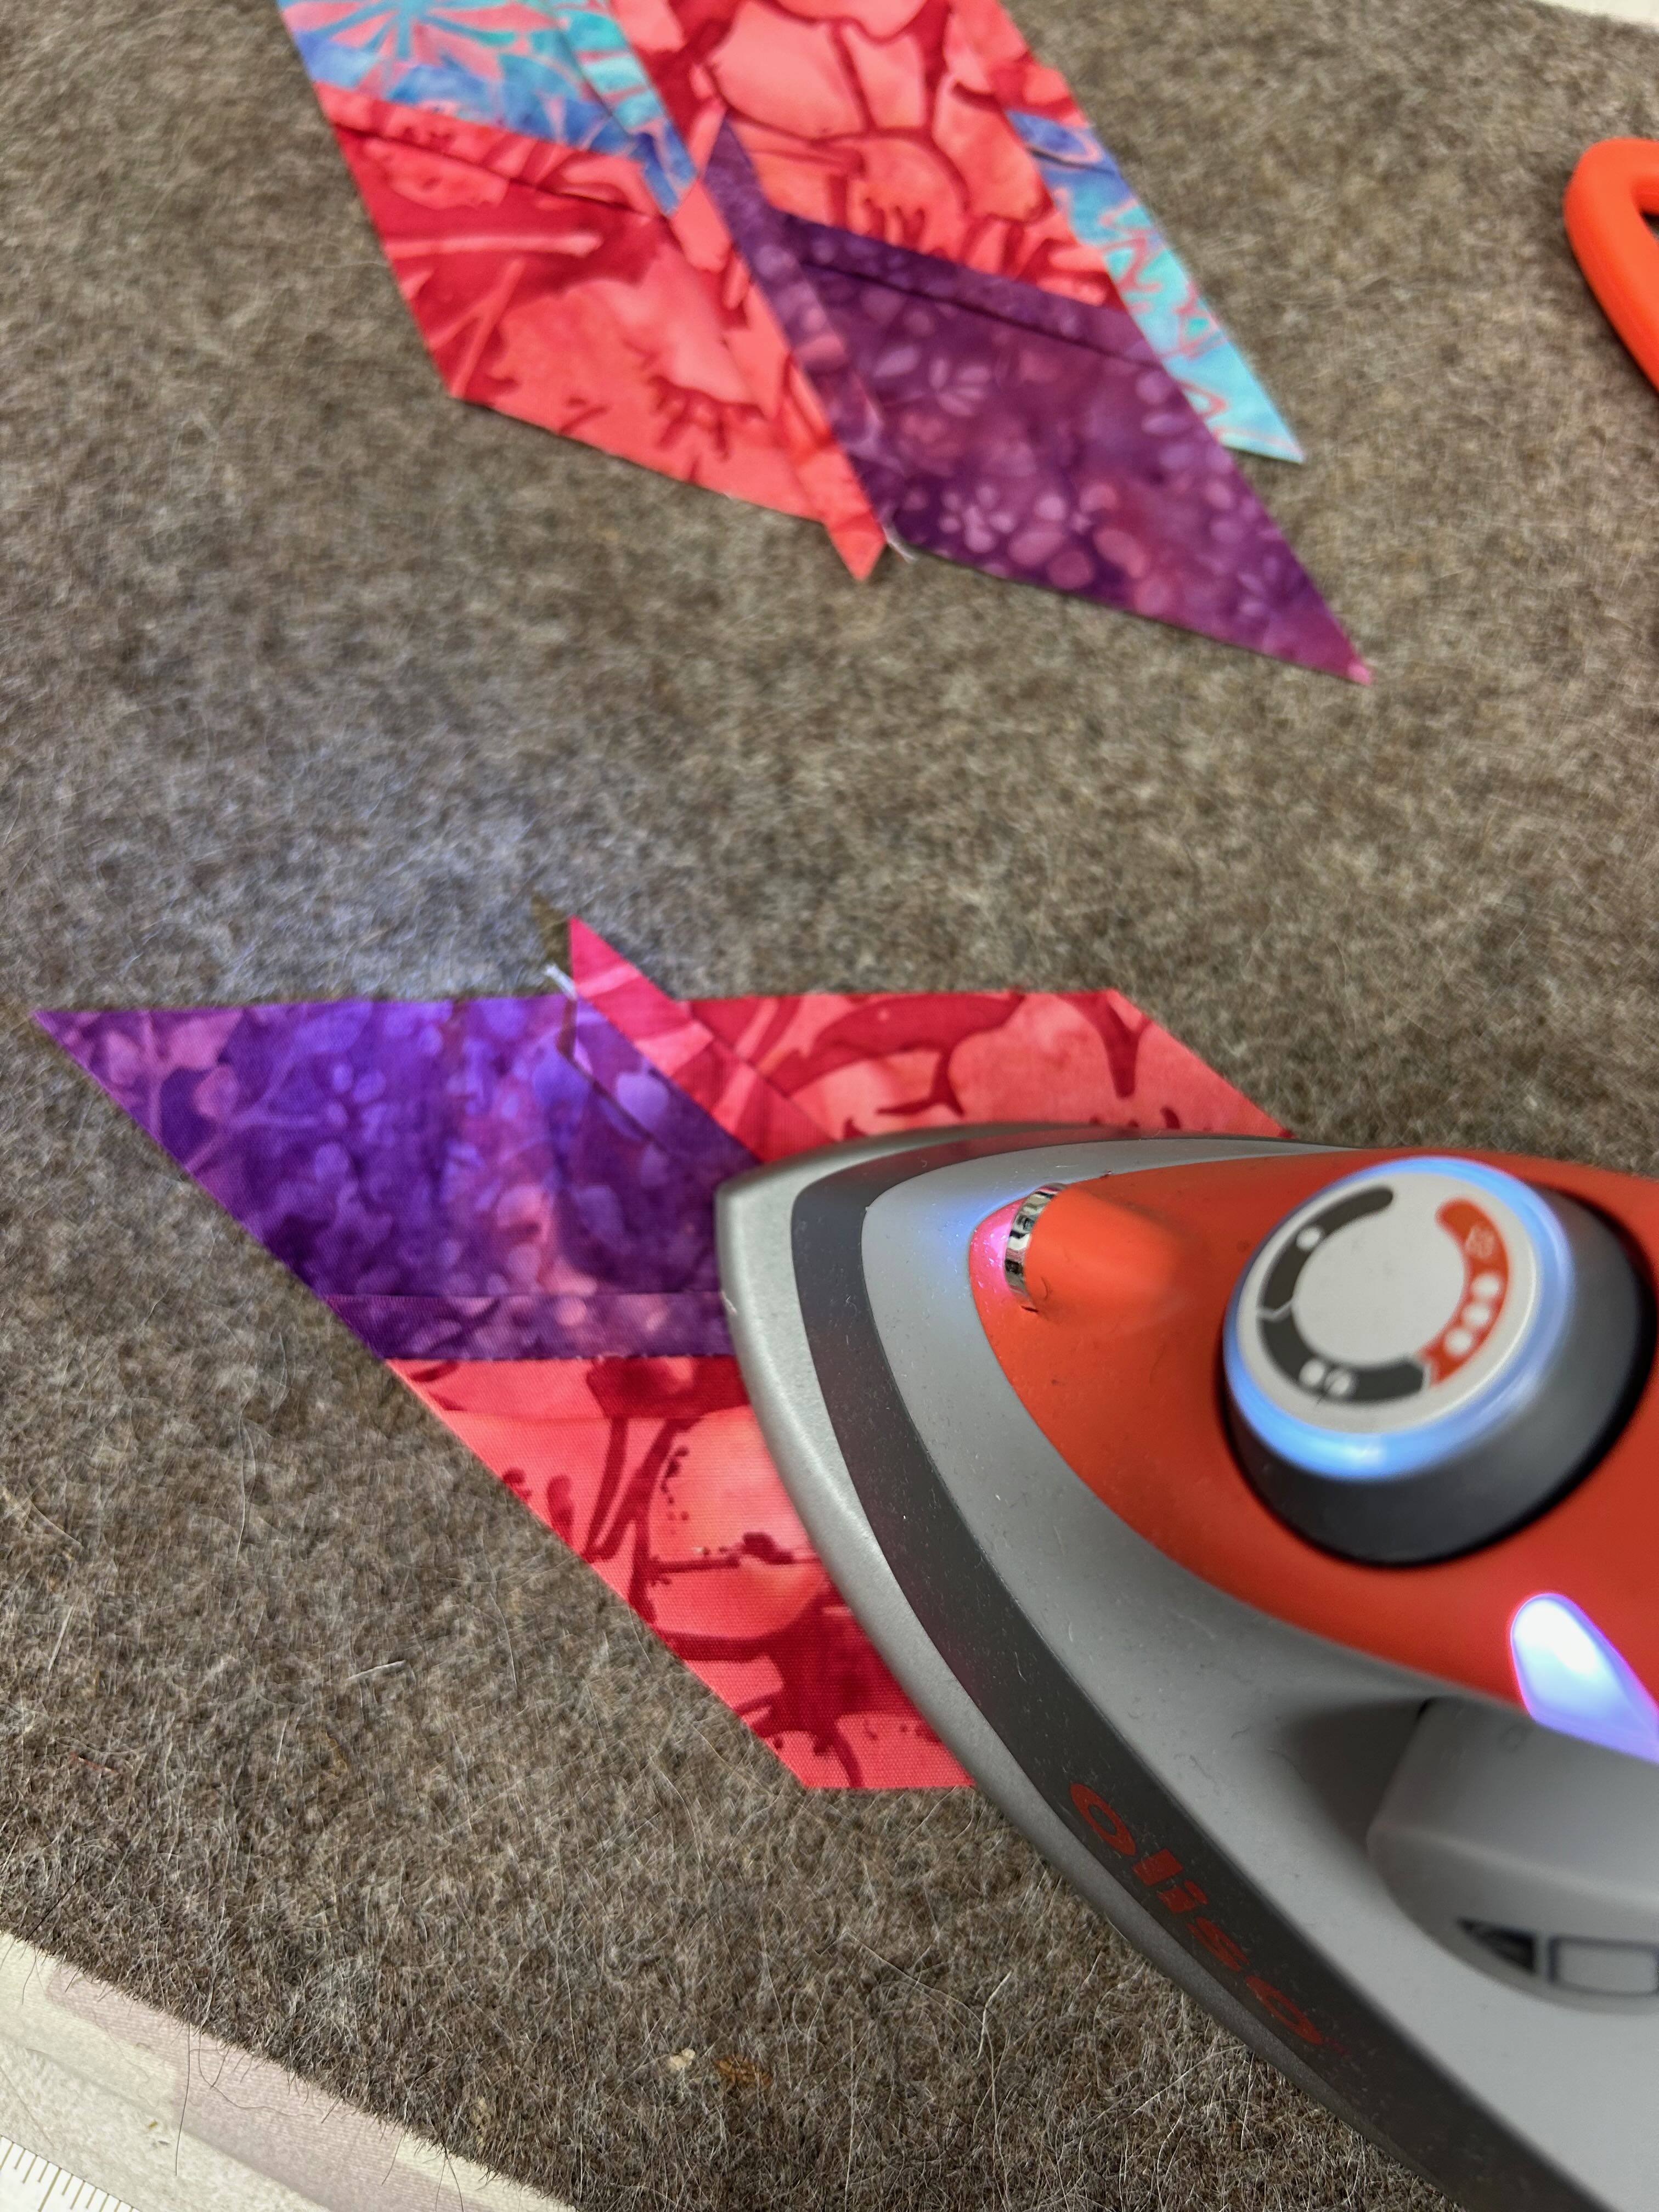
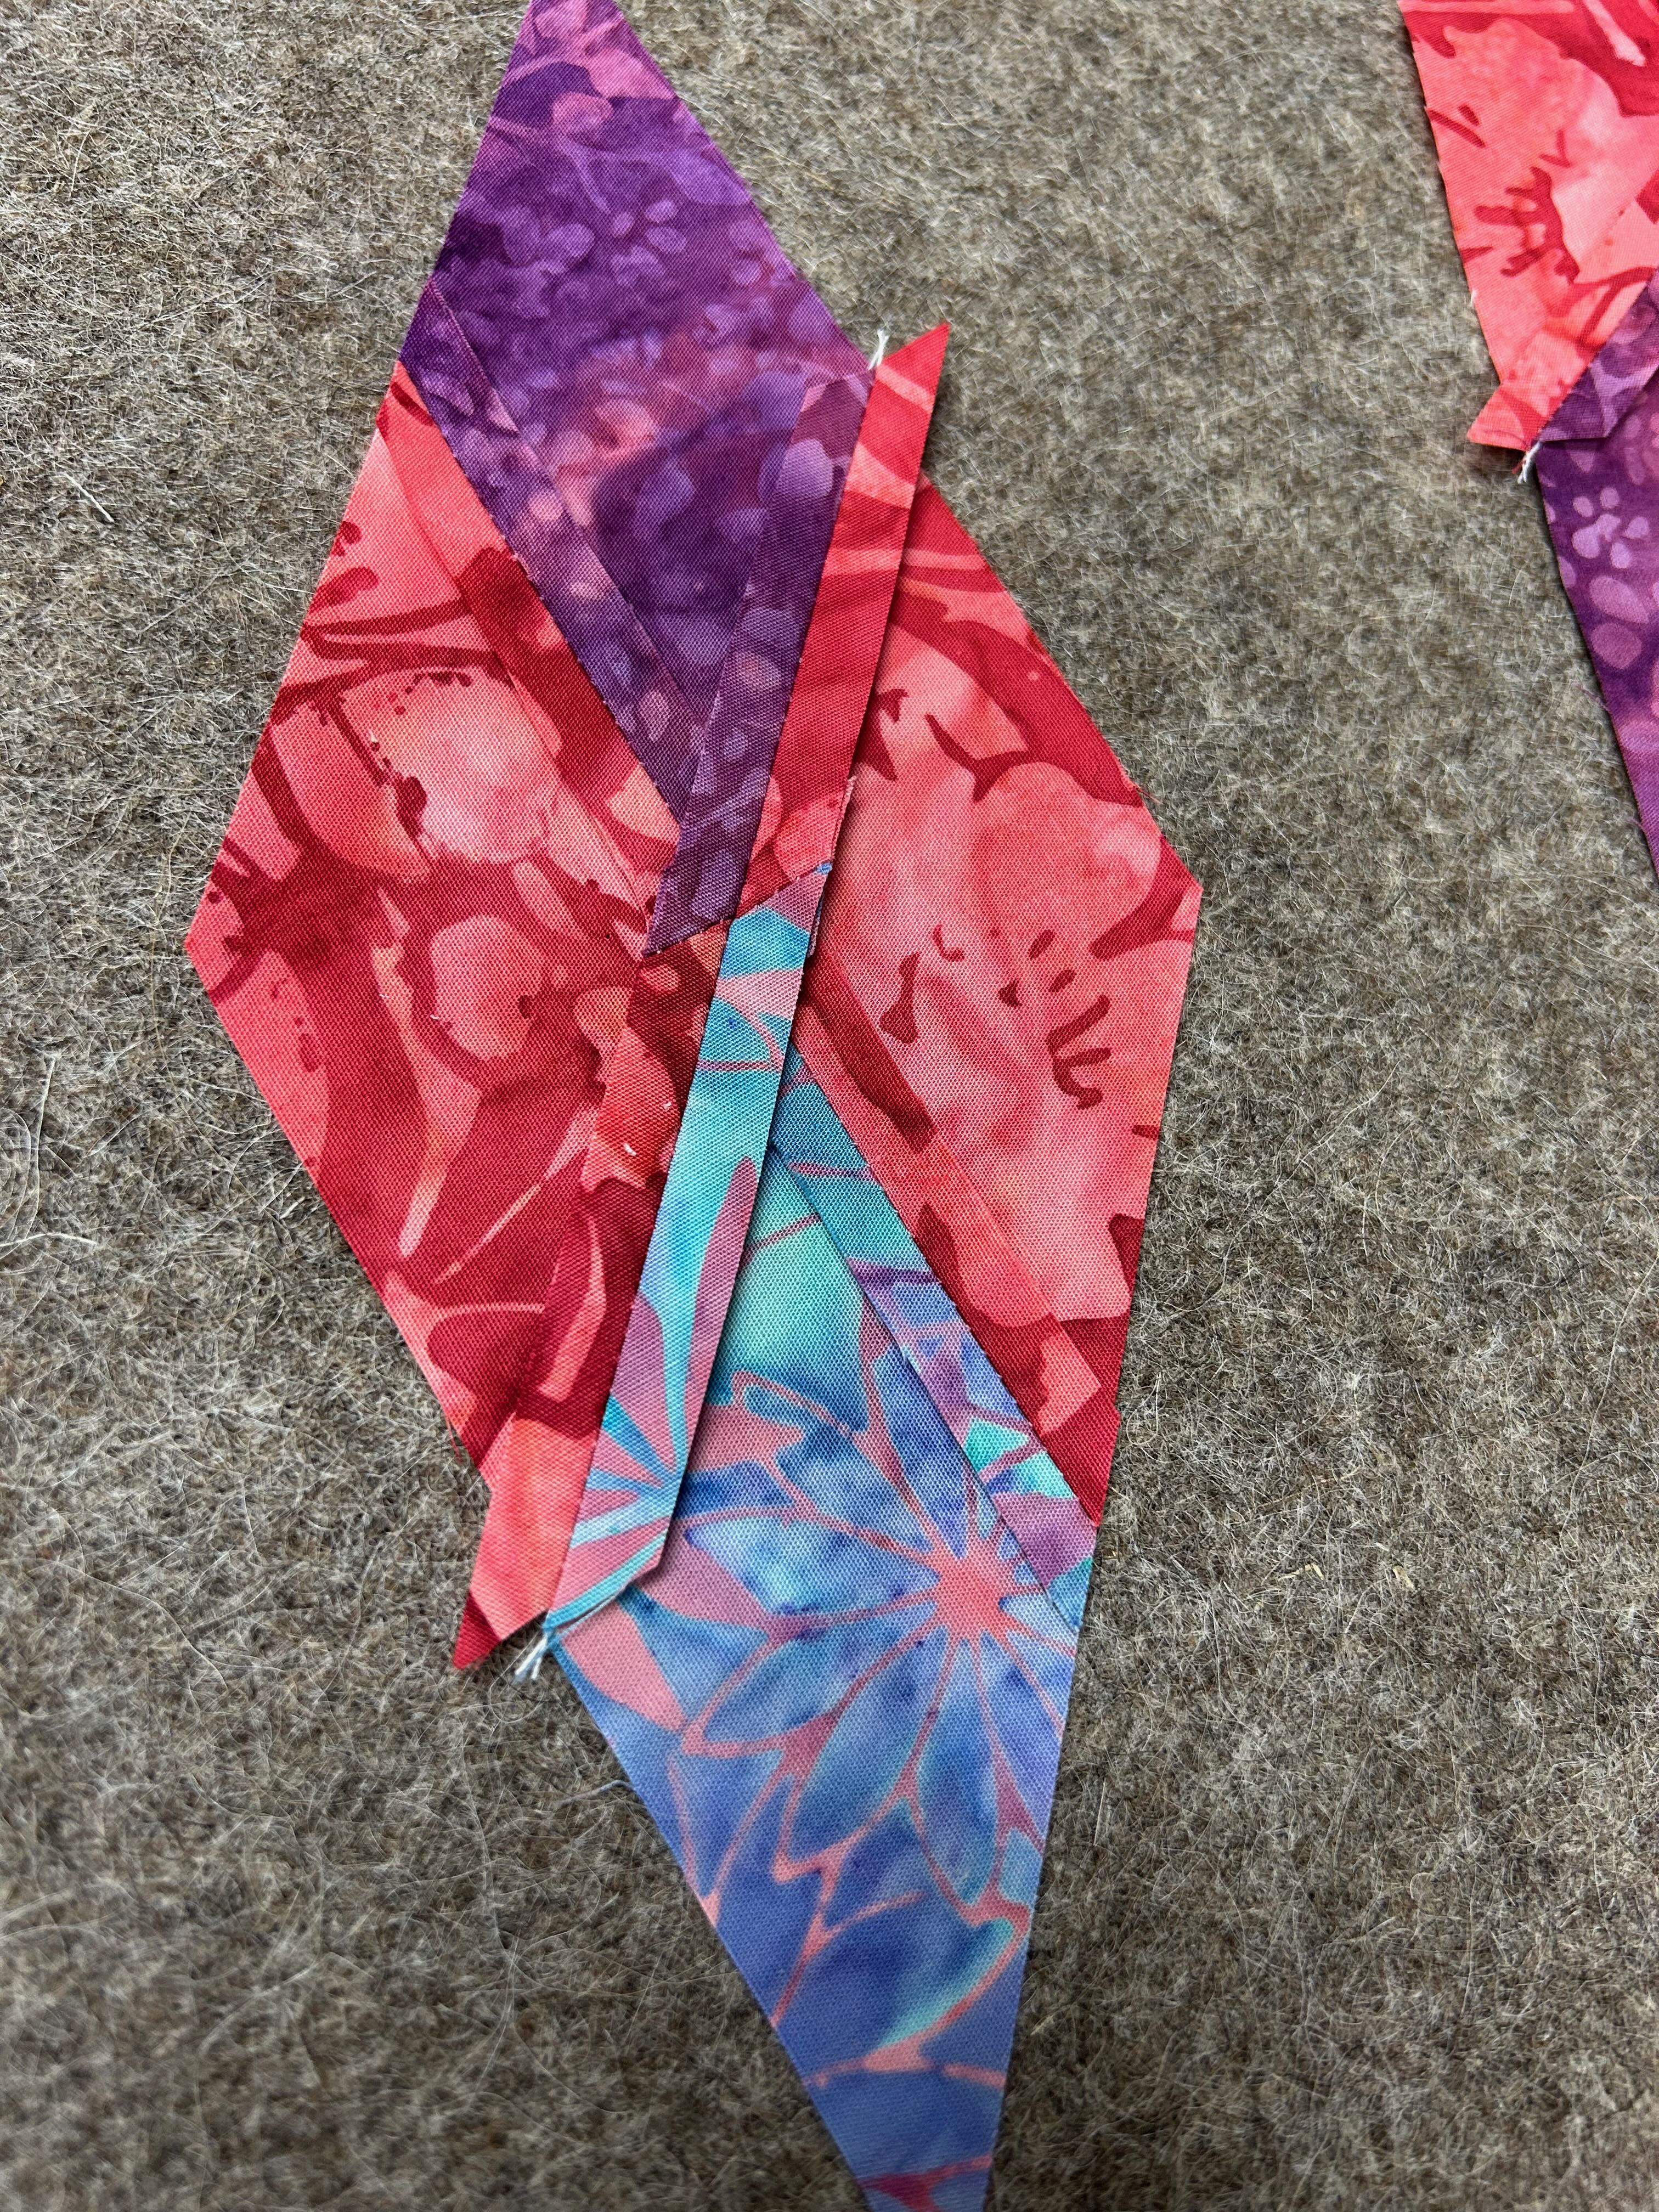
Here are pictures of the components of the Lemoyne Blazing Star in progress (a technique sheet … you can find it HERE.) The first picture shows the Studio 180 Magic Wand being used to mark the 1/4” for accurate piecing. I used my wonderful Oliso M3Pro iron. I LOVE this iron!! The last picture shows the finished component prior to trimming and adding the background pieces.
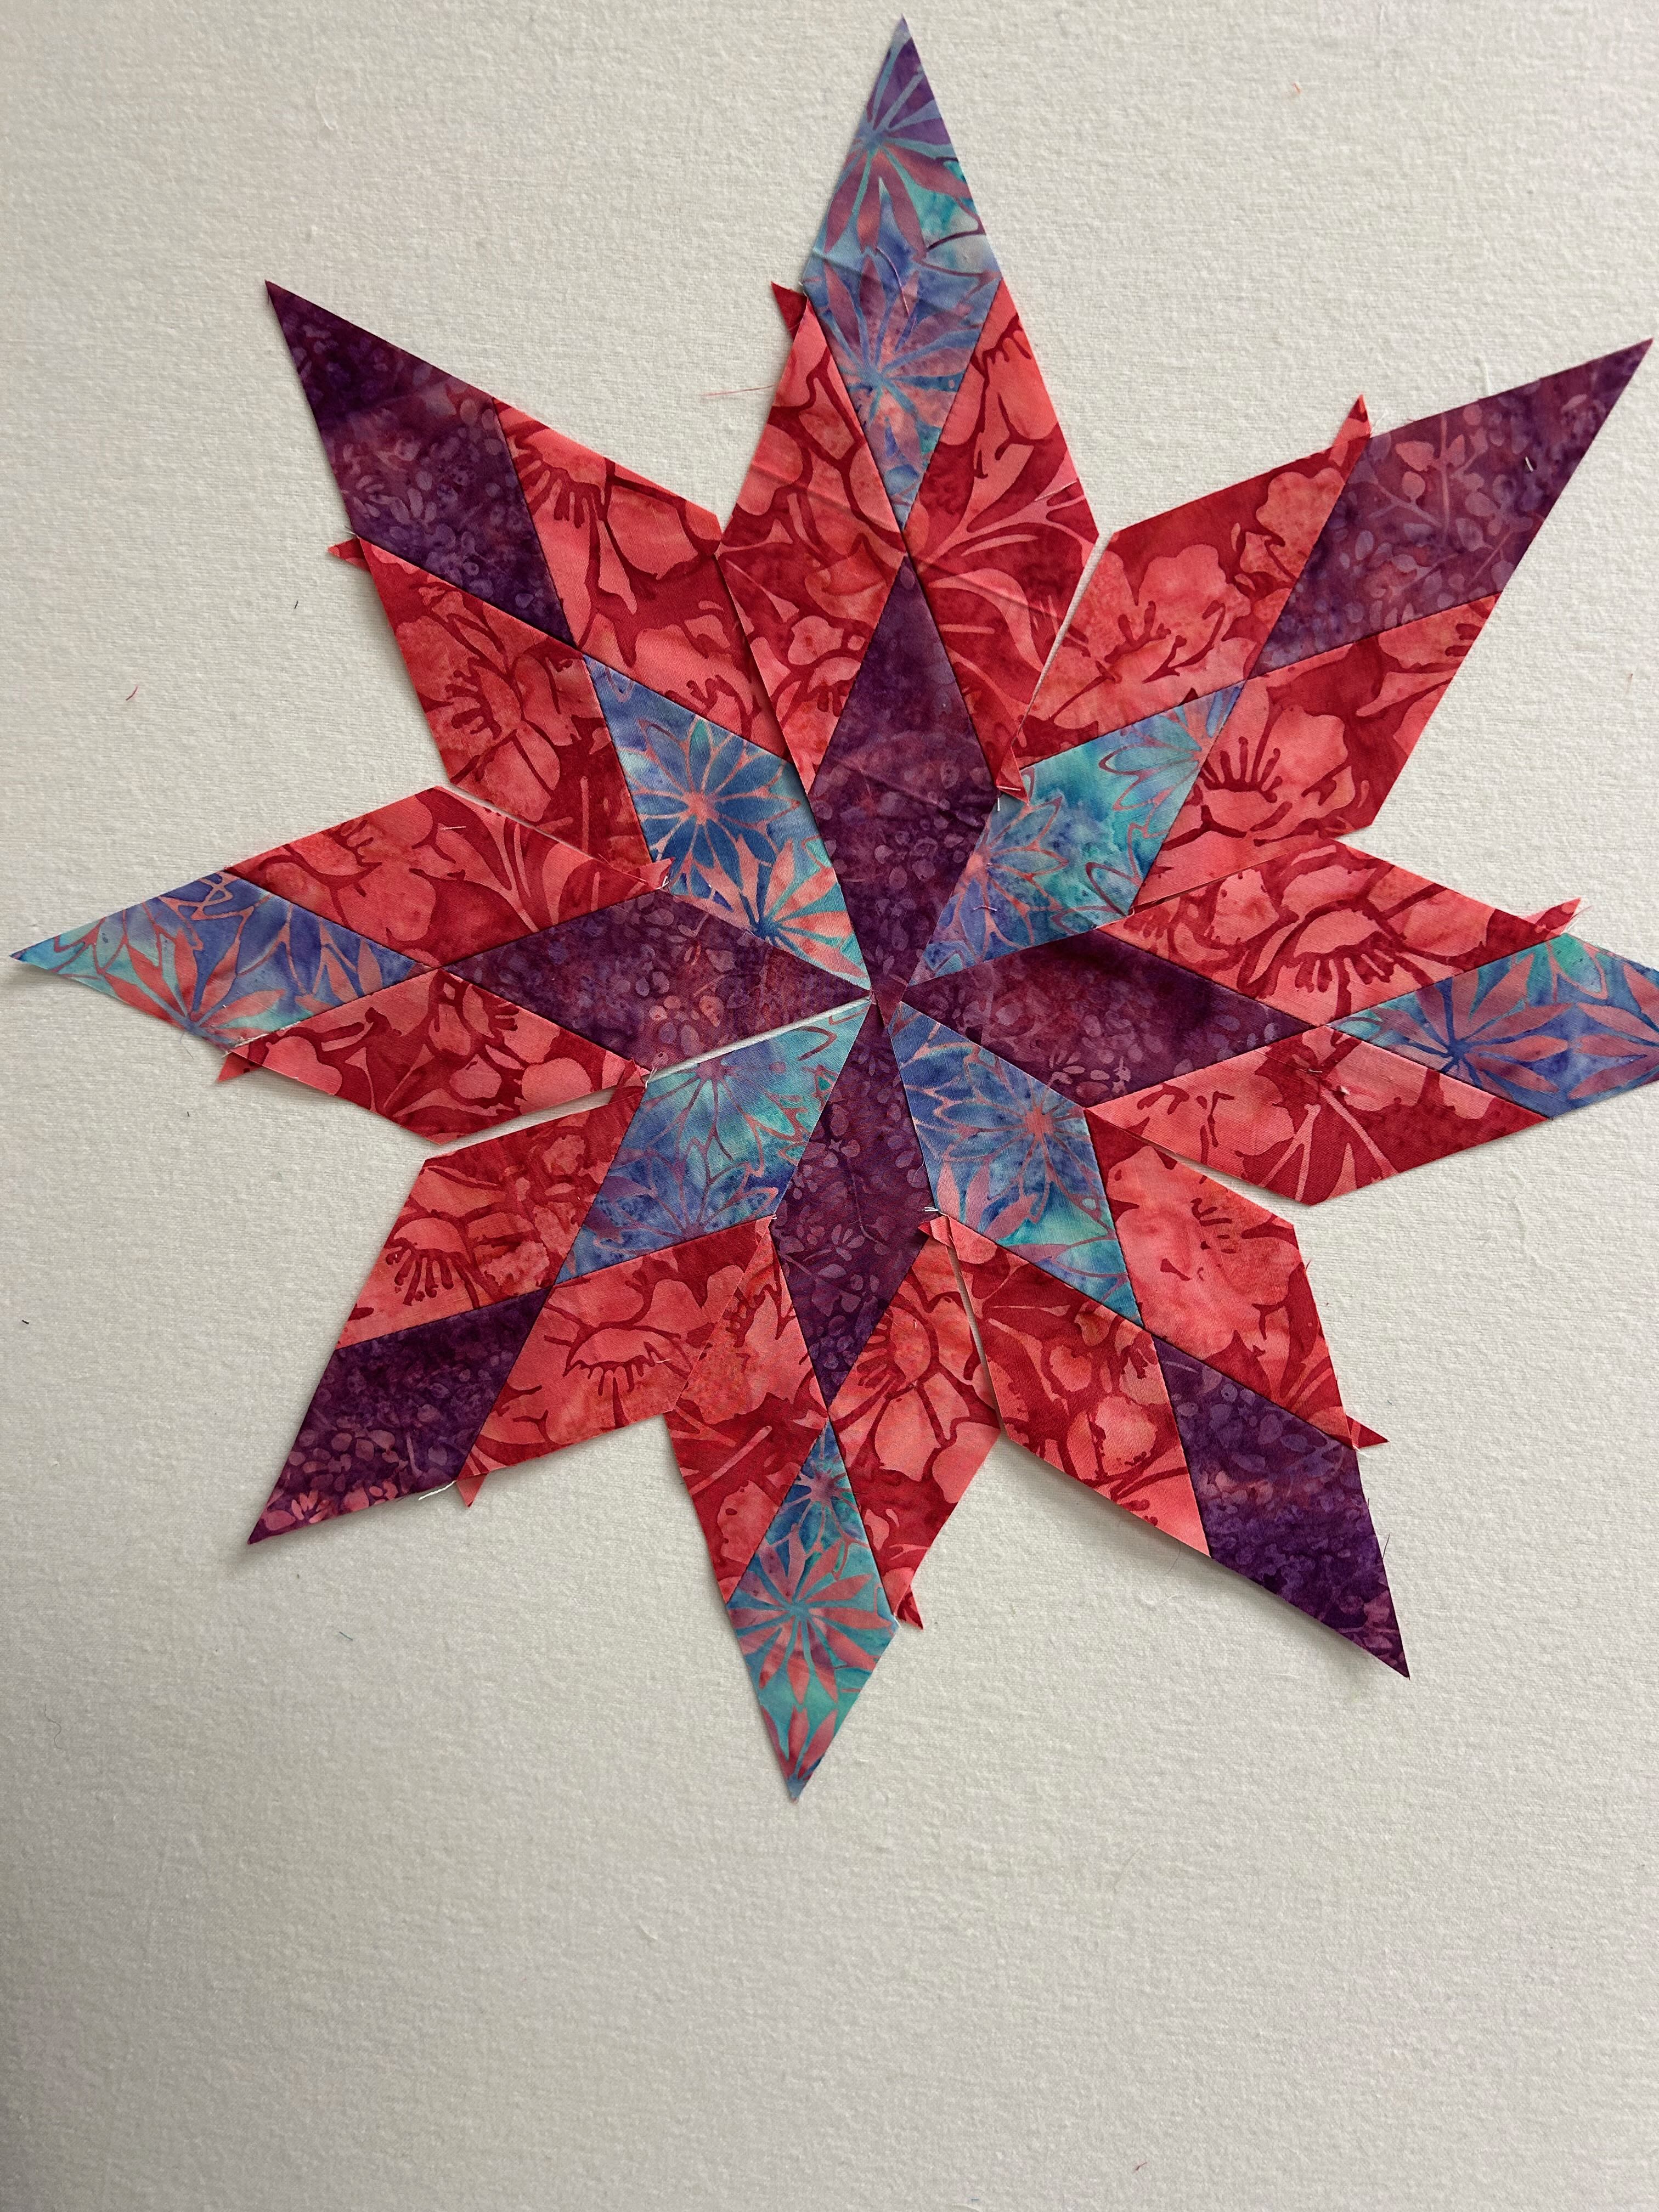
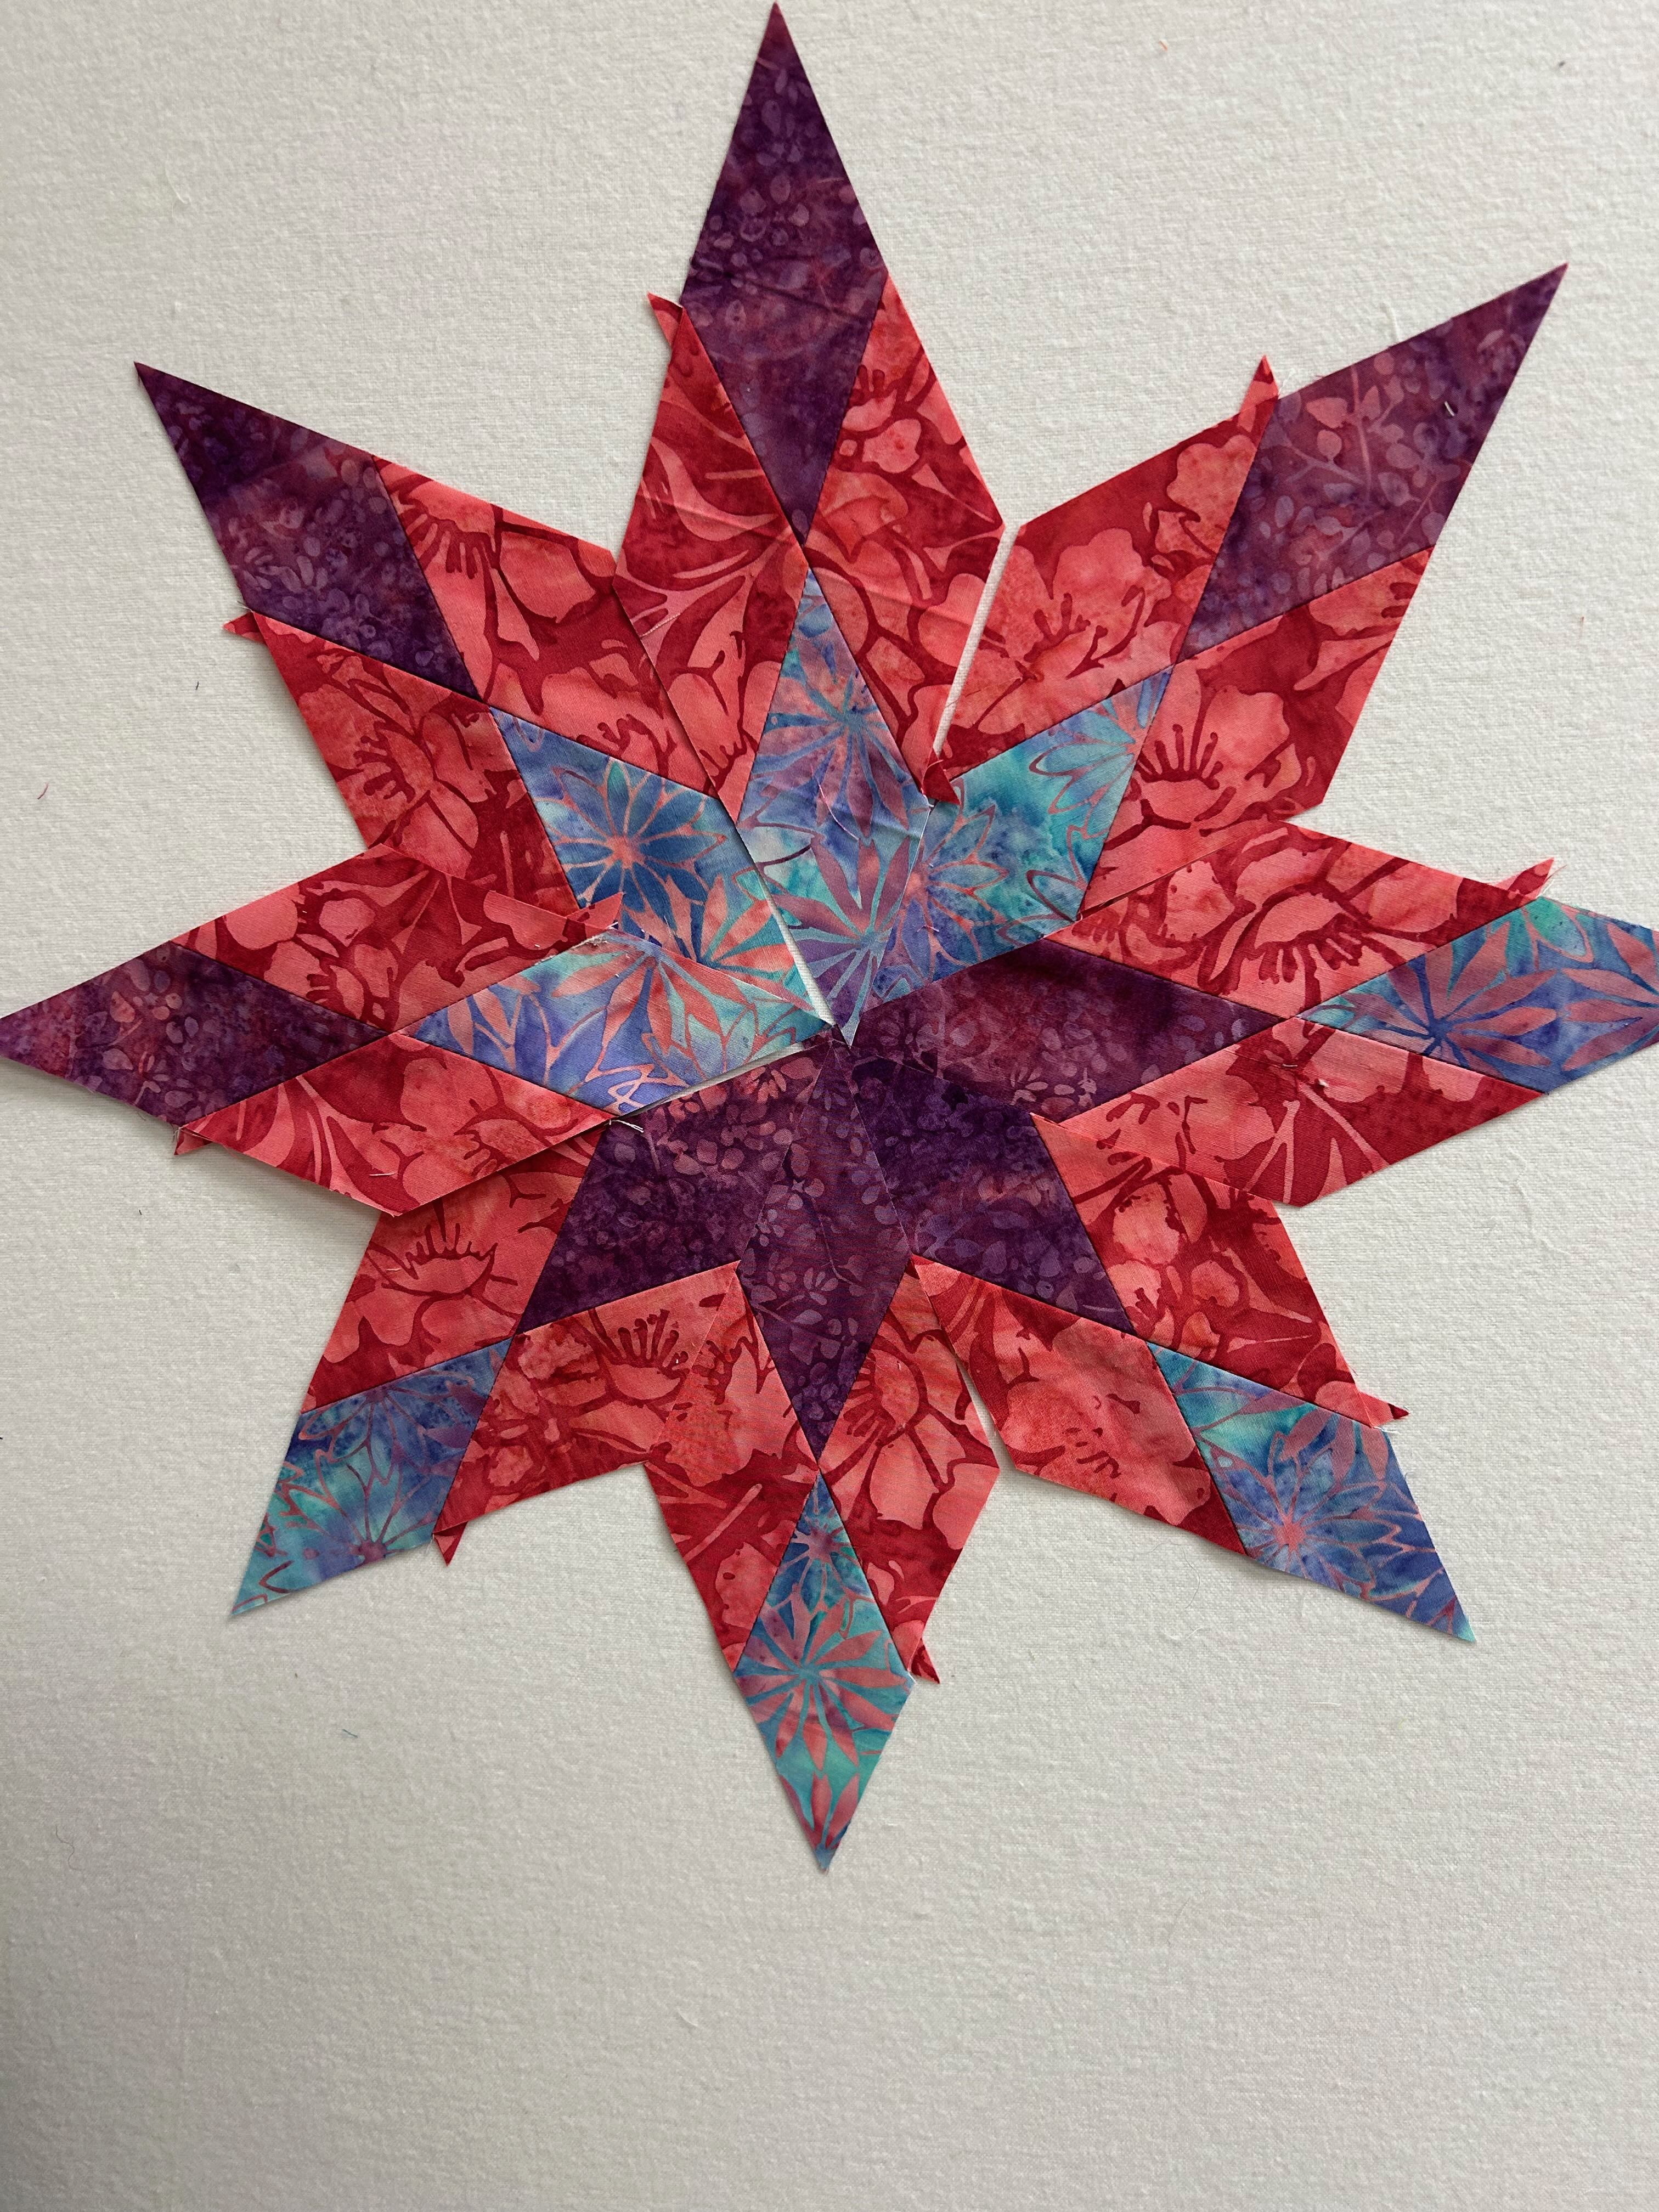
I made 8 basic components for Blazing Lemoyne Stars There are basically 4 different layouts in the following 3 pictures. The middle one has 2 (blue & purple centres and the one on the right is a combination of the Left one and the centre one).
I paired the Lemoyne Stars with Platinum (a neutral I received in my January boxes).
Now, I know that the instructions said that if I was using a Rapid Fire® Lemoyne Star, I could just make 3 stars. But, if I made 3 blazing stars (that finish at 12″), that would only use 9 of the fabrics in the collection. When it’s a blog hop, I make it a personal challenge to use as many of the 20 fabrics as possible. So I made 8 – 6″ stars, using 2 fabrics each from the collection. They were fun to make! In total, I used 19 of the fabrics in the collection for the stars. The 20th fabric I used on the back and with self-binding, there are a total of 20 fabrics seen on the top! YAY!!!
The backing is the only fabric that I didn’t use in the stars: Camellia Flower-Pink. I did a self-binding and it also is on the front:
The runner fits perfectly on my deacon’s bench!!
My grand-dog is guarding the bench!
And a couple of close-ups of the quilting. I used Silly Moon‘s “Rocket” to outline the centre star and the curved edges for the small sides of each piece. Then a simple meander for the background pieces.
Preeti, from Sew Preeti Quilts also received Radiant Burst. Make sure to visit her blog to see what she created!
Quilt Stats:
Size: 16″ x 40″
Fabric: Island Batik: “Radiant Burst” by Jerry Khiev, paired with Platinum
I am giving away 19 fabrics from the Radiant Burst collection … the smallest is 10″ x 13″ and the largest is 10″ x 16″. Leave a comment stating what you might do with these fabrics. The winner will randomly be chosen on February 26 and notified by email.
Unfortunately, this is ONLY available for those in Canada 🇨🇦 . Thank you for understanding!
Island Batik Ambassadors
Visit the other Island Batik Ambassadors to see the runners they made this month:
I am now a Silly Moon affiliate! So what does that mean? When you use my affiliate code Quiltinggail2024 at Silly Moon, you will receive 10% off your order and I will receive a small commission.
Can you guess what I’ve been doing a LOT of this week? Yup, lots of staring!!!
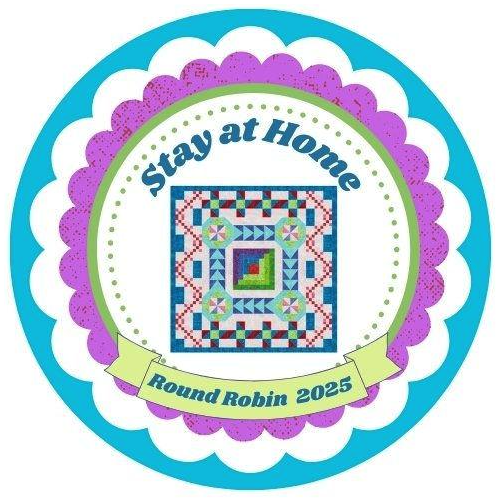
SAHRR is in progress!
We’ve had the Centre Blocks and 2 rounds so far. Tomorrow, Round #3 will be hosted by ME. Here’s where you can find each of my rounds, along with links to the co-hosts!
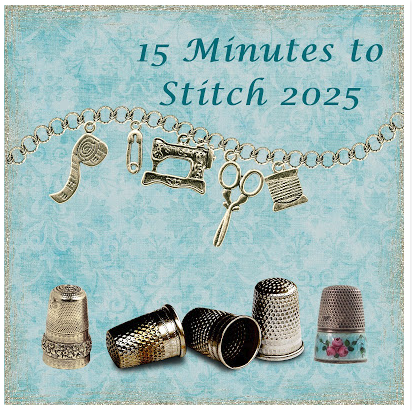
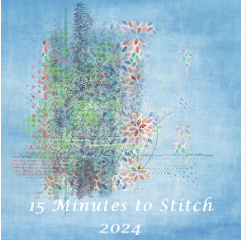
Kate, from Life in Pieces, is hosting “Stitching Stuff” and the goal is to sew for at least 15 minutes a day. I use Kate’s guideline, but my personal goal is to sew for 30 minutes a day. On those “blah” days, it does motivate me to sit at my machine and 30 minutes often turns into several hours. Thank you Kate for the motivation!
Blue Blocks: This month’s rainbow scrap colour is BLUE … so I’ll be starting that this week! See this post.
Meadow Hues: a lap sized quilt for a blog hop hosted by Claudia Porter of Create with Claudia. It is using her newest signature collection.
IB March Project: as leaders & enders … and no picture!
Quilting projects:
Test Quilt: SSB
IB February Project: sorry, no picture, except for the Studio 180 tool and the fabric!
SunlitGarden: a small lap quilt for a blog hop hosted by Jennifer of Curlicue Creations
Need to sandwich the Pink Blocks
Sunday Stash
Donna at Quilt Paint Create hosts a weekly linky party where you can display your stash numbers. This has really kept my stash from growing (somewhat!) Before I buy anything, I am always mindful of the fact that I need to report it on my blog … That sometimes stops me in my tracks!
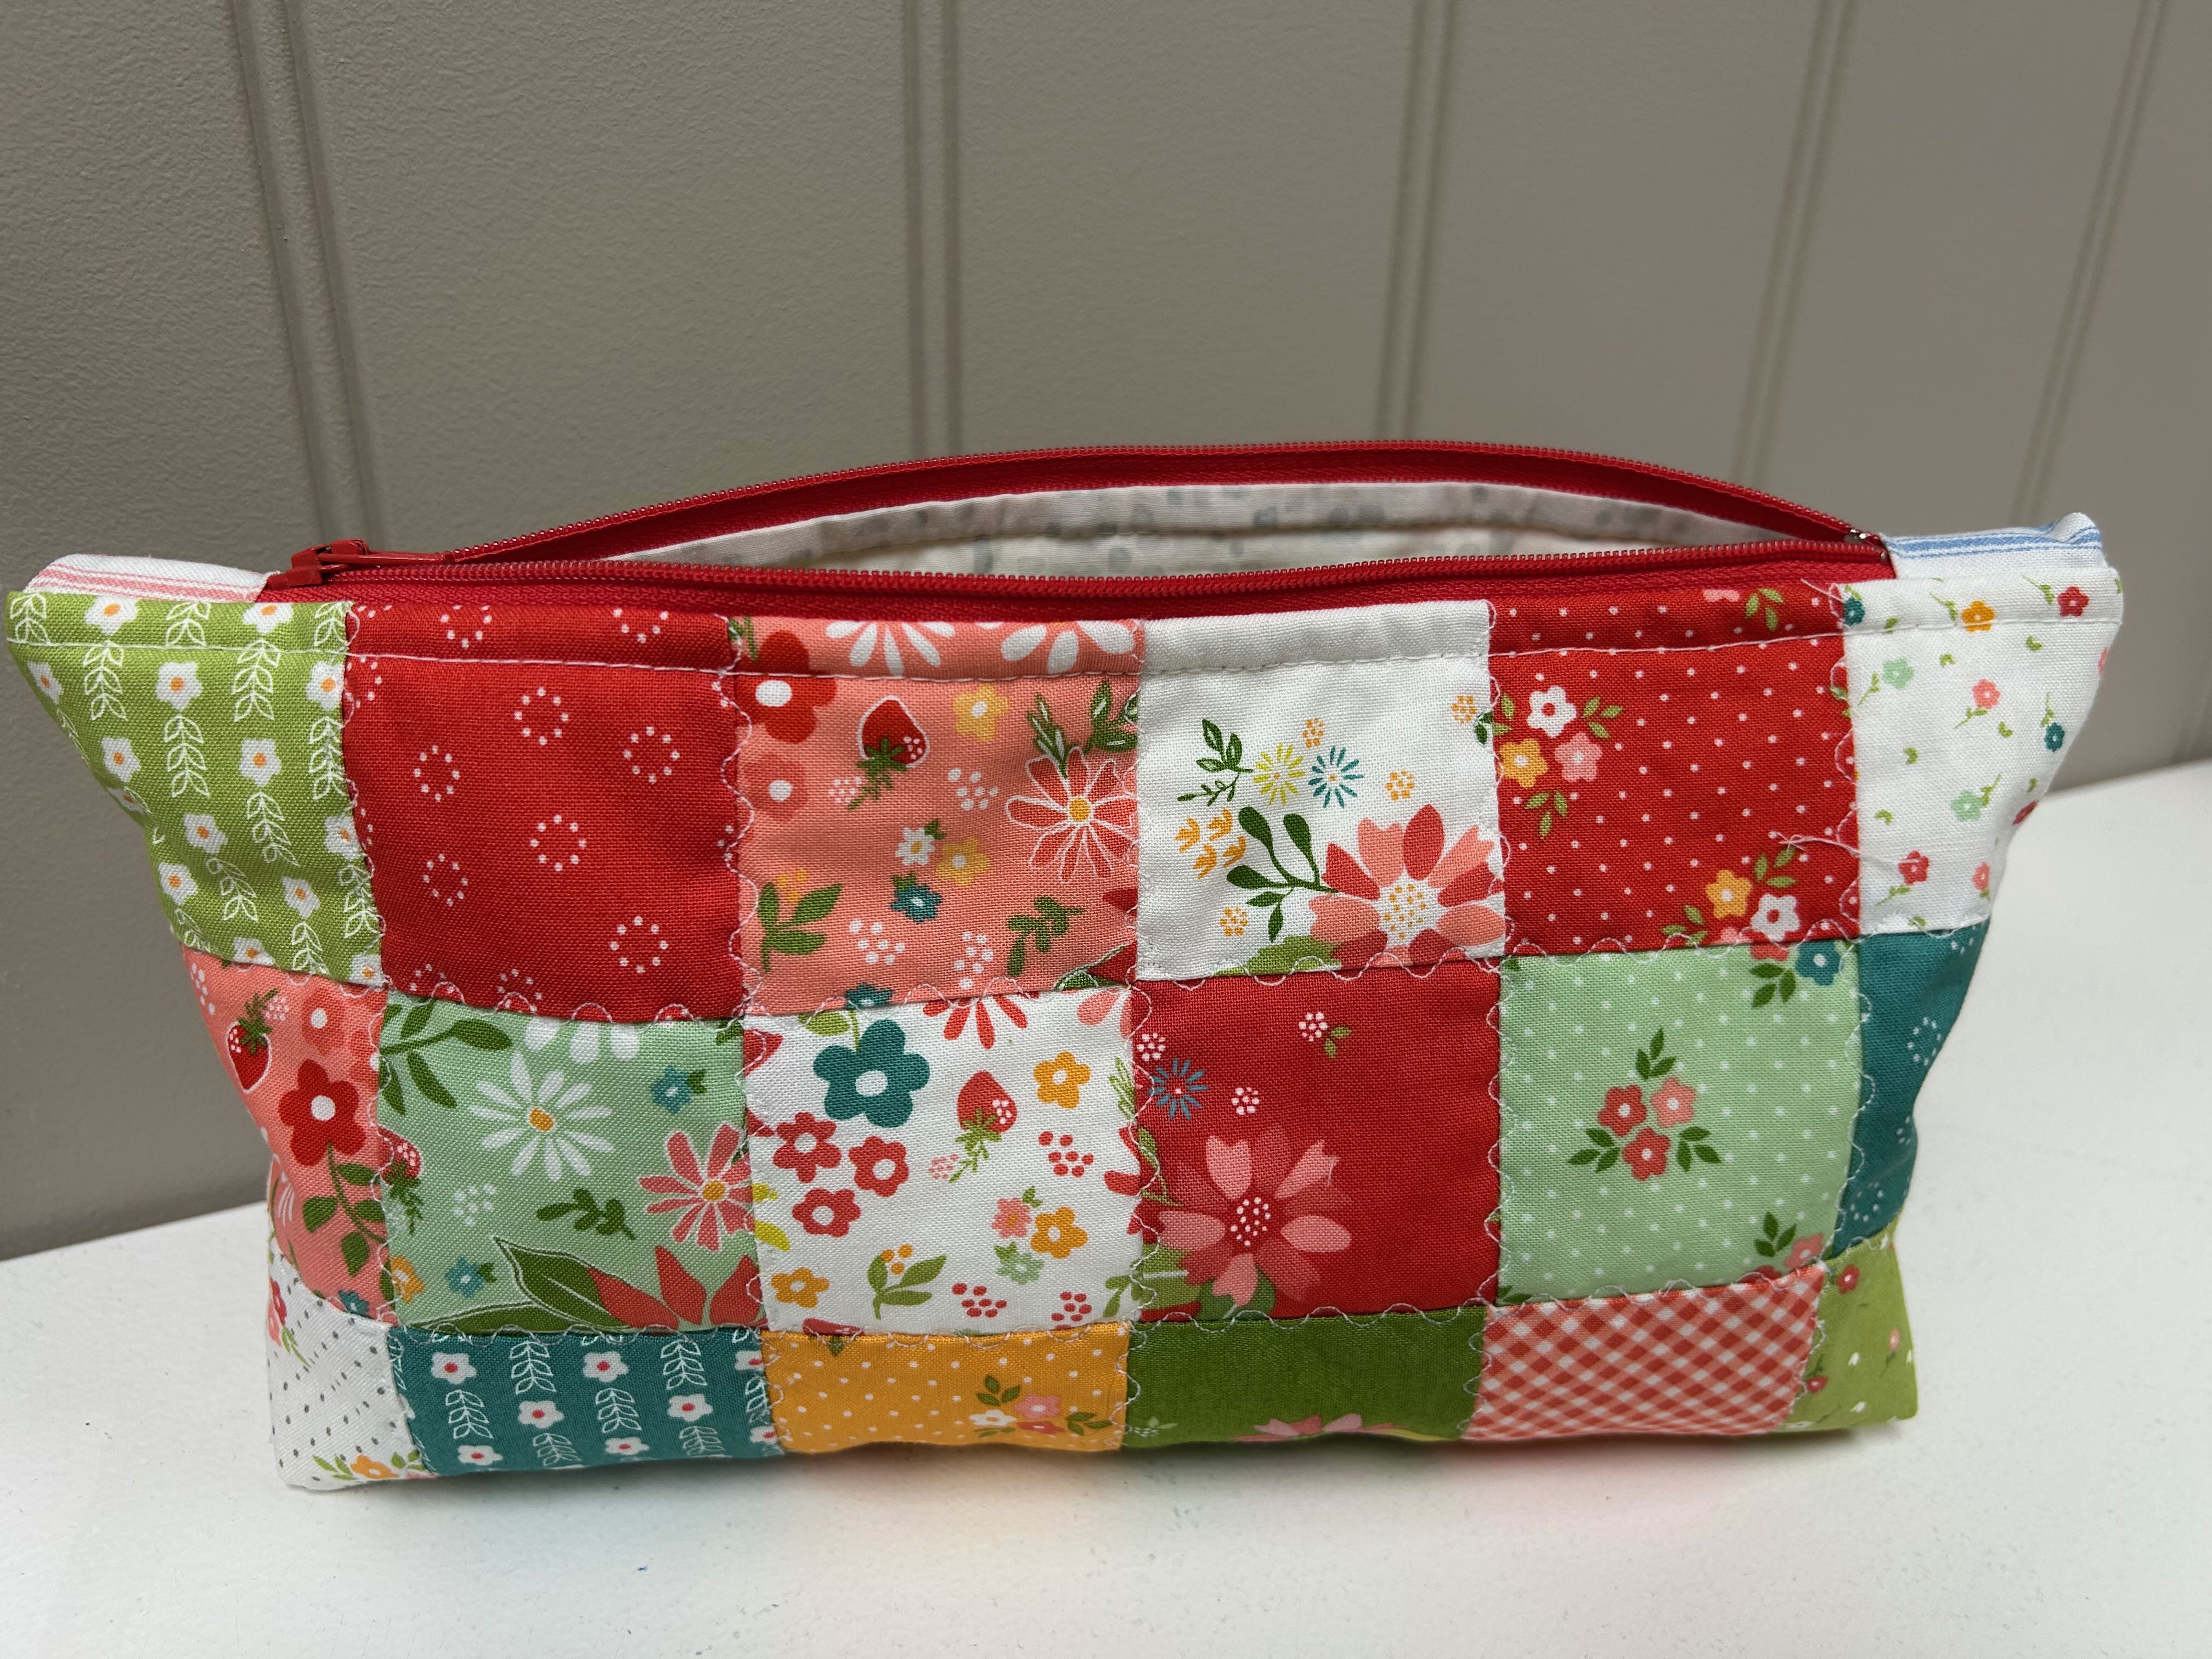
I made it through January without buying any fabric!!! I’m very happy about that! I did finish 2 projects since my last summary. The pink baby quilt (details HERE) and the small zipper pouch (see THIS POST).
I find it interesting that no matter how I put these 2 items into the ‘gallery’ the zipper pouch (6 1/2” x 12″) looks bigger than the quilt (35″ x 35″)!
Fabric used in the last 2 weeks: 4.5 yards
Fabric Used in 2025: 5yards. {1.5 yards of non Island Batik fabric}
Fabric Added in the last week: 0 yards
Fabric Added this year: 0 yards
Net Fabric used: 5 yards
To Do
Carol from Quilt Schmilt is hosting “To Do” every week.
To Do from the last week:
2025 SAHRR – bind it XX Not Done XX
Bind Glorified 9 patch.√ DONE.
Work on “Pink Blocks“. in progress
Work on IB February Project.in progress
Do IB March Project as leaders and enders … for now. in progress
Get Sunlit Garden to flimsy stage √ DONE.
Do NOT be distracted by any SQUIRRELS! I NEED this continual reminder! √ DONE.
Tidy & clean studio for 30 minutes.√ DONE.
To Do for next week:
Work on Blue Blocks
2025 SAHRR – bind it
Sandwich and Quilt “Pink Blocks“
Sandwich and Quilt IB February Project
Work on IB March Project
Sandwich and Quilt Sunlit Garden
Do NOT be distracted by any SQUIRRELS! I NEED this continual reminder!
Tidy & clean studio for 30 minutes.
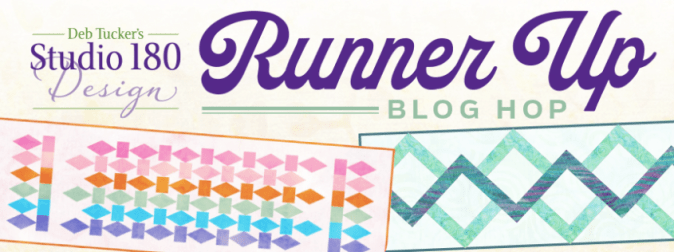
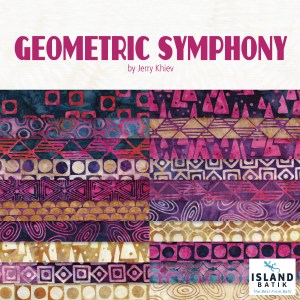
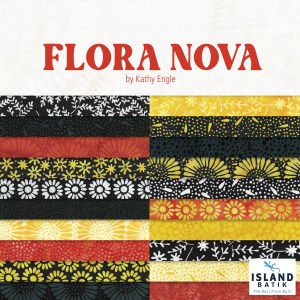
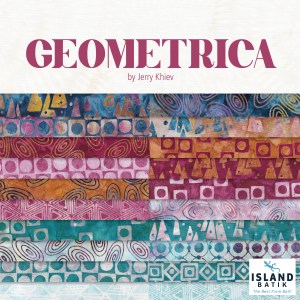
Island Batik’s Runner Up Blog Hop
This blog hop starts tomorrow!!! Be sure to follow along, I promise lots of eye candy! Here’s a list of the fabrics and ambassadors:
Visit Lumin’s blog (Island Batik) for your opportunity to win one of the two fabulous Fat Quarter bundles of collections by our very own Jerry Khiev – Botanical Dreams or Fall Flair.
Don’t Forget
I am now a Silly Moon affiliate! So what does that mean? When you use my affiliate code Quiltinggail2024 at Silly Moon, you will receive 10% off your order and I will receive a small commission.
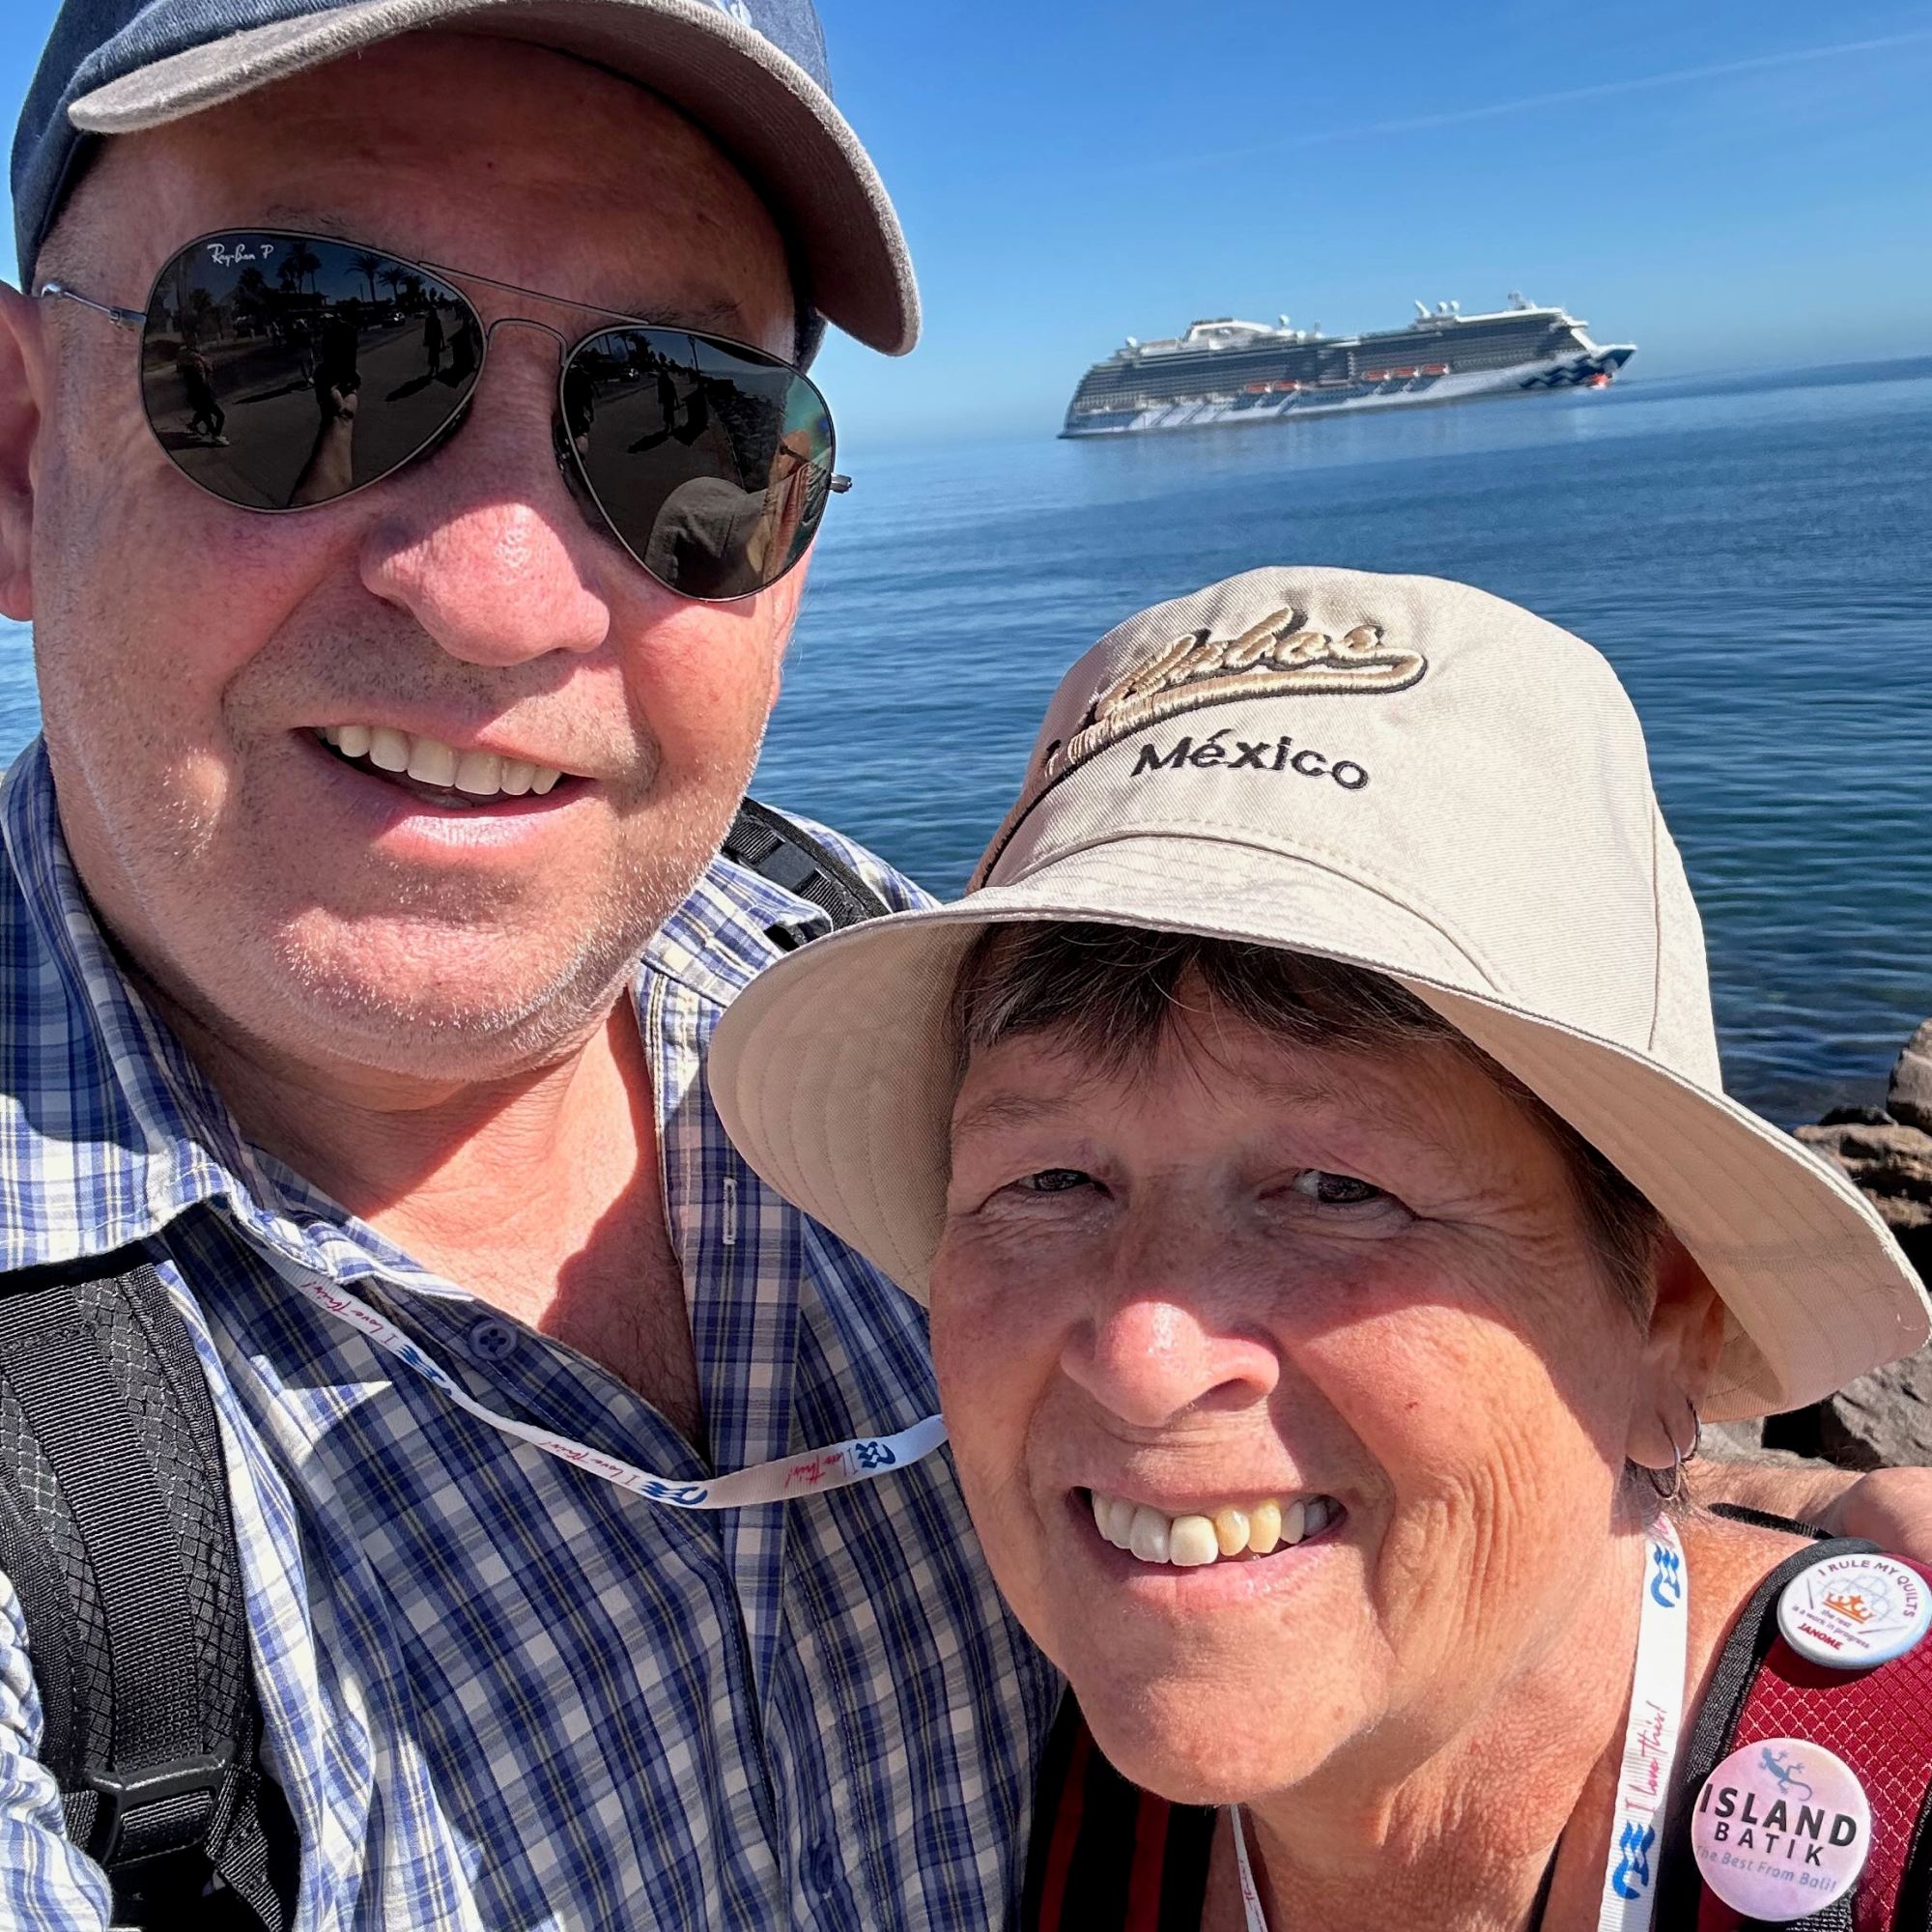
We were away on a Mexican cruise and I didn’t take my machine (shocking, I know!!) I thoroughly enjoyed our time!
We did a ‘glass bottom’ boat tour … had to laugh at the name of the boat “Sex Machine Too!” And the glass bottom was a bit of a joke … a 1′ x 3′ piece of algae covered plexiglass in the middle. But the rest of the tour was great!
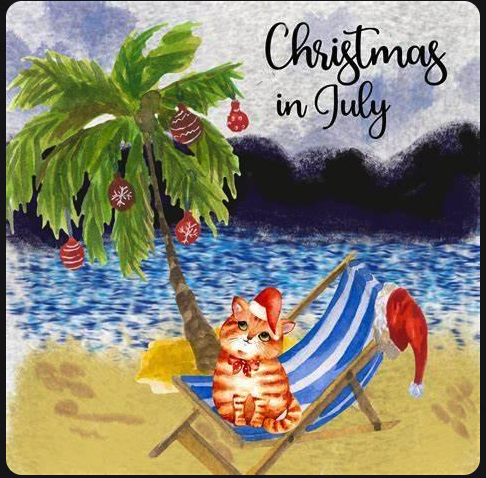
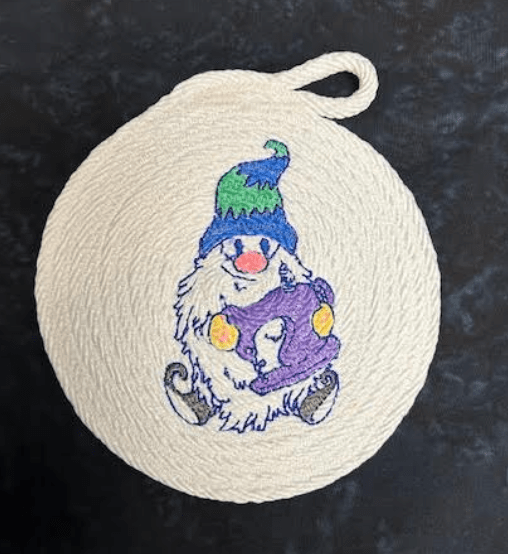
A Blog Hop Finish
This was my finish for “Gnome for Thanksgiving.” You can read about it HERE.
Stitching Stuff
Kate, from Life in Pieces, is hosting “Stitching Stuff” and the goal is to sew for at least 15 minutes a day. I use Kate’s guideline, but my personal goal is to sew for 30 minutes a day. On those “blah” days, it does motivate me to sit at my machine and 30 minutes often turns into several hours. Thank you Kate for the motivation!
Donna at Quilt Paint Create hosts a weekly linky party where you can display your stash numbers. This has really kept my stash from growing (somewhat!) Before I buy anything, I am always mindful of the fact that I need to report it on my blog … That sometimes stops me in my tracks!
Even though I was in 2 fabric stores in Mazatlan, I didn’t purchase anything! Nothing said “buy me” and believe me, I looked!!!
Fabric Used in the last week: 0 yards
Fabric Used in 2024: 192 yards from non-IB: 80.5
Fabric Added in the last week: 0 yards
Fabric Added this year: 32 yards
Net Fabric used: 160 yards
To Do
Carol from Quilt Schmilt is hosting “To Do” every week.
To Do from the last report:
Not a lot done while I was away …
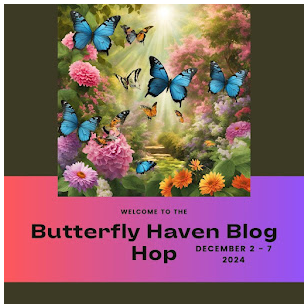
Finish Butterfly Haven Blog Hop project √ DONE
Quilt Floral Fusion.NOT DONE
2025 SAHRR Work on Prompt 6. in progress
Monthly Colour Challenge – need to sandwich, quilt and bind. NOT DONE
Work on Island Batik December project. in progress
Do NOT be distracted by any SQUIRRELS! I NEED this continual reminder! √ DONE.
Tidy & clean studio for 30 minutes.√ DONE.
To Do for next week:
Quilt Floral Fusion.
2025 SAHRR Work on Prompt 6.
Monthly Colour Challenge – need to sandwich, quilt and bind.
Monthly Colour Challenge – need to sandwich, quilt and bind.
Work on Island Batik December project.
Do NOT be distracted by any SQUIRRELS! I NEED this continual reminder!
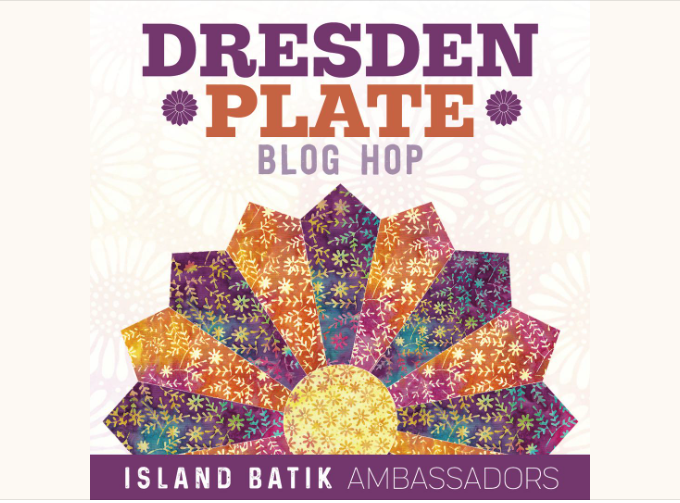
There have been a ton of awesome Dresden Plate quilts! Visit the Island Batik blog for an update on the quilts from the last 3 weeks and an opportunity to win some awesome Fat Quarters!
Visit Island Batik blog for a Round-up and an opportunity to win a fat-quarter bundle of fabric!
Don’t Forget
I am now a Silly Moon affiliate! So what does that mean? When you use my affiliate code Quiltinggail2024 at Silly Moon, you will receive 10% off your order and I will receive a small commission.
Here’s what Island Batik had to say about this challenge: “Welcome to the much-anticipated Dresden Plate Blog Hop! The Dresden Plate, a quintessential block in quilting, is known for its captivating radial design featuring pie-shaped wedges arranged in a circular pattern, resembling a delicate flower. As you embark on this quilting adventure, you’ll be exploring this timeless pattern, infusing it with your unique style and vision. Your challenge is to make a quilt, lap-sized or larger, using the assigned Summer ‘24 fabric collection that will showcase your individuality. May your needles be nimble, your creativity boundless, and your Dresden Plate quilts truly shine!“
We are to use the fabric collection that came in our surprise bundles that arrived in June/July.
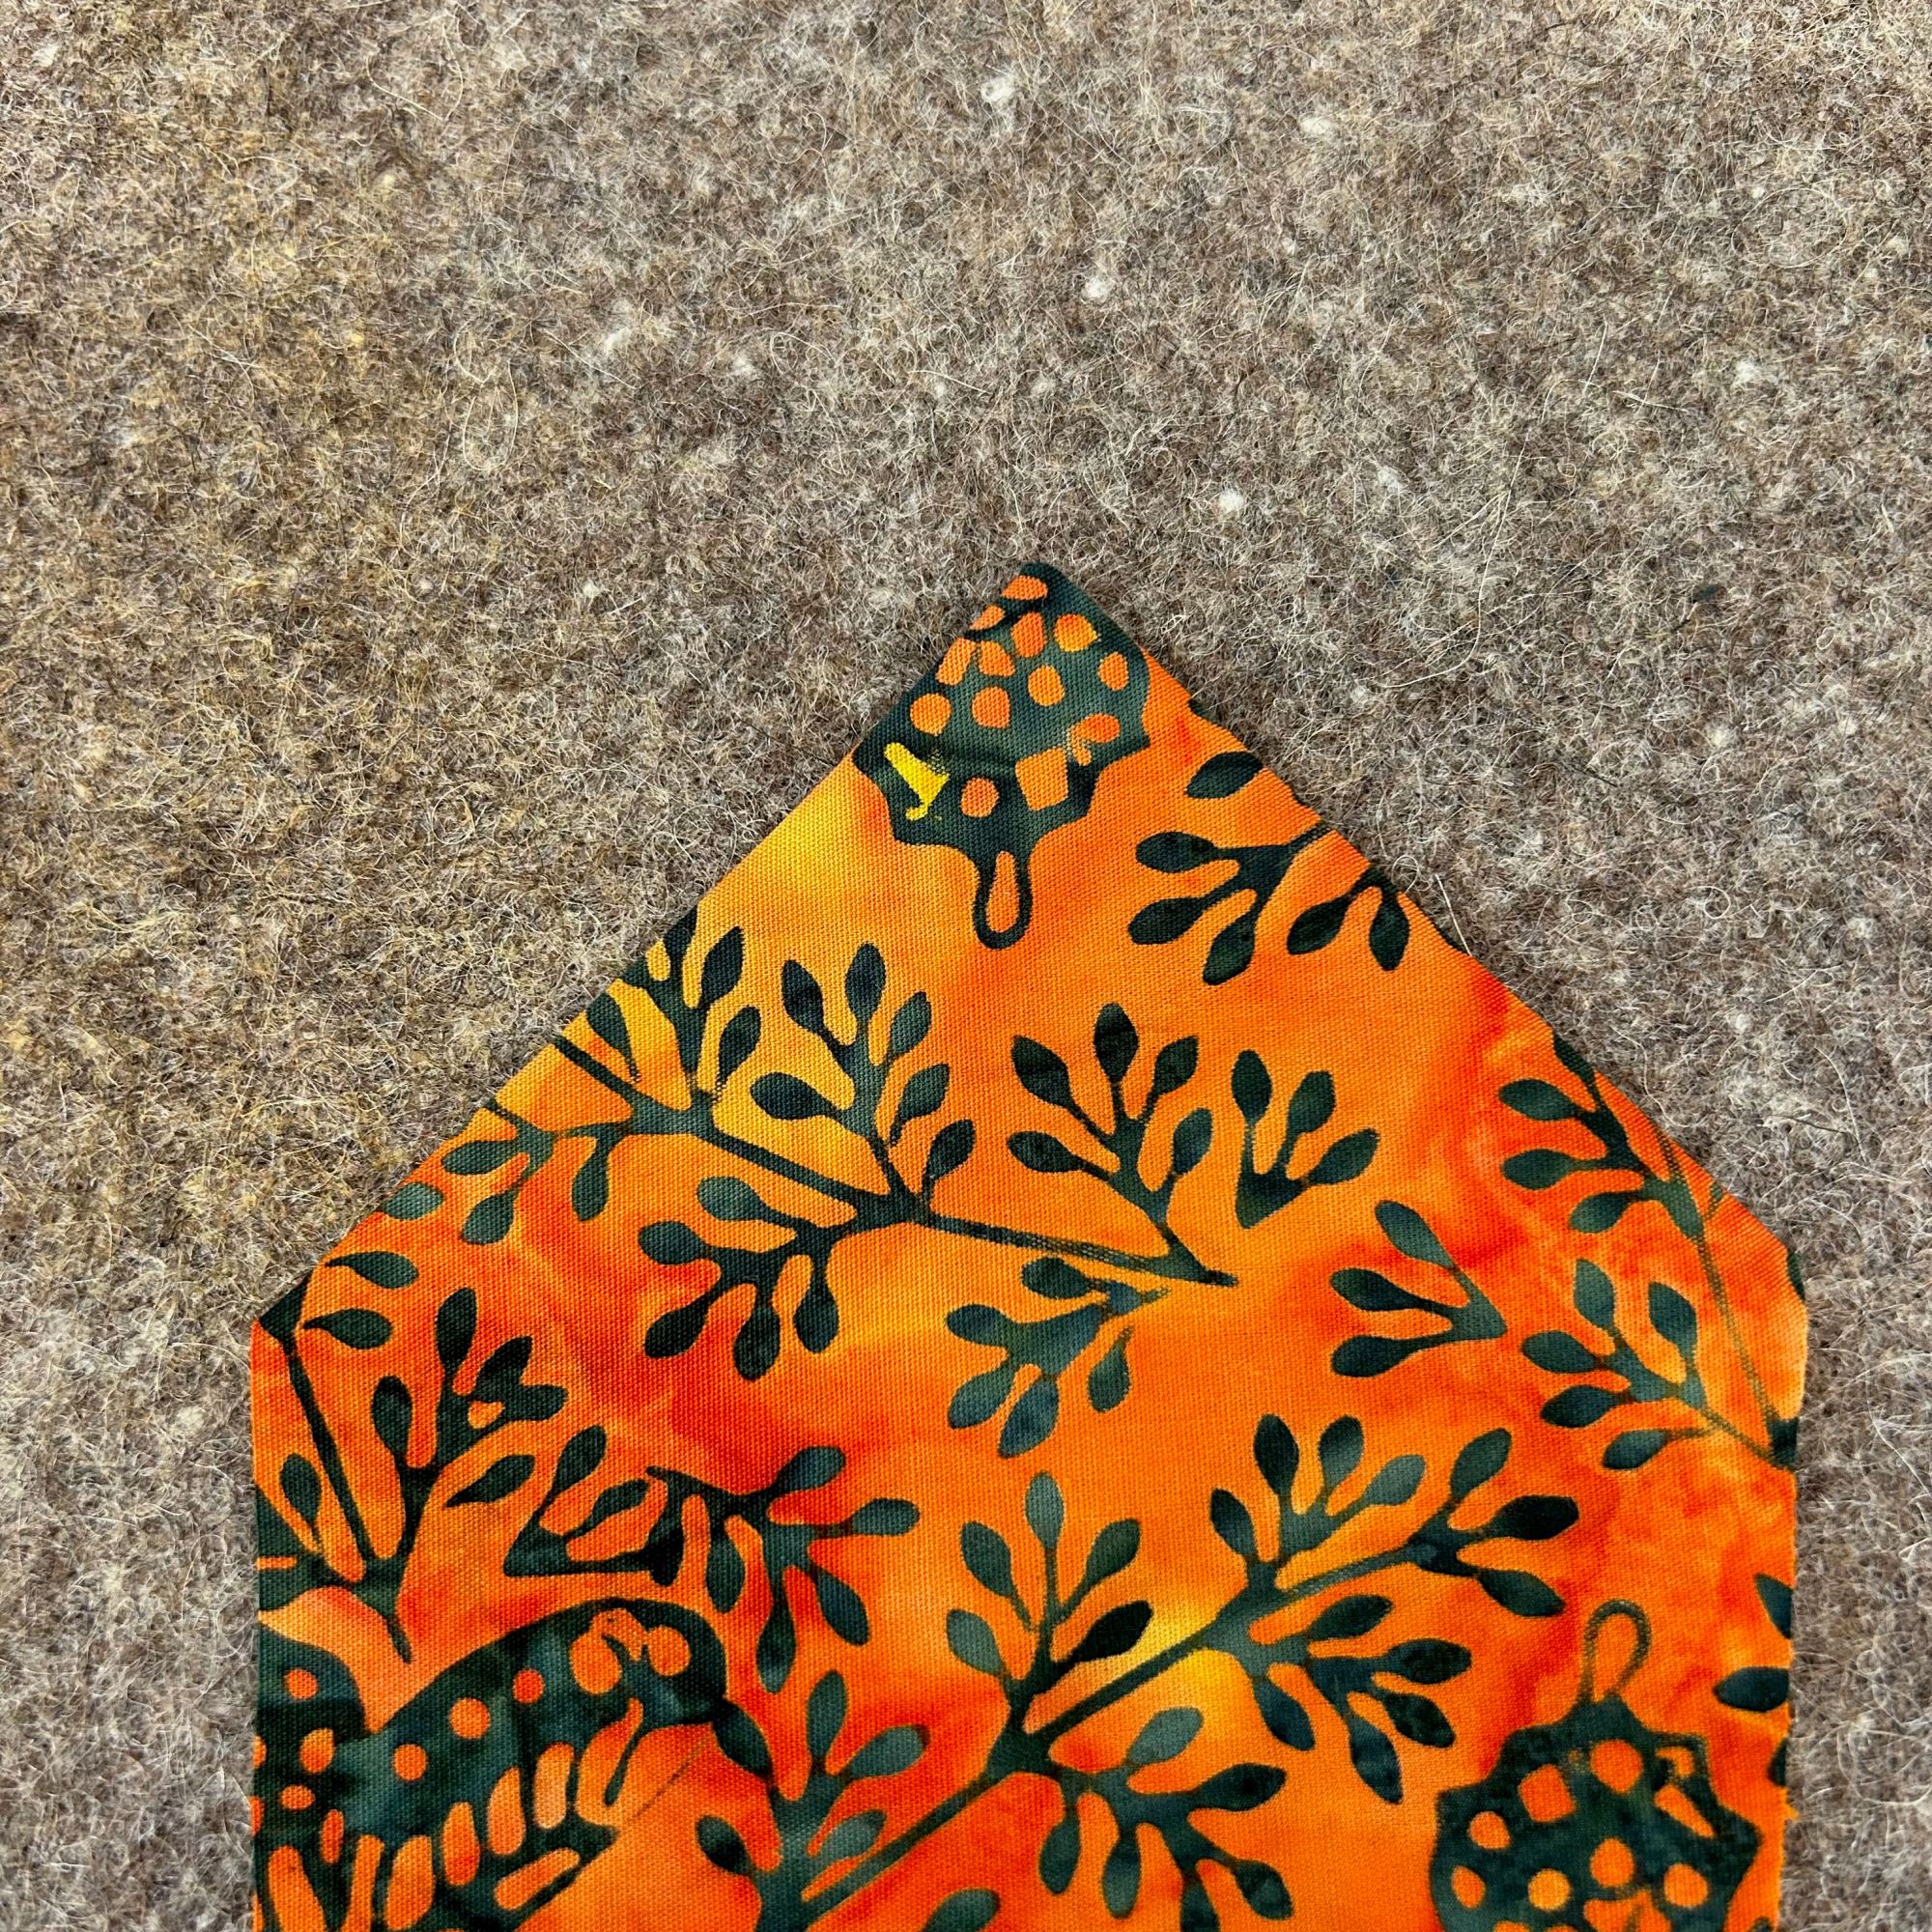
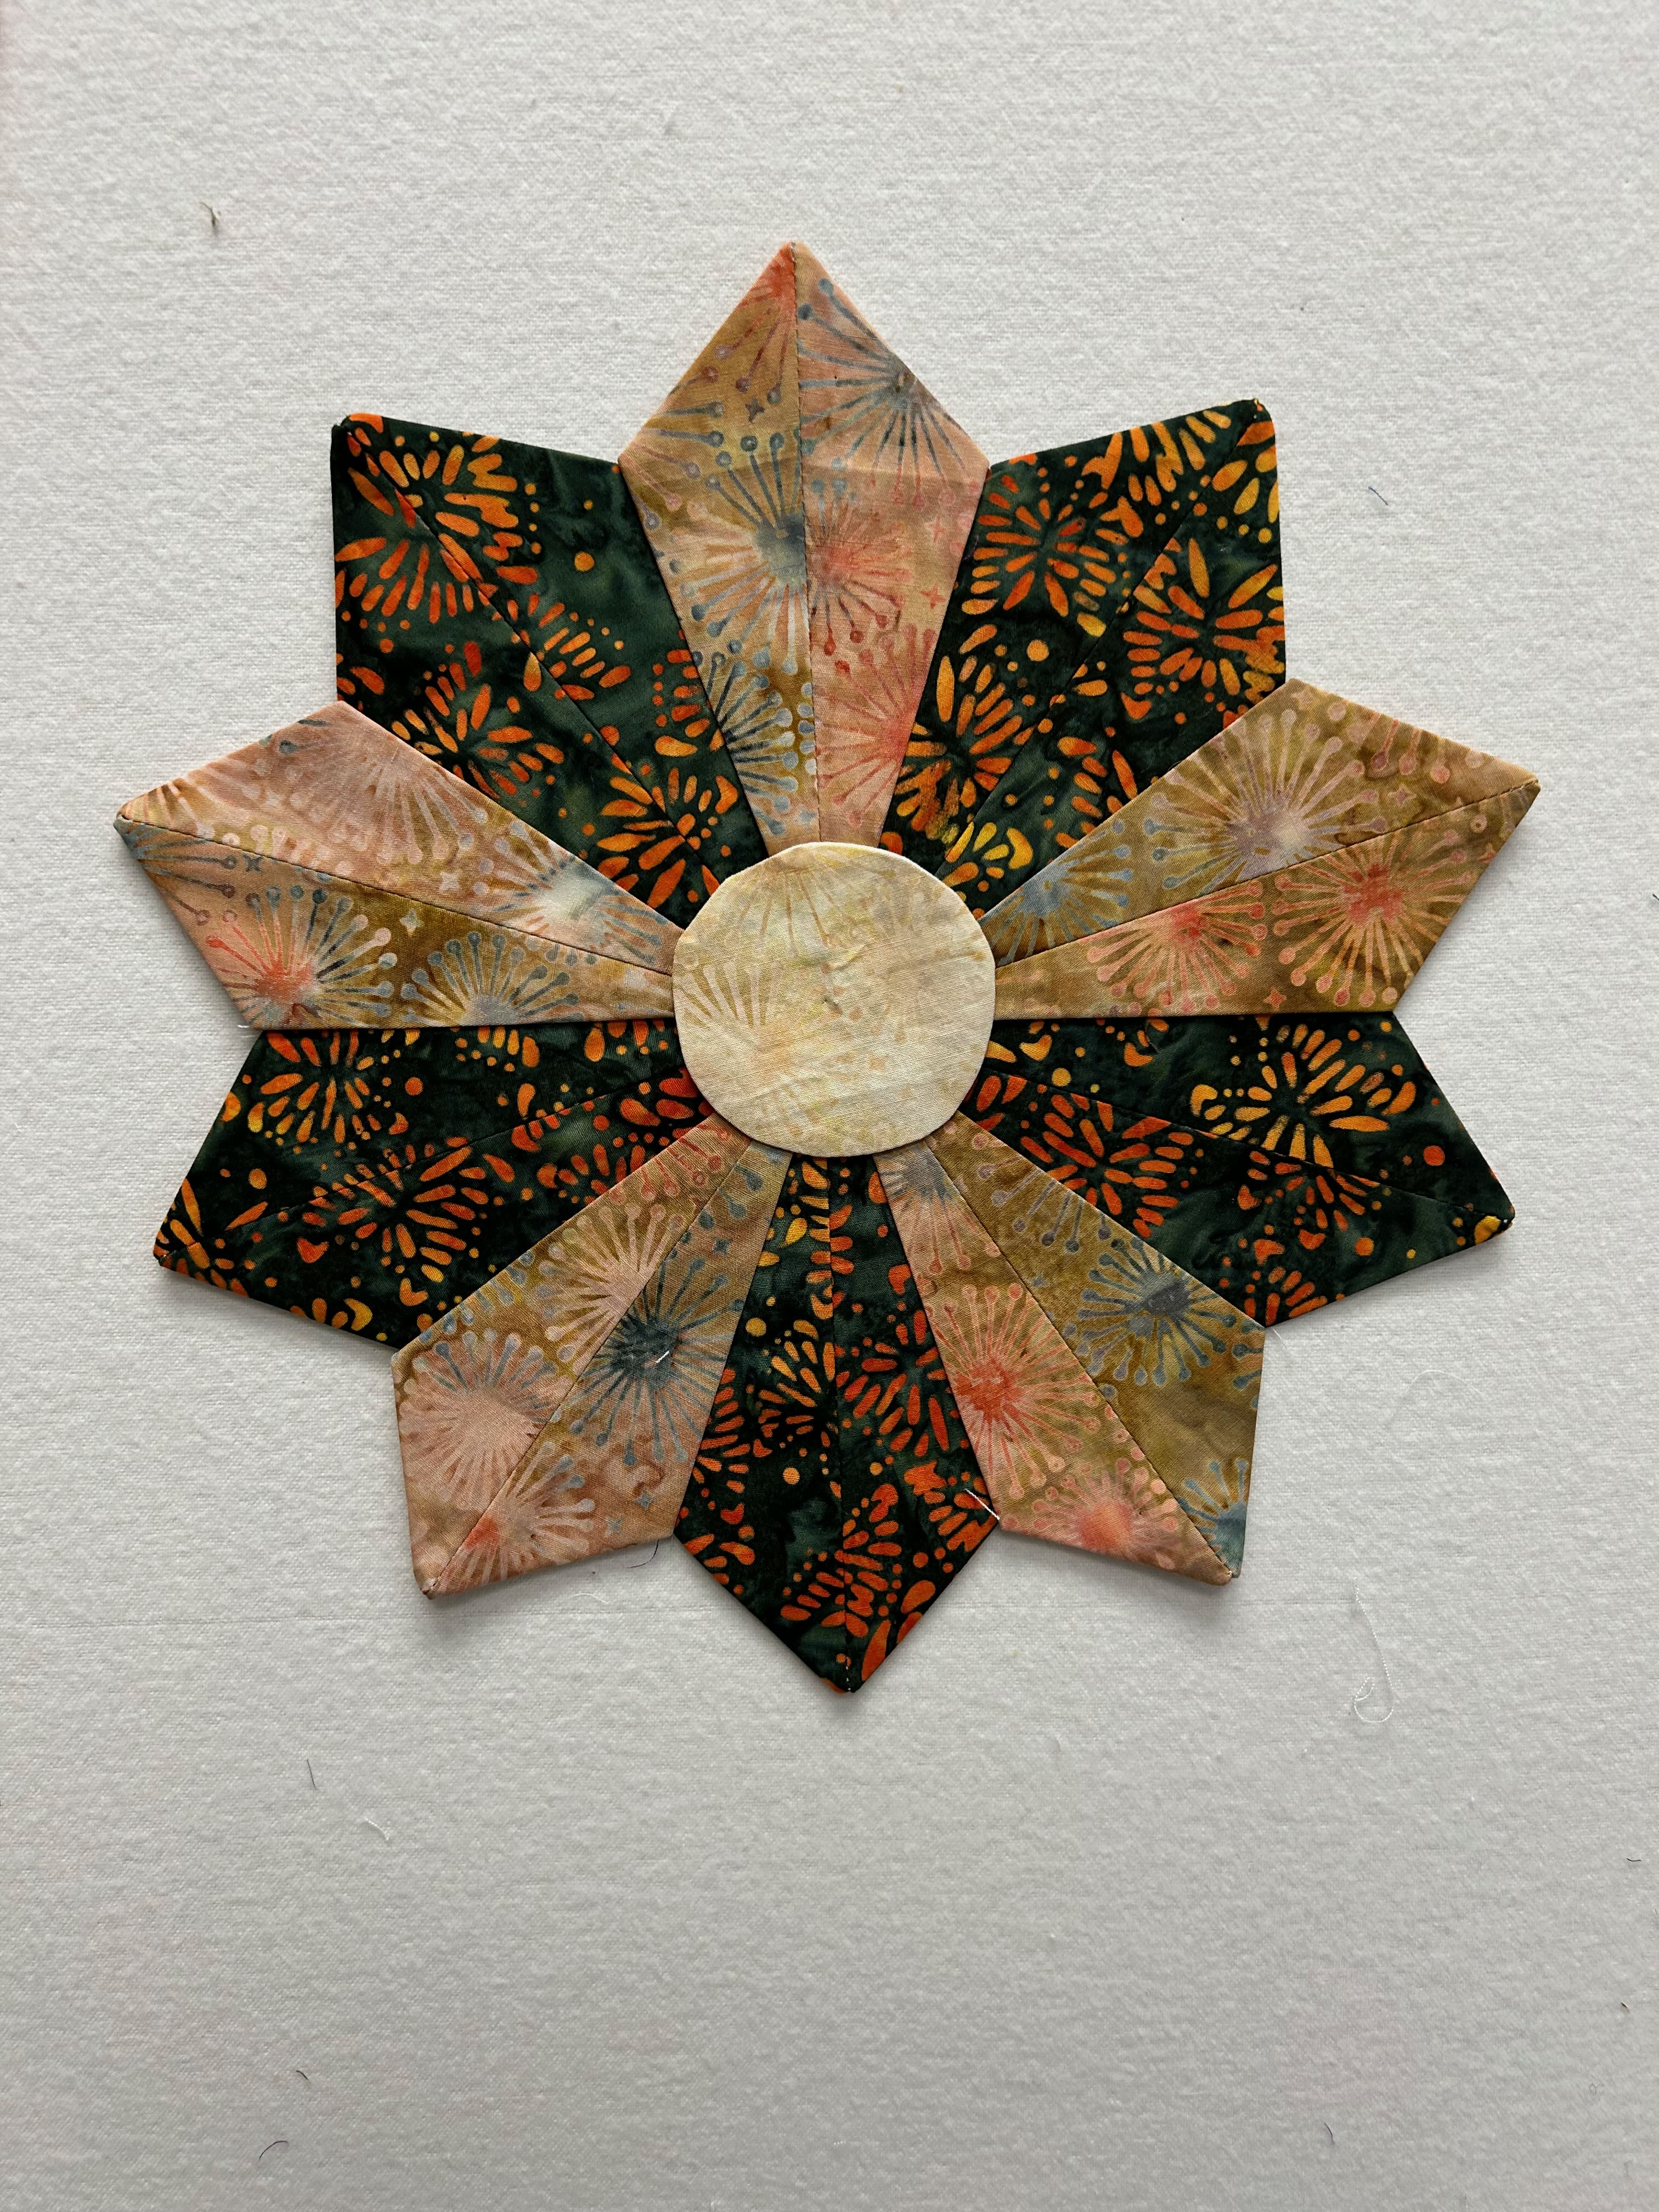
My surprise bundle contained an awesome collection “Flutter Fields” designed by Jerry Khiev. Aren’t they just gorgeous? They are paired with Buttermilk and Midnight Blue.
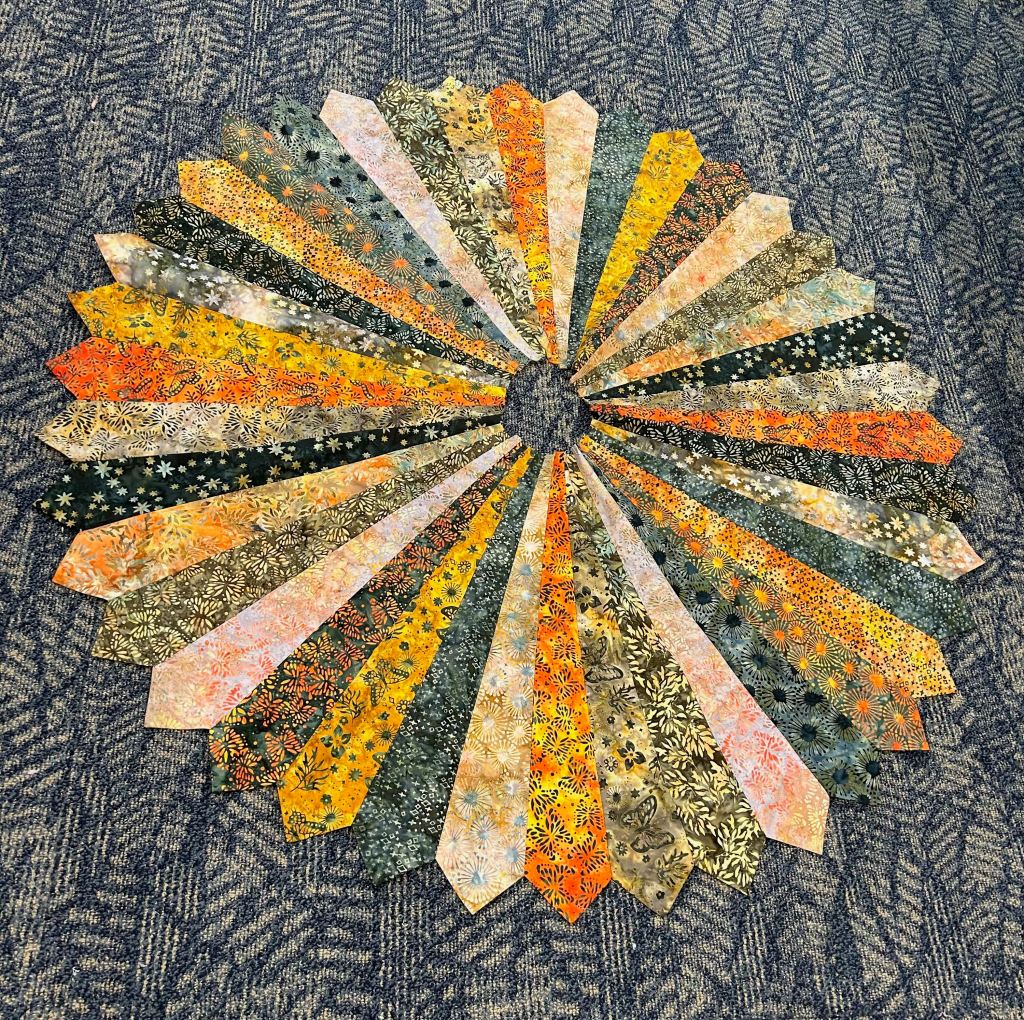
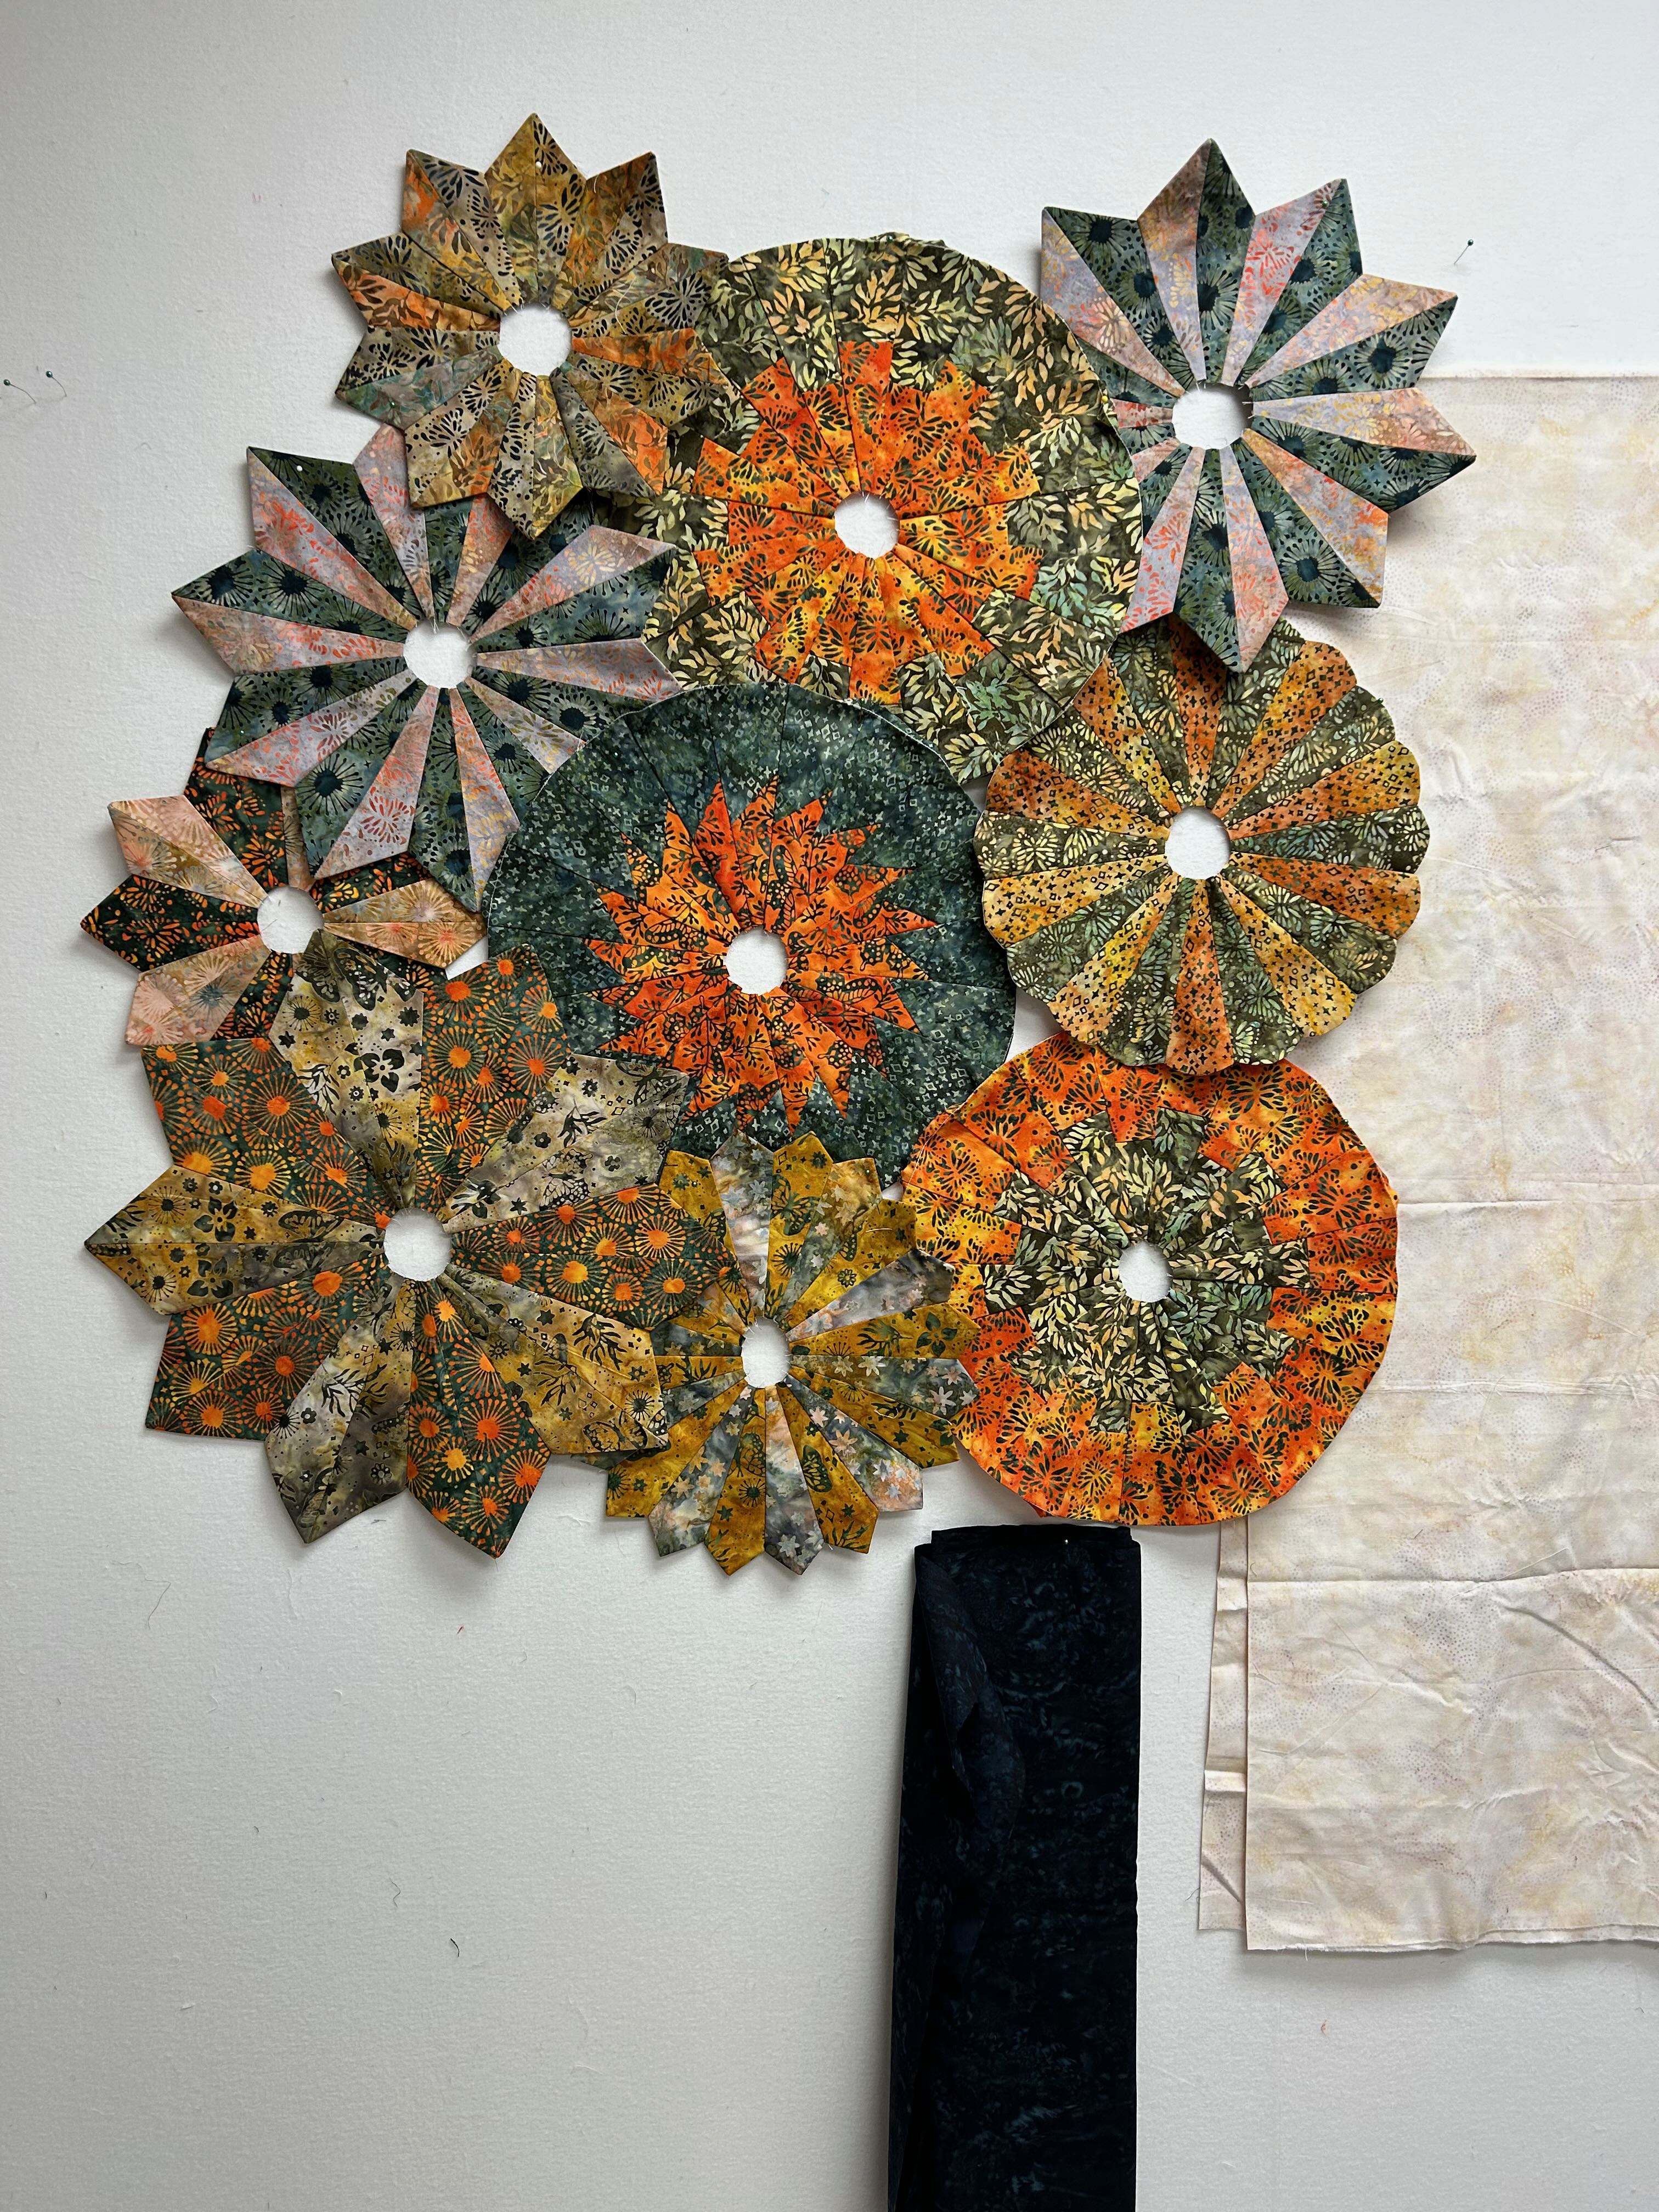
I originally decided that I would make one large Dresden Plate. I started out by putting the fabrics in an order that was pleasing to me … and I made sure to label each piece so that I wouldn’t get confused! I left out the 2 lighter fabrics as I knew they would blend too much with the background fabric.
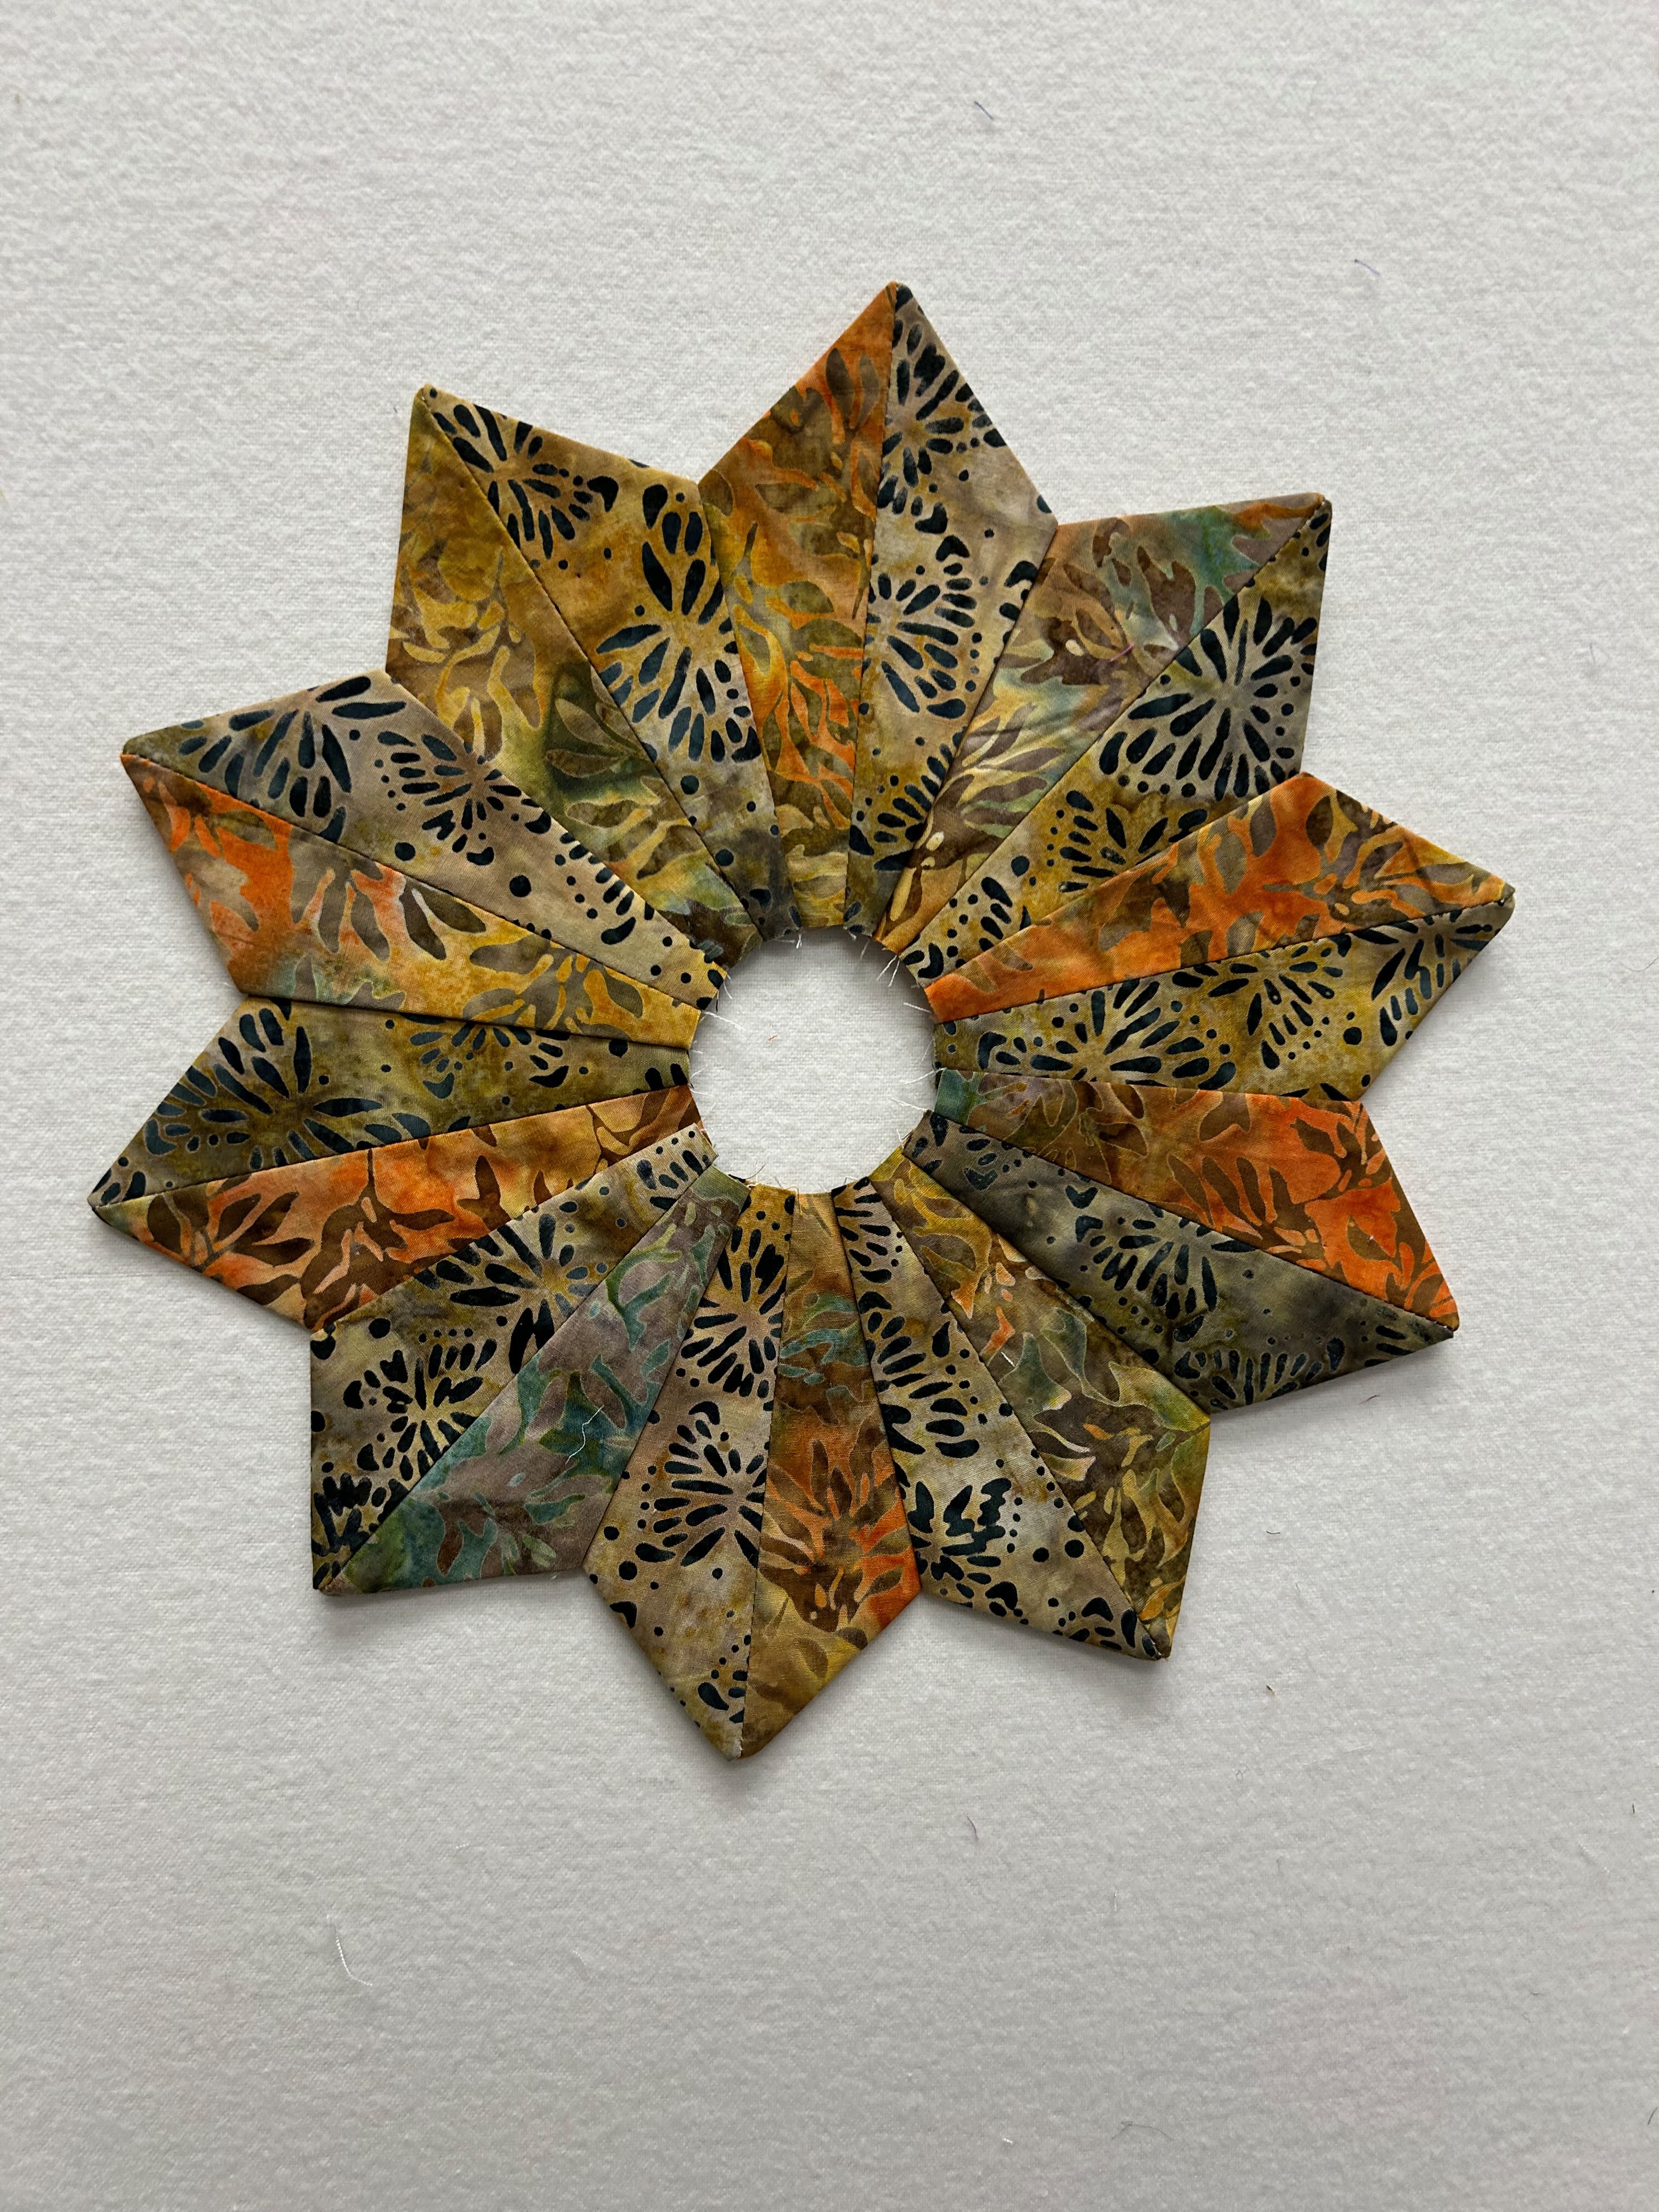
Here are a few pictures of blades in progress.
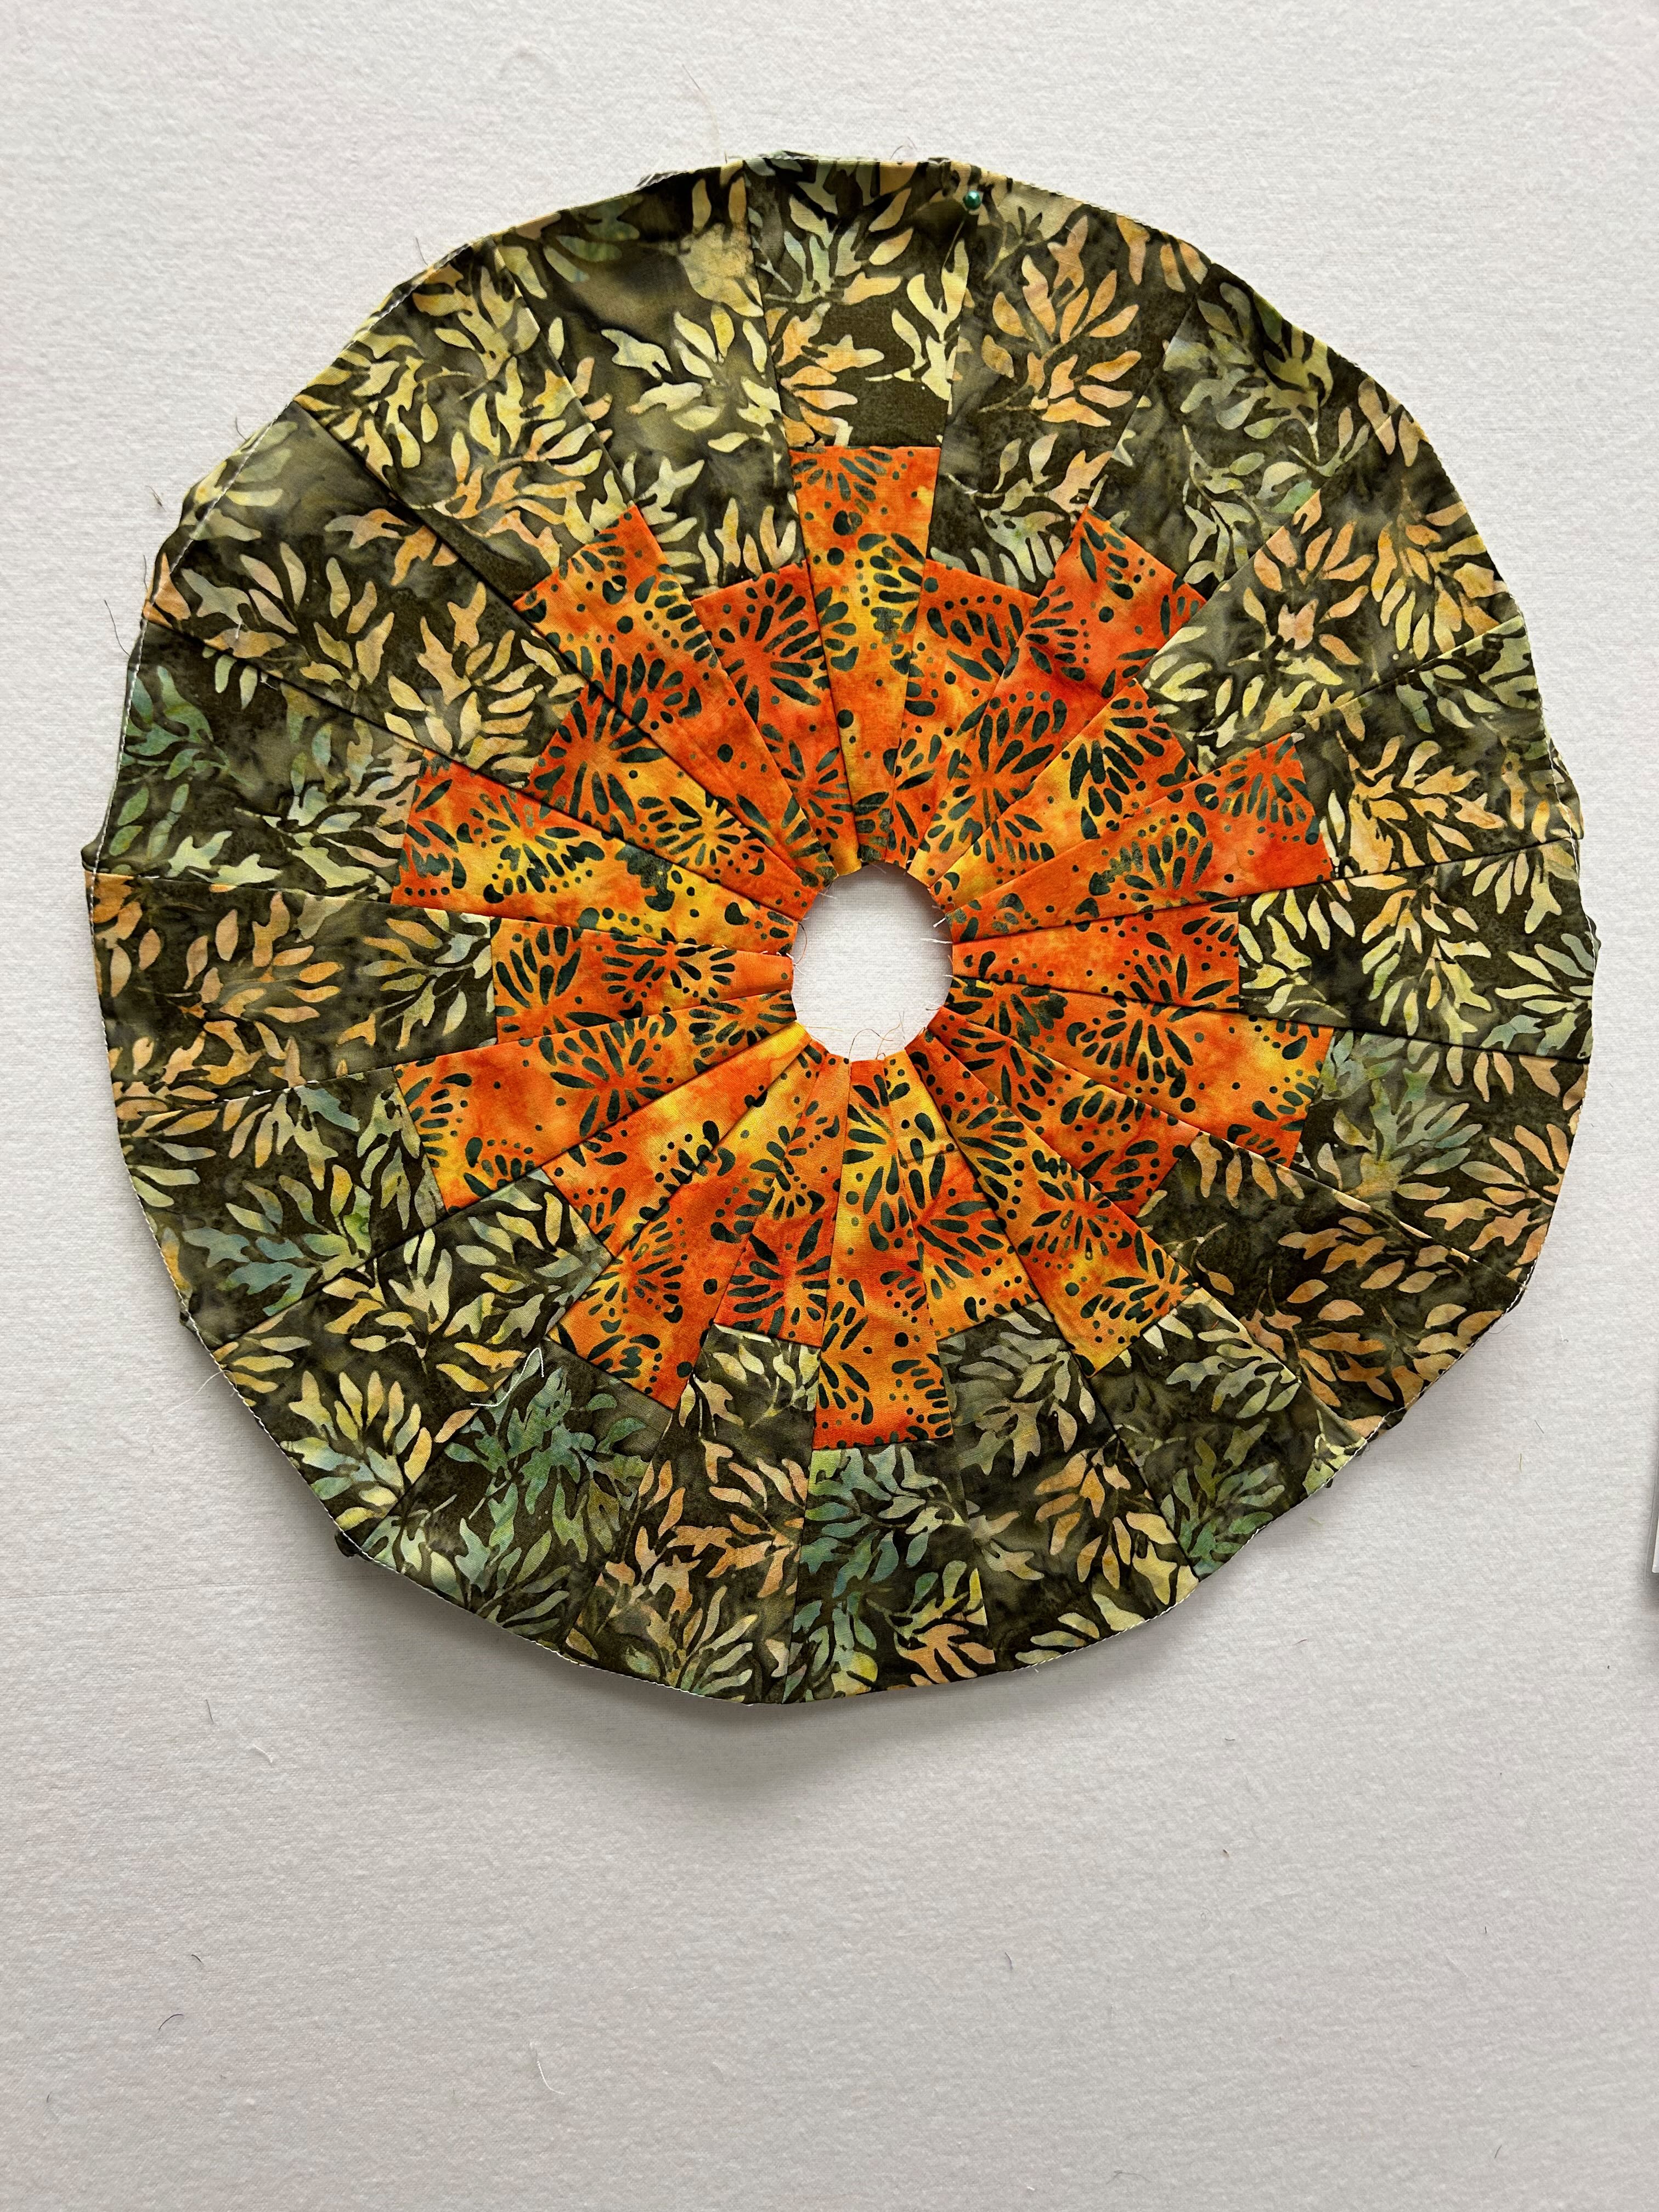
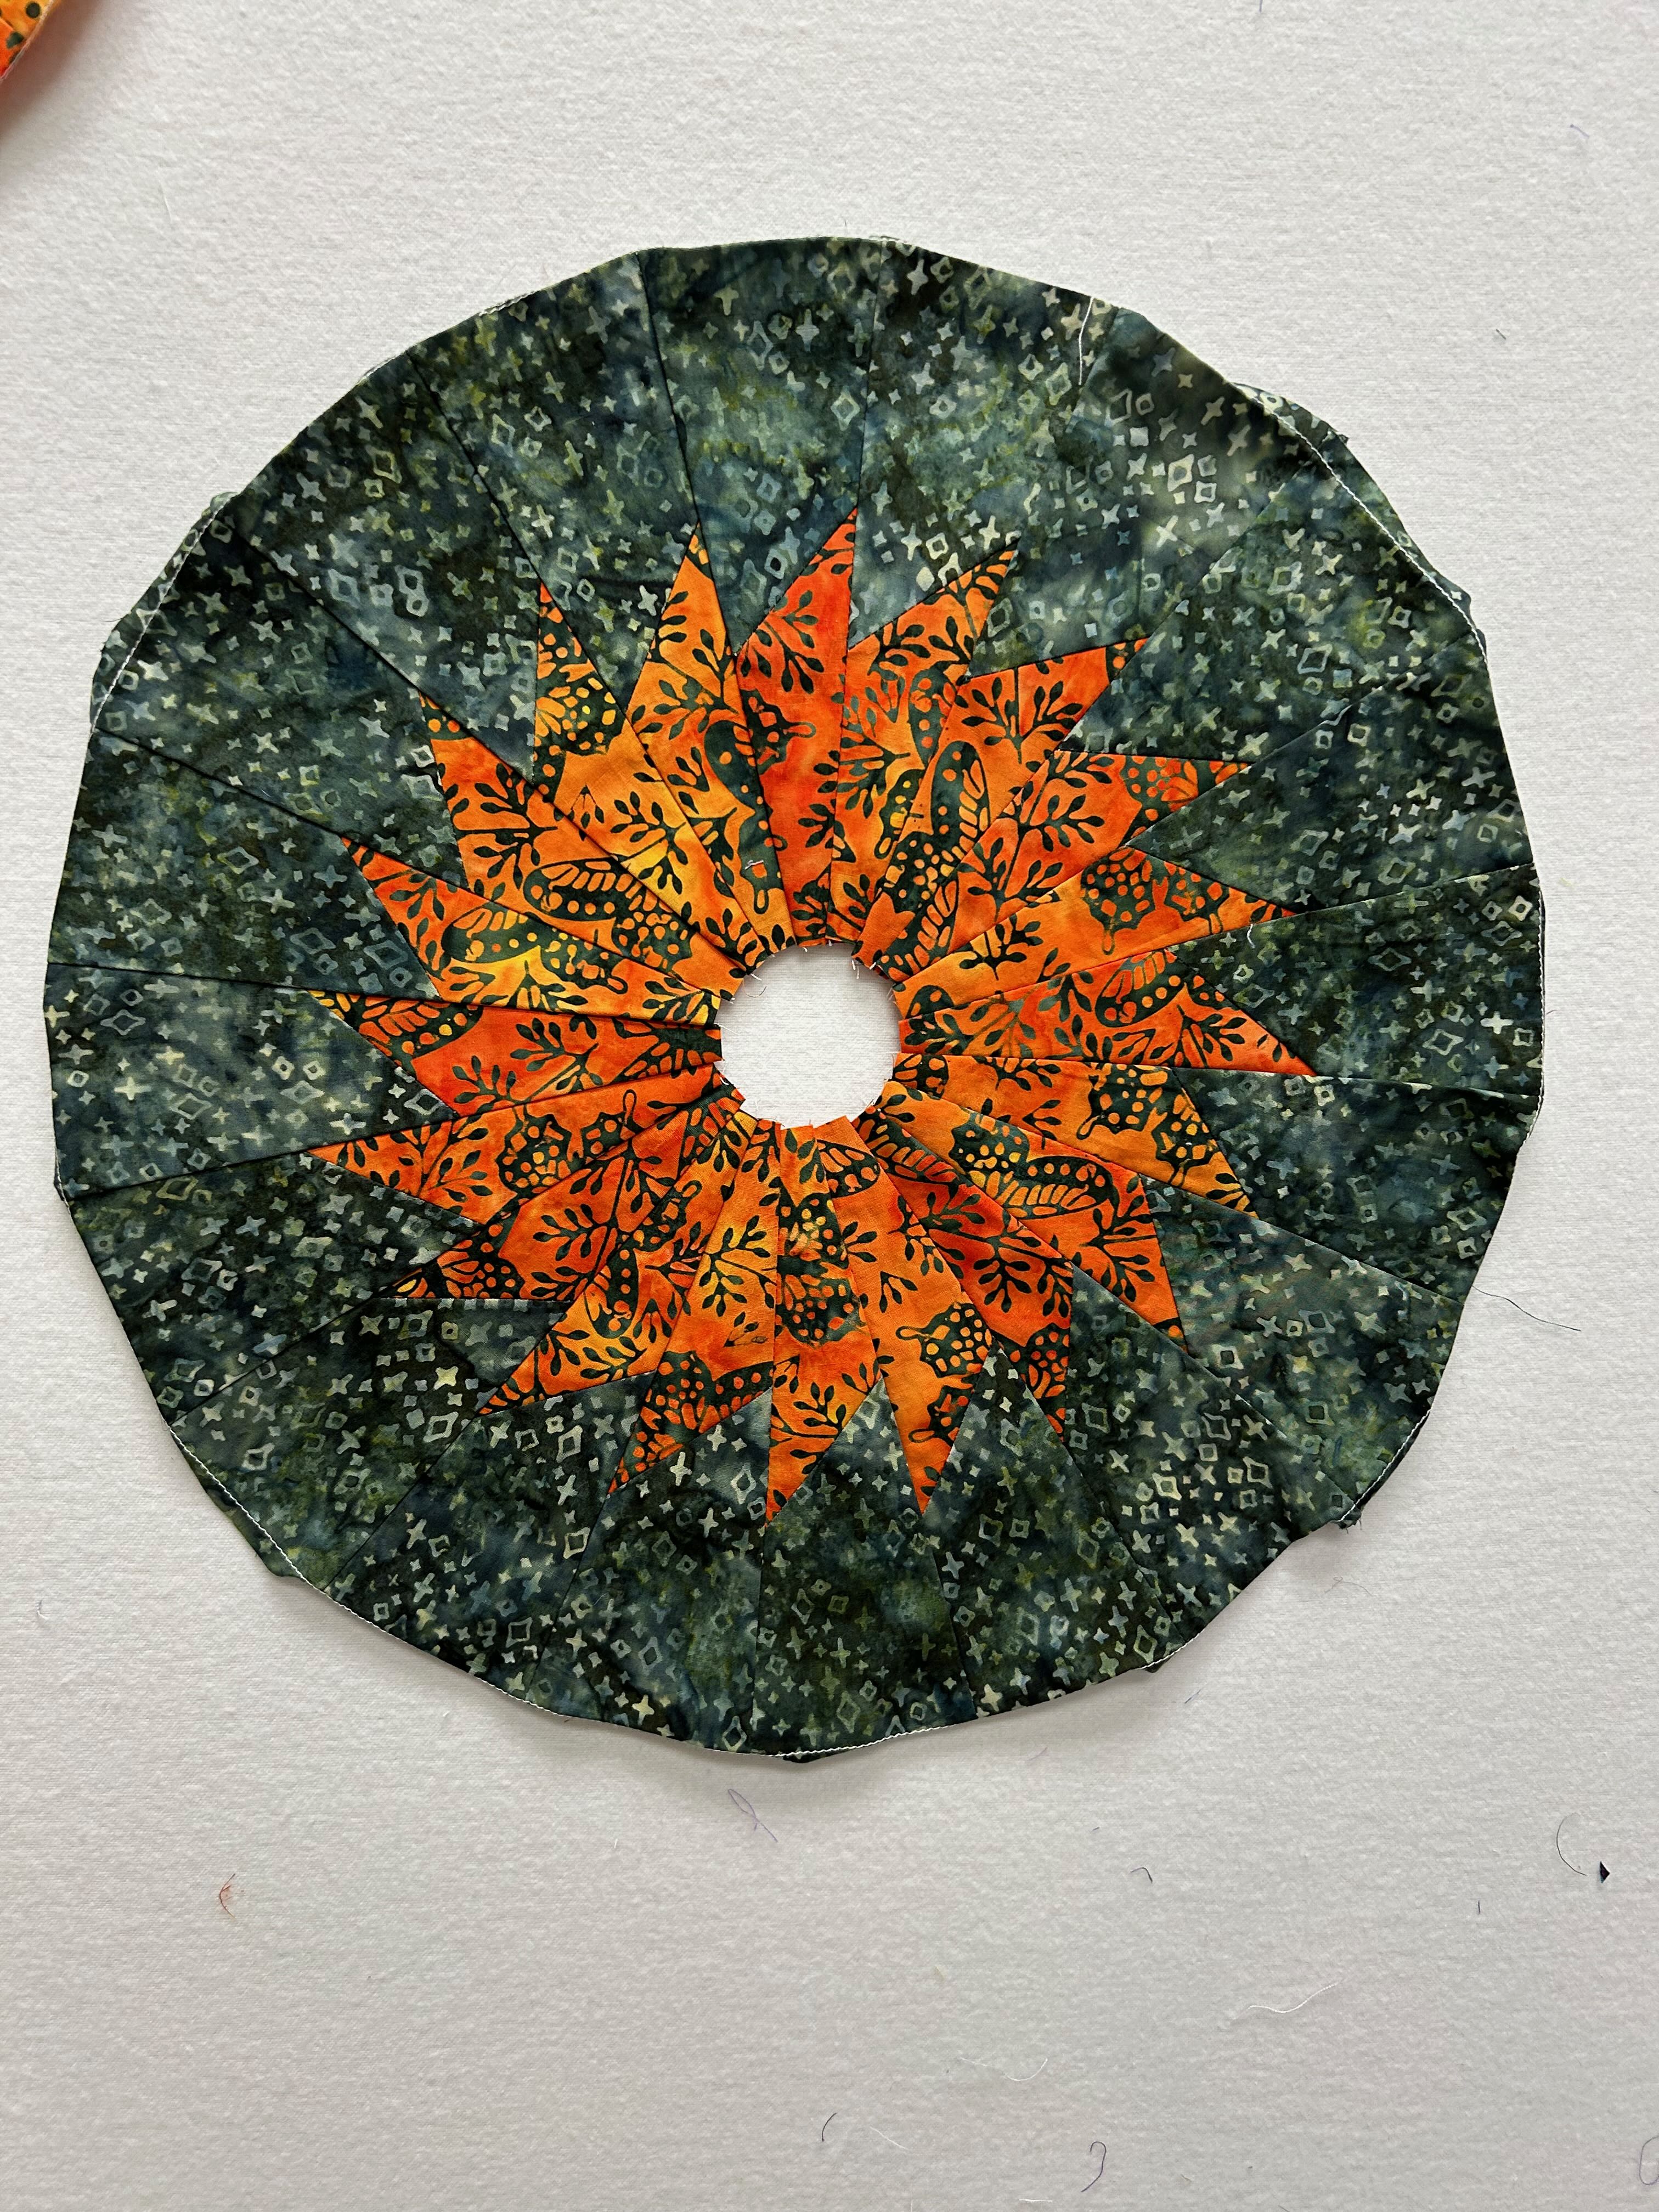
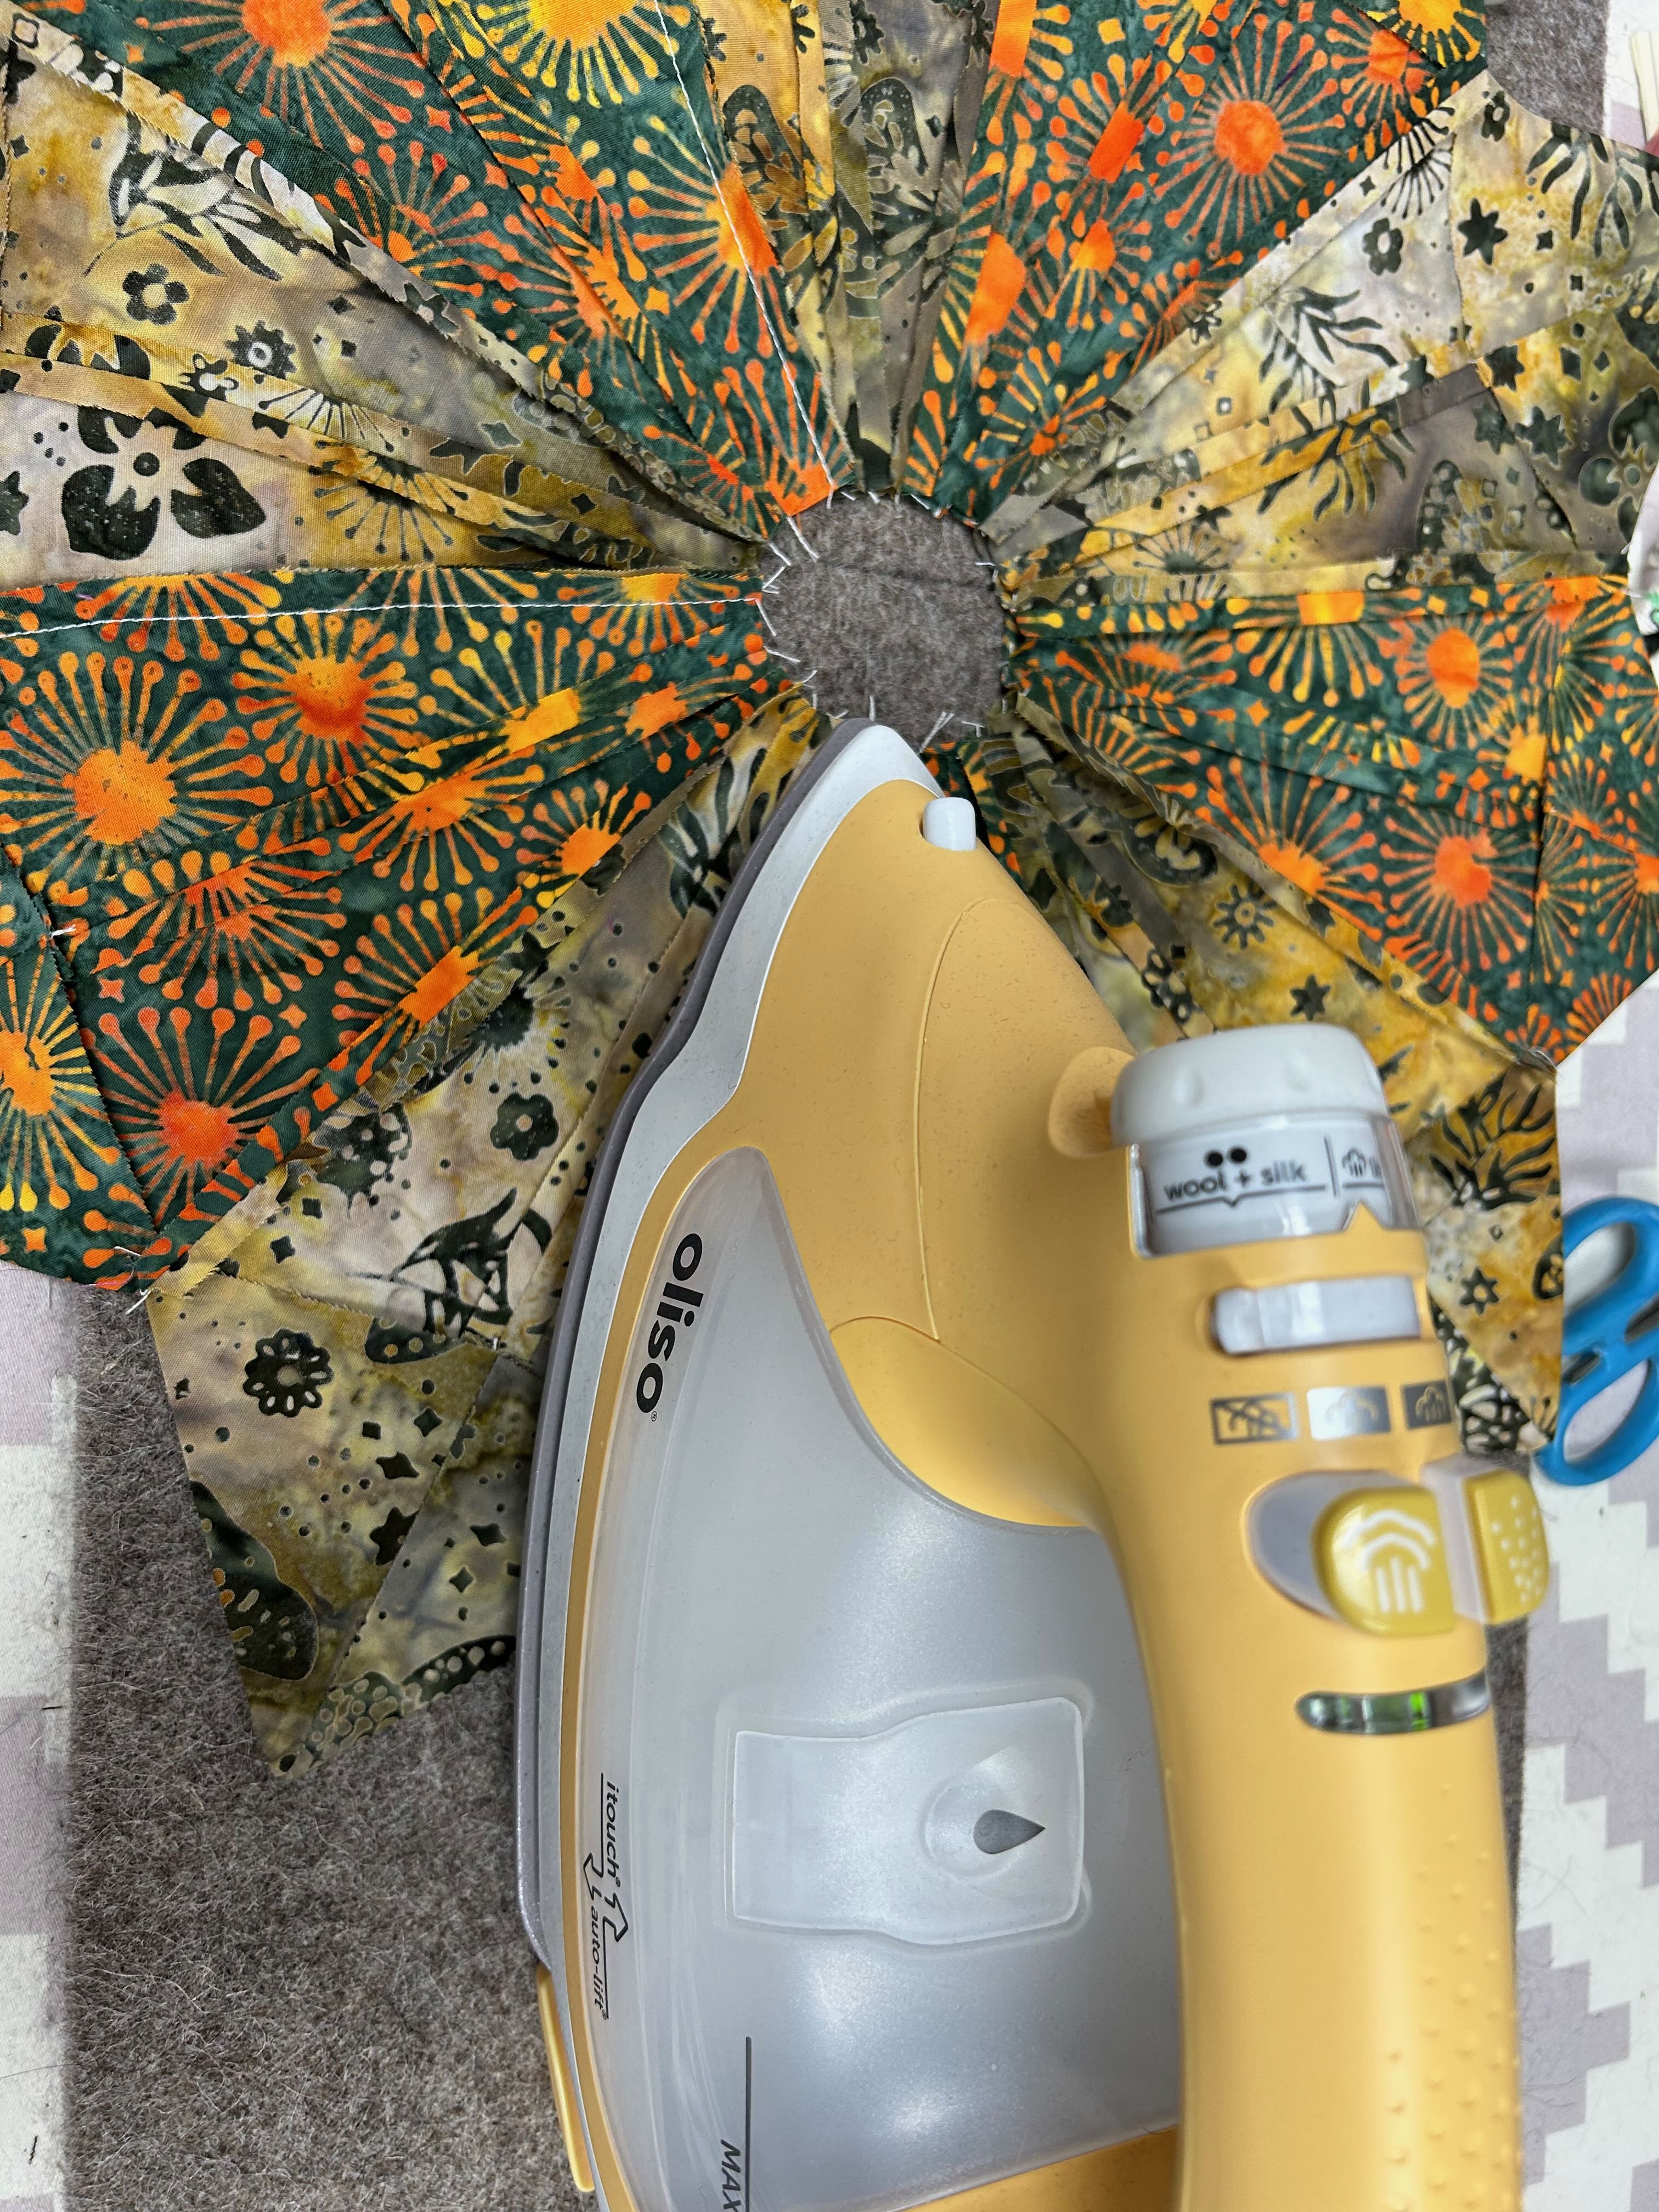
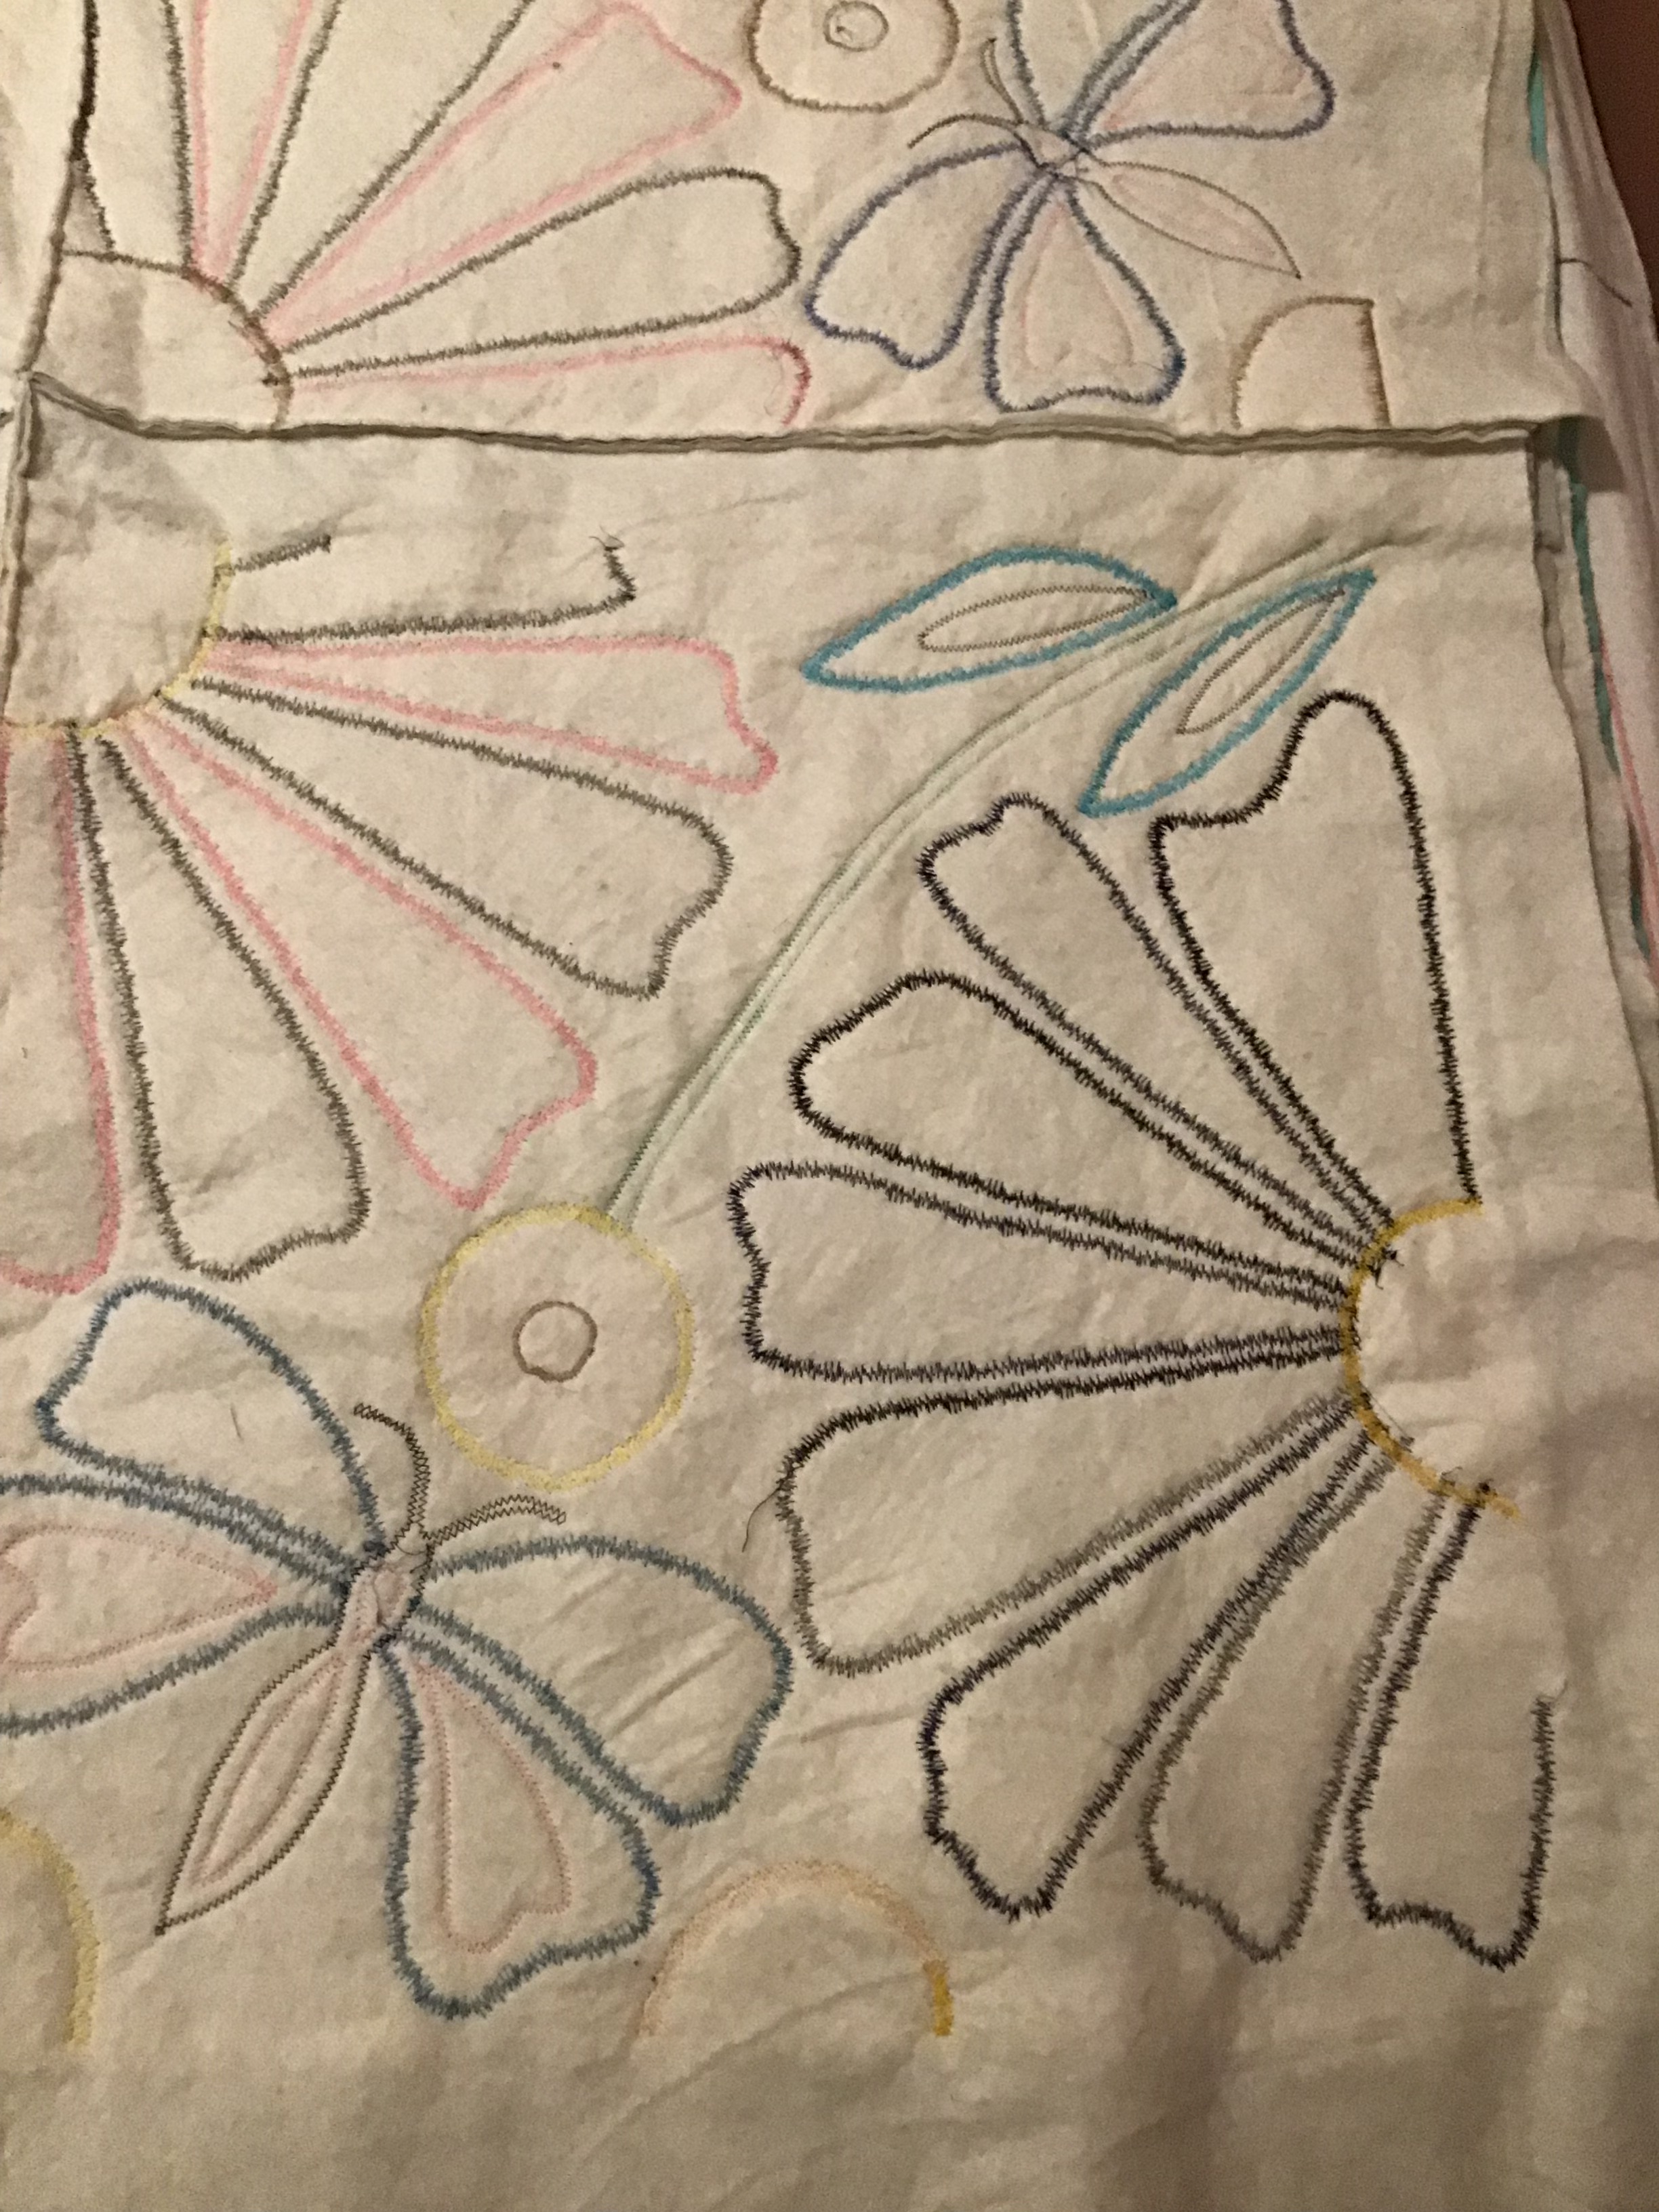
My one large Dresden Plate didn’t work out very well! You can’t tell really well from the picture, but the centre did not lie well. If you look closely at the upper right part of the centre circle, you can see that it isn’t a nice circle – it sort-of goes straight.
I tried to fix it by doing a few things: Take out one or 2 blades … unstitch a few blades that formed the ‘straight’ part of the circle and re-sew … sigh … it didn’t work.
On to plan B …
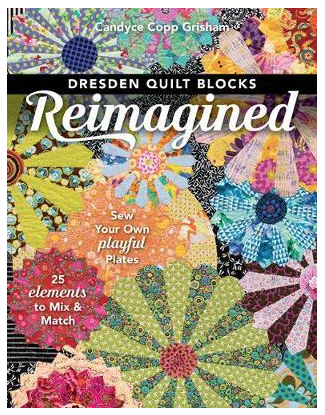
A few years ago, our guild had a zoom presentation by Candace Copp Grisham. Shortly after the presentation, I was at a guild retreat and “Dresden” fever was evident. Almost everyone at the retreat was making a Dresden plate! I ended up buying the book and played around with some of the ideas.
There is a LOT of inspiration on Candace’s website HERE. Also, a friend had made a wall hanging with Dresden plates and a vase … between the website and my friends quilt, my inspiration was newly born!
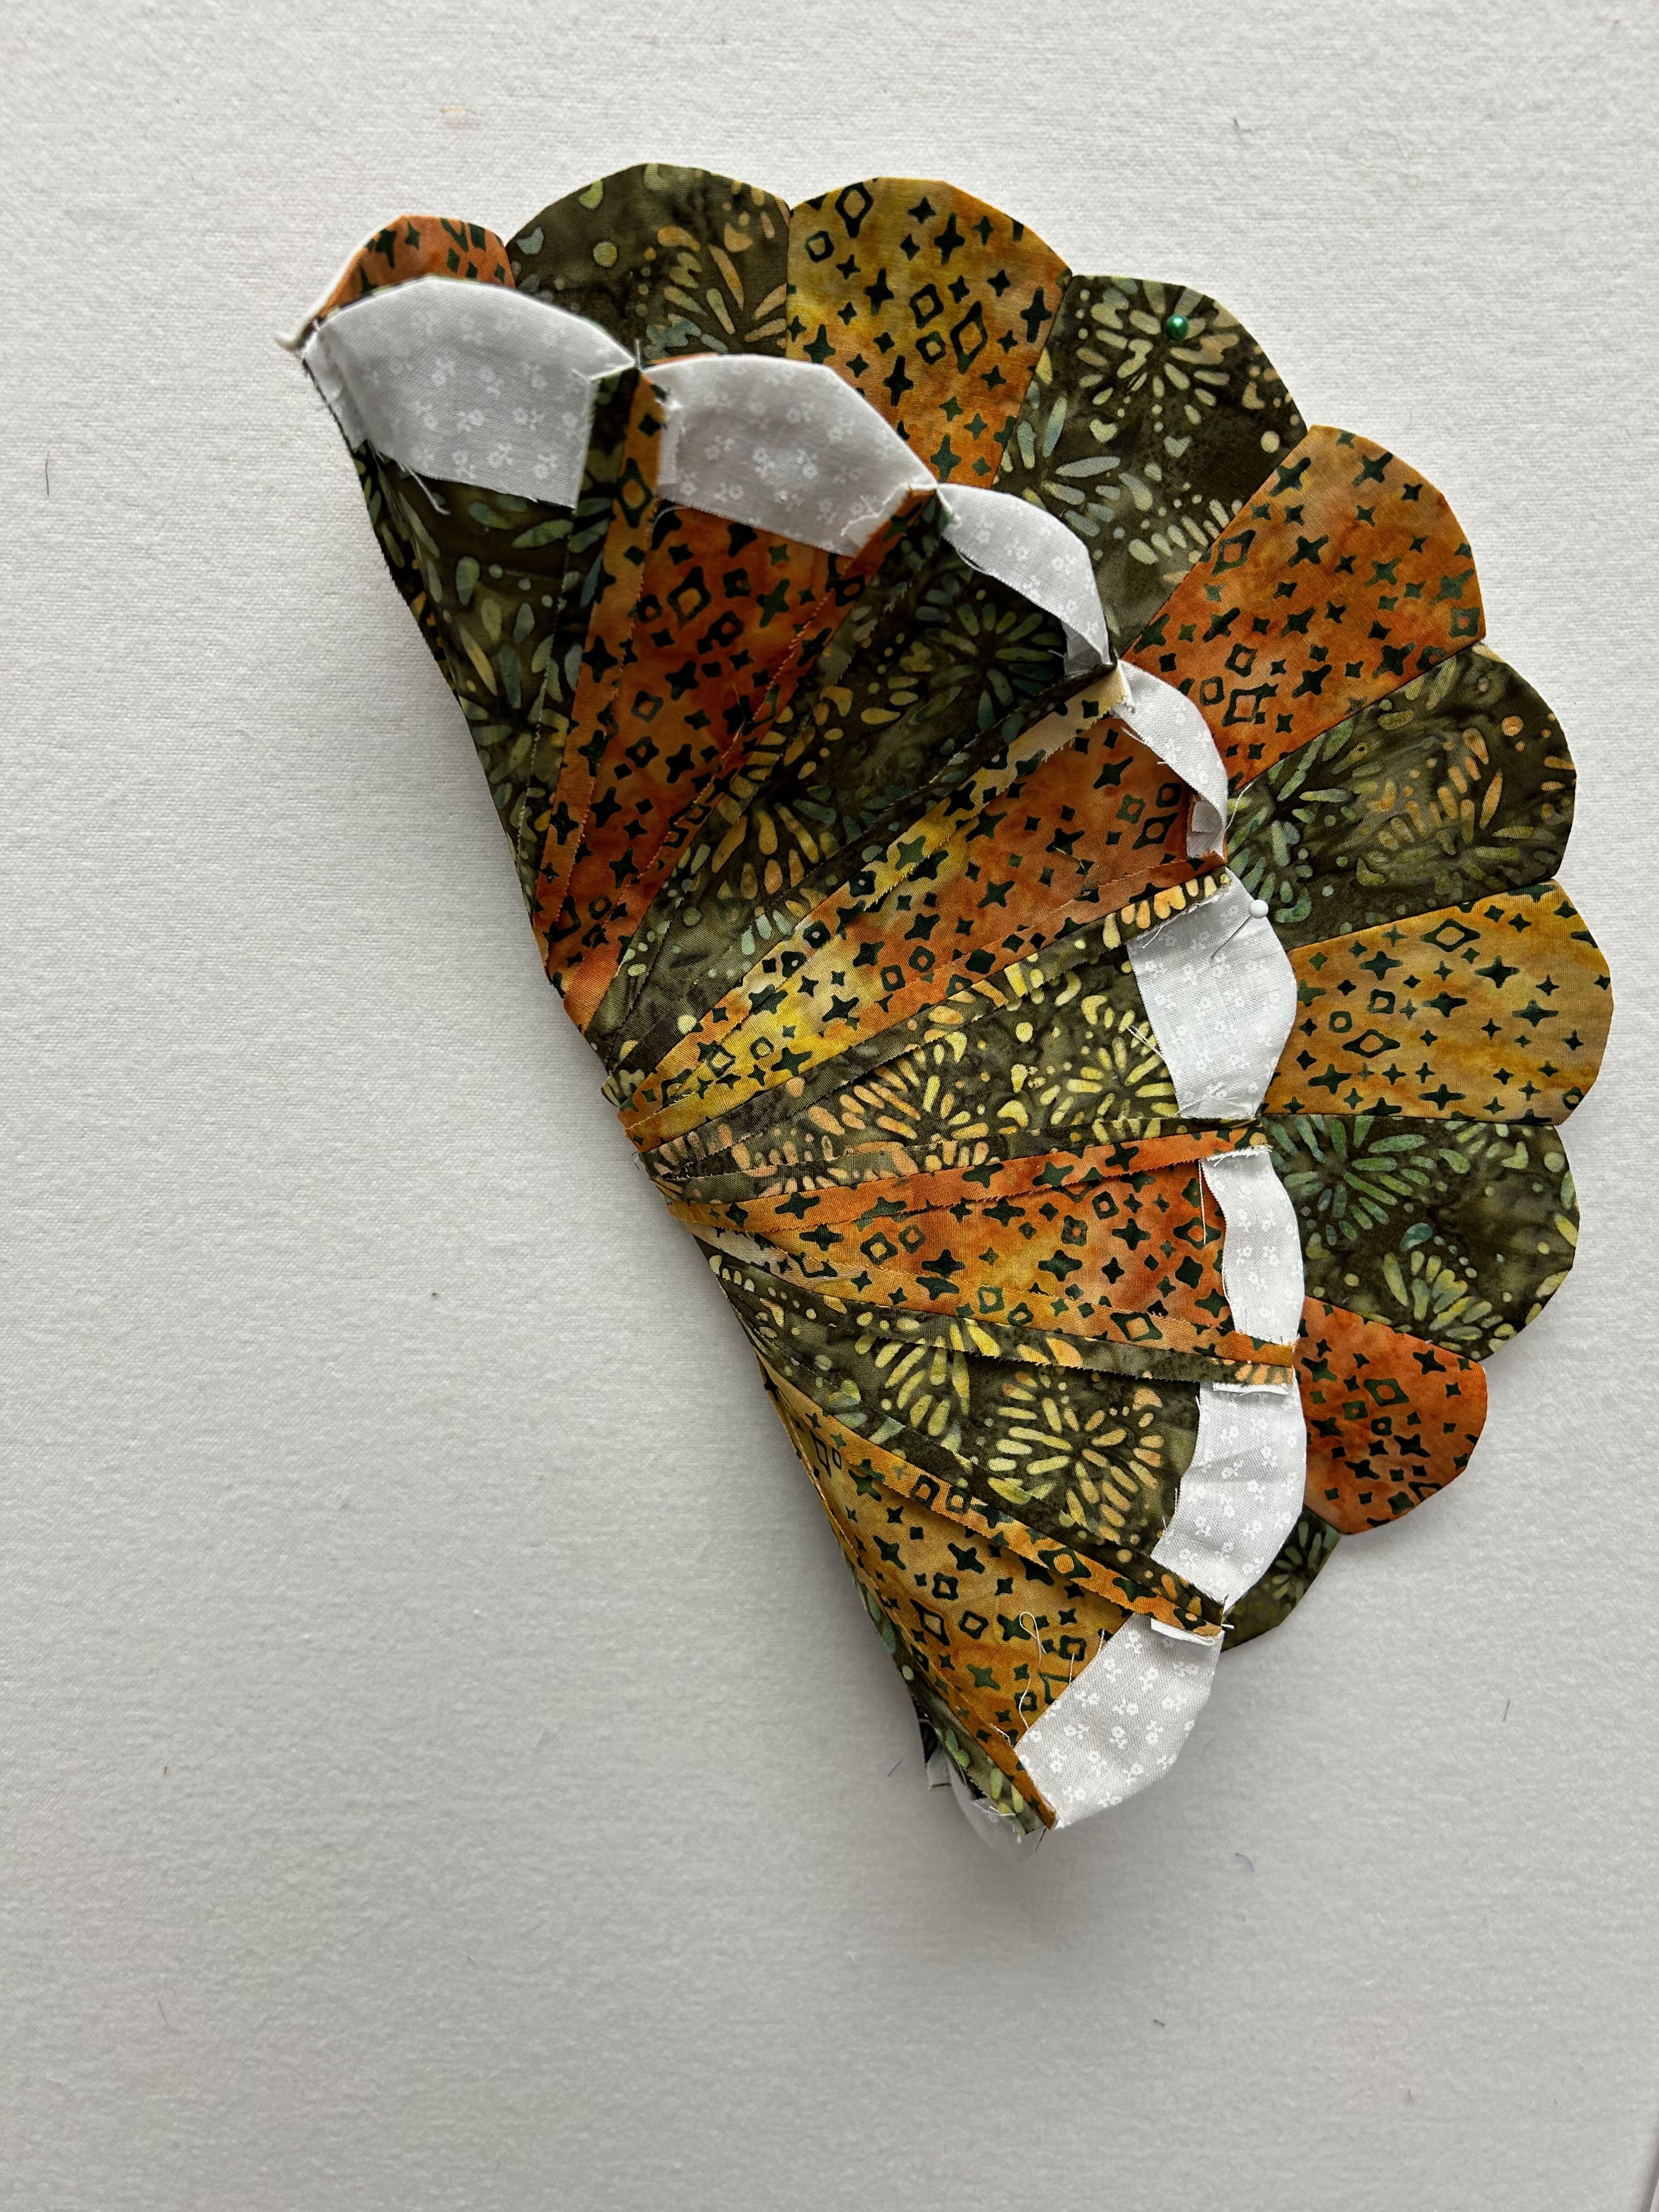
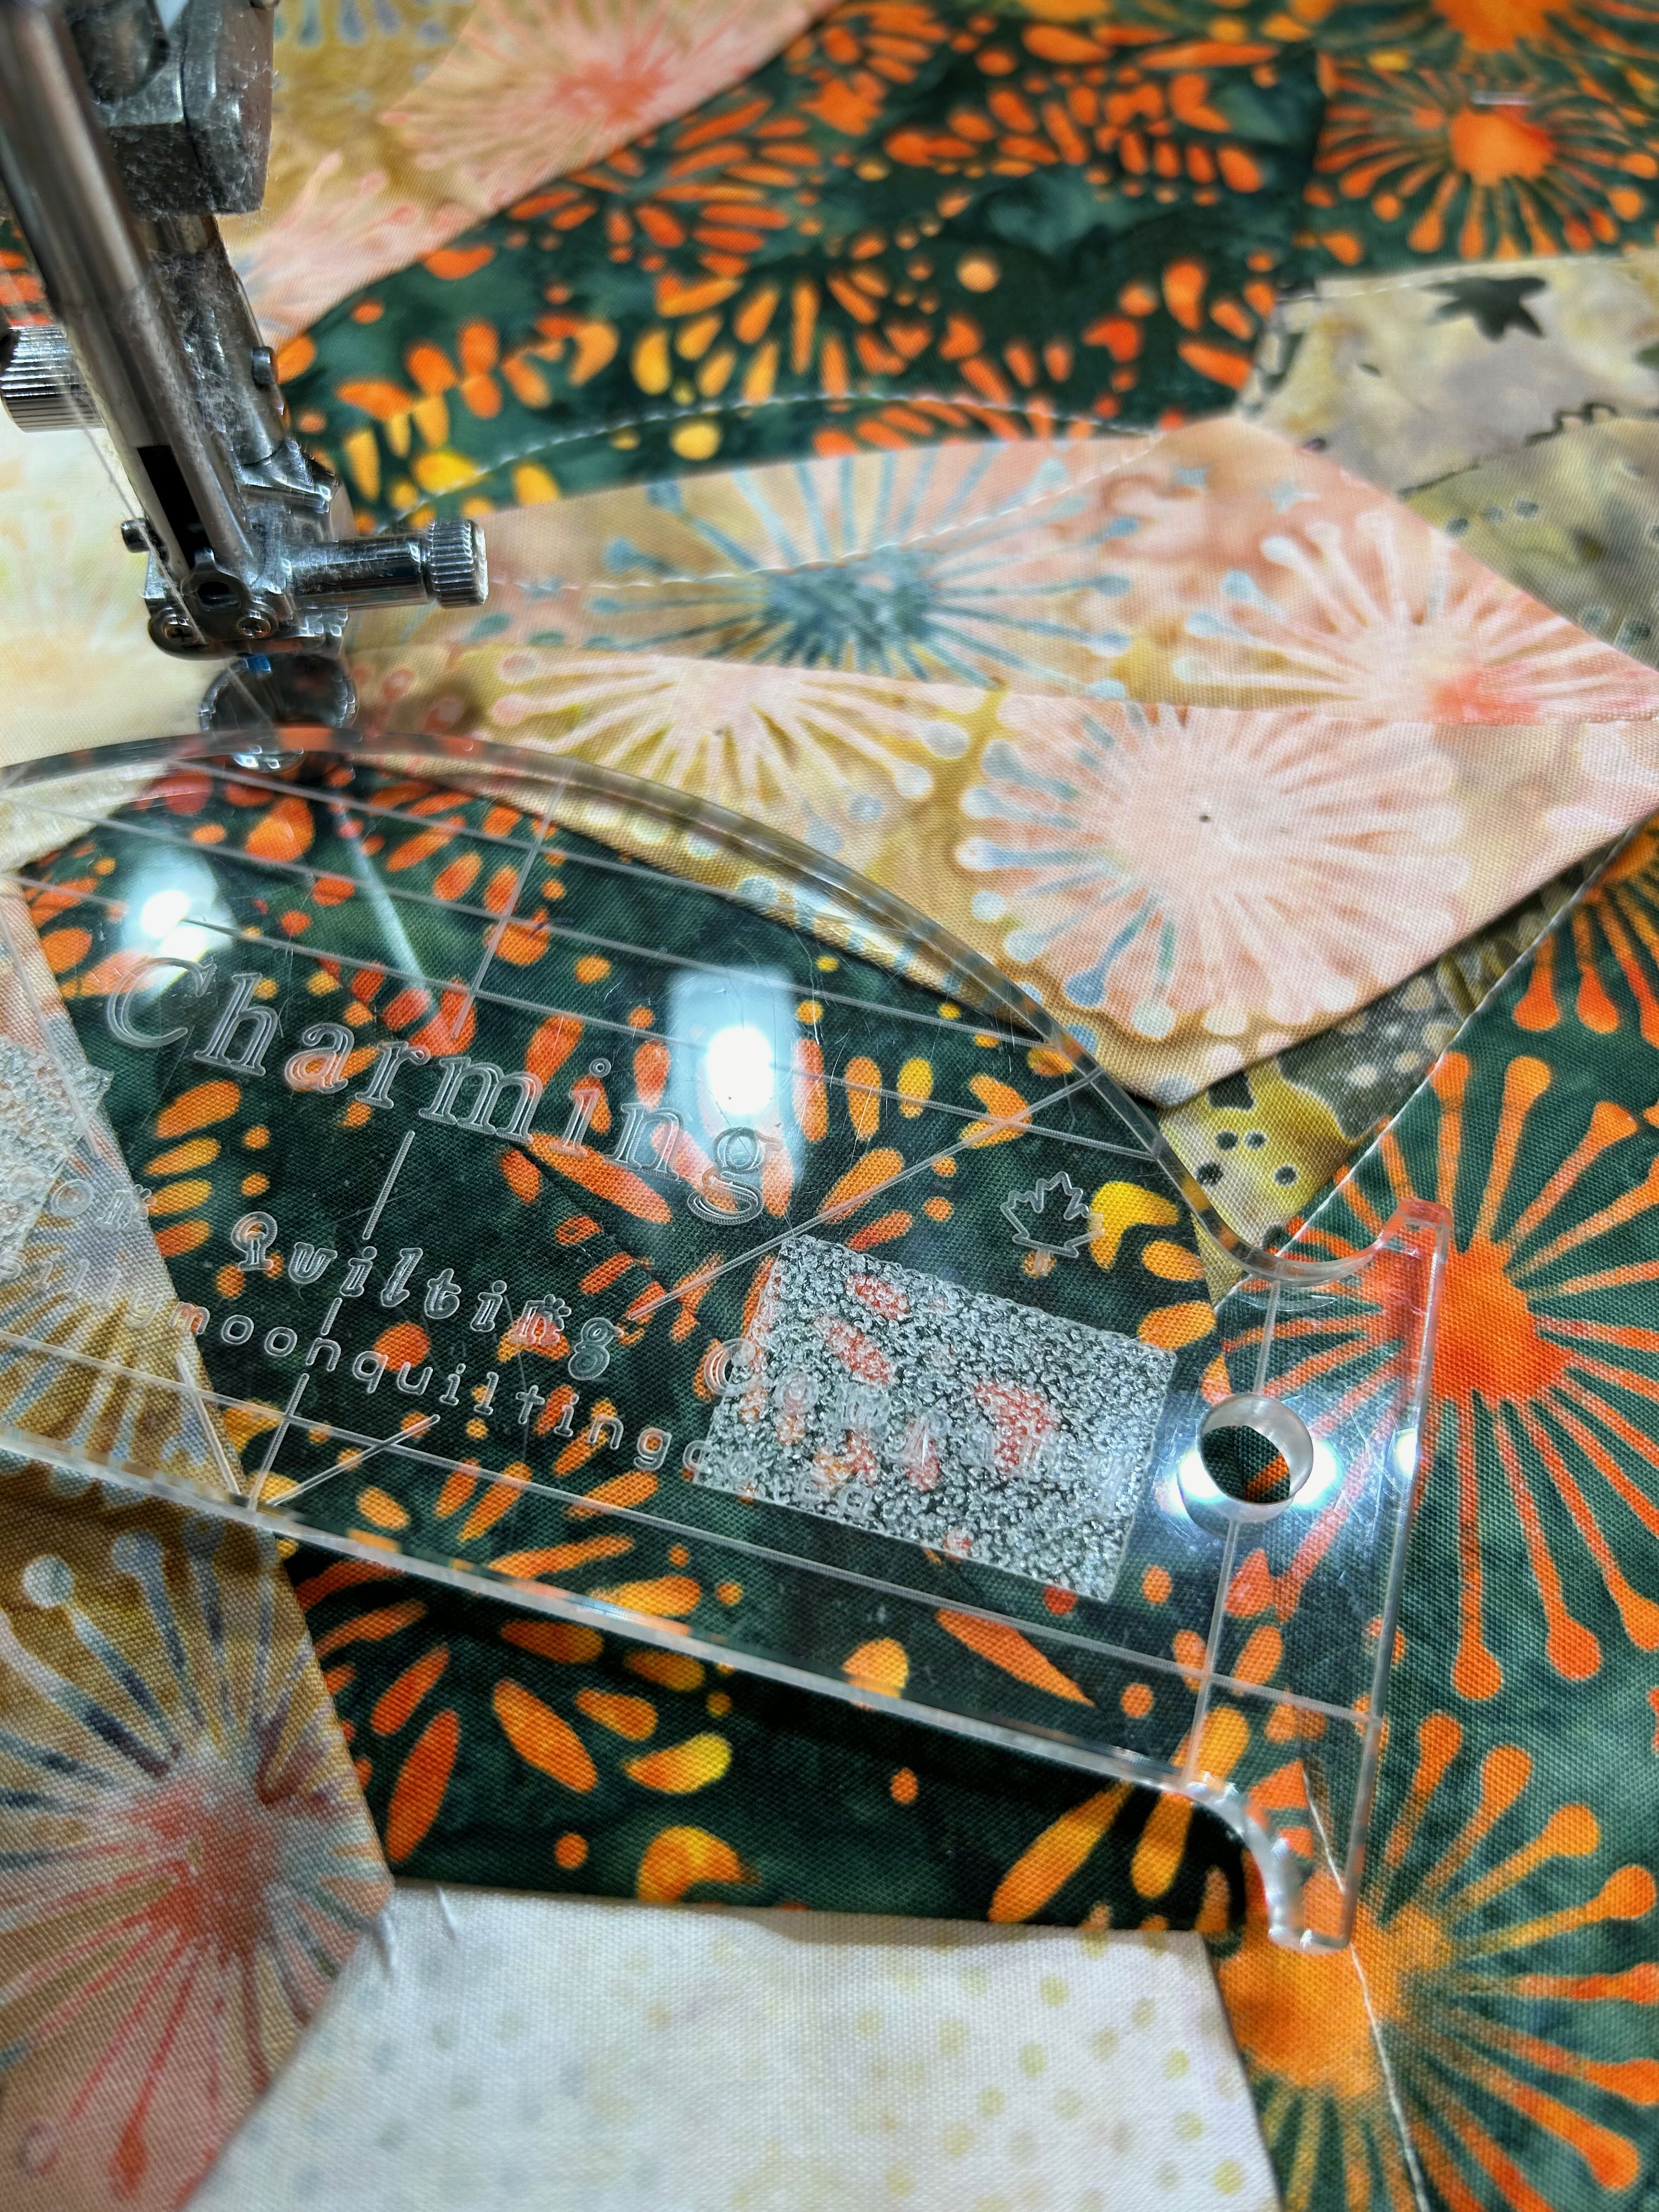
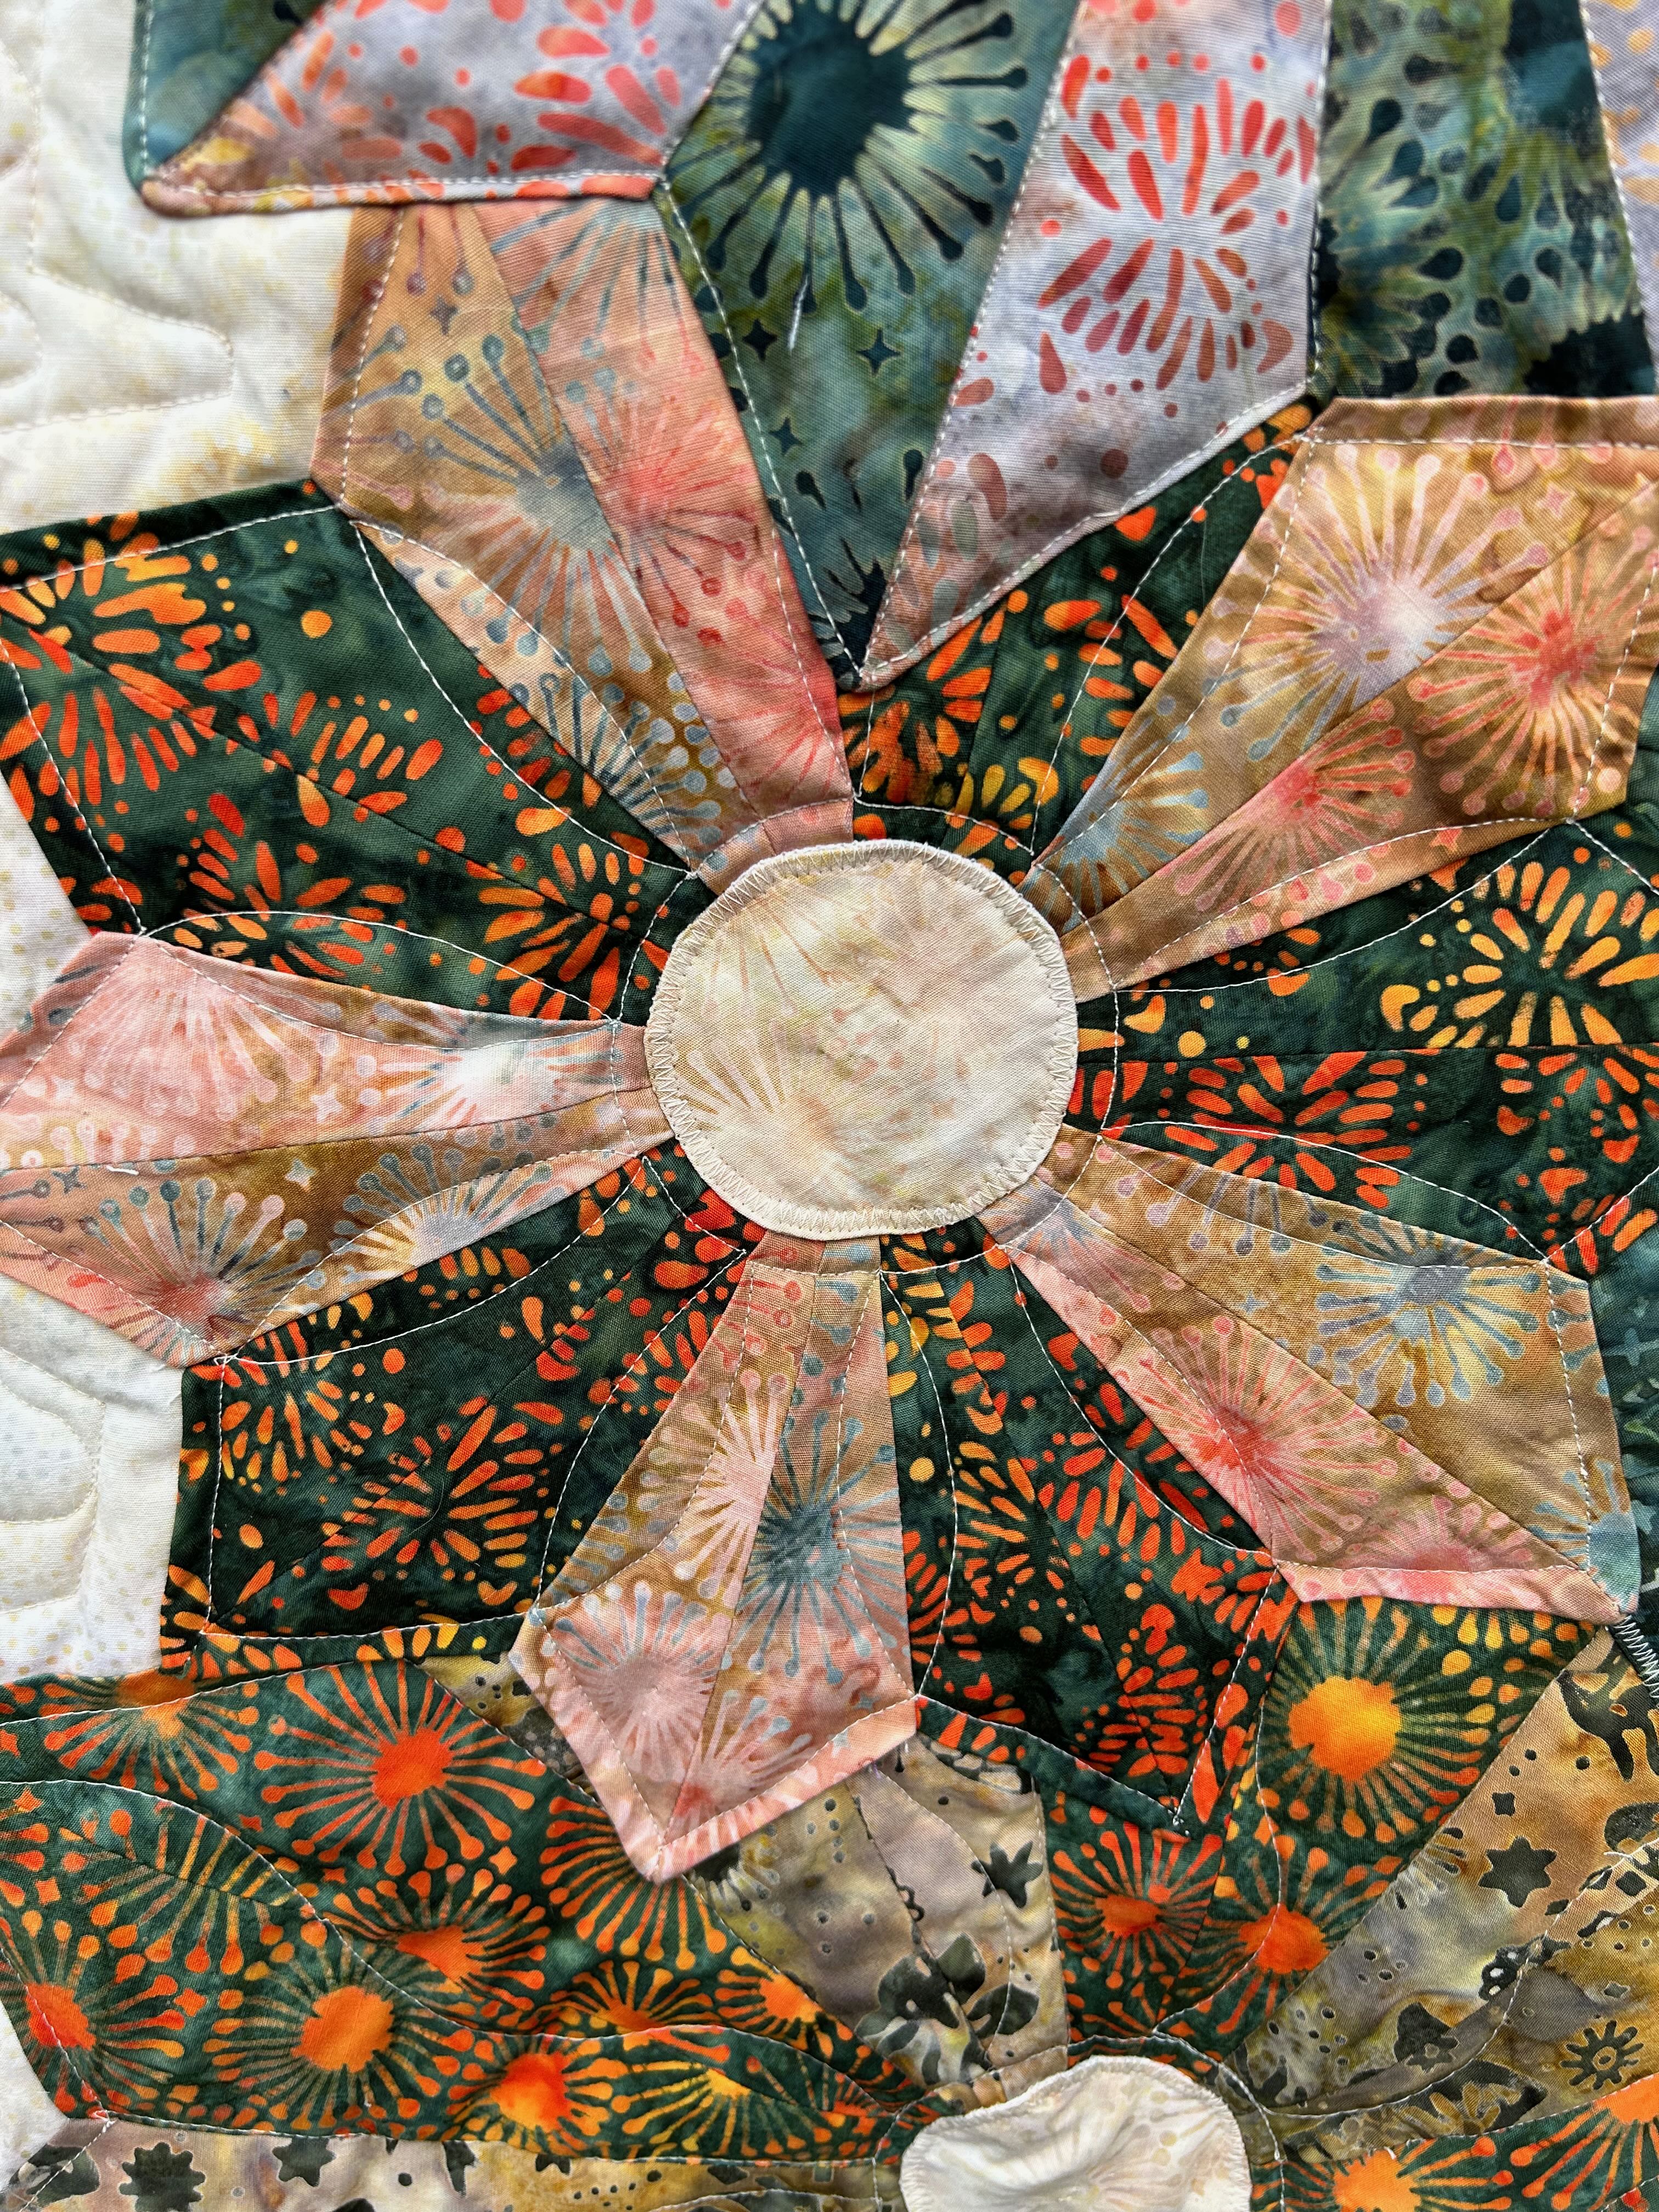
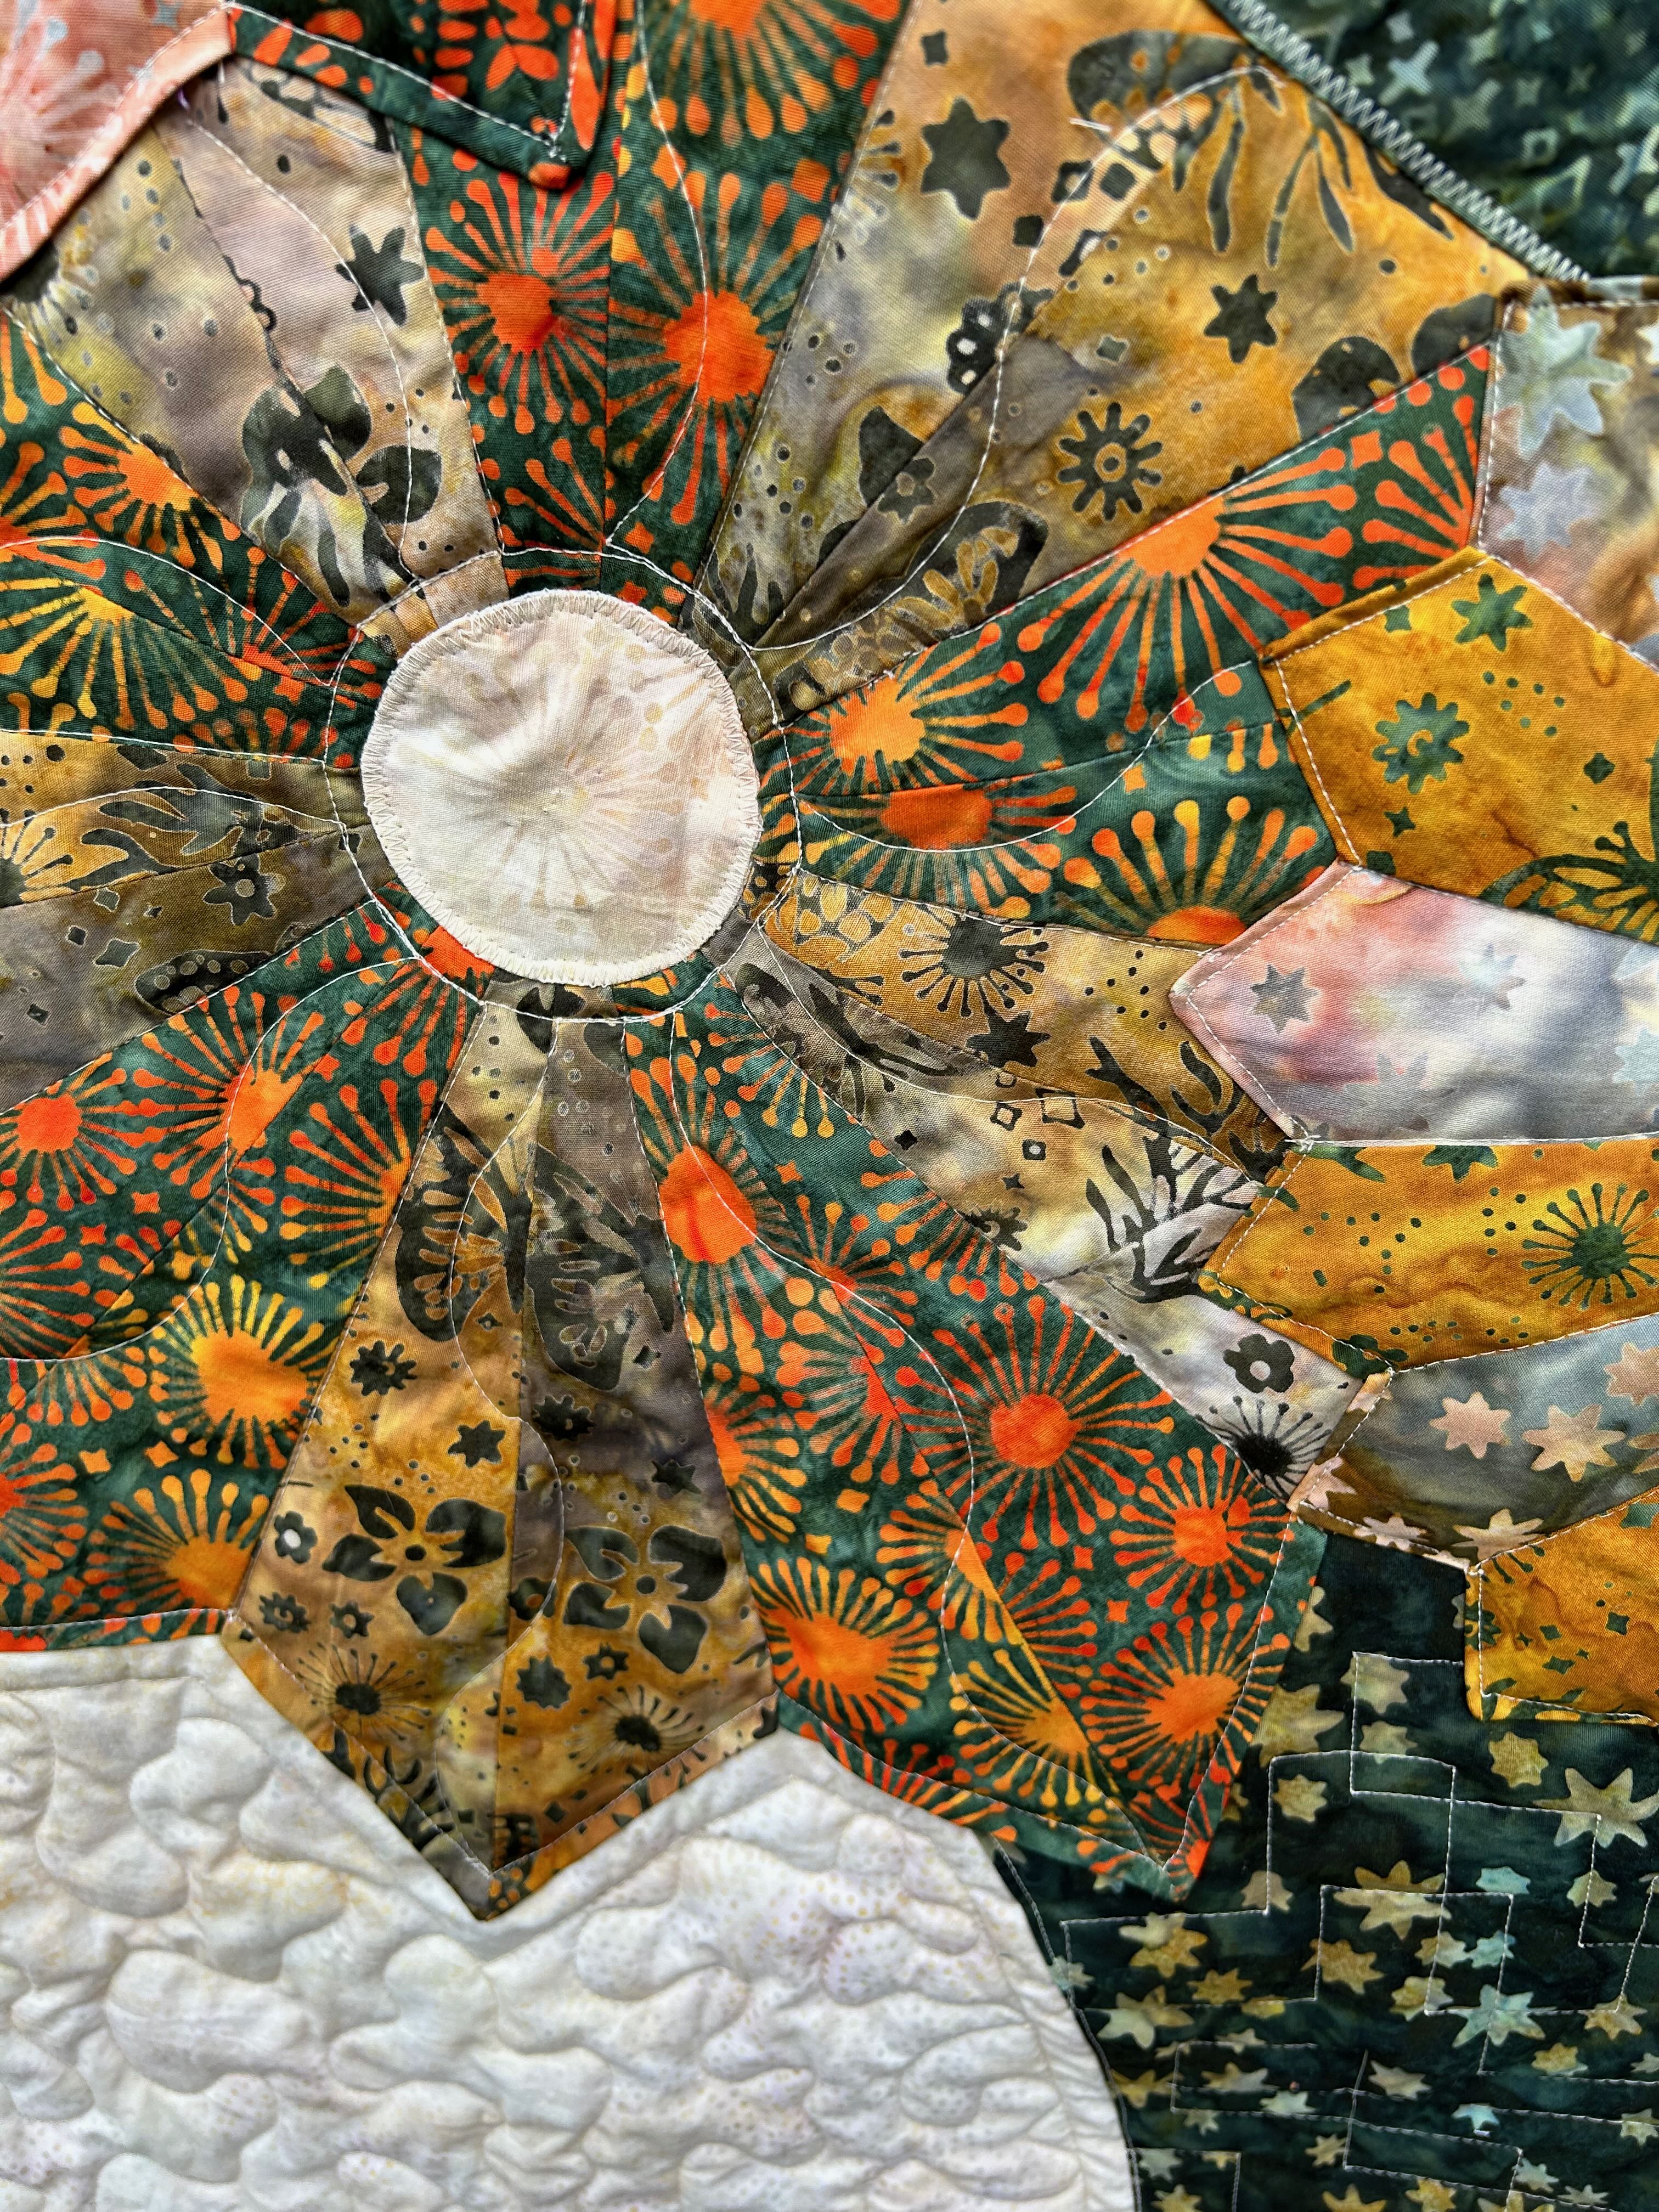
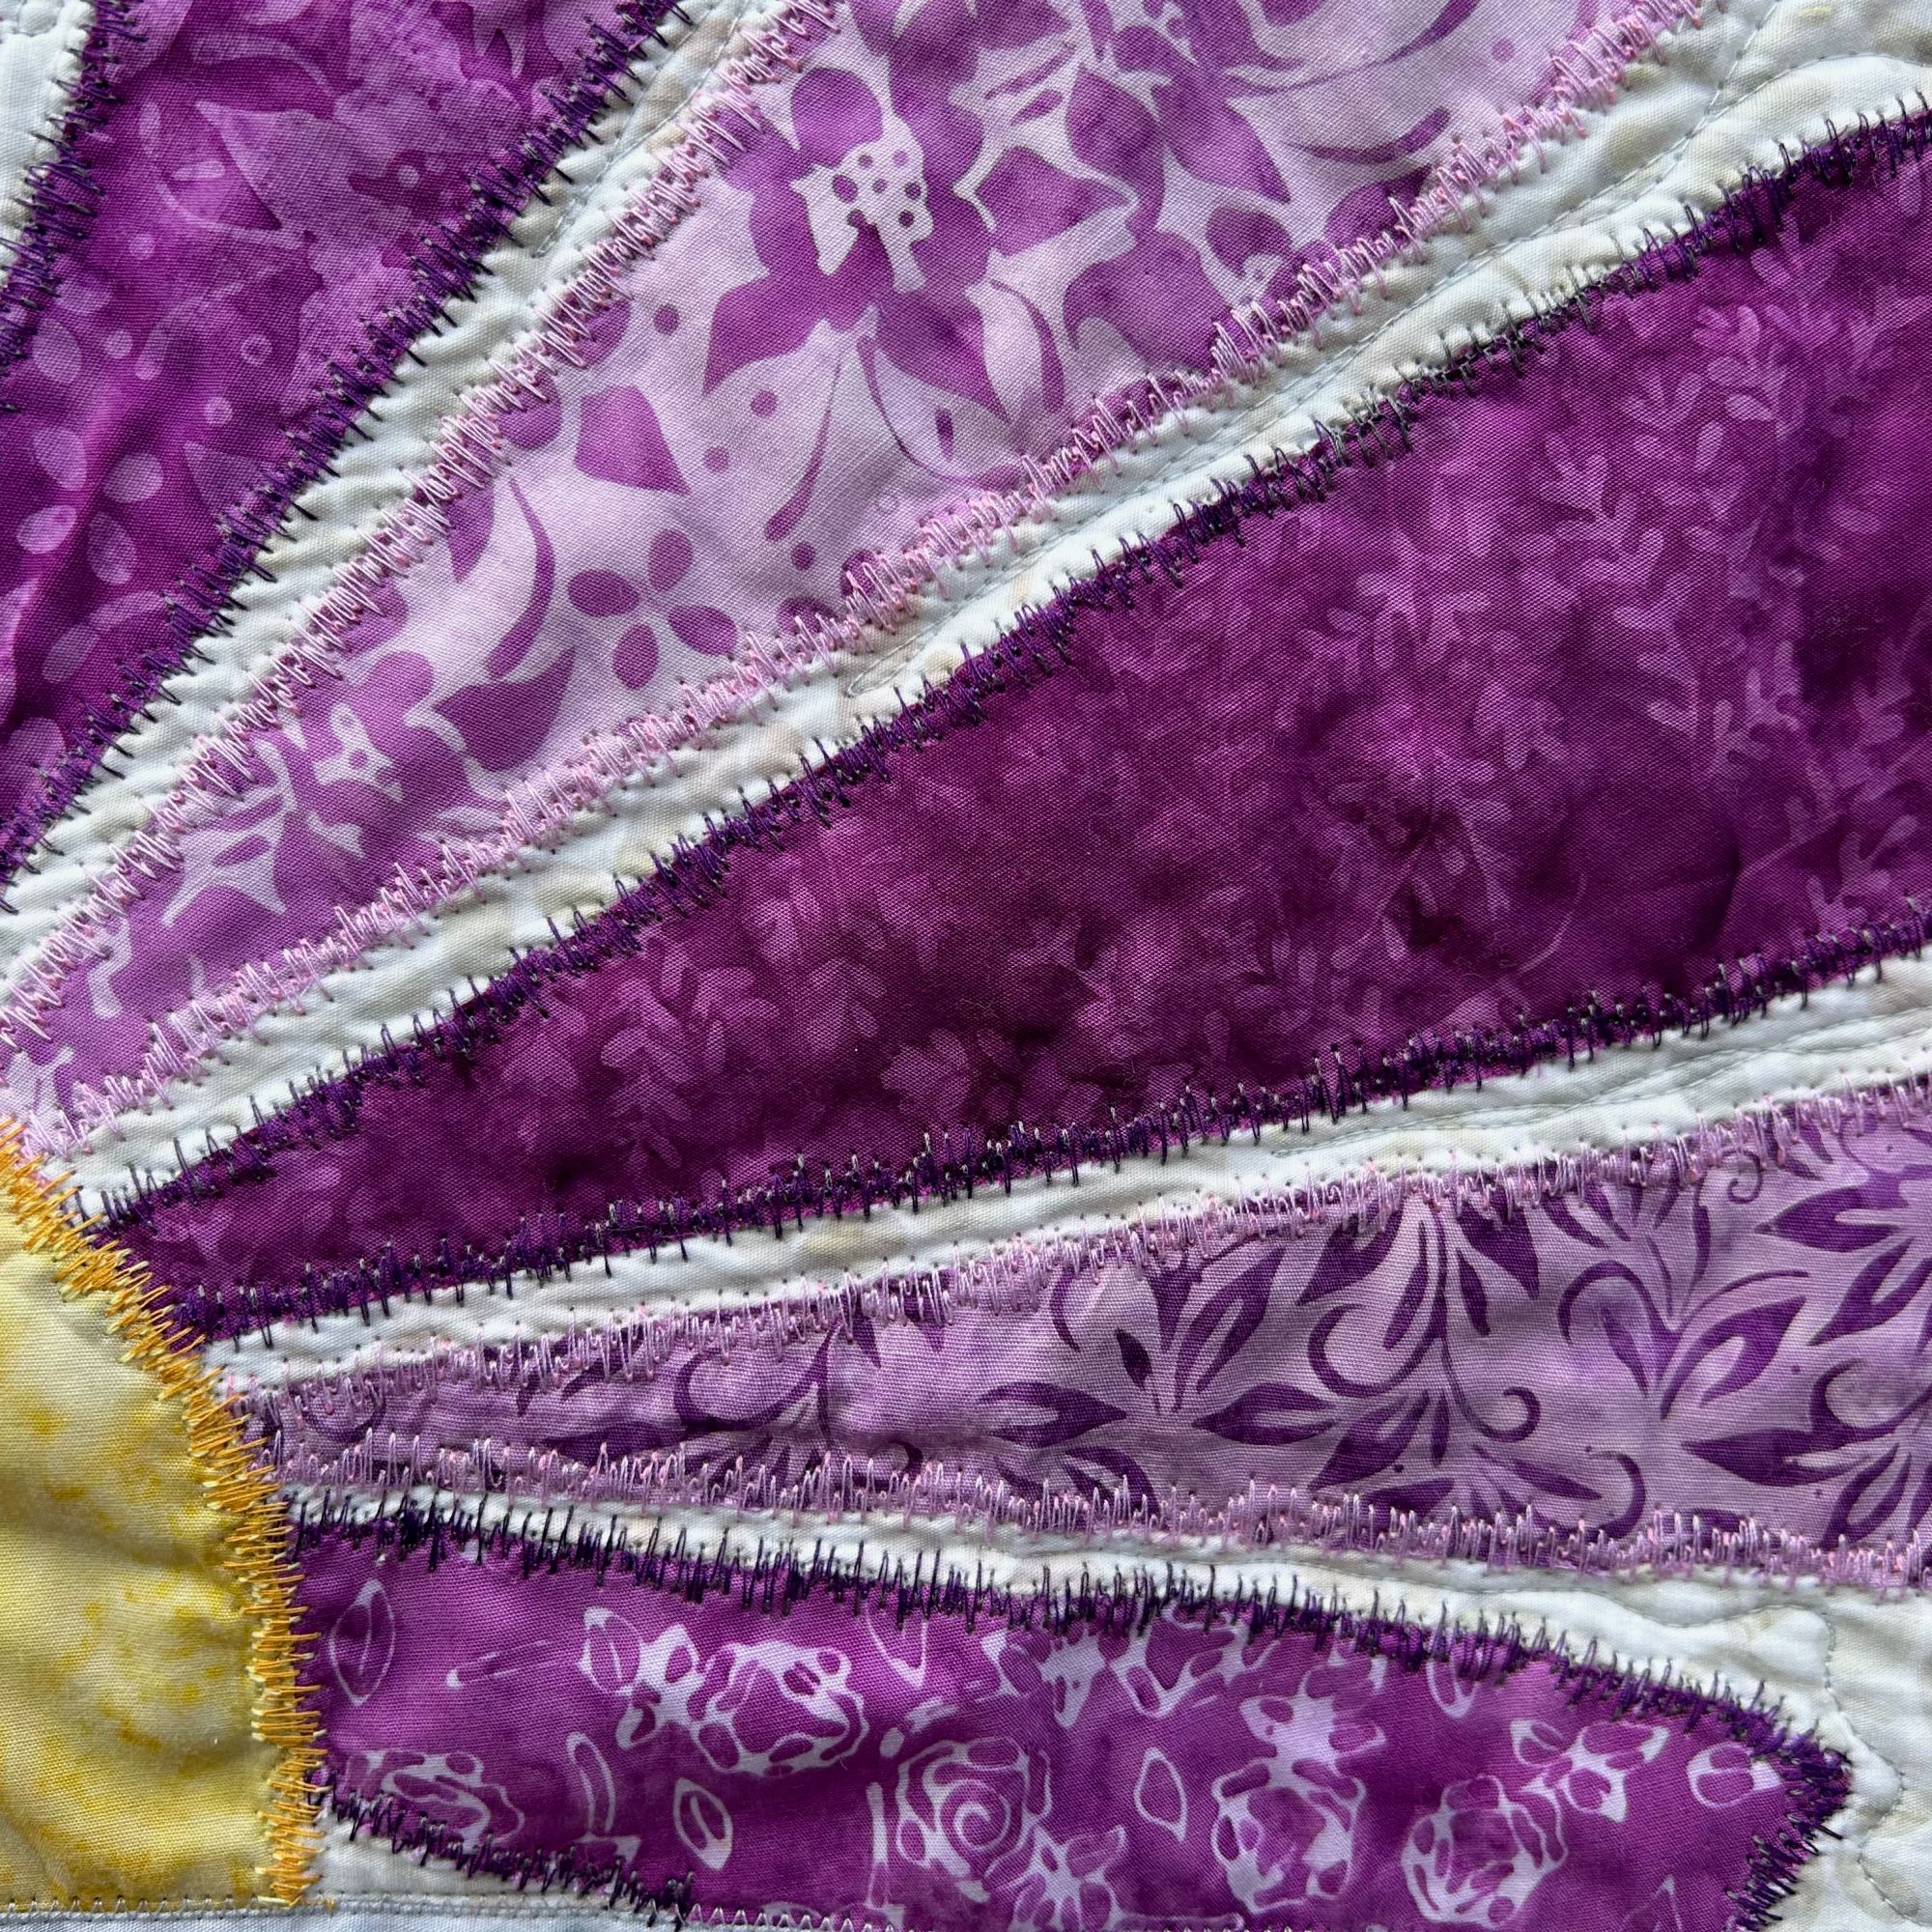
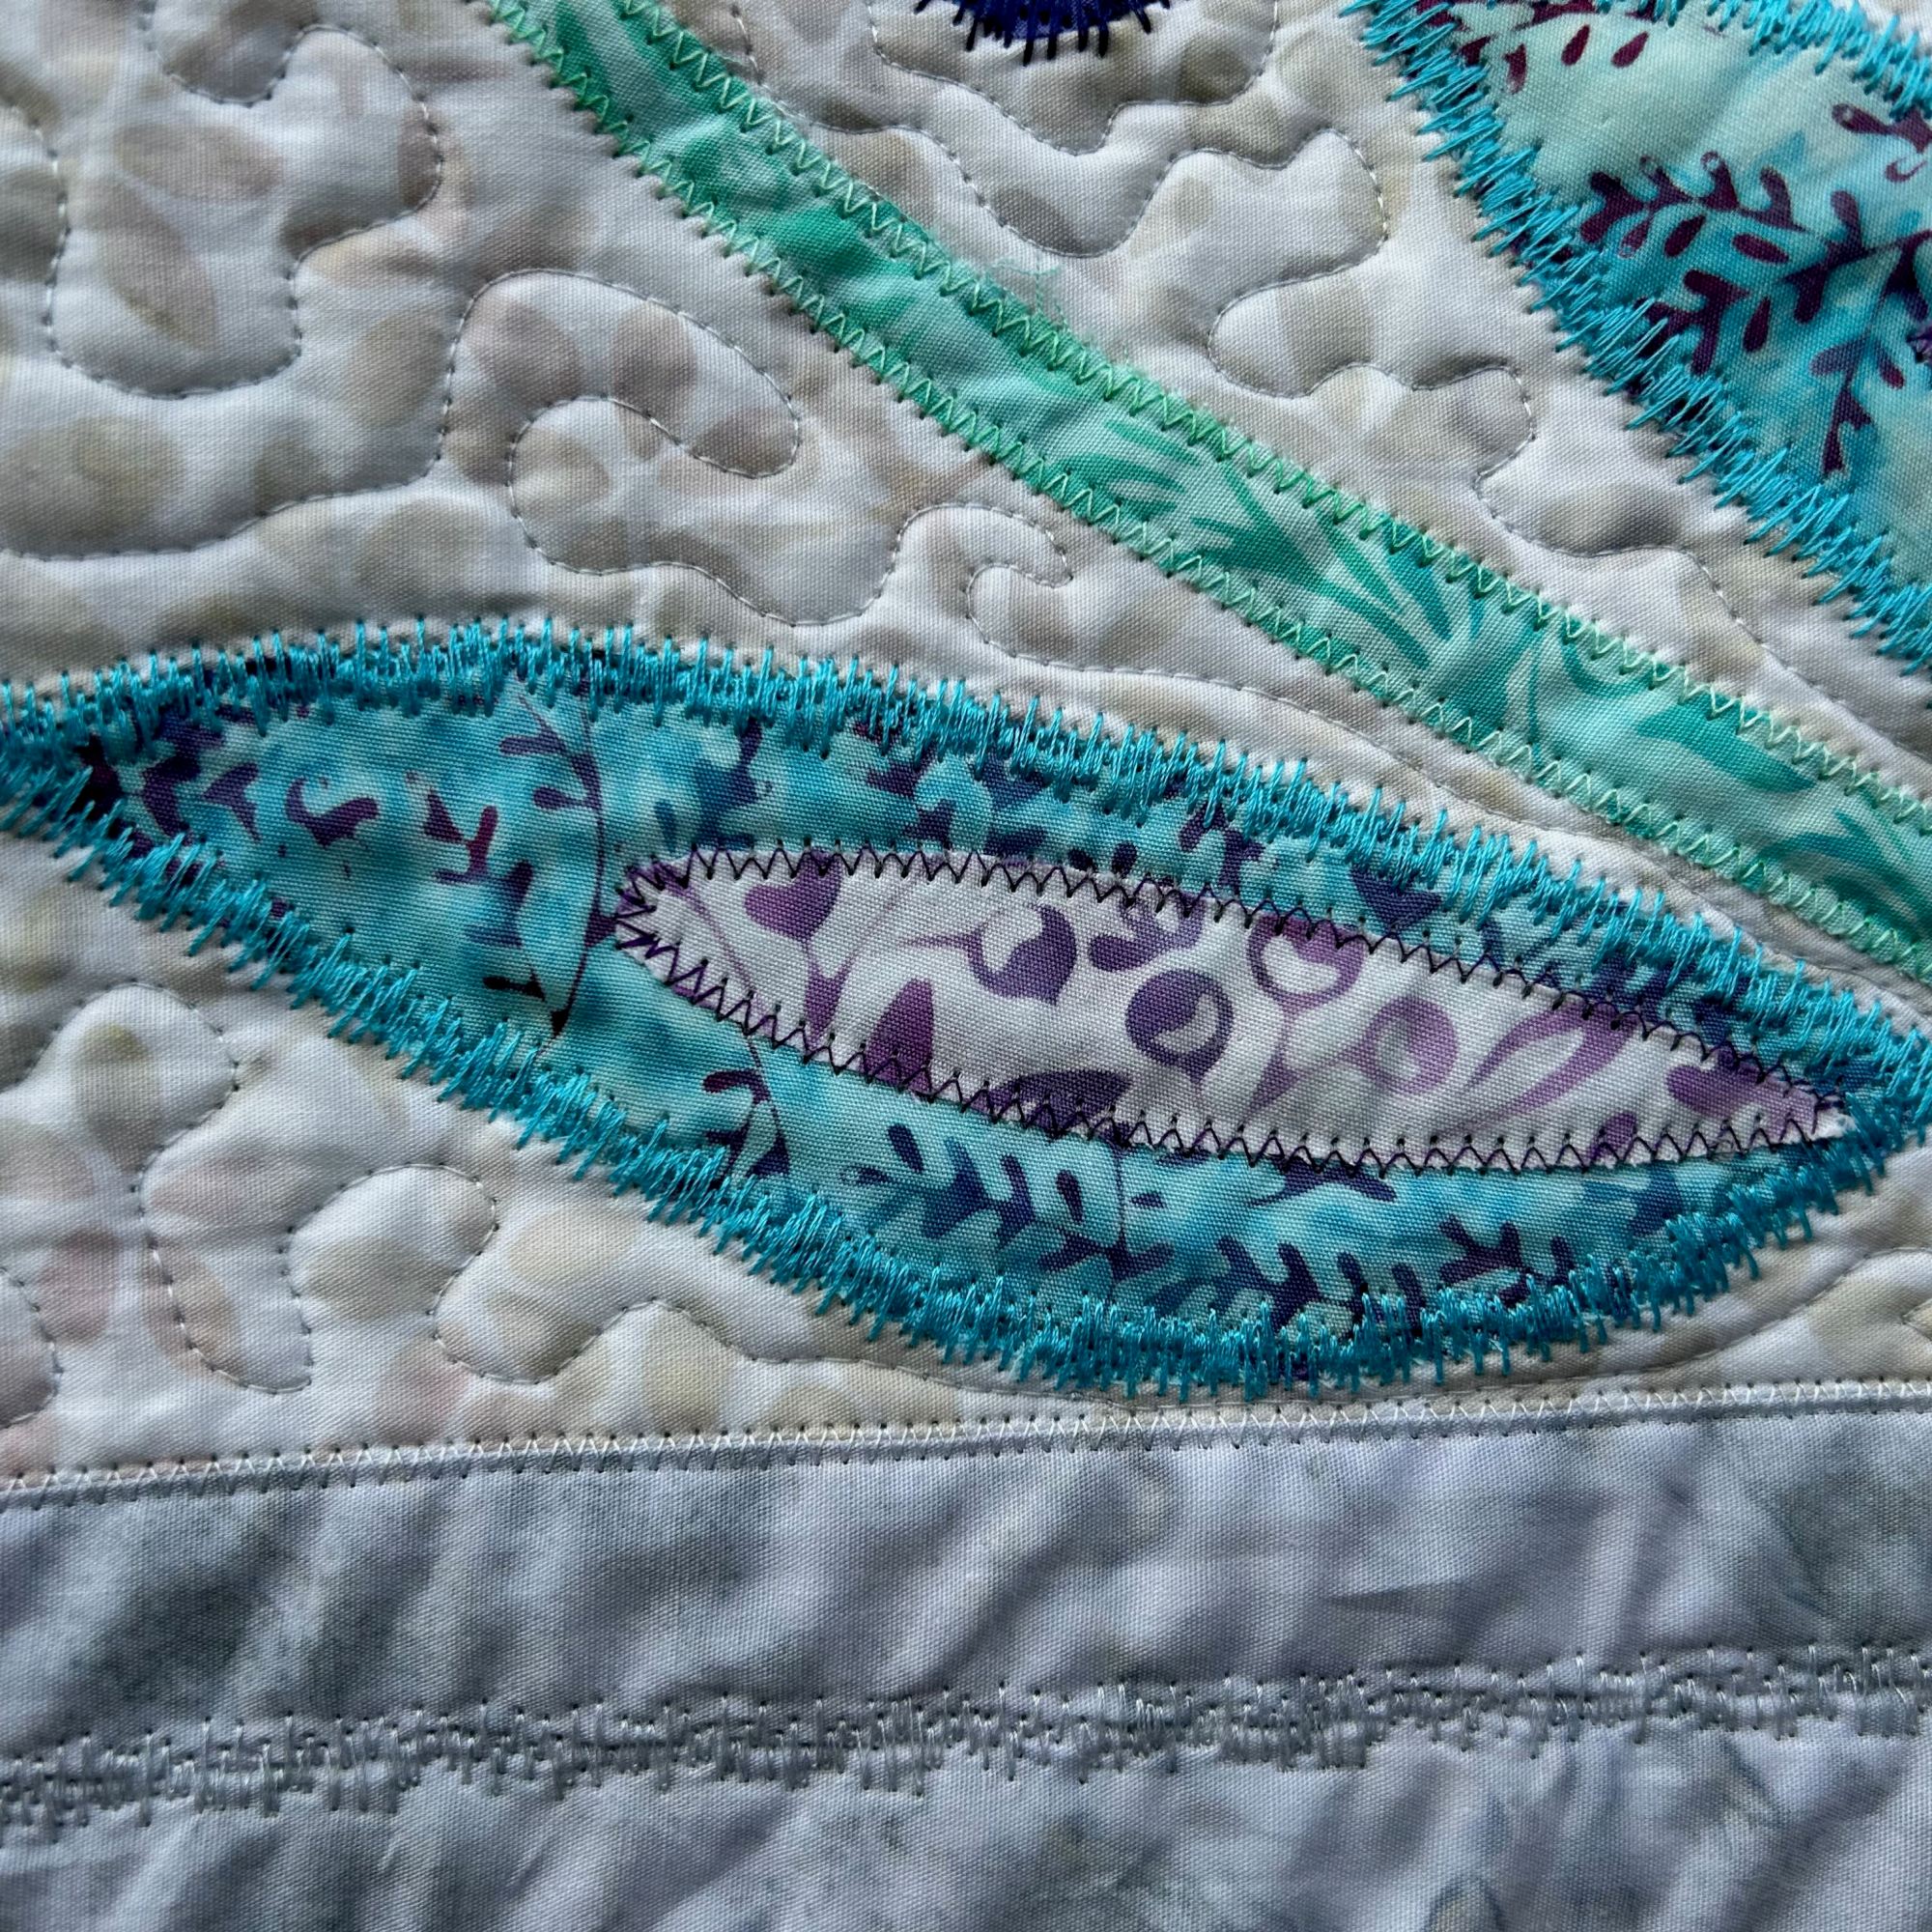
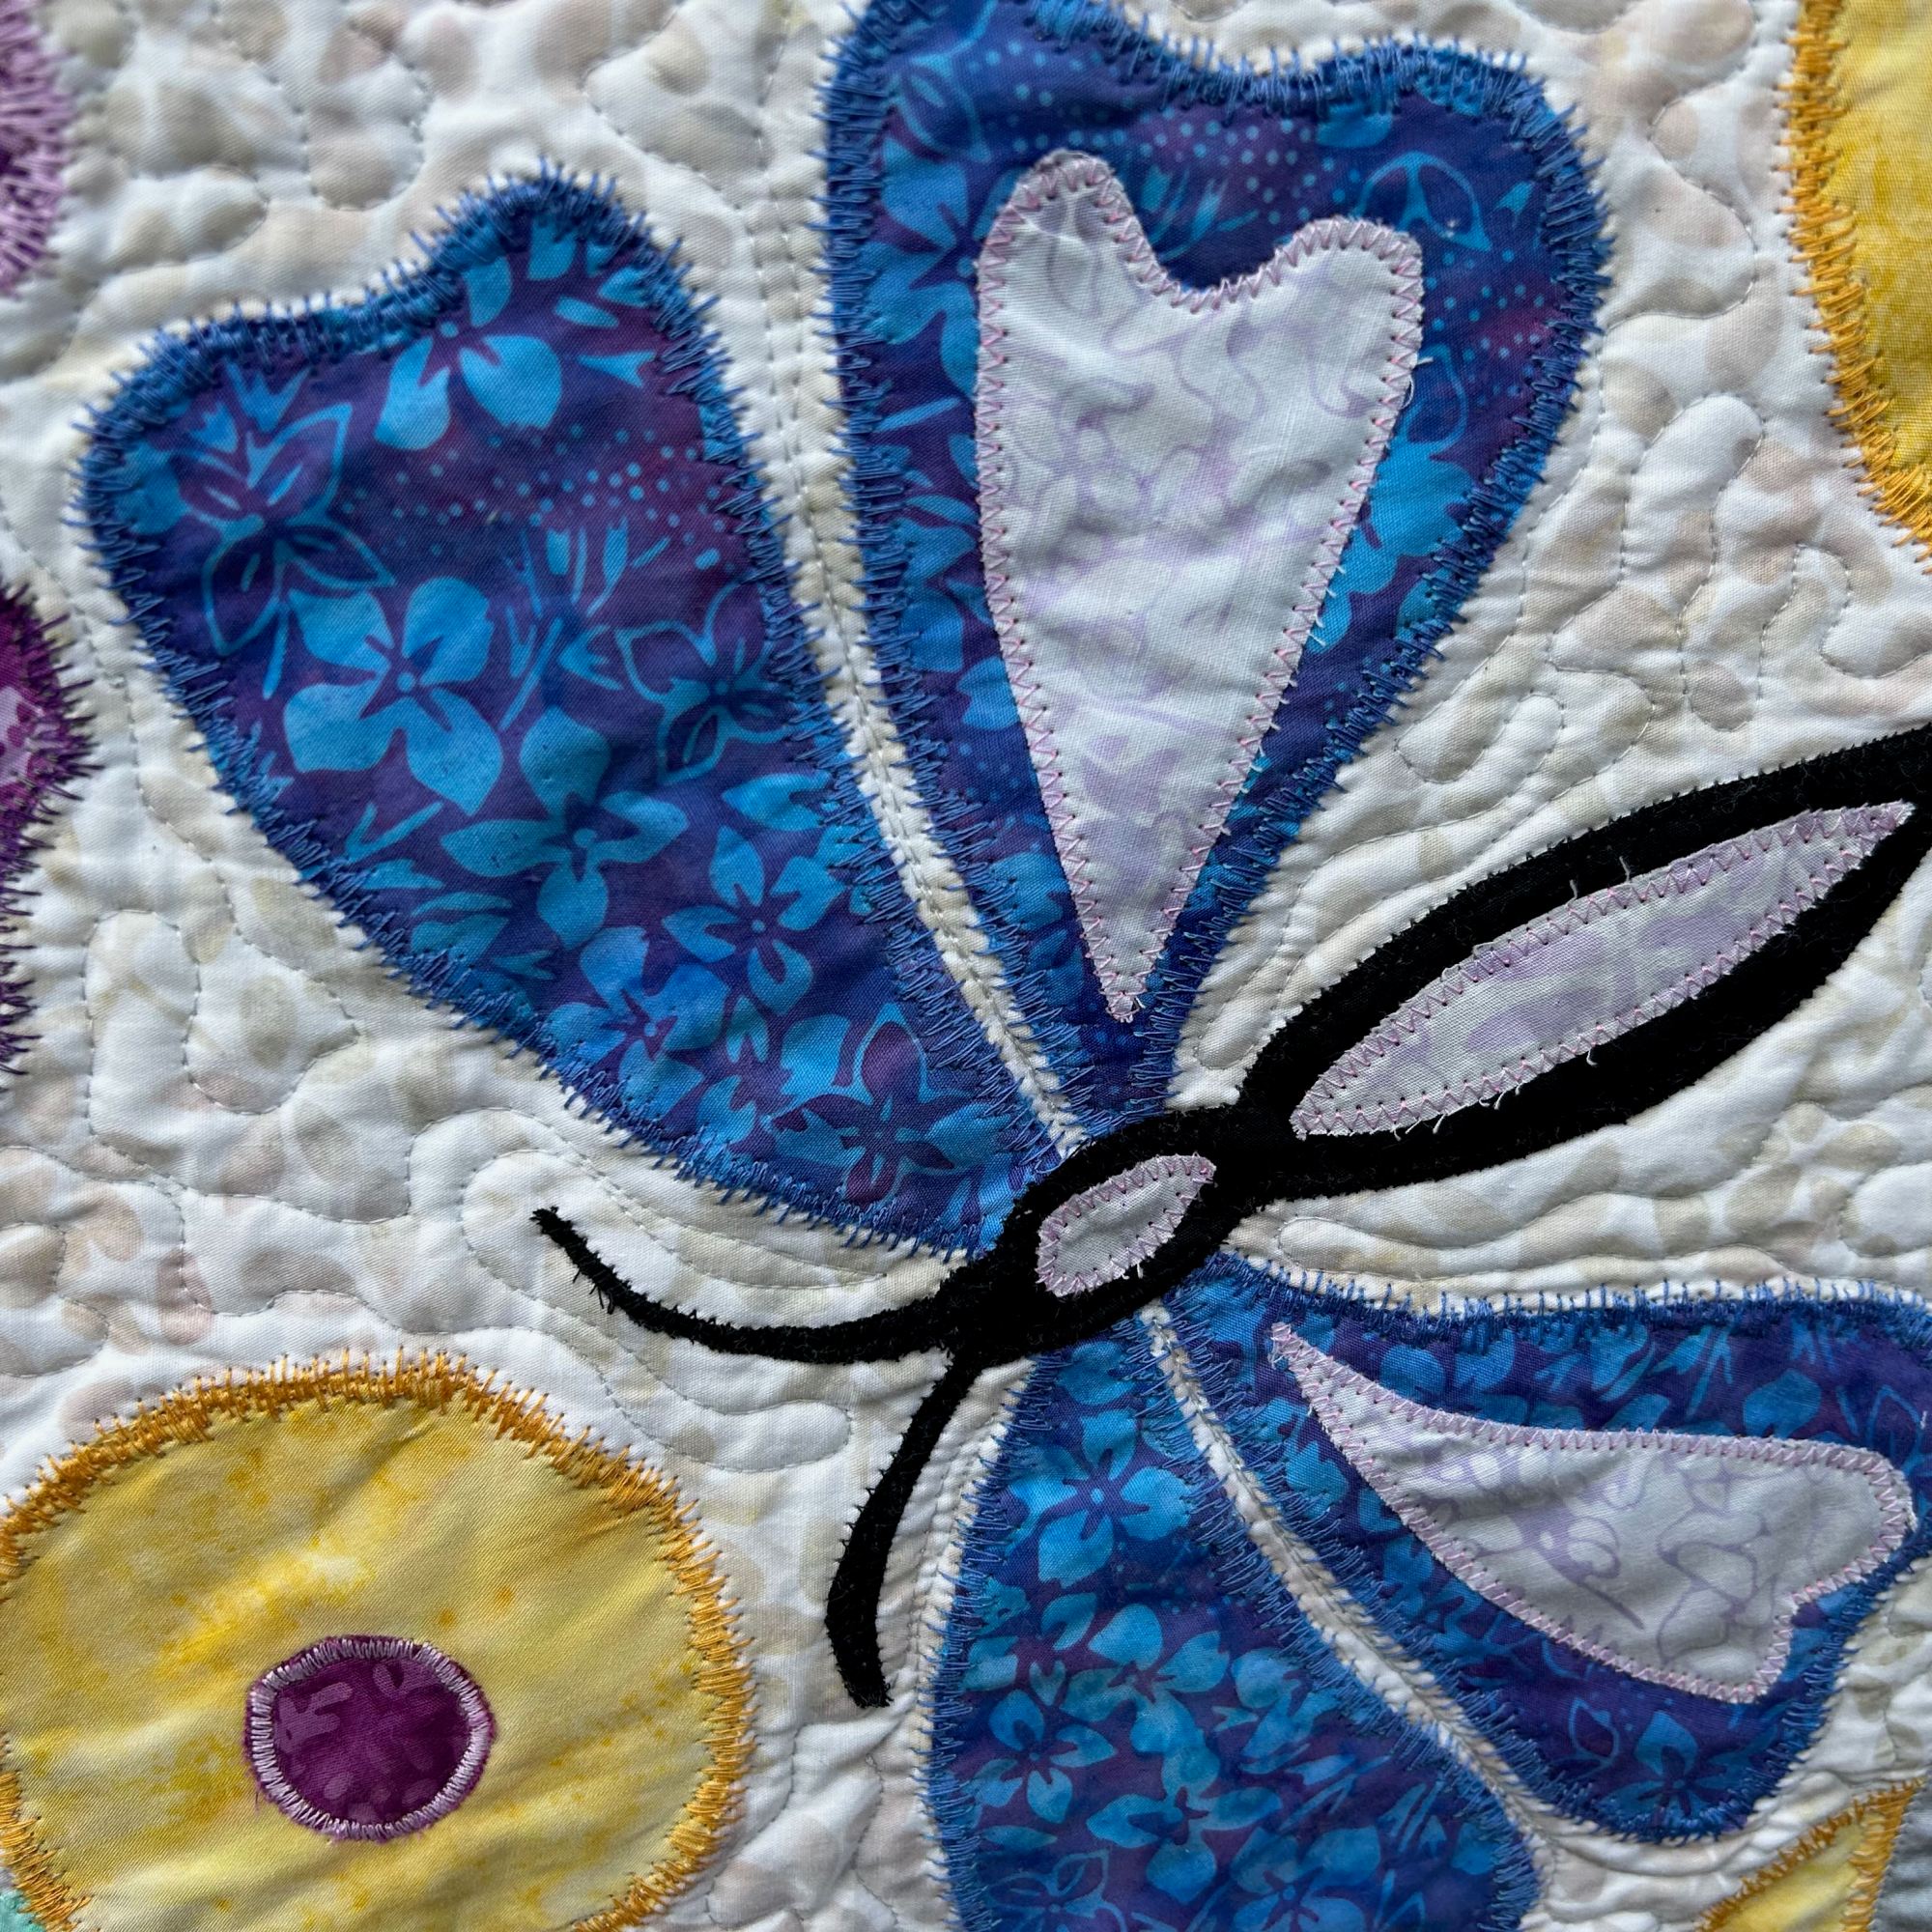
Here is a close-up of some of the Dresden plates, using different techniques:
The process of putting the plates together:
Using my Oliso iron to press open the seams
Showing the ‘wrong’ side of the curved Dresden
The original layout (I initially was going to use the Midnight Blue for the vase, but decided on using one of the green fabrics with gold stars on it.
One of the centre circles
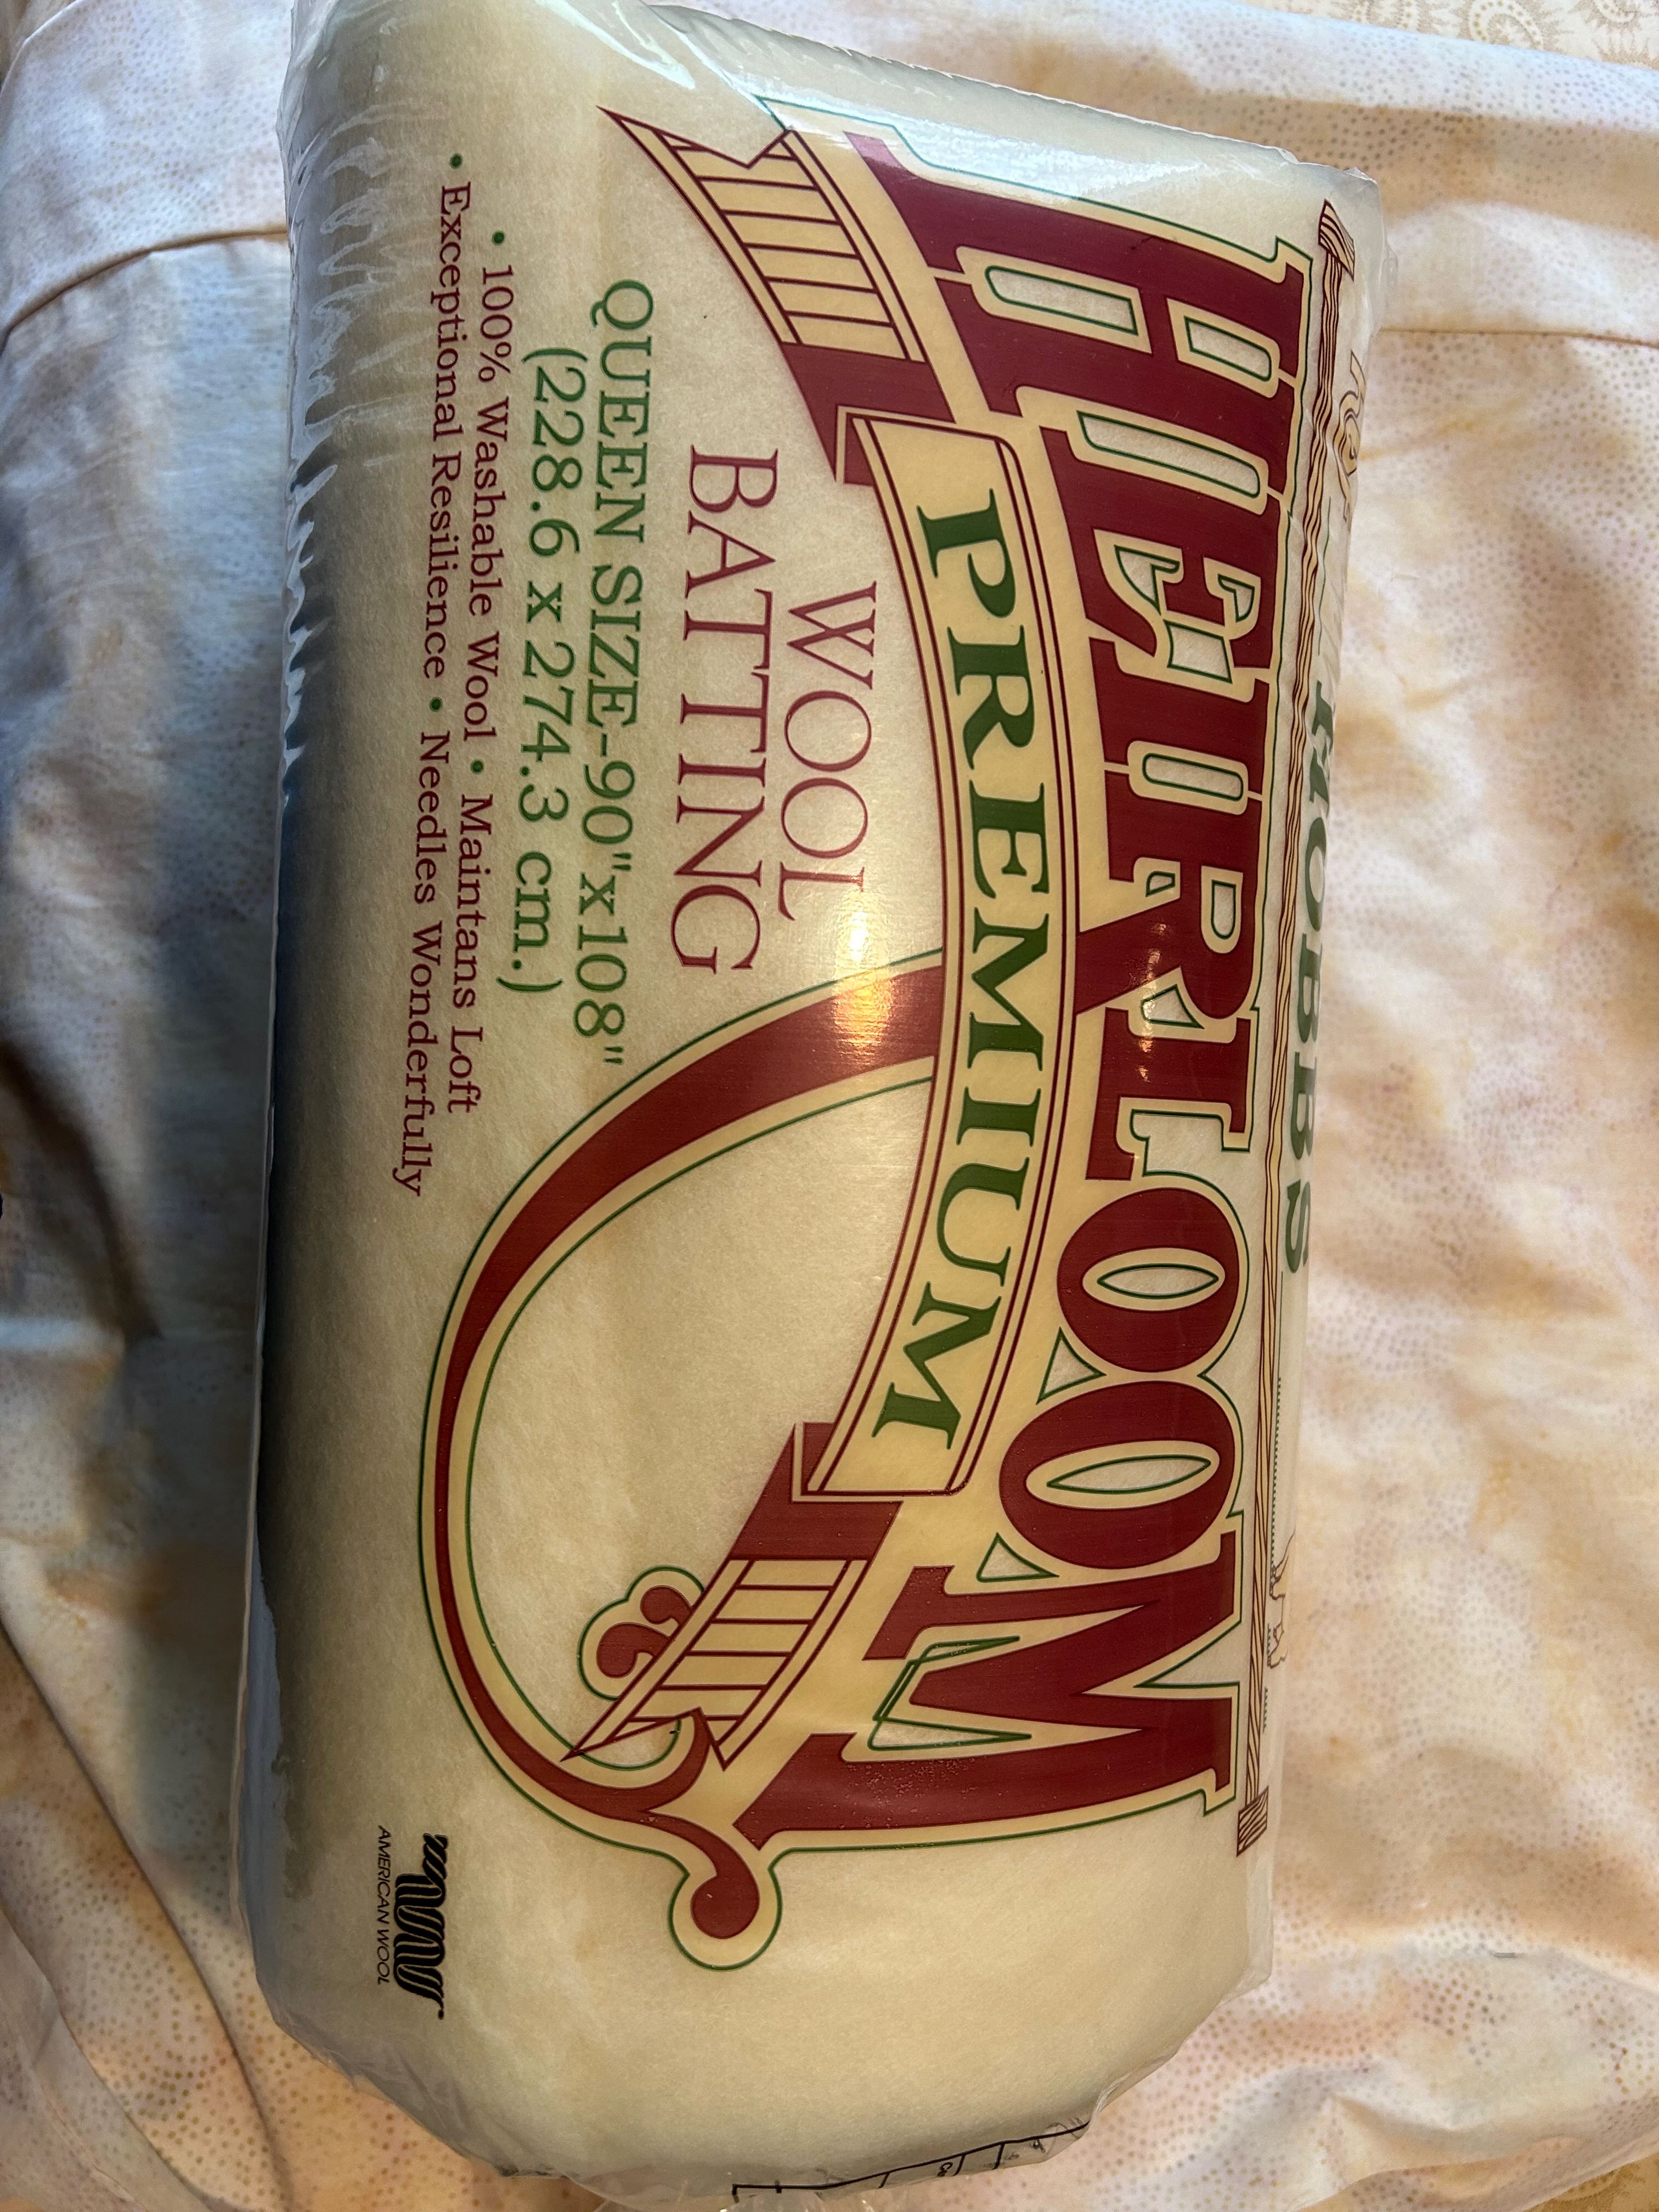
My batting of choice for this quilt: Hobbs Heirloom Premium Wool Batting
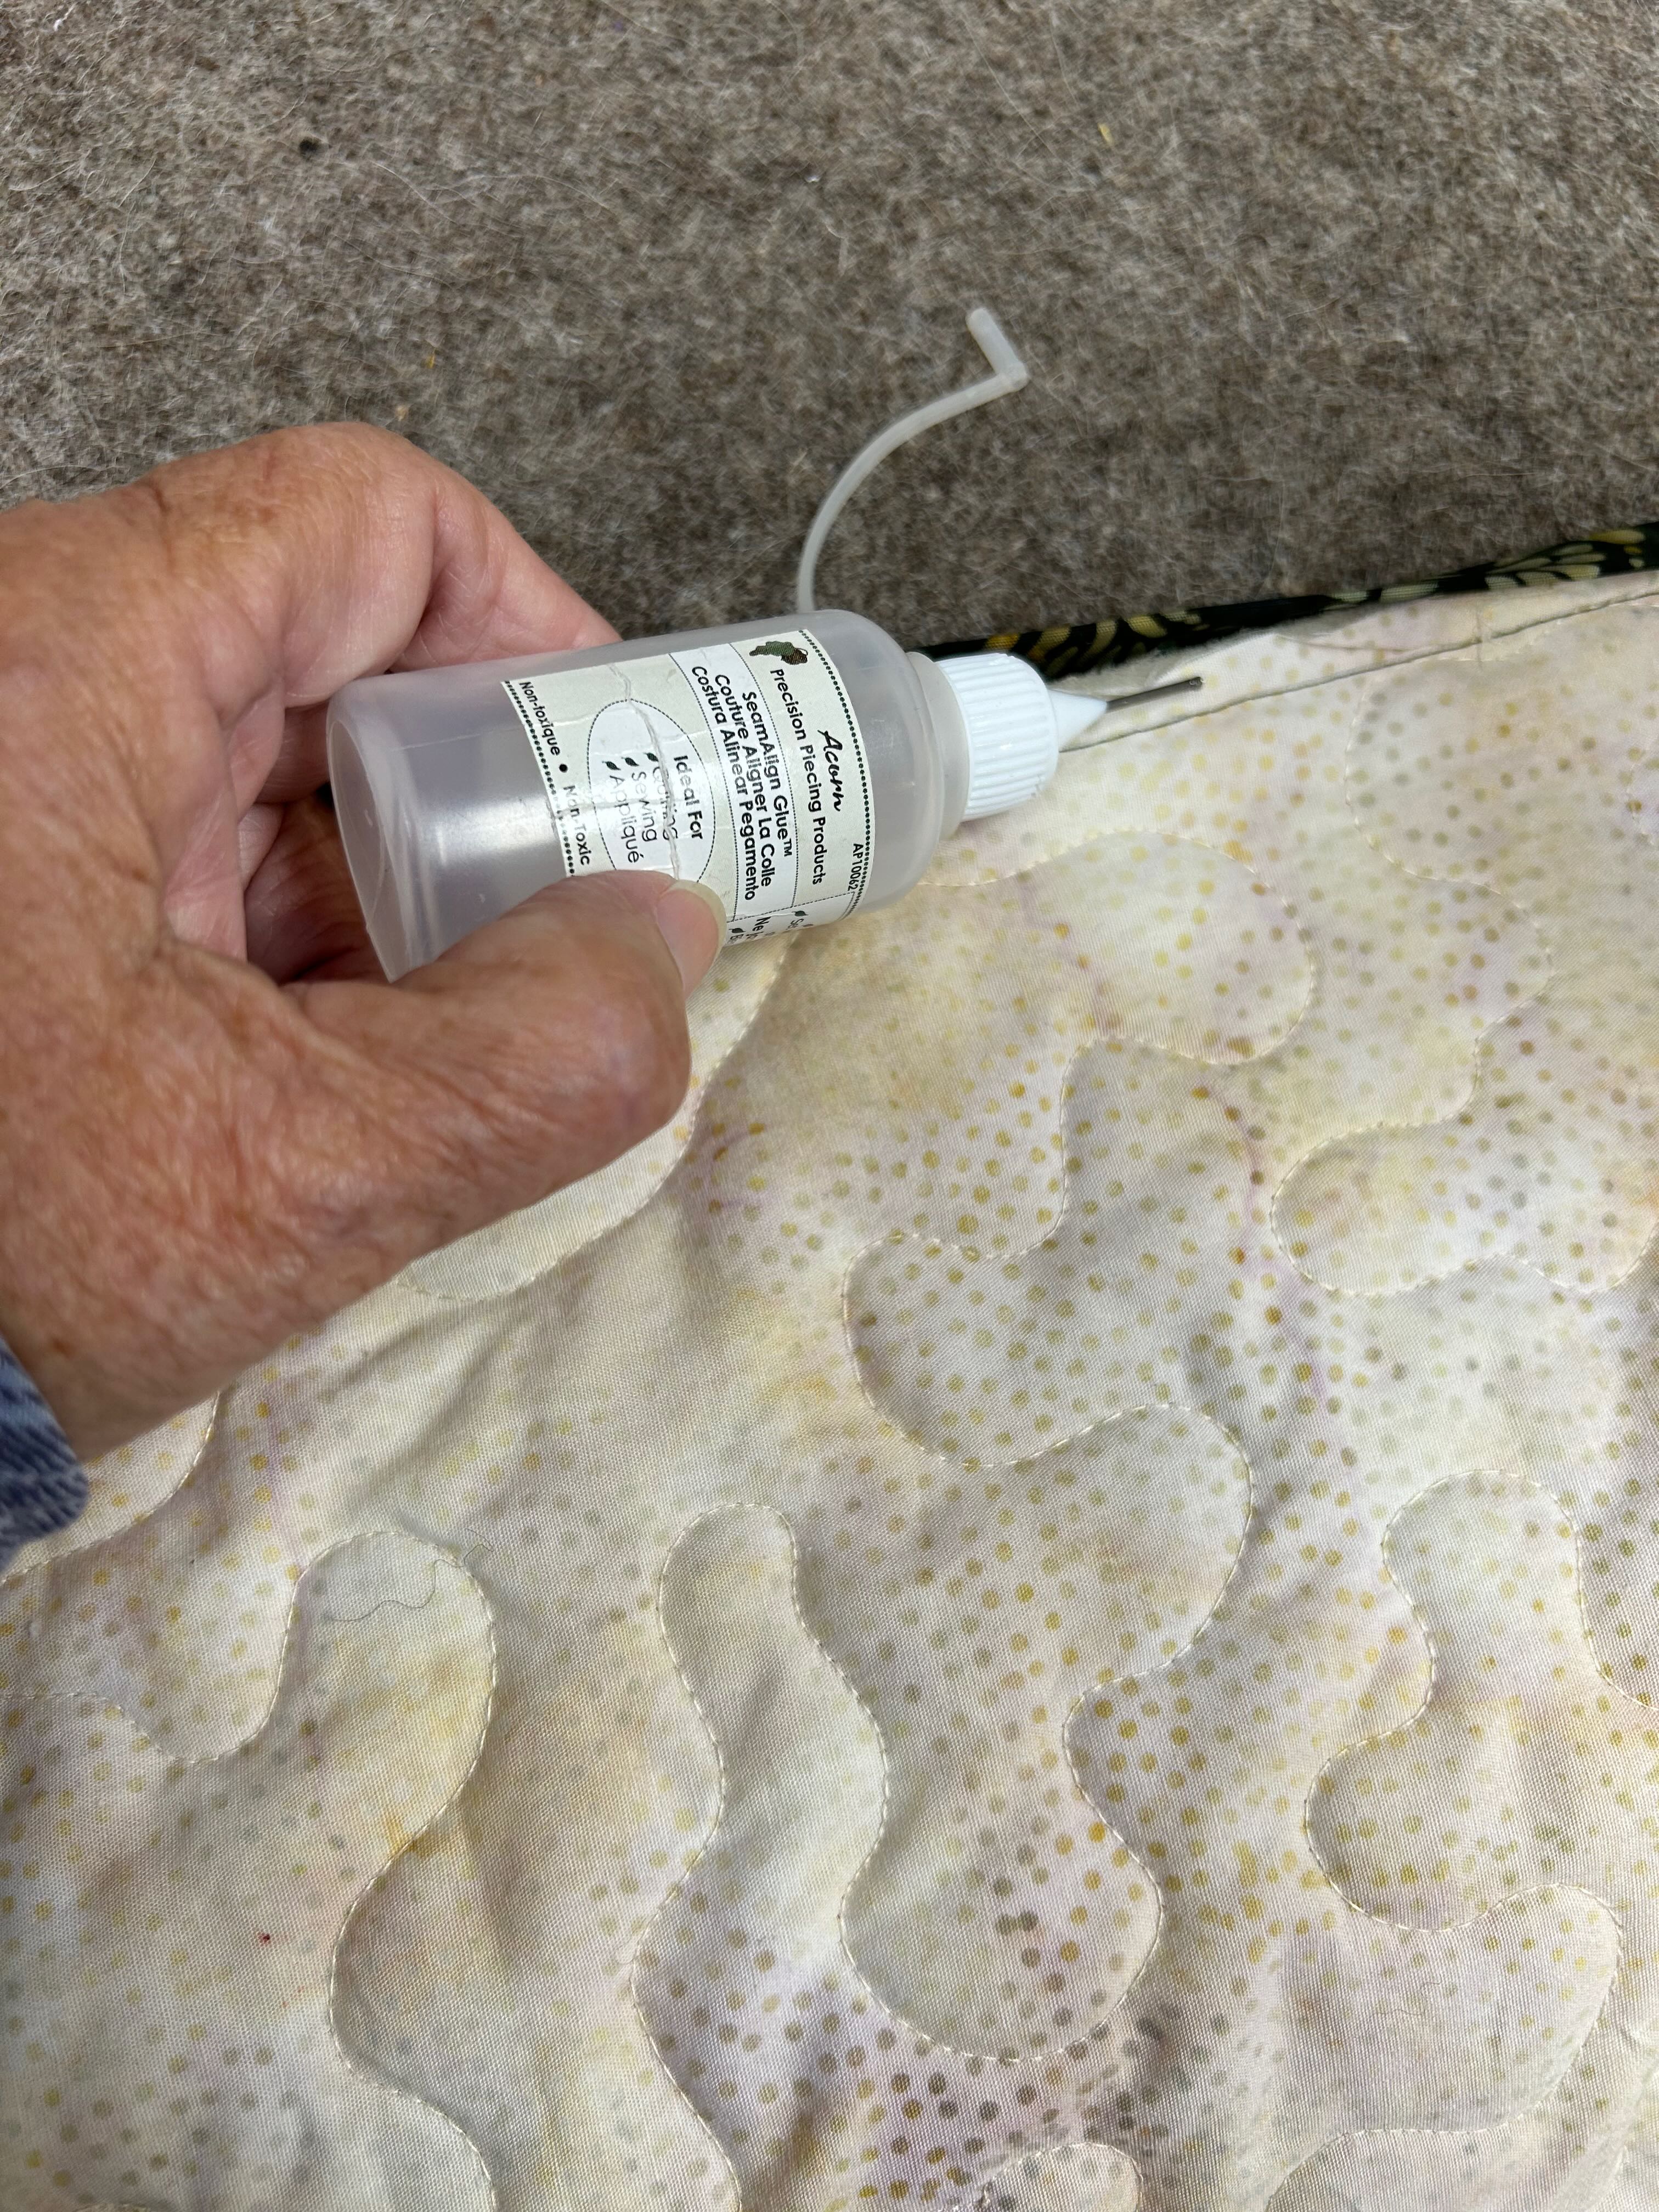
The background was pieced, then the vase and flowers were placed on the background. I did this on the spare bed so that I could use glue (Acorn Precision Piecing Seam Align Glue) and press all the pieces into place. Yes, the spare bed makes a fantastic ironing surface for large projects!
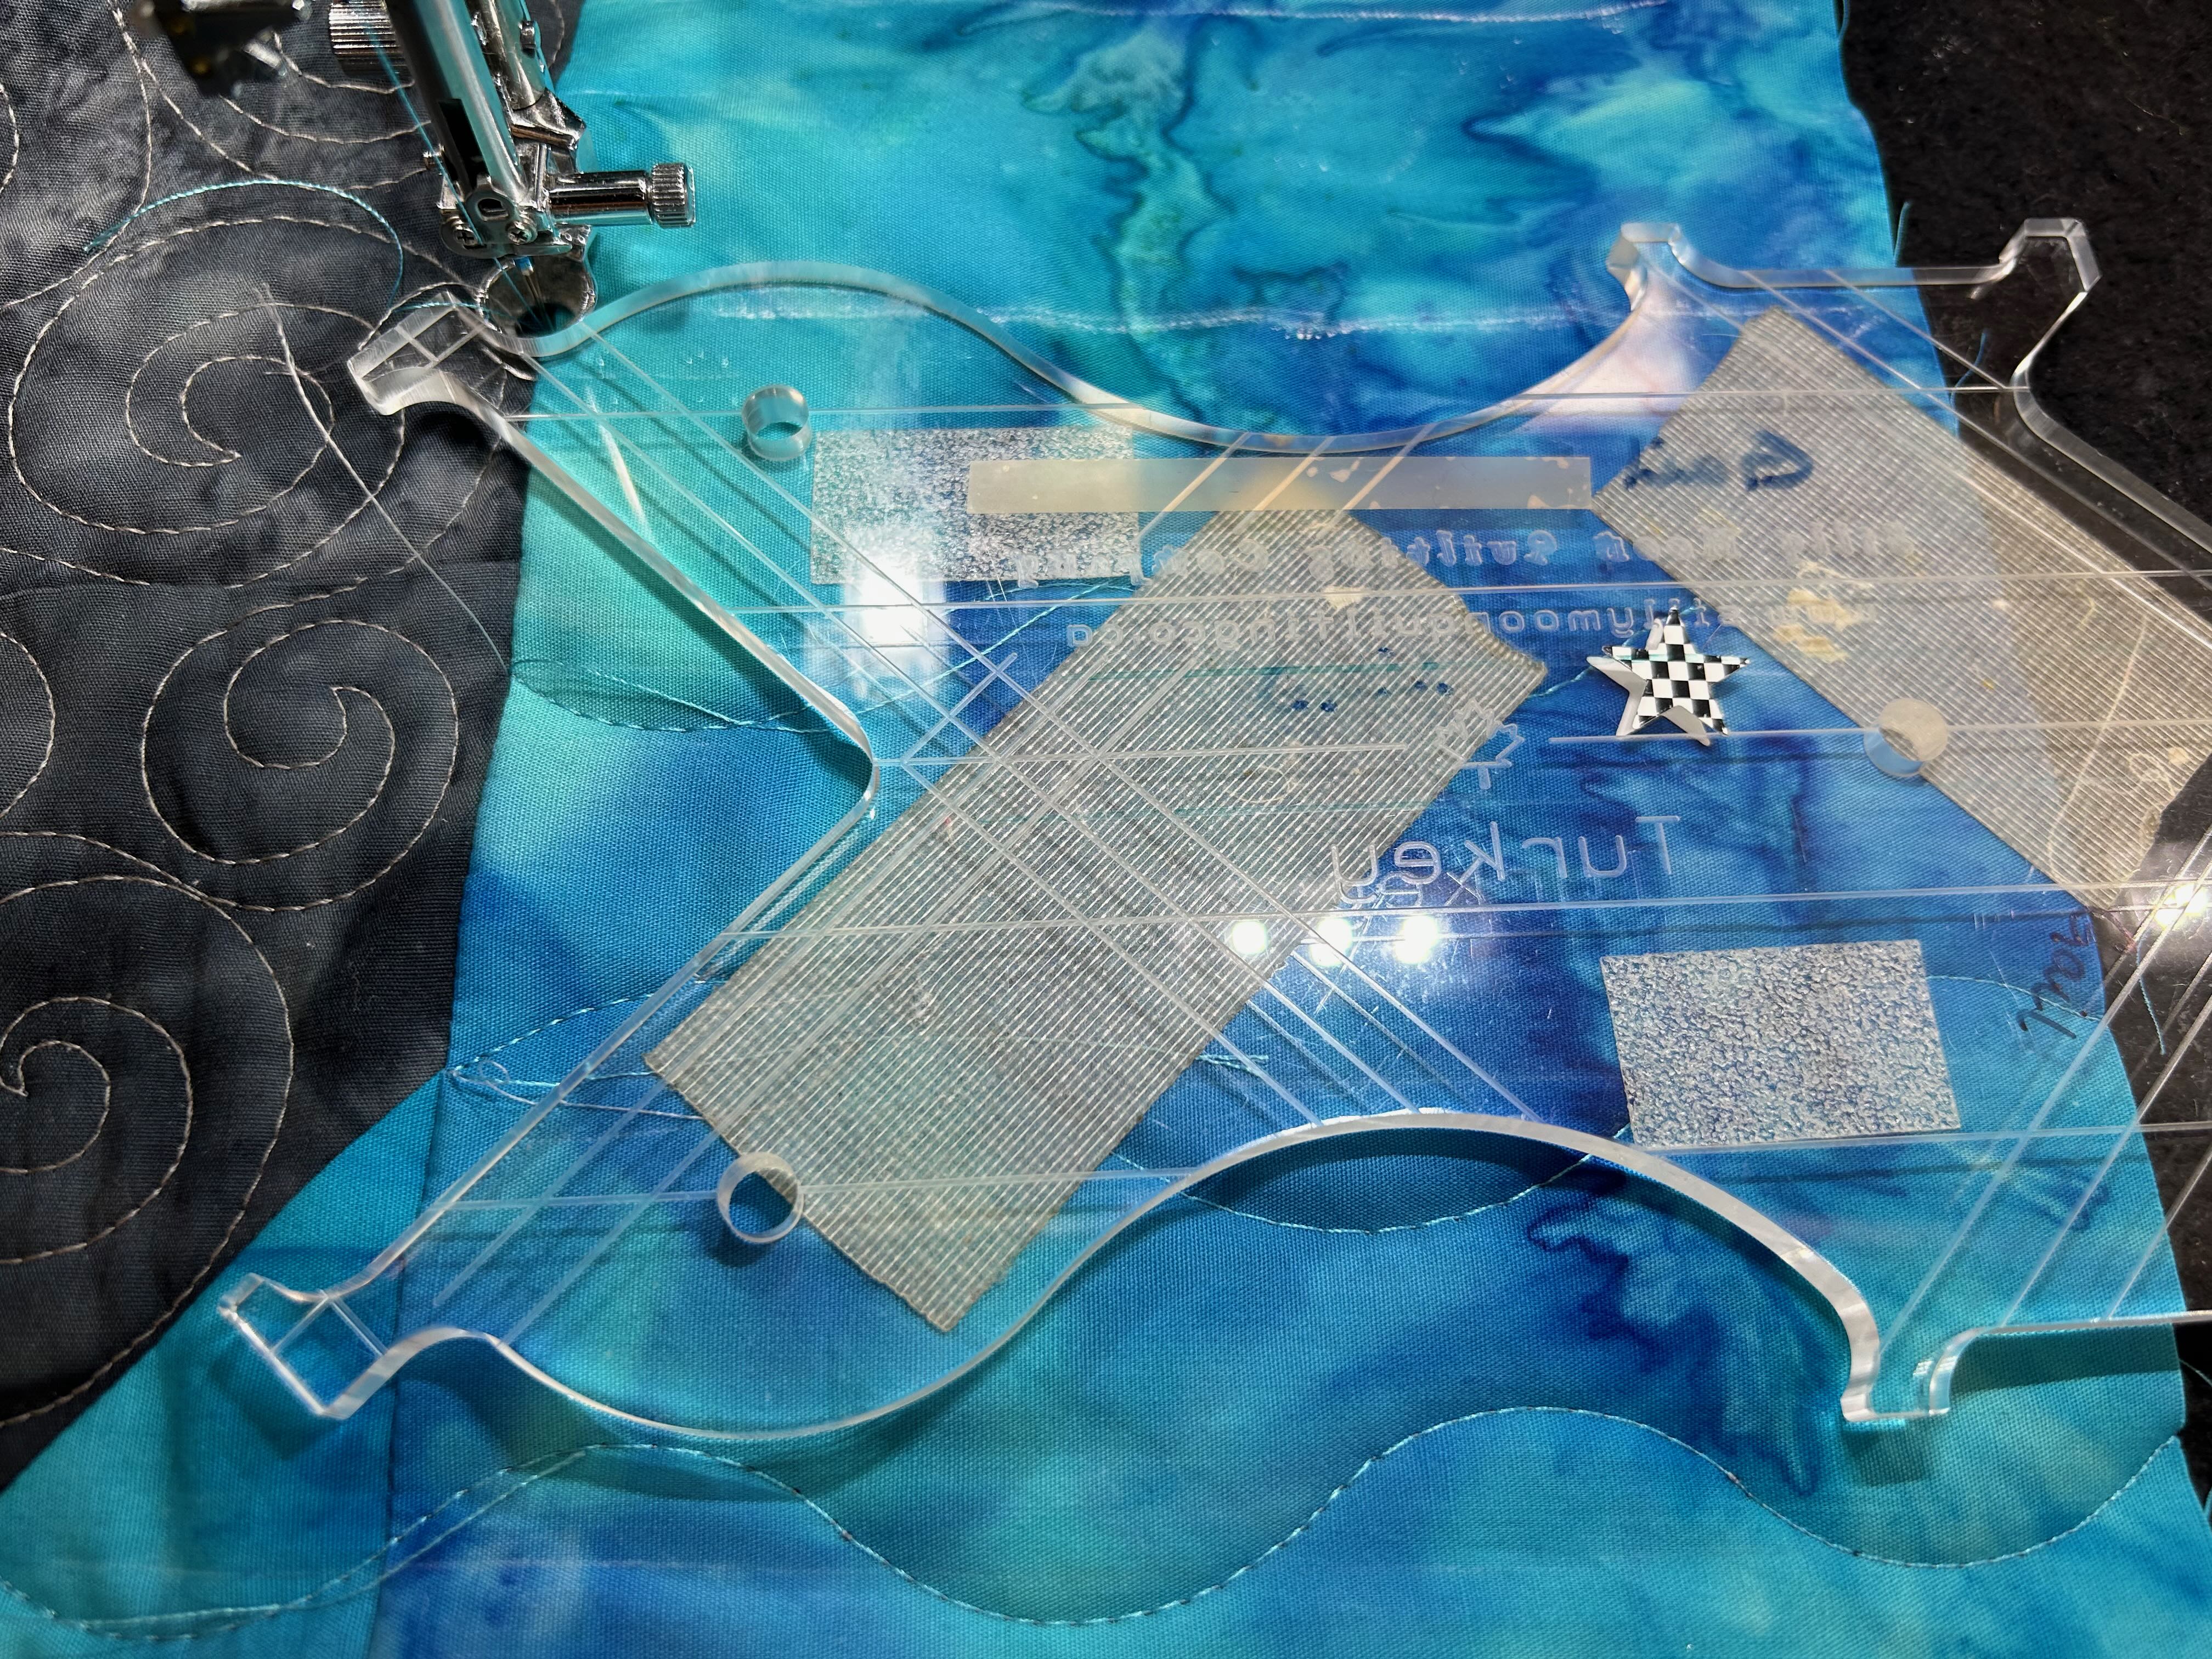
Silly Moon Rulers: Rocket for all the straight lines, Charming and Kite (for the wavy line)
Make sure you visit Mania Hatziioannidi @ Mania for quilts as she is using the same fabric collection! She’s quite the artist, so I’m 100% positive that her quilt will be totally awesome!
Where can you buy Flutter Fields?
There are several stores throughout the USA that sell Flutter Fields:
Visit Island Batik blog for a Round-up and an opportunity to win a fat-quarter bundle of fabric!
Don’t Forget:
I am now a Silly Moon affiliate! So what does that mean? When you use my affiliate code Quiltinggail2024 at Silly Moon, you will receive 10% off your order and I will receive a small commission.
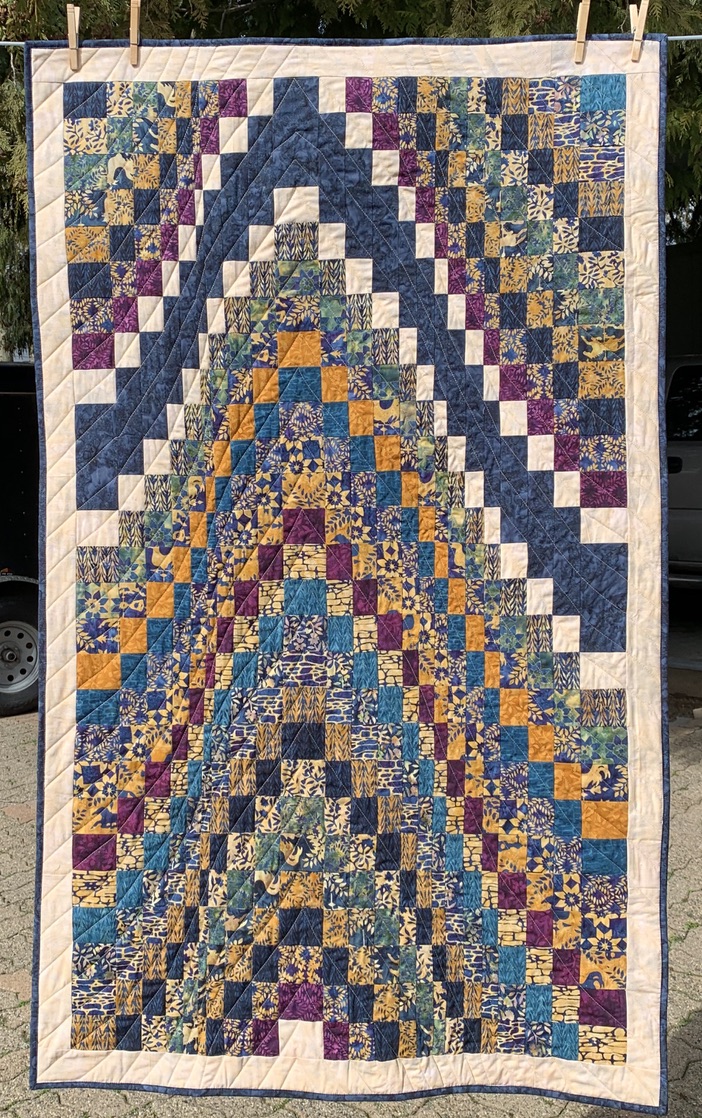
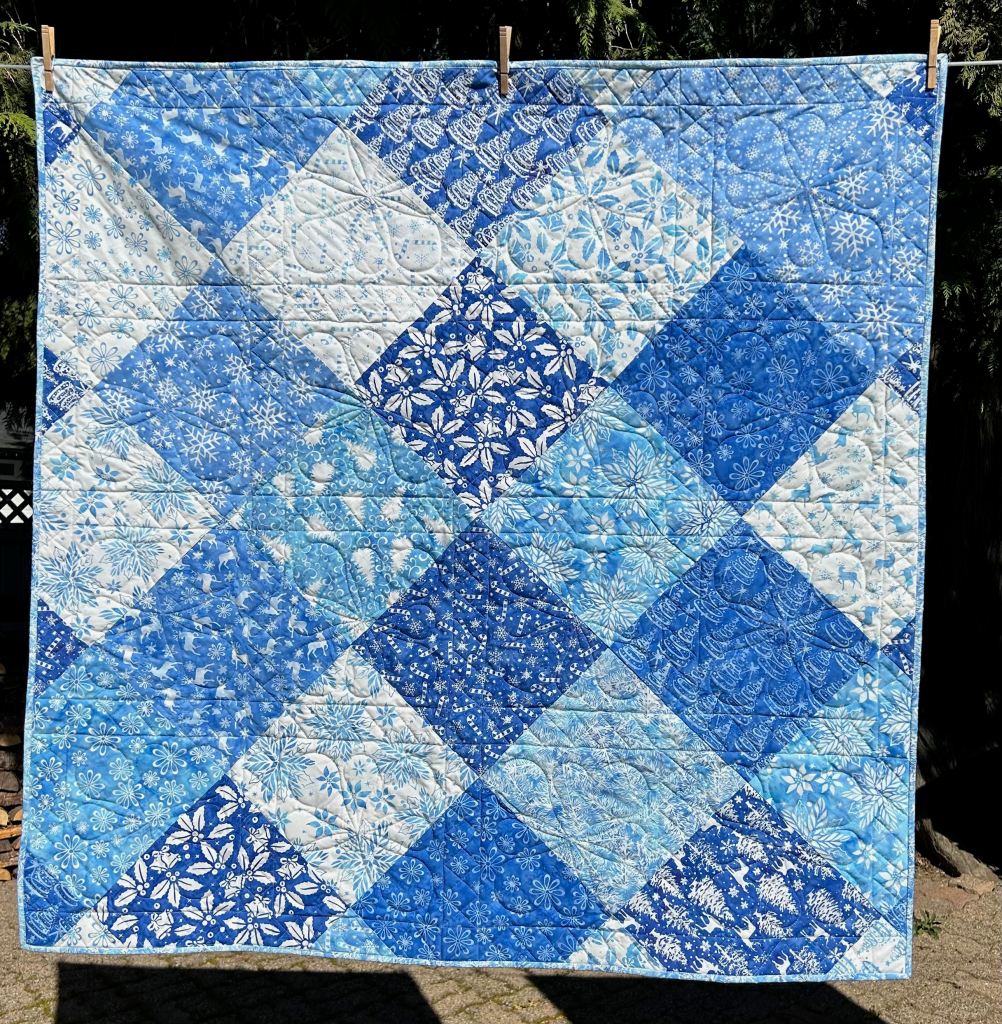
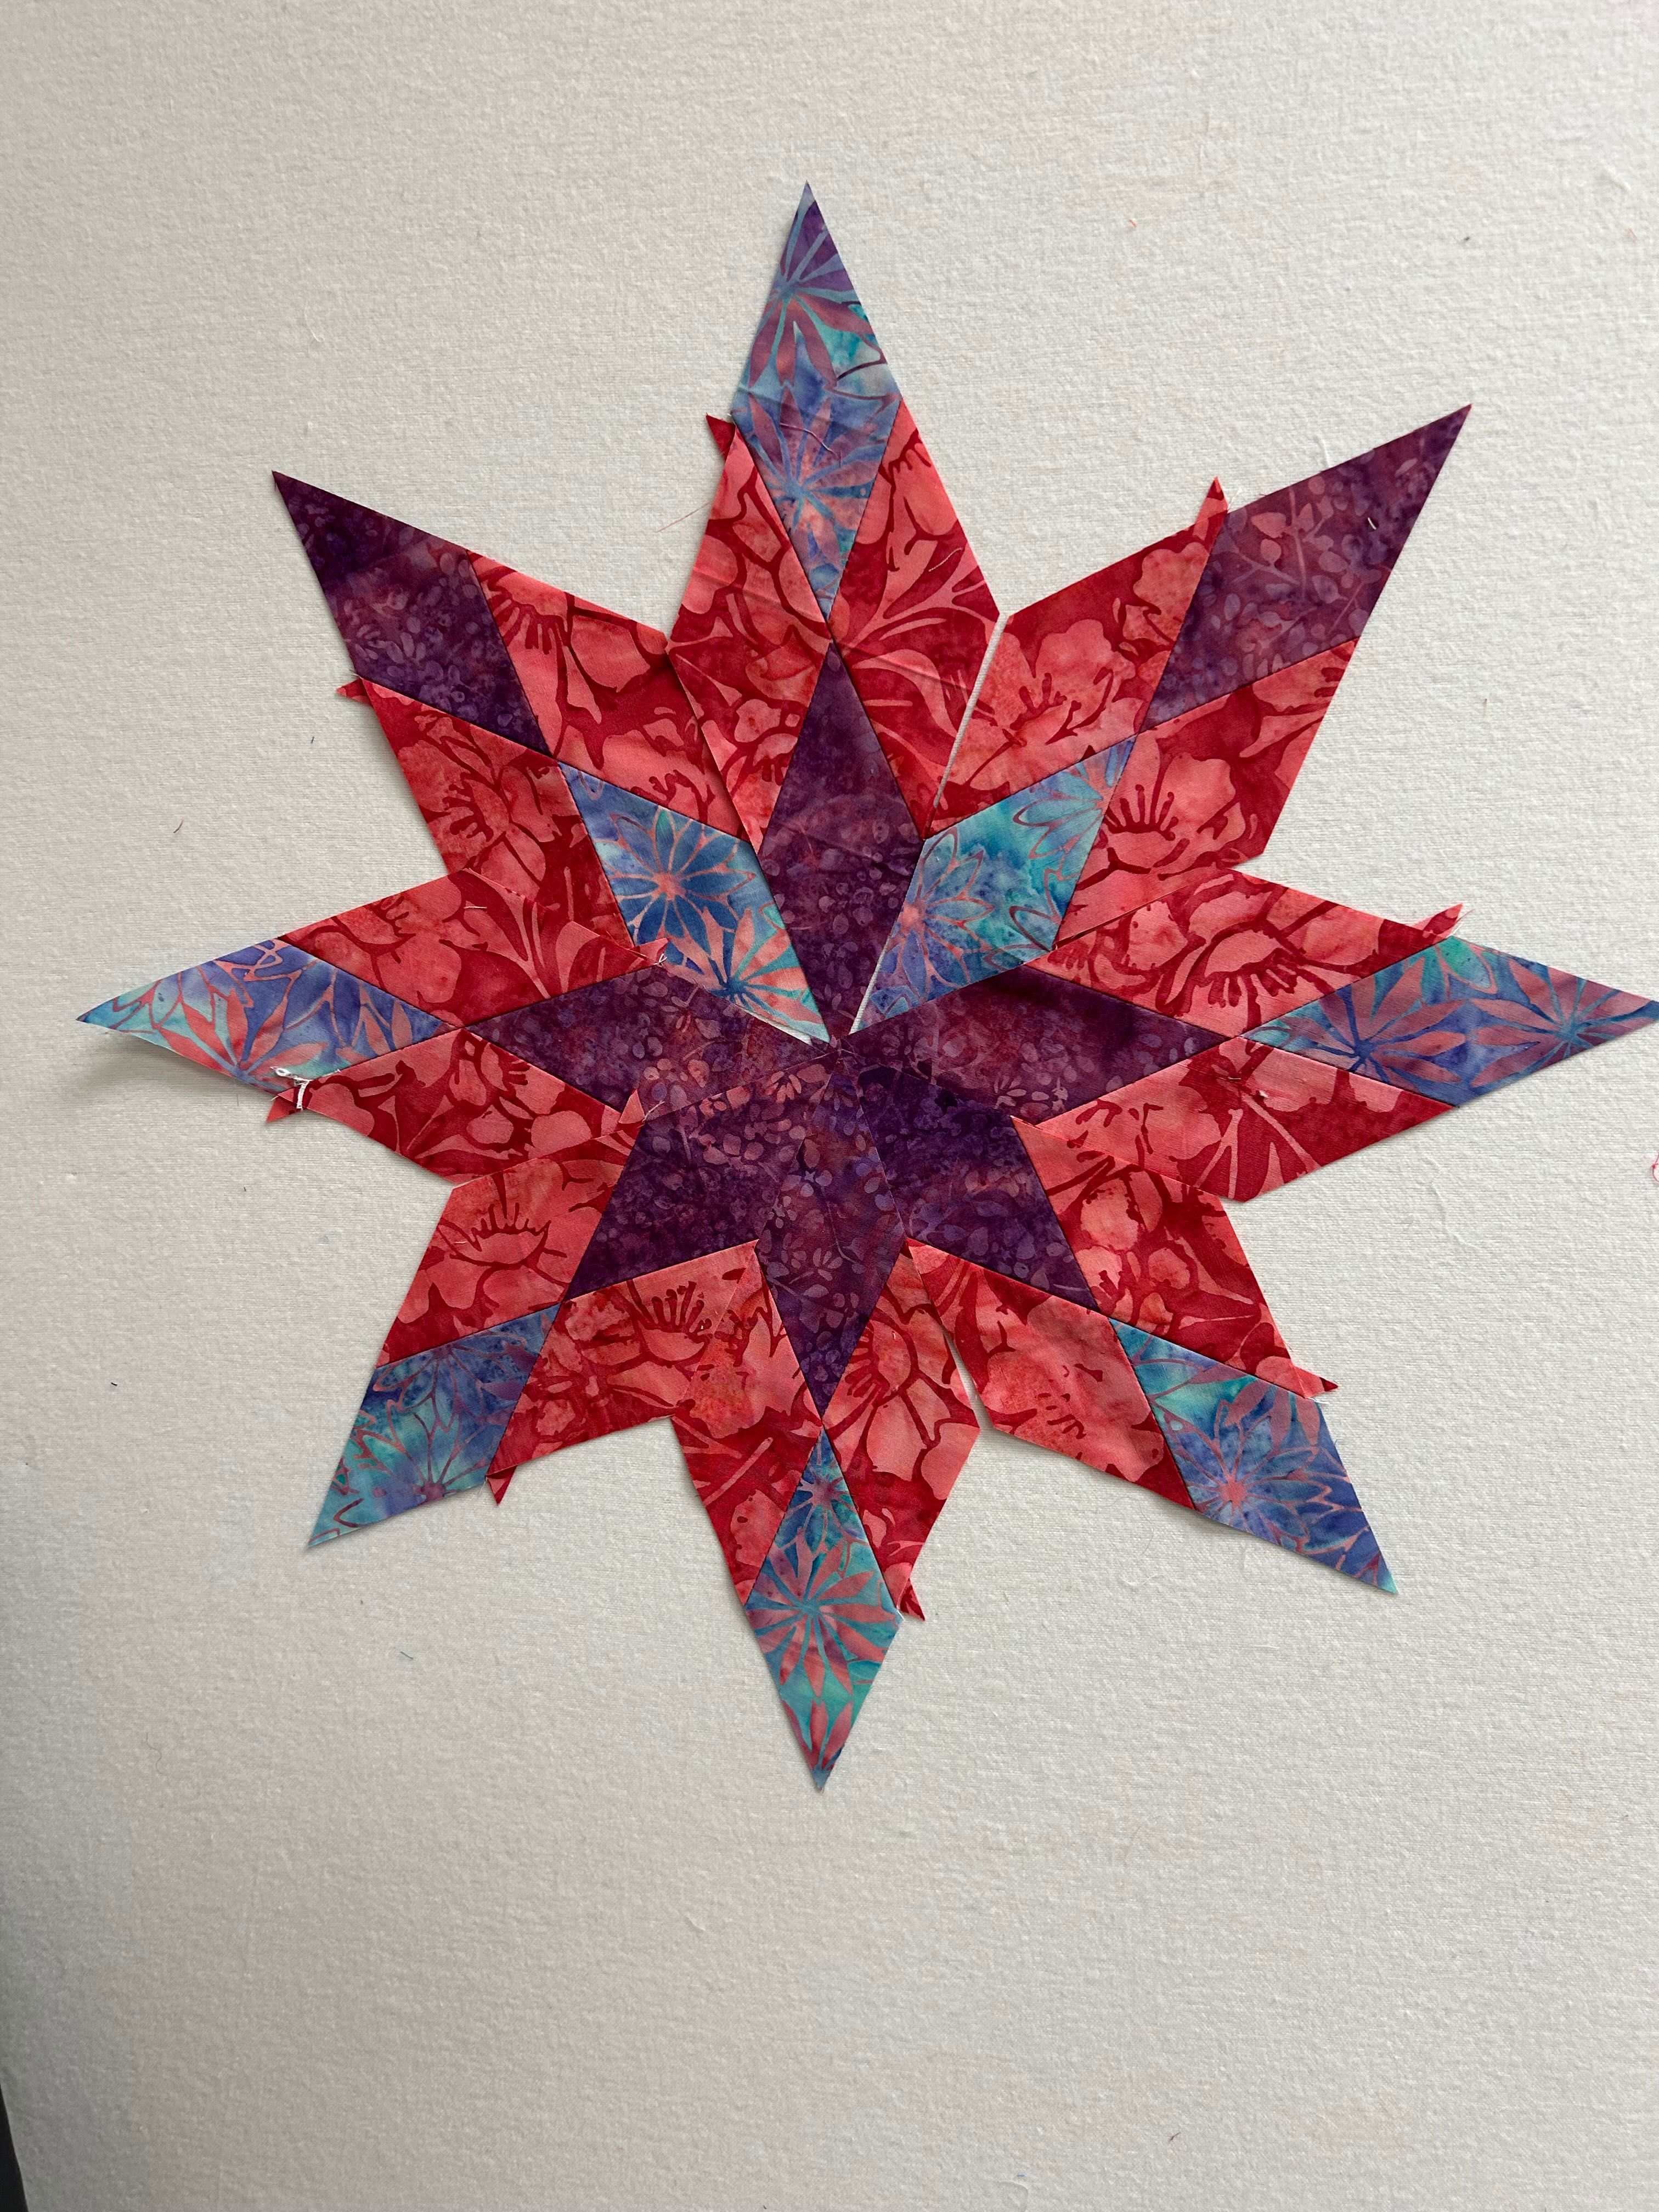
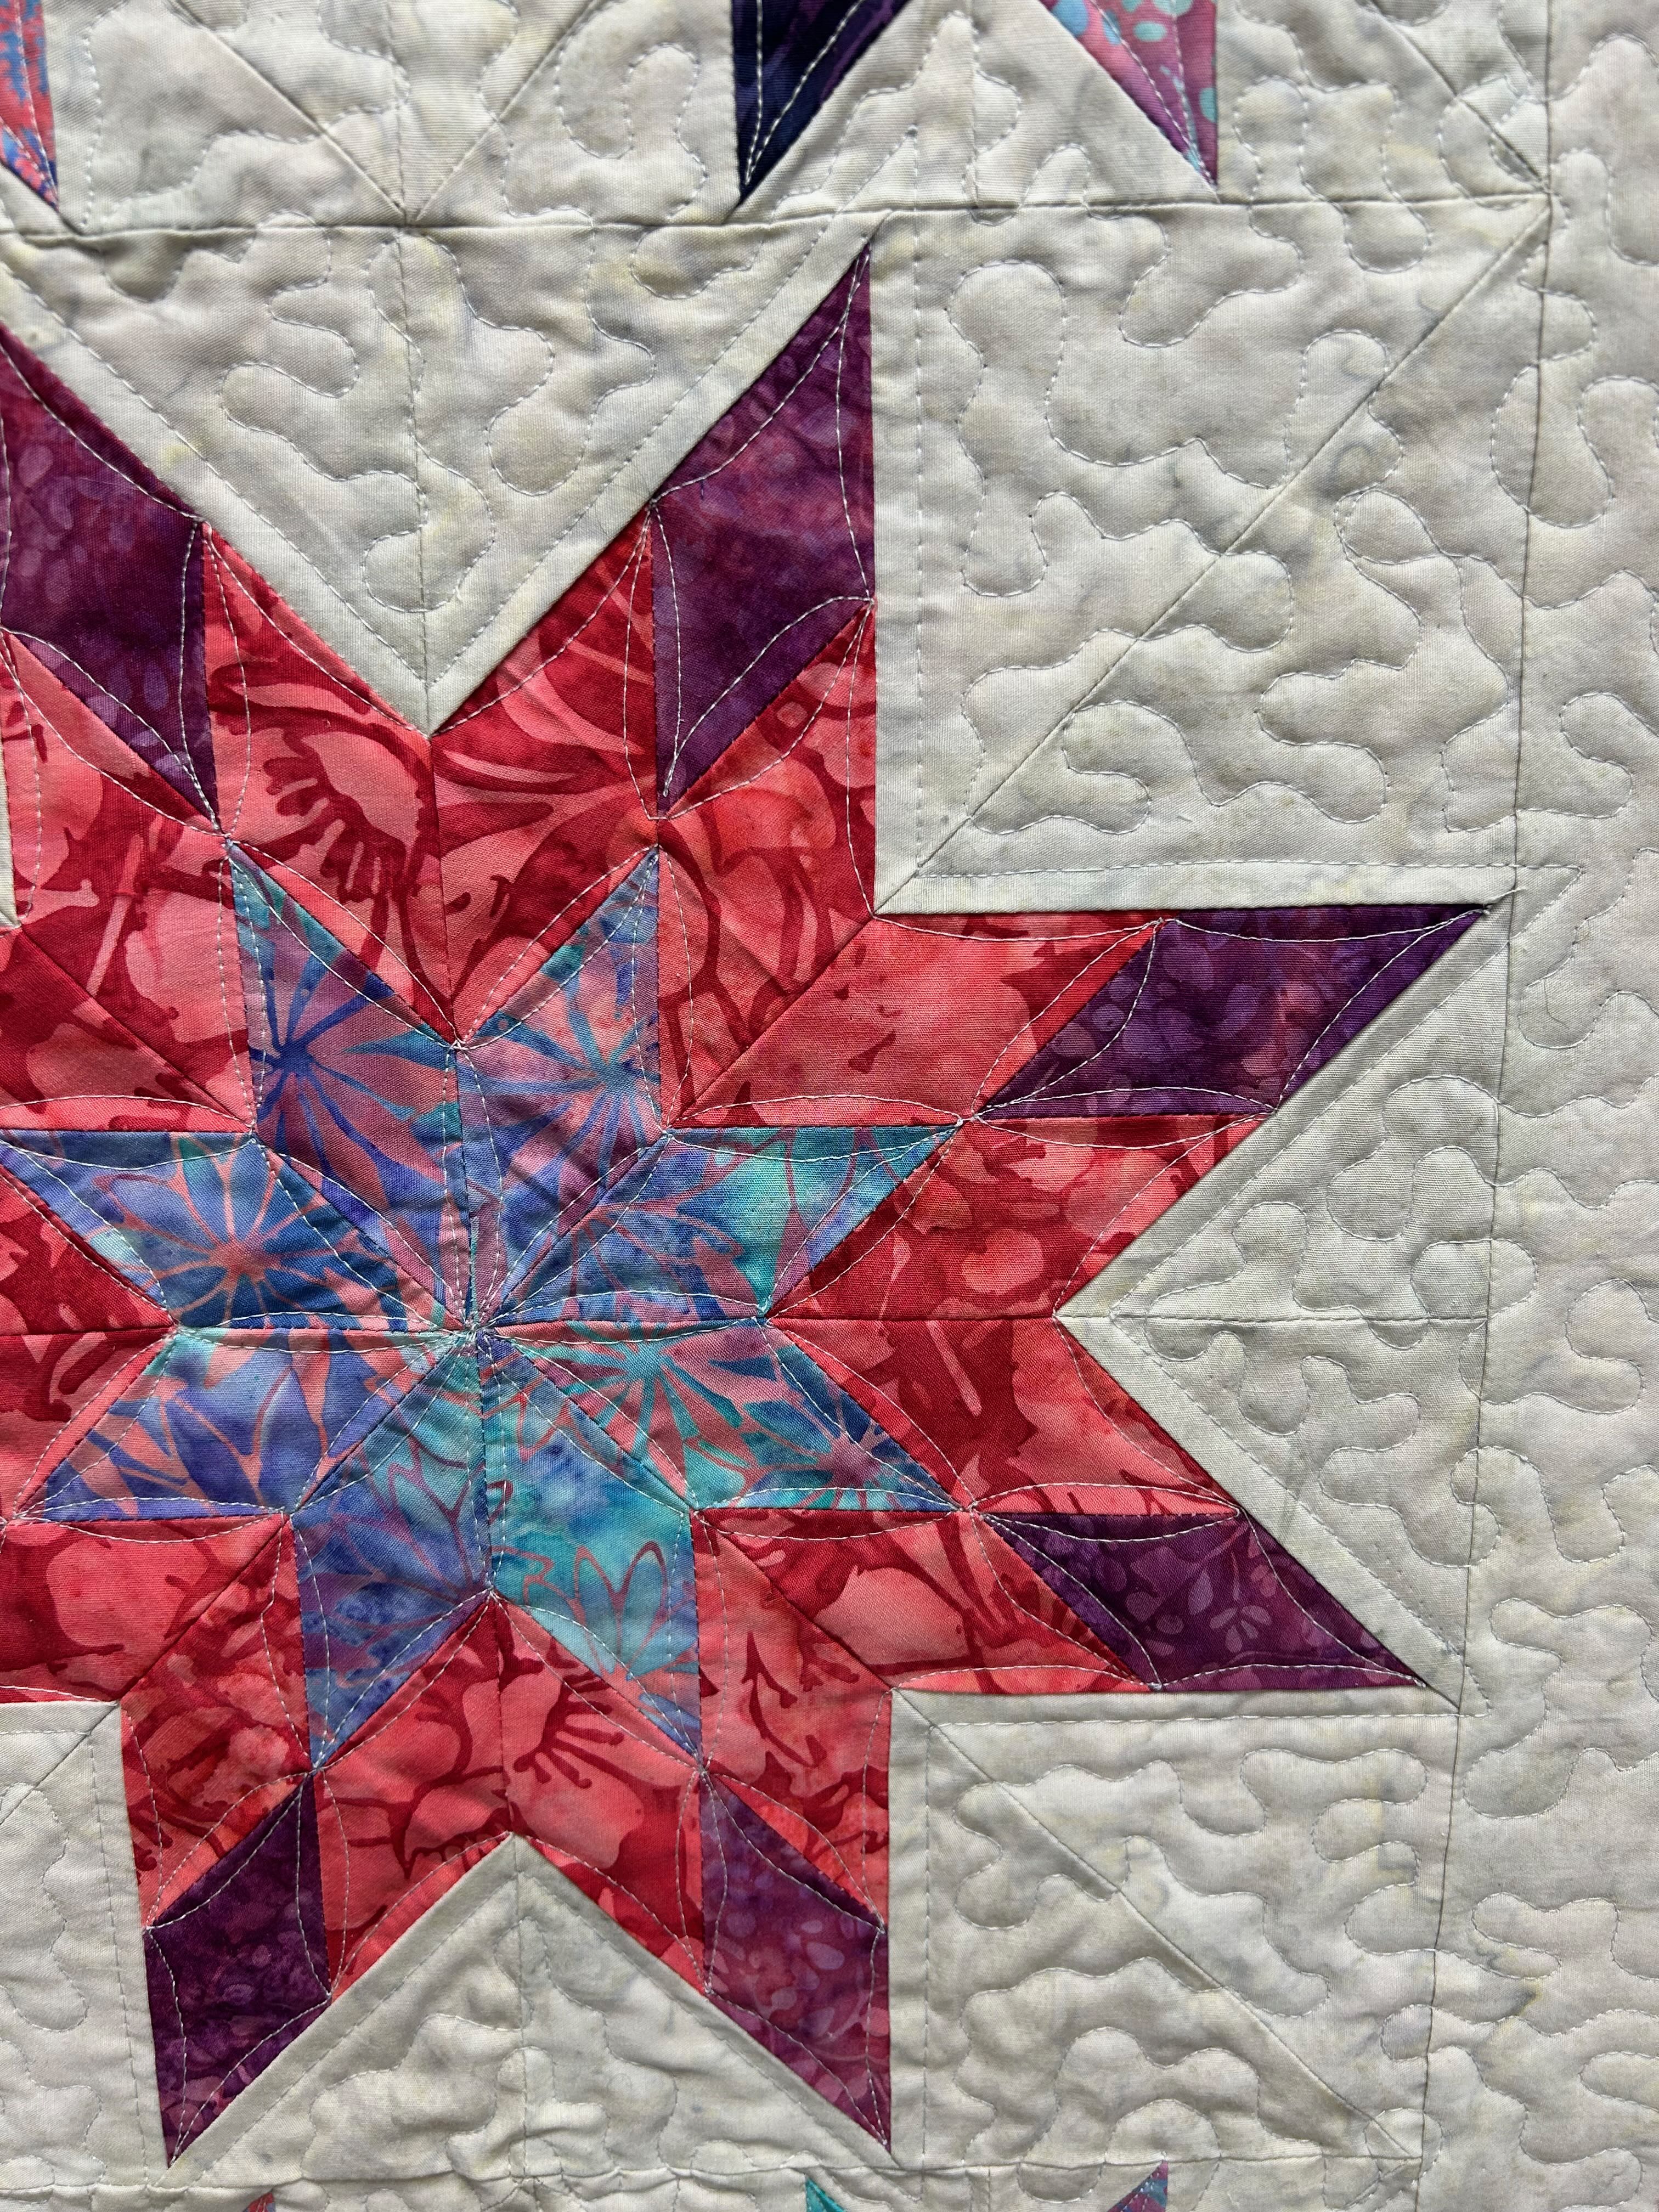
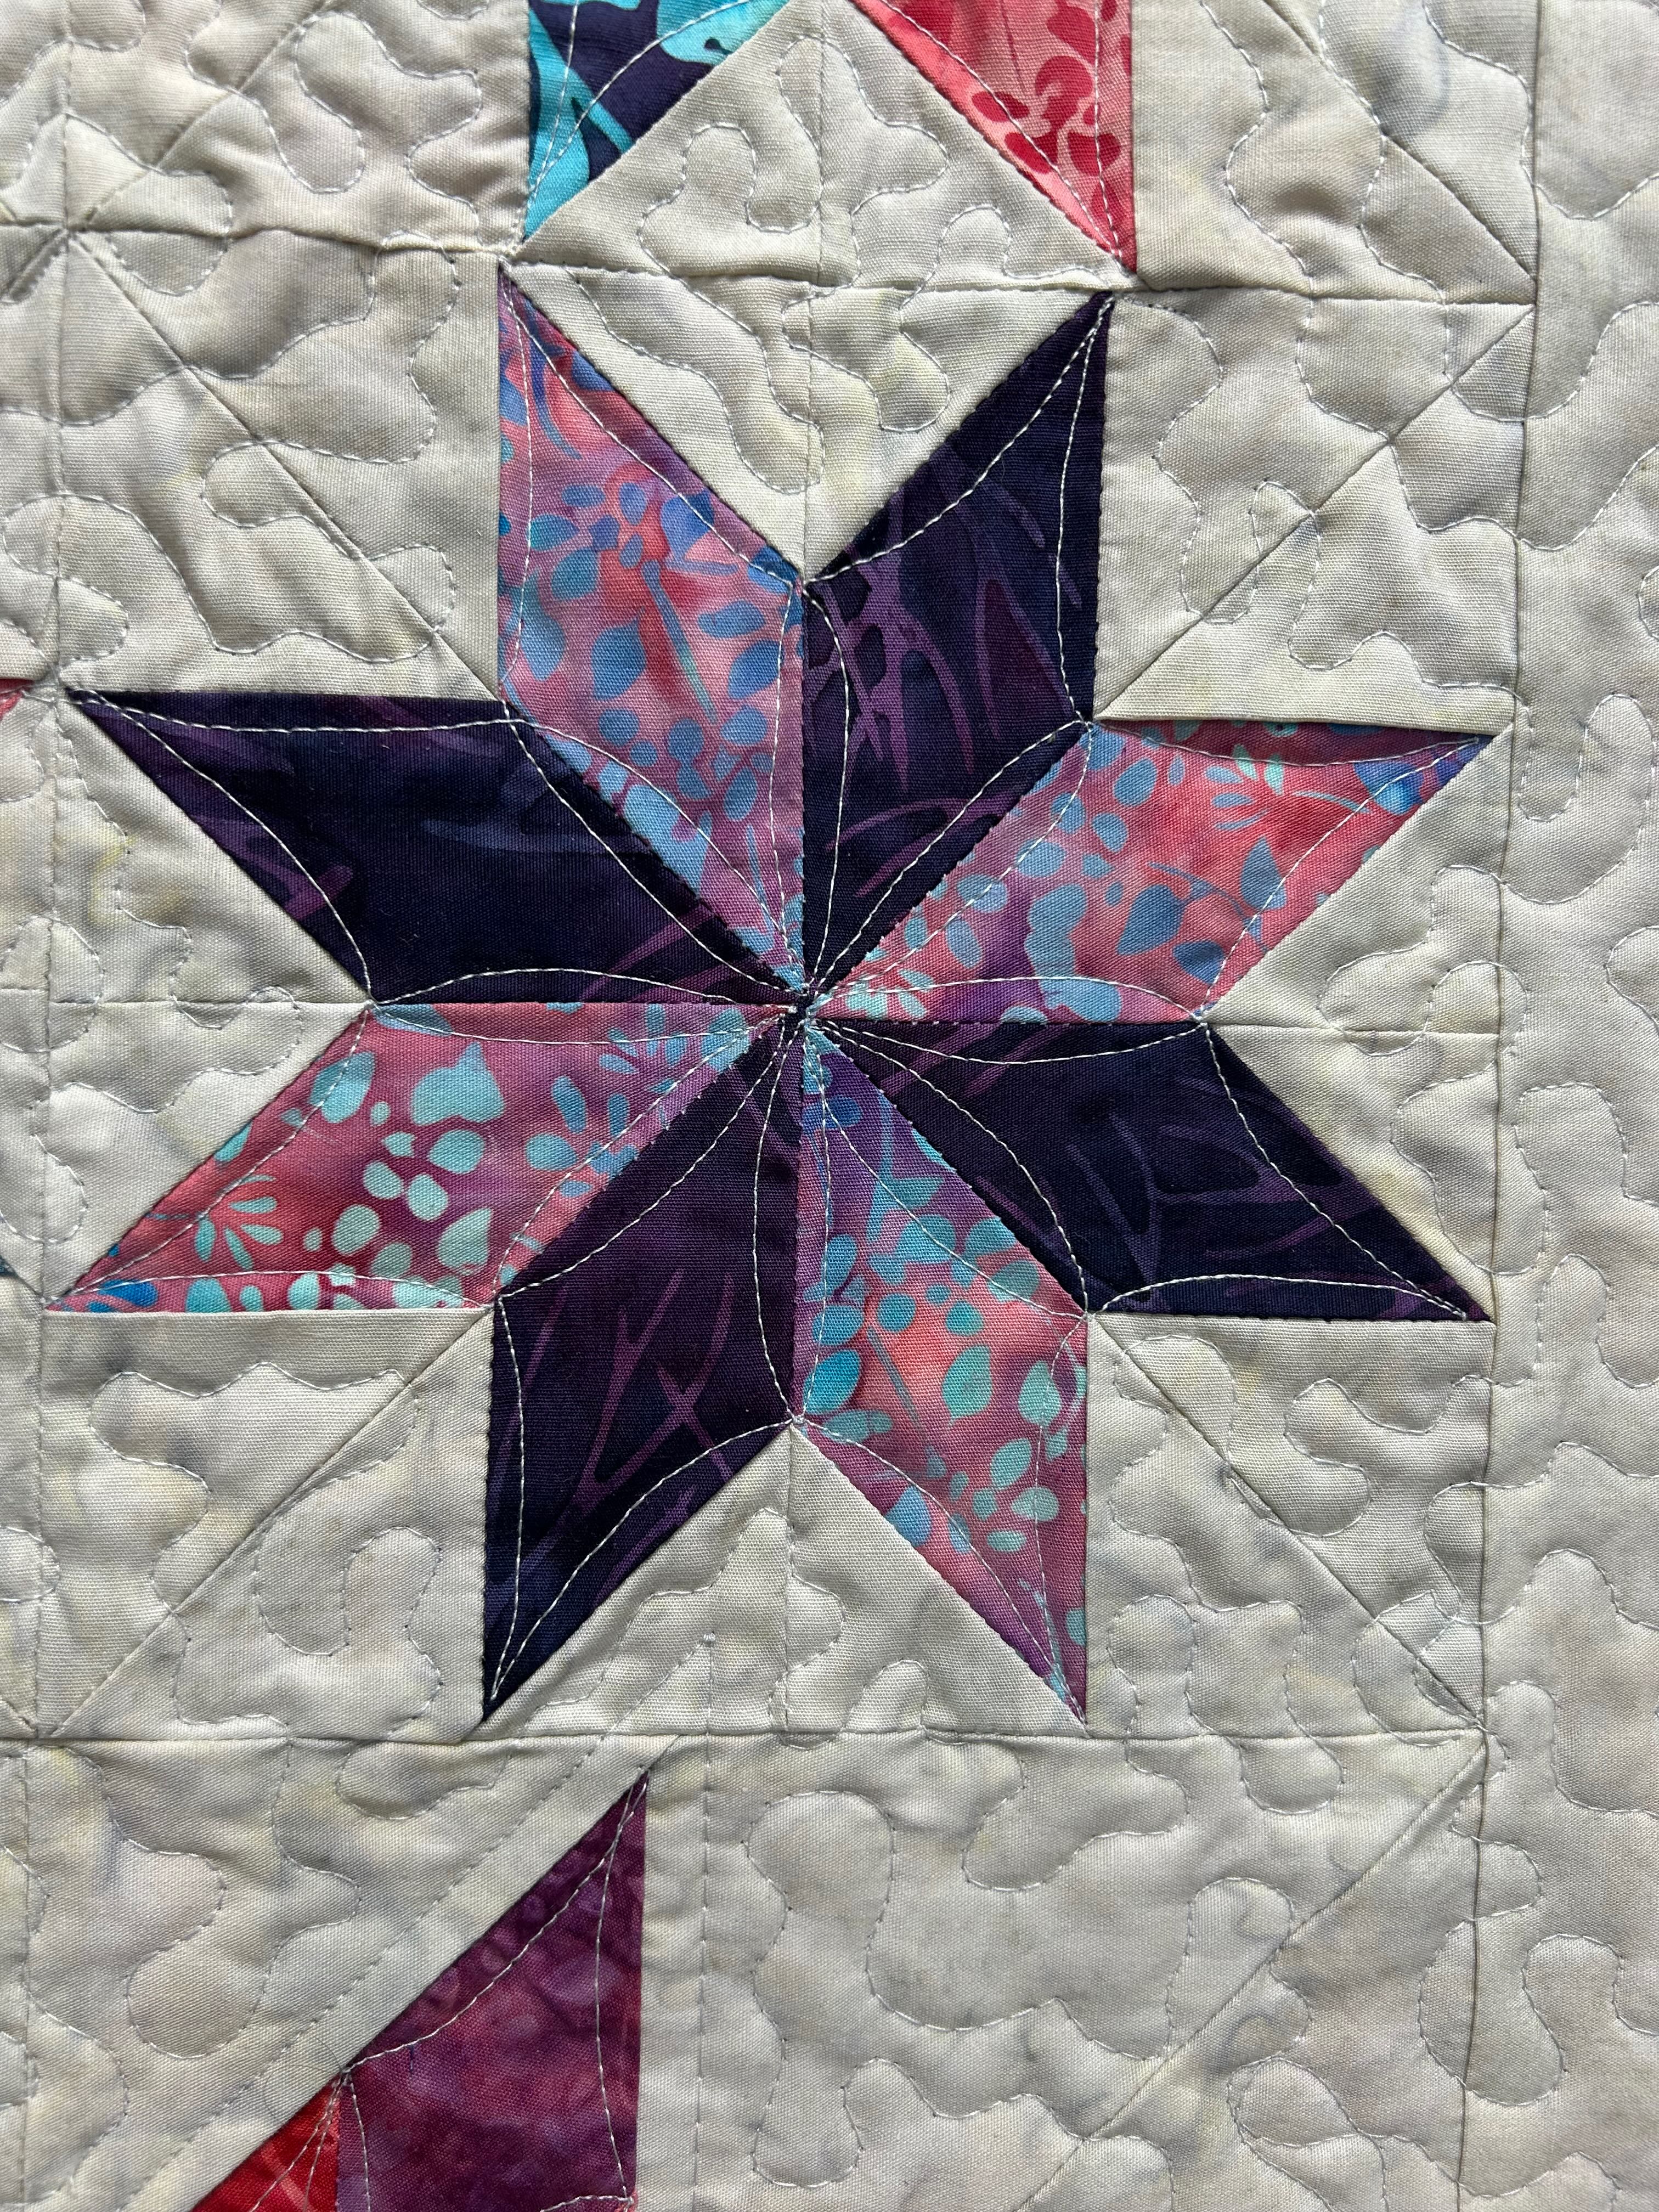
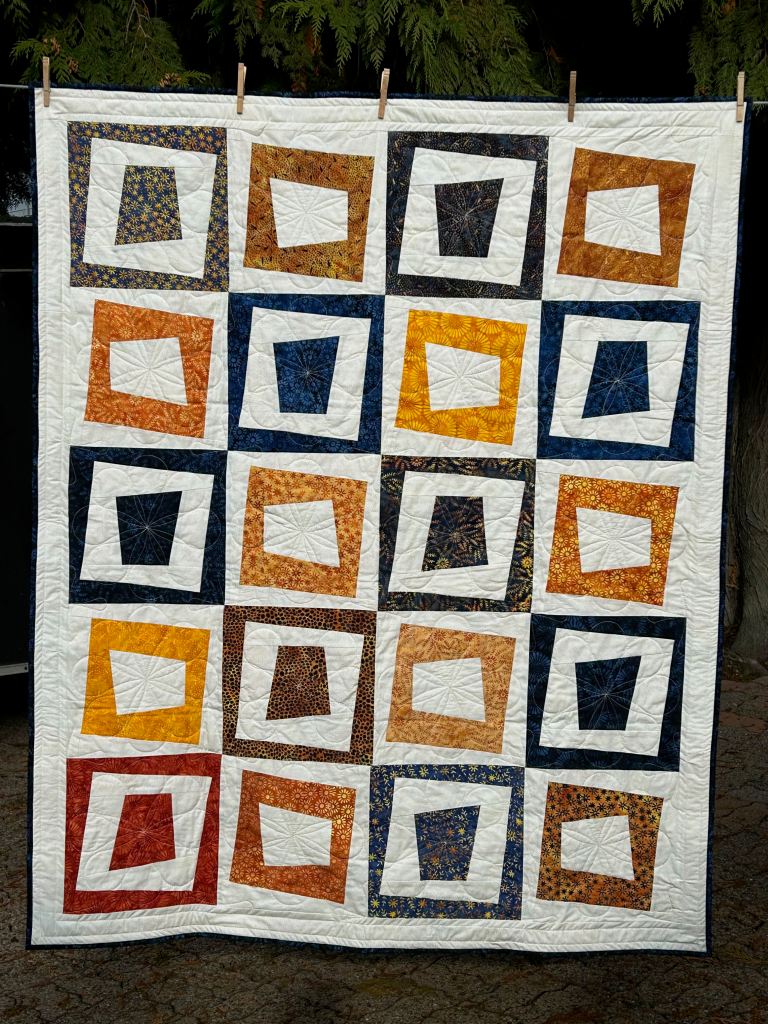
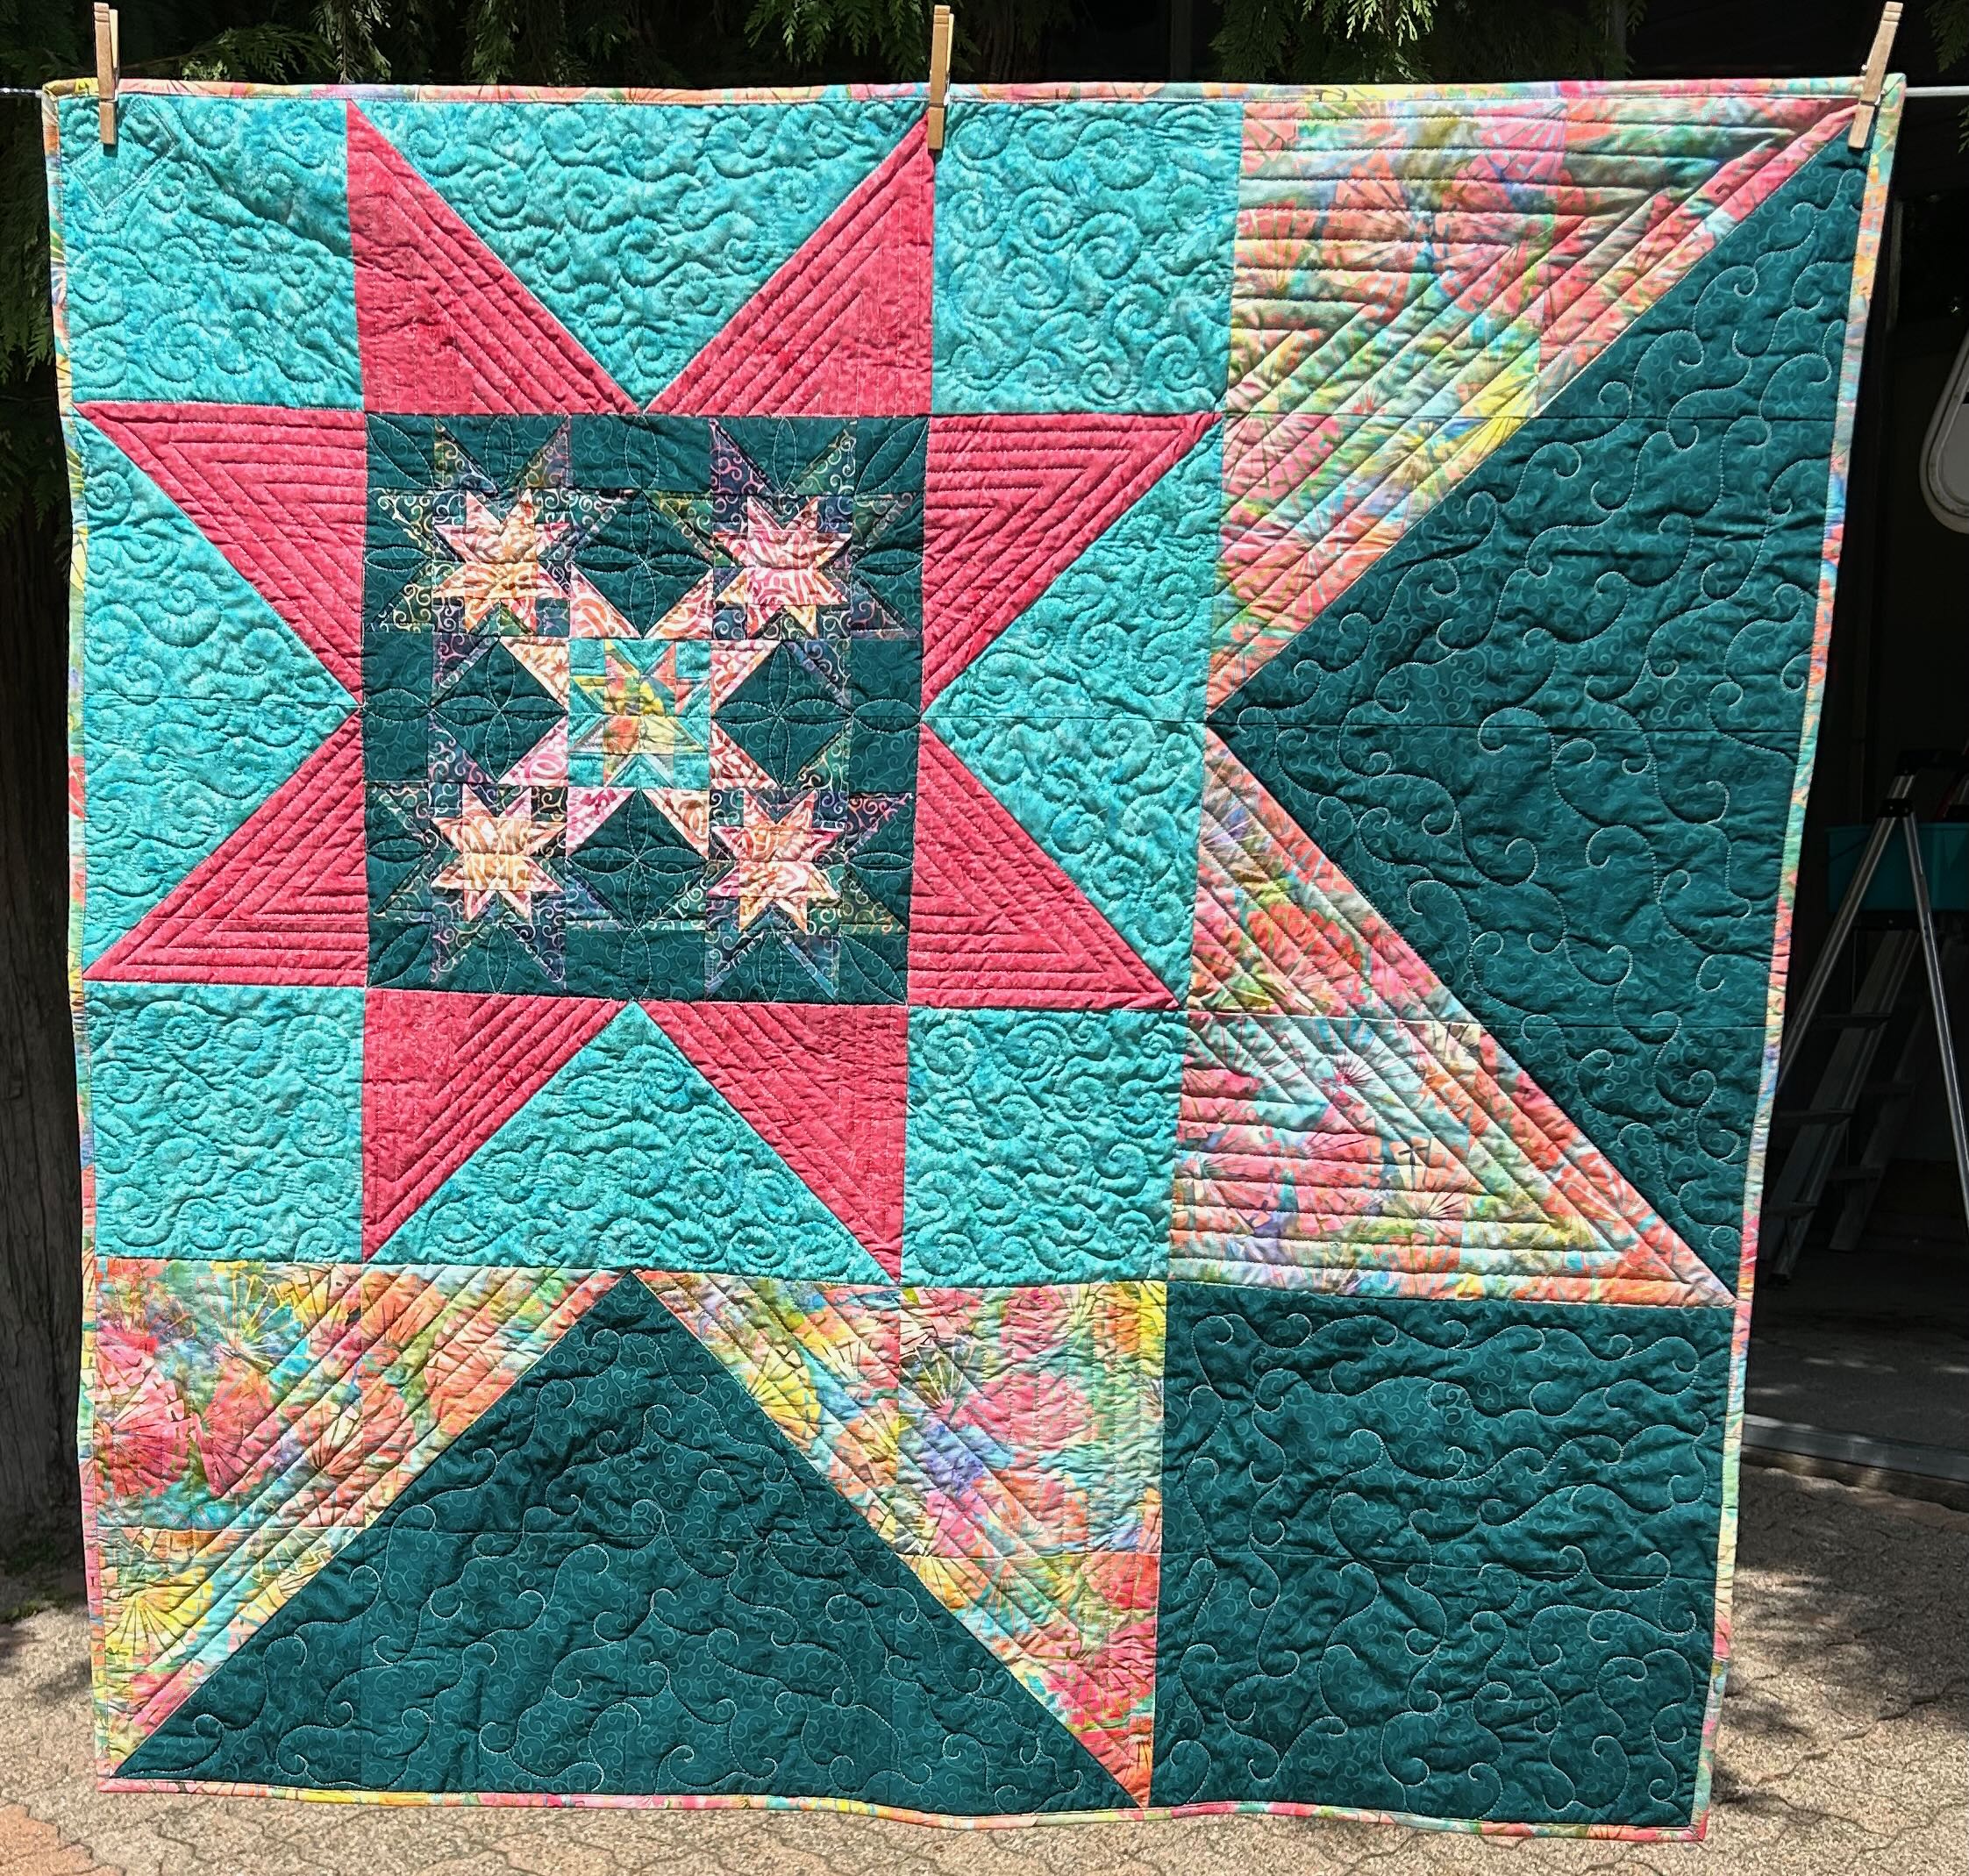
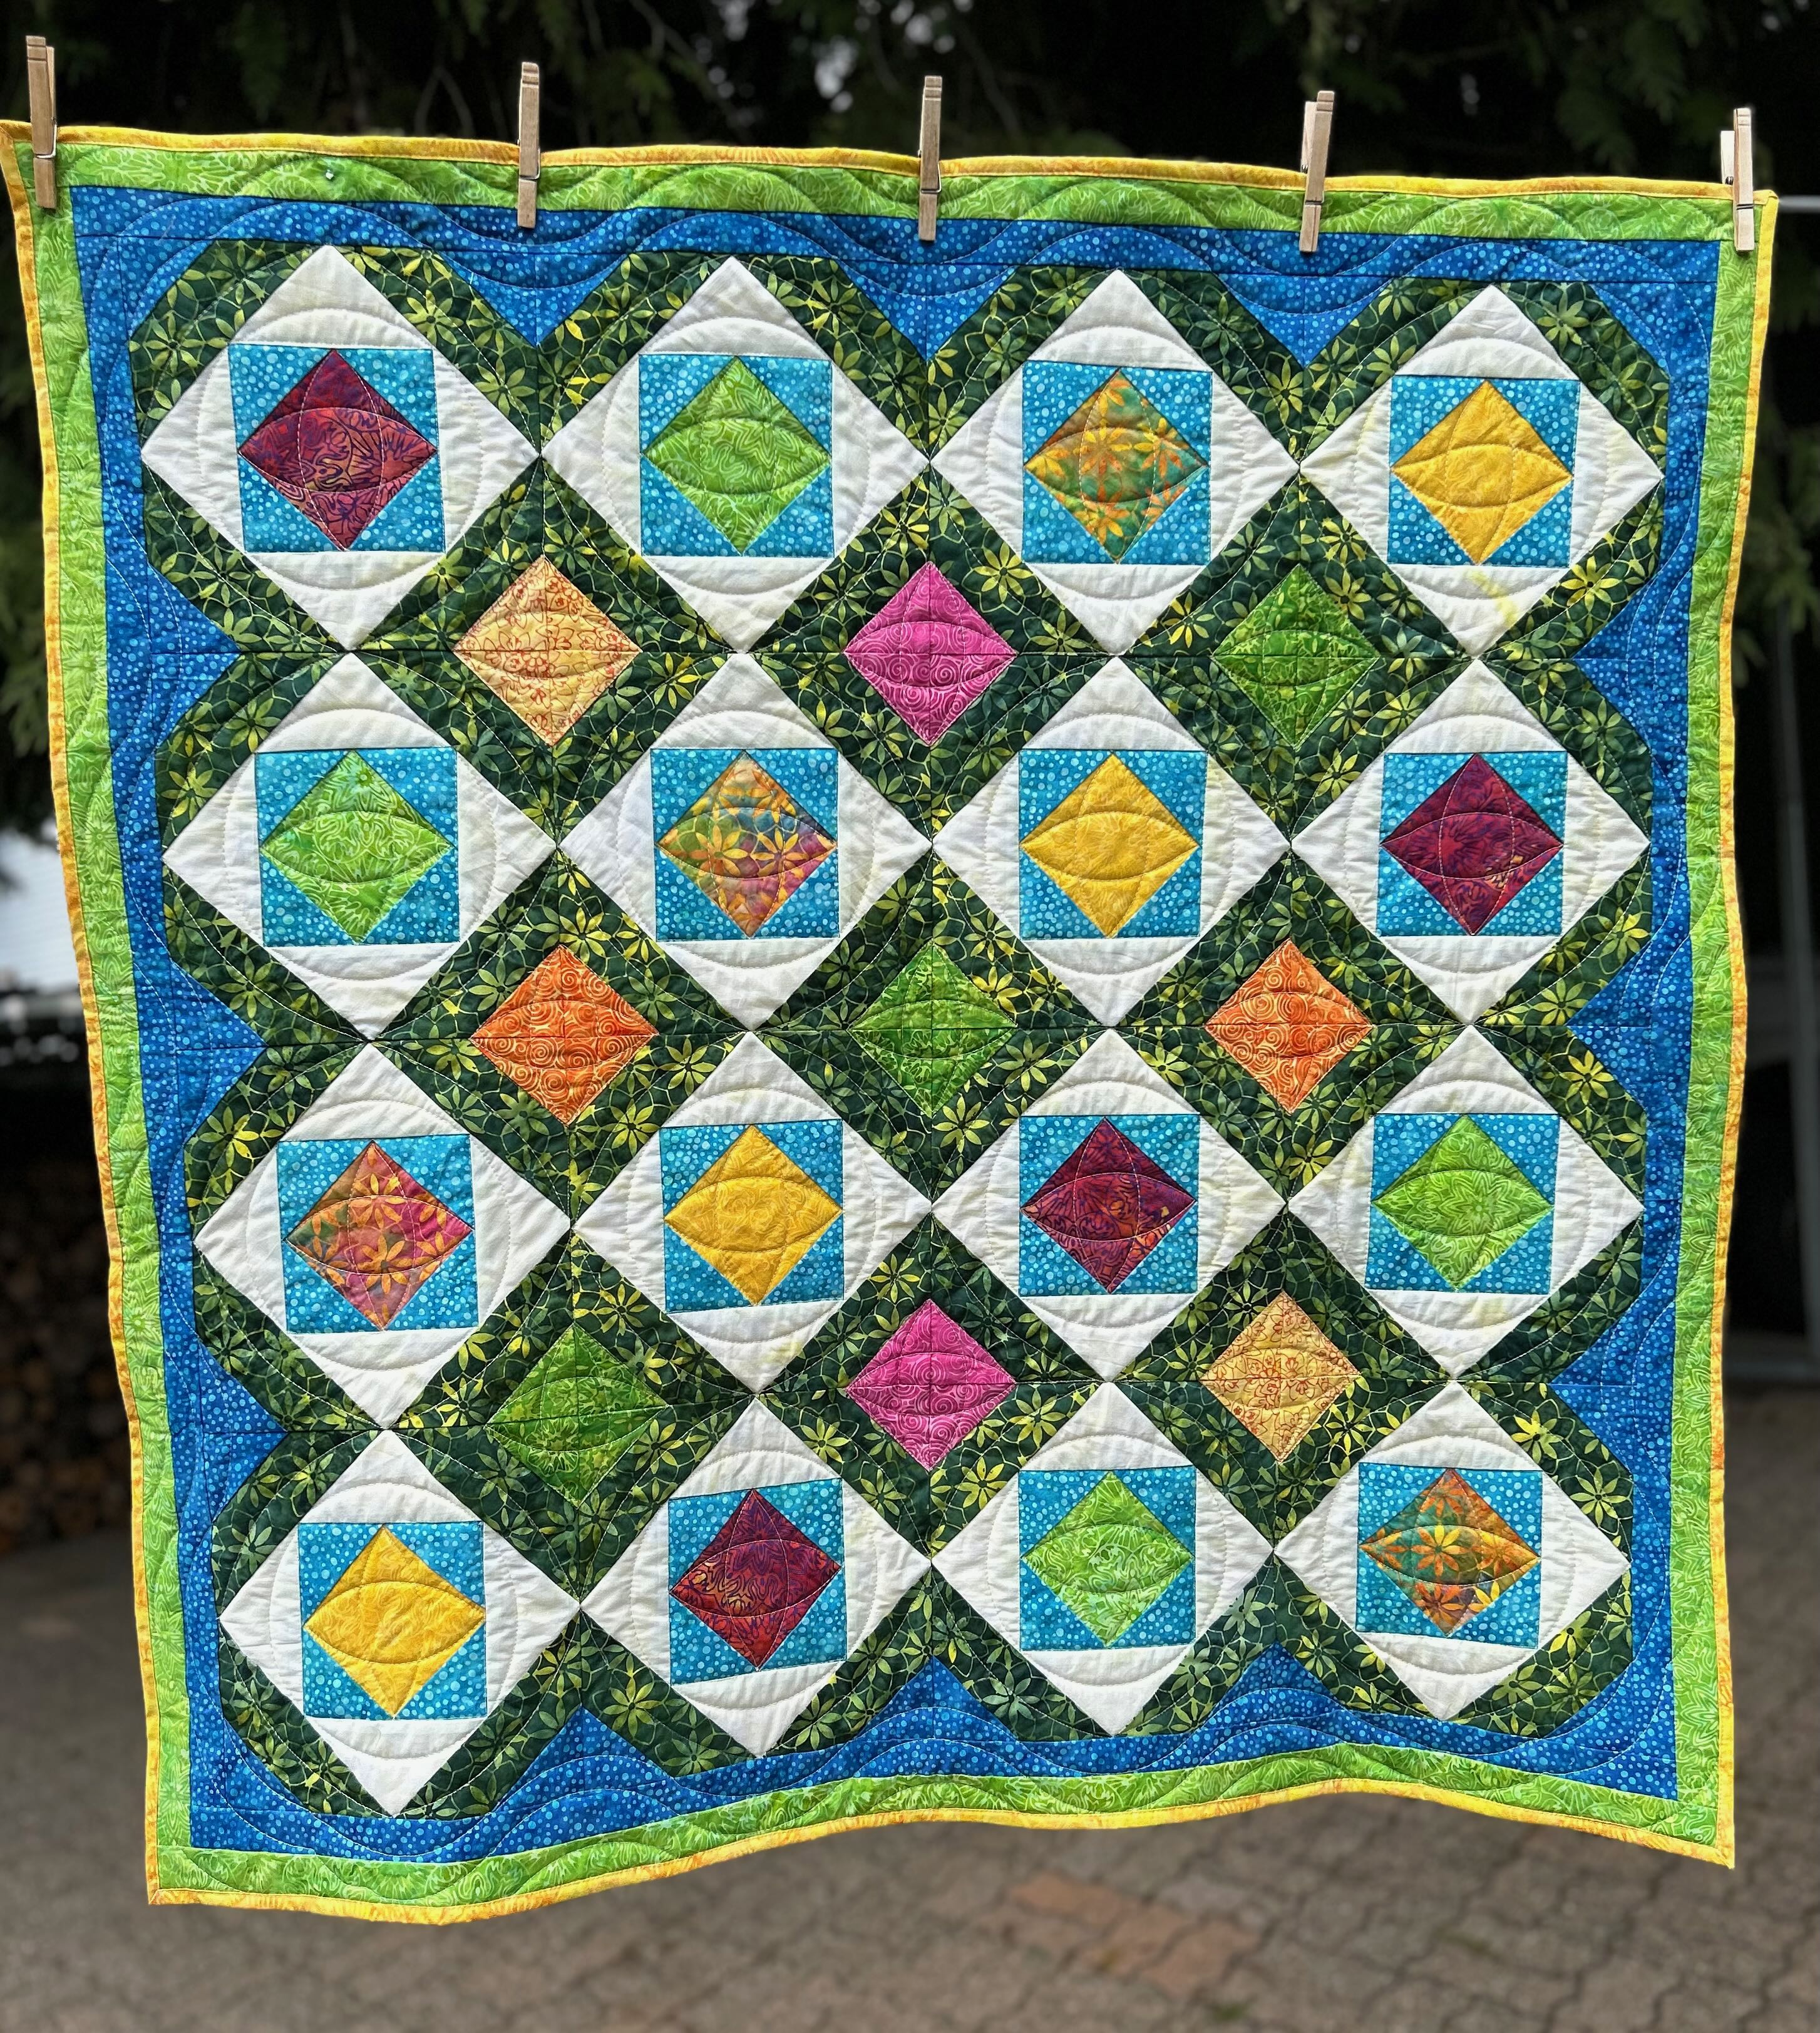
Claudia asked if I would be interested in participating in her blog hop featuring her Island Batik signature collection. I love the blues and golds … it’s such a pretty collection! I paired it with Eggwhite, an Island Batik foundation that is available year round.
When I ordered fabric from her, I ordered what EQ8 said I needed. I should know better! It was way more than I needed!! So, out of guilt, I ended up making 3 quilts!
This first one was designed in EQ8 and is paper pieced. I like how the centre blocks go every which way. It measures 51″ x 63.5″
This was quilted with Silly Moon’s Drop 3 and Drop 1 rulers.
This 2nd one was cut with similar measurements in the squares. And they were all cut the same. It didn’t matter which way I oriented the blocks, the centre block looks like it is always in the same orientation. This quilt measures 52″ x 52″.
This one was free motion quilted, attempting to quilt daisies – like in some of the fabrics!
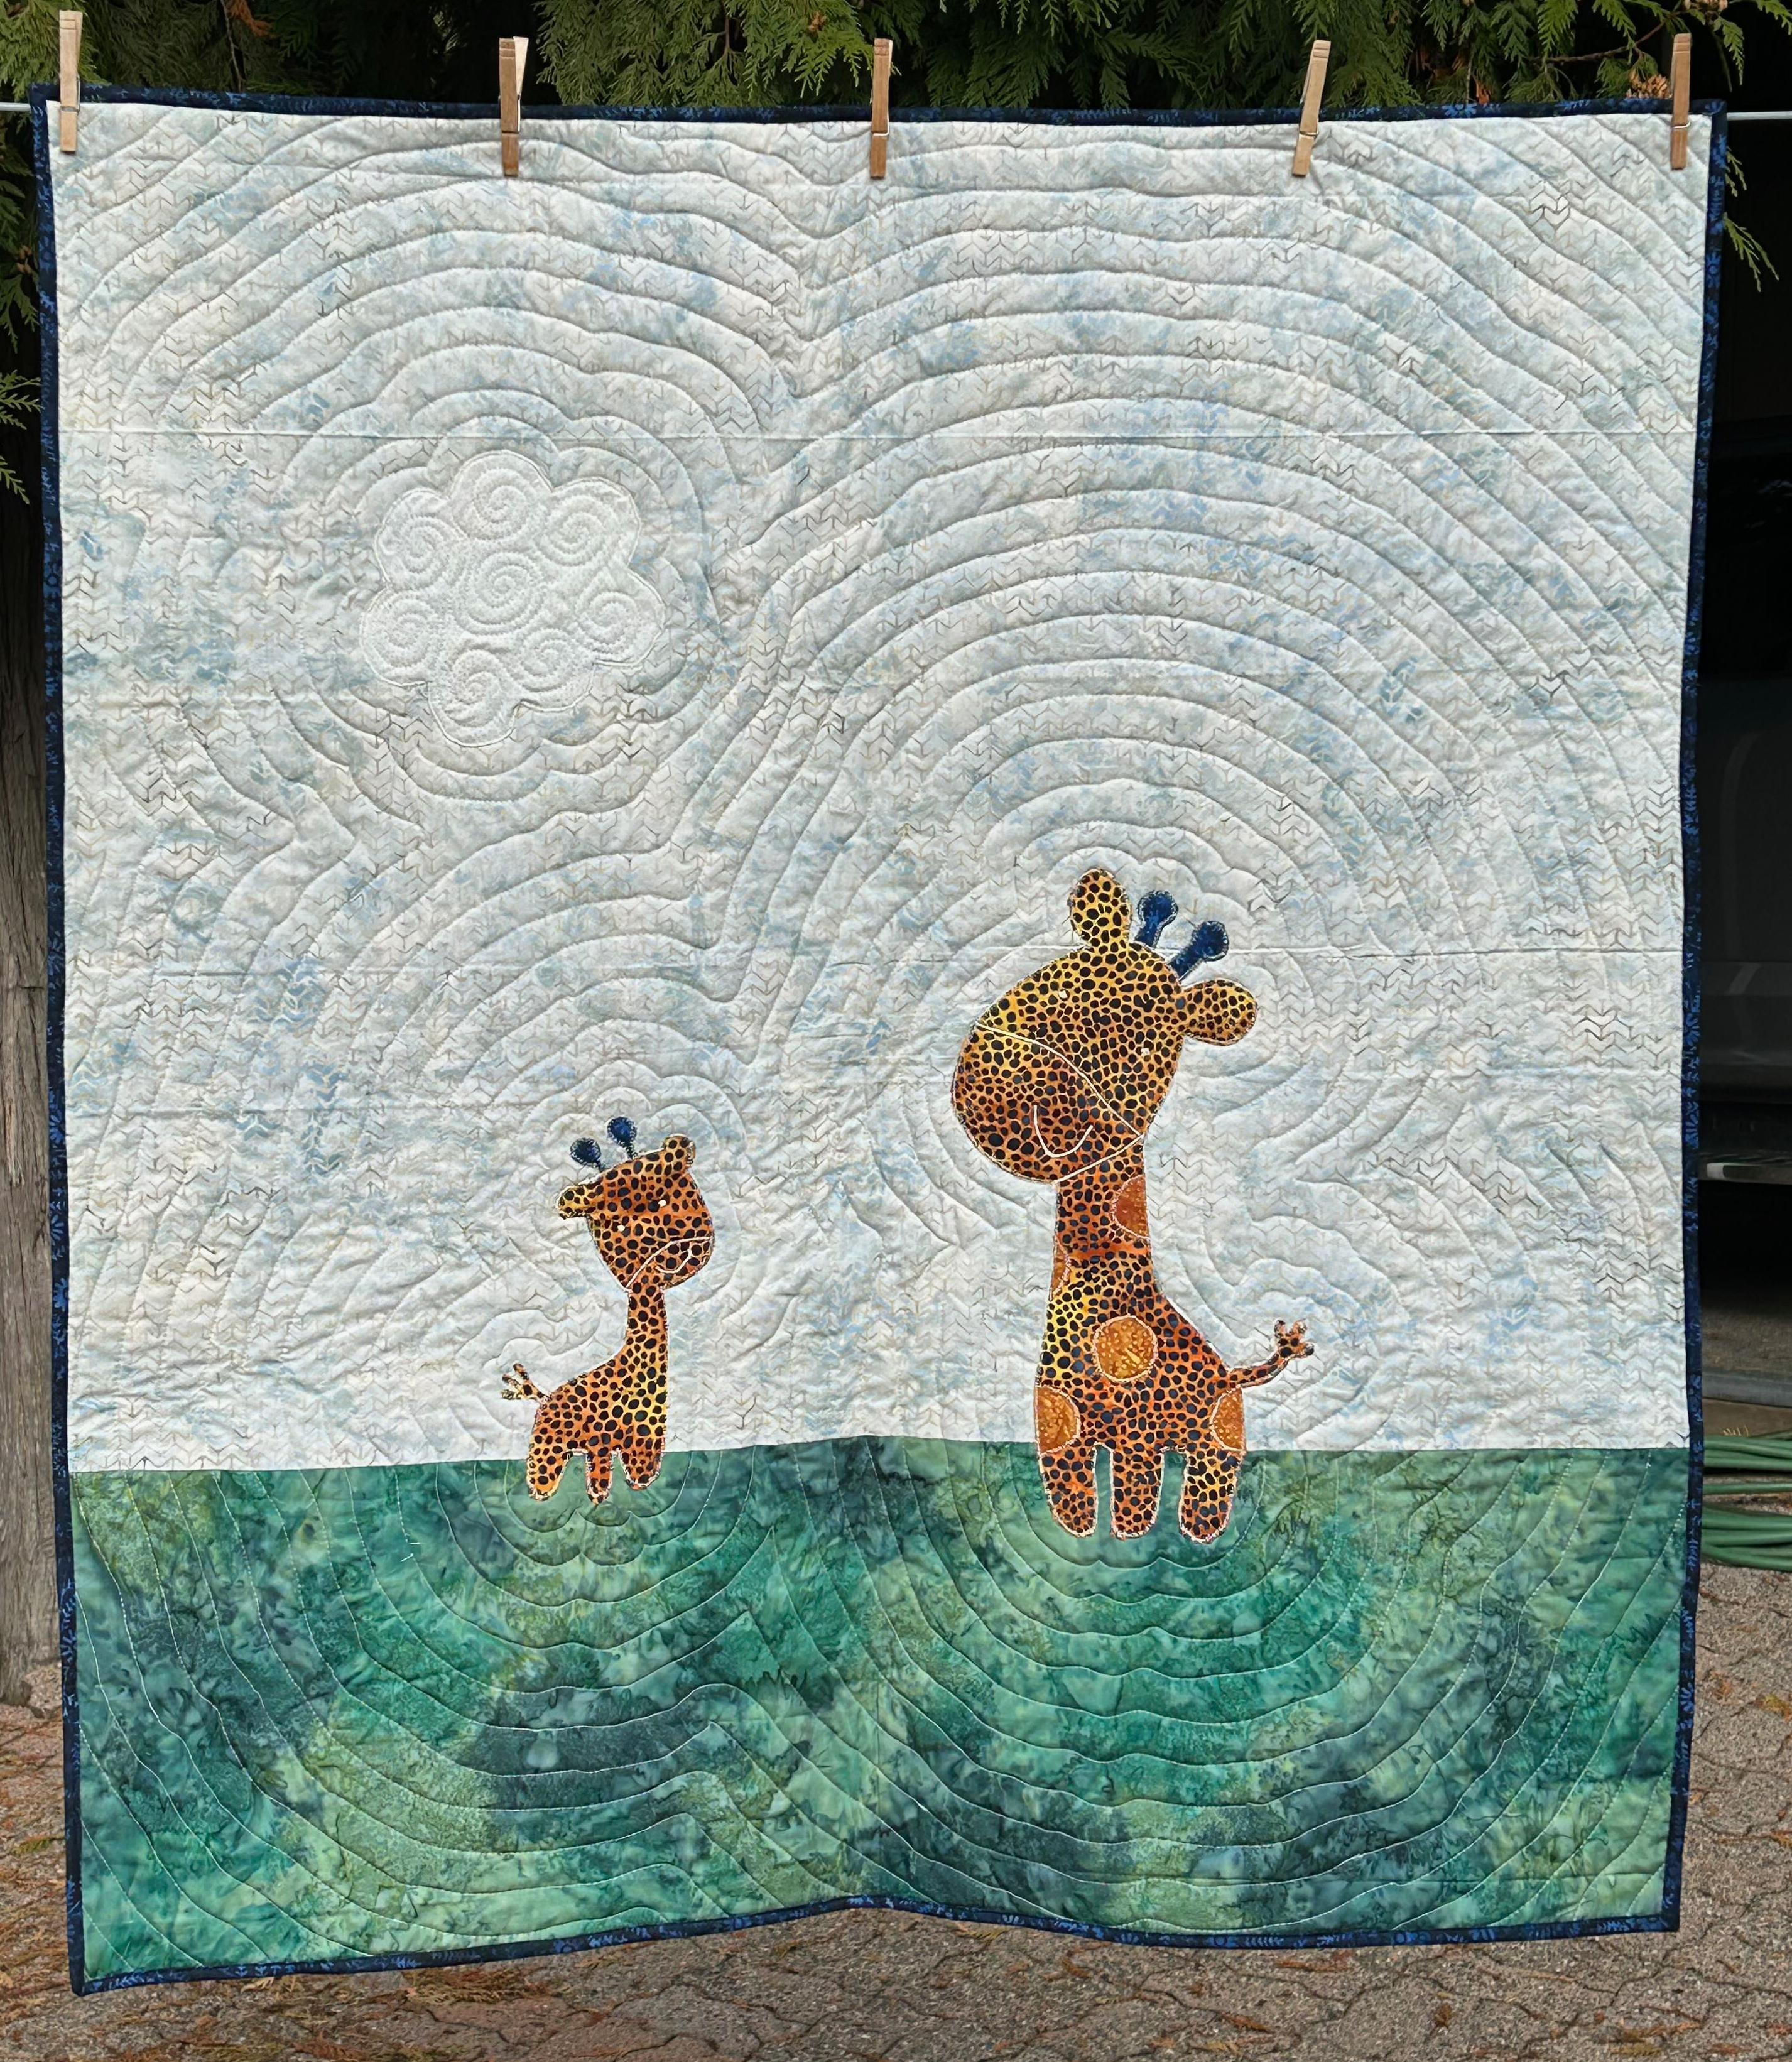
One of the fabrics reminded me of a giraffe. Of course, giraffes do not have blue spots, but I thought it would make a cute quilt. The grass and sky were from my Island Batik stash. The cloud is eggwhite. This quilt is 43″ x 47.”
I won binding chicken when I was binding this quilt!
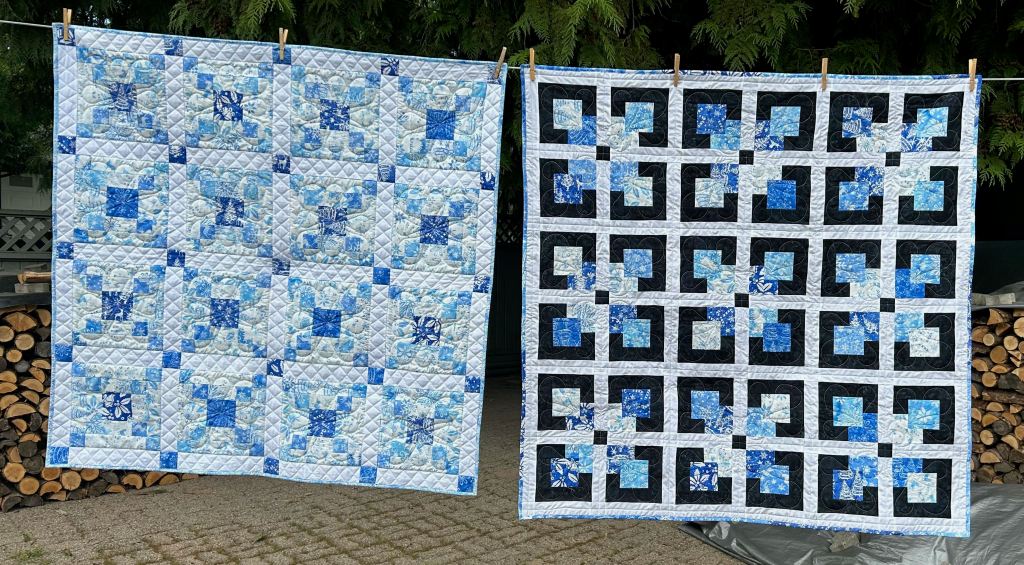
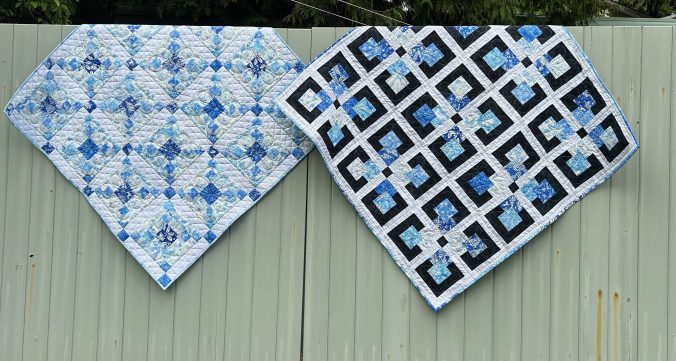
And here’s a picture of all 3 quilts hanging on the clothesline:
I am now a Silly Moon affiliate! So what does that mean? When you use my affiliate code Quiltinggail2024 at Silly Moon, you will receive 10% off your order and I will receive a small commission.
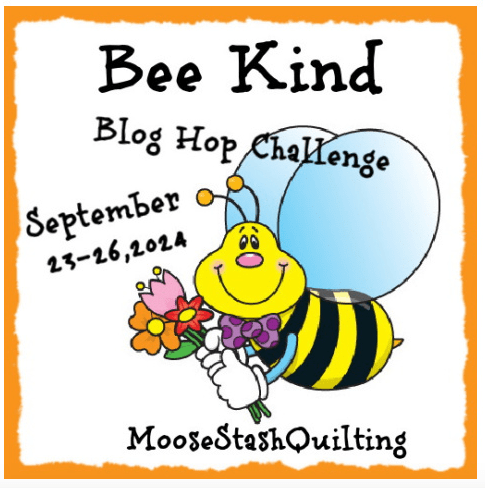
Challenge: September is the time to remember that a little kindness goes a long way. Share your “kind” projects. Your favorite charity project, a free online pattern or anything that shows you spread a little kindness, everywhere you go. The Bee’s are an important part of life as well, and we all need to be kind to them too!
I thought it would be cute to make a quilt with a bee on it. But “NO” was my mind’s response to that thought. I’m allergic to bees (their stings) and I generally don’t like them. Yes, I know they are good for growing things and are necessary, but honestly, I don’t want them anywhere near me. And not close-up in a quilt!
I do a LOT of donation quilts for numerous charities (see below), but I wanted to do something different.
So what to do???
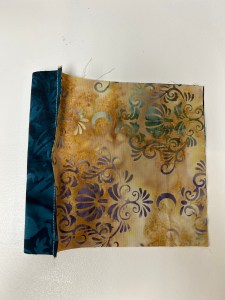
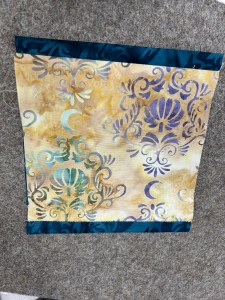
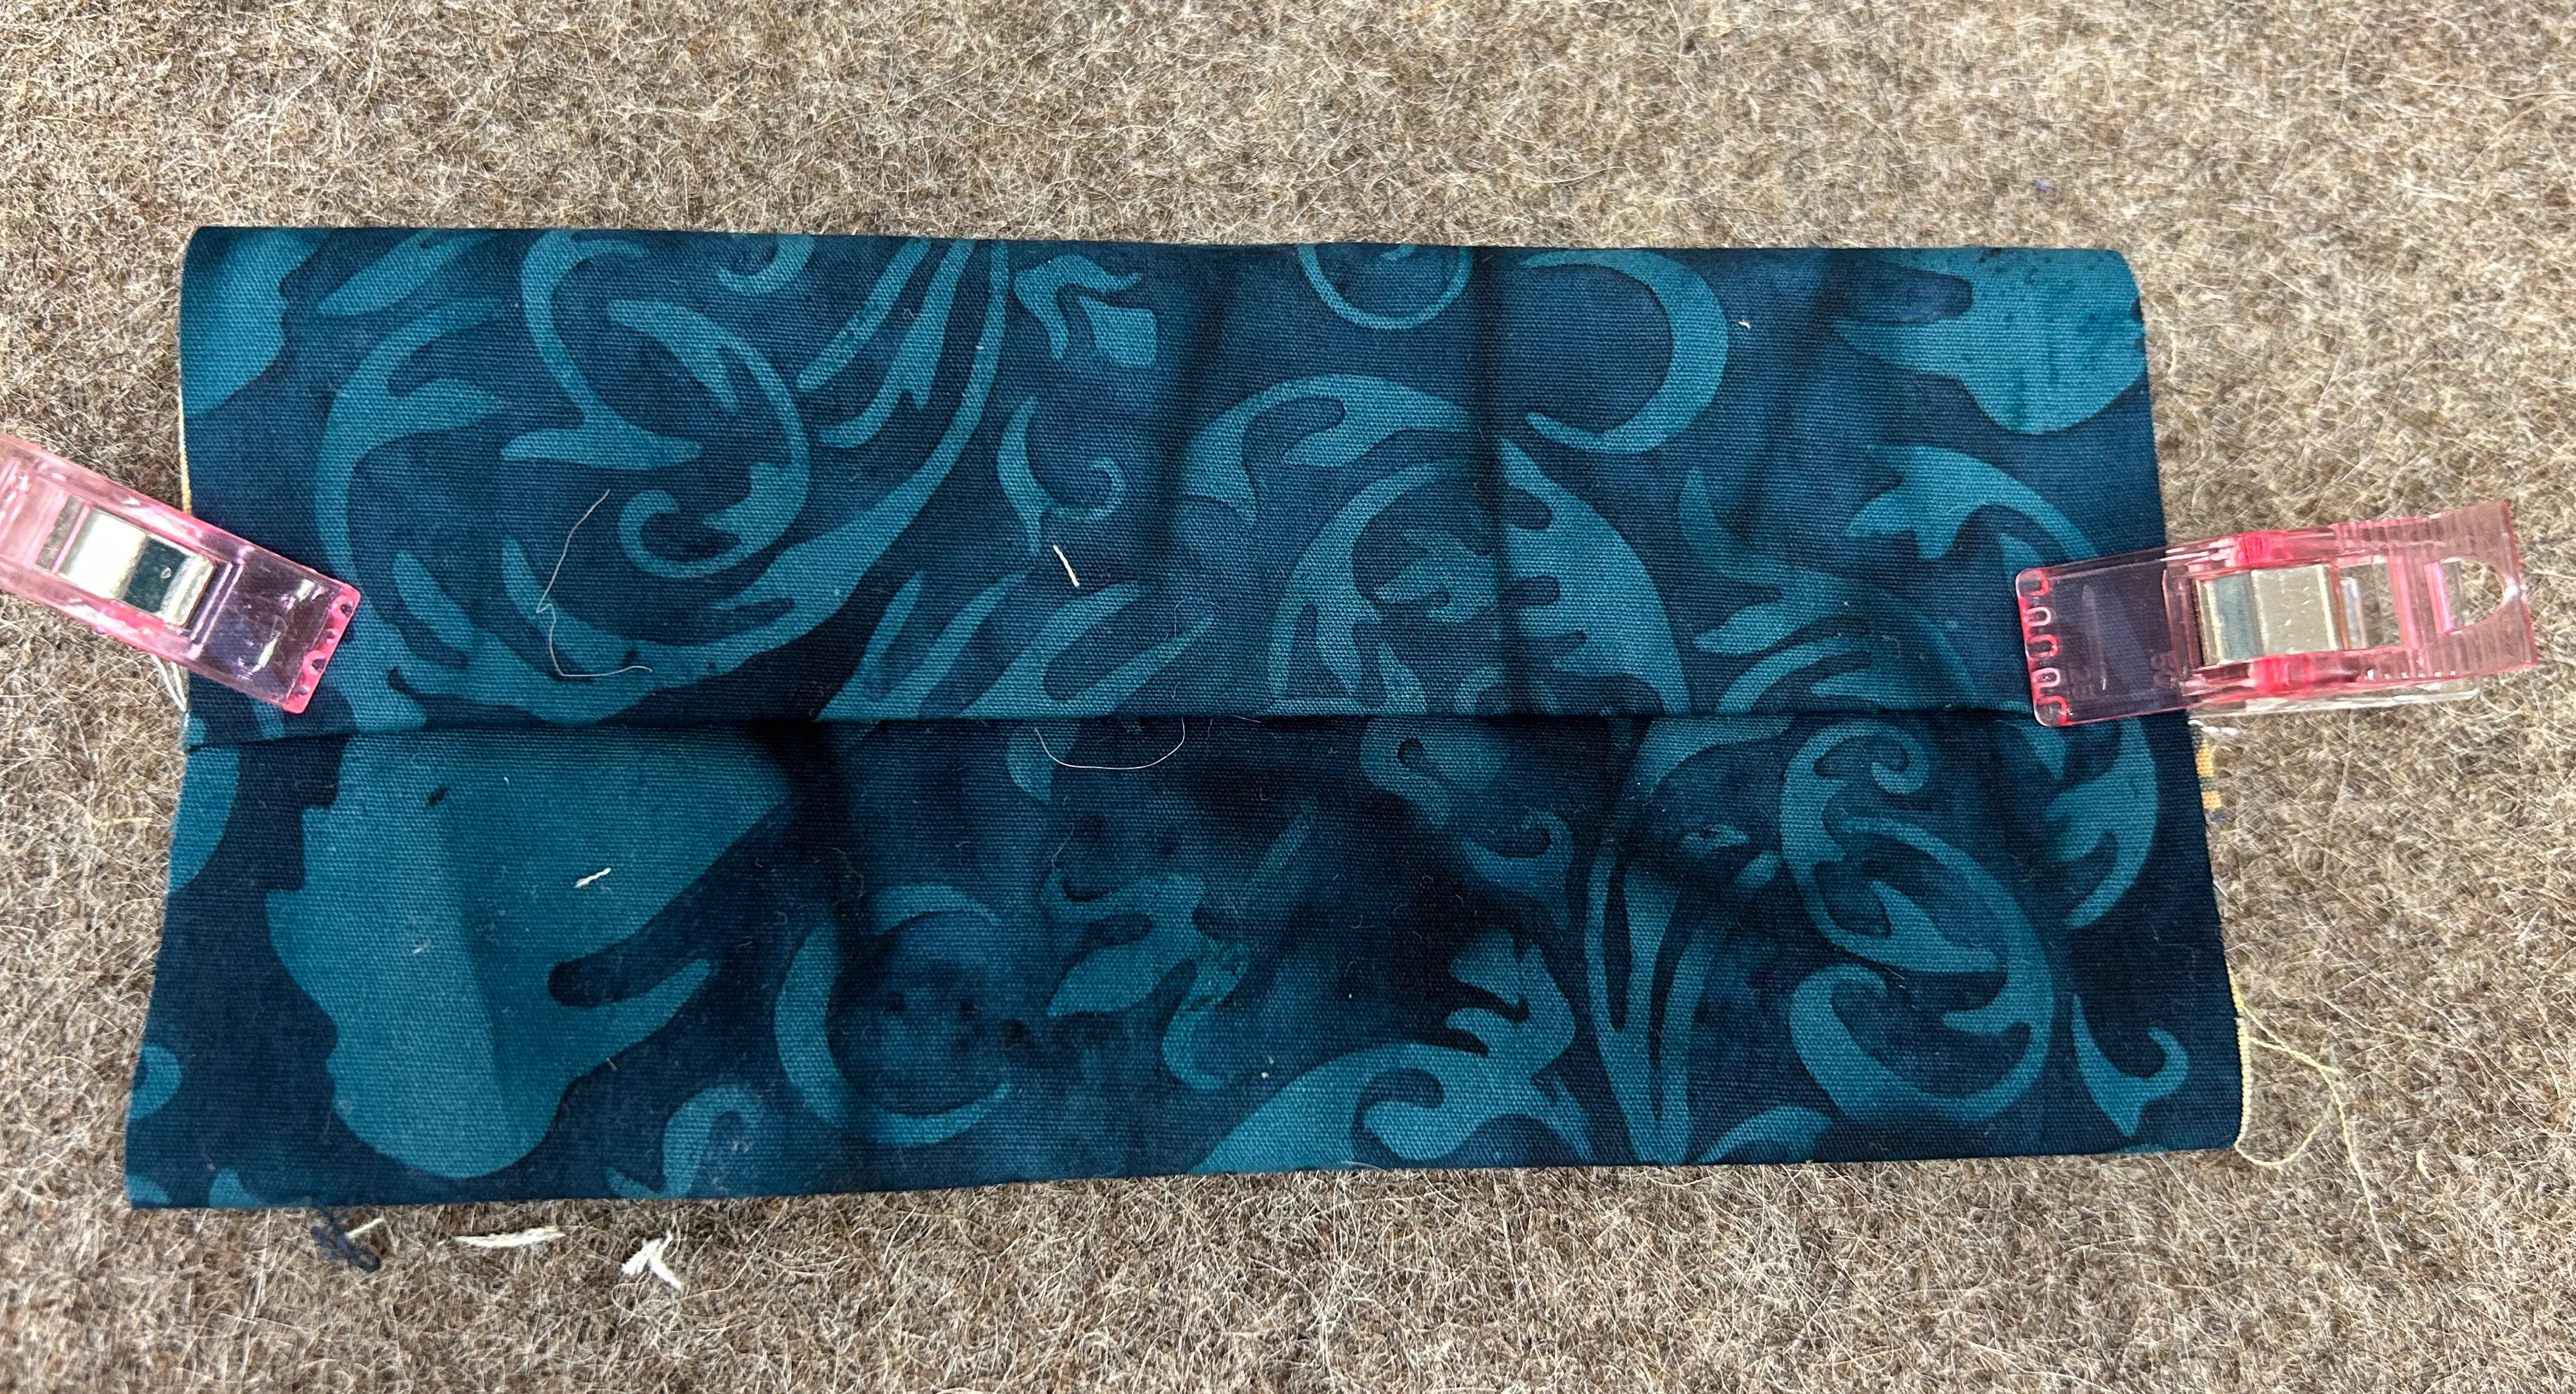
I was thinking about what to do as I was making a ton of tissue holders. I was getting ready for a retreat and making them for every attendee. Tissues are something that we all use and need at one time or another. The holders are quick and easy to make. But making over 20 of them takes time. And yes, I was doing it as a kindness to everyone!
Here’s how to make them:
Step #1: Take a 6″ x 6″ square and an 6″ x 8″ rectangle. Sew them together on the long ends of the 8″ rectangle, wrong sides together, using a 1/4” seam.
Step #2: Turn it right side out and ensure the ends of the 8″ rectangle form a small ‘border’ on each end. (I don’t measure, I just estimate that they are close to the same width).
Step #3: Fold over one of the edges, measuring 1 3/4” up. Overlap the second side, folding down 1 1/2“. Clip into place and sew the ends. (Yes, they will overlap).
Step #4: Sew the ends, using a 1/4” seam.
Step #5: Make boxed corners. Fold as in the picture and sew a line 1/2” from the corner. Trim boxed corners and turn right side out.
Boundary Bay Quilting Guild accepts donations for baby quilts, comfort quilts and Quilts of Valour. I regularly donate to the baby quilt and comfort quilt committees. I make a lot of quilts and it’s nice to know that they are going someplace where they are loved. Here are a few that I’ve made in the last while:
At Christmas time, the guild collects placemats for meals on wheels. I make these throughout the year, using left-overs from quilts. I simply put some Christmas fabric on the back and the recipient will have a reversible placemat. Sorry, no pictures.
Bee Kind Blog Hoppers
Bee sure to see all the Kindness of other bloggers
For September, there is no 20% off an order of $50 or more. However, MSQC is having fantastic sales this month and if you use my Affiliate link, I will still receive a small commission.
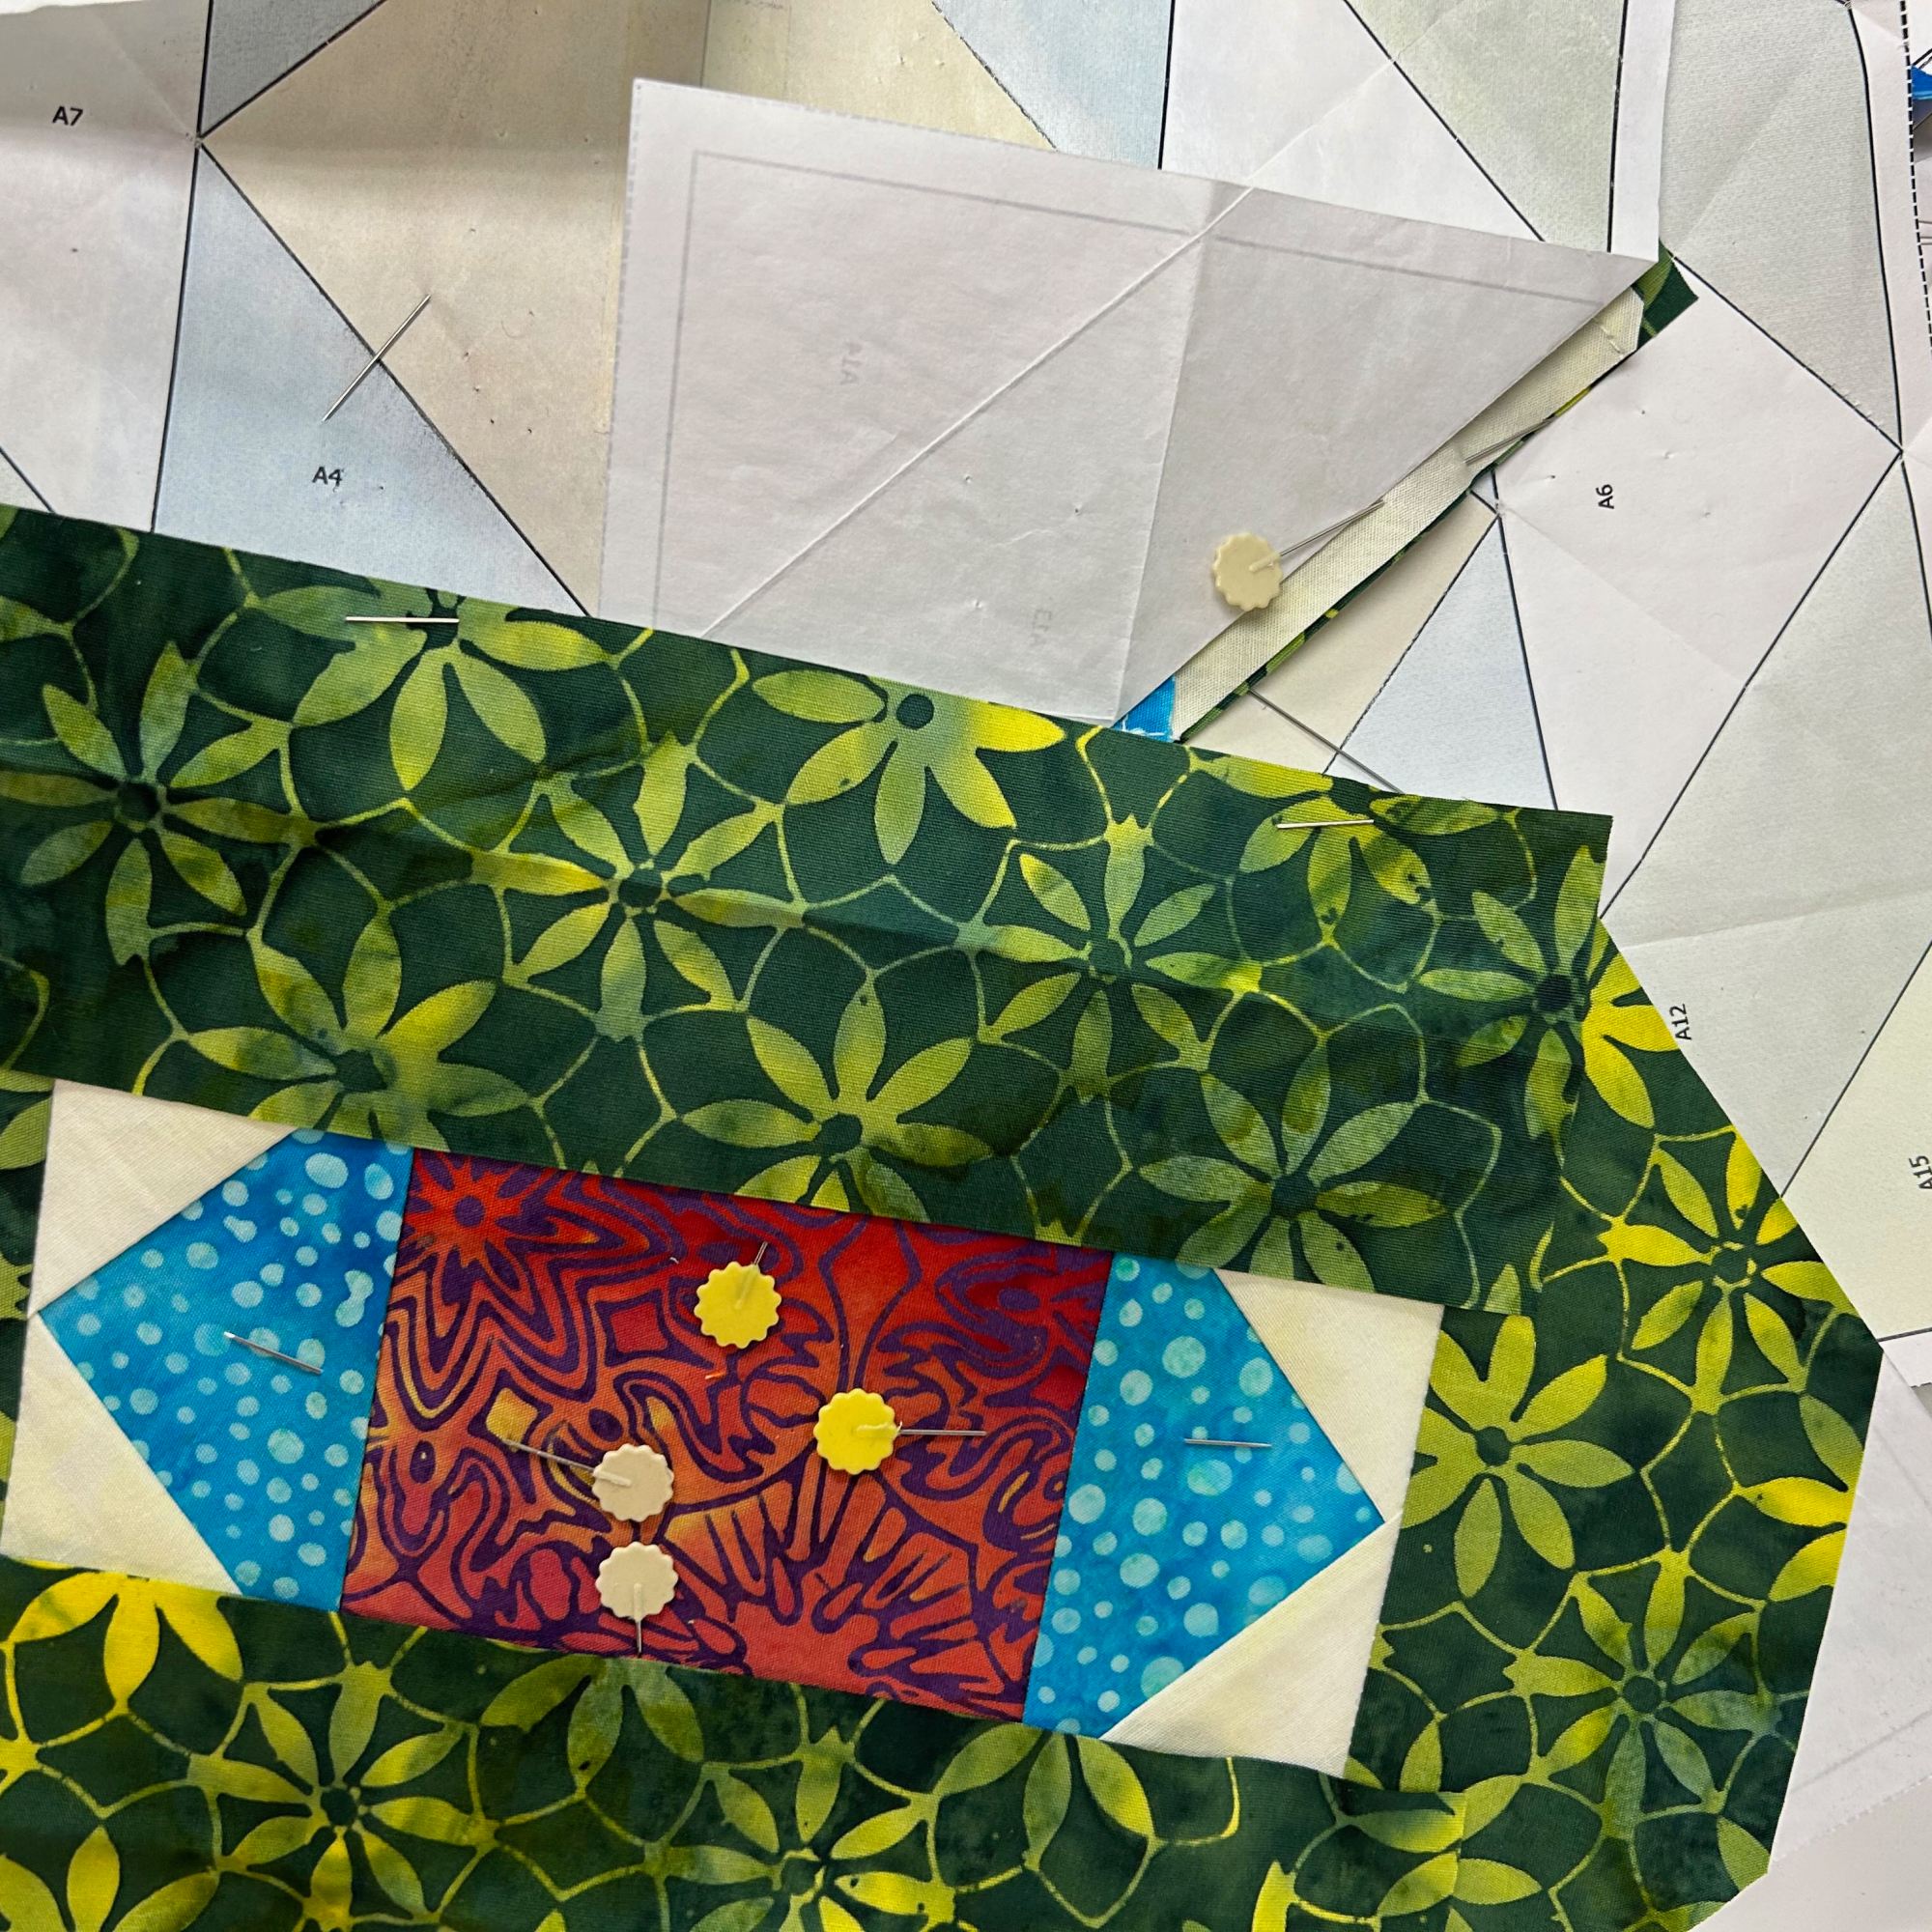
For this challenge, we were encouraged to use an edge-painting technique that was used for a quilt called Full Bloom. A great youtube tutorial was the inspiration. (Click HERE). The basic premise is to appliqué the pieces using the edge painting technique.
This is the fantastic fabric I received, along with 5 spools of 40 weight Aurifil thread. The collection is called Poetic Bouquet, designed by Kathy Engle for Heidi Pridemore of The Whimsical Workshop.
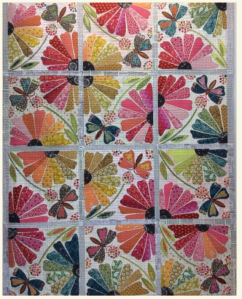
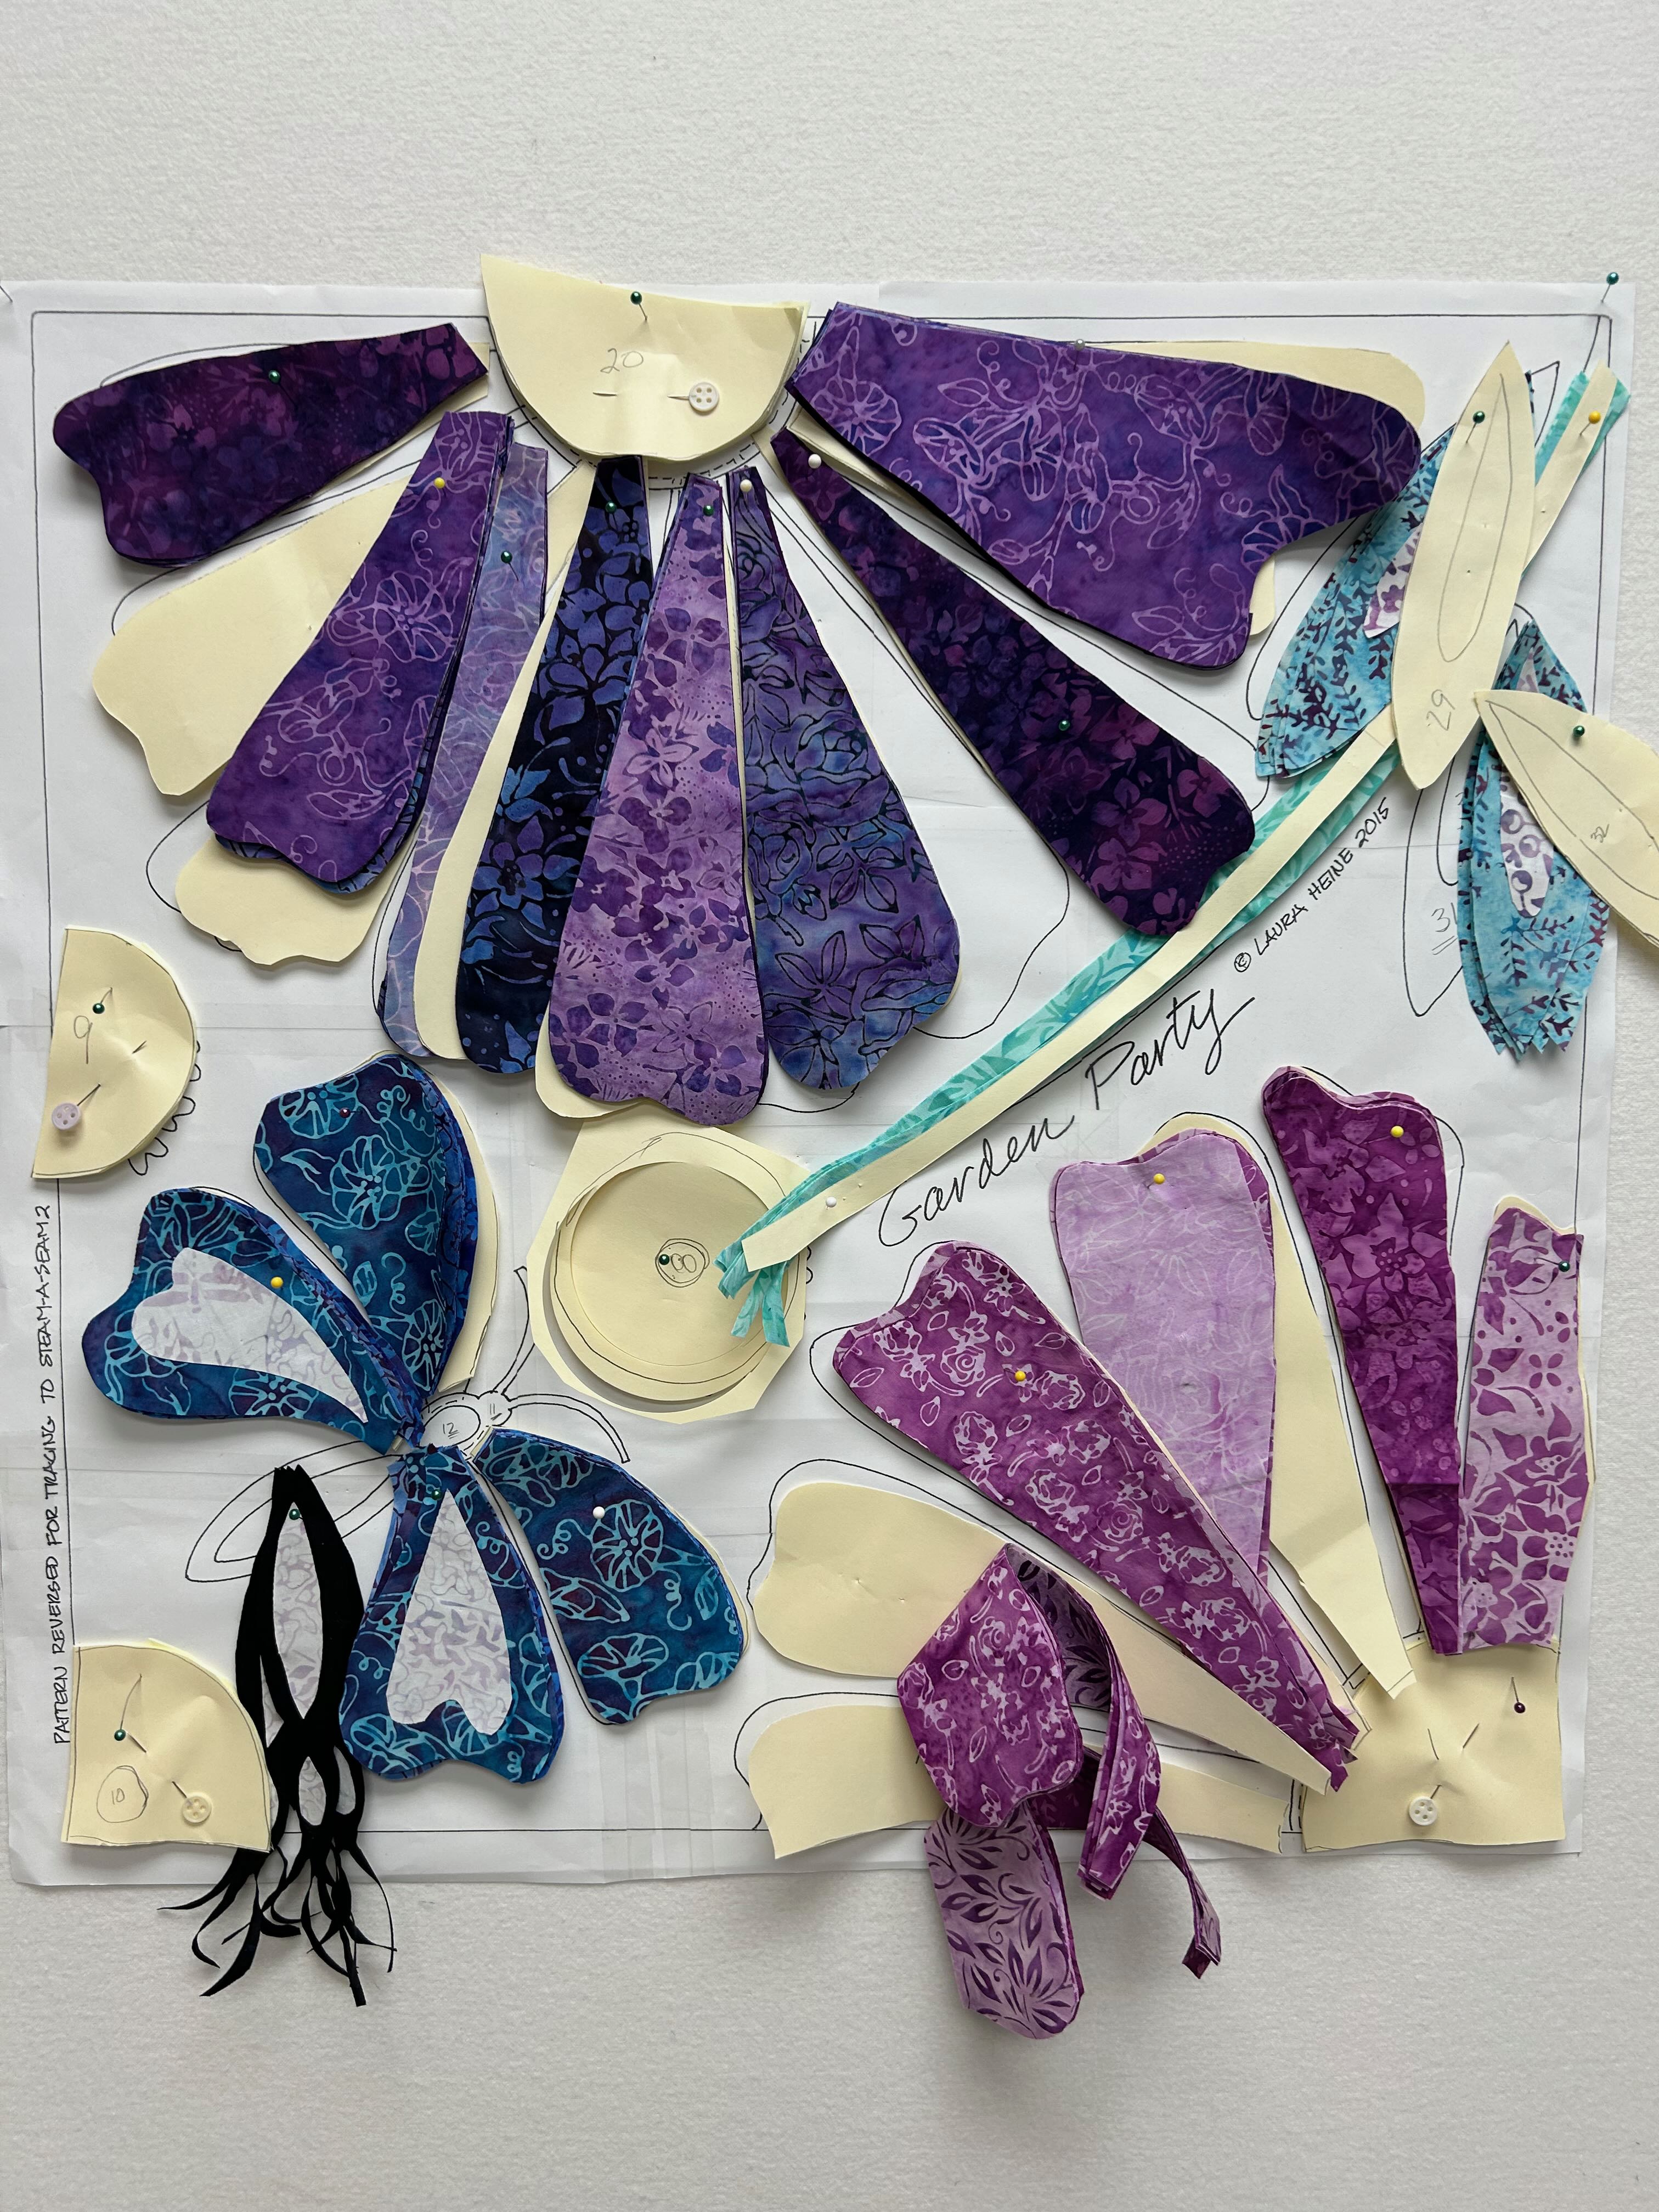
I decided to use the Garden Party quilt pattern by Laura Heine. You can get the pattern HERE. I wanted a pattern that had some fairly large pieces and this fit pattern with flowers and butterflies fit my purpose!
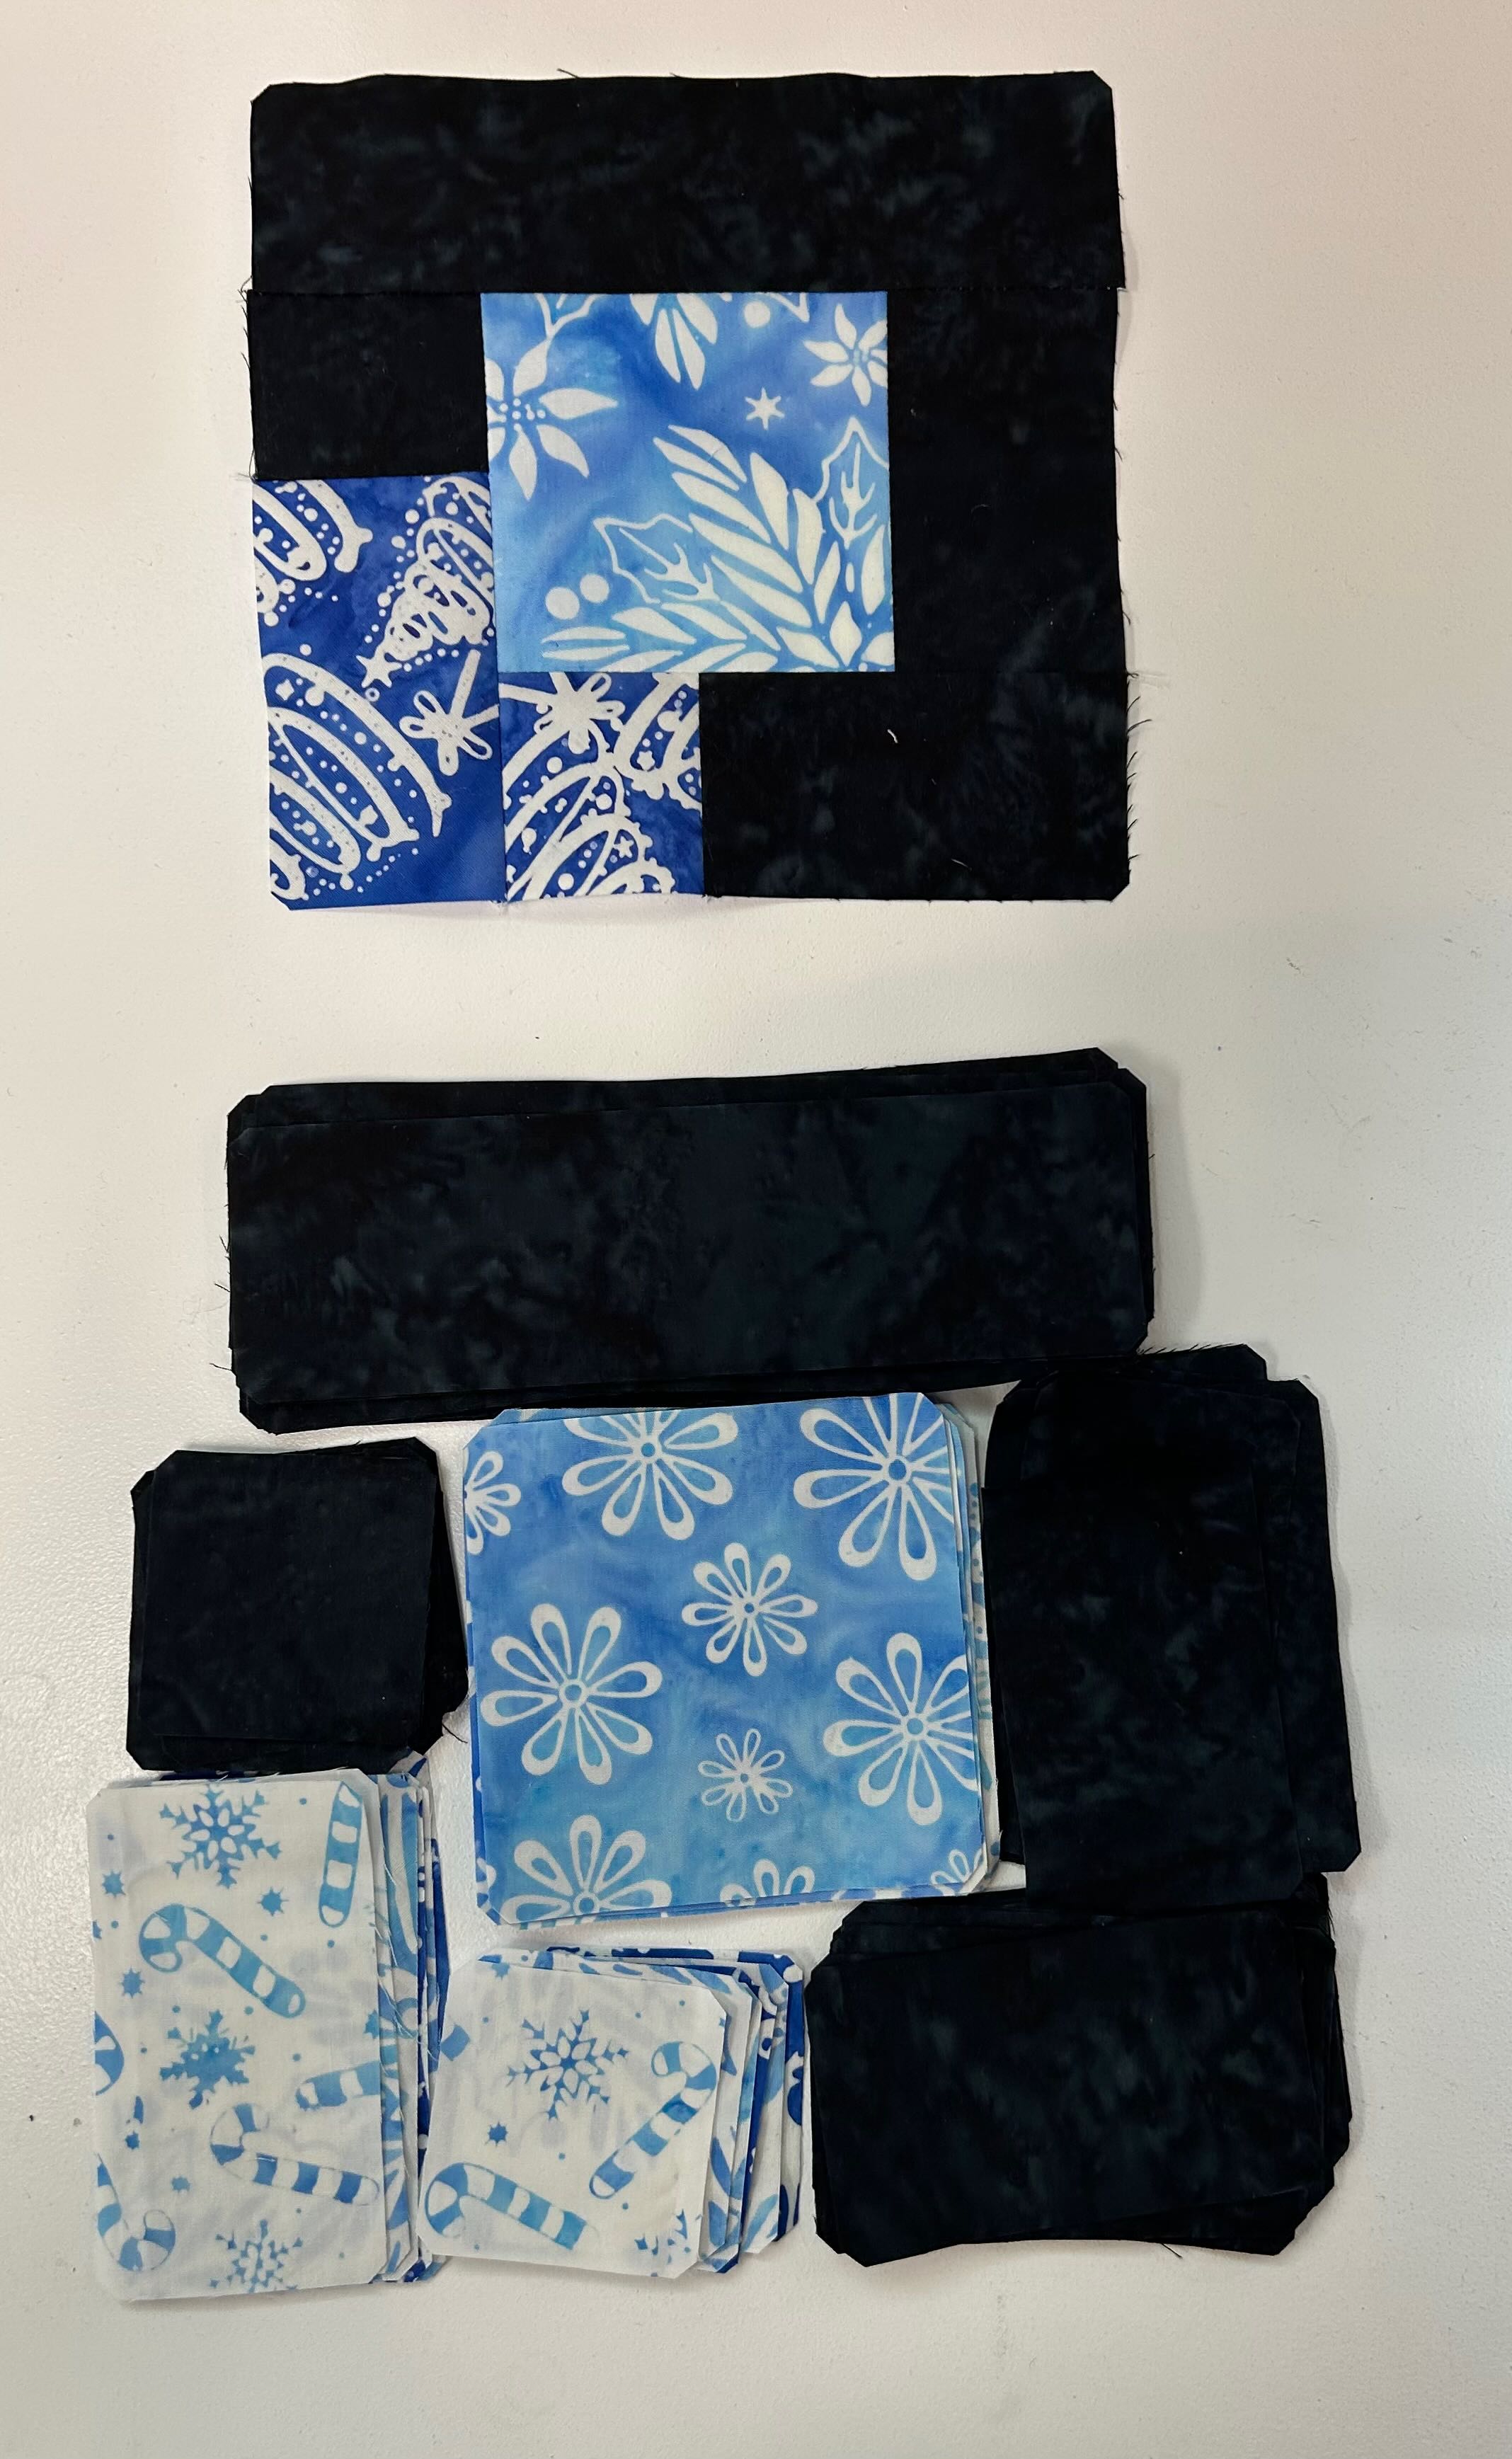
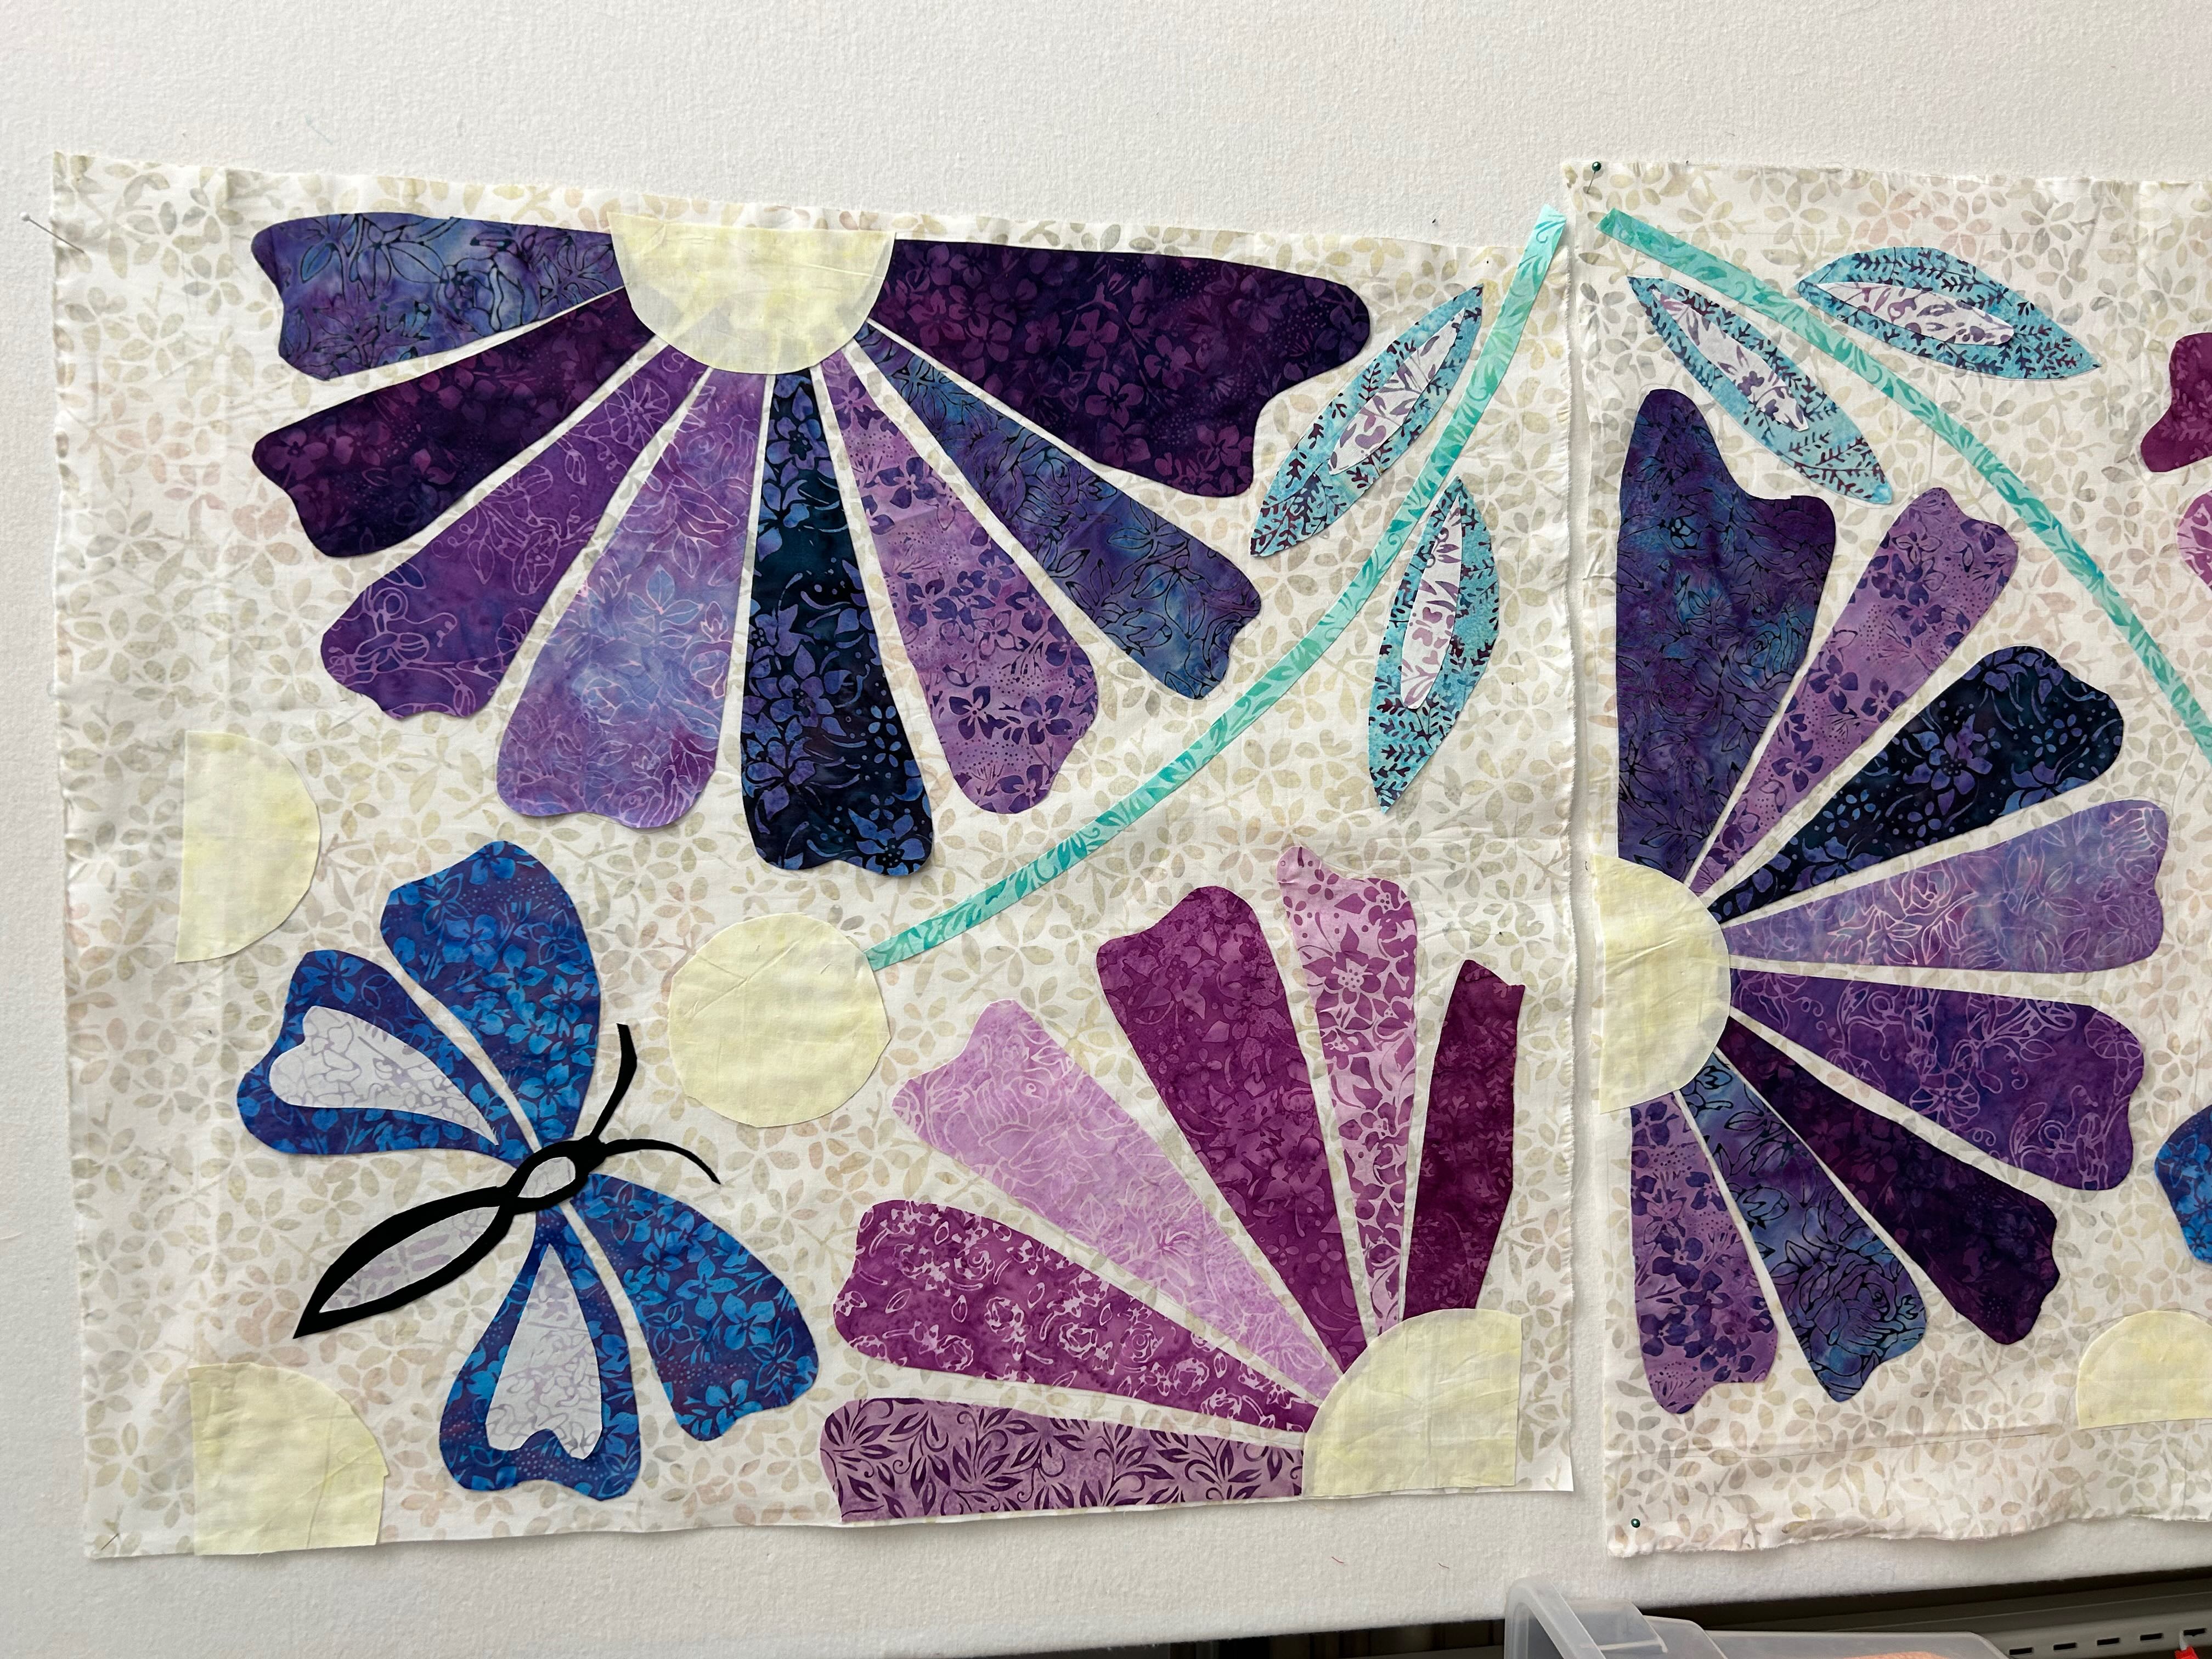
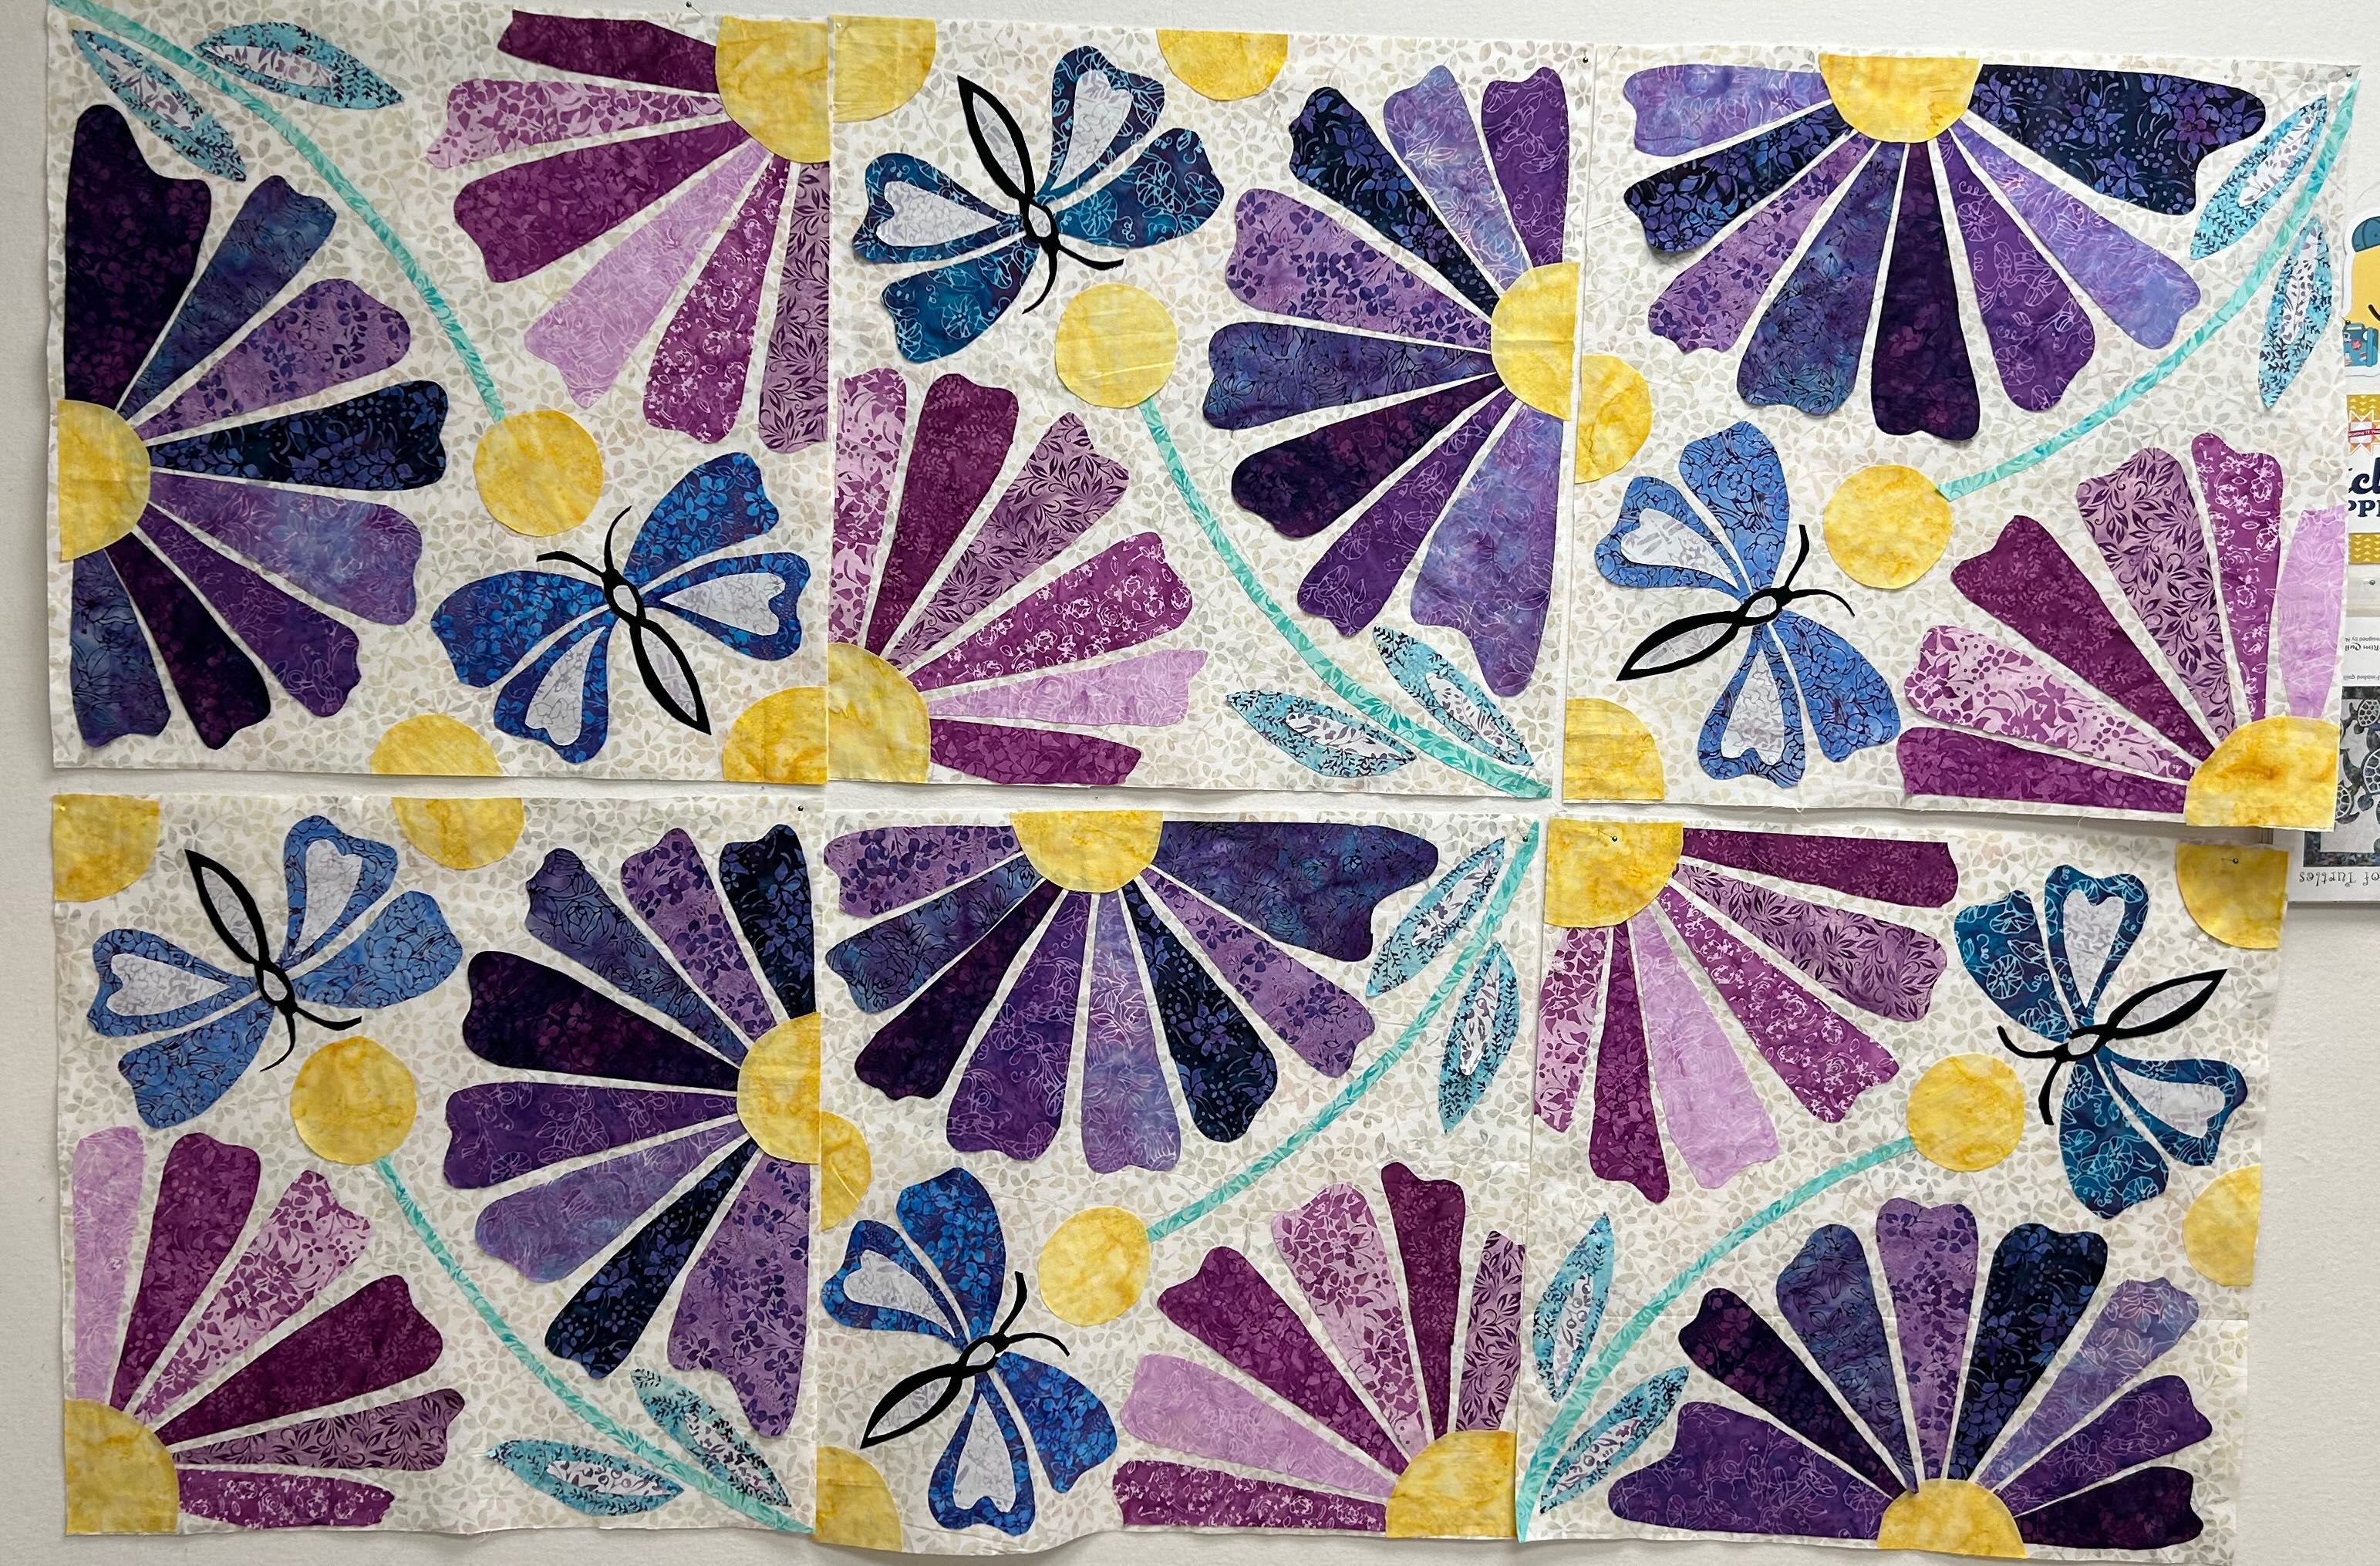
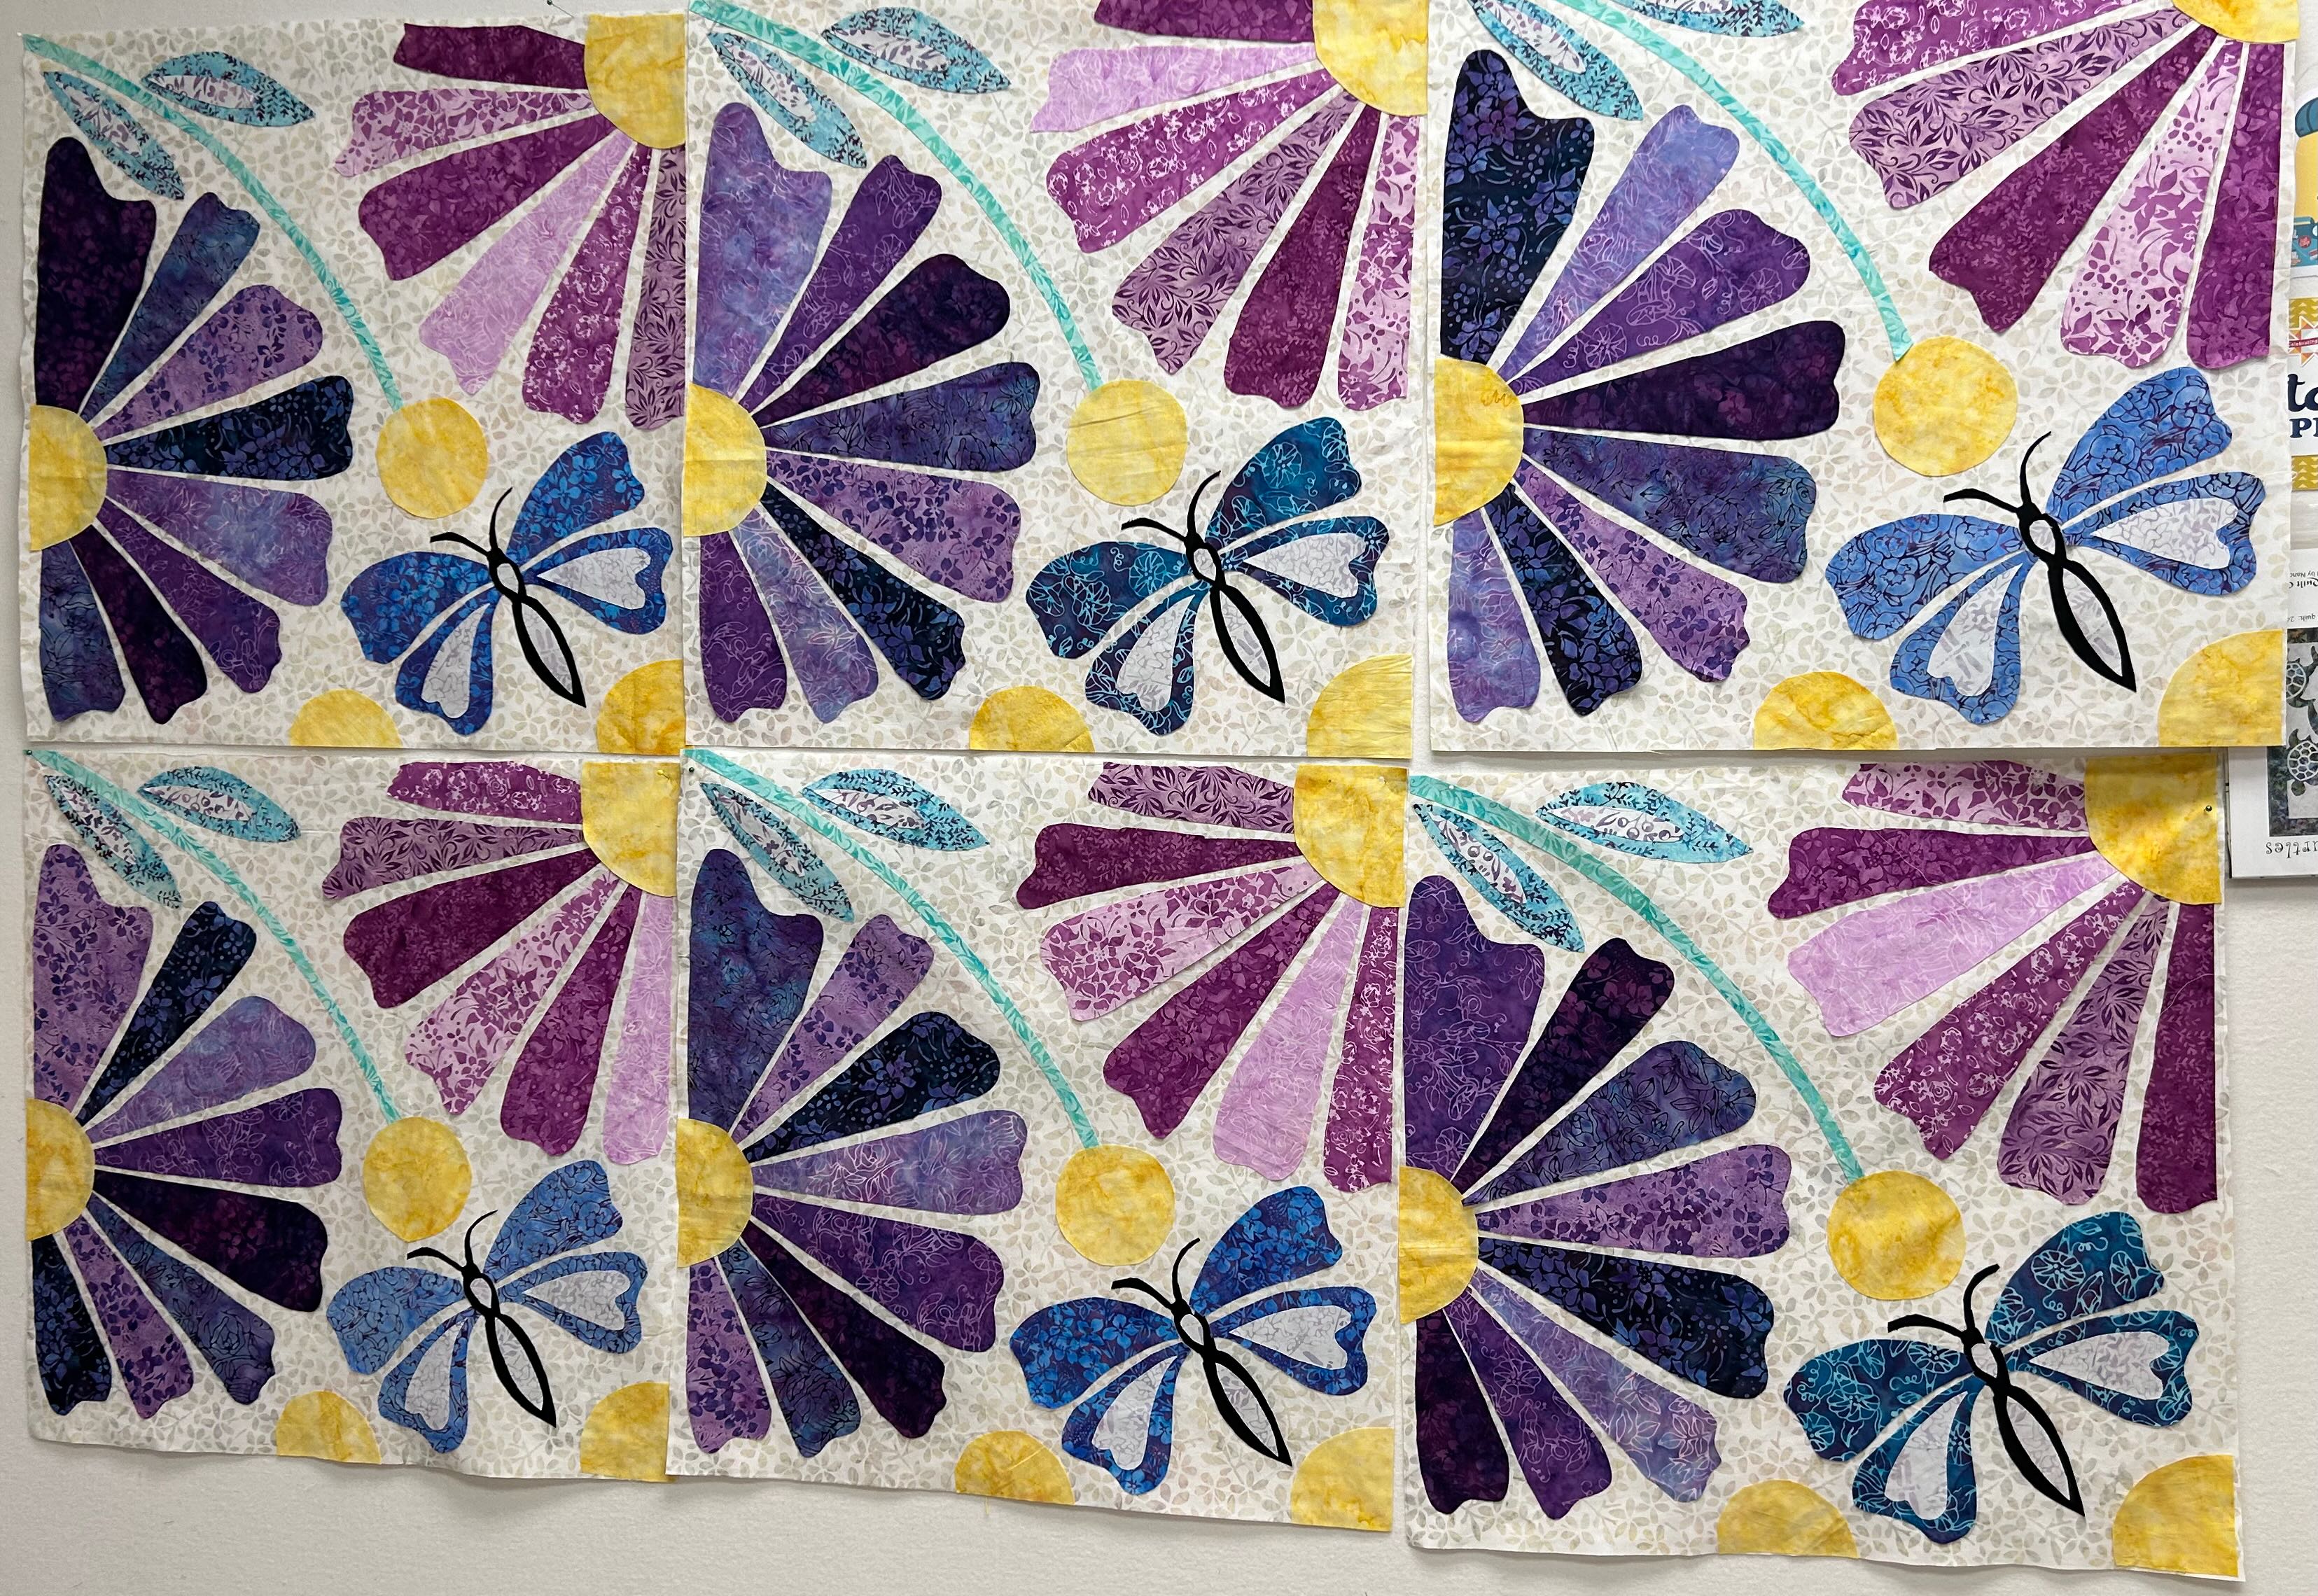
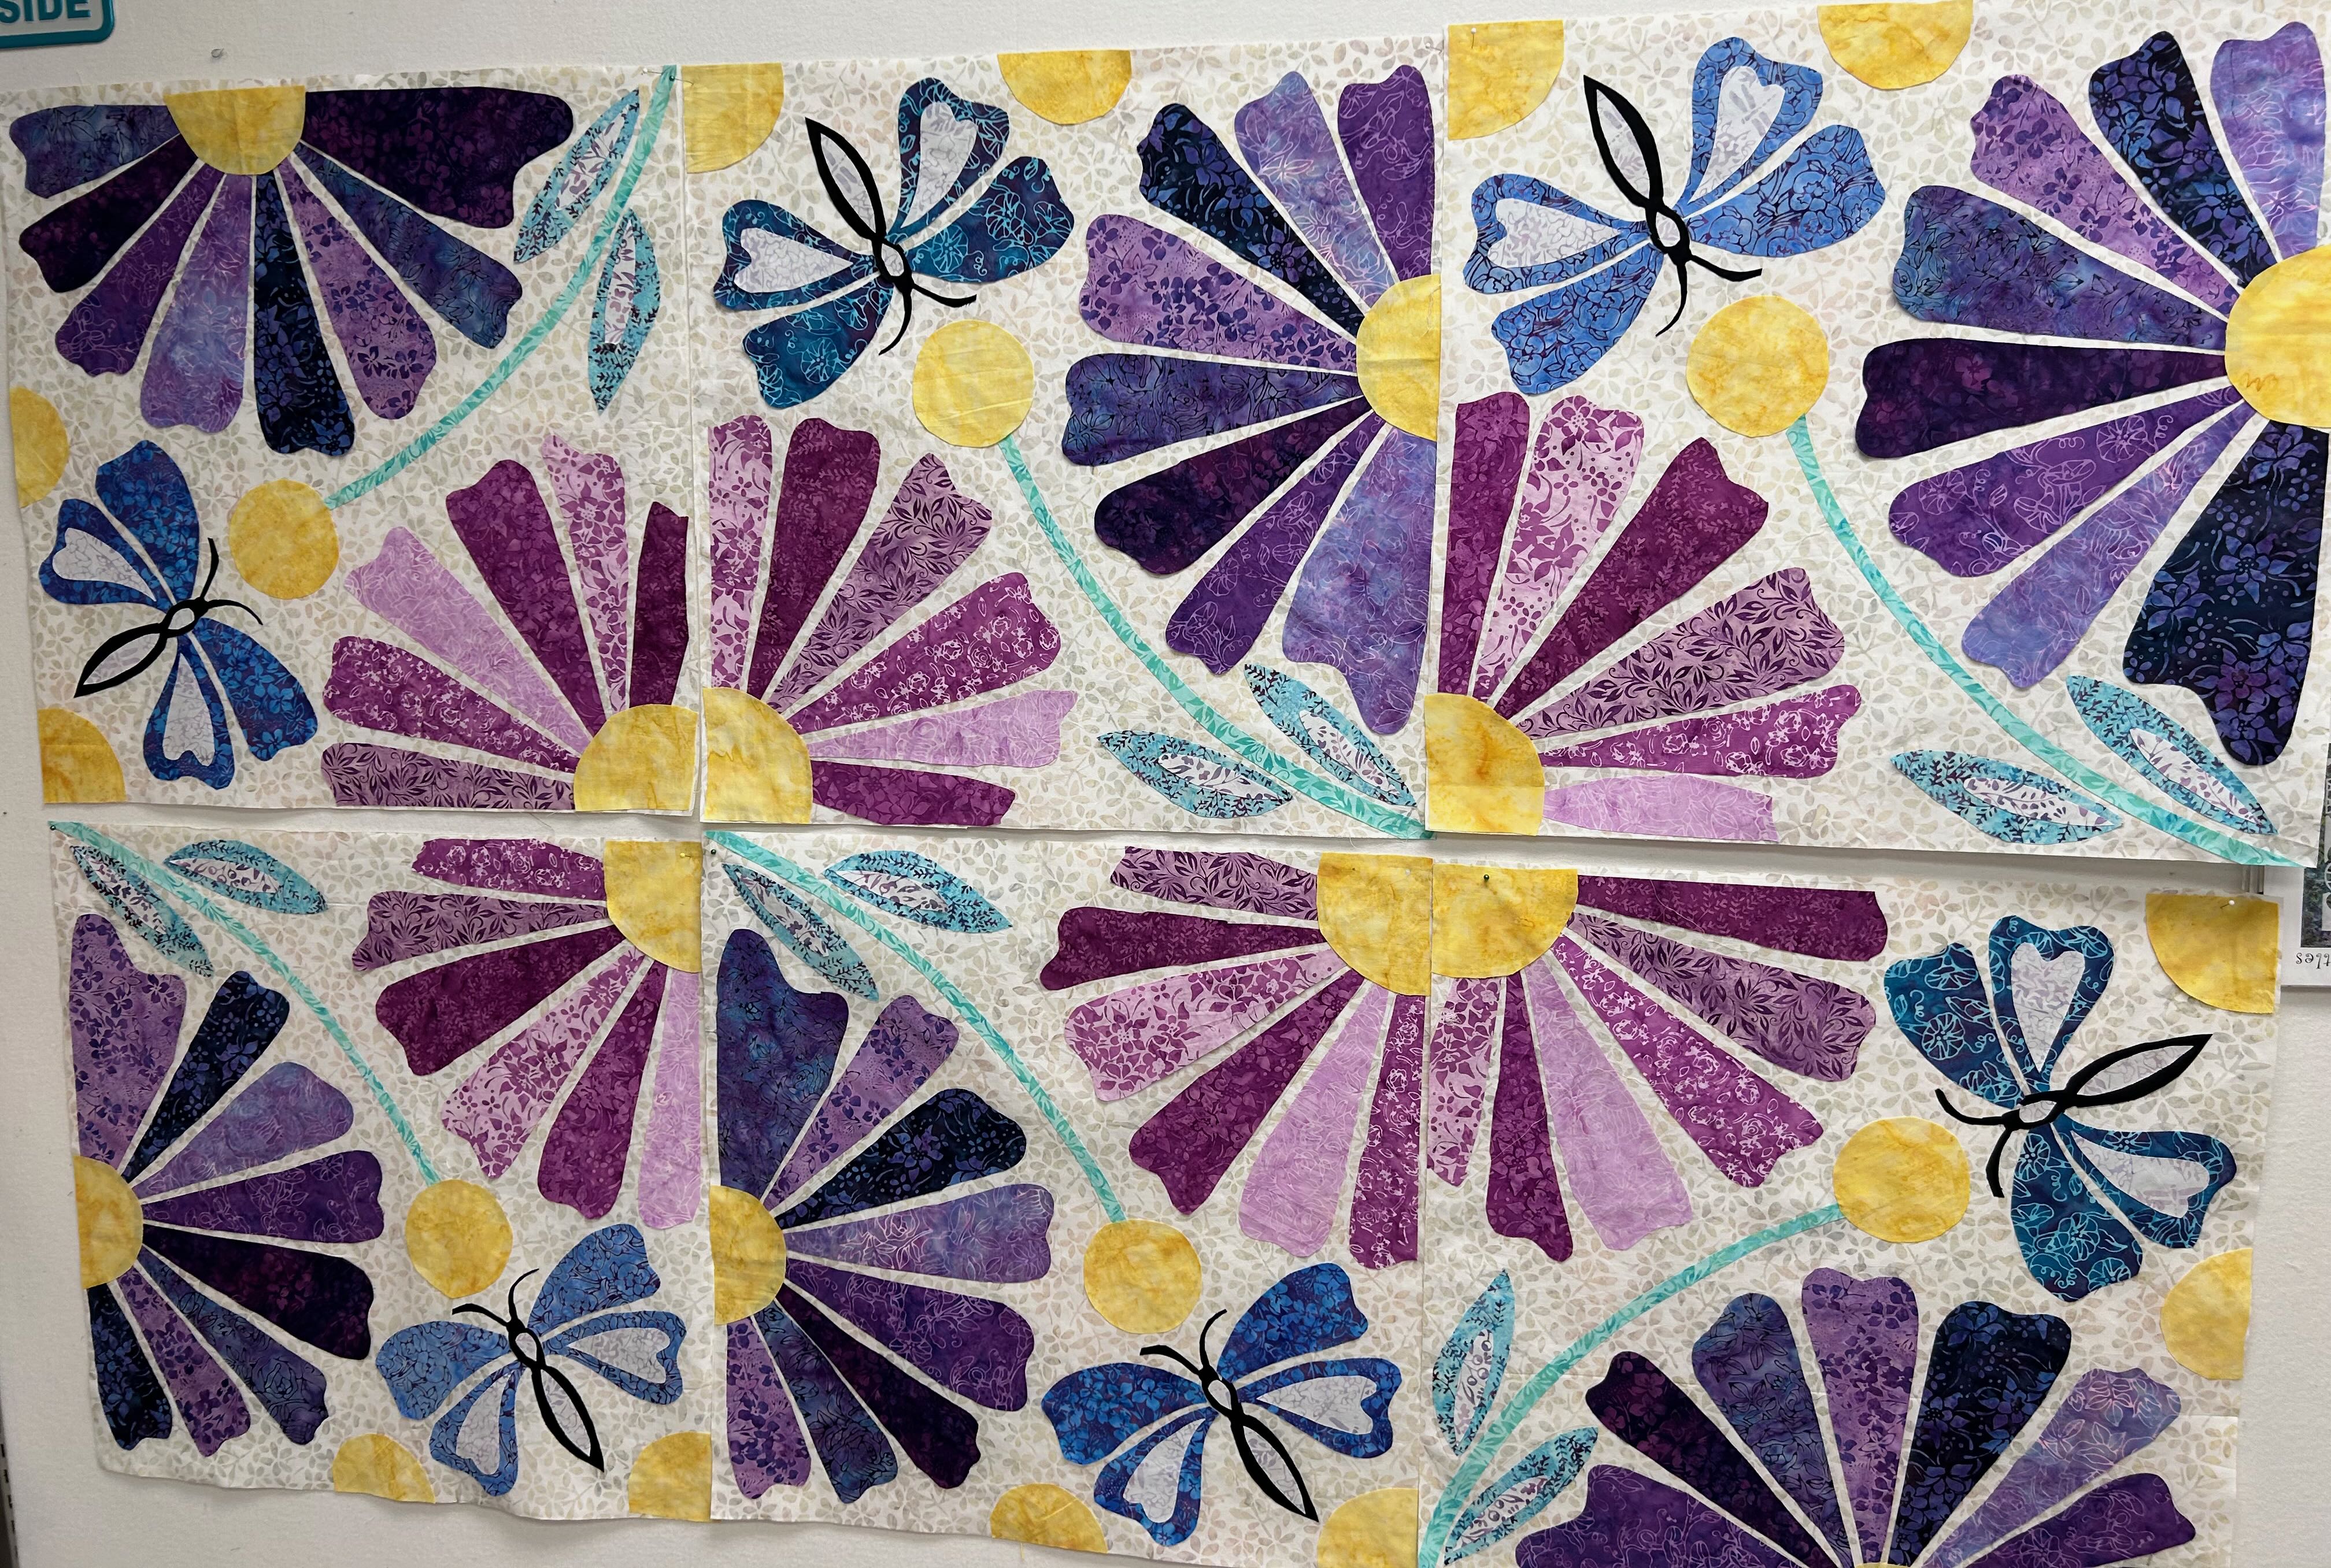
I traced out the pattern onto six 22″ background squares of Frosting – an Island Batik neutral that is available year round. The individual pattern pieces were cut out using 19 of the 20 fabrics in the collection. (The 20th fabric was used for the binding.). The design board was handy for pinning each of the fabrics on the main squares. I was able to ensure that the purple petals and the light petals were in different positions.
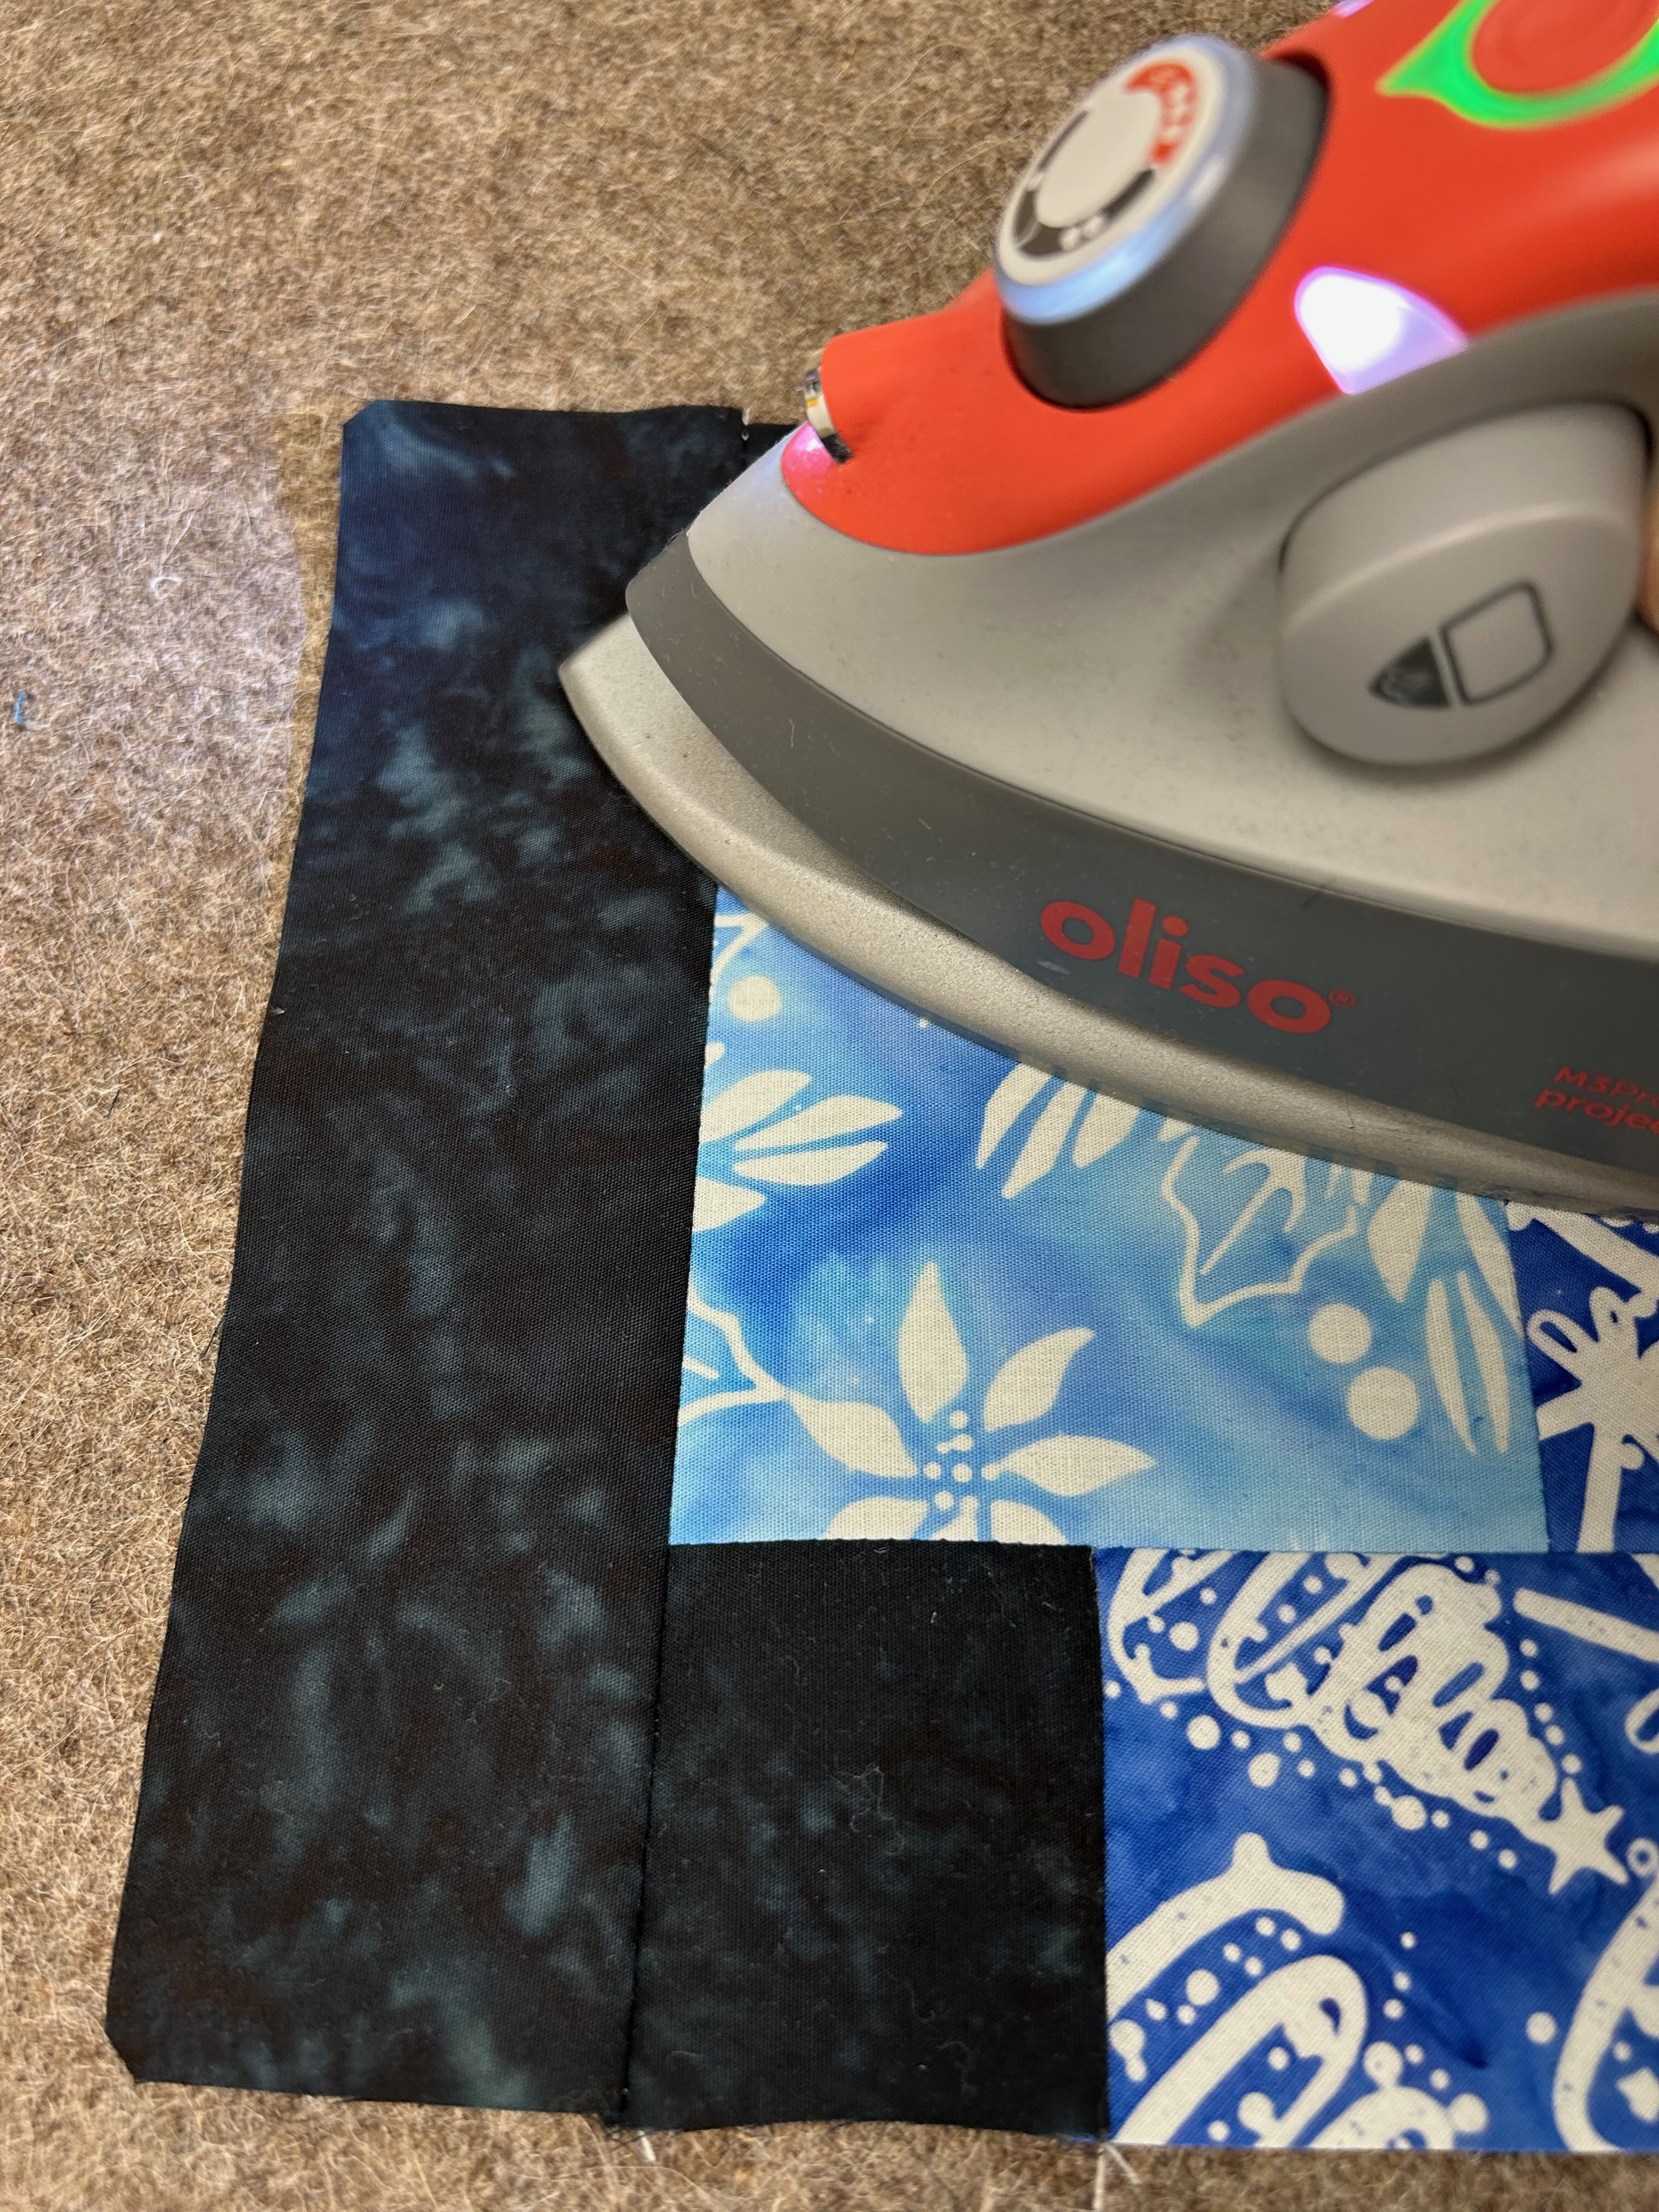
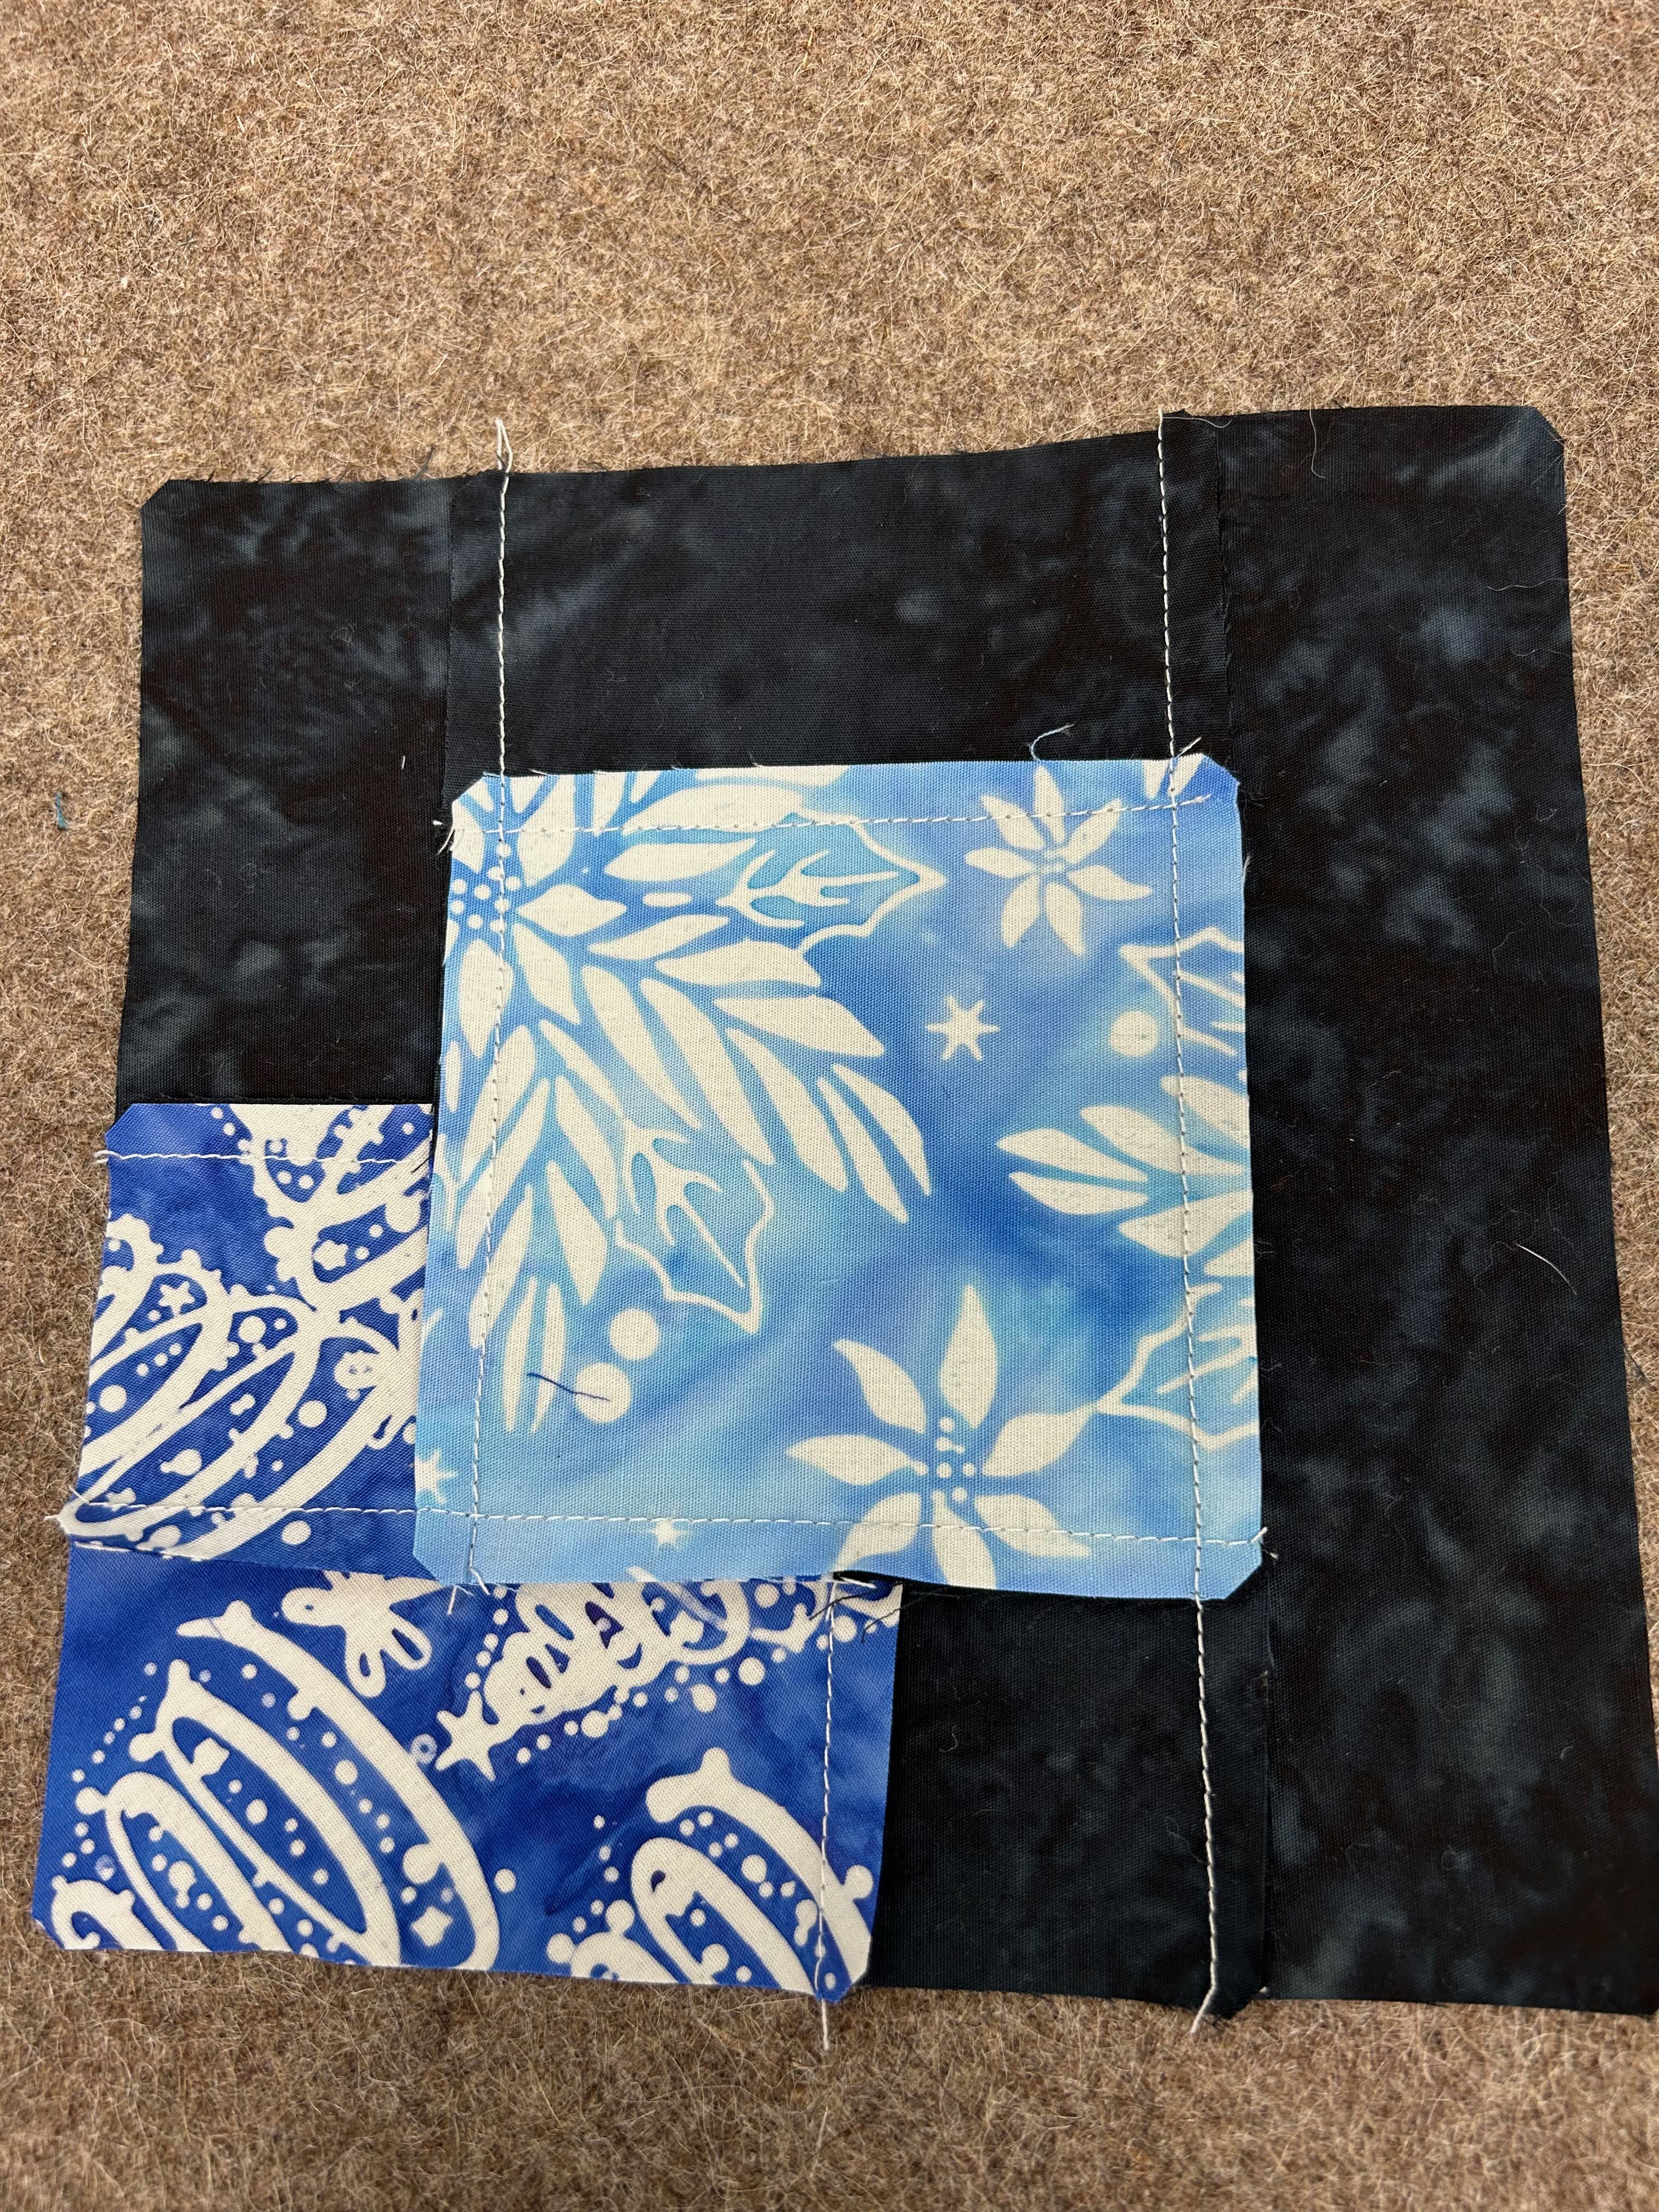
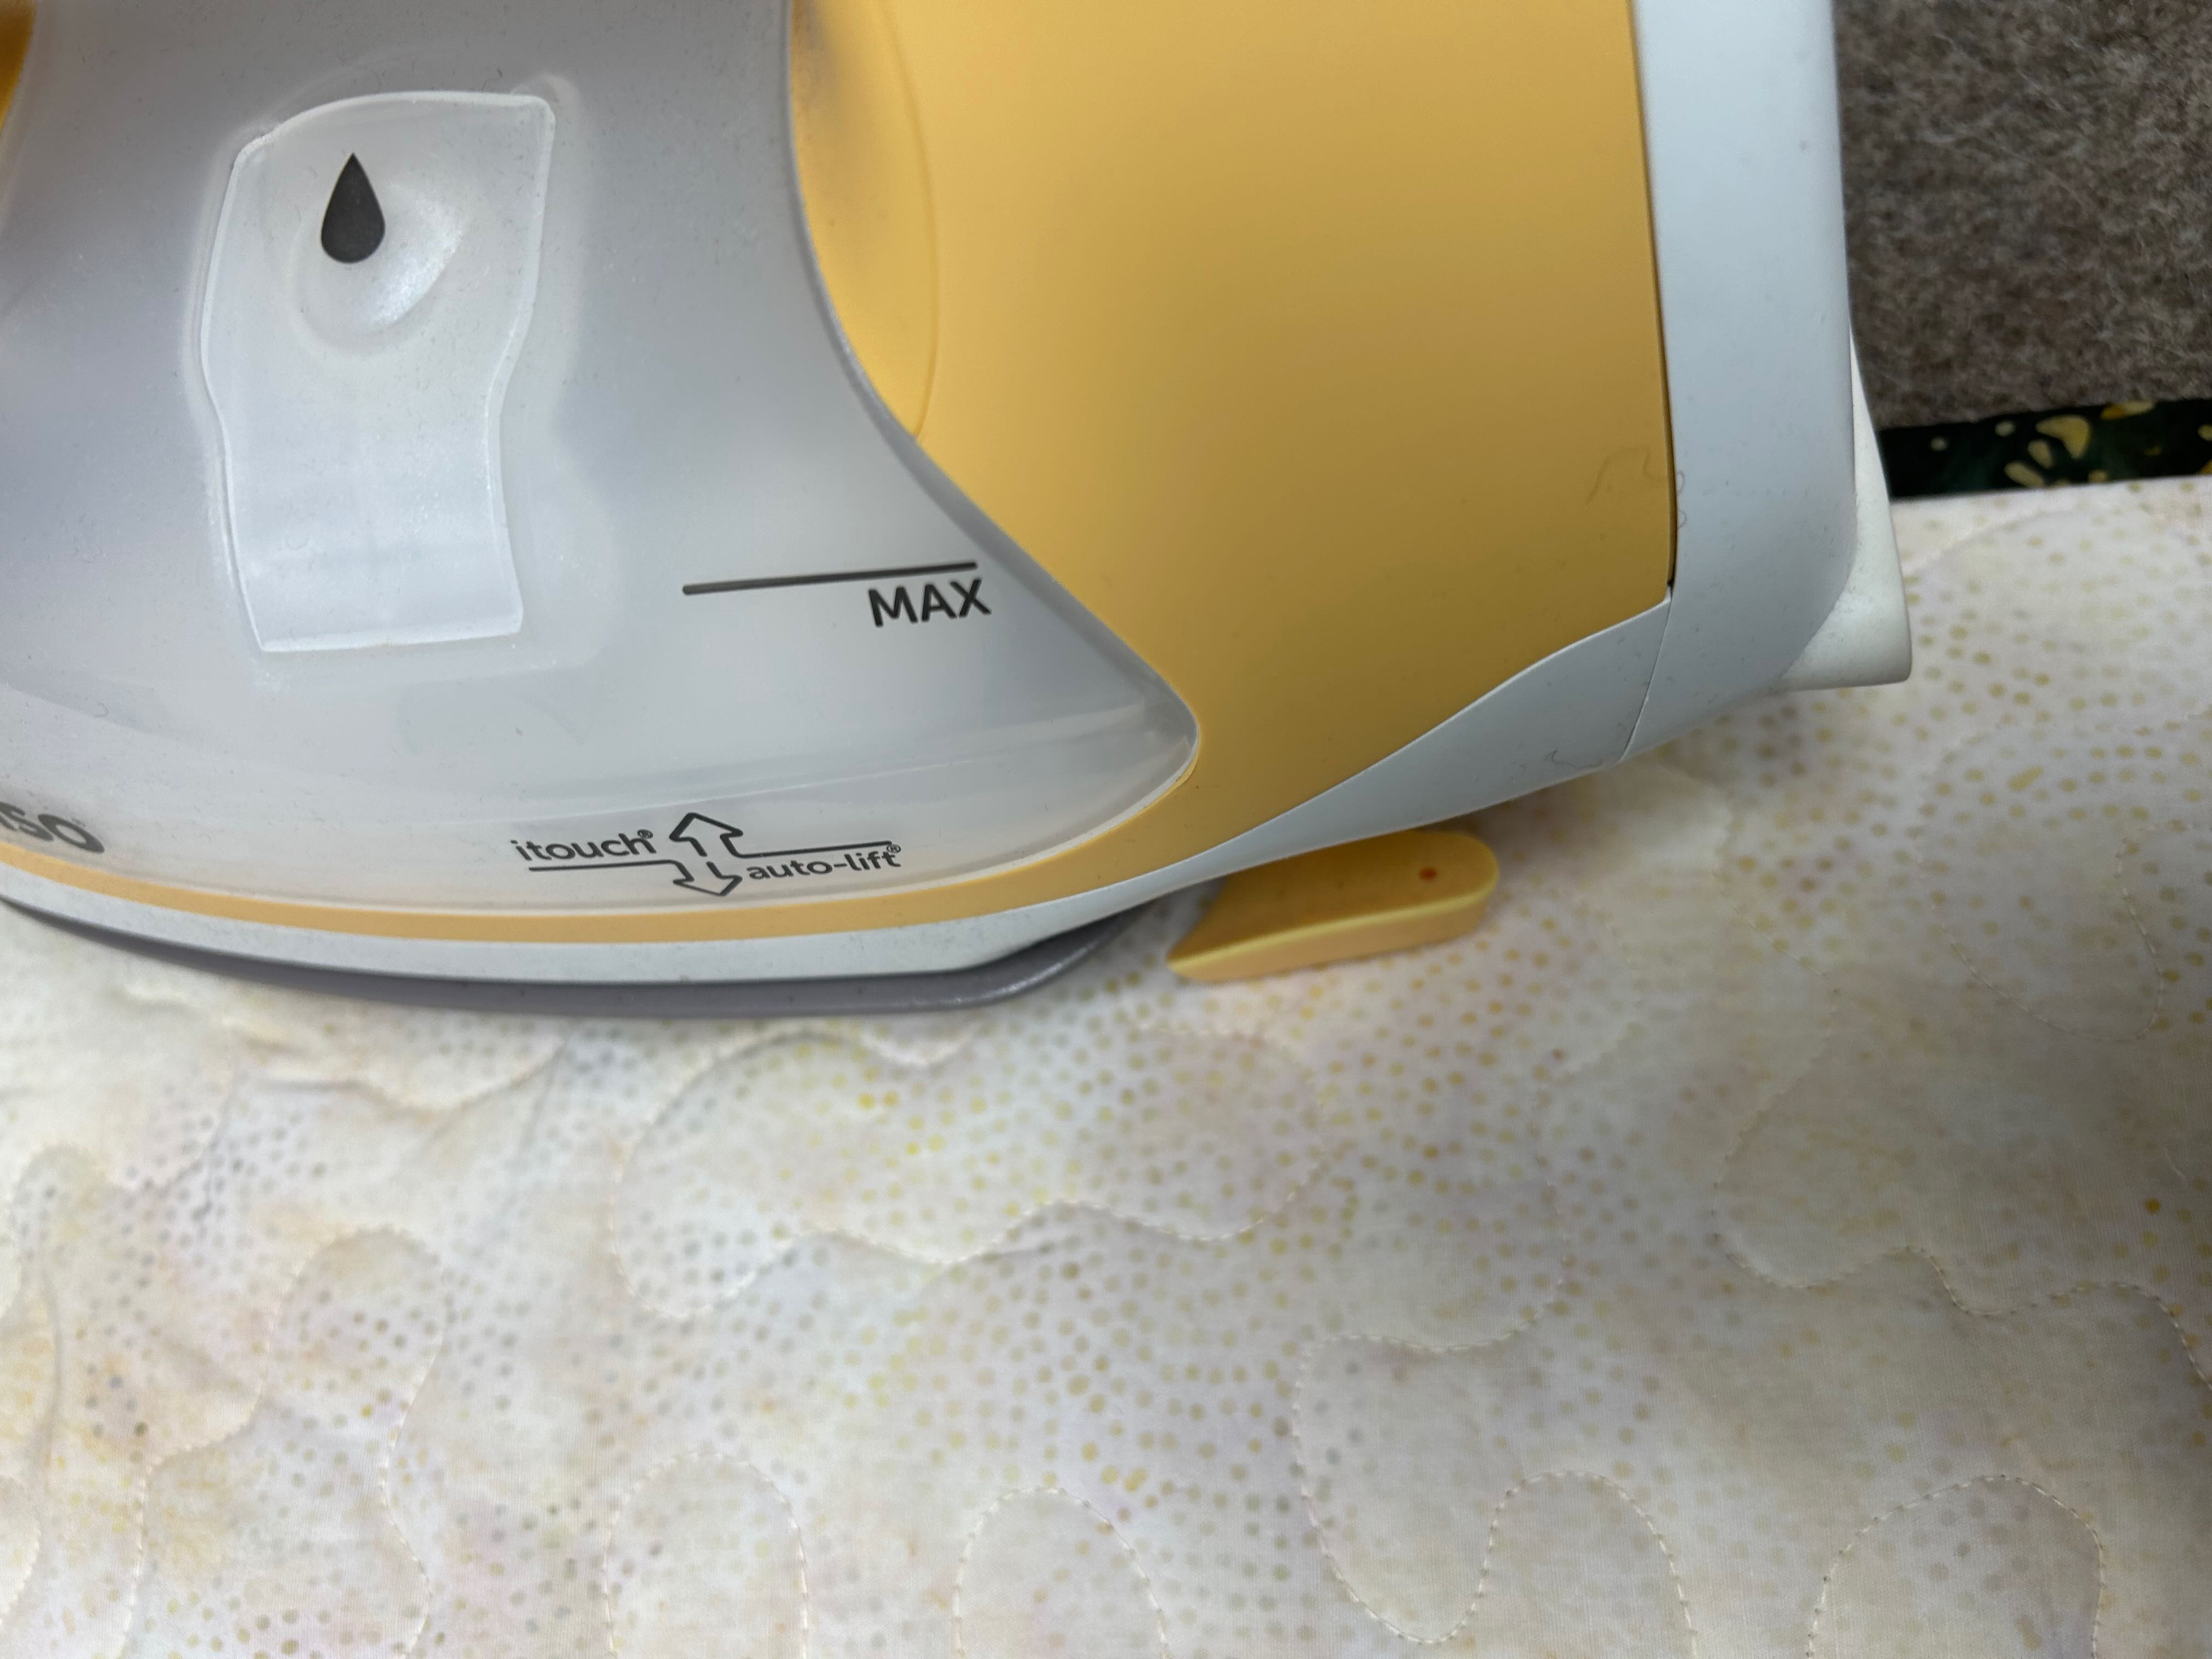
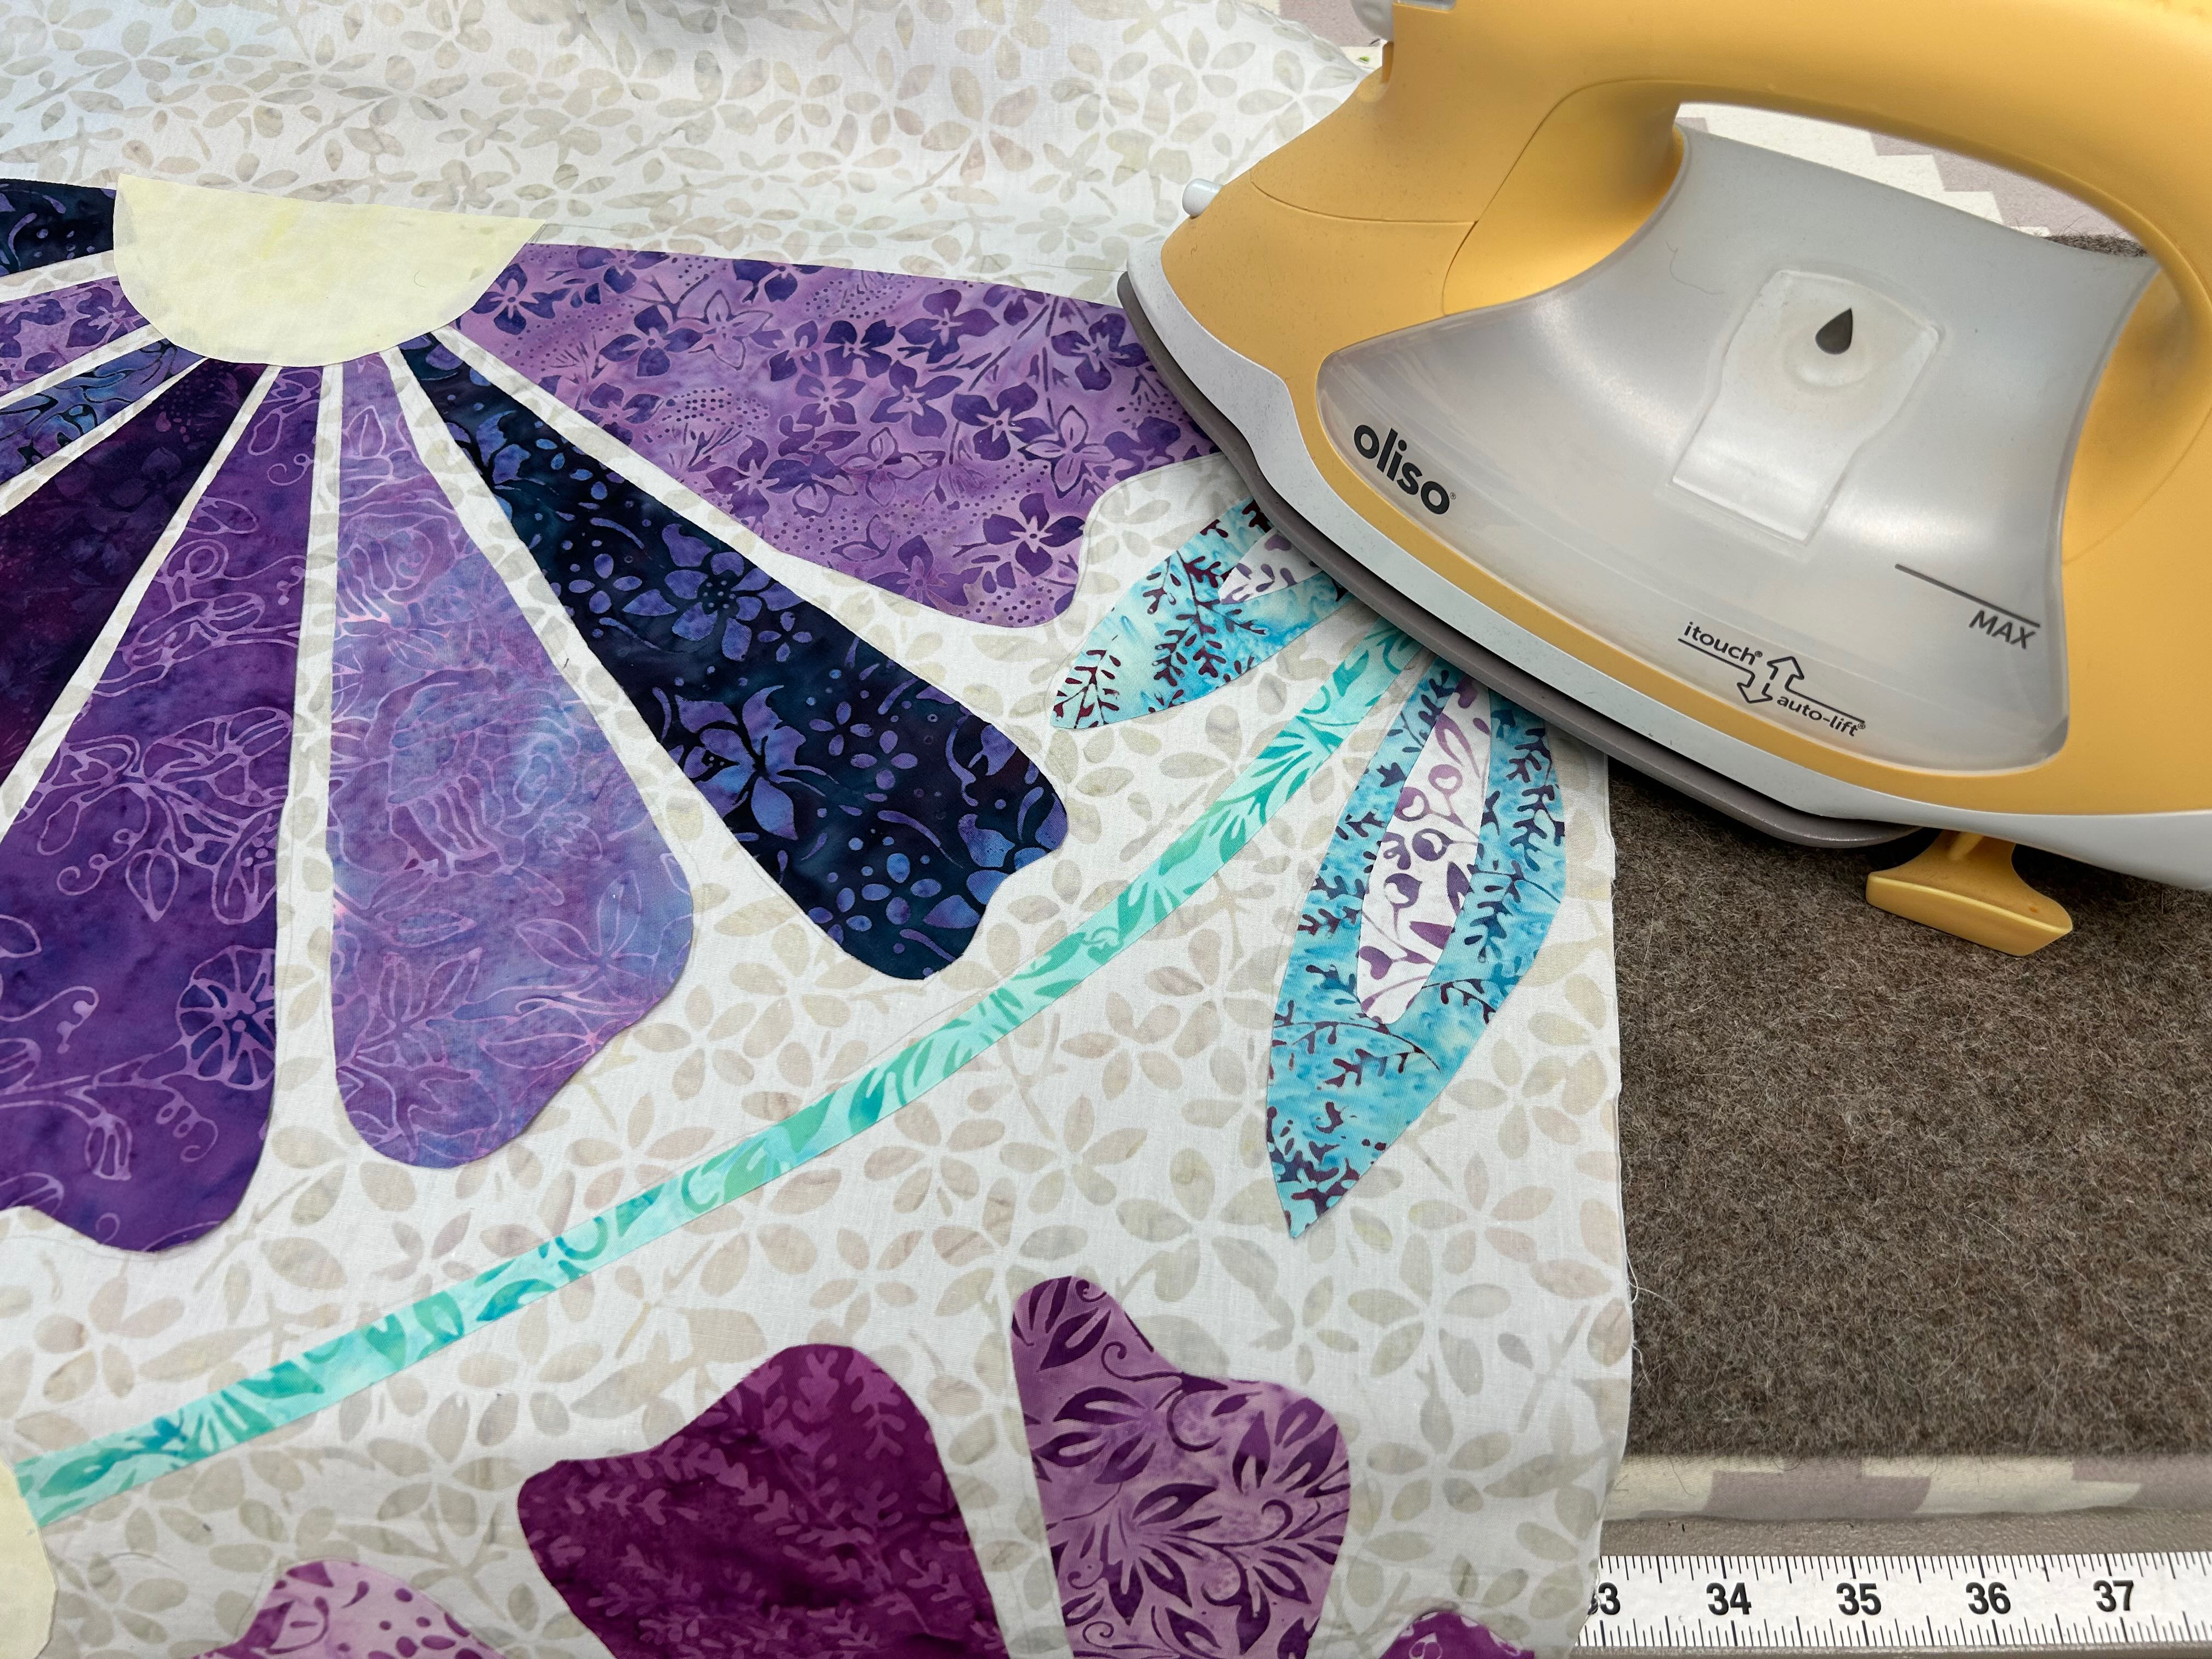
Then I started to glue each piece into place, using Acorn Seam Align glue. (You can get the glue HERE). I had this glue in a “Precision Piecing” kit that has been sitting in a drawer for a LONG time. I had never used the kit because I don’t see the point in gluing each and every seam that I sew. ANYHOW, I decided to try it for gluing the pieces onto the background. It worked like a charm!!!! Especially with the Oliso Iron, to press it into place.
When the 6 squares had the individual pieces ironed on them, it was time to audition the layout. The first was an attempt at alternating the butterflies. The 2nd had all the squares in the same orientation and the 3rd had the 3/4 flowers. The 3rd layout won!
I decided that I would appliqué each square on it’s own. Since it would be easier to manipulate a 22″ square than a whole quilt. I chose to use Hobbs Batting Heirloom Cotton with scrim as I knew that it would appliqué nicely on my machine and not get caught up in the feed dogs. (Yes, it required frequent cleaning, but it worked). I was able to cut several layers of the batting easily with the Missouri Star Amelia Scissors as the rotary cutter would not cut through the layers. A test sample was made to make sure I was on the right path.
I was using the 40 weight Aurifil Thread I had received in my July box and quickly realized that I shouldn’t (or didn’t need to) use the 40 weight in the bobbin or I would run out of thread for the top. I used a lot of various Aurifil Thread 50 weight bobbins in colours close to what I was using on the top. Here is what the stitches looked like on the back of the batting. I used a few different Appliqué stitches on my Janome M7 to thread paint the sides of the pieces. #18 was used the most, #17 was used occasionally and a simple zig zag was used once in a while (on the stems and leaf centres).
Here are some close-ups of the stitching from the front.
Once each of the squares was appliquéd, they were sashed together with Island Batik‘s solid grey and a backing applied. The background was free-motion quilted around each of the appliqué pieces. The sashing and borders were quilted using the same appliqué stitch that was used for the edge stitching.
Quilt Stats:
Size: 48″ x 70″
Fabric: Island Batik: Poetic Bouquet, Solid Black (butterfly centres), Amber (flower centres, from Opulent Orange), Frosting (Background) and Solid Grey (sashing and borders).
Make sure you visit Megan Best‘s blog! She has the same collection as me!!! And, I also heard that she used some of the same appliqué stitches as me!! I can’t wait to see her quilt!!
Where can you find Poetic Bouquet?
There are several stores throughout the USA that sell Poetic Bouquet, here are a few:
PLEASE NOTE: Missouri Star is having a ton of promotions in September to celebrate their birthday! You will NOT receive 20% off these. Although, I may still receive a small commission!
Thank you for your support!
I am now a Silly Moon affiliate! So what does that mean? When you use my affiliate code Quiltinggail2024 at Silly Moon, you will receive 10% off your order and I will receive a small commission.
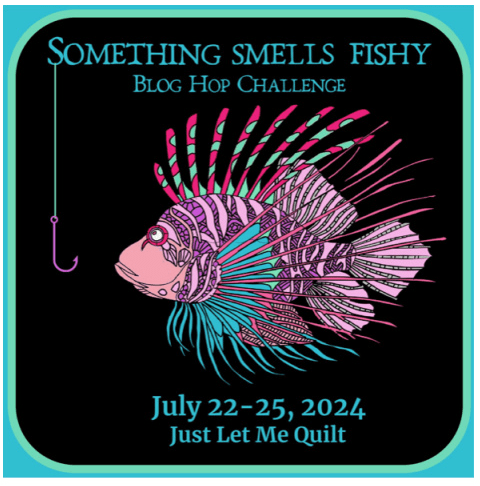
Carol from Just let Me Quilt is the host of this blog hop. Here’s what she had to say:
Challenge: This one is easy! Make something with a fish in the fabric or in the quilt design (applique or pieced fish.)
Well, Carol might have thought this was easy … but I had SEW many ideas, it was hard to choose!
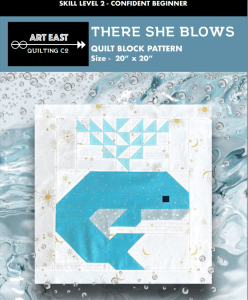
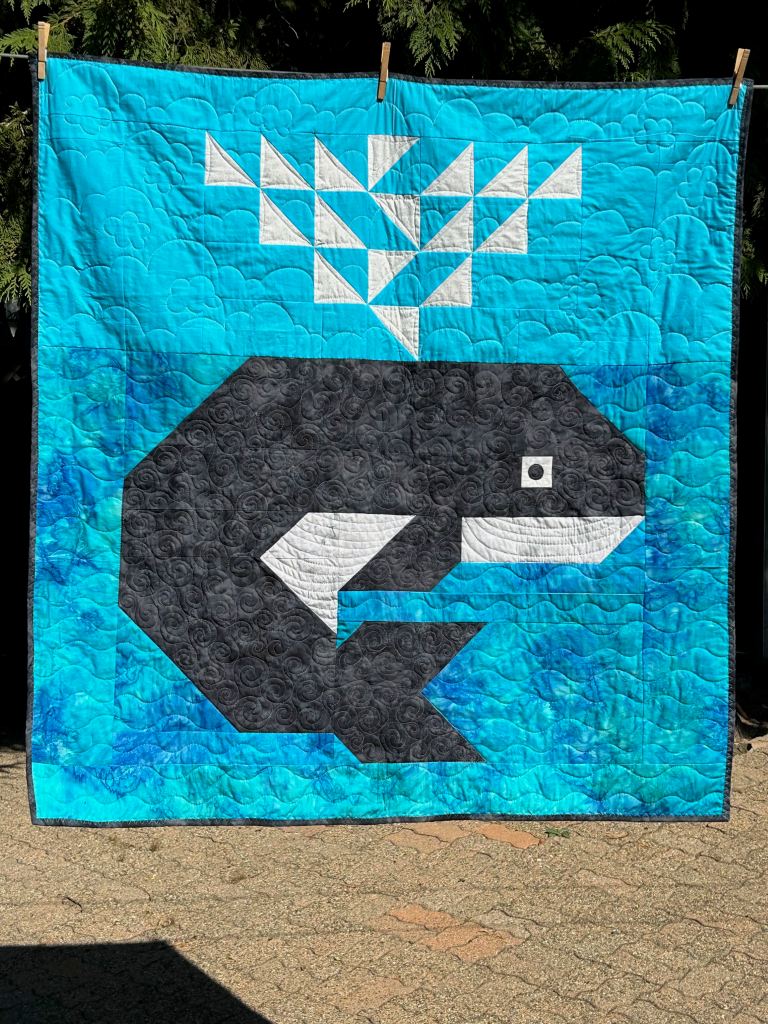
Call it a miracle, or fate, or whatever, but I received a free pattern “There She Blows” from the Art East Quilting Company. It’s a 20″ block and I wanted to make a baby quilt, but didn’t feel like making 4 whales … so I decided to just double the size of all the cutting. Well, it was good in theory, but didn’t always work out … so I had to do a bit of re-calculating. However, the directions are full of tips to make the block easily! And, if you want to make the bigger size, check out their Resizing Cheat Sheet (–> “More” –> “Resources.”)
A little bit about the Art East Quilting Company It is a Canadian 🇨🇦 company, but they ship all over the world. Our guild had them do a zoom presentation and it was wonderful. So if you’re looking for something different and fun, check them out!
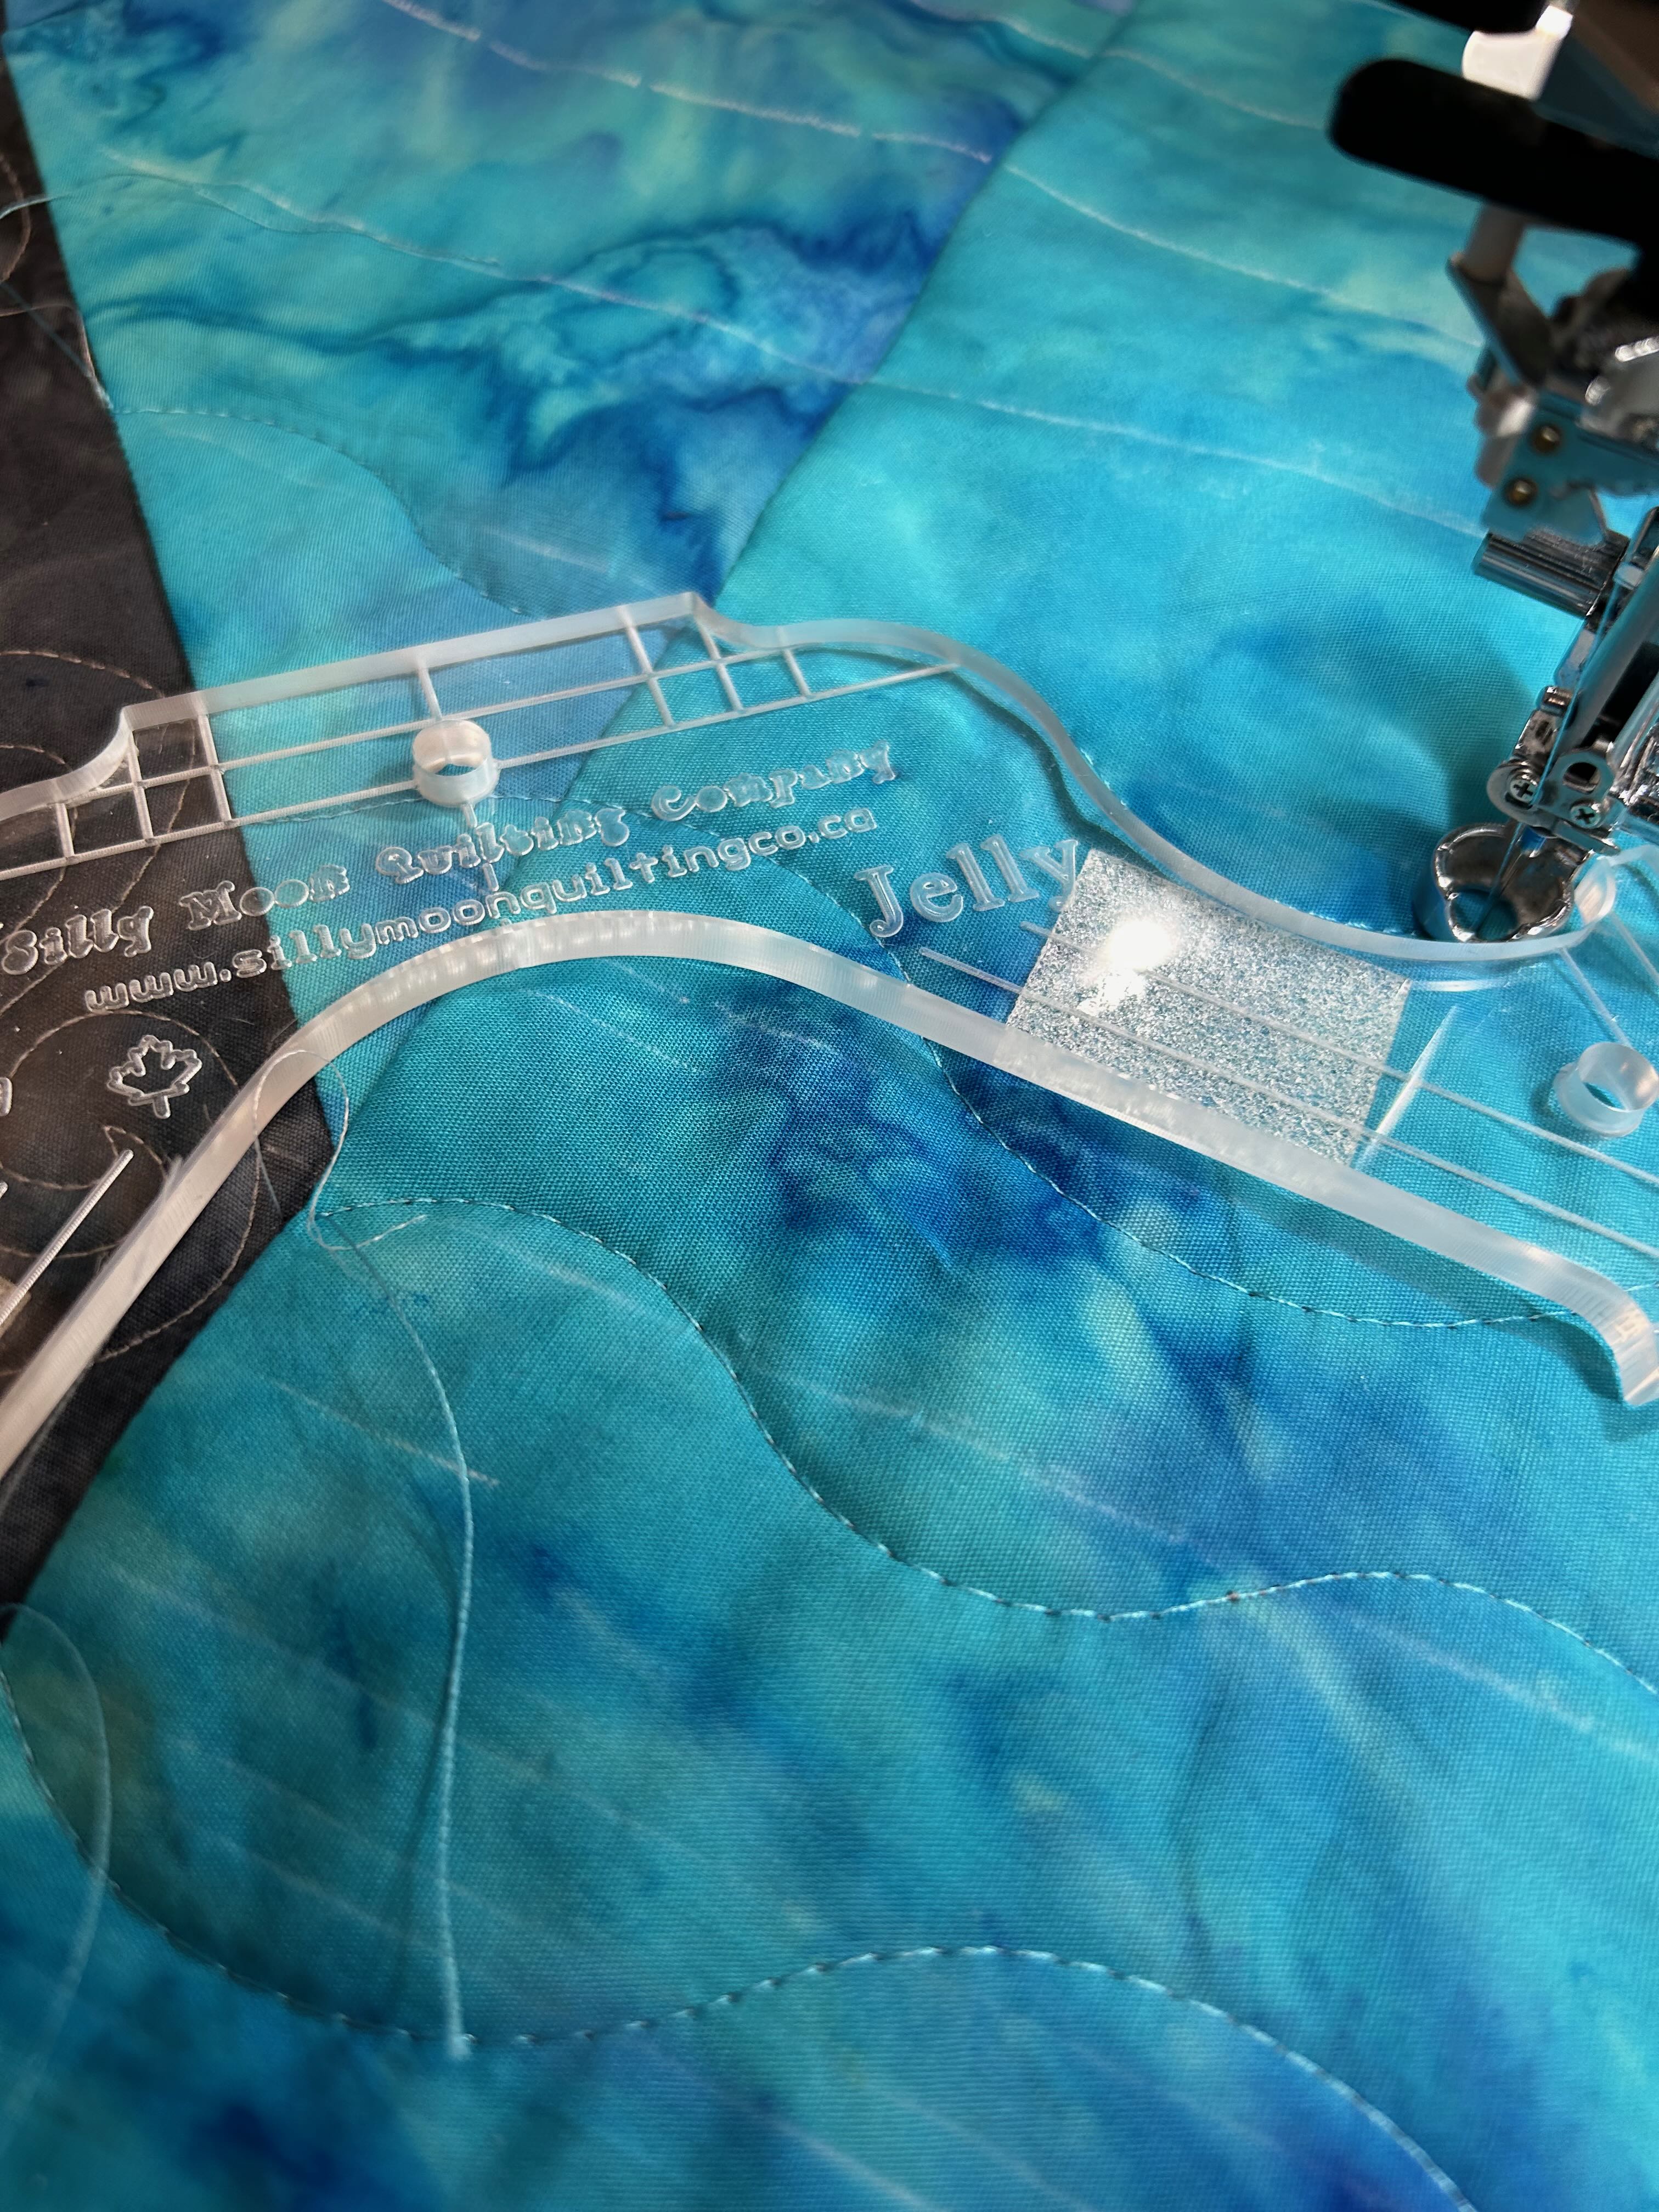
When quilting the water, I used both “Turkey” and “Jelly” from Silly Moon. I wanted the waves all different.
Anyhow, this is my “newest baby quilt “There She Blows”! I live on the west coast of Canada, so I had to make my whale an Orca!
Here is my Affiliate link: https://glnk.io/mzmmj/quiltinggail If you order over $50 from Missouri Star, you will get 20% off your order and I may receive a small commission. Thank you for your support!
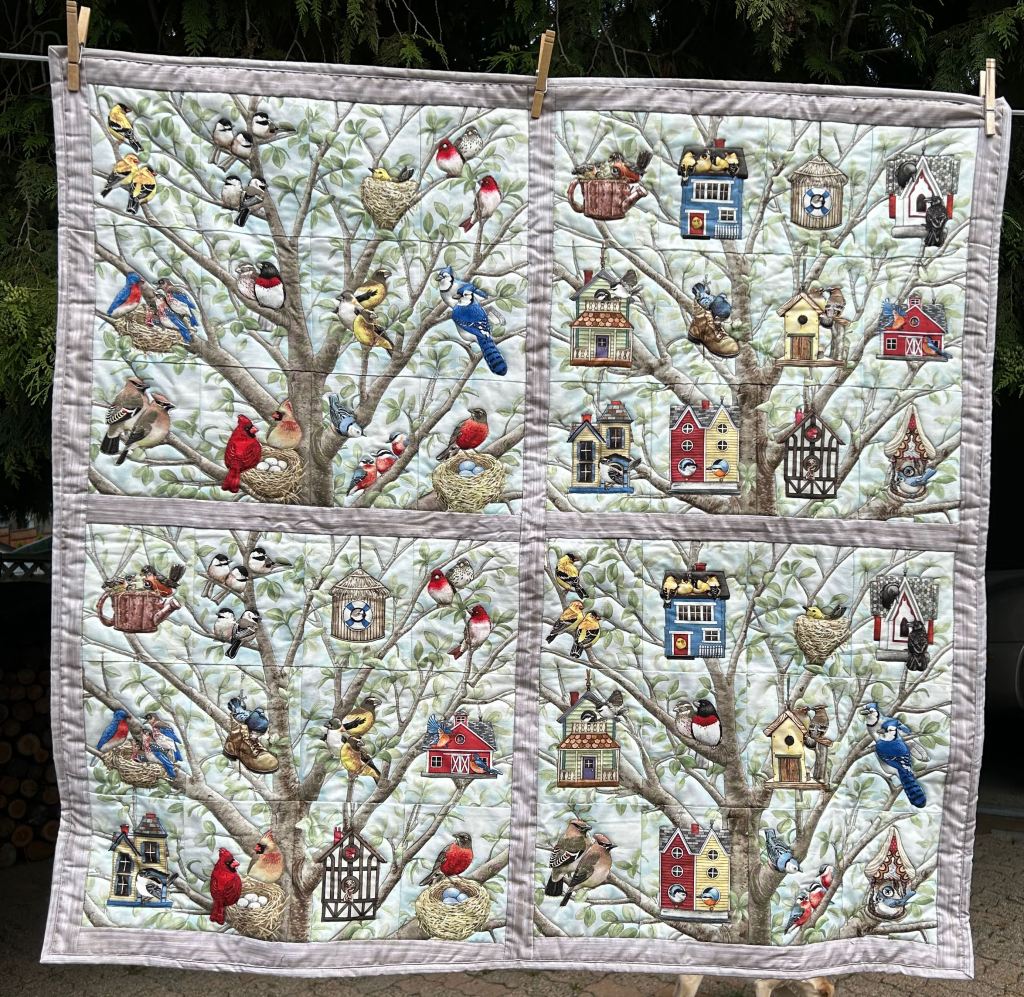
Challenge: Angry birds, crazy birds, whimsical birds, or flying geese. If it’s a bird, this is their time to show their colors
I had a ton of ideas for this hop, but I decided to finish a UFO. That makes sense, doesn’t it? This quilt is made of panels. The tree in the background are the same in each panel, so that made it easy to mix and match the bird houses and the birds. It takes a bit of pinning to make sure that the tree limbs line up, but I love the end result!
Close up of the Quilting:
Quilt Stats:
Size: 39″ x 36″
Fabric: panel from ??? It was in my stash from years ago.
Here is my Affiliate link: https://glnk.io/mzmmj/quiltinggail If you order over $50 from Missouri Star, you will get 20% off your order and I will receive a small commission. Thank you for your support!
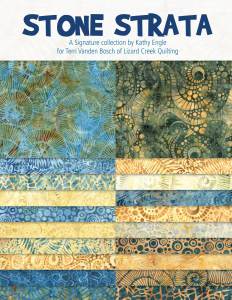
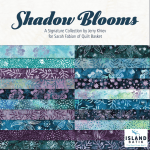
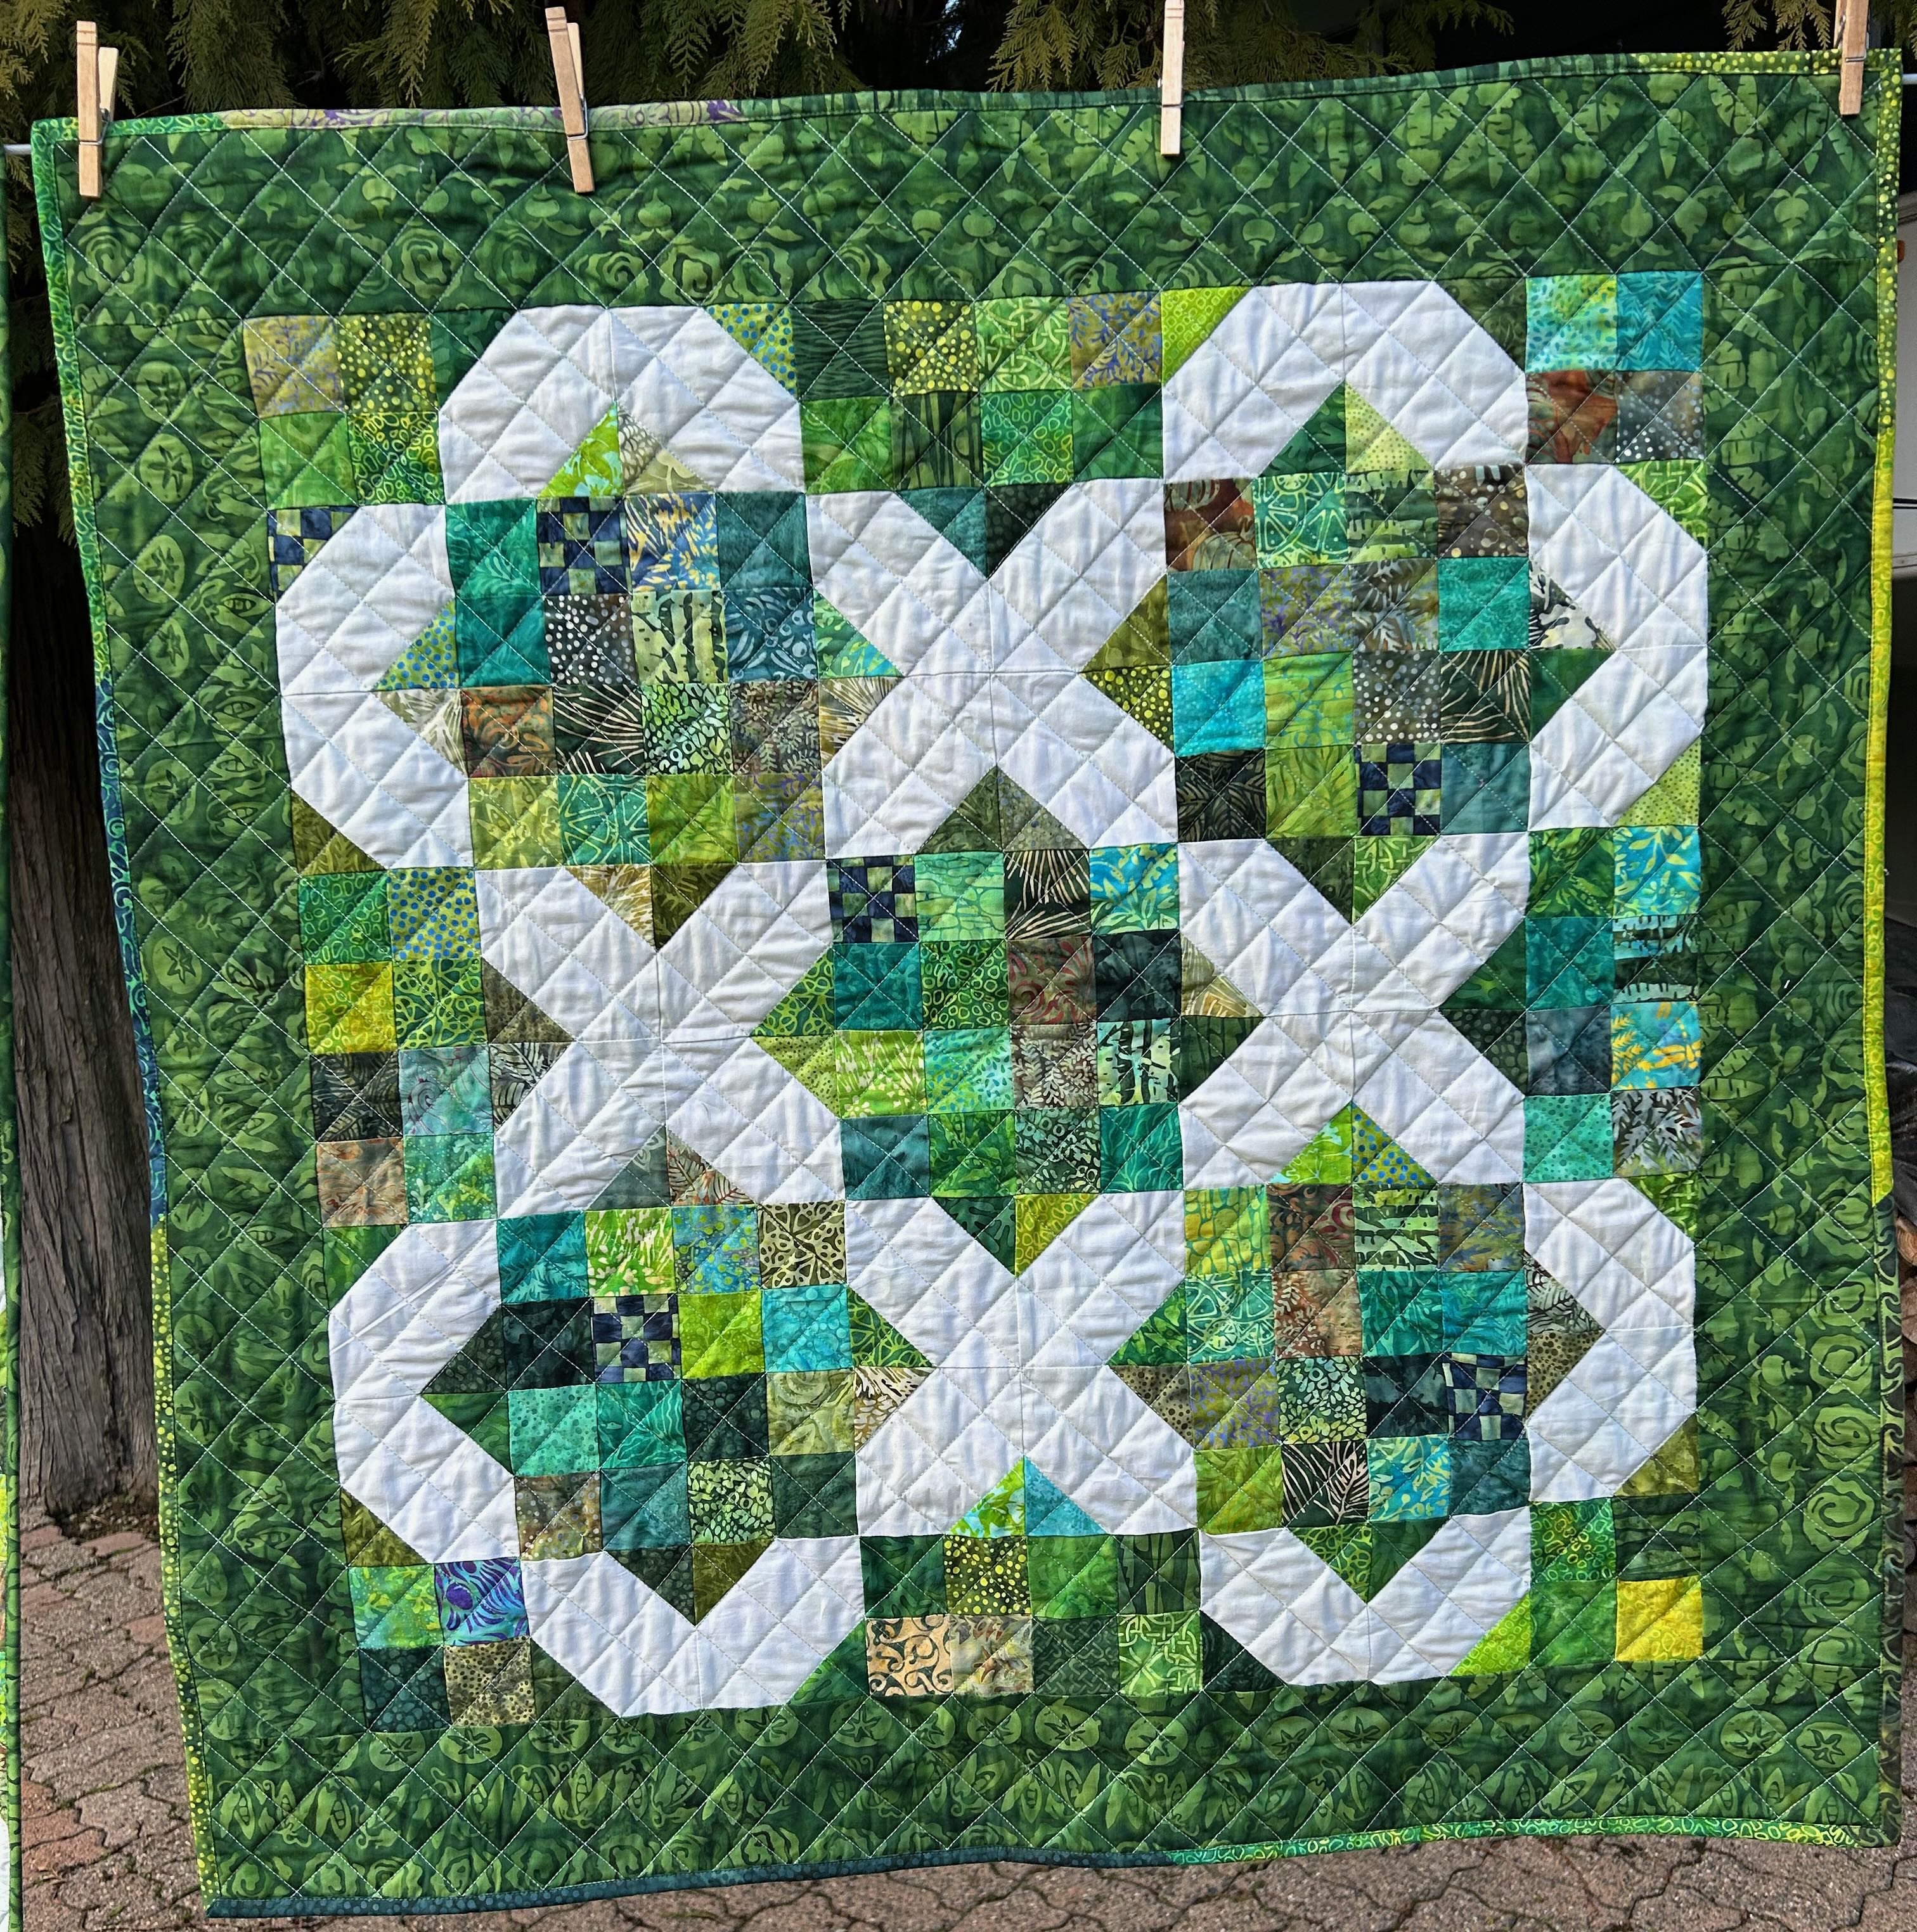
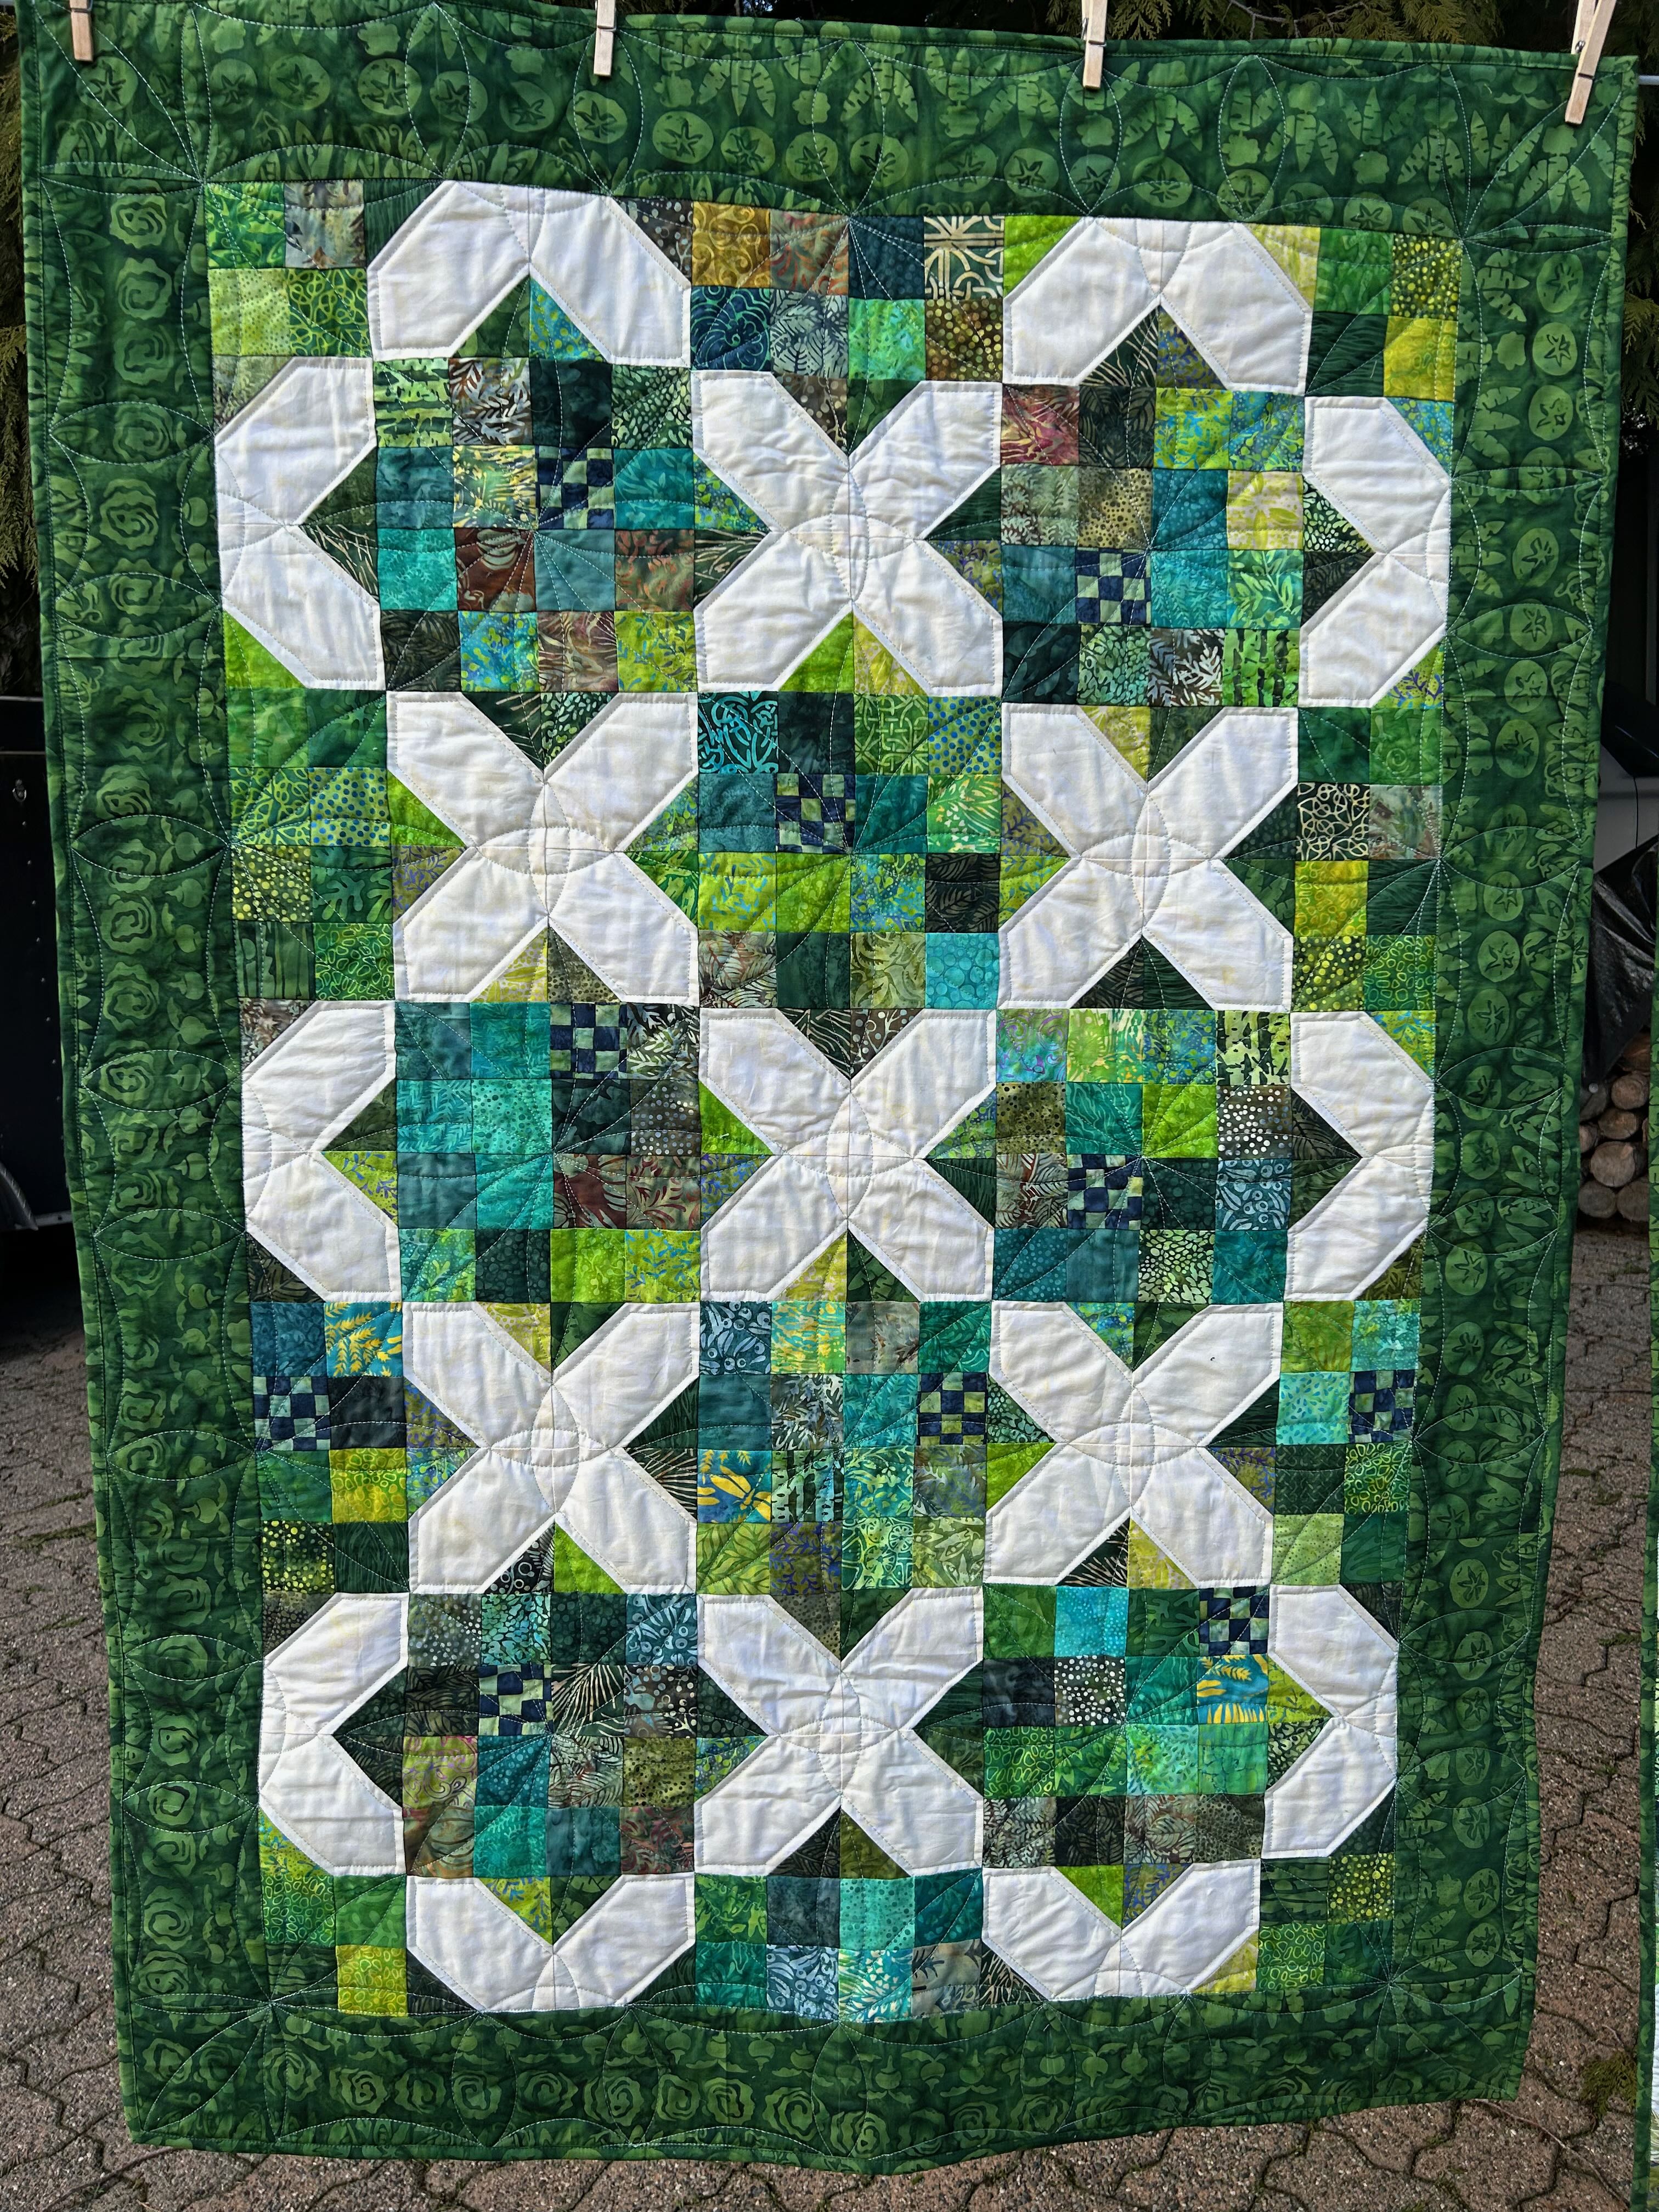
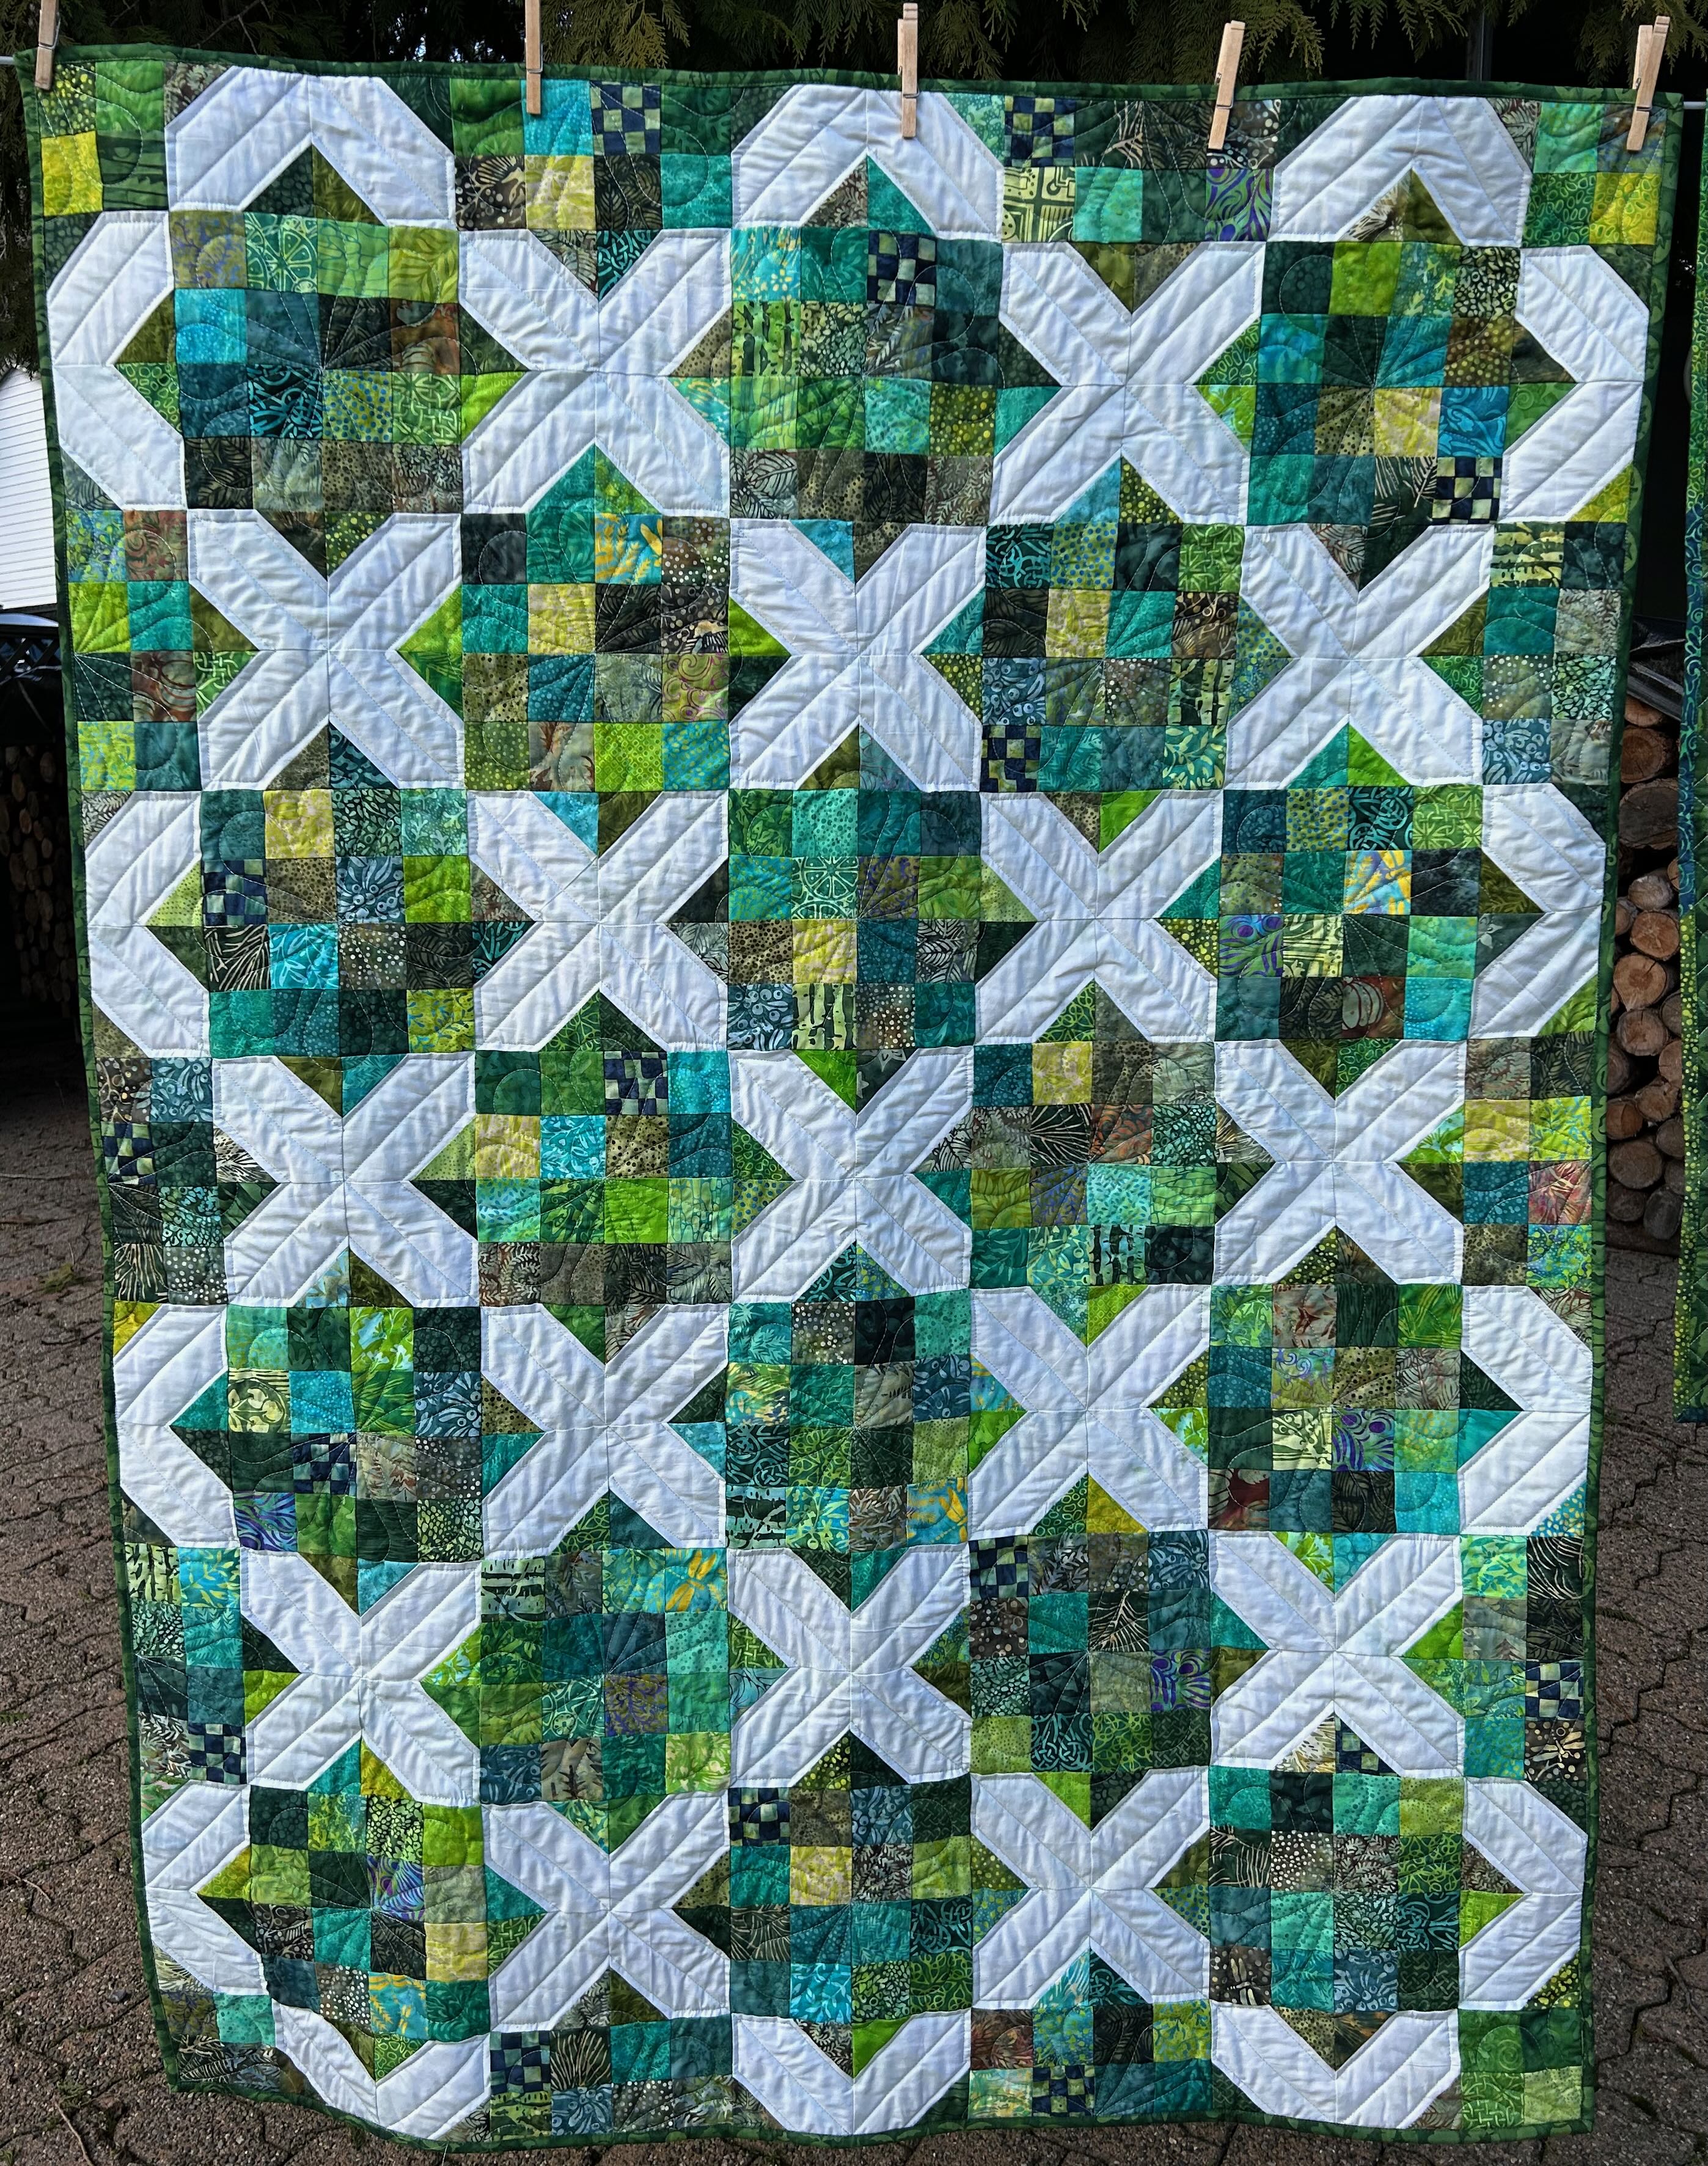
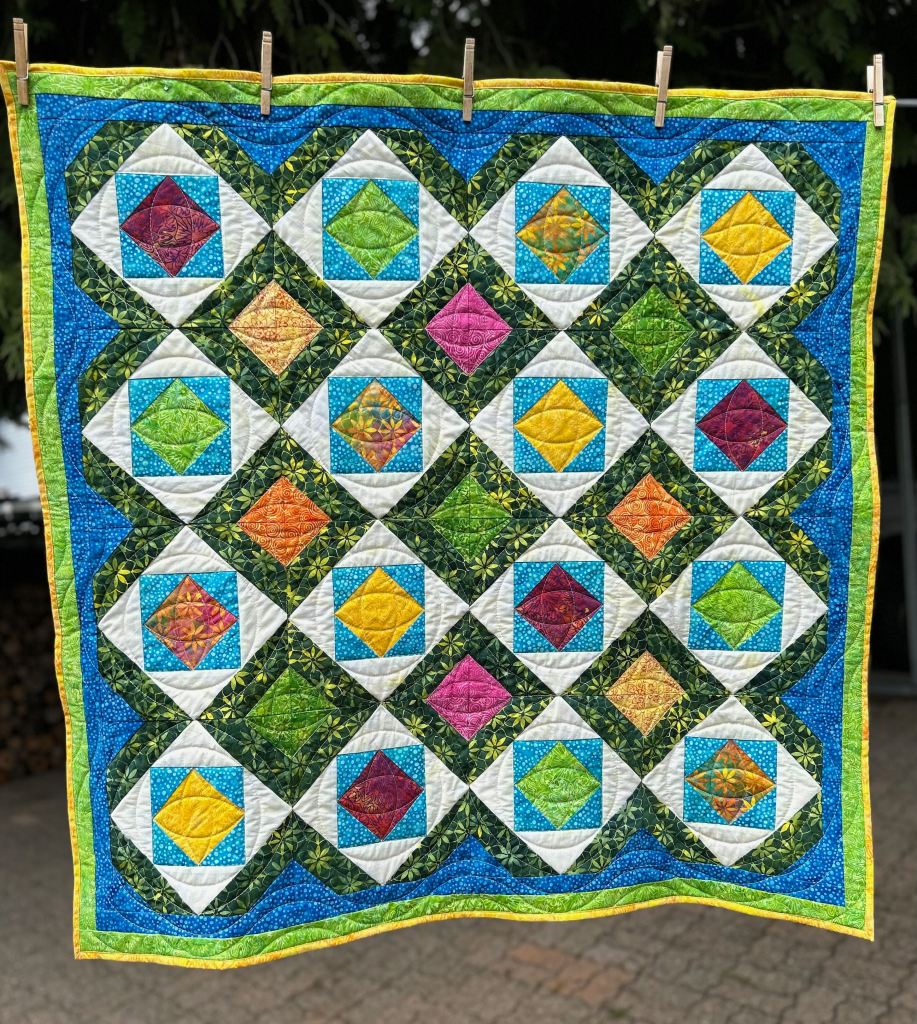
Prisms is a signature collection for Claudia Porter (from Create with Claudia).
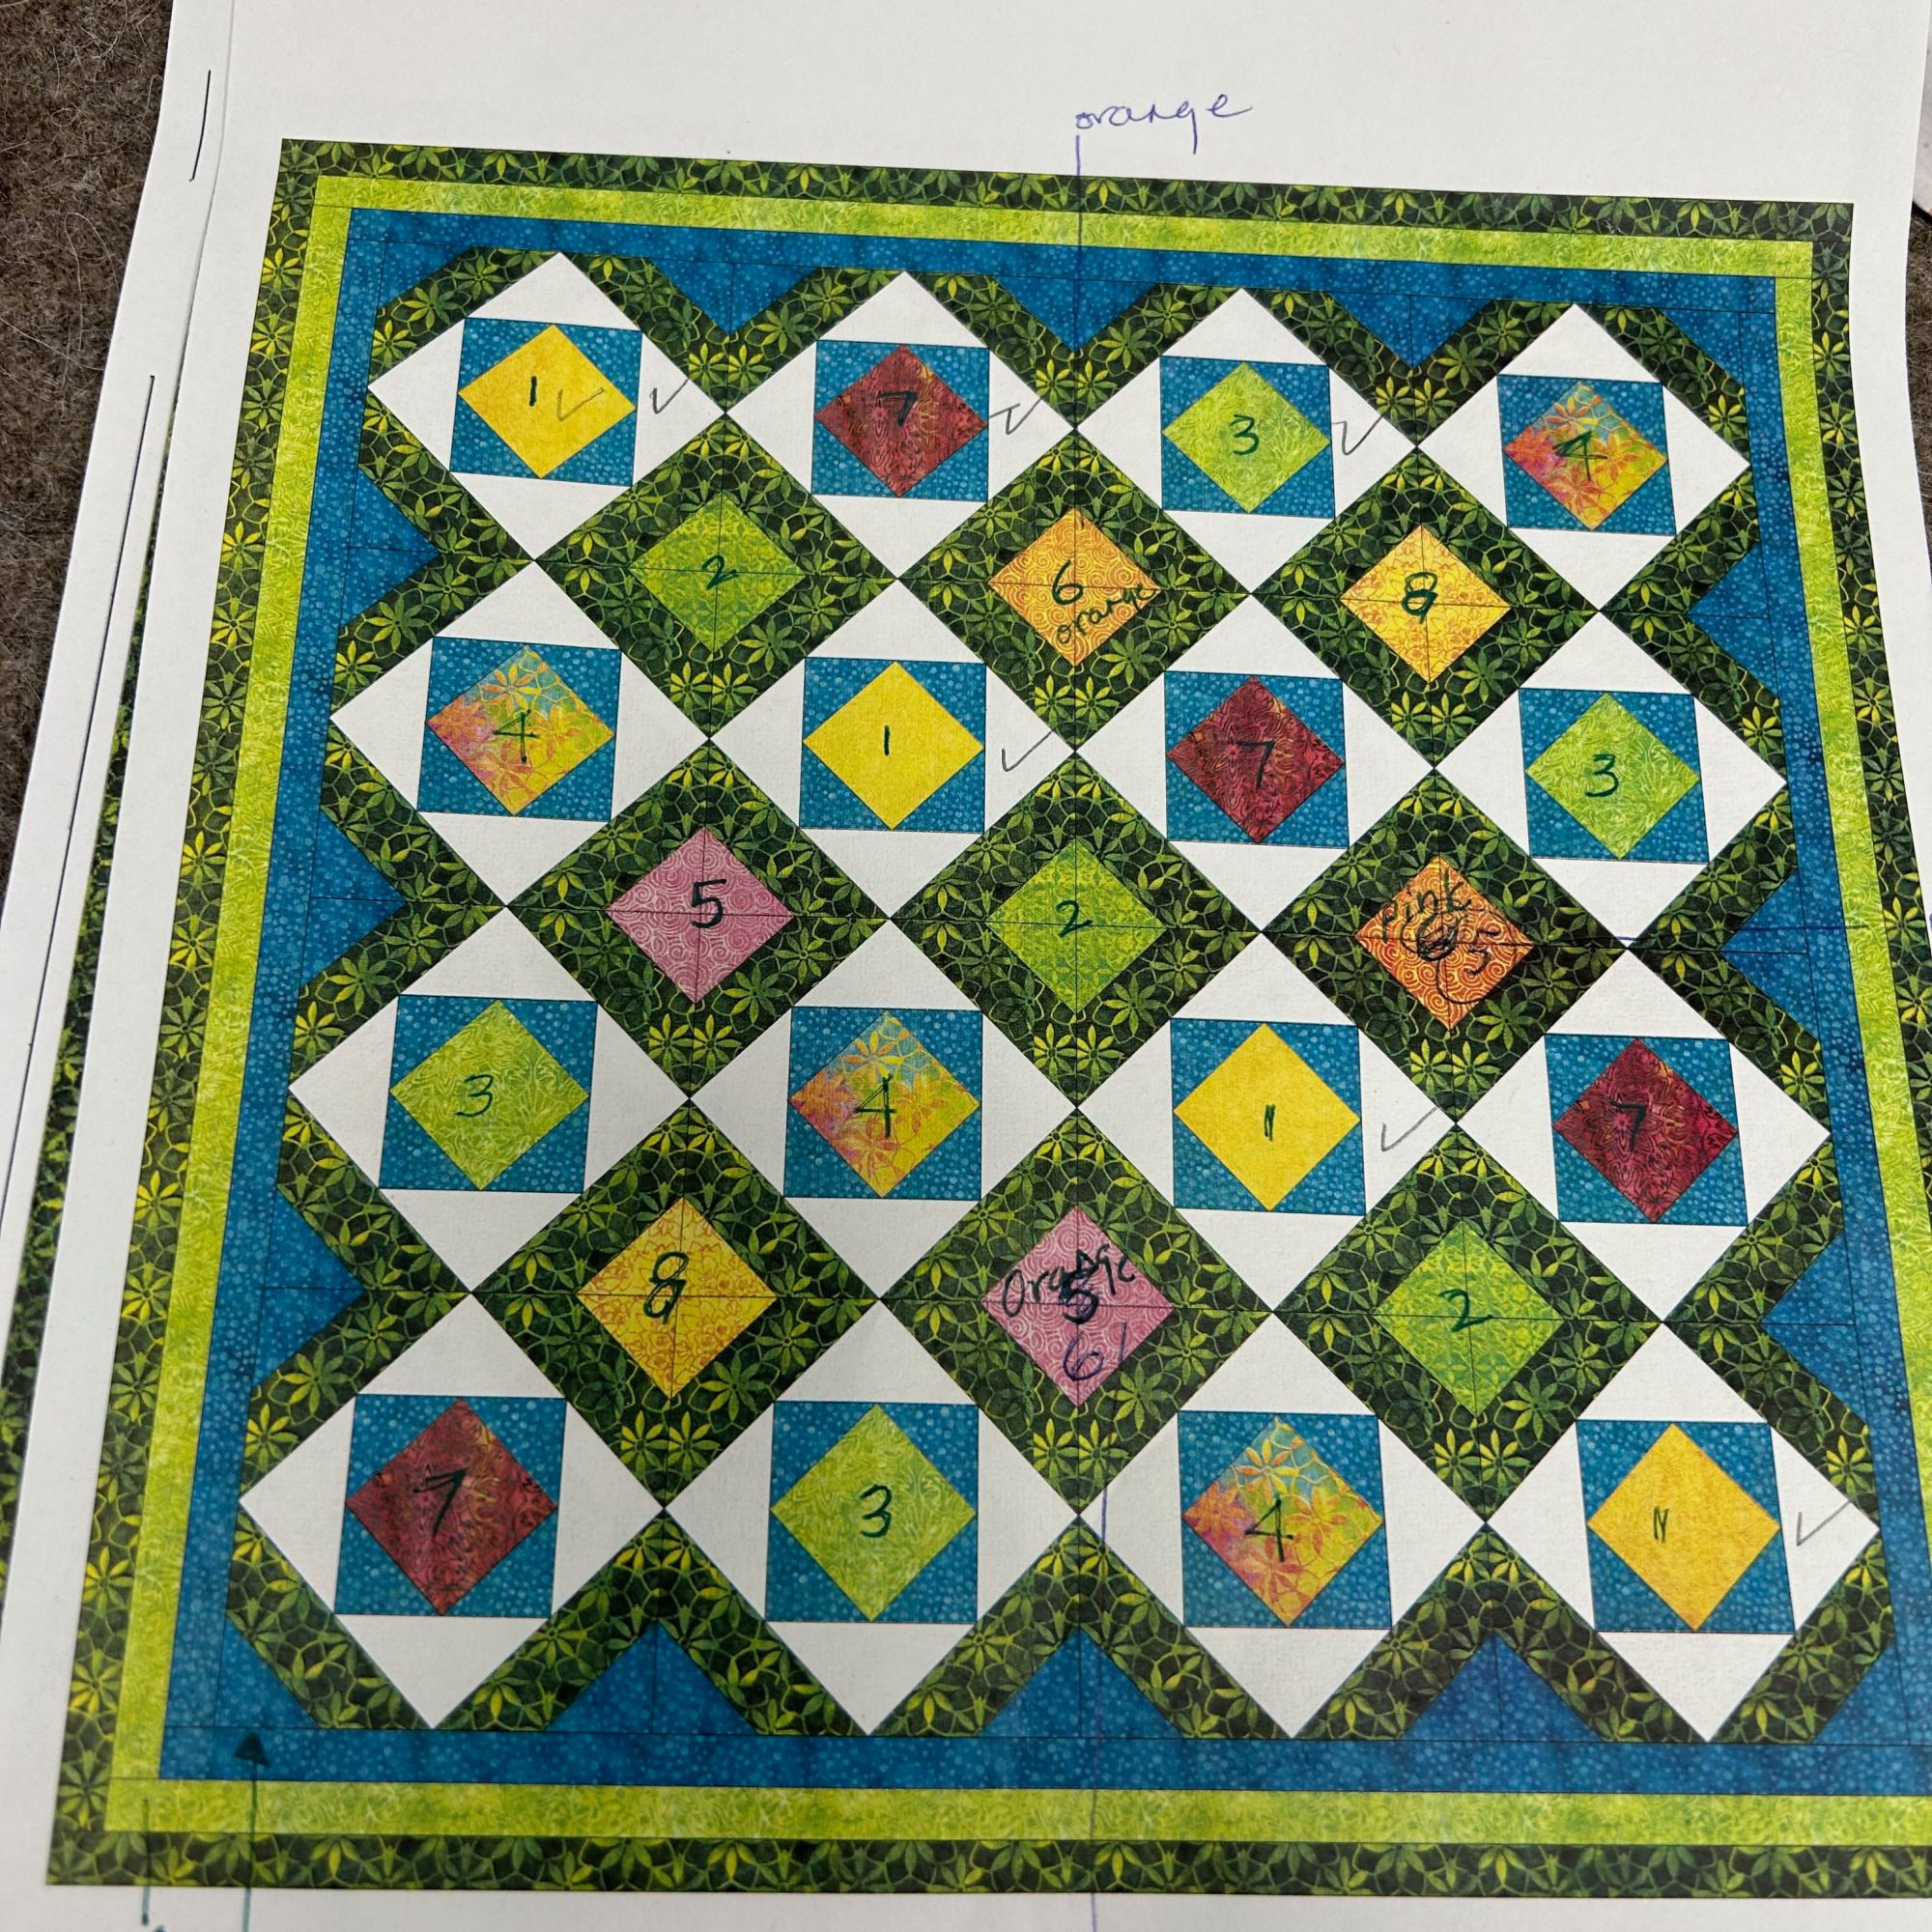
This collection is so pretty. When Claudia asked if I’d participate in her blog hop, I said sure. I went to EQ and designed this quilt:
It wasn’t too long and the fabric arrived! I didn’t ask for any background because I wasn’t sure I liked the white with it. Once the fabric arrived, I auditioned several different lights and I found that Linen, a soft yellow was perfect!
This quilt was paper pieced! What was I thinking??? At least I can do it without sewing on the paper and therefore I can sew other projects at the same time! My picture was heavily marked as I needed to keep track of which colour went in which location. And the design wall helped a lot!
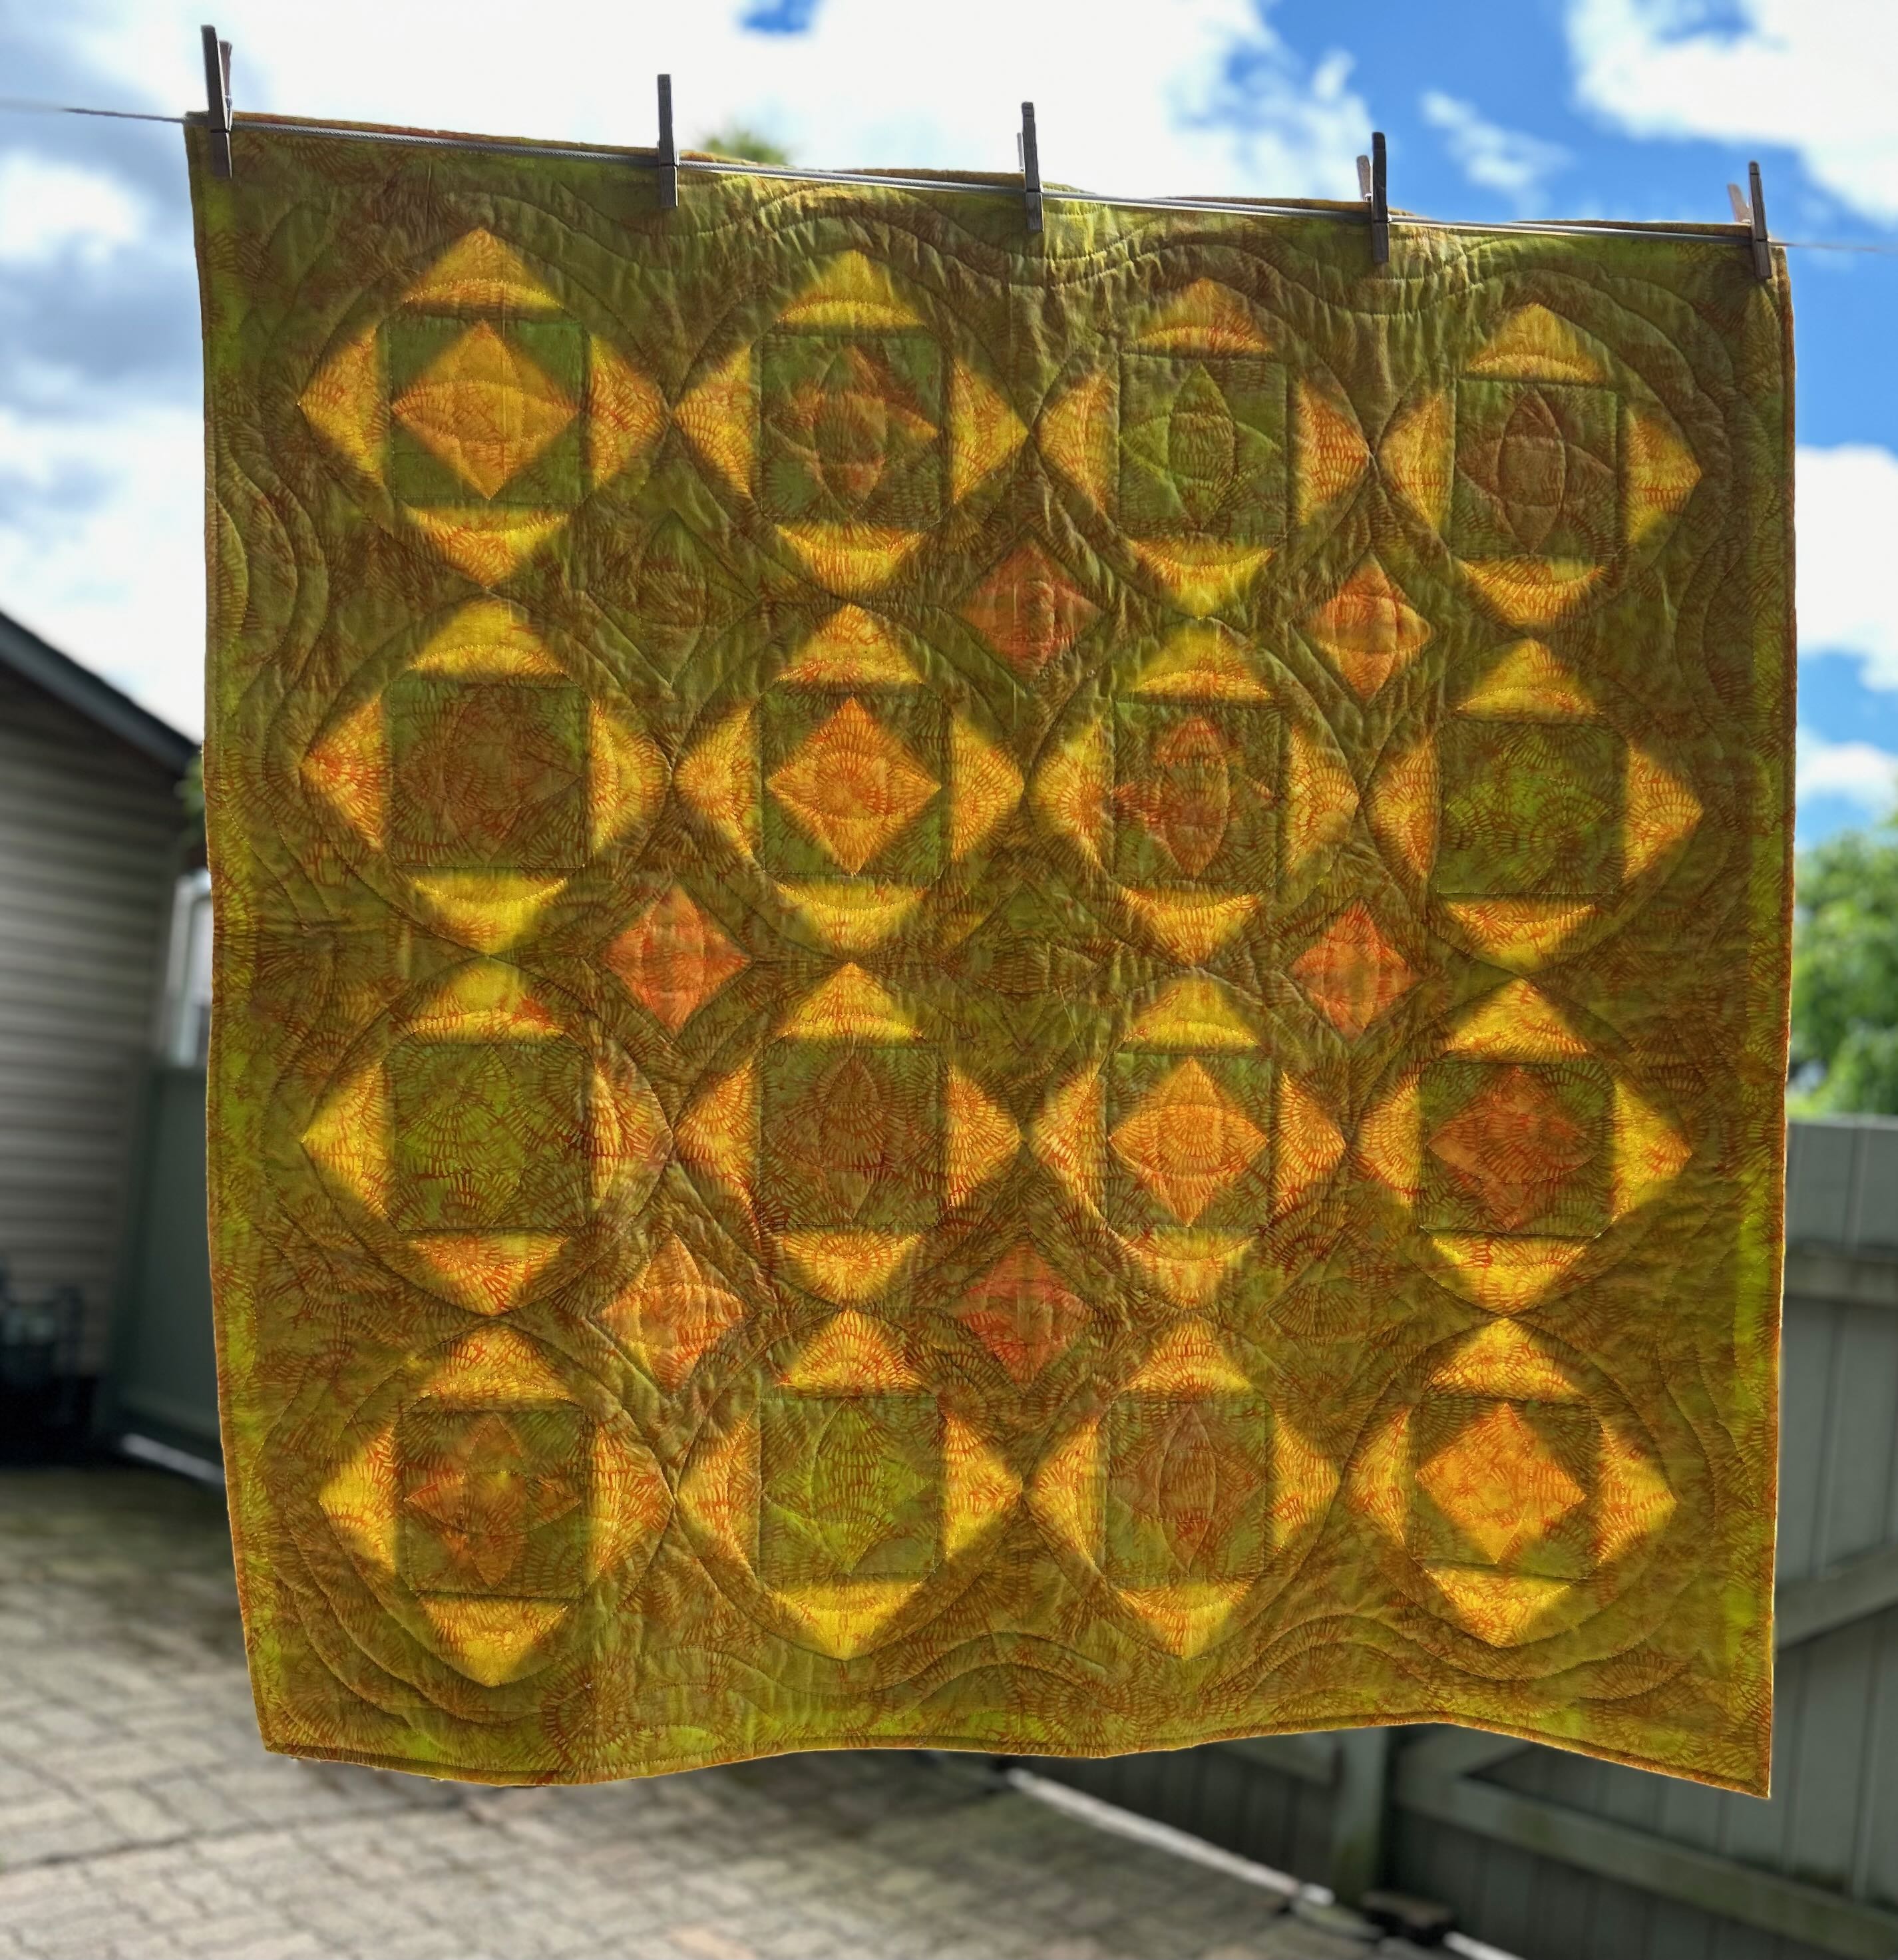
The backing is one of Island Batik’s Blenders called Dandelion Daffodil! So bright and cheerful!
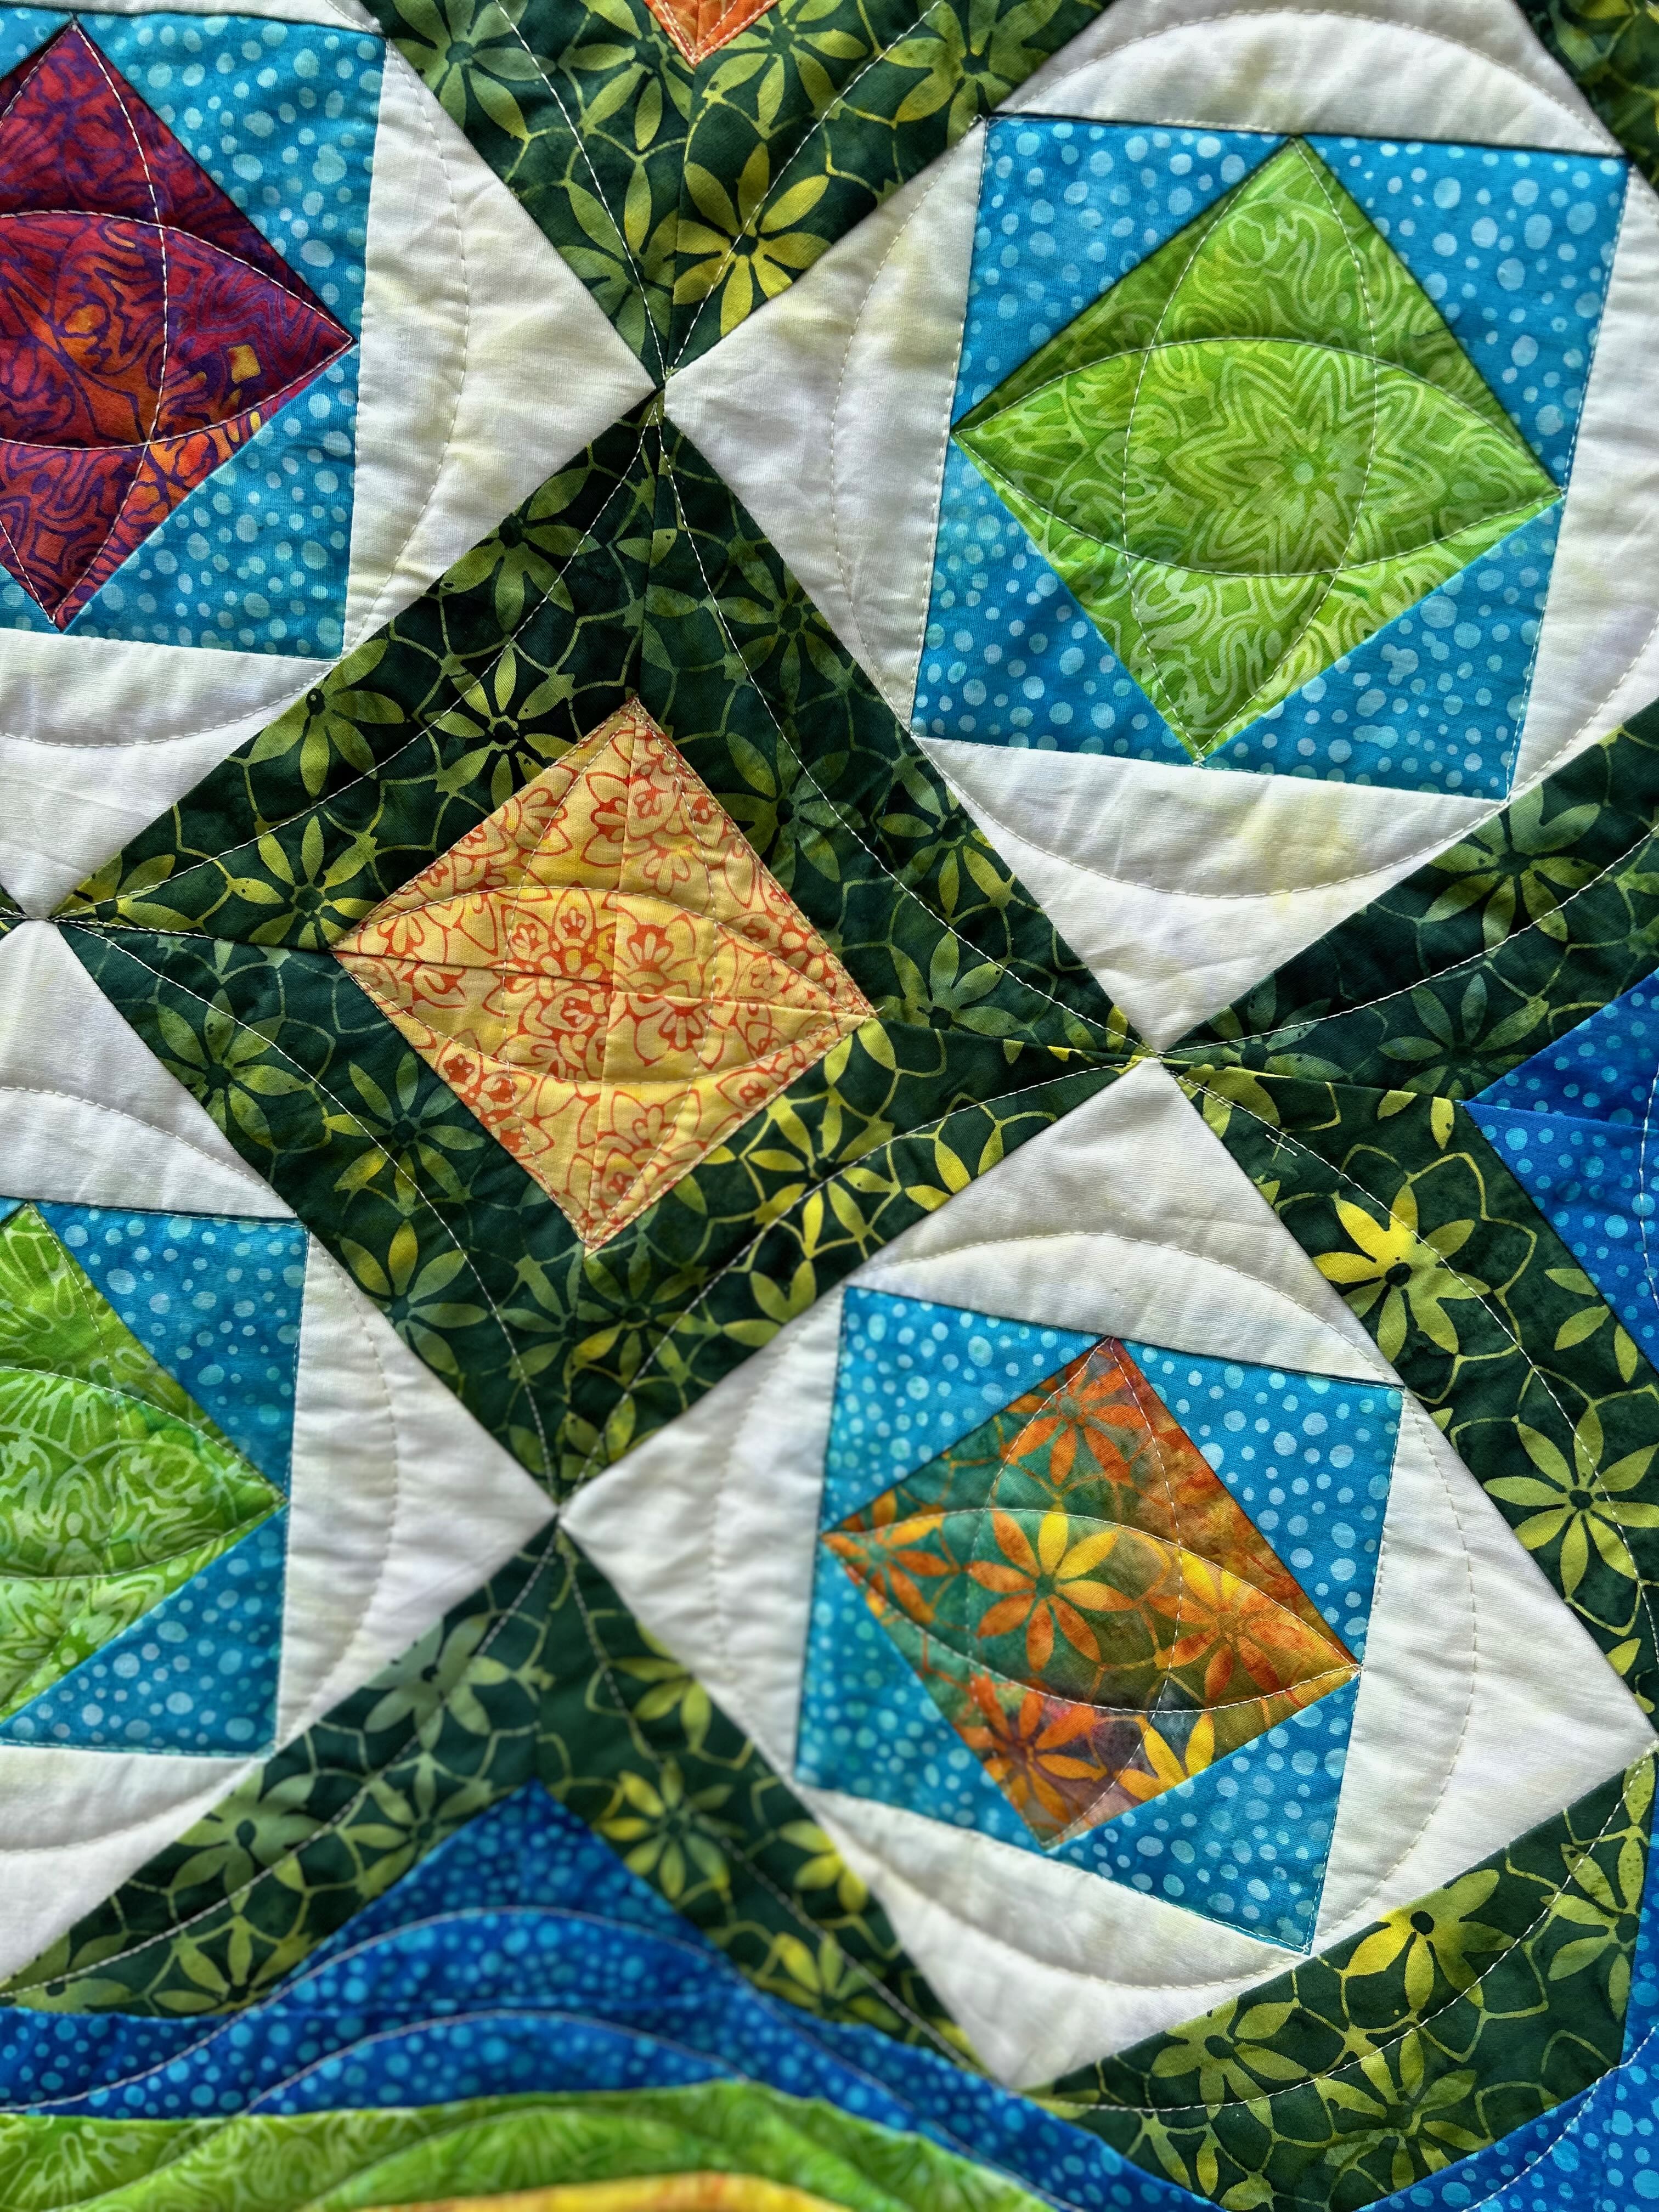
A close-up of the quilting and the. back of the quilt with the sun shining on the front.
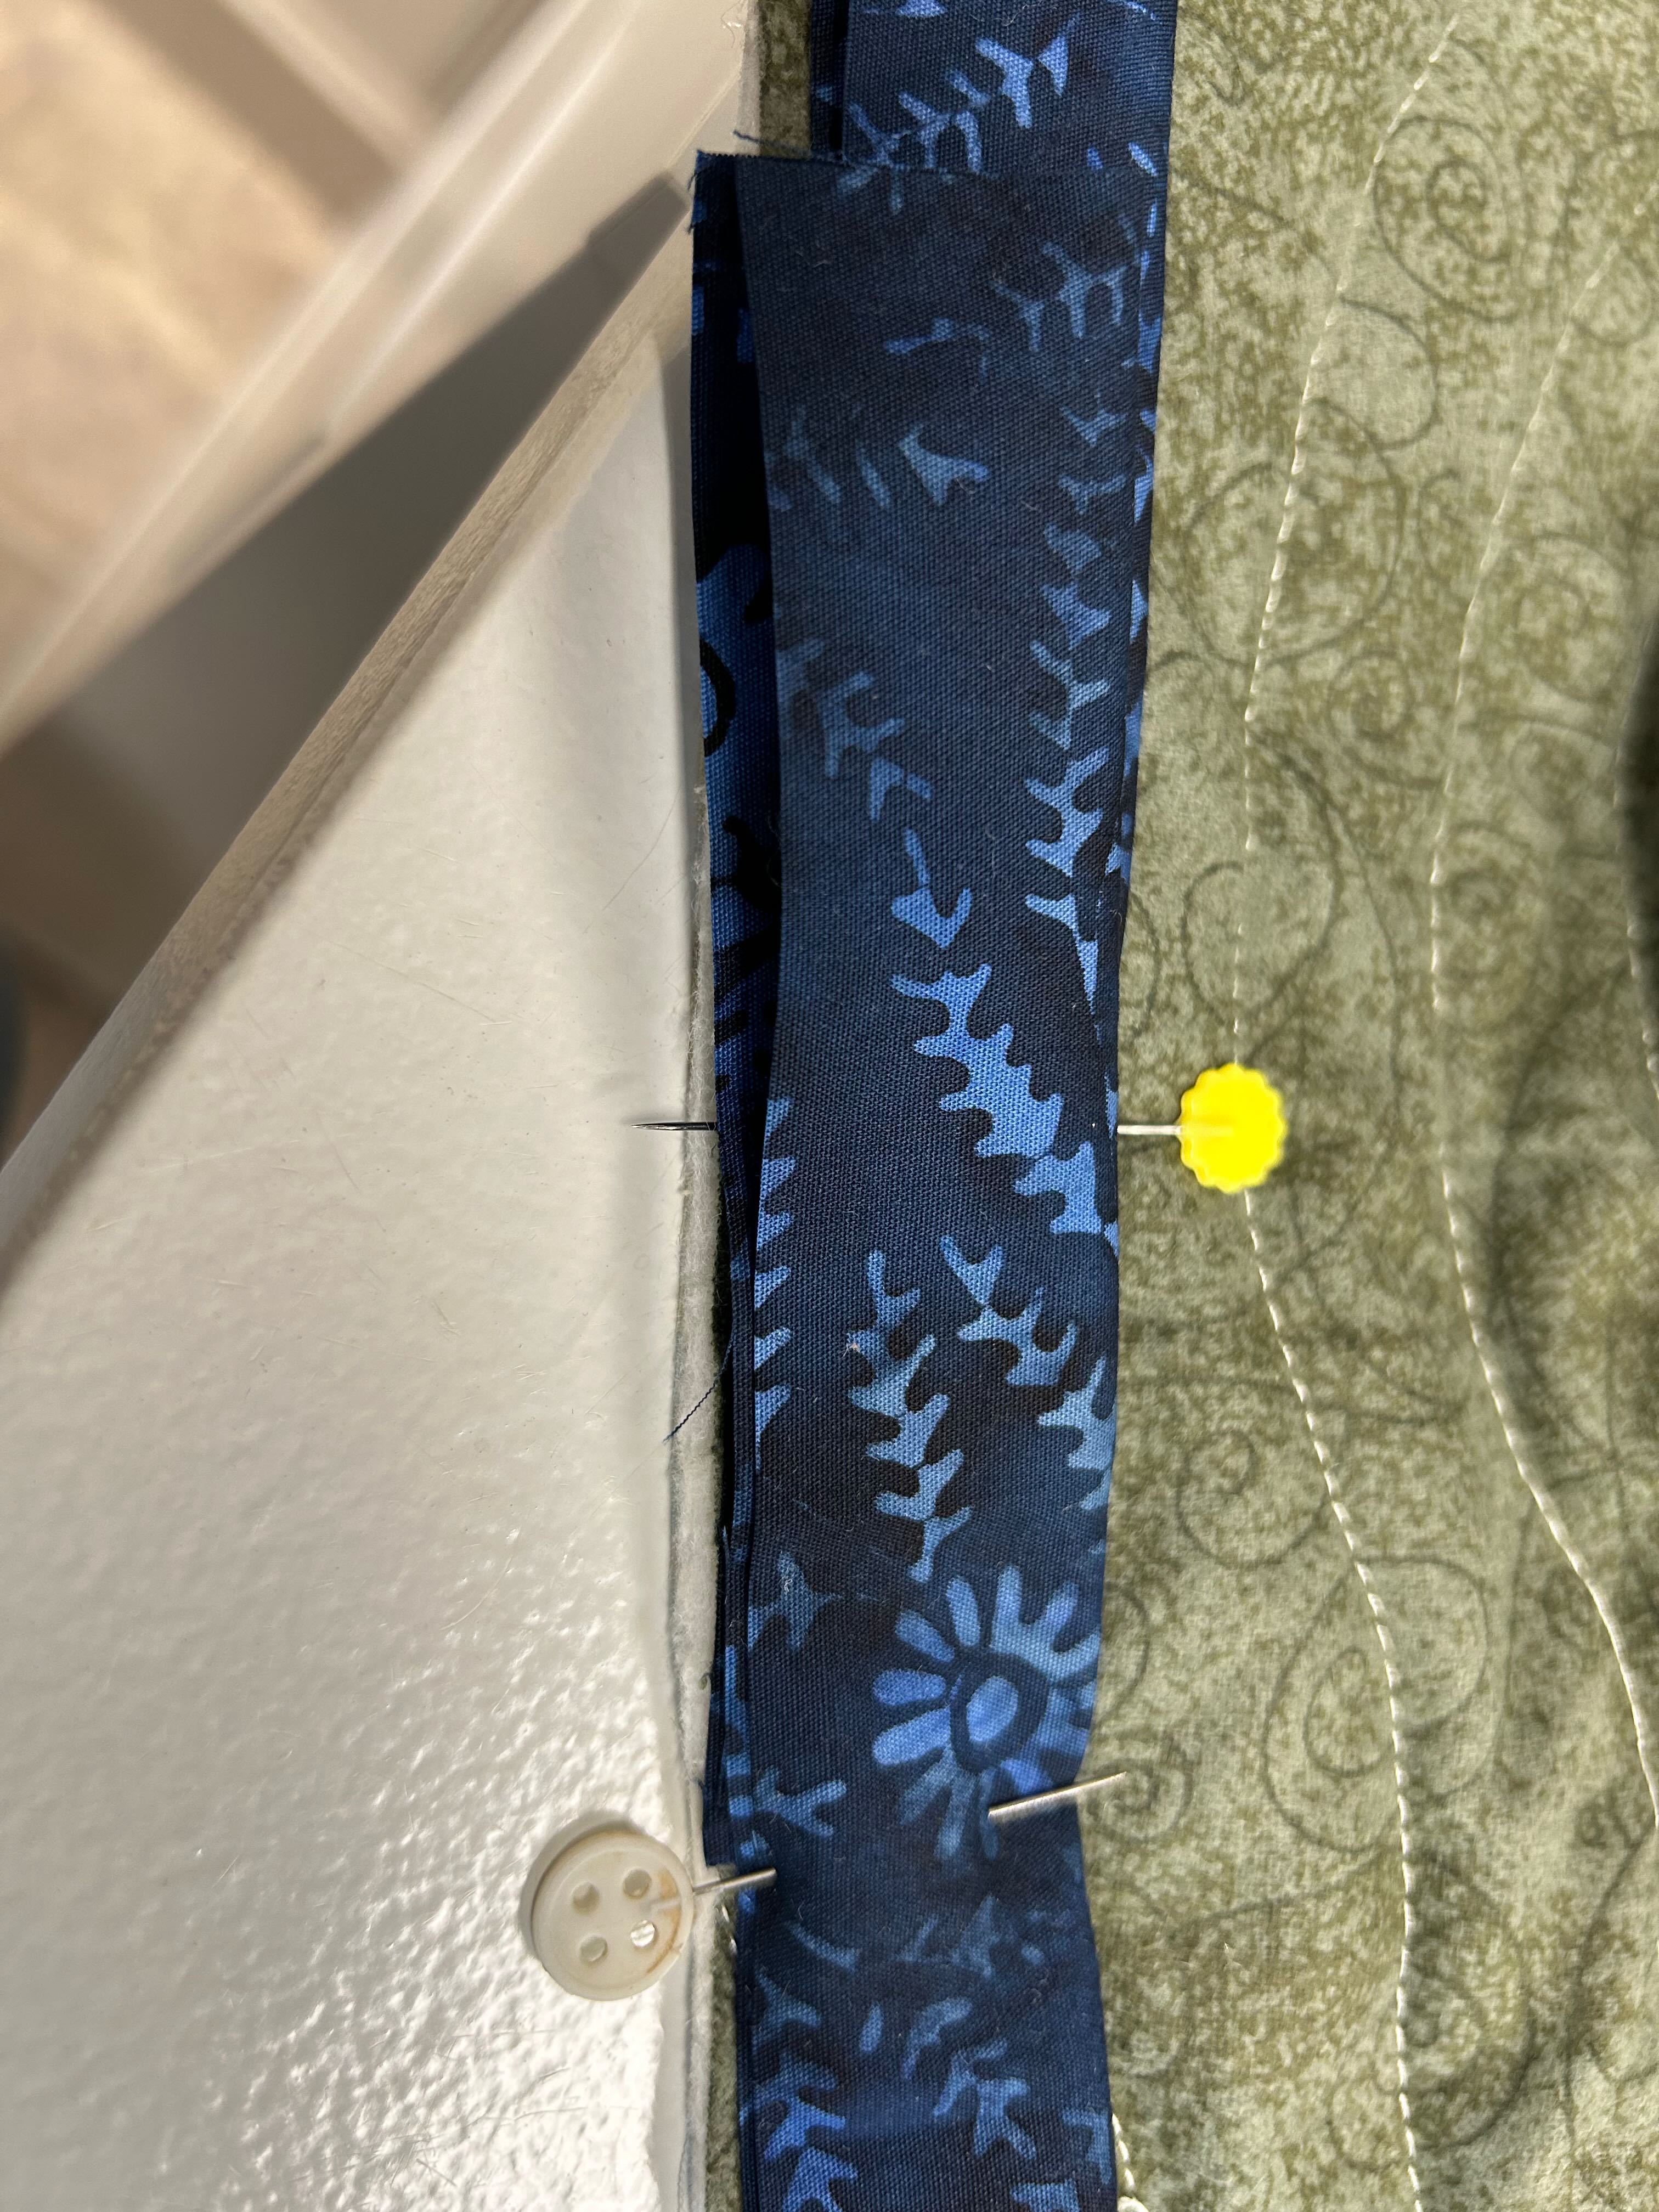
I had forgotten to order enough fabric for the binding, so I thought I’d try doing a self binding. I am rarely successful when doing this, as I tend to slice a bit of the backing. Even when I’m careful. However, this time, I had this brain wave, after pinning the backing out of the way, “Cut 1/8” away from the finished top.” It worked!!! I was so happy!
Don’t Forget
Here is my Affiliate link: https://glnk.io/mzmmj/quiltinggail If you order over $50 from Missouri Star, you will get 20% off your order and I will receive a small commission. Thank you for your support!
Carol, from Just let me Quilt, is hosting “On the Road Again” blog hop. Here’s what she had to say about the blog hop:
Challenge: May starts the summer of travel so where would you like to go? Make something showing transportation vehicles (cars, planes, buses, etc.), summer fun, or a place you’d like to travel to.
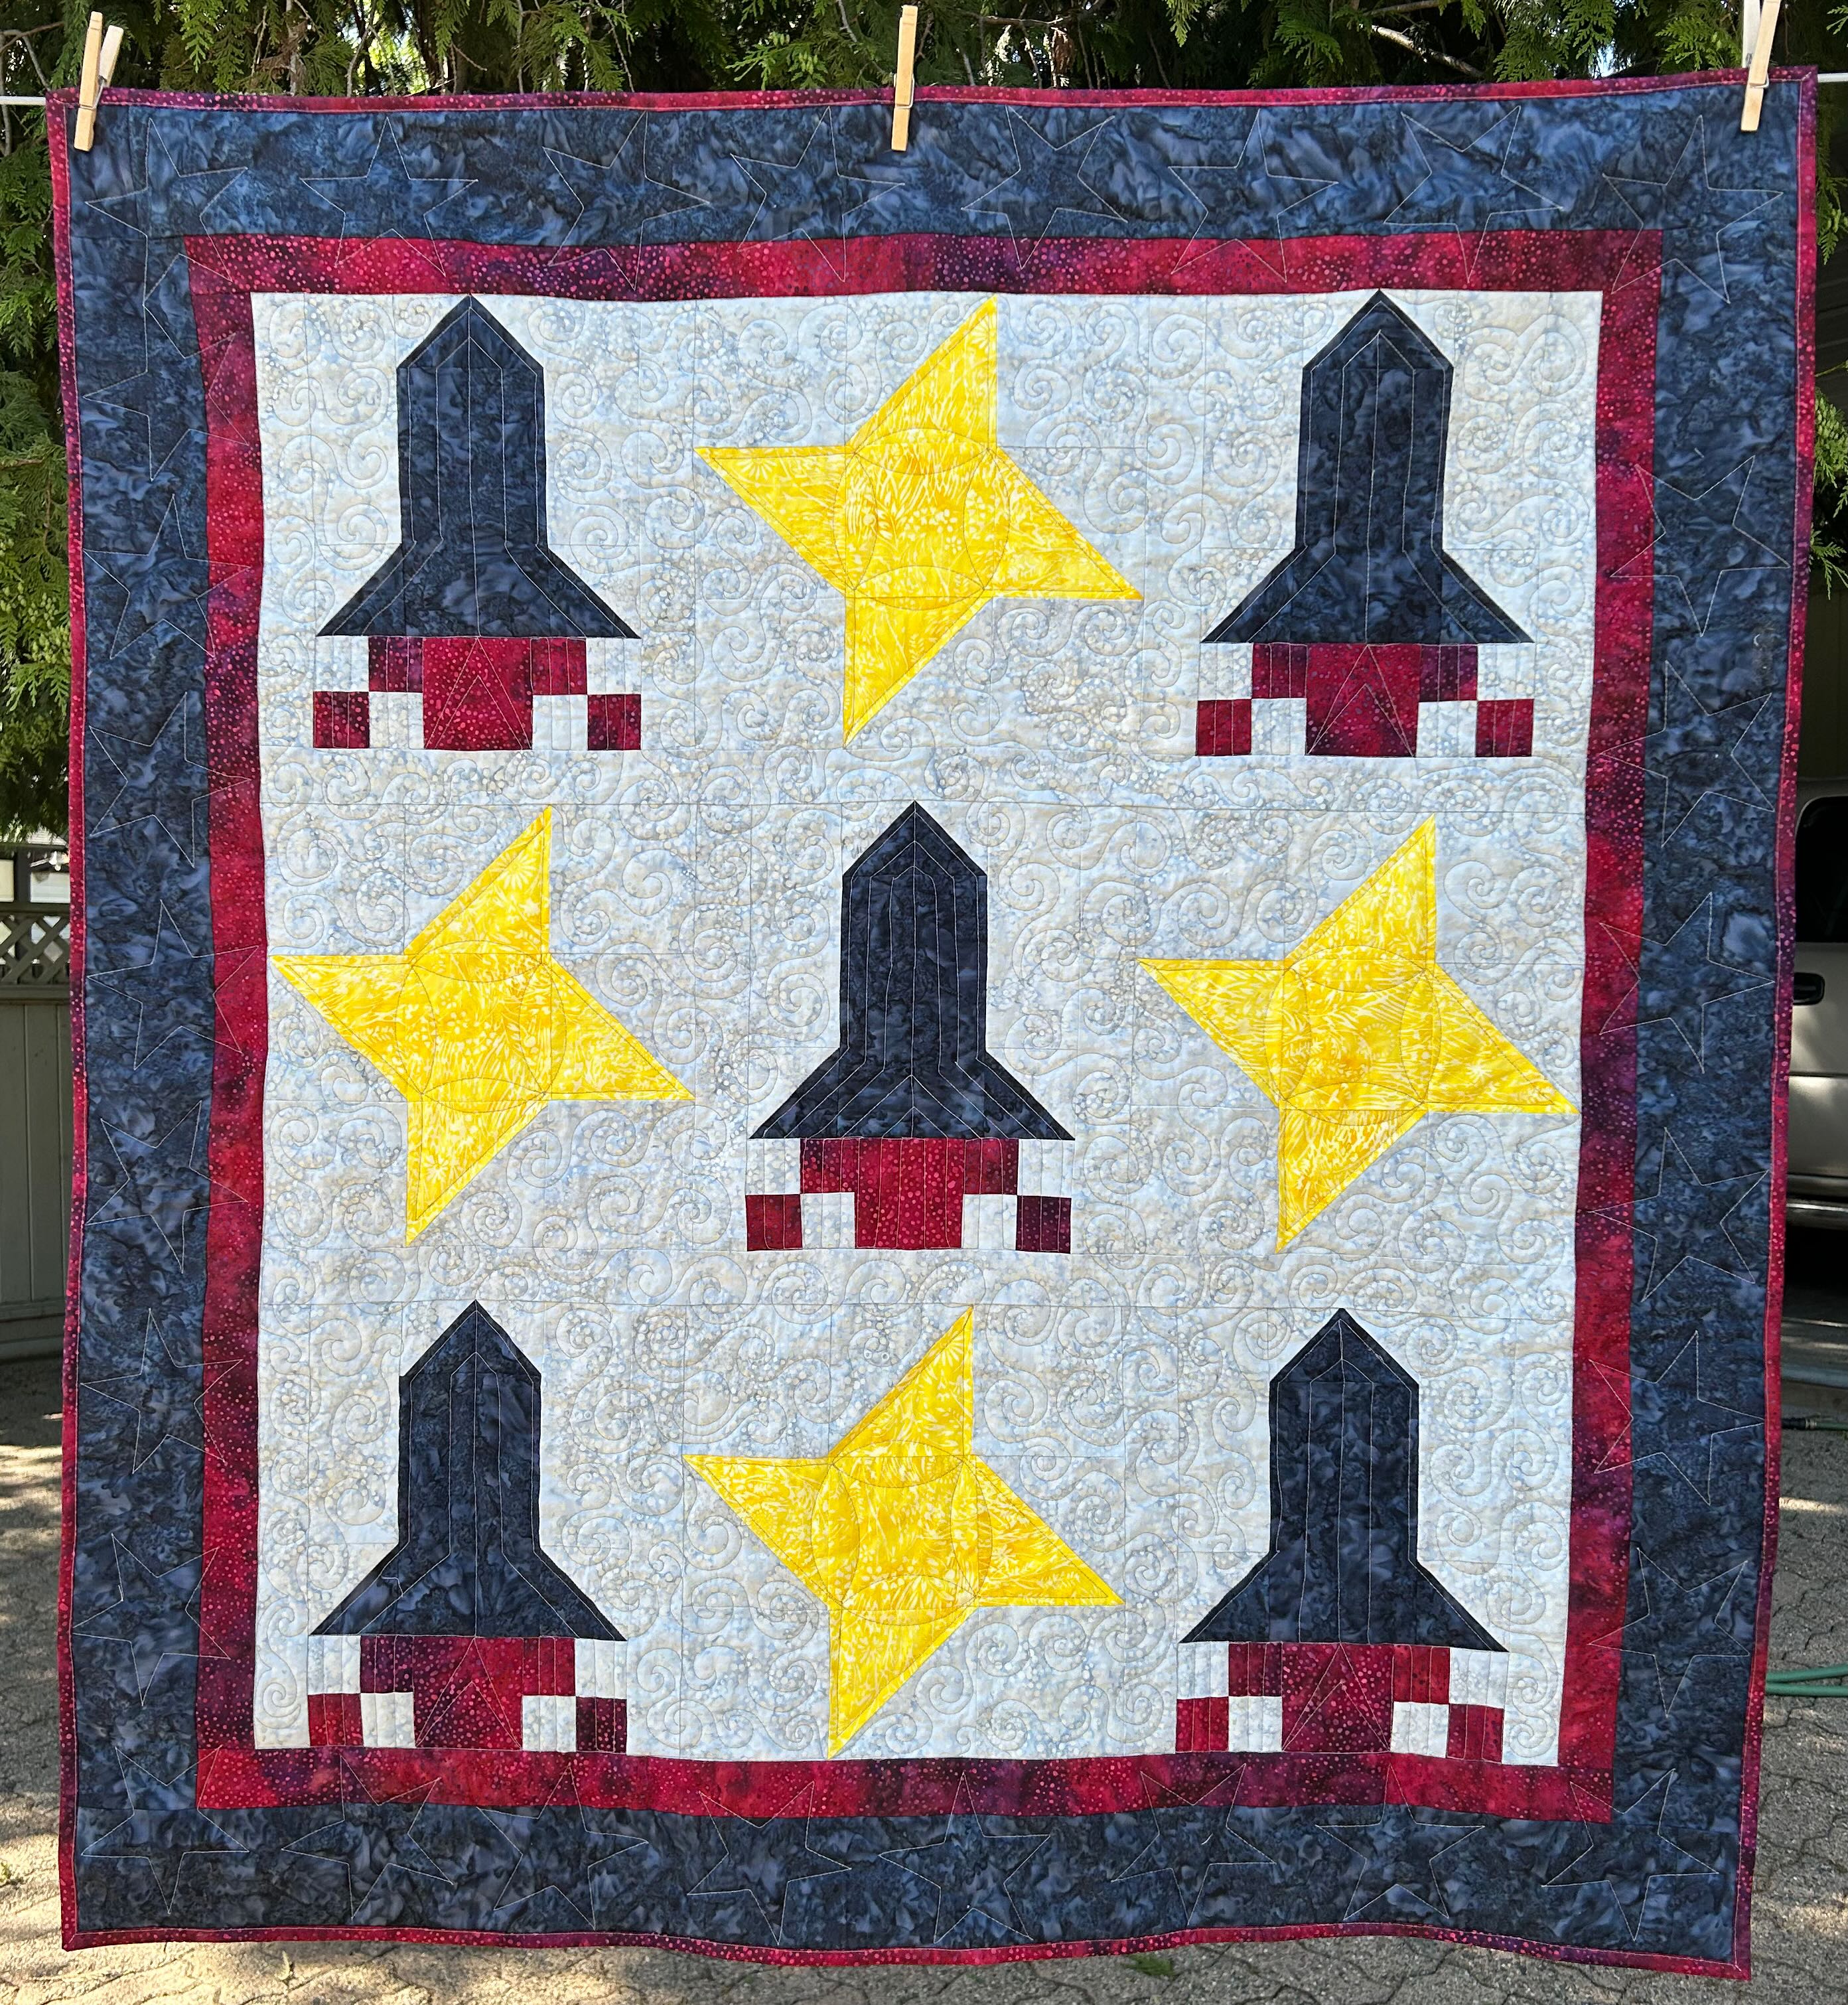
I was debating and mulling over what to do for this challenge. I’d have one excellent idea, and then a day later, I’d throw it out. Another idea, and another day and ‘nope’ it’s not going to work. Silly cars?? planes?? Sailboats?? Mountains?? the beach?? SIGH!!! Such a fun theme, how can it be so difficult?
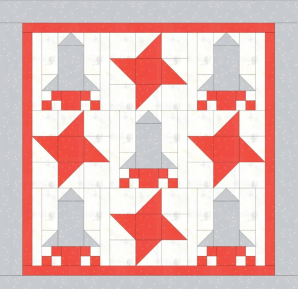
THEN … along came a post from Sew Can She … and I knew it was perfect for what I wanted! Rockets and Stars!! You can find the pattern HERE.
Now, I do not have any dreams to be in a rocket or to circle the earth or to go to the space station. Nope, not a single one. But, I’m almost 100% positive that the little boy that gets this quilt will at some time, dream of being an astronaut!
I made a few changes to the original pattern. I decided to do the stars in a different colour than the rocket blasts and I added a strip of sashing between the rows. And, when I was quilting it, I wish I had added one at the top and bottom as well.
Here’s a close-up picture of the quilting and a picture of the back:
Here is my Affiliate link: https://glnk.io/mzmmj/quiltinggail If you order over $50 from Missouri Star, you will get 20% off your order and I will receive a small commission. Thank you for your support!