
Oh, I put off putting a facing on my improv piece. I haven’t faced a quilt before … so why not procrastinate and put it off? and wait a little longer? and put it off? and put it to the side so it’s not staring me in the face? Maybe it’ll just disappear and I’ll forget about it …
Oh … it’s on my PHD chart of “Starts in 2021” and so in order to get my PHD in 2021, it does need to be finished. And a lot of my followers have seen me say in my “To Do” list that it needs a facing … for several weeks. Sigh …
Last week in my PHD in 2021 May post, I talked about how one can easily be faced with procrastination. I wasn’t thinking about this project, but it fits!!!
SEW … with a renewed determination to get it done, I decided to Google “How to Add a Facing.” The first link that showed up was a Youtube video from American Patchwork and Quilting. I grabbed a drink of water and started to watch it. You can see it HERE. AND my immediate reaction was
HOW CAN IT BE THAT SIMPLE ????
I quickly cut the squares for the corners and the side strips. I LOVE the fact that there are hanging triangles on ALL 4 corners, so I can easily change how I want it hung! I cut the squares at 4.5″

Then I pinned the triangles and facings in place:

The facings were pinned in place and I sewed as directed …
Turned the facing and triangles to the backside.
Then, the directions said to HAND stitch the facings down. OH NO!!! I hate hand stitching. What to do? I took my trusty Elmer’s disappearing glue and glued the facings down. If it holds for a period of time, I’ll be happy! If it doesn’t, well then I’ll pull out the black thread and hand stitch it down. But I’m crossing my fingers and hope that it holds!
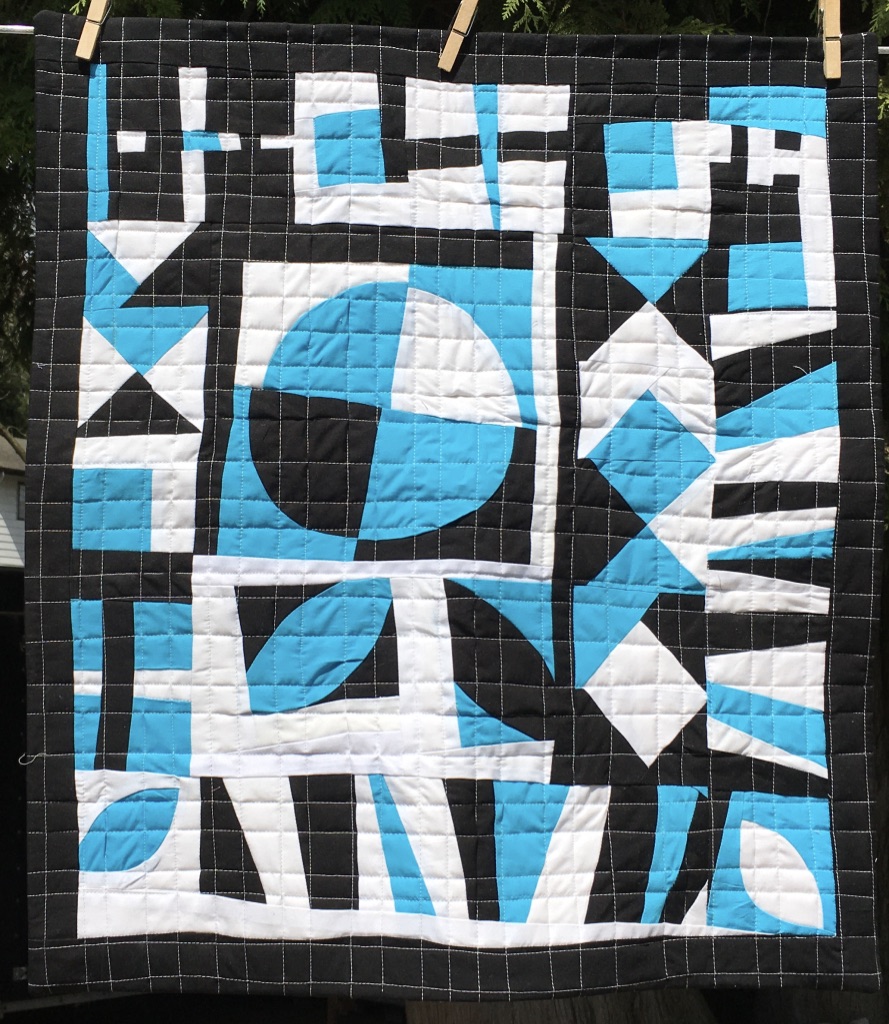
This little piece used Island Batik solids, Aurifil, dove for quilting and Hobbs batting.
Design Wall
Piecing
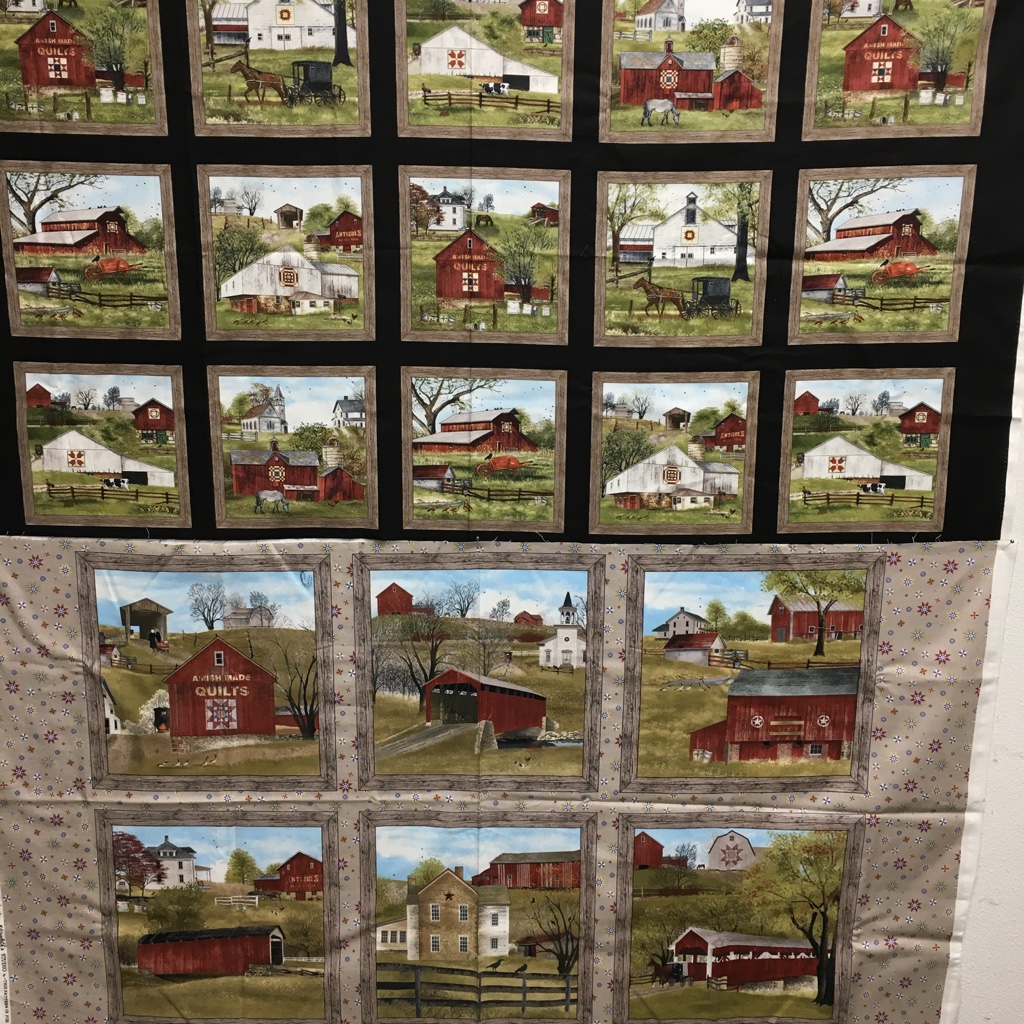
#1 Amish panel: I’ve cut some of the blocks apart … I’m just deciding if I want to cut them all apart … Then I need to add black sashing …
#2 July Island Batik project … it’s a secret for now!
Quilting:
#1 Mystery Quilt … coming soon! This will be a mystery quilt that you can do over the summer. I’m still writing the pattern, but I think there will be around 10 clues. (This mystery was originally going to use fat quarters, but I’ve changed my mind and have gone in another direction … so it’s no longer called the “Bunny Fat Quarter Mystery.”
Stash Report

The backing of Story-less Improv used 1 yard as did the “Follow Your Own Path”
- Fabric Used this week 2 yards
- Fabric Used this year: 60 yards
- Fabric Bought this week: 0 yards
- Fabric Added this year: 24 yards (my husbands amounts as well)
- Net Fabric used 36 yards
- Husband’s purchases: 0 yards (which are added into my total amount of Fabric added this year). For those of you who don’t know … my husband often buys more fabric than I do … so, I’m keeping track! Unfortunately, he doesn’t sew!

Stitchin’ Time

I’m aiming for at least 30 minutes a day.
I have stitched for over 30 minutes each day
- January – May– 150 / 150
- June – 6 / 6
- Percentage = 100 %
For more Stitchin’ Time, you can check out Kate’s blog: Life in Pieces
TO DO

Chris from ChrisKnits is hosting it “To Do” every week. You can check out her blog HERE.
Last week:
- Follow Your Own Path: bind √ done
- SPEED DATING: ADD FACING GAIL: QUIT PROCRASTINATING!!! √ done
Bunny Fat Quarters: Summer Mystery Quilt: finish writing the pattern partially done- June IB project: finish √ done
- Do NOT be distracted by any SQUIRRELS! √ done
- Tidy & clean studio for 30 minutes √ done
This week’s list:
- Summer Mystery Quilt: Quilt & Finish writing pattern
- Amish Panels: Finish cutting out and maybe get it assembled
- Do NOT be distracted by any SQUIRRELS! I NEED this continual reminder!
- Tidy & clean studio for 30 minutes


One who sleeps under a quilt is covered by LOVE!
Happy Quilting!
Gail
******************
Linking to:
- Tish @ Tish’s Adventures in Wonderland
- So Scrappy @ Scrap Happy
- Sunday Stash @ quiltpaintcreate
- Oh Scrap @ Quilting is More Fun than Housework
- 15 minutes to Stitch @ Life in Pieces
- Frédérique @ Quilting Patchwork Applique
- Monday Making @ Love, Laugh, Quilt
- Design Wall Monday @ Small Quilts and Doll Quilts
- To-Do Tuesday @ Chris Knits

I love the blue/black/white combo! I learned how to do a facing in an embroidery class — she demo using Heat N Bond in the purple bag– the mini is still hanging in my sewing room — so far so good!
LikeLiked by 1 person
Hi Karla,
Another blogging friend also suggested using 2 sided fusible to hold the facing down … such a fantastic idea!
LikeLiked by 1 person
A great week on the progress front, two finishes! Congrats on conquering the procrastination. That’s always a hard one to deal with. Happy stitching this week.
LikeLiked by 1 person
Thanks, Kathy! Yes, procrastination does live in my life … I’m not too fond of it! 🙂
LikeLike
Congrats on the finish!
LikeLiked by 1 person
Thanks, Donna!
LikeLike
Hi,
Love your Improv Quilt, it’s awesome! I really like your colorful
Arrows quilt, so pretty. Have a great day!
LikeLiked by 1 person
Thanks, Sherrie! Both were fun to do! Even if I did procrastinate FOREVER with the facing! 🙂
LikeLike
Congratulations on the beautiful finish! I love the facing finishing method, and I agree, it’s easy ;))
Thank you for linking up with “Patchwork & Quilts” link party!
LikeLiked by 1 person
Hi Frédérique,
I was shocked at how EASY the facing was to do!
Thanks for hosting the linky party!
LikeLike
Great job on the facing! It is a nice way to finish and I love them for wall hangings!
LikeLiked by 1 person
Hi Kathleen,
Thanks! I agree it’s a great way to finish a wall hanging!
LikeLike
Just checked out the video….Oh my how easy can it get!
And with hanging pockets yet!!
Thanks for sharing….
LikeLiked by 1 person
I know, Becky!!! I don’t think it can get any easier! 🙂
LikeLike
Hi Gail! So glad that you have faced the facing! Your quilt looks fab. It is definitely one I would enjoy hanging in my home should you ever tire of it! ~smile~ Roseanne
LikeLiked by 1 person
Hi Roseanne,
I doubt that I’ll ever tire of it! it’s my first real improv piece … a good piece to show what I learned!
However, I’ll put a note on it that it can go to you … in like 30 years … 🙂
LikeLiked by 1 person
HAHAHA! I wouldn’t expect that you’ll EVER tire of it. ~smile~
LikeLiked by 1 person
Enjoyed your post. I may try that facing technique one day. I’m not too fond of handwork either. It’s too slow. LOL I have to really keep an eye on those squirrels too. I can’t figure out how the squirrels can get started and finished quicker than my UFOs!
LikeLiked by 1 person
Hi Pamela,
Not only is handwork SLOW … it literally hurts after about 10 minutes!
As for the squirrels finishing faster than the UFOs, I’m sure it has sometime to do with how fast they run! 🙂
LikeLike
I wouldn’t have thought to use glue for the facing. I’m curious if it will hold, too. Facings are super easy. The only thing I fuss over is getting the facing crisply rolled to the back.
LikeLiked by 1 person
Hi Wendy,
So far the glue is holding … but it’s only been a couple of days … we shall see! 🙂
LikeLiked by 1 person
For that facing – take some thin strips (1/2″) of fusible web and fuse that facing down. If you never plan to take it off or sew through it, Heat ‘n’ Bond has an UltraHold that will probably hold for a lifetime or more.
LikeLiked by 1 person
Excellent idea, Gene!!! I actually have some “hem” tape that’s 1/2″ wide … if the glue doesn’t hold, I’ll be pressing it into place! 🙂
LikeLike
If you should ever want to make a facing again, I highly recommend a you tube with Joe Cunningham. It’s very clear and, while there is hand sewing, the result is really good. I really like the way your black and blue wallhanging turned out, especially the quilting.
LikeLiked by 1 person
Thanks Marianne! I’ll keep that in mind! The quilting is pretty simple … walking foot, organic straight lines!
LikeLike