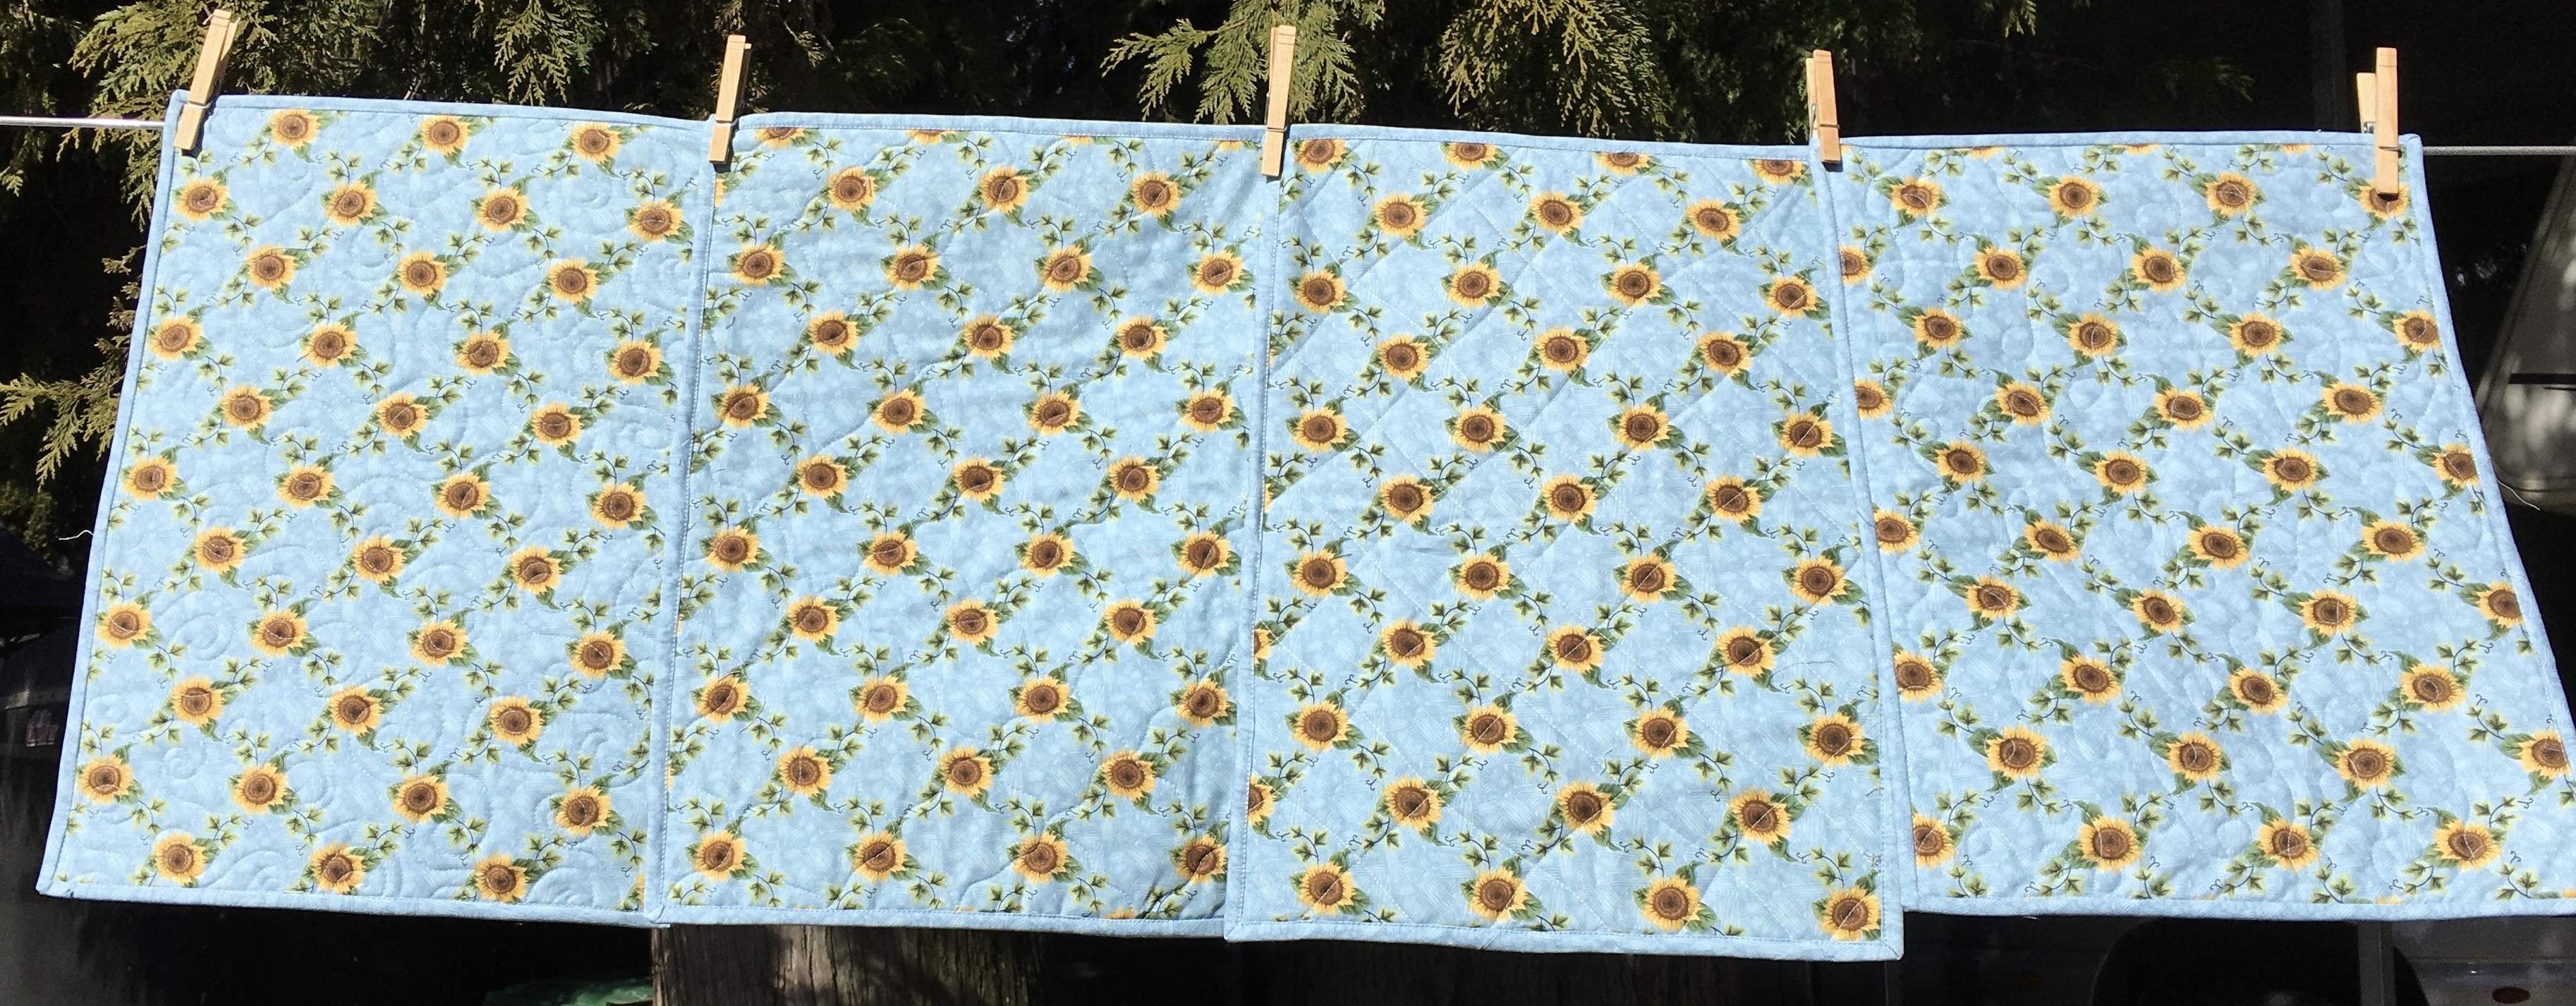
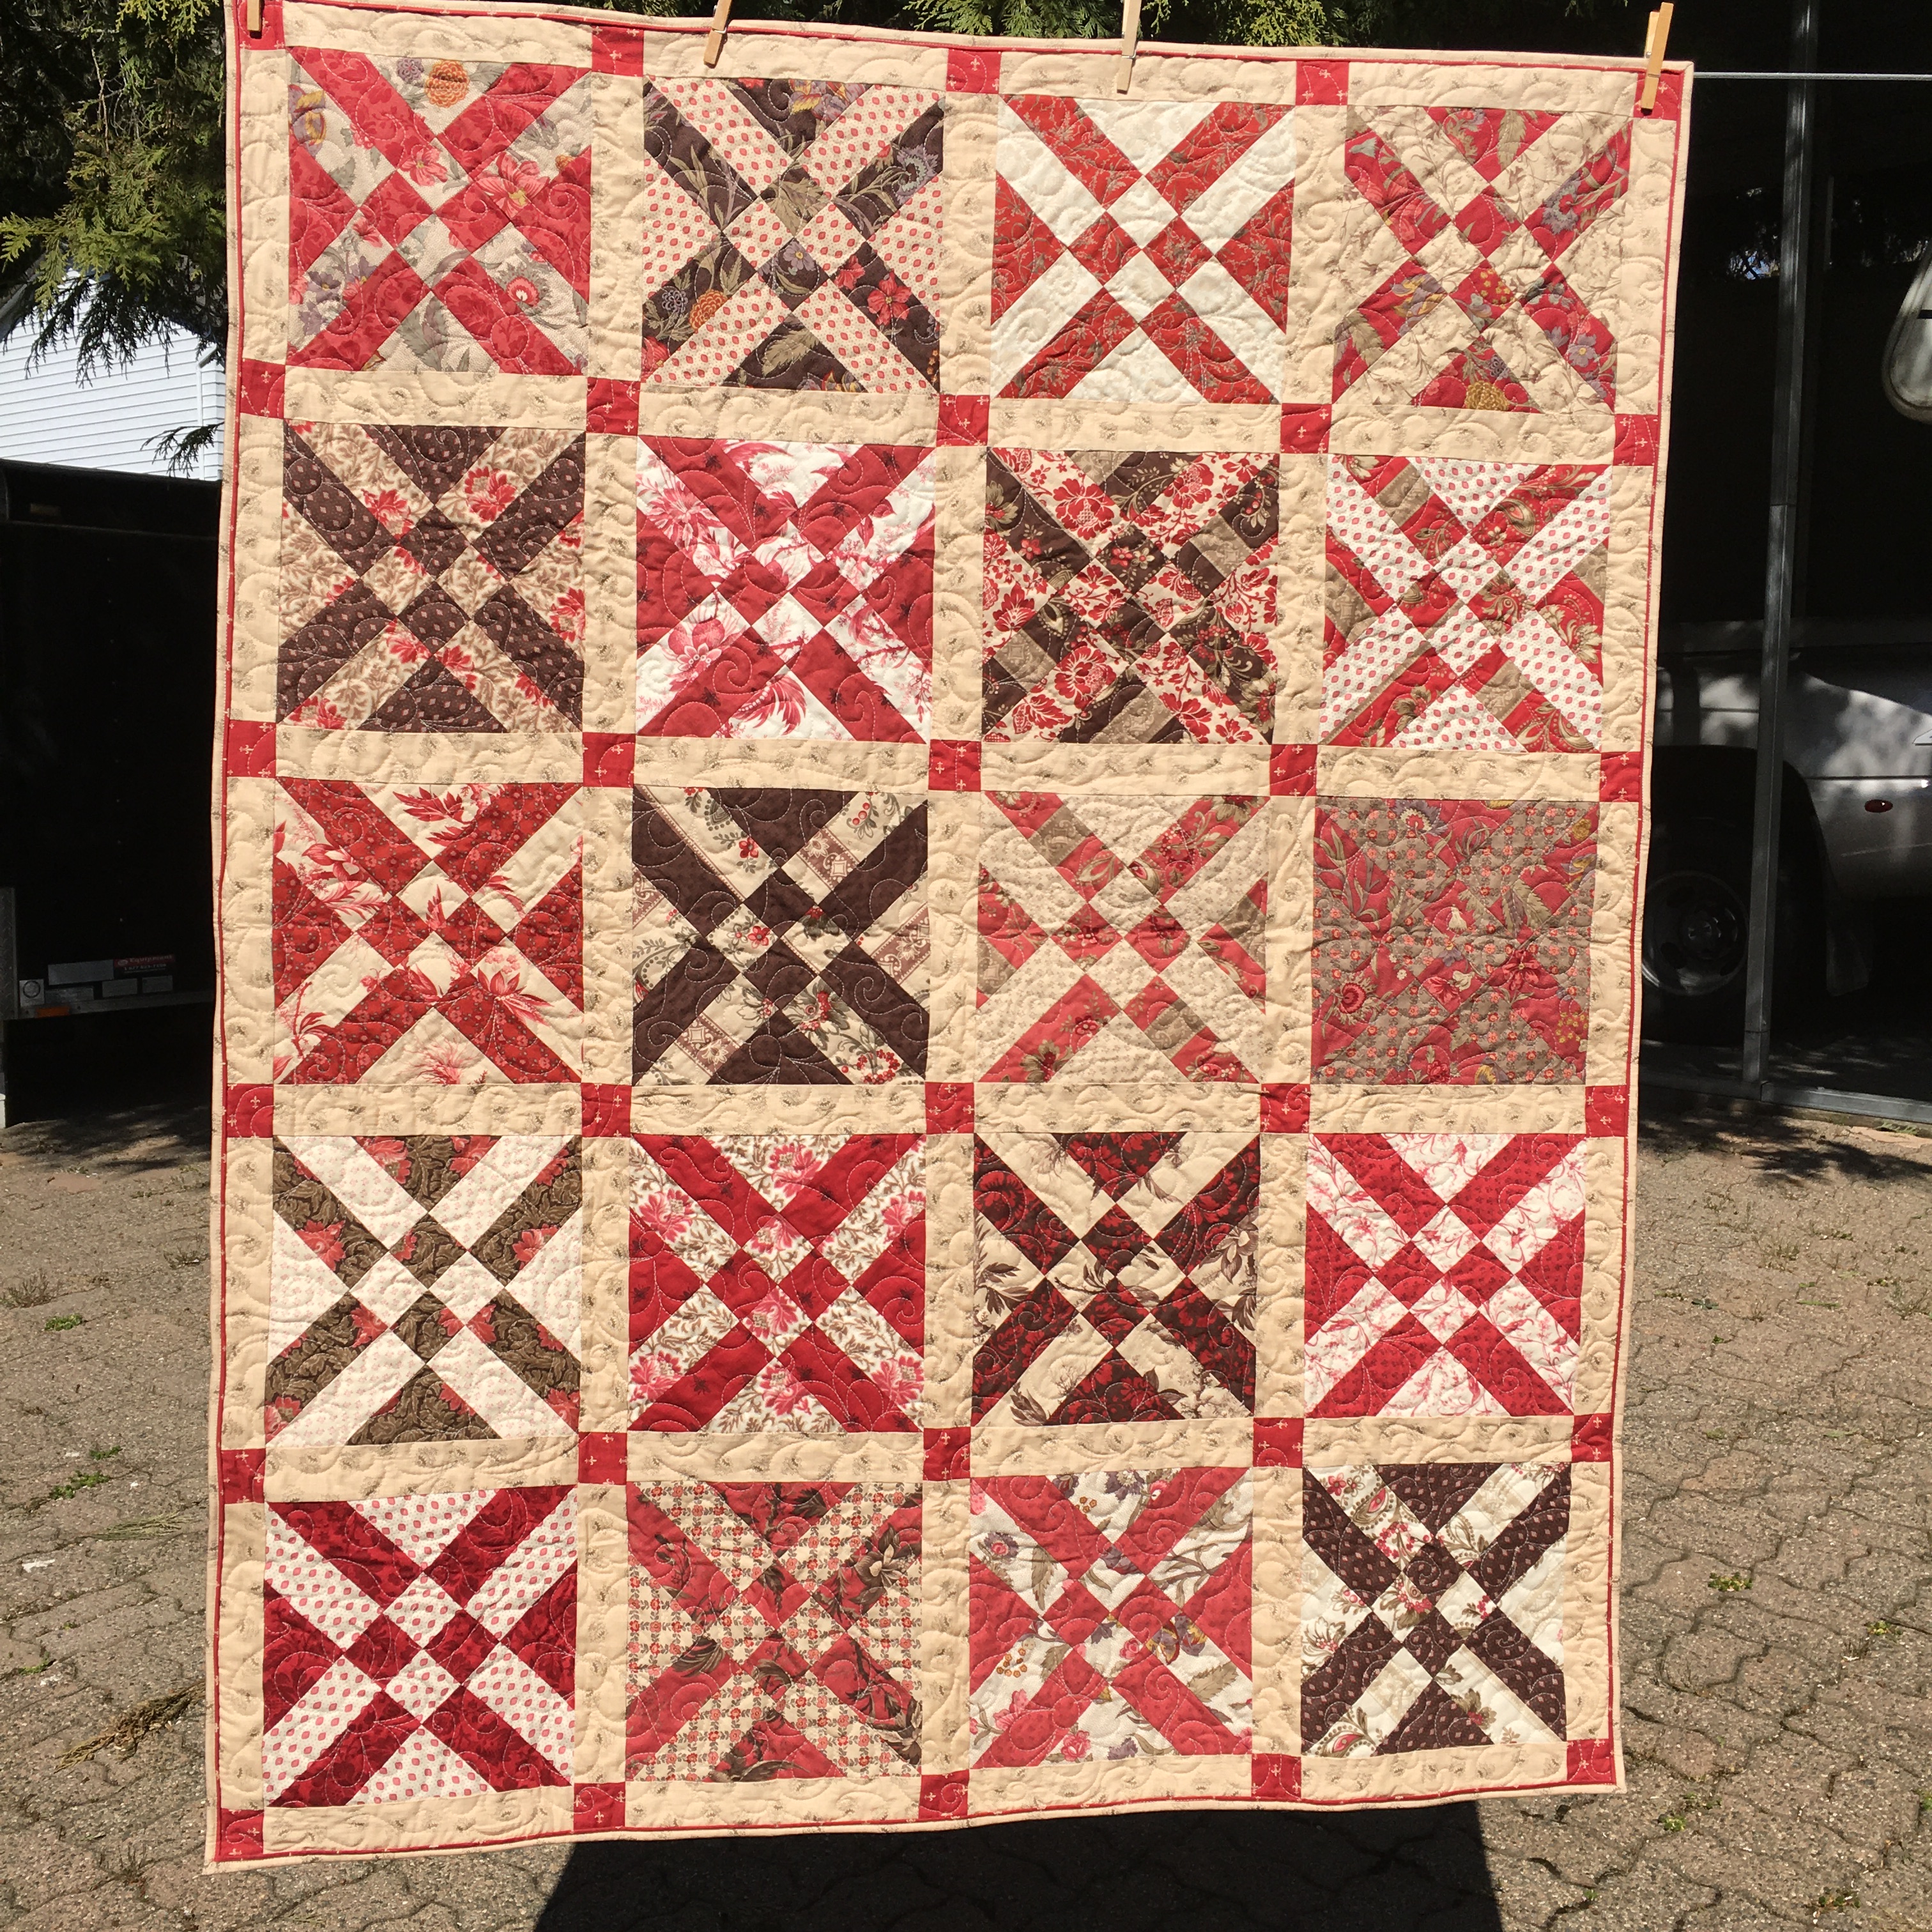
I haven’t finished any UFOs this month … Scrappy Repro is close … but it’s still a UFO and it’s still NOT finished.
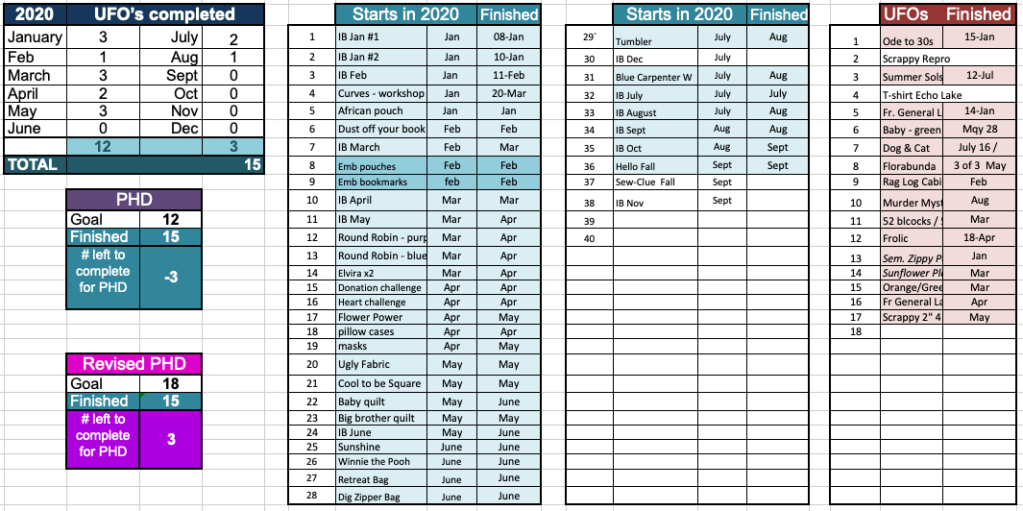
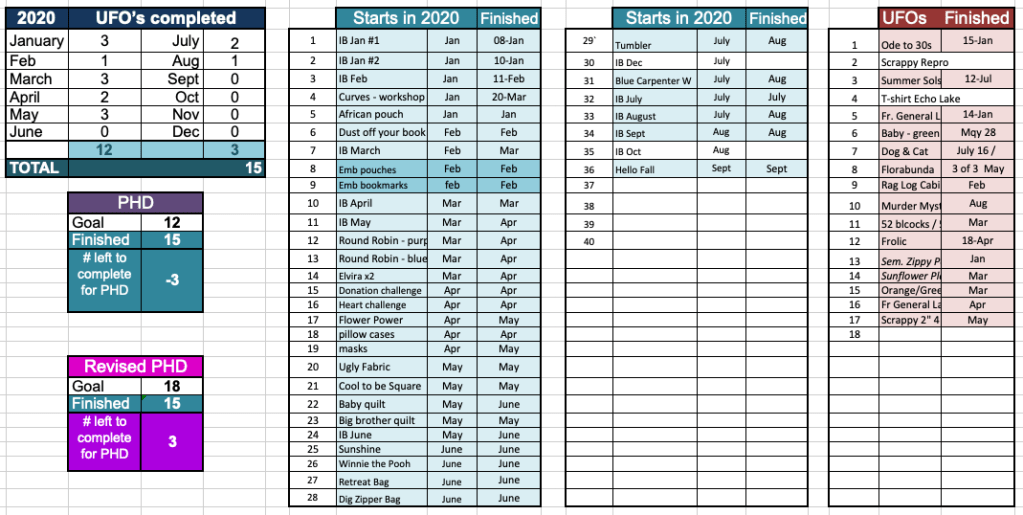
Here’s a recap of the UFOs I’ve completed this year! There’s a total of 15, but some of them turned into 2 or 3 quilts (Dog/cat and Florabunda) … but they counted as 1.
New Starts
I’m hosting a mystery quilt for our guild … so of course, I can’t show you that until they have all the clues.
A couple more Island Batik projects … which I will show you when the time is right!
“From the Heart” blog hop is later this month, and that project is still a WHIMM (Work Hidden in My Mind)
I was going to link up to Cheryl at Meadow Mist Designs for my Favourite Finish for September. At the time this is going live, I don’t see her link … I’m going to post it anyways and will link up when it’s available!
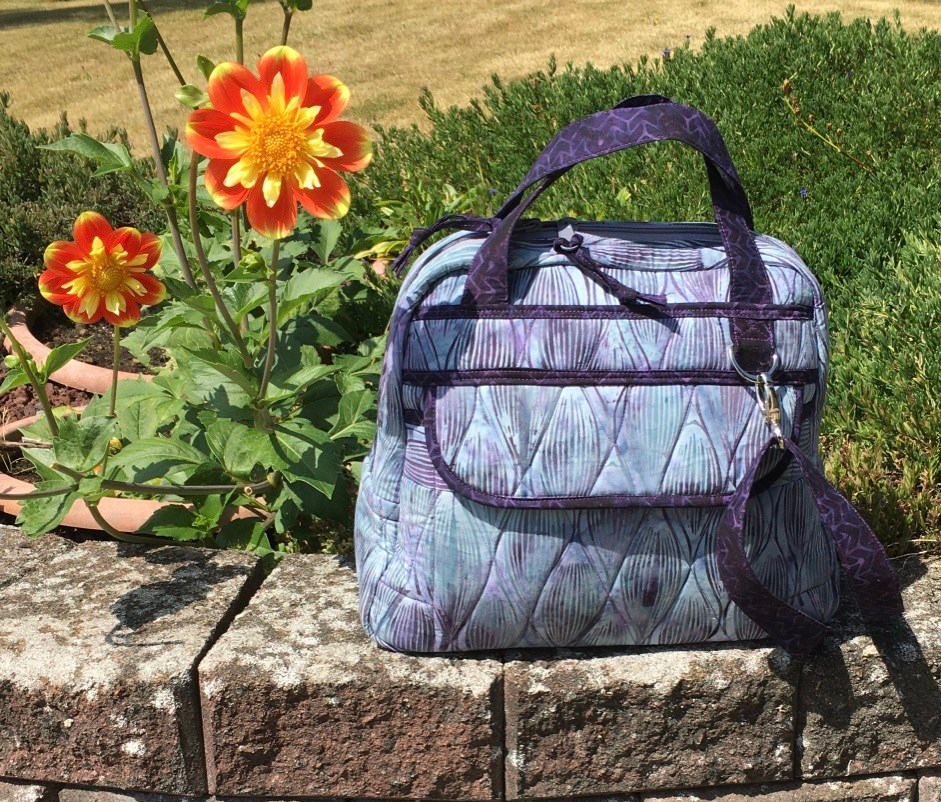
This purse, pattern byAnnie, is my favourite!!! I also think this is my favourite purse EVER!!! I’ve been using it a lot! It has tons of pockets and I’m able to keep everything organized! You can read about it HERE. This purse was made for the Island Batik blog hop “It’s in the Bag.”
I just feel like I haven’t gotten a lot done this month … but that is probably because I was away for almost 2 weeks!
3 Housekeeping / Updating things
First
Did you see my post about when we were visiting friends who live off-grid in the wilds of British Columbia? I showed a picture of a quilt being made by one of the girls. I thought she was at least 14 or 15 … and it turns out she’s actually 13!!!! WOW!! Oh to be able to quilt at that level, using scissors (no rotary cutter) is amazing. You can see the post HERE.
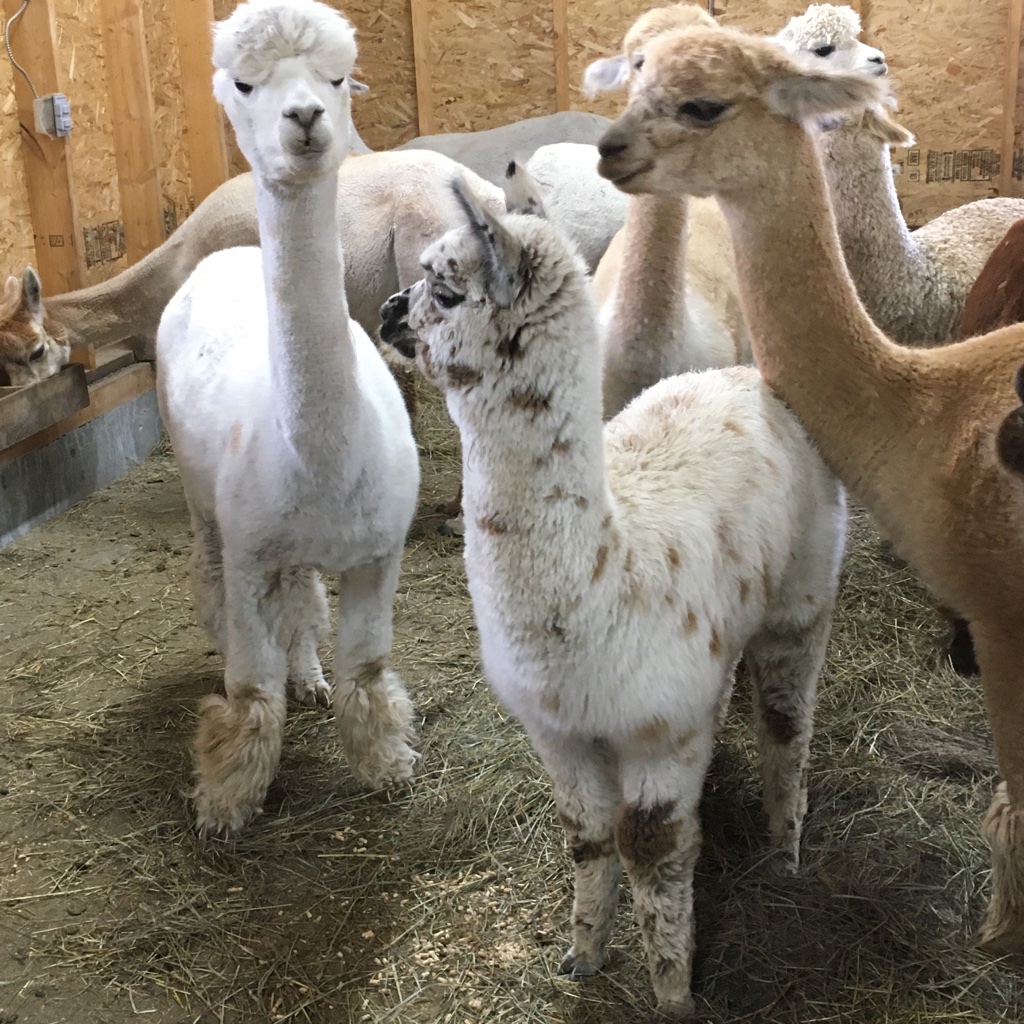
That’s right! Alpacas! We visited a dear friend, Carmen, I’ve known her for ages and ages … she has an alpaca farm … just a few alpacas! It was a ton of fun! Her farm is called Prairie Spirit Alpacas,
Every single alpaca has a name! I can remember a few of the names, but Georgia is the only one I can identify! She’s the one with the spots on her. We were in the barn and it was feeding time for the gals and young gents that need extra food.
Each one has a different face and expression! I don’t think they liked me very much – many of their ears were back. And some of them looked at me as if to say, “who are you?”
I hope you enjoy the slide show … and can you pick out Georgia??? And to make this about quilting … look at all the various neutrals in their fleece!
The alpaca fleece is very soft – especially from the young. One thing I love about alpaca fleece is that it is hypoallergenic. AND, it’s warmer than sheep’s wool. Now if you’re interested in trying any alpaca products, from Prairie Spirit Alpacas, put “Gail” in the purchase code and you will receive a 10% discount! I’ll be putting in an order for some socks for my cold feet!
Ah yes, shopping. While we were visiting my sister in Edmonton, we just happened to visit a couple of quilt stores!
Our first stop was Quincy’s Quilting in Leduc (just south of Edmonton). I bought a couple of rulers and no fabric. And yes, there was a lovely sleepy dachshund in the store!
At Lori’s Country Cottage I bought a few Studio 180 rulers and my husband bought some fabric … I didn’t buy any fabric. Do you remember in August, for the Island Batik challenge, I used the “Four Patch Square Up” ruler and how much I LOVED it? (see HERE) Well, I bought 4 more Studio 180 rulers. I can’t wait until I’m able to play with them!!!
Design Wall
Piecing:
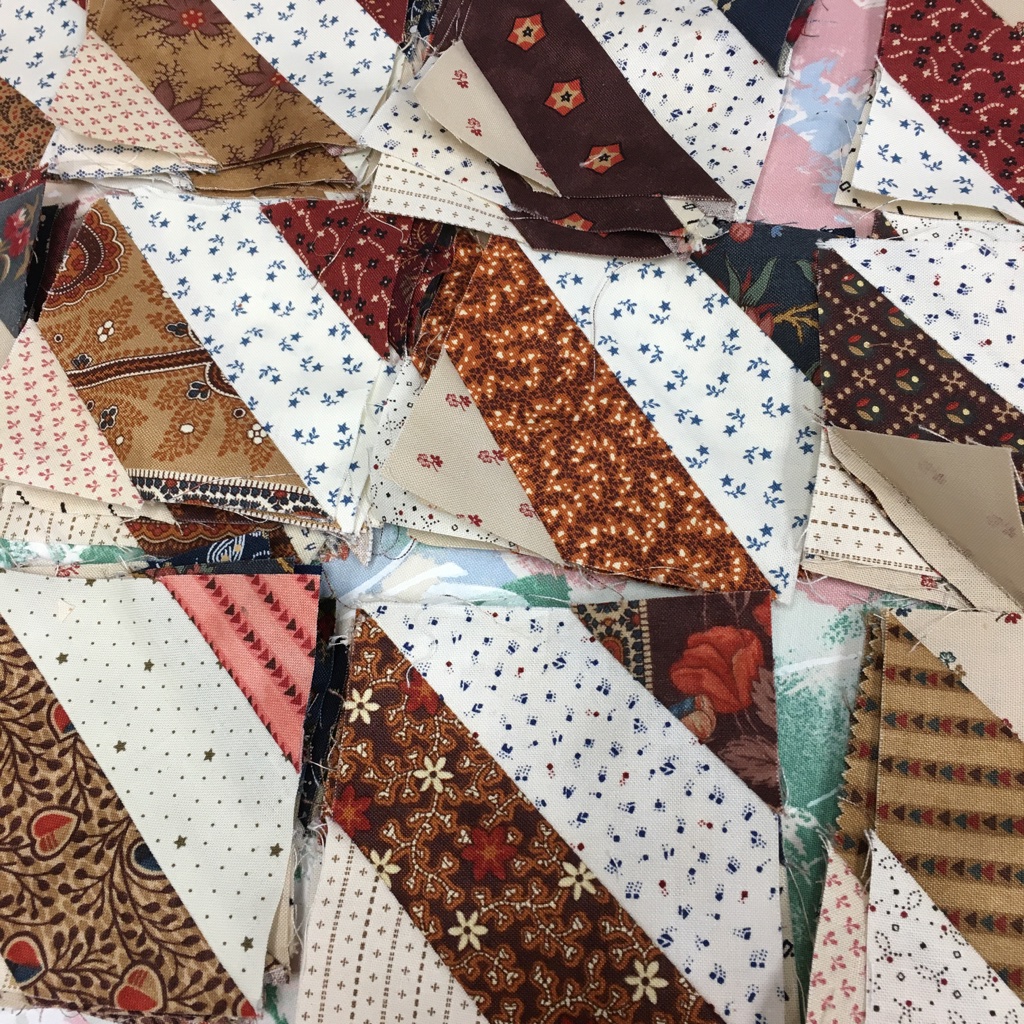
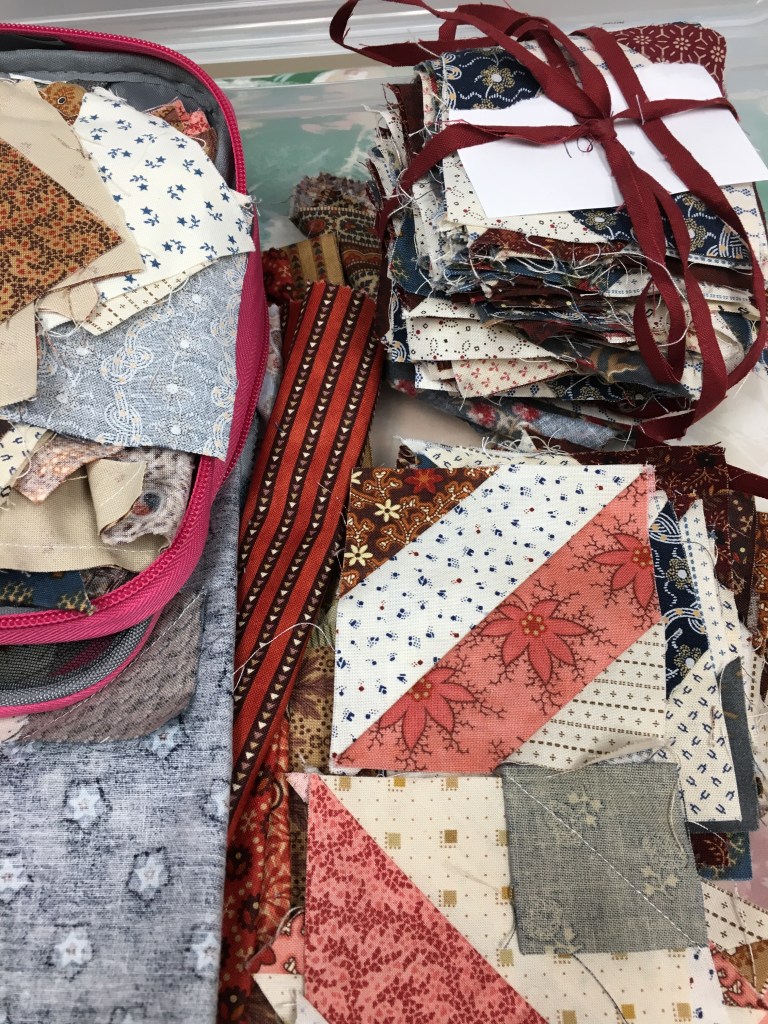
I finished all the blocks that I need for the Scrappy Repro quilt. And here’s some of the blocks – ready to be organized into groups to start sewing them together.
Quilting:
I’m working on October’s Island Batik challenge (sorry, no pictures, yet)!
Stash Report
No finishes, but my husband bought fabric from the sale area at one of the quilt stores. He rationalized it all. The red might be enough for a backing, the bug fabric will go in the quilt he’s planning (for me to make) and the green is to add to my stash because he thinks I need more green). I think he is an enable-er.
Fabric Used this week 0 yards
Fabric Used this year: 261 yards
Fabric Bought this week: 0 yards
Fabric Added this year: 35 yards
Net Fabric used 237.5 yards
Husband’s purchases: 11.5 yards
Stitchin’ Time
On Sept. 6, I stated that I had stitched 13 out of 13 days in September … that was SEW incorrect! Impossible to stitch for 13 days when only 6 days had passed … it should have read “6 / 6“!!!
I only sewed one day while we were away.
January – July: 239 / 243
30 min days/ Sept: 10 / 20
Total days in 2020: 249 / 263
Percentage = 94%
For more Stitchin’ Time, you can check out Kate’s blog: Life in Pieces
TO DO
I’m linking up to Roseanne & Sue’s “TO DO” Tuesday. Their blog is “Home Sewn by Us.”
2 week’s ago list:
Work on Scrappy Repro√ done
Welcome Fall project√ done
Work on Oct. Island Batik project √ done
Tidy & clean studio for 30 minutes. √ done
This week’s list:
Work on Scrappy Repro
Work on Oct. Island Batik project
Tidy & clean studio for 30 minutes.
No changes from the last report …
BLOG HOP
This is Week 3 of a delightful blog hop. So many projects that are not quilts, but are using Island Batik’s wonderful amazing fabrics! Make sure you visit the other Island Batik Ambassadors that are showing their byAnnie creations!
For your opportunity to win some AWESOME fabrics – a fat quarter pack of Urbanization or Nouveau Soul check out the Rafflecoper at Island Batik’s blog.
Yes, HOLIDAYS! We loaded up the camper and went to northern BC and then over to Alberta … I’ll tell you more about a few of the visits in future blog posts, but this is about our first stop …
Off Grid
We visited some friends that live in the wilds of northern British Columbia and they are off-grid. We had a wonderful time. They have a parcel of land and have homesteaded and … well, it’s just great. If you want to know more, visit their website or youtube channel and watch some of their videos …
An exciting part for me was Christina and her quilt. (I forgot to ask, but I think she’s about 14 or 15). She has an electric sewing machine (they have power from solar panels) and she is making a quilt for one of her sisters. This is the first quilt she has made. No rotary cutter … totally cut with scissors … What a LOT of work!!!
The pictures were taken with natural light from outside … Here’s a closeup of the piecing … I was in awe!!! Where the pieces are suppose to meet up – they are PERFECT!
Here is a picture of Christina – about to measure the width of the quilt because she wants to add borders to make it bigger.
I can’t wait to see the finished quilt!
It’s in the Bag Blog Hop
Week 2 of the blog hop is finished! What an awesome week with many wonderful bags! To see all the bags, go to this POST and follow all the links.
Go HERE to have an opportunity to win some AWESOME Island Batik Fabric!
I’m talking about Left-overs in the sewing room … A lot of times, fabric that is left-over gets added into the stash … this time … something different …
I had quilted fabric left over from when I made the Bowl Me Over 2.0 bag by Annie. See HERE. Just a few little strips … nothing much really … but …
I used a few of Annie’s wonderful tips and made this little bag.
As you can see, there wasn’t one large piece of left-over quilted fabric, but I managed to piece it together to make this cute little bag.
The fabric is from the Deco Revival collection, there is soft and stable and I used Aurifil thread to complete the bag. Thank you Island Batik, byAnnie and Aurifil!
This month’s Island Batik challenge is to make a ByAnnie bag. There are SEW many bags to choose from and I choose the “Bowl Me Over 2.0” bag.
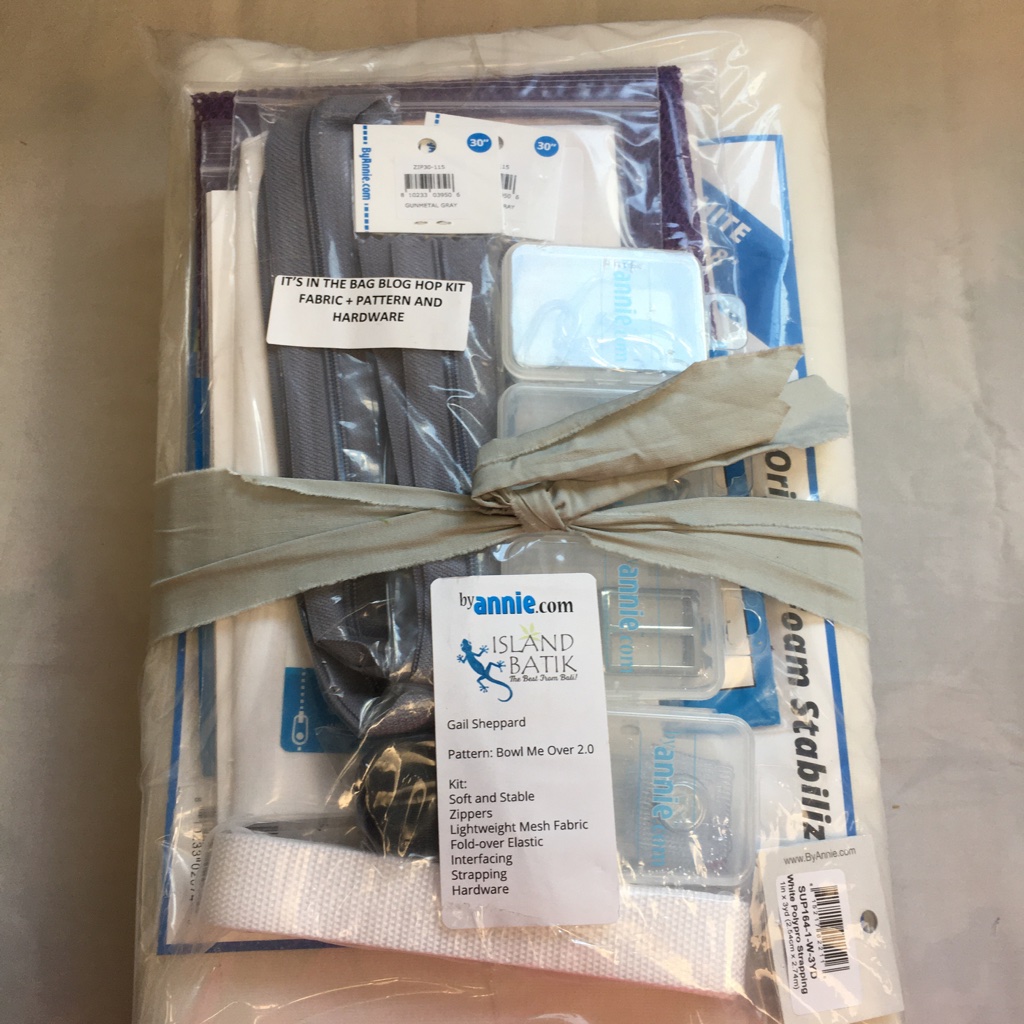
When I did my unboxing video from Island Batik in July, the kit to make this bag was in the box. (You can see the video HERE.) Annie had picked out the Island Batik fabric from the Deco Revival fabric collection. Everything to make the bag was included: Soft and Stable batting, the hardware, zippers, mesh, elastic and webbing … Everything I needed to make the bag. There was also a coupon with the pattern to access the videos to assist in making the bag. Here are the fabrics from the Deco Revival collection that I was to use:
Deco Revival is shipping to stores now!!! It’s a wonderful line of fabric … can’t you just imagine all the wonderful bags and quilts you could make with it?
The Bag
Here’s a picture of the kit that was in my box!
When I make bags, I usually end up doing my own thing … but I needed to follow directions with this one.
Making the Bag
The instructions first told us to print out a sheet with labels on it to keep all of our cut fabrics organized. WOW!! Am I glad I did that! It helped a LOT!
Before I cut the coordinating fabric, I needed to decide what I wanted for handles. I choose Option 1 which gives me an over the shoulder strap along with short handles. It was fantastic to be able to choose how I would carry the bag! We all carry our bags differently and have our favourite ways!
I quilted the fabric with Soft and Stable (byAnnie) between 2 batik fabrics. The pattern suggested either straight lines or quilt as desired. Of course, I chose to do my own thing and quilted lines that sort-of followed the fabric. Aurifil #4225, a purple that came in my July box, was used for the quilting.
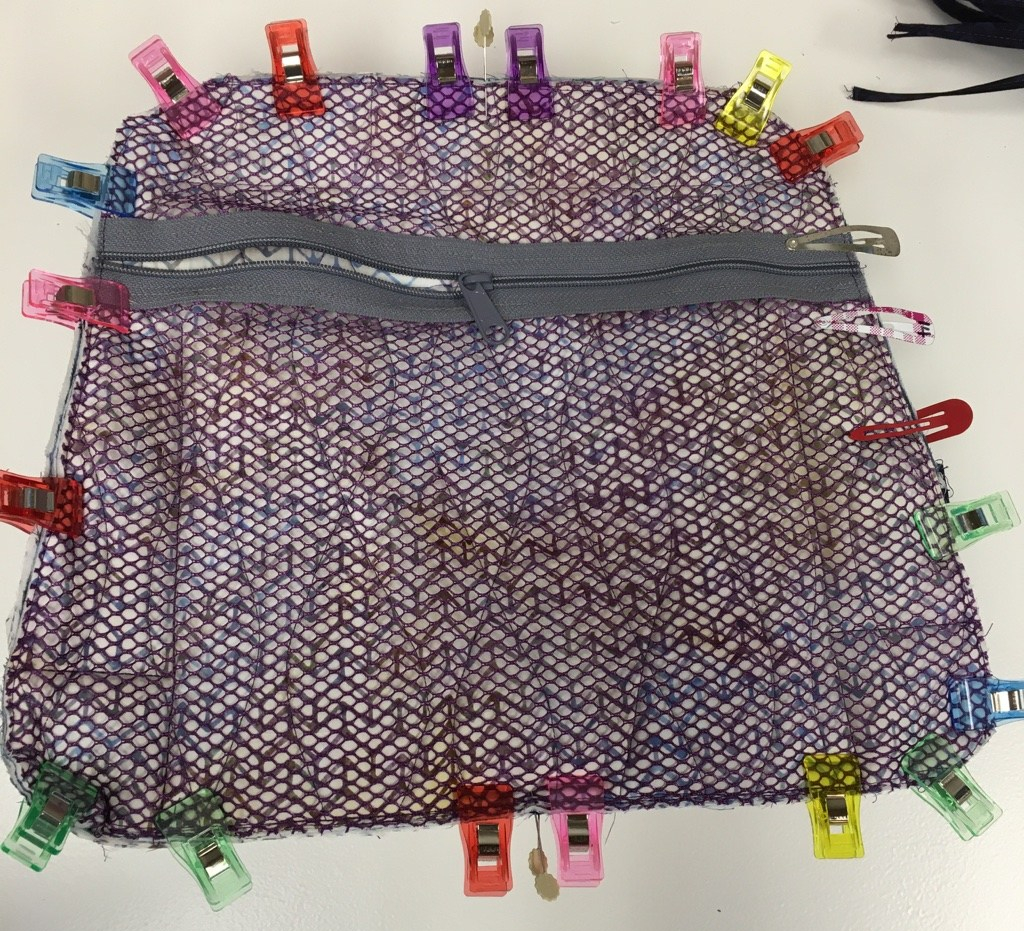
As I followed the cutting directions, I carefully labeled each piece, using hair clips to hold each label on. There are a LOT of pieces and the labelling was both a life saver and a time saver! A life saver because I didn’t become frustrated with which piece was which! And a time saver because I could identify each piece easily as I followed the pattern.
One of the inside pockets gave me the choice of using fabric or mesh. Well, since I had never sewn with mesh fabric before and I like the idea of seeing what’s in the pocket, I chose the mesh. For that pocket, I used Aurifil #2625 – Grey – to match the grey zipper.
As I followed the pattern, each of the components were made as directed.
Finally, I was able to put the bag together. Using clips was a great way to go. As you can see in the photo below, I used a couple of hair clips (on the right) because I had run out of the “cool” clips. The hair clips easily popped off. I obviously need to get some more “cool” clips!
Schmetz Super Nonstick 80/12 was used. It was the perfect needle, especially at the end when I was sewing through 6 layers of batik and 3 layers of Soft & Stable.
Then the bag was done!
The Front View … the flap at the front has a magnet closure and it’s nice and strong!
The Back View … there is a nice roomy pocket with a zipper.
The mesh pocket inside is large enough to hold my iPad!
The pocket with fold-over elastic is in 3 sections … will be perfect for my phone, reading glasses and a small notepad …
I LOVE it!
I had some fabric left over … SEW … I made a couple of coordinating masks using by Annie’s free mask pattern. The mask on the left was made with the alternate fabric for the inside pocket (where I used mesh). Annie’s mask pattern is a different from the usual pleated masks … there is a small pleat at the bottom which helps the mask fit better.
Questions:
Would I make this bag again? Absolutely! Even though I’m not a great bag maker, it was made and I’m very happy with it!
Was it hard? It was challenging for me. However, the videos that Annie provides for the difficult, or more challenging steps, made those sections a lot easier.
Did I like “Soft and Stable?” Yes. It was easy to use and it gives the bag fantastic body!
Was the mesh hard to put in? Absolutely not … Annie has a unique way (to me) of inserting zippers and it was easy peasy!
Do I have any suggestions for someone who is thinking of making this bag? Yes … go to ByAnnie’s website and make the free pattern, “Easy Does It.” I watched a lot of the videos for this bag as I was making my Bowl Me Over 2.0 and it helped tremendously.
Would I make another byAnnie pattern? YES!! I already have the patterns for “Running with Scissors,” “Take a Stand,” “Easy Does It,” and “Clam Up.” Obviously, ByAnnie’s patterns appealed to me prior to making the “Bowl Me Over 2.0” bag!
Disclaimer: All products used for this bag were provided by Island Batik and the industry partners: byannie, Aurifil and Schmetz needles.
BLOG HOP
Make sure you visit the other Island Batik Ambassadors that are showing their byAnnie creations! It’s a wonderful blog hop!
Yes! We Zoomed again … although it was only Terry and I quilting. Cousin Connie felt she needed to be outside in her garden and at the lake (can you blame her?) and my sister, Lynn was not feeling well, but she did visit with us from time to time.
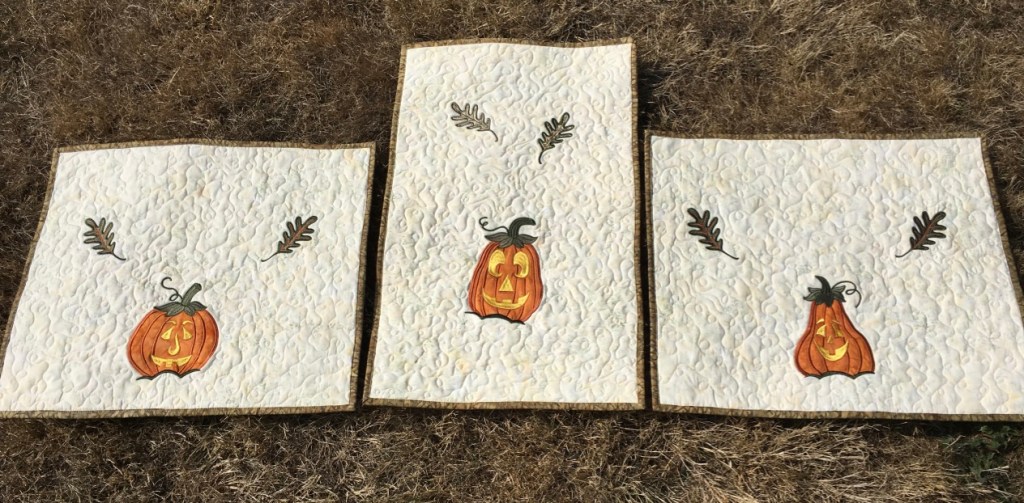
I finished my “Hello Fall” project! So you’ll see that during the “Hello Fall” Blog Hop … my day is Sept 22. And if you ask me, it’s just stinking cute!
The other project I worked on was the “Scrappy Repro” UFO … I managed to finish up all the blocks and decided on a layout where I won’t have to match seams. Yup, I know that’s being lazy – but I’m not totally in love with this project any more, so it’s just got to be DONE.
TGIFF is THANK GOODNESS IT”S FINISHED FRIDAY. A day where quilters around the world post their finishes … or their works in progress!
Some of you will be saying “but it’s still early on Thursday.” I know … but just think … in some parts of the world … Friday is almost over!
TGIFF is hosted by various bloggers … a different one each week. And it’s managed by a few very capable inventive quilters who send out reminders and pitch in when needed. If you want to host TGIFF, check out their website. (They will also help you to set up a Linky Party!)
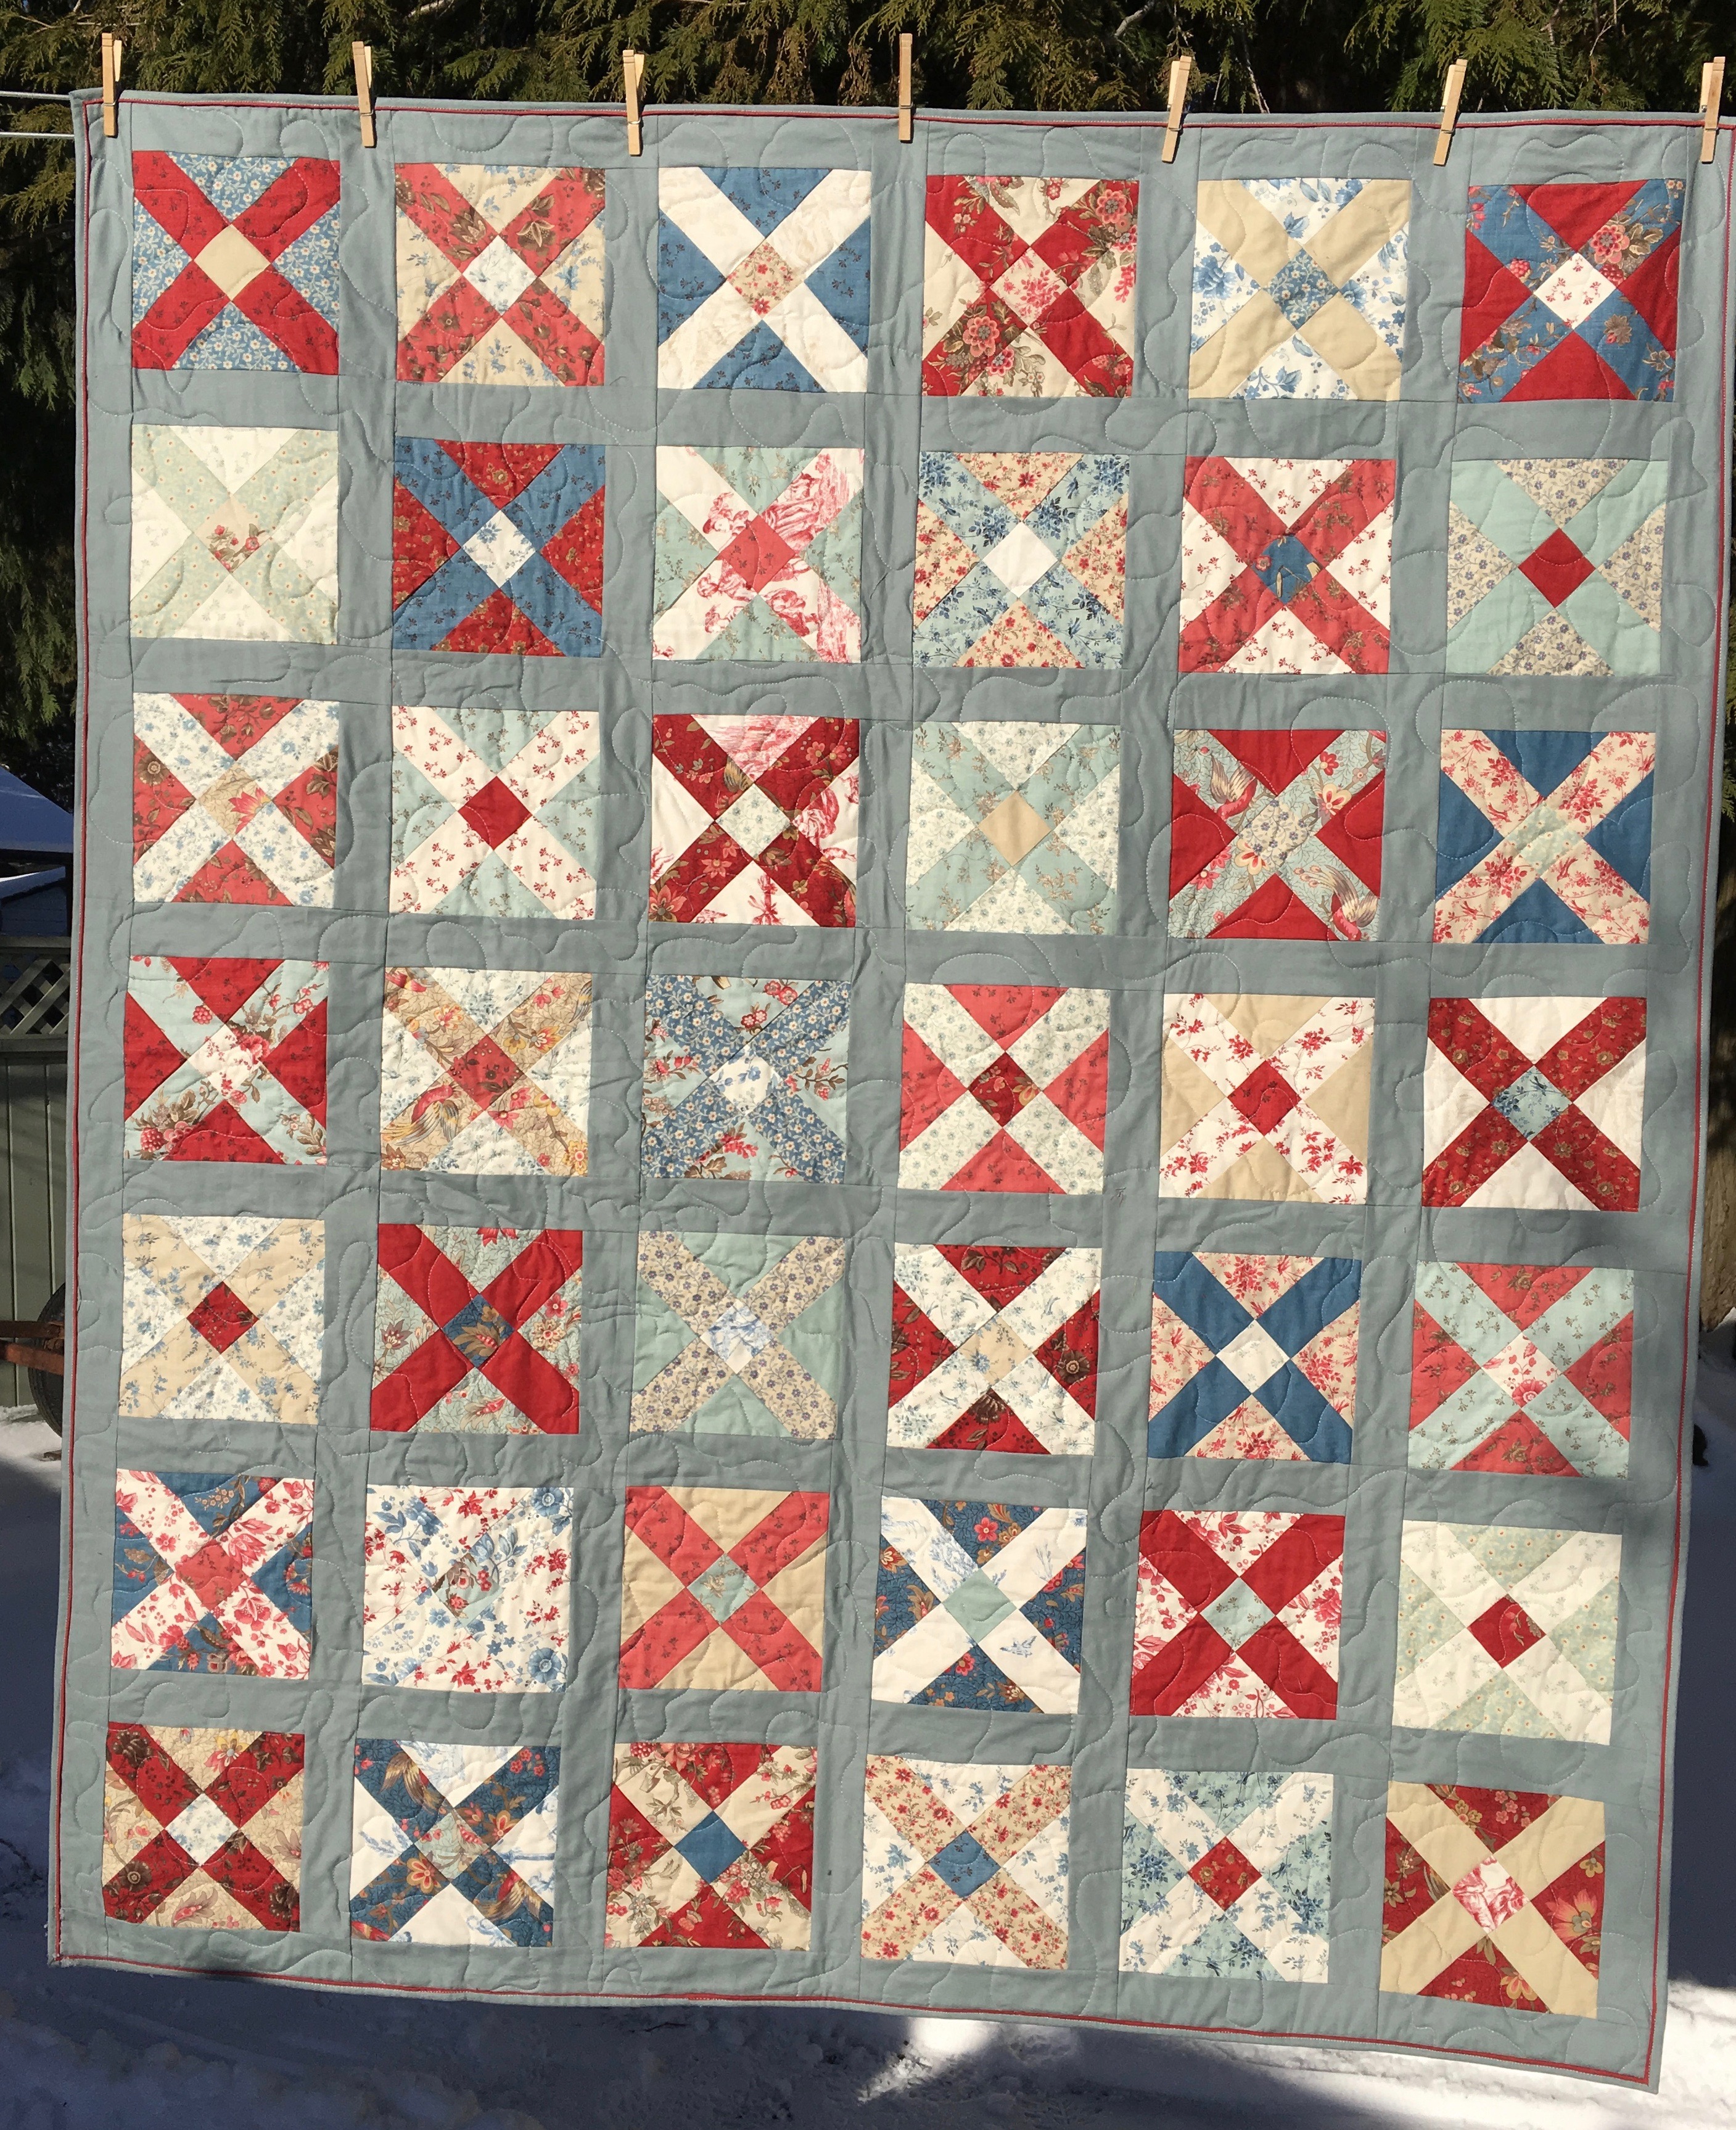
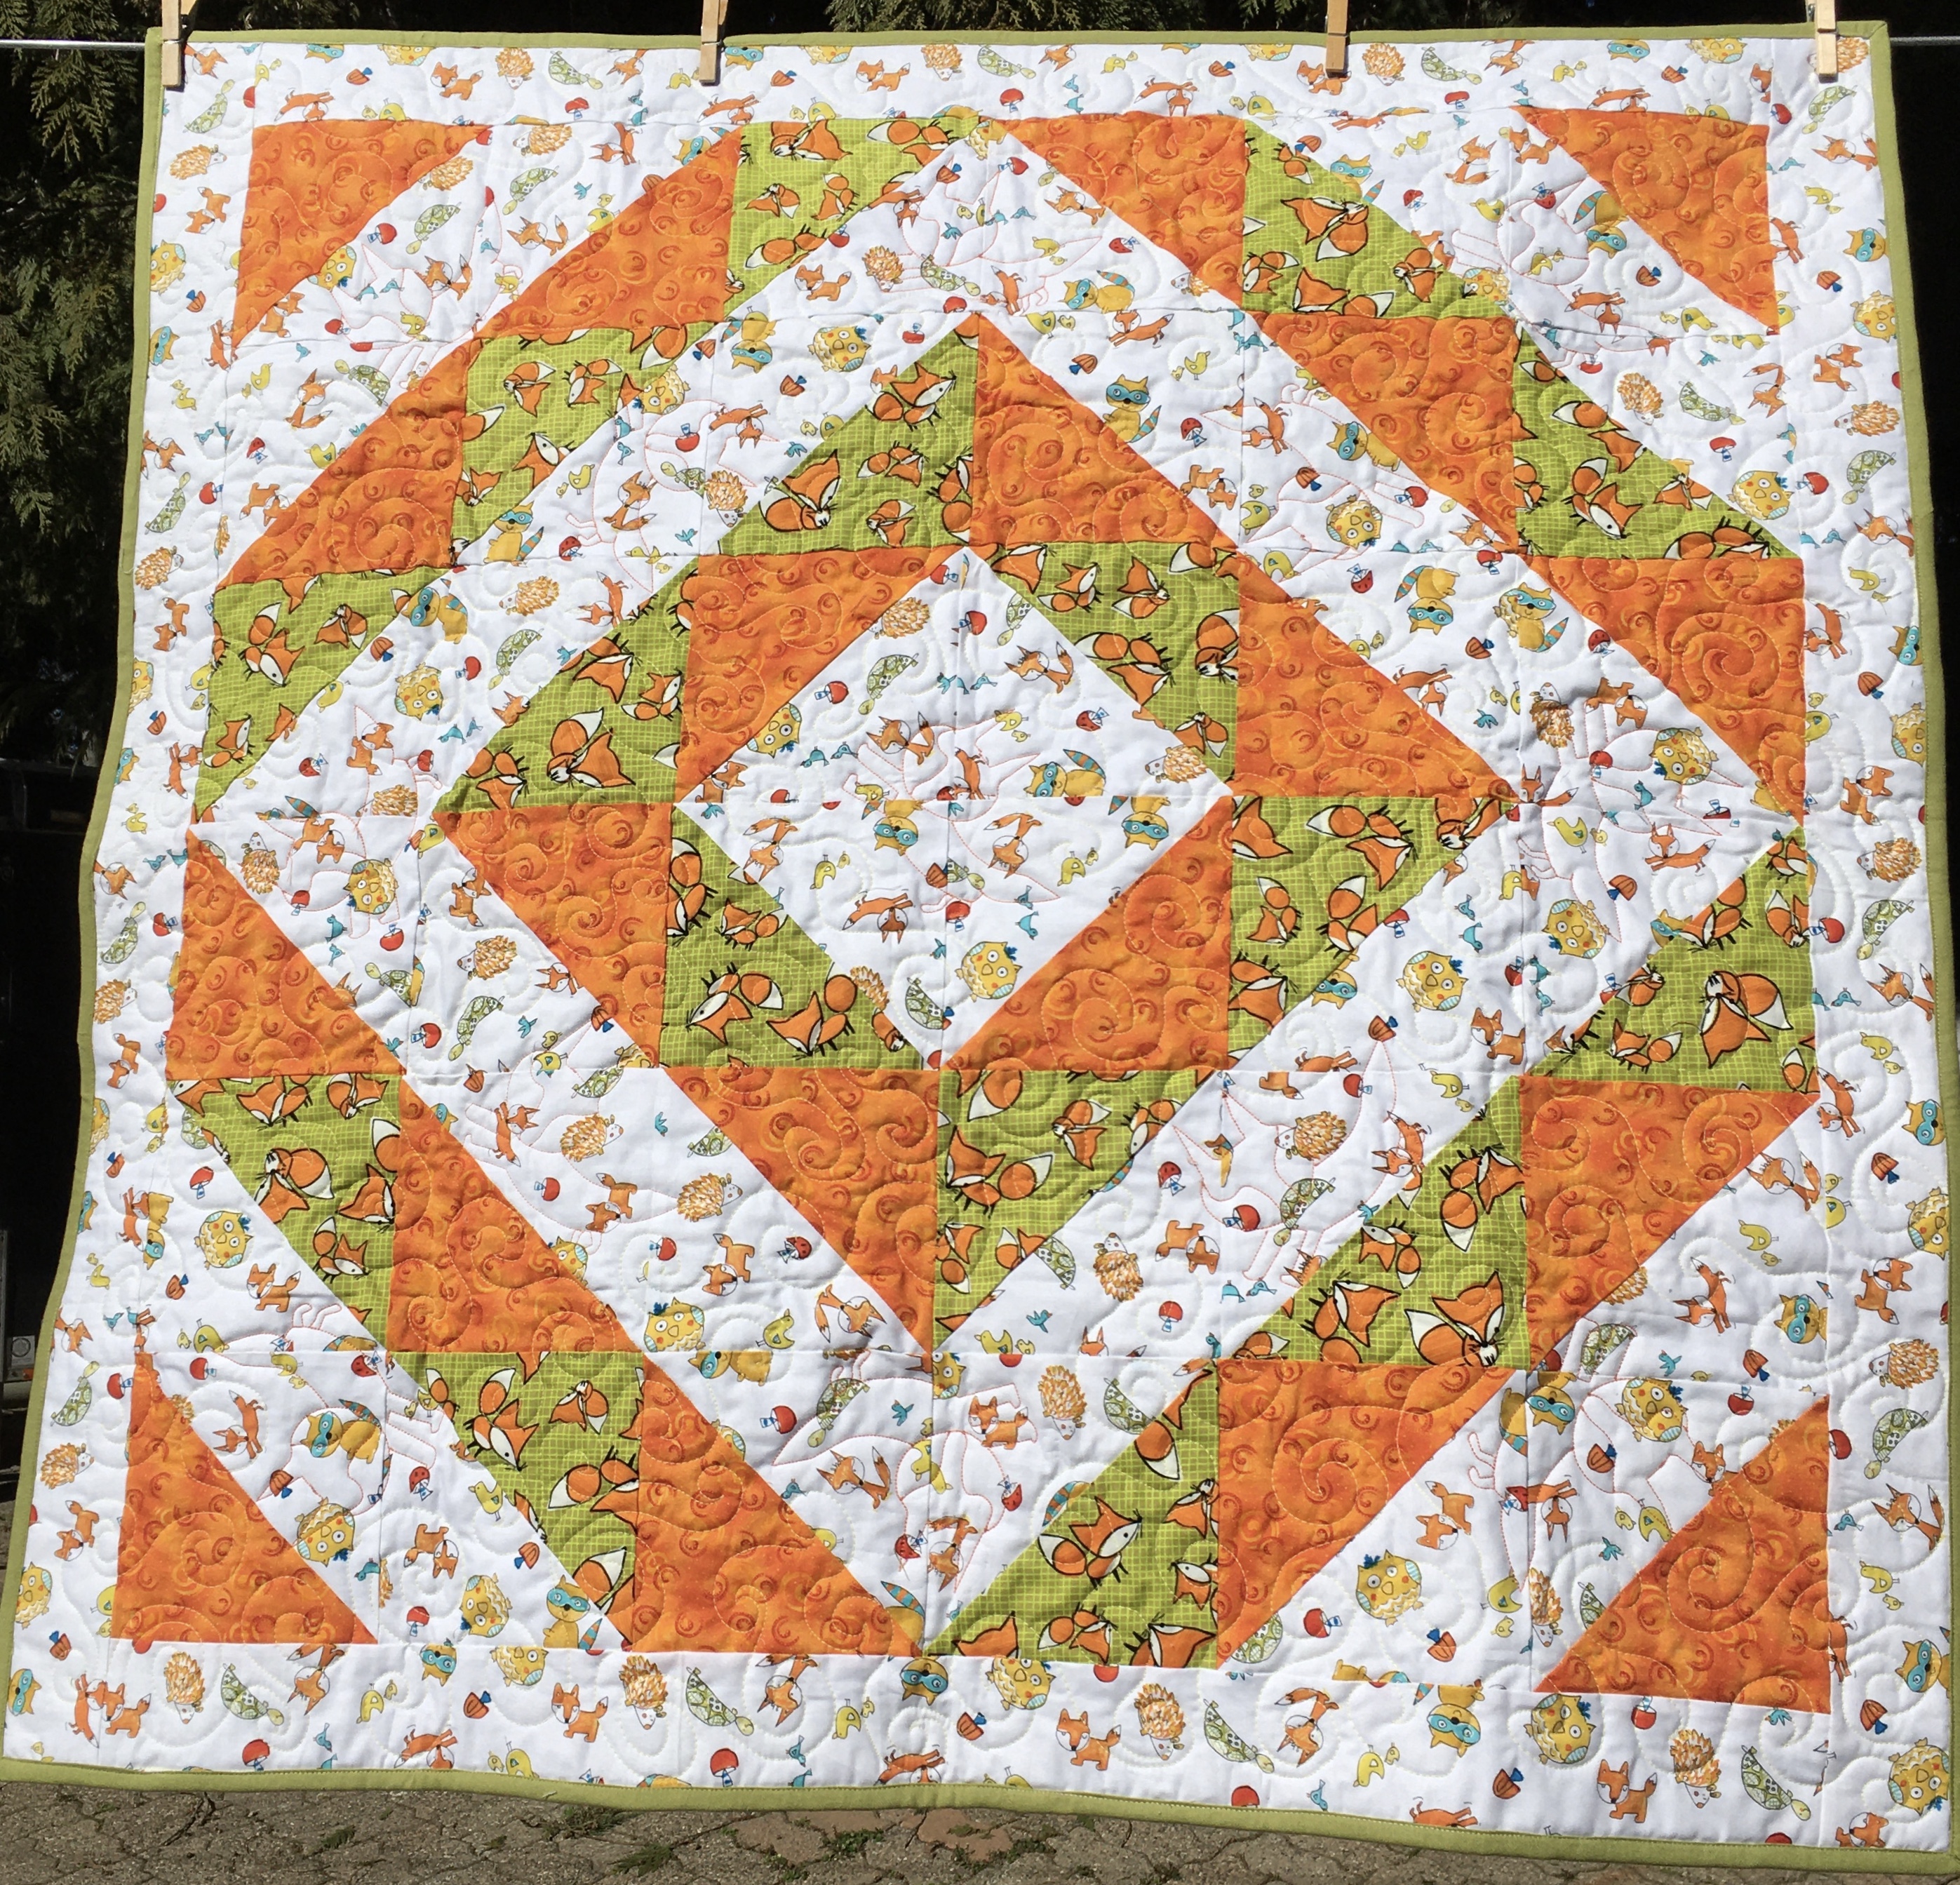
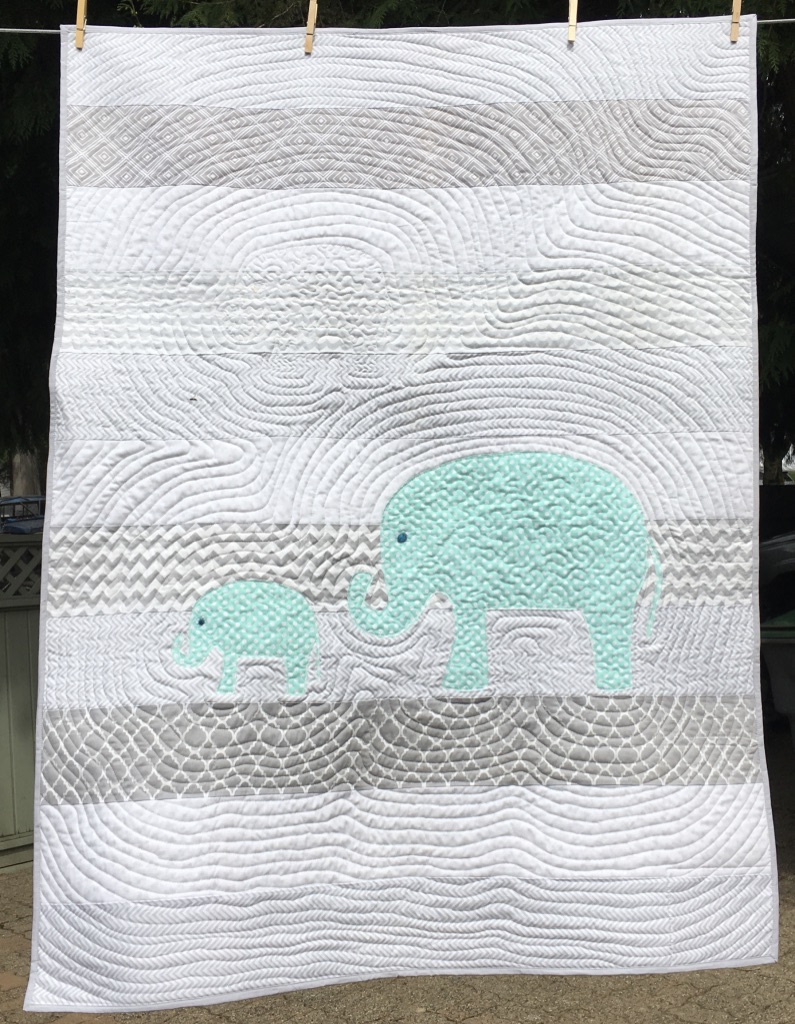
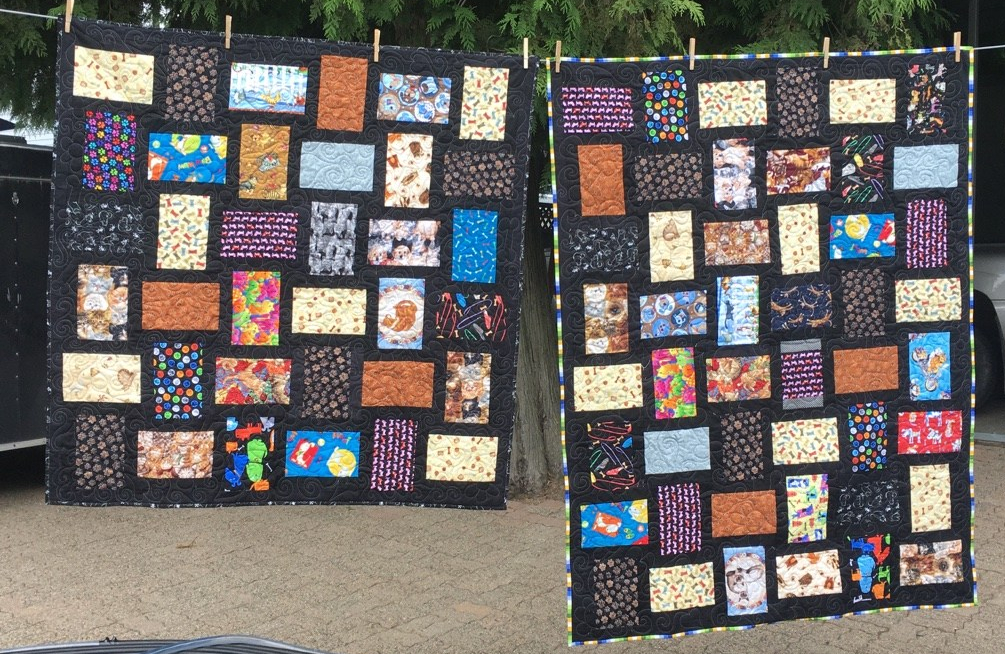
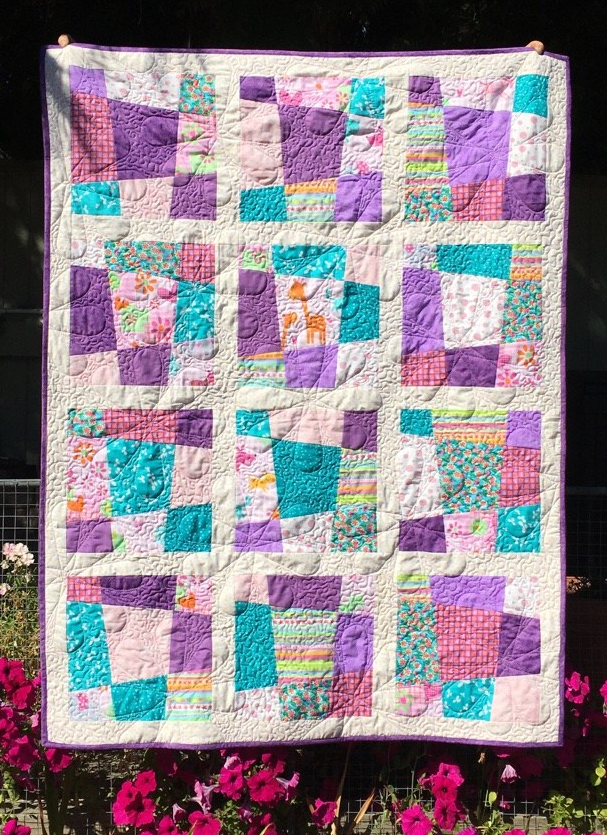
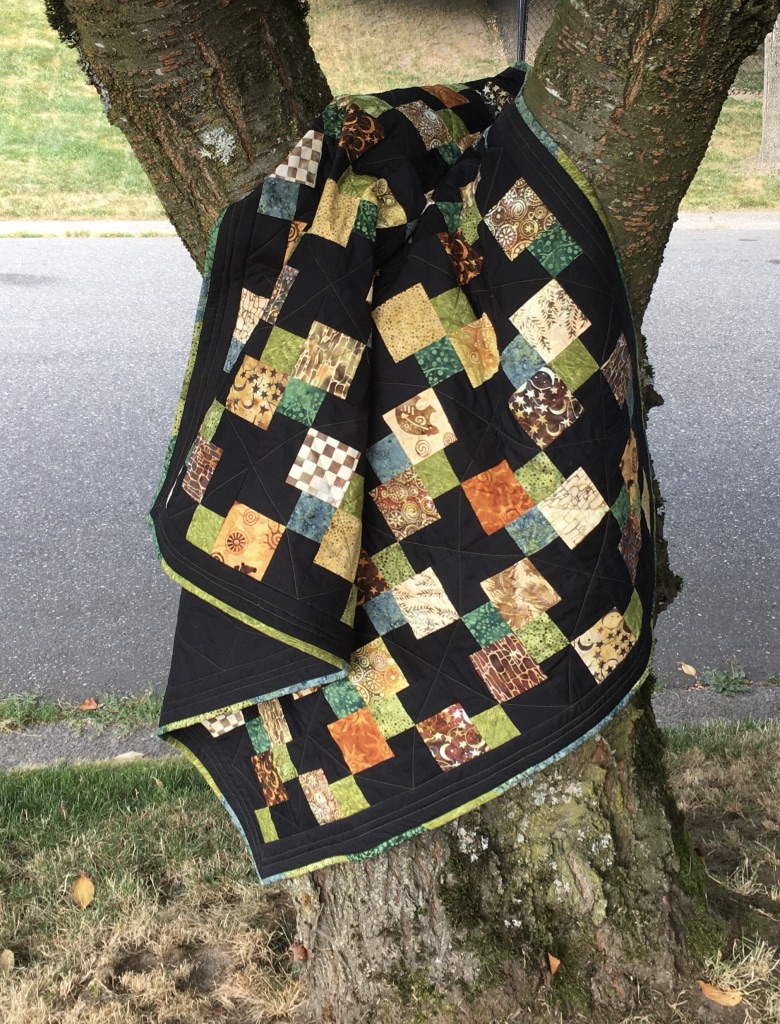
My finish is this cute quilt … it was in a pile of “to be quilted” and I had even forgotten to put it on my “New Starts in 2020” for my PHD program. That’s OK … it’s done now, even if it didn’t make it to the list!
The quilt is basically the pattern from “5 ways to use ugly fabric” youtube video. I didn’t care for the look when the blocks were finished, so I added sashing and borders. The quilt finishes at 44″ x 59″ and the fabrics were not what I’d call ugly … but it did use up some fat quarters that were hanging around.
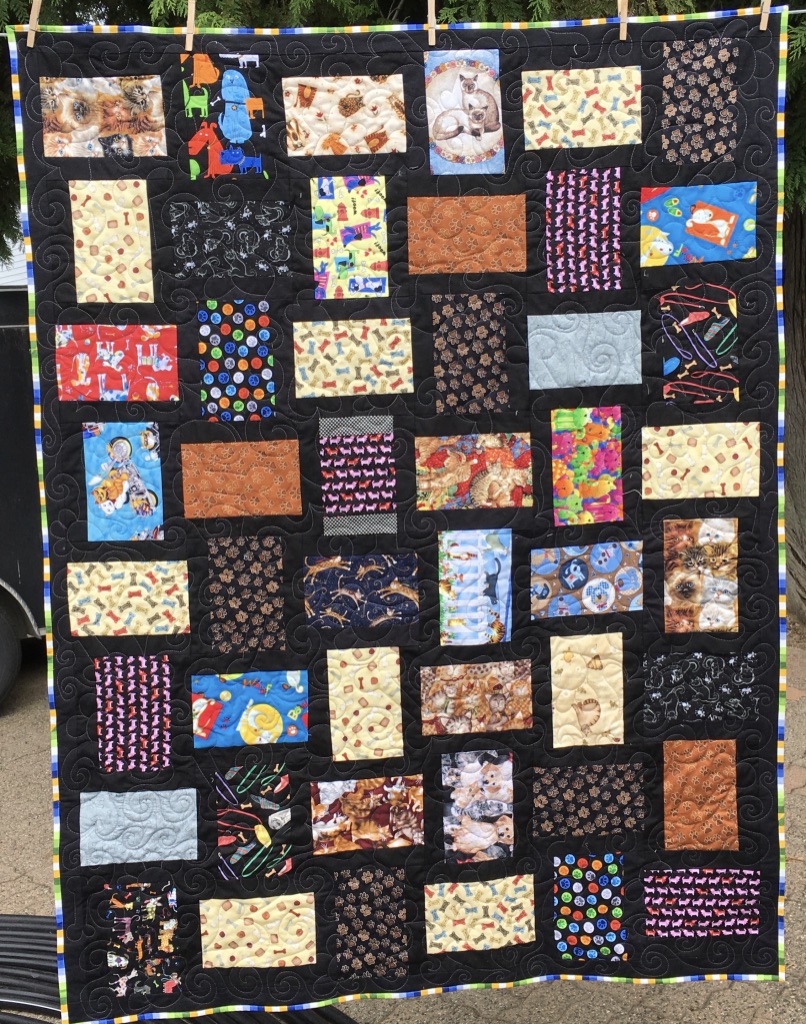
I finished UFO #15 on Sunday … YAY!!! You can read about it HERE. I have finished 3 since June … (and 12 from January to June.) Yes, I know there are 4 quilts below, but the 2 dog/cat quilts in the middle counted as 1 UFO …
I have 2 new starts … one in July, one in August. They are both Island Batik projects … and you know that means I can’t show you yet …
You are invited to the Inlinkz link party! Show your PHD progress.
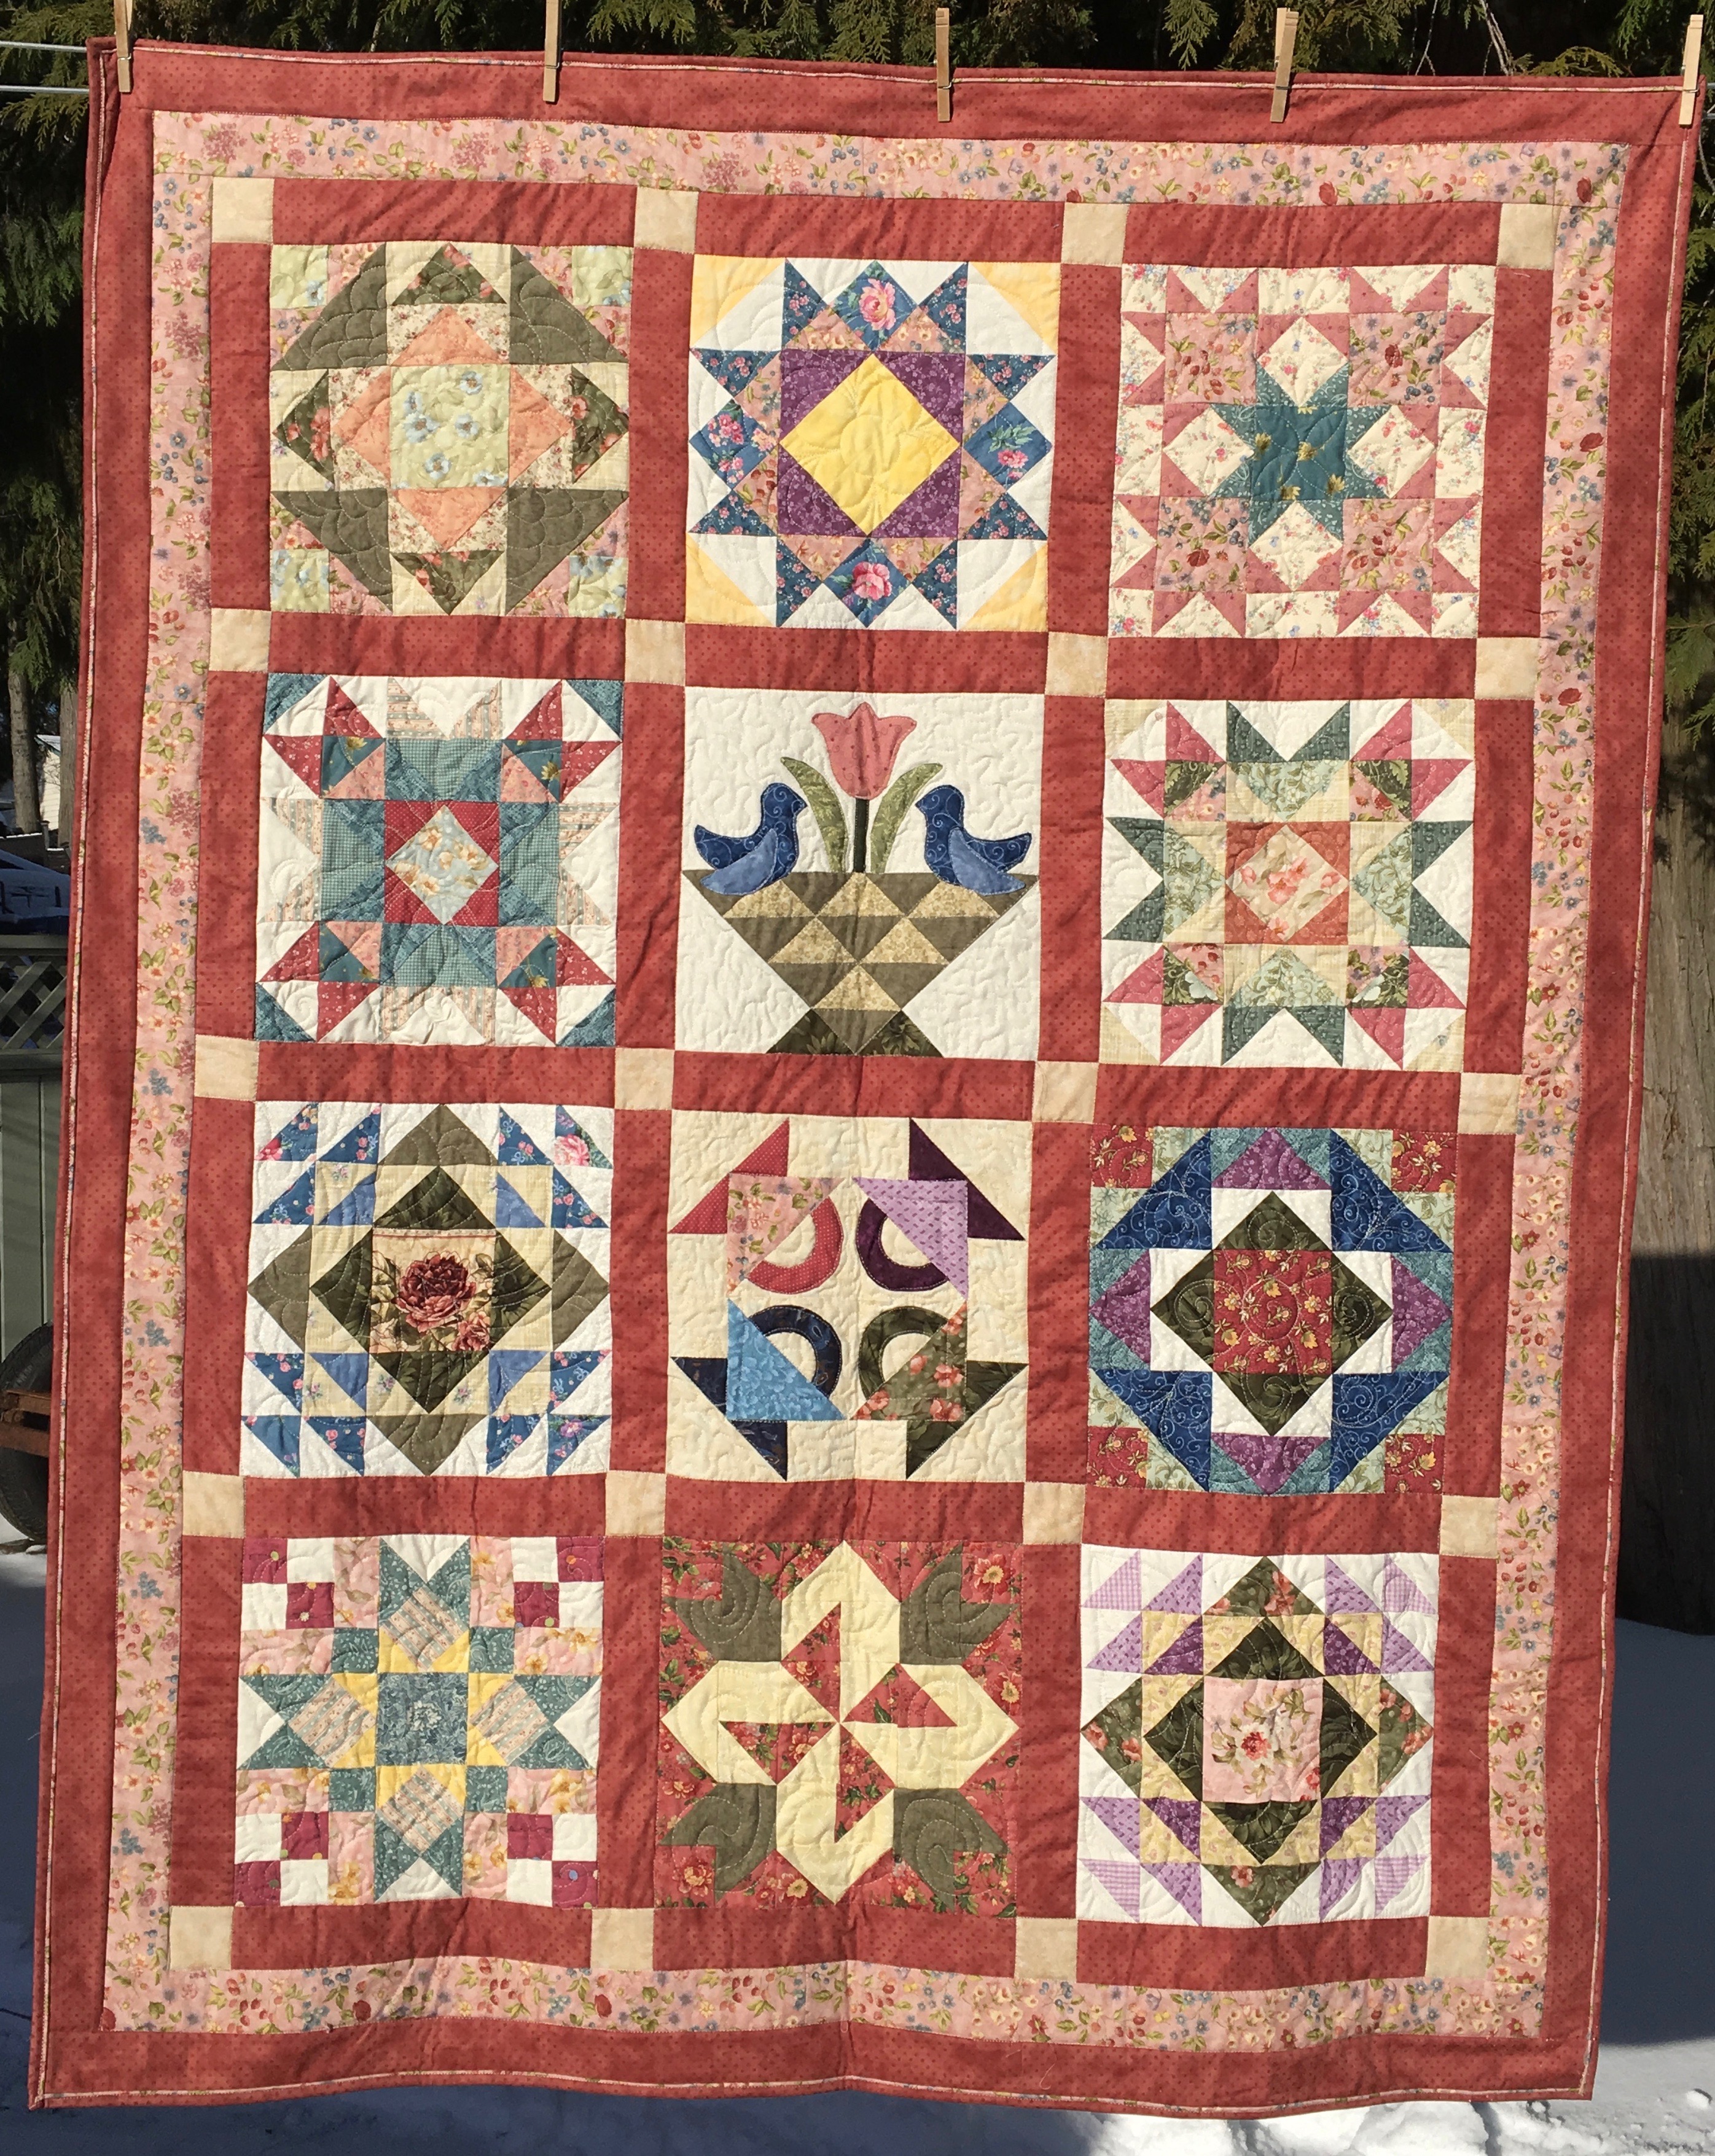
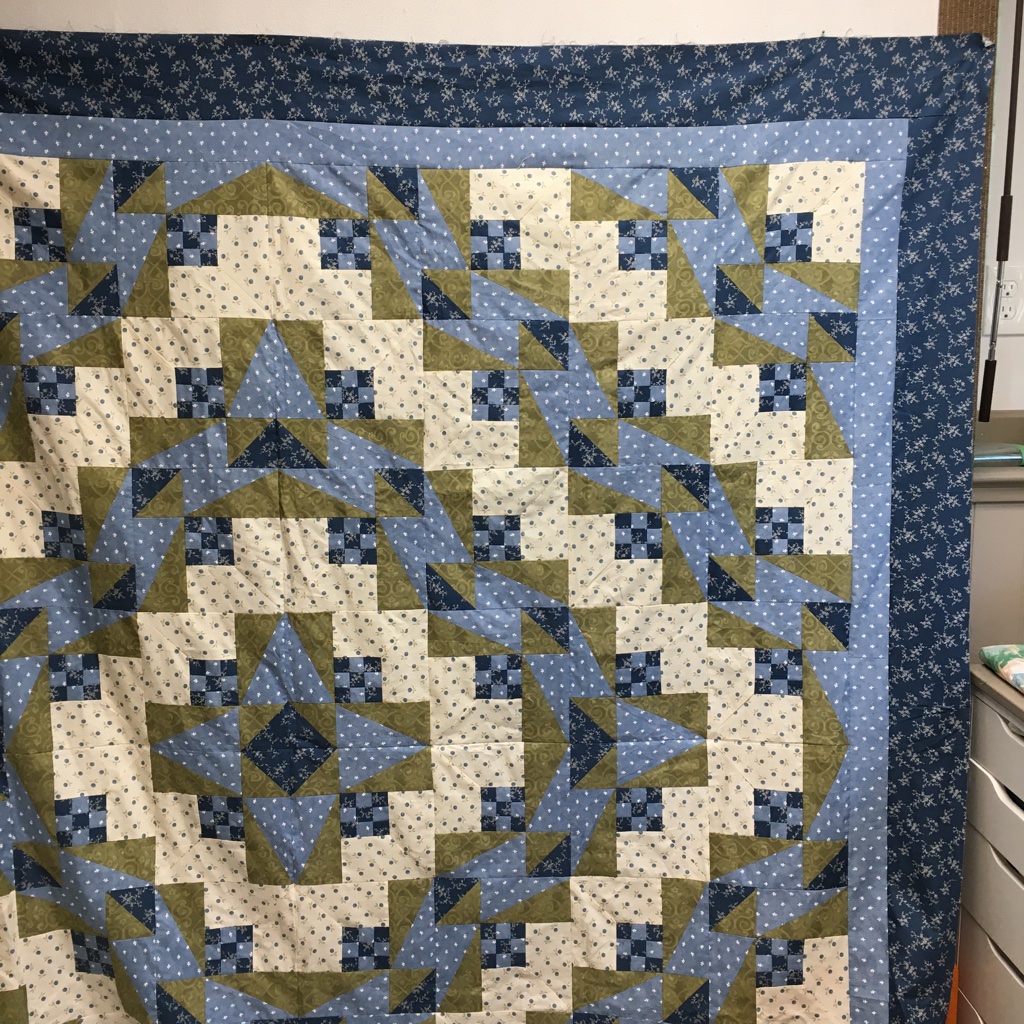
The Bouquet Murder Mystery Quilt is finished! Quilted, label and binding … done, done, done. This is UFO #15 for this year!
The quilt is 90″ square. It was quilted on my domestic machine … a Janome M7 with a large harp area. I had no difficulty with this quilt – it fit easily in the space.
The batting is Hobbs 80/20 and it was quilted with Aurifil thread #2000.
Here’s some close-up pictures of the quilting … the centre of the quilt … The blue and green sections have loops and orange peels (or “C’s” as I think of them when quilting. The background has a vine with swirls …
The 1st border has little “bows” … a figure 8 with ribbon between them . The 2nd border repeats the vine with swirls.
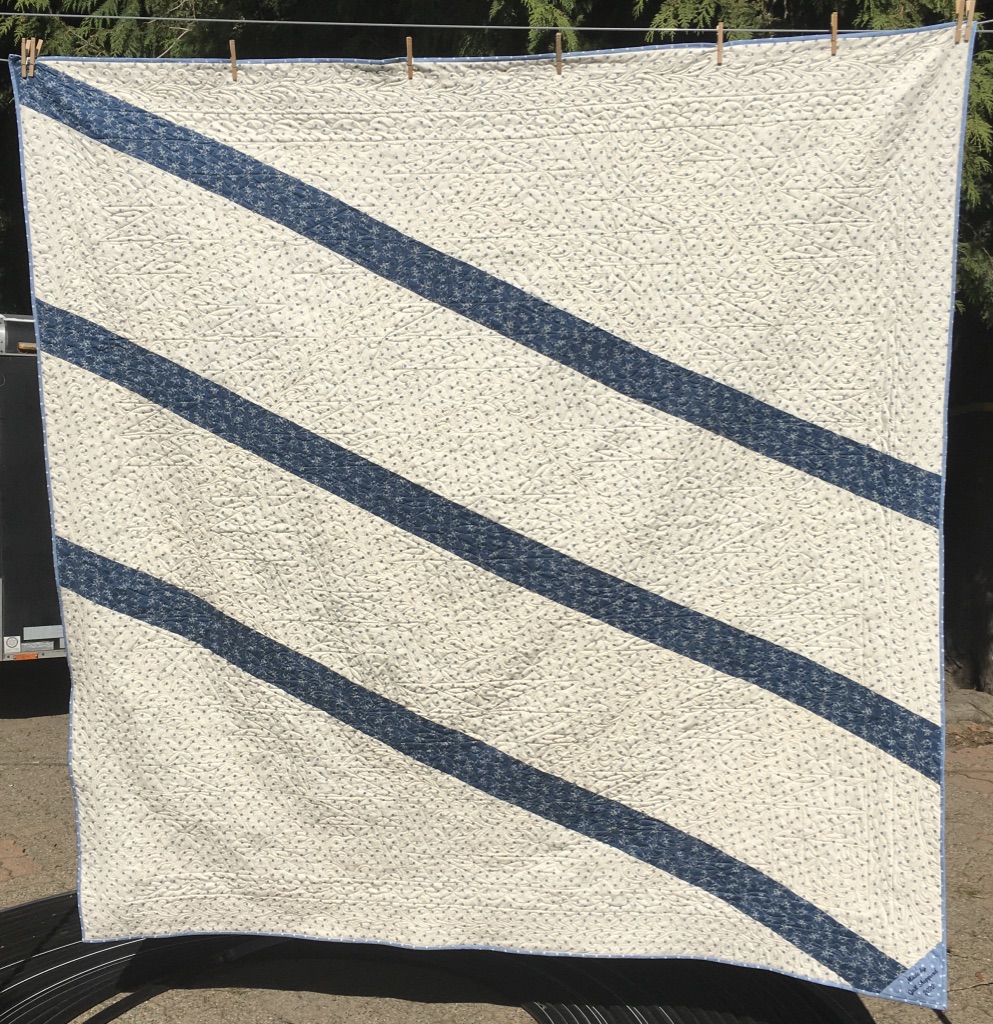
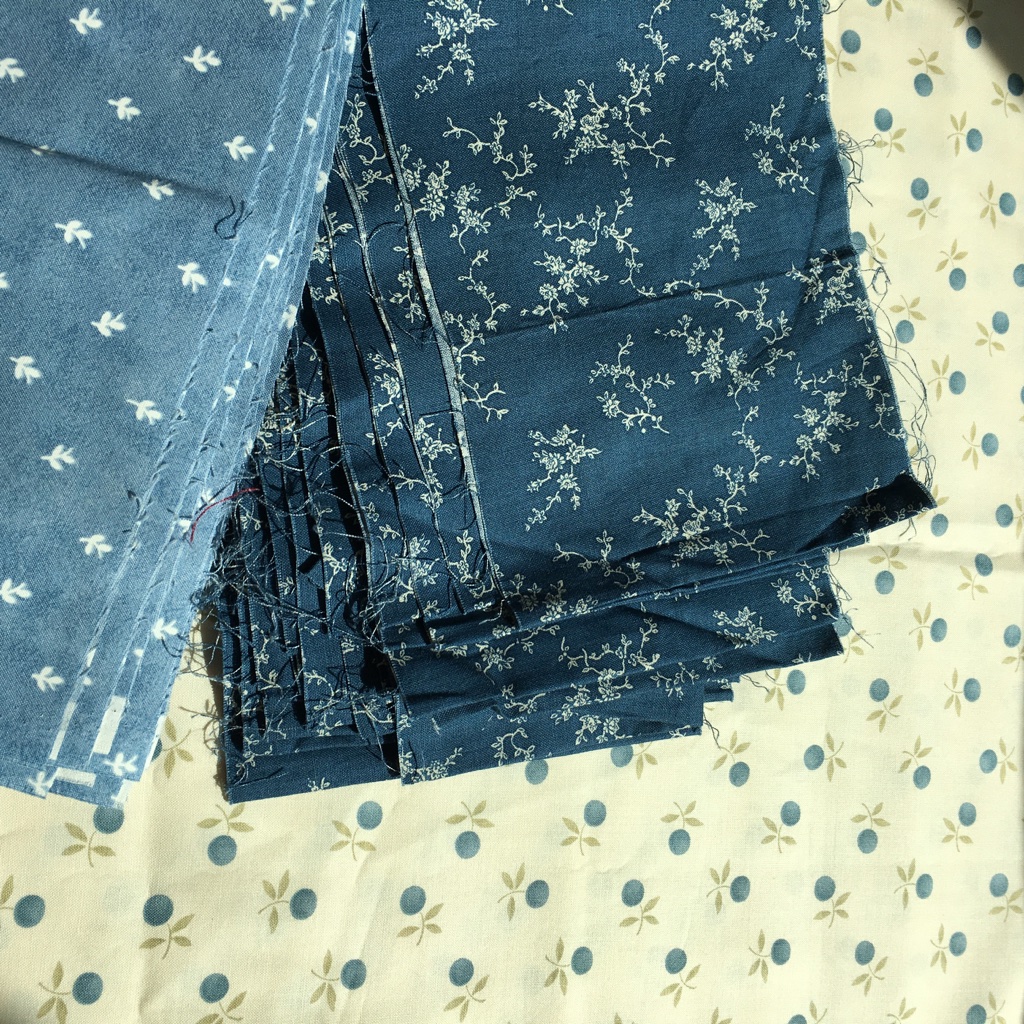
And the back … I had a ton of the 6″ dark blue – cut and joined together. I’m not sure why there was so much … way more than I needed for the border – and with lots of the off-white with blueberries, I joined them all together for the back. The back used up most of what was left of the dark blue and a substantial amount of the off-white.
Clothesline Hints
Someone told me that they have trouble taking pictures of quilts on a clothesline … especially when they are larger quilts. My husband made up 2 long “sticks” with notches on the top and they support the clothesline so that larger quilts do not drag on the ground. To the right is a picture of the “stick” holding up the clothesline. There’s one on the other side of the quilt … but I figure that one picture is enough to give you the idea …
Design Wall
Piecing:
This UFO was going to come out to play … Scrappy Repro … but it didn’t play at all this week … hopefully something will happen in the next week!
Quilting:
Nothing at the moment … I’ve been busy busy busy quilting the Bouquet Murder Mystery quilt …
Stash Report
The Bouquet Murder Mystery used 20 yards for the top and backing.
Fabric Used this week 20 yards
Fabric Used this year: 261 yards
Fabric Bought this week: 0 yards
Fabric Added this year: 23.5
Net Fabric used 237.5 yards
Stitchin’ Time
I am aiming for 30 minutes/day – at least! I switched from 15 minutes / day to 30 minutes/day in April!
15 minute days: January – July: 210 / 212
30 min days/ Aug: 28 / 30
Total days in 2020: 238/ 242
Percentage = 98%
For more Stitchin’ Time, you can check out Kate’s blog: Life in Pieces
TO DO
I’m linking up to Roseanne & Sue’s “TO DO” Tuesday. Their blog is “Home Sewn by Us.”
Last weeks list:
Make label and finish binding my niece’s baby’s quilt. √ done
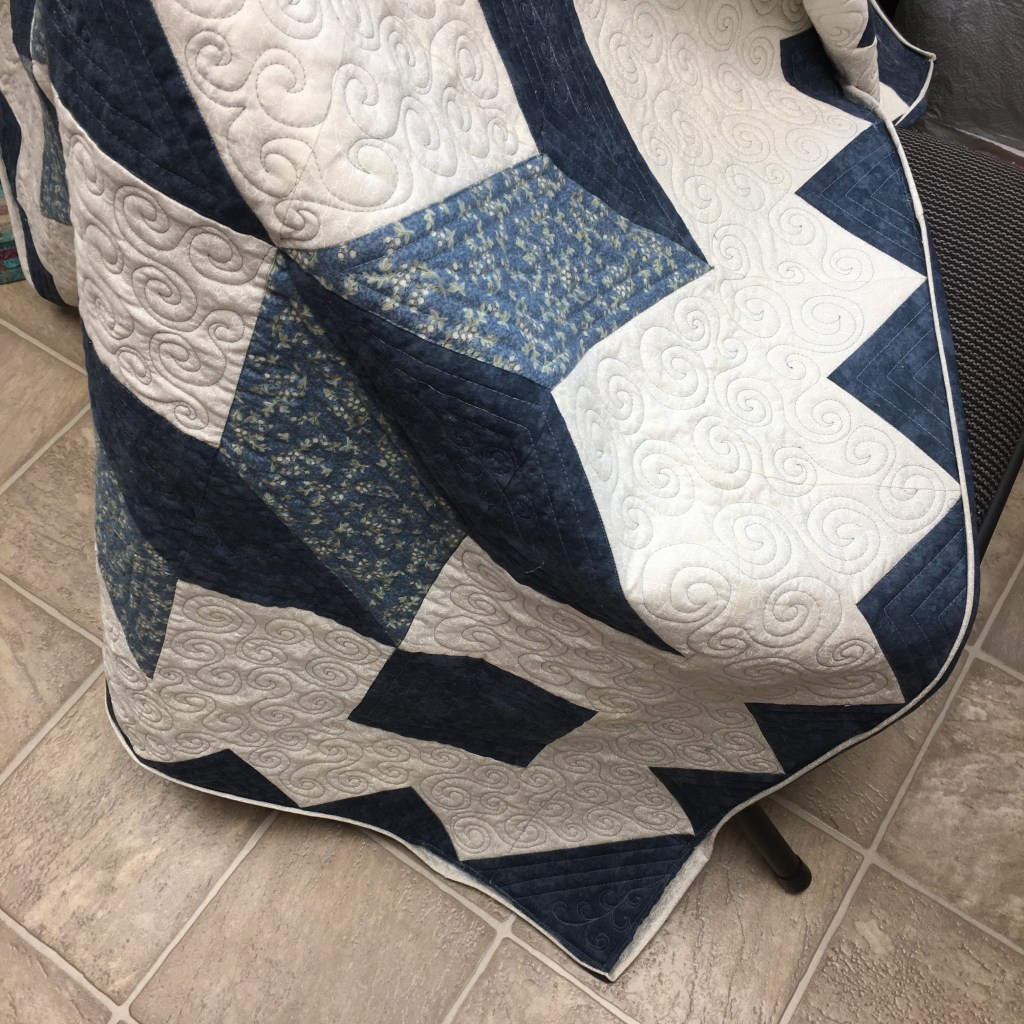
SEW … I don’t have a finish for this Friday … but I will show you some close-ups of the quilt I showed on Monday. (For details see HERE).
And closeups … so you don’t have to zoom in to see the details.
Straight line, ruler quilting in the border, flange binding and random swirls in the background.
Straight line, ruler quilting in the dark blue and floral blue prints, with a vine scroll in the middle.
More of the straight line quilting, ore of the random swirls …
Picnic in the Park
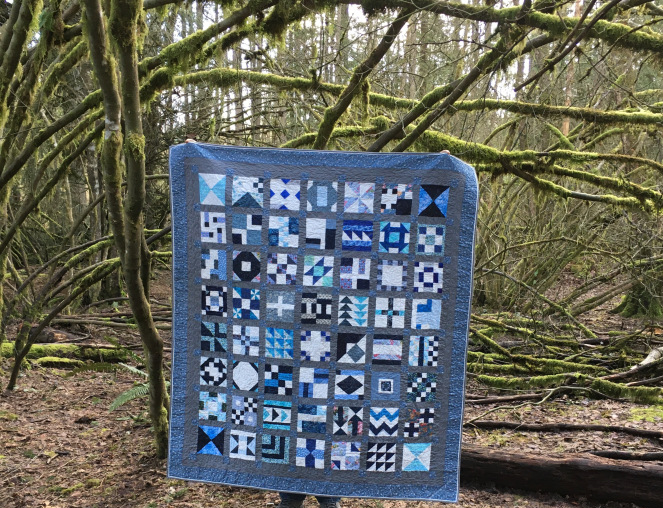
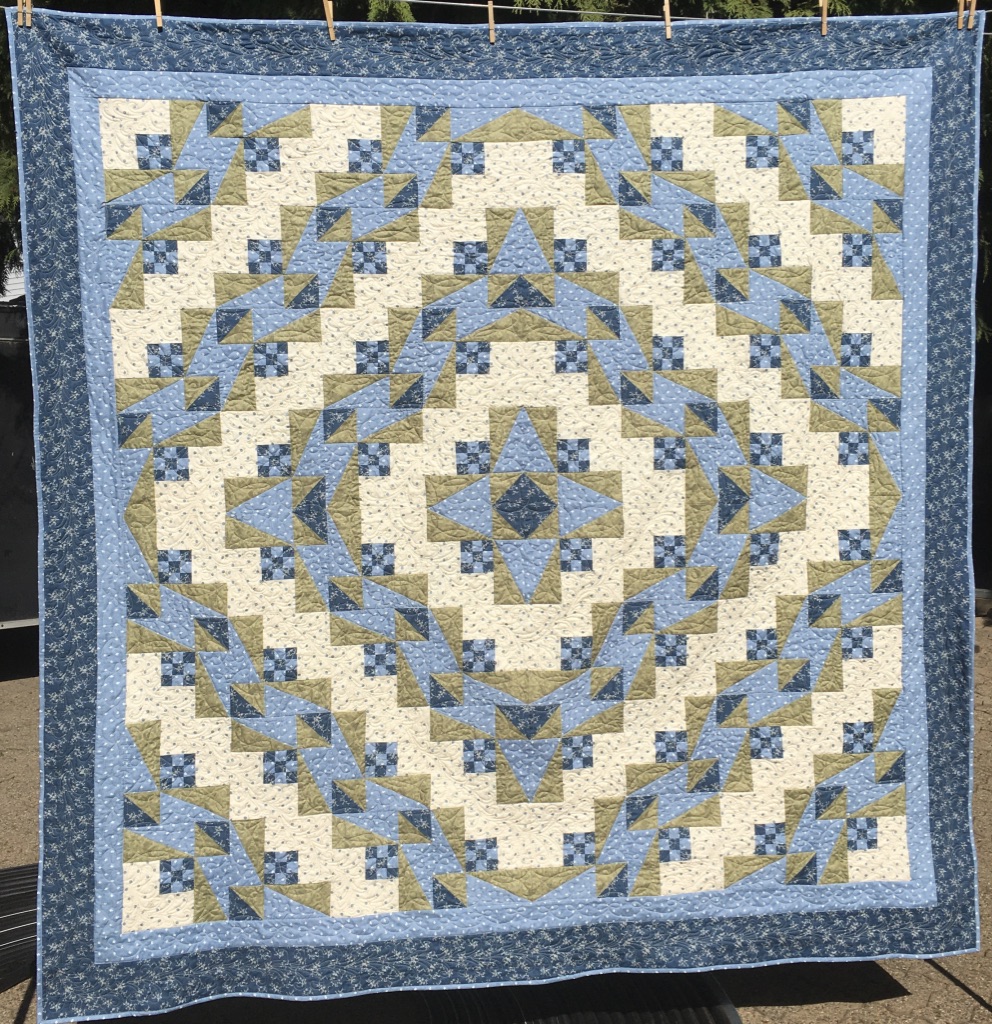
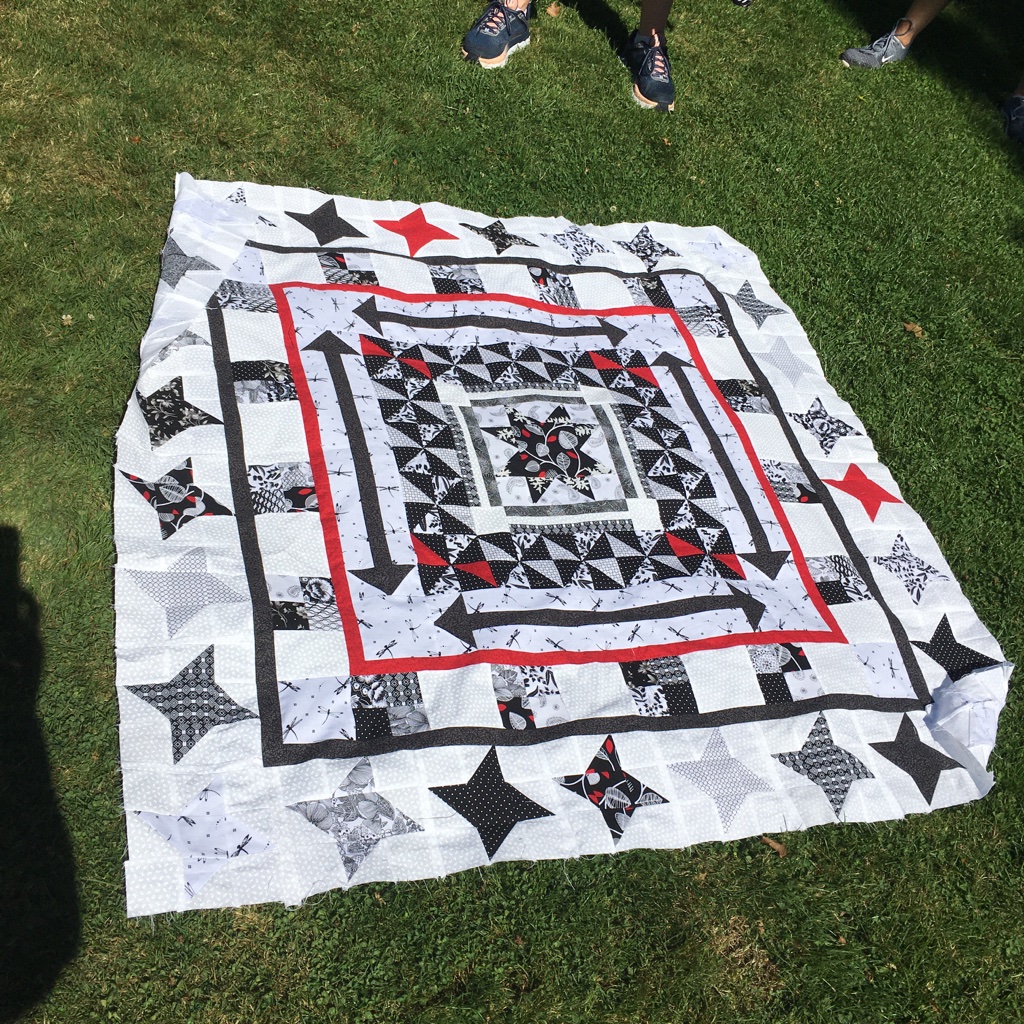
Earlier this week, some of the guild members met in a park for lunch … everyone practiced social distancing and there was show and tell. I hadn’t met Brenda before, but I was thrilled to meet her! She had just finished her top from the “Stay at Home Round Robin” that I hosted in the spring. (See Here for the finish and Here for the start.)
Doesn’t Brenda’s top look fantastic in black & white with a pop of red? She wants to make it bigger … so ideas were flying around. Koodos to Brenda for knowing “it’s not a race” and for sticking with it! I can’t wait to see the finish!
What’s Happening Soon?
Next week, I’ll be hosting TGIFF. So make sure you come back and see the marvelous quilts and projects that others are working on!
A Couple of Blog Hops
First up is the Island Batik Block Hop “It’s in the Bag.” I’m super excited about this one! “It’s in the Bag” will be featuring all sorts of byAnnie bags! It promises to be absolutely fantastic!!! Make sure that you follow along and take advantage of opportunities to WIN some wonderful Island Batik fabrics!!!
Second will be the “Hello Fall” Blog Hop that starts later in September. This one is hosted by Carla from “Creatin’ in the Sticks.” Hmmm … perhaps, I need to work on this one and get it finished? The answer to that question is a definite YES!!!
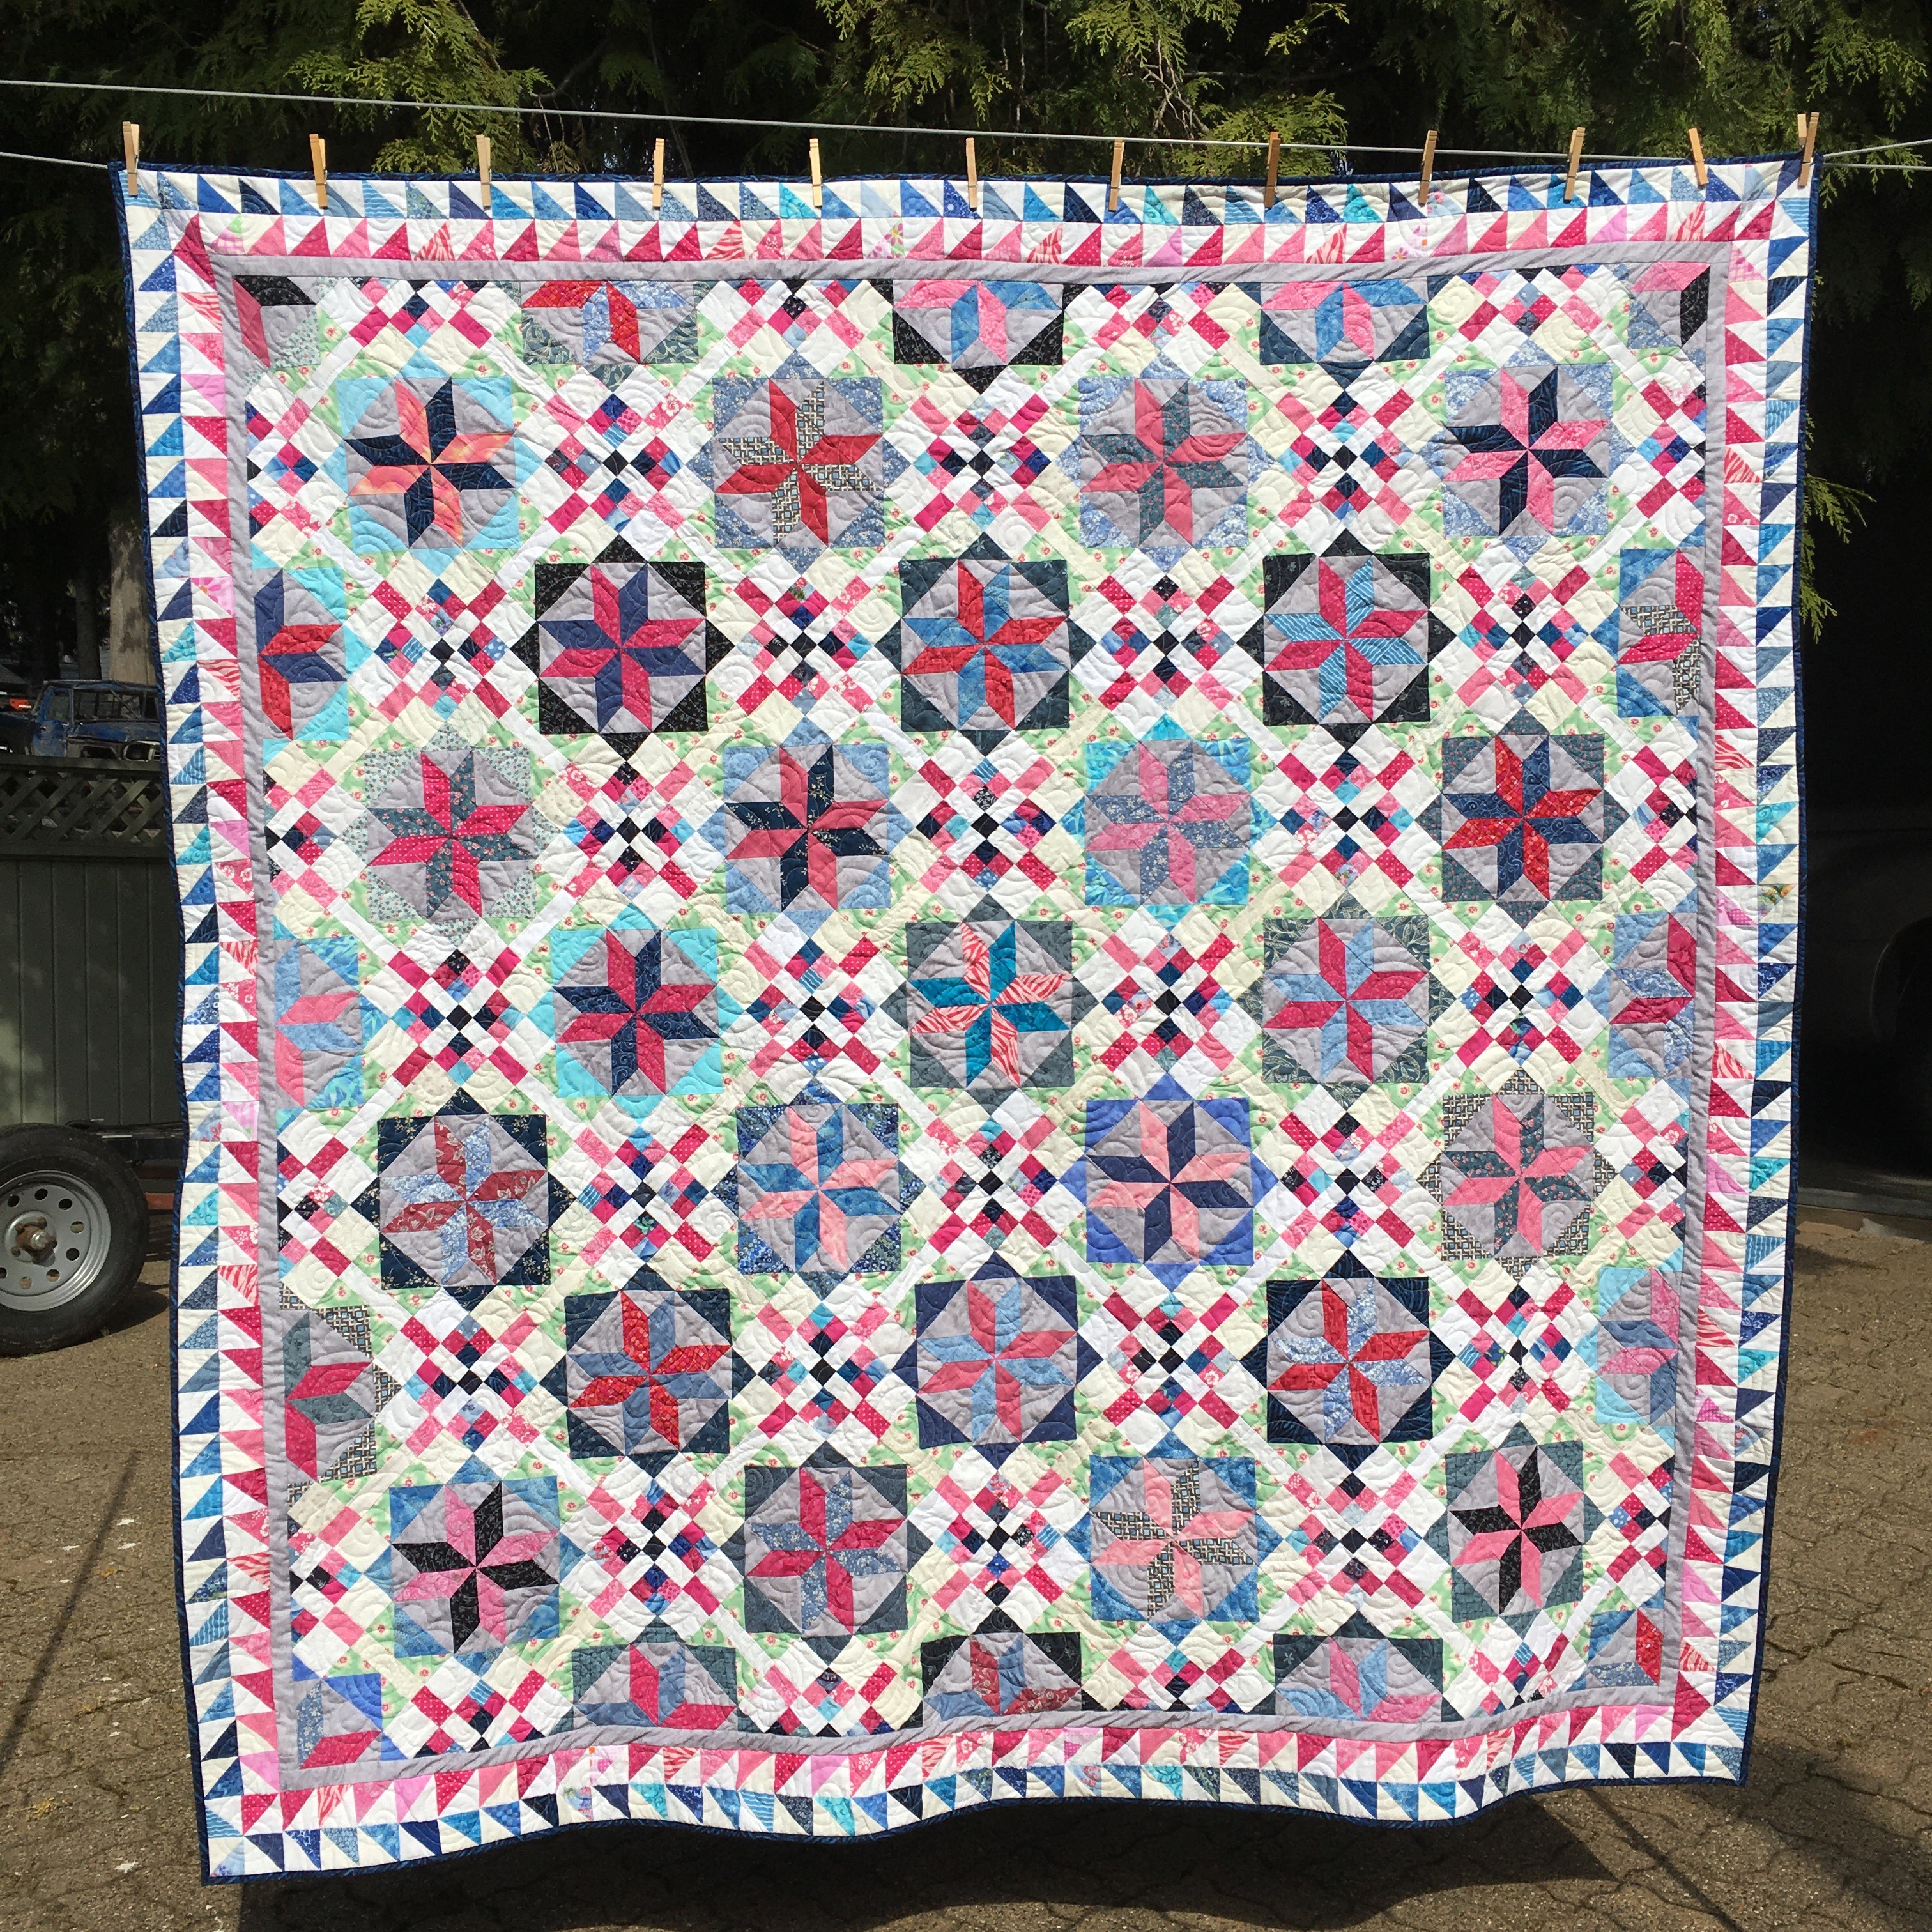
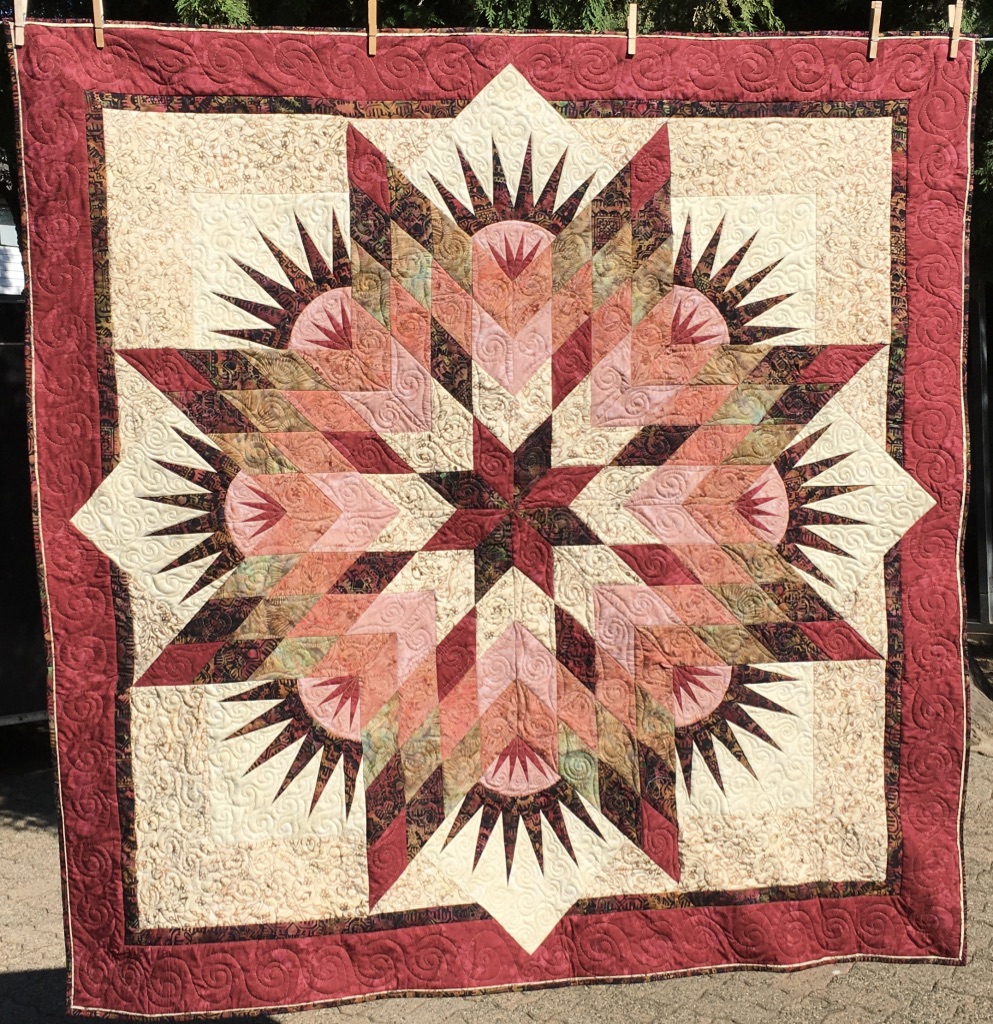
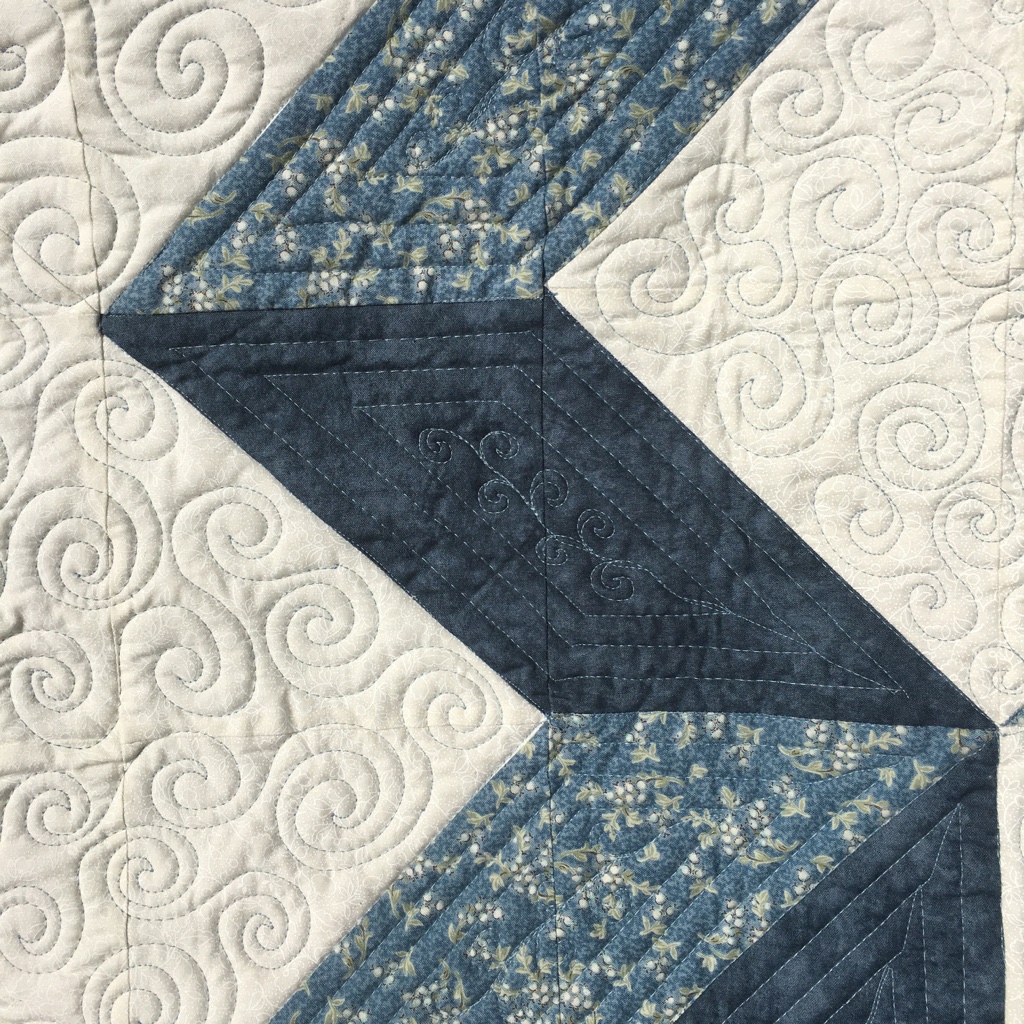
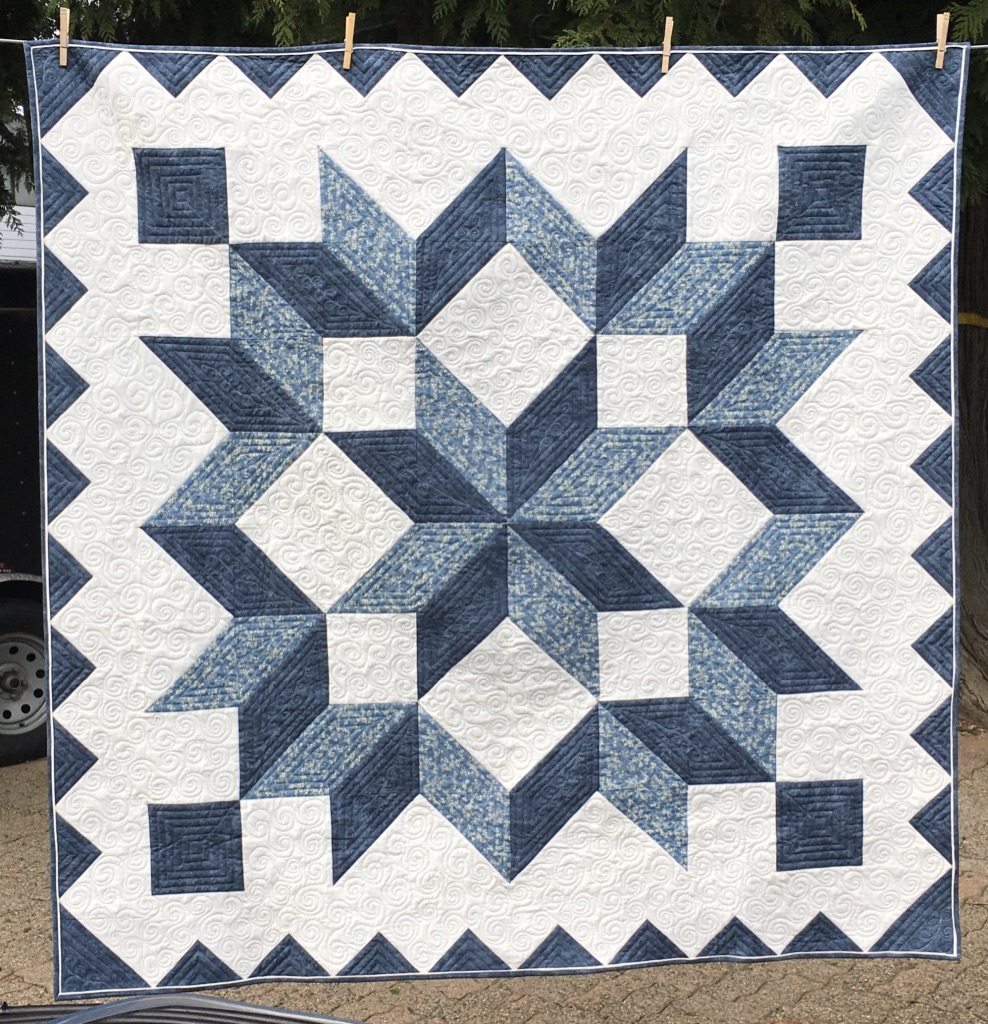
The Carpenter’s Star … in all it’s starry glory! Is done! I’m in love with it! If it didn’t have a specific destination, I would be keeping this one!
There are swirls in all the background (whitish) pieces and mostly straight lines in the coloured areas. All of the quilting is free motion on my domestic sewing machine.
Design Wall
Piecing:
… This UFO is going to come out to play … Scrappy Repro
Quilting:
The Bouquet Murder Mystery quilt is in the process of being quilted.
Stash Report
The Carpenter’s Star is finished! It used 6.5 yards for the top and 4 yards for the back …
Fabric Used this week 10.5 yards
Fabric Used this year: 241 yards
Fabric Bought this week: 0 yards
Fabric Added this year: 23.5
Net Fabric used 217.5 yards
Stitchin’ Time
I am aiming for 30 minutes/day – at least! I switched from 15 minutes / day to 30 minutes/day in April!
15 minute days: January – July: 210 / 212
30 min days/ Aug: 21 / 23
Total days in 2020: 231 / 235
Percentage = 98%
For more Stitchin’ Time, you can check out Kate’s blog: Life in Pieces
TO DO
I’m linking up to Roseanne & Sue’s “TO DO” Tuesday. Their blog is “Home Sewn by Us.”
Last weeks list:
Finish Quilting Carpenter’s Wheel √ done
Make label and bind Carpenter’s Wheel√ done
Make backing for Bouquet Murder Mystery √ done
Make label and finish binding my niece’s baby’s quilt. not done
Tidy & clean studio for 30 minutes. √ done
This weeks list:
Make label and finish binding my niece’s baby’s quilt.
Bouquet Murder Mystery :
finish quilting
make label
bind
Work on Scrappy Repro
Welcome Fall project
Tidy & clean studio for 30 minutes.
Carpenter’s Star was started in July and finished this week! No new starts this week. No UFOs finished … but one is almost there … hopefully by next week!
It’s raining out, the breeze is blowing and it’s fairly warm out. We have most of the windows open and are enjoying the fresh air! I just love summer days like this! I prefer to see sun, but this is a nice change and the sun is suppose to return tomorrow.
On the Quilting Front
I’m almost finished the Carpenter’s Star (Wheel). The quilting is done … the label is on … the binding is on, but needs to be sewn down. It’s a flange binding and most of what you see in the picture is the flange … it’s hard to see the dark blue that will show the most. I should be able to finish this quilt later today. I always sew my binding by machine – so it really doesn’t take that long
In my last post HERE, I talked about back to school and dollar store items for your sewing room / studio. I had forgotten to mention that I also like black Sharpies. I used them when I made the wall hanging from Helen Godden’s Flower Power Quilt Along. I also use them when a light thread shows through on black fabric. The flowers in the wall hanging below were outlined with black sharpie prior to being coloured and sewn. All of this as per Helen Godden’s instructions.
Tips and Hints from Others
Norma, from “Notes from Norma,” said that she spent around $15 at Dollar Tree and here’s what she bought … “little plastic containers with lids for my embossing powders, a 2021 calendar for my studio, envelopes, plastic spoons for containers, cosmetic wedges to use with inks when stamping, index cards, glue tape, toothbrush for spattering ink, sponge brushes.” Now … you must go visit her blog to see her fantastic work!
Emily, from “The Darling Dogwood” said that she likes little post-it notes for labelling tiny pieces (which she’ll later pin) and kid’s glue sticks. She said this about them, “I like the Elmer’s Disappearing Purple glue sticks, but do have to warn you that the shade of purple when the glue goes on will freak you out that you ruined your project–you didn’t!” It’s good to know that the purple will not ruin your work!
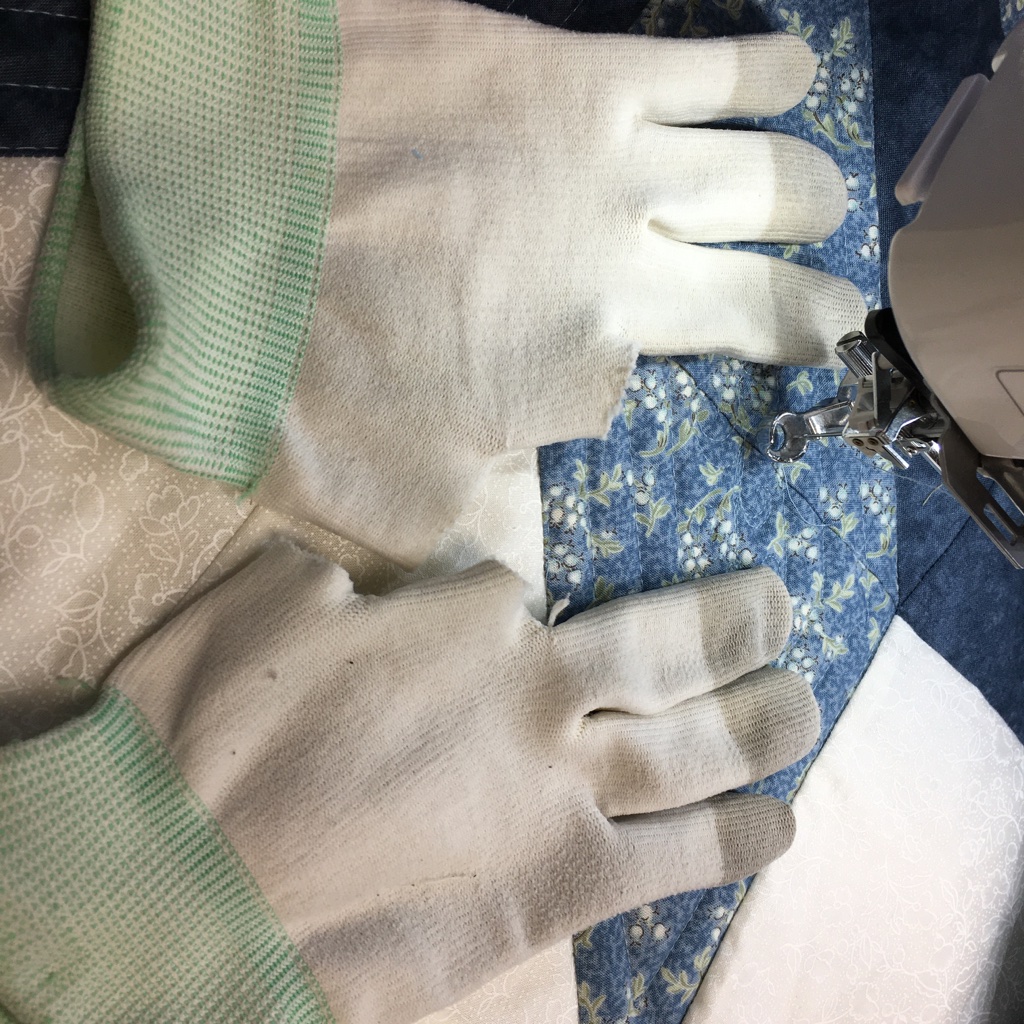
One friend, Roseanne, from “Home Sewn by Us,” commented on how clean my gloves were … I was caught!!! I have a nearly new pair that I use for videos and pictures, but in real life … well, you decide … the ones on the left are what I usually wear. I’ve washed them, I’ve soaked them … they are still dirty looking. However, when quilting on white fabric, none of the “dirt” comes off. Do you have any hints on how to keep these quilting gloves looking clean?
Wendy, from “Pieceful Thoughts,” said that she has another tip for the shelf liner: “cut a small 2″ square and place it between your small square ruler and fabric. It will keep the ruler from shifting.” What a great idea!
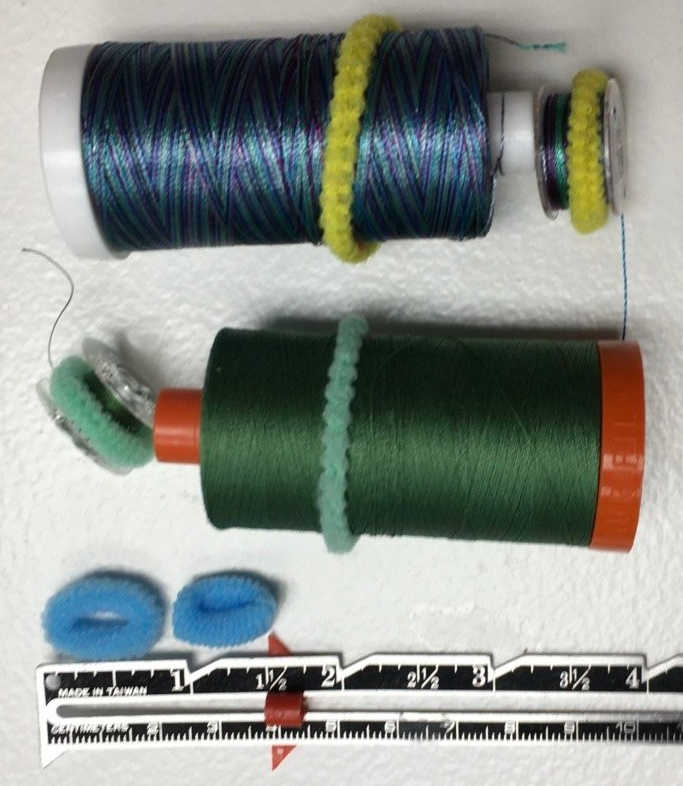
Bonnie, from “In Stitches with Bonnie,” couldn’t figure out how I used the hair ties. These are the small hair ties … they are cloth covered elastics. You can see in the picture how small they are. When my thread and bobbins are in the drawer, it’s super easy to figure out which bobbin goes with which spool of thread. Plus there isn’t miles of thread all over!
Design Wall
Piecing:
BouquetMurder Mystery: There is progress on this UFO!!! The borders are on! Now to piece the back!
Quilting:
The Carpenter’s Wheel (Star) is in the process of being quilted! I’m outlining all the star points with Stitch in the ditch and using my straight ruler to fill in the blue portions.
Stash Report
No finishes, no shopping, no change in the numbers …
Fabric Used this week 0 yards
Fabric Used this year: 230.5 yards
Fabric Bought this week: 0 yards
Fabric Added this year: 23.5
Net Fabric used 207 yards
Stitchin’ Time
I am aiming for 30 minutes/day – at least! I switched from 15 minutes / day to 30 minutes/day in April!
15 minute days: January – July: 210 / 212
30 min days/ Aug: 14/ 16
Total days in 2020: 224 / 228
Percentage = 98%
For more Stitchin’ Time, you can check out Kate’s blog: Life in Pieces
TO DO
I’m linking up to Roseanne & Sue’s “TO DO” Tuesday. Their blog is “Home Sewn by Us.”
Last weeks list:
I kept my list short, because I knew I wouldn’t be available to sew every day … but I got it done!
Start Quilting Carpenter’s Wheel √ done
Add borders to Bouquet Murder Mystery √ done
This weeks list:
Finish Quilting Carpenter’s Wheel
Make label and bind Carpenter’s Wheel
Make backing for Bouquet Murder Mystery
Make label and finish binding my niece’s baby’s quilt.
Tidy & clean studio for 30 minutes.
No new starts this week … no finishes … there is progress being made on the UFO I’m working on!
It’s August and kids are starting to get ready to go back to school … or not. At any rate, the stores have all their “back to school” sales on. Do you take advantage of these sales for your sewing room?
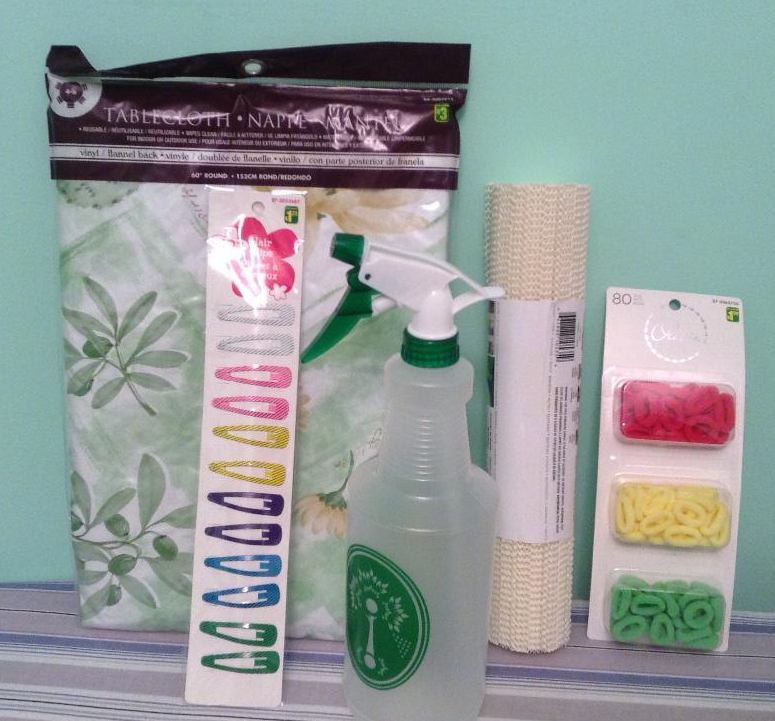
I do. Here are some of the products I use in my sewing room:
A flannel back tablecloth is great for a design wall … especially if I’m going sewing somewhere besides in my home.
Hair clips are great for clipping labels onto fabric
Spray bottle for water (I always use a dry iron … and I spray the fabric if I want steam)
Shelf liner … will hold your sewing machine foot in place, add it to the back of pincushions to prevent them from slipping around, and in a pinch, you can use a couple of pieces (3″x 3″) to place under your hands when you free motion quilt
Hair ties – place them around the thread and the bobbin and you know which bobbin goes with which thread … plus it keeps the thread from unwinding
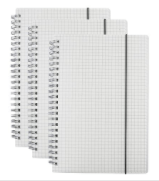
Notebook with grid lines … for planning that next quilt and Pencil crayons to colour your quilt
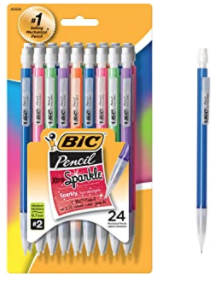
Mechanical pencils for fine lines (on the back of HST or to mark the centre of a block.
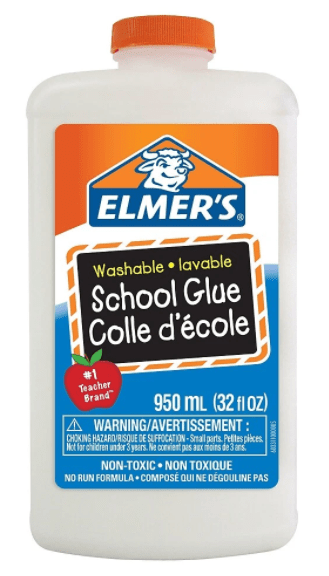
Elmer’s School Glue … I use this a LOT … dilute it 4 parts water to 1 part glue and it’s perfect for gluing down binding or whatever needs to stay in place.
There’s probably a lot of other school supply and dollar store products that can be used for quilting. What do you use?
On the Quilting side of life
The first picture is a snapshot of the stitch in the ditch quilting I’m doing for the Carpenter’s Star. The 2nd picture is some of the border pieces cut out for the murder mystery UFO.
I did finish my August Island Batik Project using Deb Tucker’s Studio 180 ruler “Four Patch Square Up.” You can read more about it HERE.
Design Wall
Piecing:
The borders are still not on this quilt.
Quilting:
The Carpenter’s Wheel (Star) is sandwiched … and the thread is chosen and it is sitting at the machine … but not a stitch of quilting has happened!
Stash Report
No finishes, no shopping, no change in the numbers …
Fabric Used this week 0 yards
Fabric Used this year: 230.5 yards
Fabric Bought this week: 0 yards
Fabric Added this year: 23.5
Net Fabric used 207 yards
Stitchin’ Time
I am aiming for 30 minutes/day – at least! I switched from 15 minutes / day to 30 minutes/day in April! No stitchin’ on the 19th … ’cause it’s not a race!
15 minute days: January – July: 210 / 212
30 min days/ Aug: 9/9
Total days in 2020: 219 / 221
Percentage = 99%
For more Stitchin’ Time, you can check out Kate’s blog: Life in Pieces
TO DO
I’m linking up to Roseanne & Sue’s “TO DO” Tuesday. Their blog is “Home Sewn by Us.”
Last weeks list:
I’m not surprised that I didn’t get #1 and #2 done … but I did get #3, 4 & 5 done! And Roseanne always quotes Gladys Taber: “Contentment is a list with half of it crossed off.” I’m content!
Sandwich & Quilt Carpenter’s Wheel ½ donesandwiched but not quilted.
Add borders to Bouquet Murder Mystery not done
Work on IB Sept project √ done (it’s a secret … and I LOVE it!)
Spend at least 30 minutes this week CLEANING/ TIDYING my sewing room. √ done
Photo shoot and blog about IB August project √ done
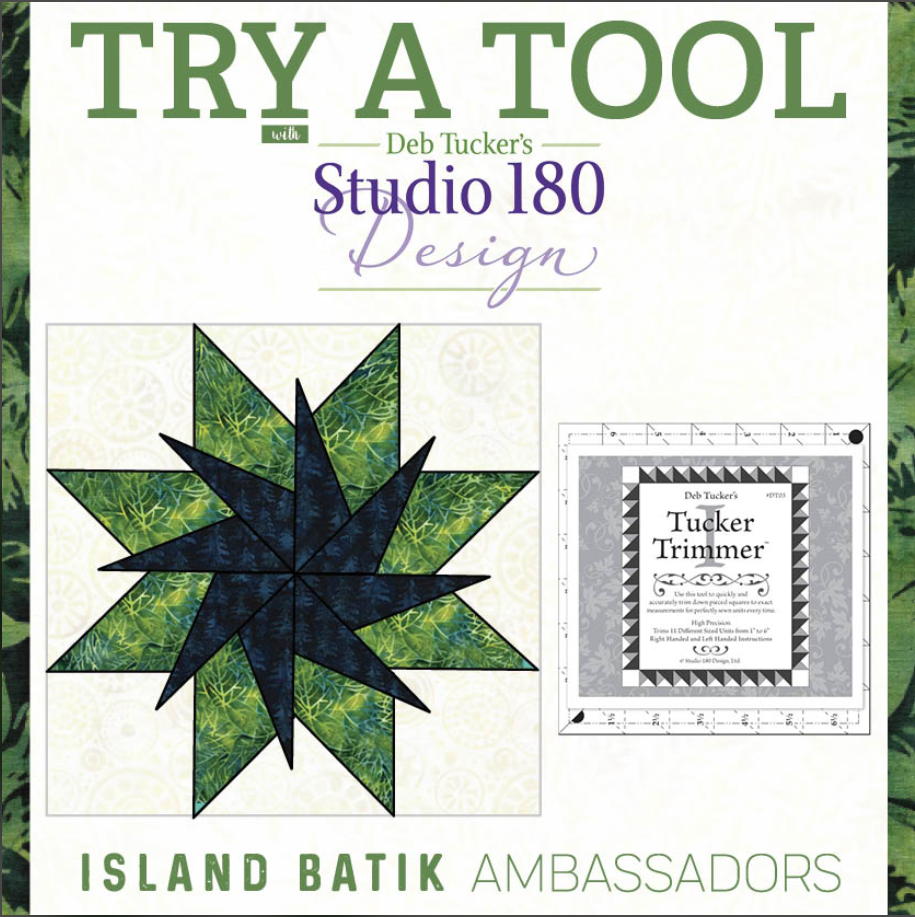
The August Challenge for Island Batik is “Try a Tool” using a Deb Tucker’s Studio 180 Design tool.
In my July box, I received the 4 Patch Square Up tool. This tool gave me the choice of 4 Patches or Offset 4 Patches. No pattern was provided. We were to make a quilt with at least 16 of the “units” made with the tool.
I have never used any of Deb Tucker’s Studio 180 Design rulers before (except for the Quilter’s Magic Wand for one marking half square triangle). As you read through this post, you’ll discover how delighted I was to use this ruler!
⇐ Mesa Verde
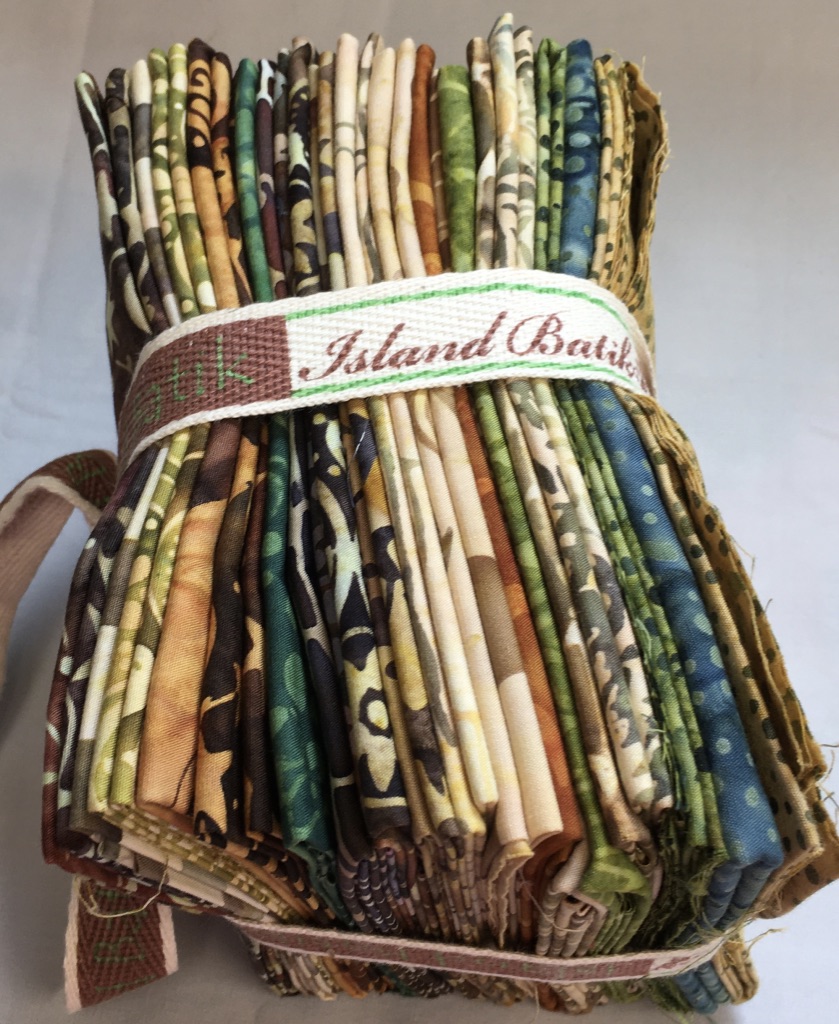
I received a fat quarter pack in my July box.
Designing
EQ7 was used to design my quilt using the “Mesa Verde” fabric collection, along with Island Batik’s solid black. The black just seemed so right with this line of fabric! I had several layouts to choose from. It was fun to manipulate the quilt by changing the block orientations with a click or 2 of the mouse!
But in the end, this is the quilt I decided on:
Of course the location of where the fabrics ended up in the quilt is totally different than in the EQ version!
Sewing the Creation
I used Deb Tucker’s Studio 180 tool “Four Patch Square Up.” I made the Offset 4 patches. There is no accompanying video -yet – for the Offset 4 patches … but after watching the video for the 4 patches and reading the directions for the Offset 4 patches – it was easy to make. Really easy!!!
Here is the back of the first unit I made. The instructions teach you how to “spin” the seams. If you’ve taken a class from me, you know how much I LOVE to spin the seams. It certainly makes the quilt lie flatter. But, you do need to be consistent when sewing your unit blocks together.
I was able to spin ALL of the seams when I put the quilt together. It certainly made it lie nice and flat!
I readily admit that I am NOT a perfect quilter! I learned to fudge A LOT when I was learning to quilt … in the last century! BUT … with using this ruler … not to boast or anything … but each block is perfect!!! It sewed together like a dream. PERFECTLY!!!
OH MY!!! Now, I get why people like to have perfection in their sewing!!!
YUP … I’m in LOVE ♥ with the 4 Patch Square Up ruler and can’t wait to try some of the other Studio 180 rulers!
Anyhow … on to the quilt I made!
The Quilt
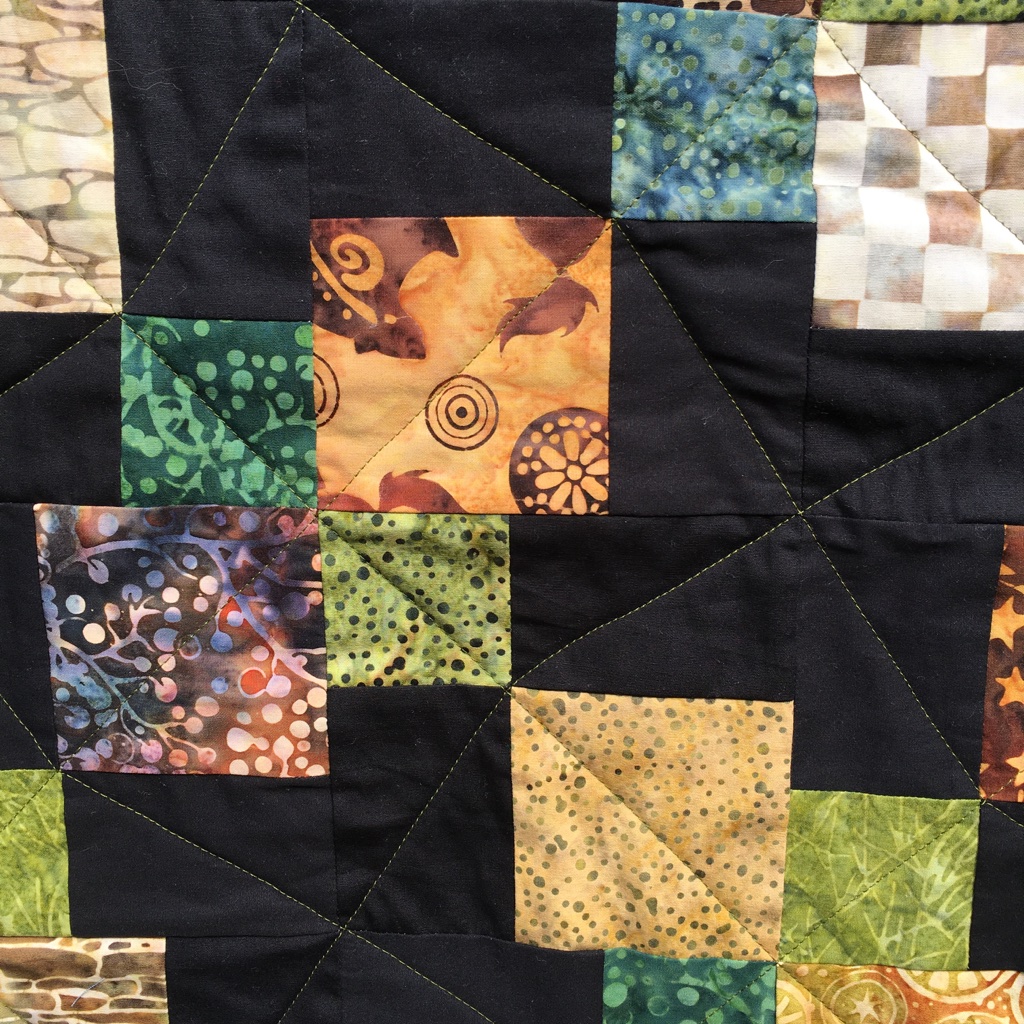
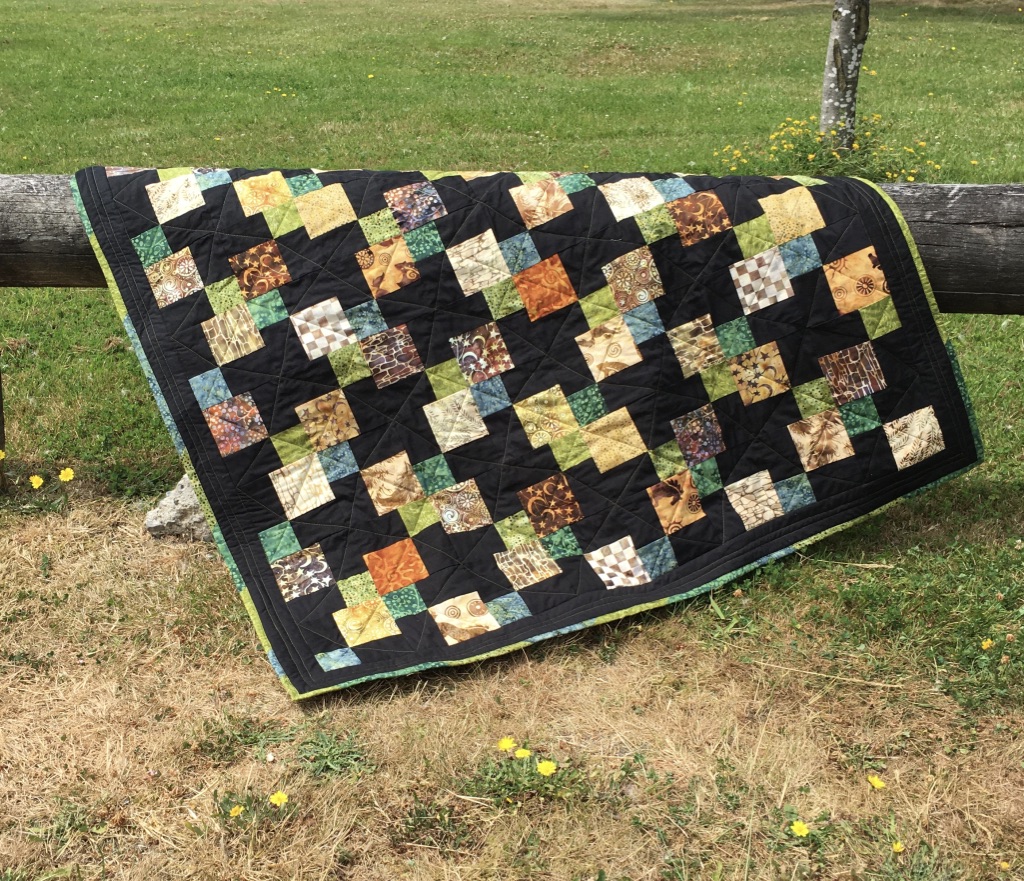
Here it is on the clothesline. I made the largest Offset 4 patch block: 5″. The smallest is 3/4″ … that’s a super mini size! The quilt measures 43″ x 53″ … The binding is scrappy and used the every scrap of the green fabric that was left from the small blocks.
I used my walking foot with an olive green Aurifil thread #2887 to quilt, Hobb’s Heirloom 80/20 Black batting, and Schmetz Microtex Chrome 80/12.
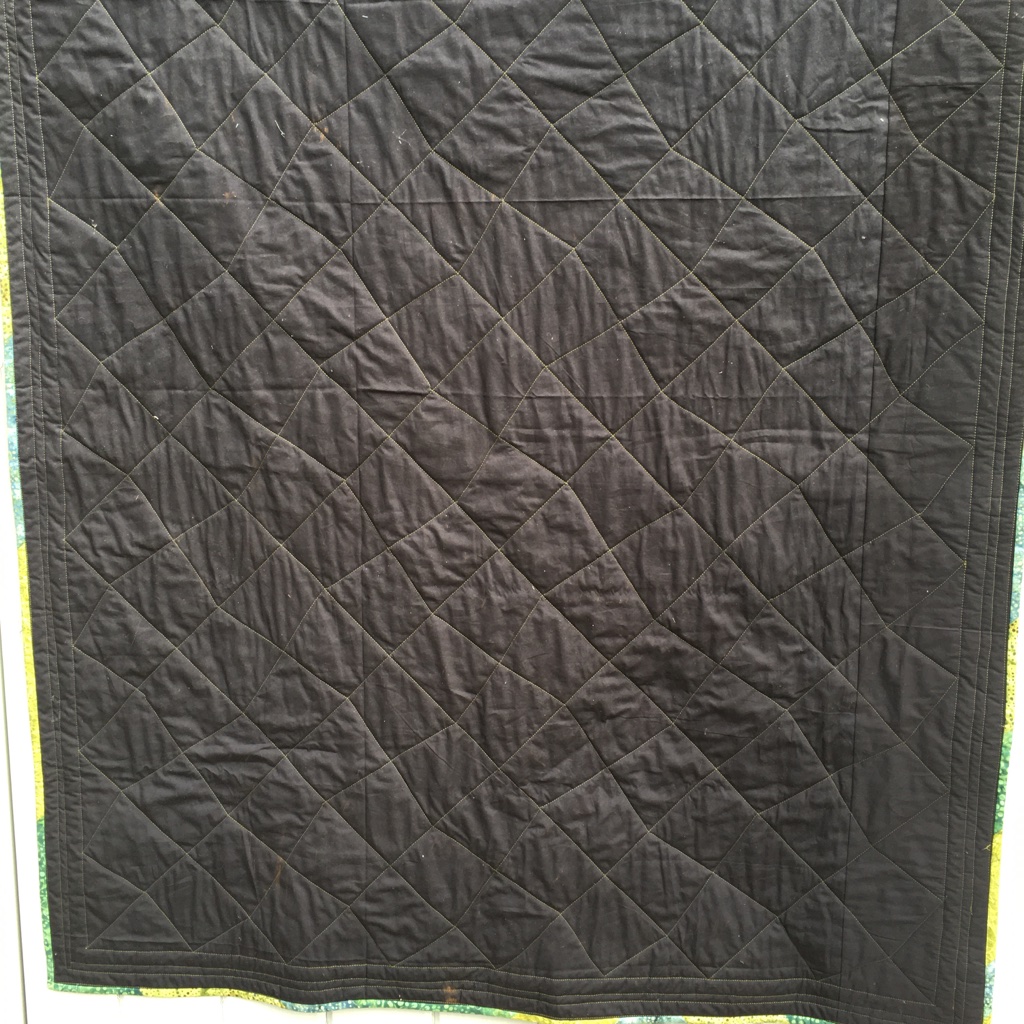
The quilting is super simple: I just did diagonal lines through the black rectangles and then straight lines through the Mesa Verde fabrics.
I like how the quilting looks pretty funky on the back. I backed this quilt with the same black I used on the front – but with the sun shining, the colour certainly isn’t true!
I love the earthy tones in the Mesa Verde fabrics and this tree said “lay the quilt here for a picture.”
And the wooden fence said the same thing …
Disclaimer: All of the fabric and supplies (other than my sewing machine and iron) were given to me by Island Batik and the industry partners! Thank you!


 When I make bags, I usually end up doing my own thing … but I needed to follow directions with this one.


 The borders are still not on this quilt.
 I’m linking up to Roseanne & Sue’s “TO DO” Tuesday. Their blog is “

 In my July box, I received the 4 Patch Square Up tool. This tool gave me the choice of


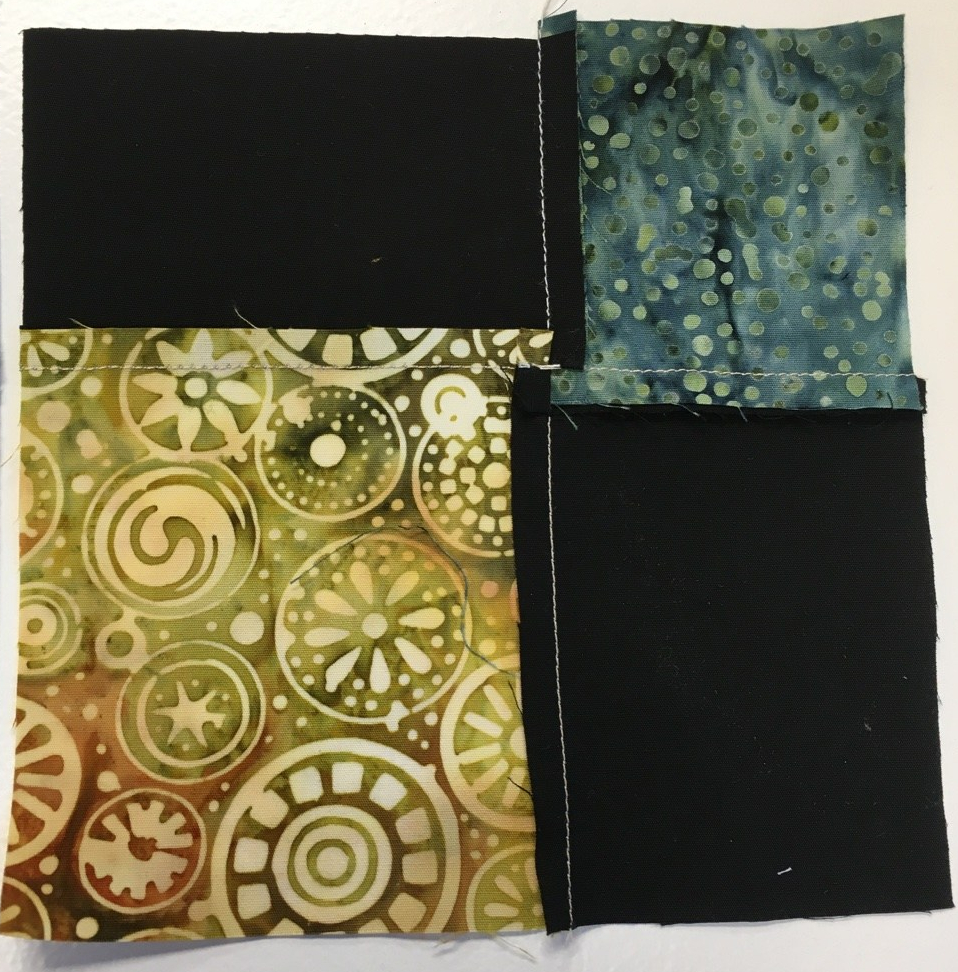 Here is the back of the first unit I made. The instructions teach you how to “spin” the seams. If you’ve taken a class from me, you know how mu