The Spicy Colour Challenge is from Patterns by Jen. Each month she has a unique block based on the Spice of the month. The pattern is free for the month … after the month is over, you can purchase the month’s block for a small fee … OR you can purchase the entire pattern from Jen!
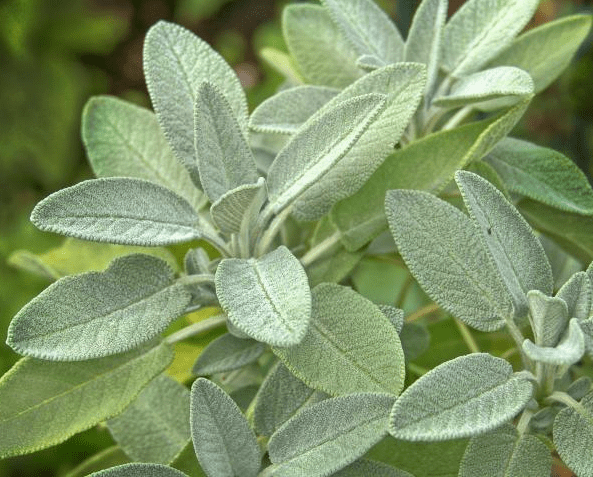
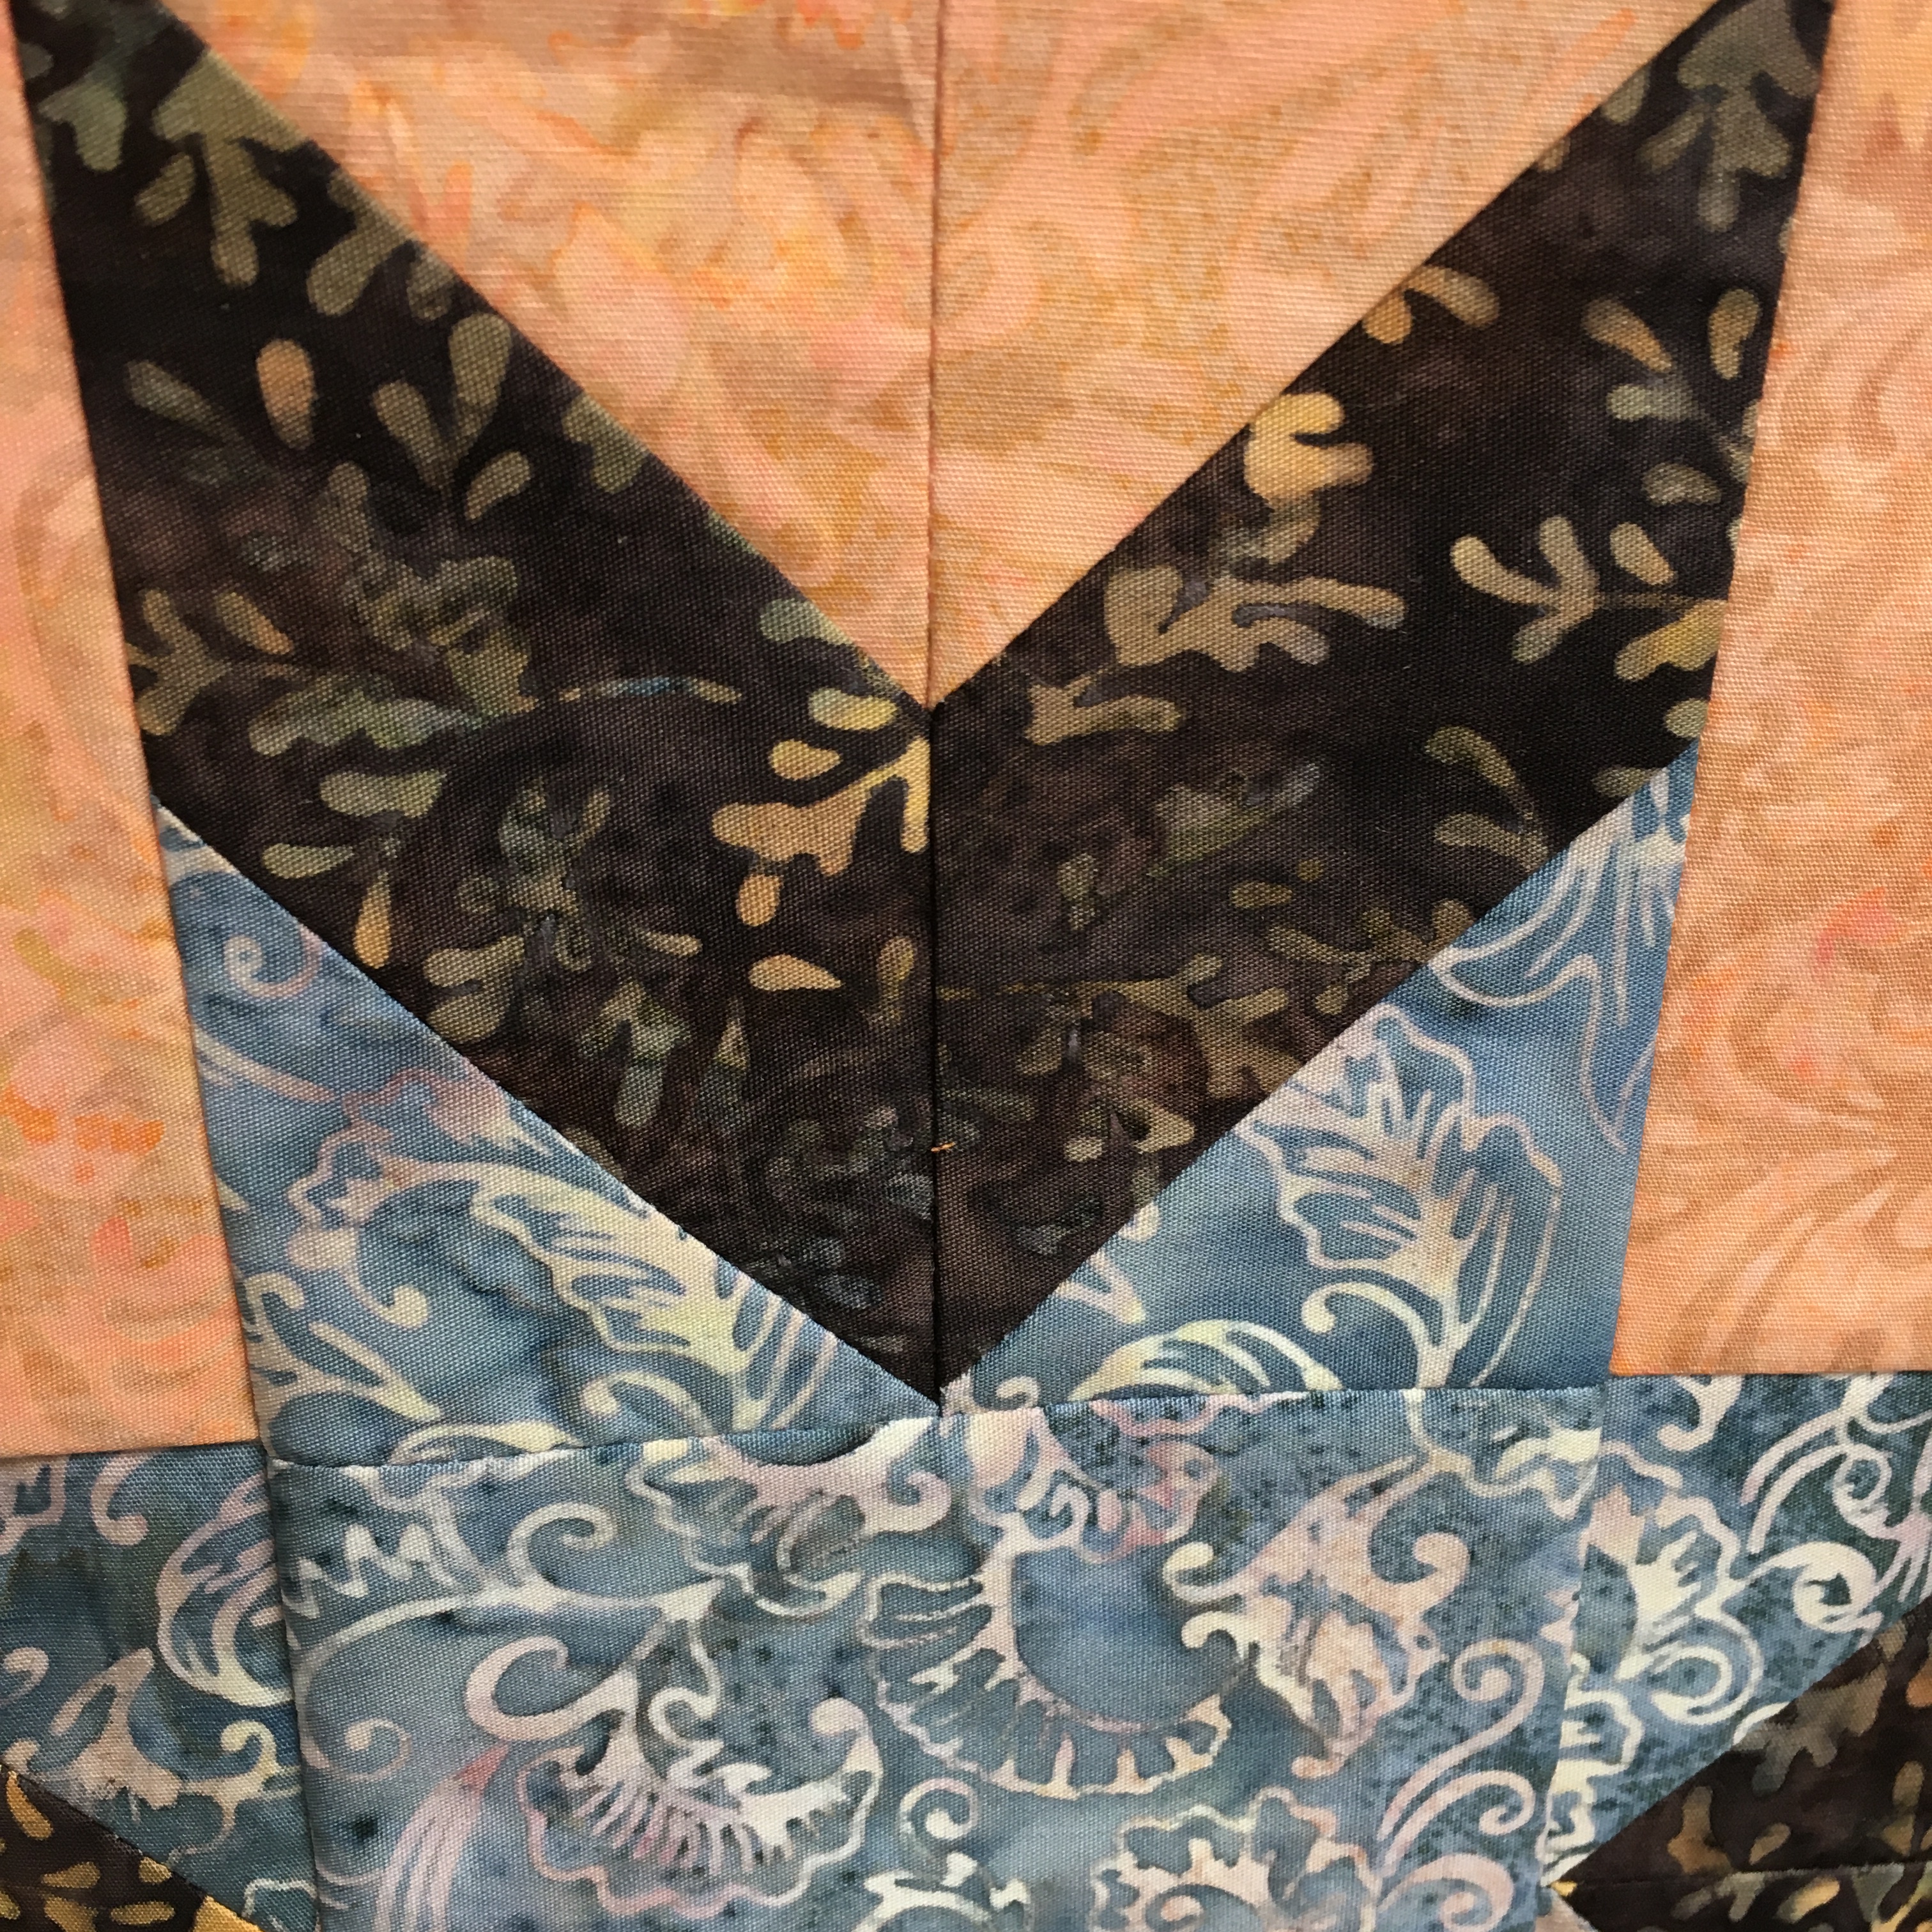
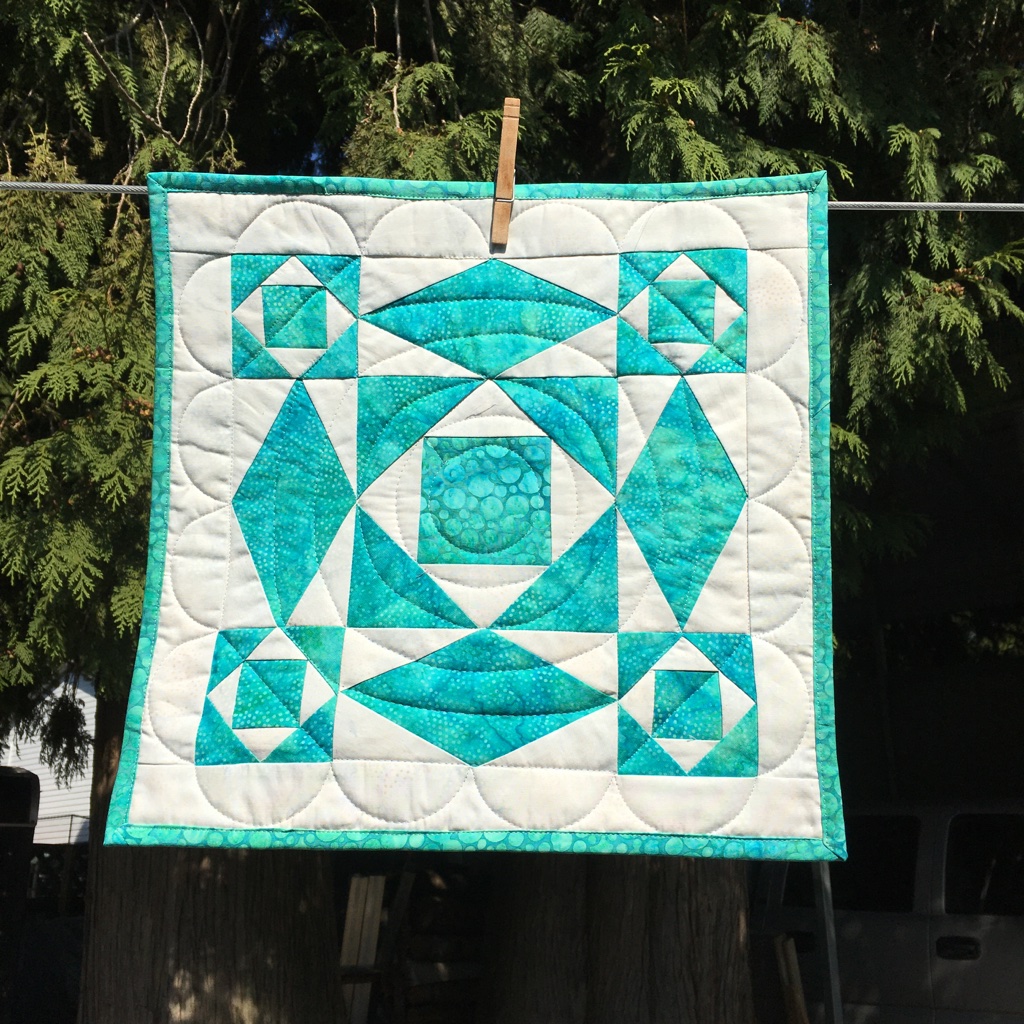
October’s spice is SAGE.
Sage is a plant that I have grown in my garden for years! Here in the Pacific Wet Coast (south western British Columbia) it grows easily. I use it mostly for poultry dishes … especially stuffing for chicken and turkey. YUM!!! I don’t need to dry or freeze it, because even in the winter it’s ready for picking!
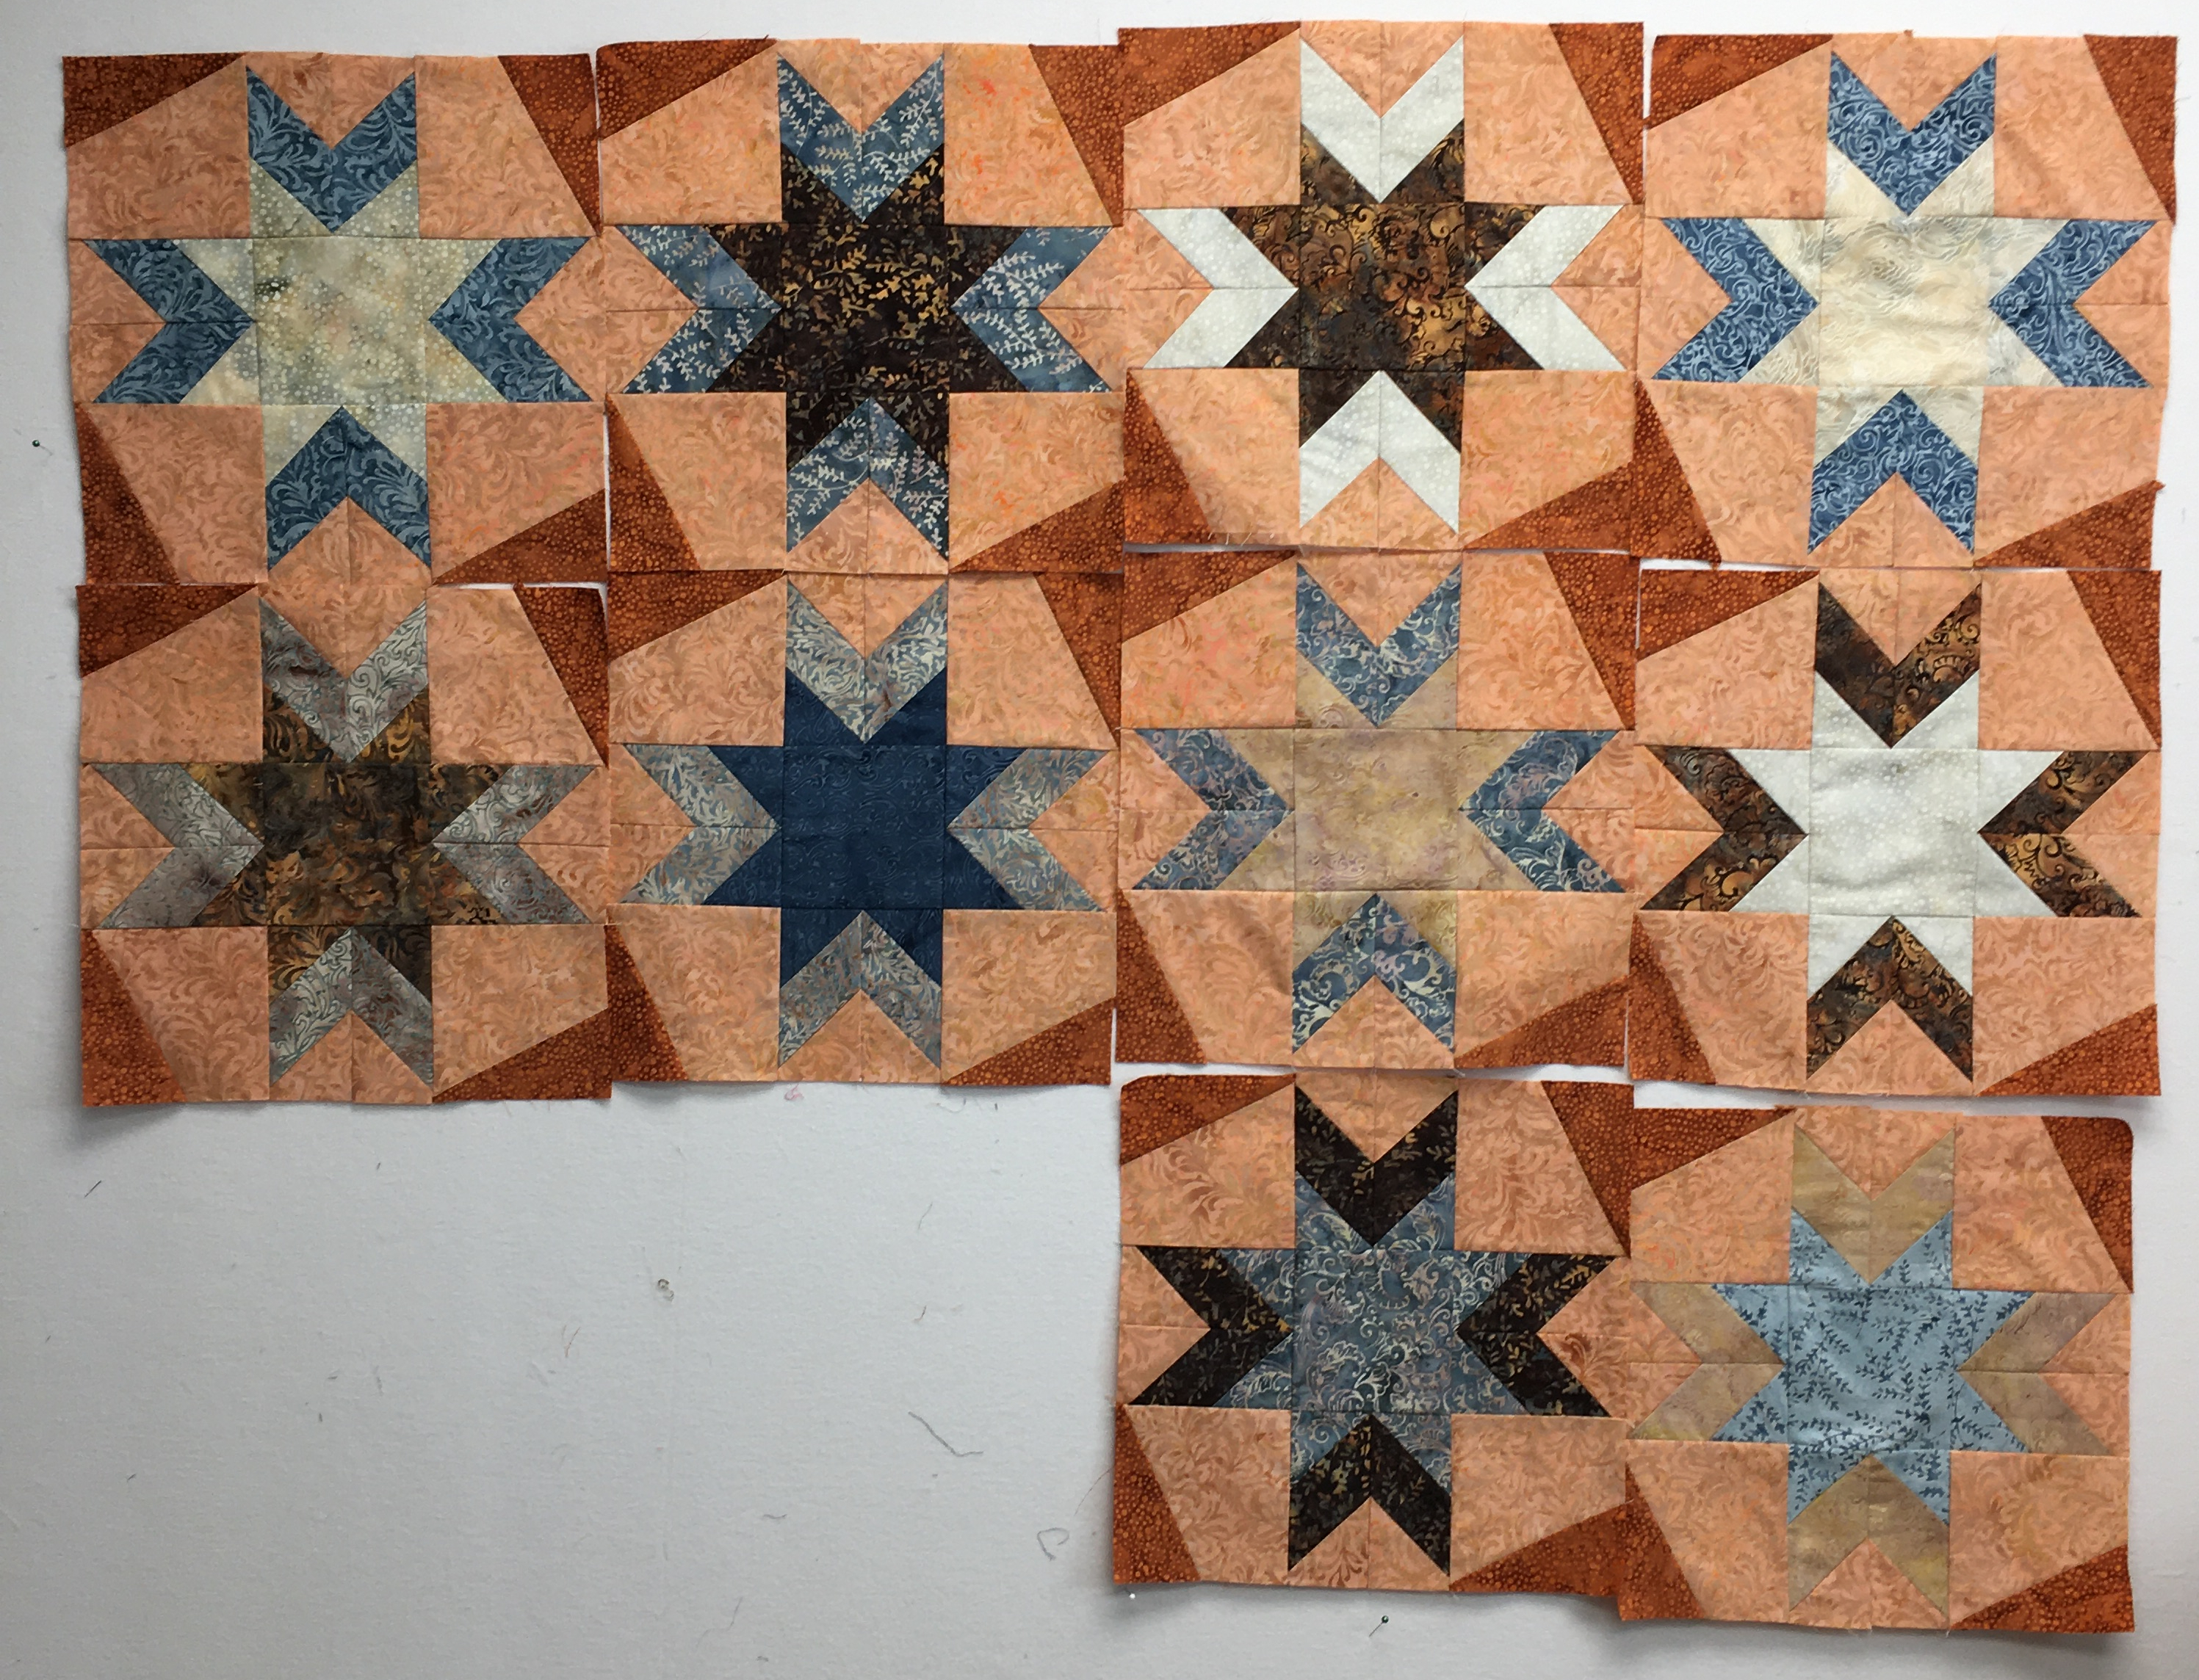
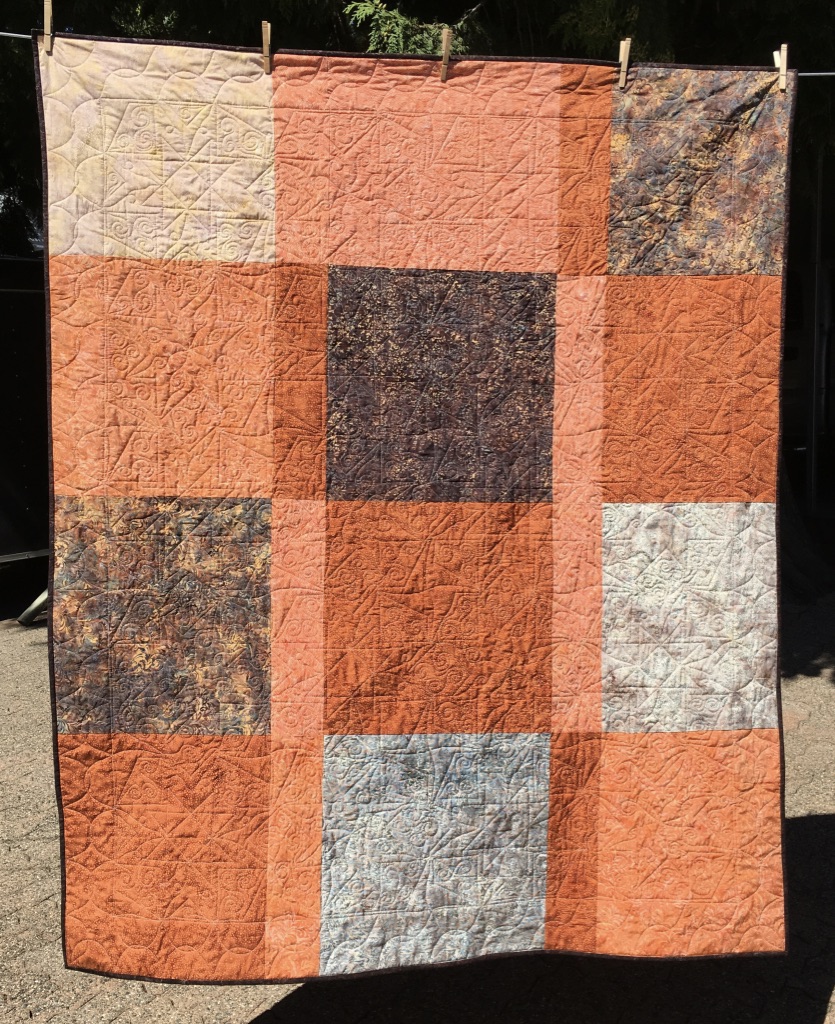
Here is my Sage block – made with Island Batik fabrics!
And a picture of all 11 blocks … waiting for the last 2 blocks to assemble into a beautiful quilt!
Visit the other quilters who are featuring a sage block!
Both of these are quilts made with Island Batik fabrics. The one on the left was made for a Storm at Sea challenge and you can read about it HERE. The one on the right was made recently for a Gadget Blog hop and you can read about it HERE. Both quilts use Hobbs batting and are pieced either on my Featherweight or my Janome M7 and are quilted on my domestic Janome M7.
Well, I didn’t finish ANY UFOs this month. None, Nada, not a one …
However, I did finish 3 new starts … I finished my October Island Batik project … which you will see in October. I also finished the Pinktober quilt for the blog hop happening in October to honour breast cancer patients. My day is October 13th. As well, my gadget quilt was finished. It was a fun quilt to make. You can read about it HERE.
I have 2 more UFOs to finish before the end of the year and 3 new starts … for me, I think it’s doable! I hope!
Earlier in the month, I posted my September Island Batik project using a Studio 180 tool, Corner Pop, along with a few other tools that I own. I LOVE Studio 180 tools! You can read more about this quilt HERE.
This has been a super fantastic blog hop with ambassadors using new fabric collections and a Studio 180 tool. Every quilt has been totally different and amazing. This is the lineup for this week.
Kate, from Life in Pieces, is hosting “Stitching Stuff” and the goal is to sew for at least 15 minutes a day. I use Kate’s guideline, but my personal goal is to sew for 30 minutes a day. On those “blah” days, it does motivate me to sit at my machine and 30 minutes often turns into several hours. Thank you Kate for the motivation!
January – Aug: 209 / 242
Sept: 24 / 25
Total: 233 / 267
Percentage = 87%
Stash Report
Donna at Quilt Paint Create hosts a weekly linky party where you can display your stash numbers. This has really kept my stash from growing (somewhat!) Before I buy anything, I am always mindful of the fact that I need to report it on my blog … That sometimes stops me in my tracks!
No shopping, but the quilt I made for the Gadget blog hop used 2 yards of fabric for the backing. You can read about it HERE.
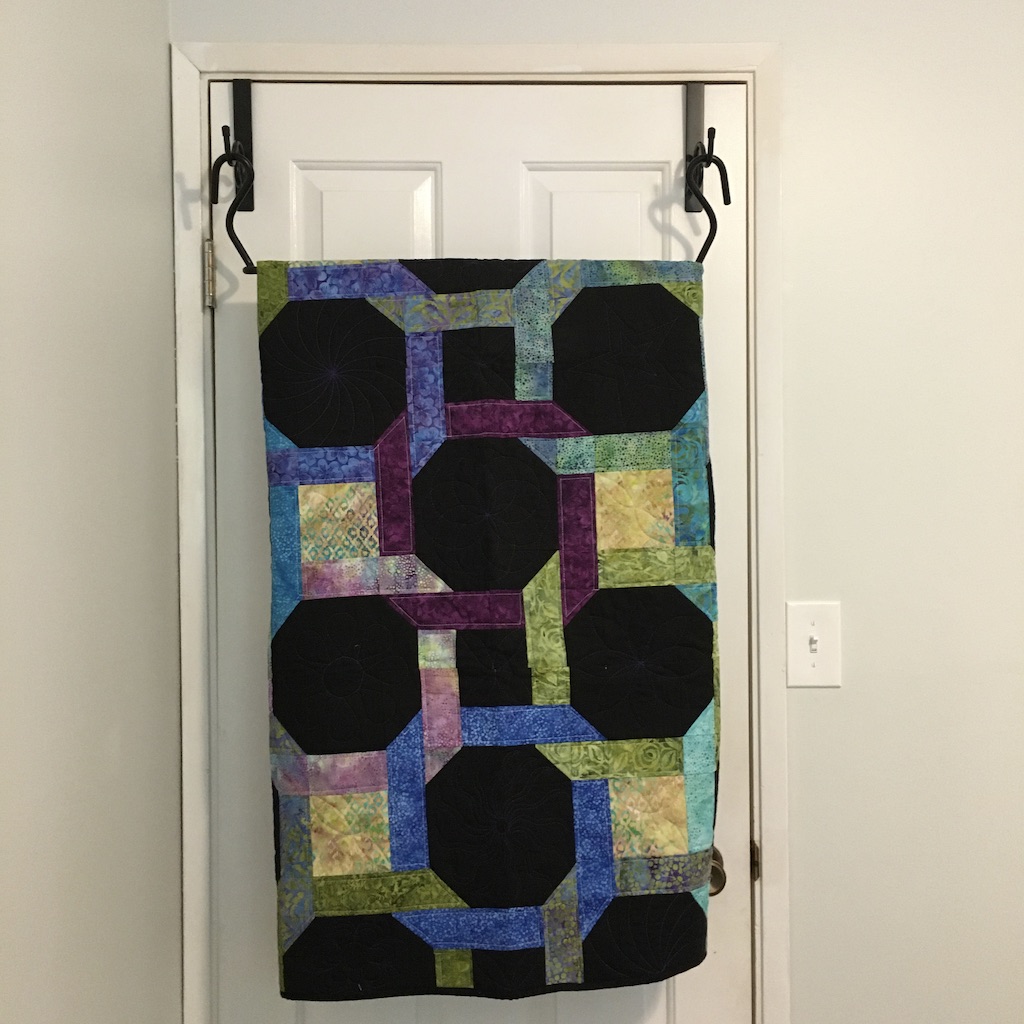
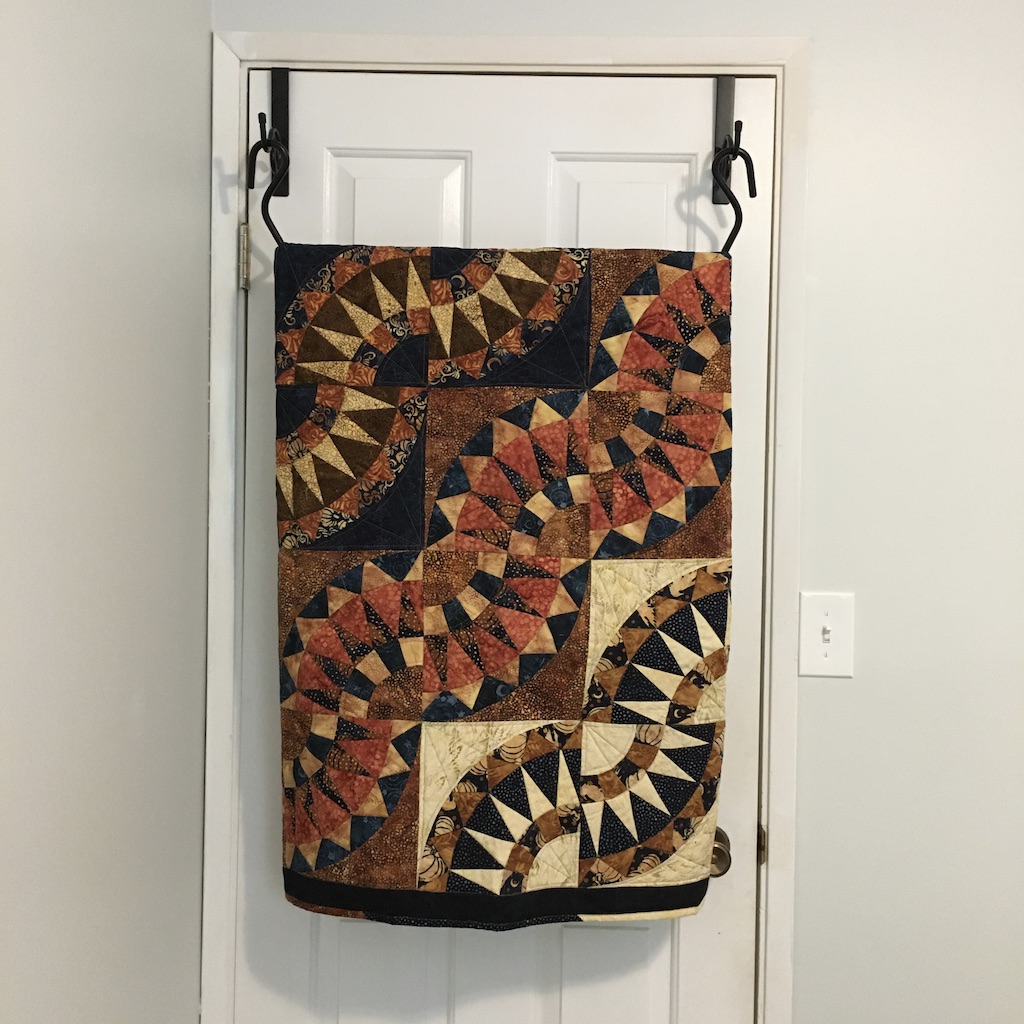
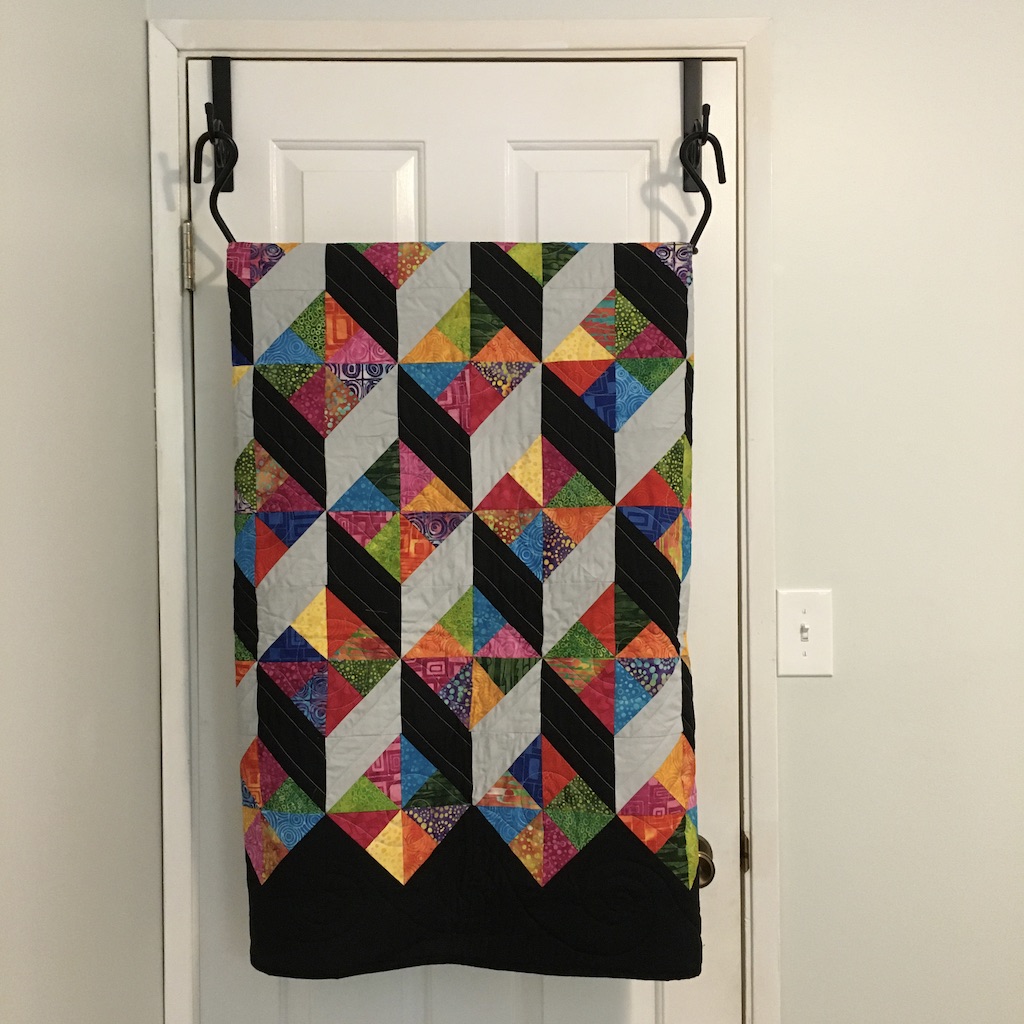
I was contacted by Ellen this summer. She sent me a Quilt Keeper and asked me to blog about my experience with it.
So, who’s Ellen? Ellen Taurins is a quilter who originally designed the Quilt Keeper for hanging her own quilts. She’s obviously a very clever lady!
The first thing I noticed when I opened the box was the quality of the product! It is superb! It is extremely well build and very professional looking! I hung a variety of my favourite Island Batik quilts and took pictures. Don’t they look lovely hanging on the back of the door?
There is a video HERE that will explain how easy it is to use.
The Quilt Keeper will fit any regular door! It comes with foam inserts should you need to adjust it at the top (I didn’t). It’s very easy to hang and switch out the quilts. It actually took me longer to fold each quilt than it did to hang it! So simple to use! If you’re looking for a way to store some of your quilts and show off some of your quilts – this might just be what you’re looking for!
Ellen has a facebook page where you can see many more pictures of the Quilt Keeper! There’s even one with a Christmas quilt and a red bow … makes me think it might make a wonderful Christmas gift for a quilter in your life! Or for yourself!
Oh me, oh my! What a blog hop this promises to be!!! Gadgets, gadgets, gadgets … I have a few! Do I need to pick just one??? Carol, from Just Let me Quilt, organized this blog hop and I signed up right away!!!
But before I started, I decided that I needed to actually define what a “gadget” is. According to Mirriam-Webster a gadget is “an often small mechanical or electronic device with a practical use but often thought of as a novelty.”
Hmmm, to me, I have always considered a gadget something that makes my quilting easier. Sometimes the “gadget” is electronical, sometimes mechanical, but always is practical and useful. Hence, I’m going with my own definition of “gadget.”
I will show you the gadgets that I used for this project. I doubt this will make me the Queen of Gadgets, but even I was surprised at how many I actually used!
Gadget #1
EQ8
I used EQ8 to design this quilt using Island Batik’s “Pumpkin Spice,” a signature collection for Sarah Fabian, designed by Kathy Engle. I had received a 10″ stack, along with a 2 yard cut of “Celery” (which I used for the background) and a 2 yard cut of “Bluegrass” which I used for the binding.
And yes, just in case you were wondering, I recently upgraded from EQ7 to 8. A tiny learning curve, but lots of features I really really like! Well worth upgrading! Wish I’d done it sooner!
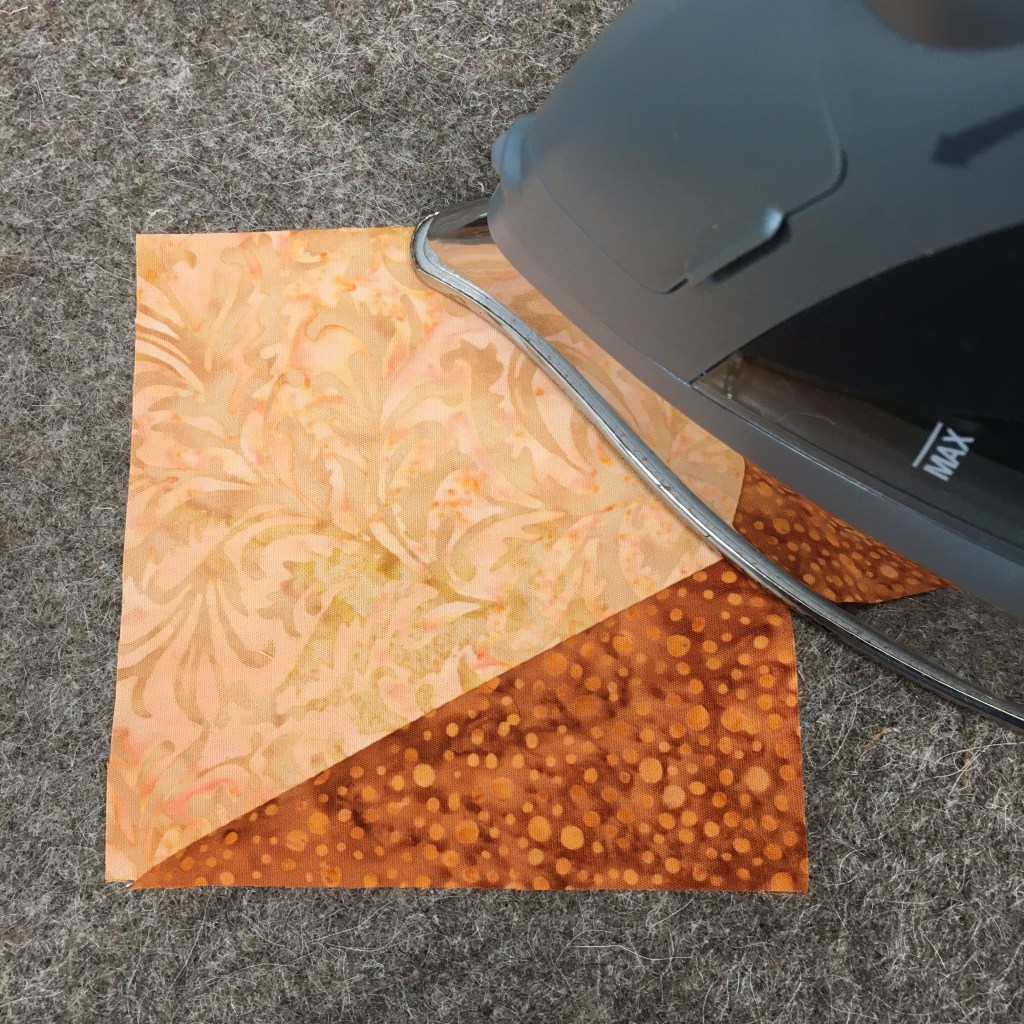
I made a quilt for the current Island Batik Blog Hop and I used Studio 180 rulers along with the “Flourish” fabric collection.. You can read about this quilt HERE.
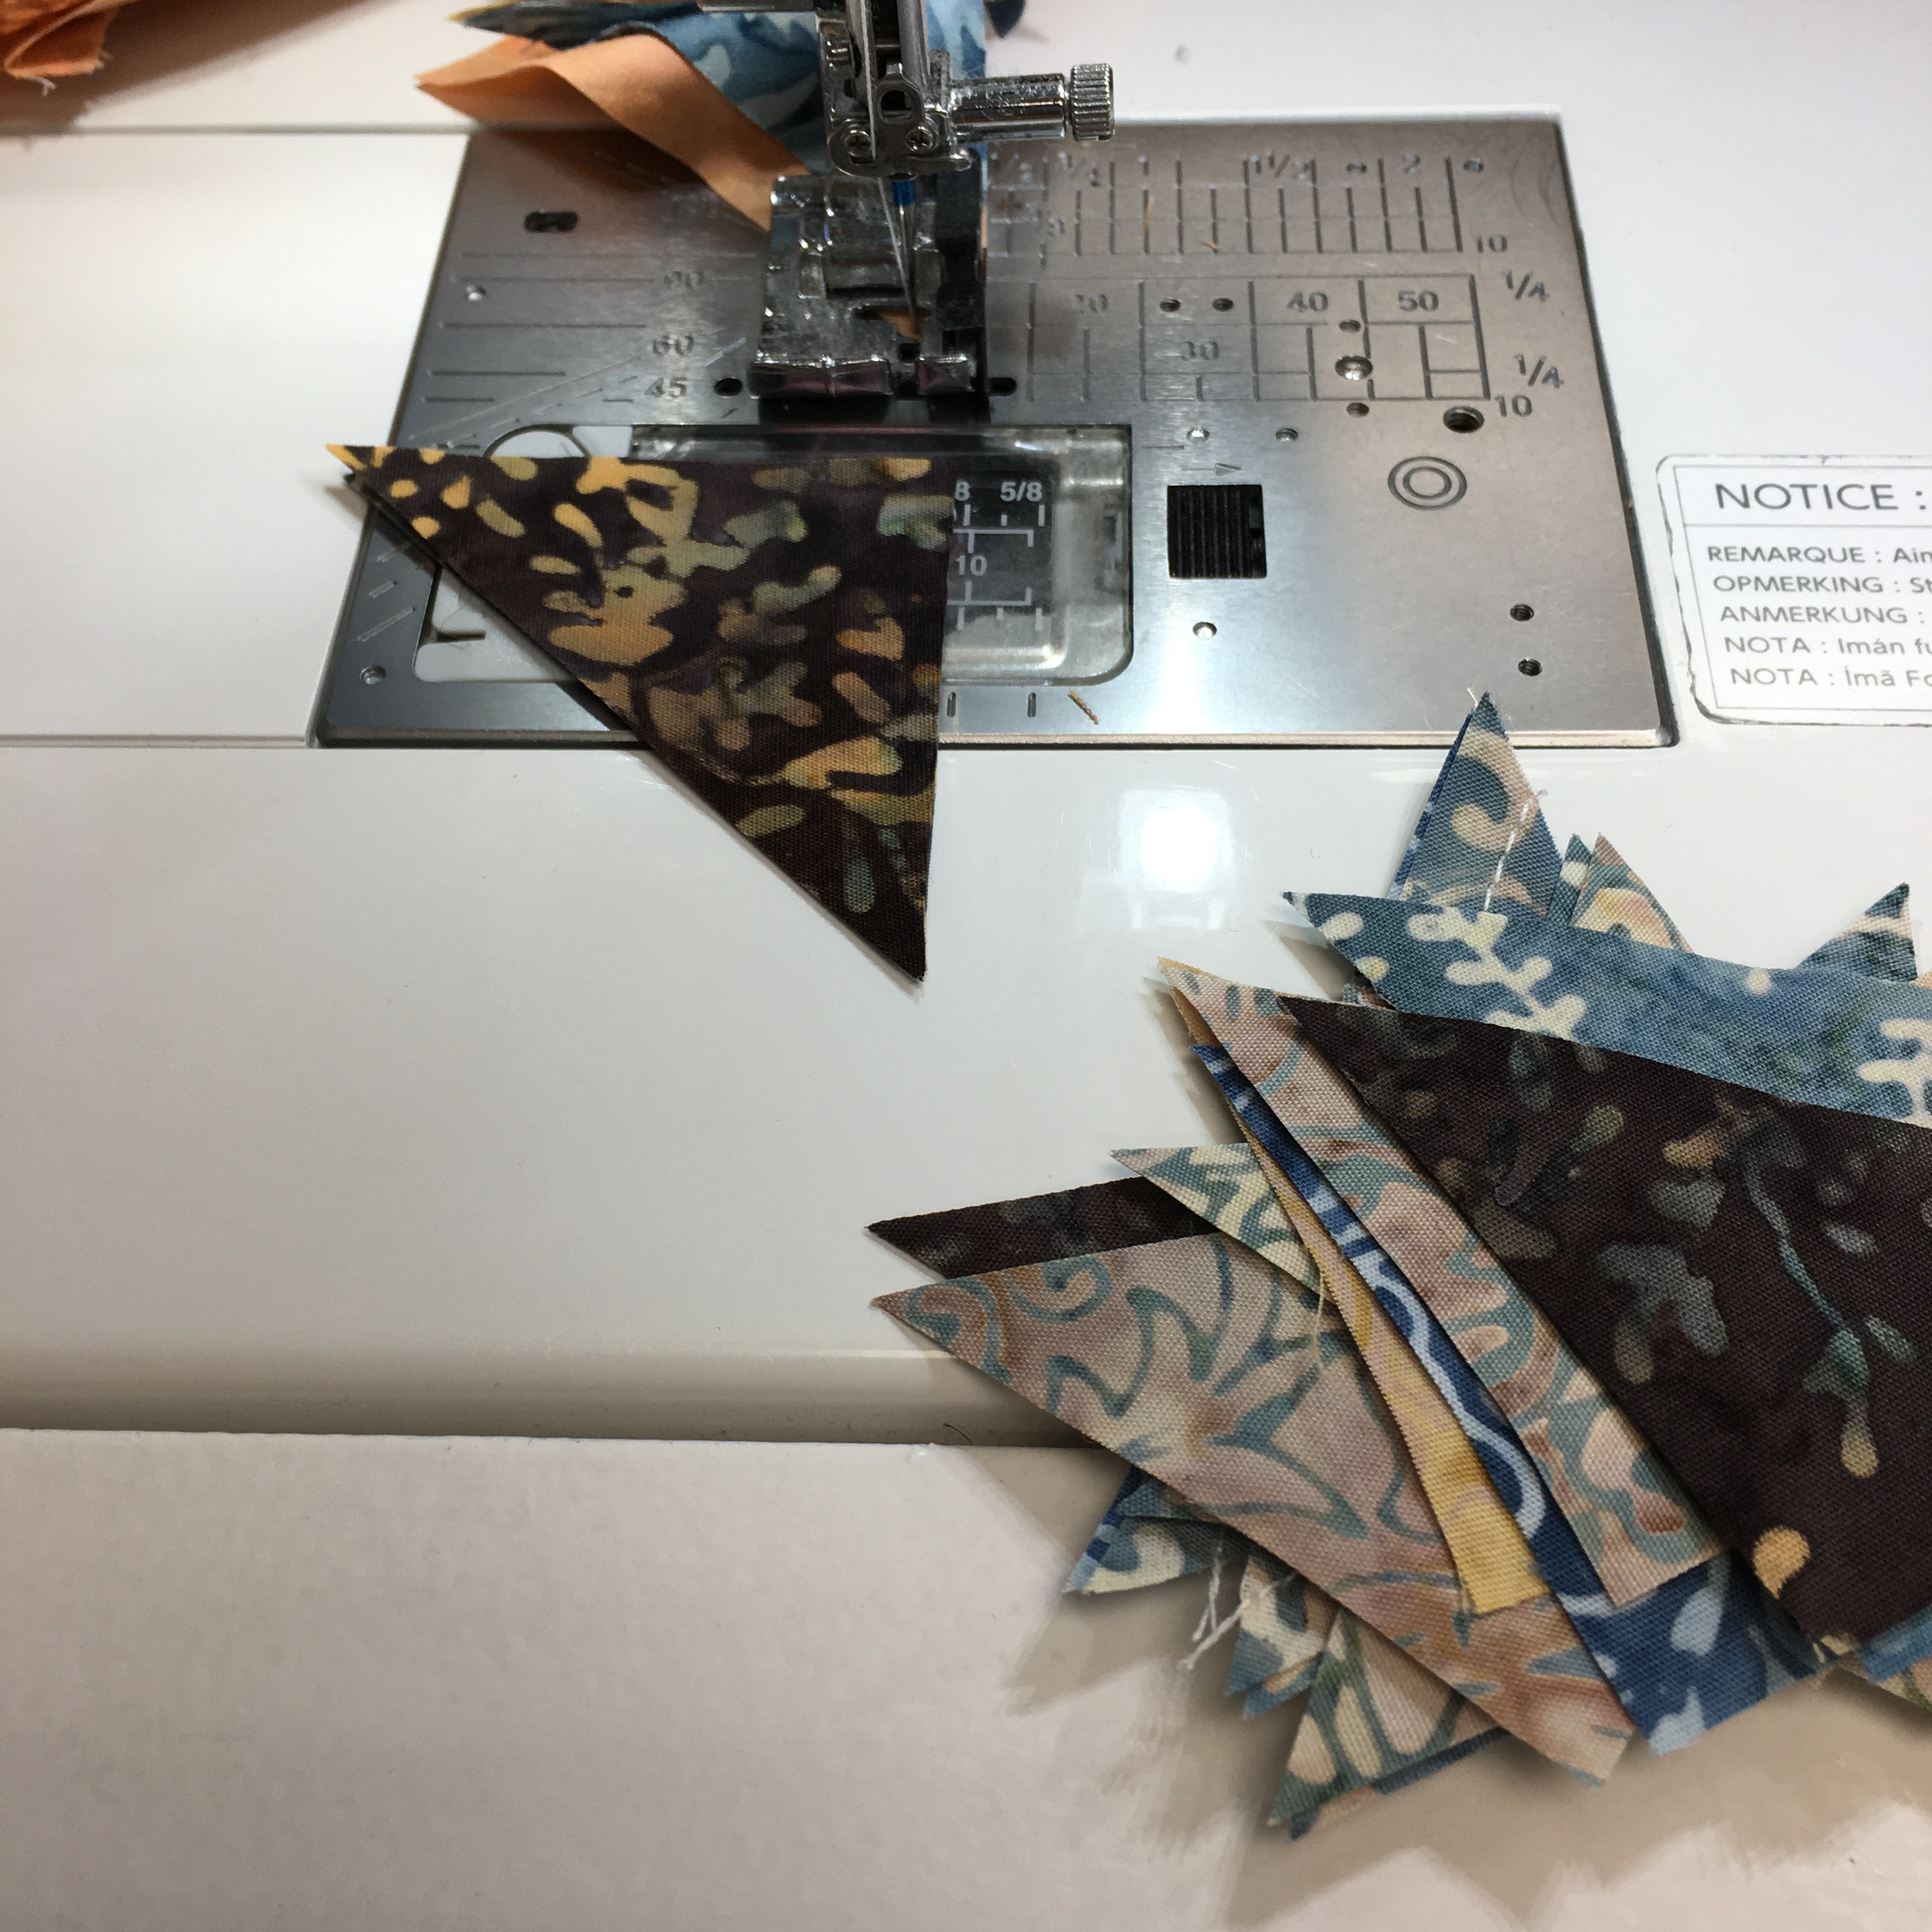
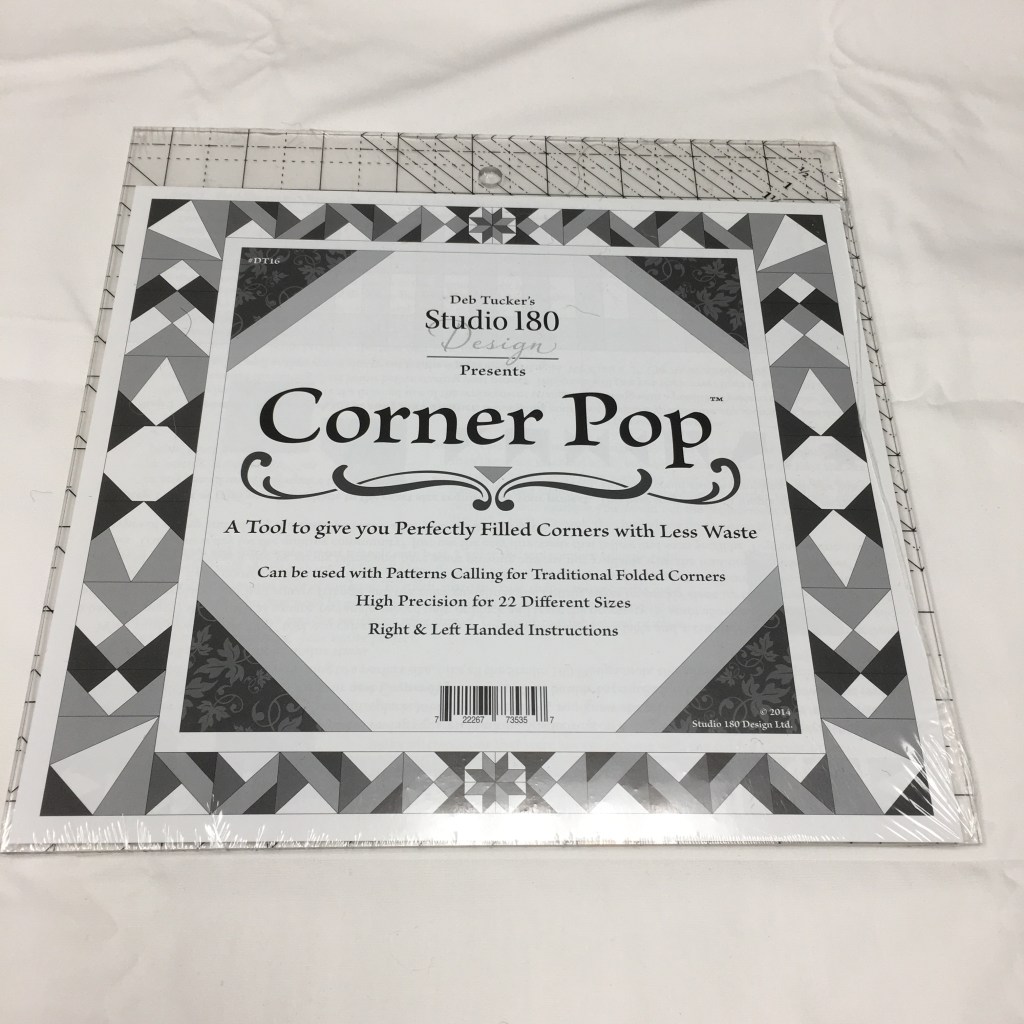
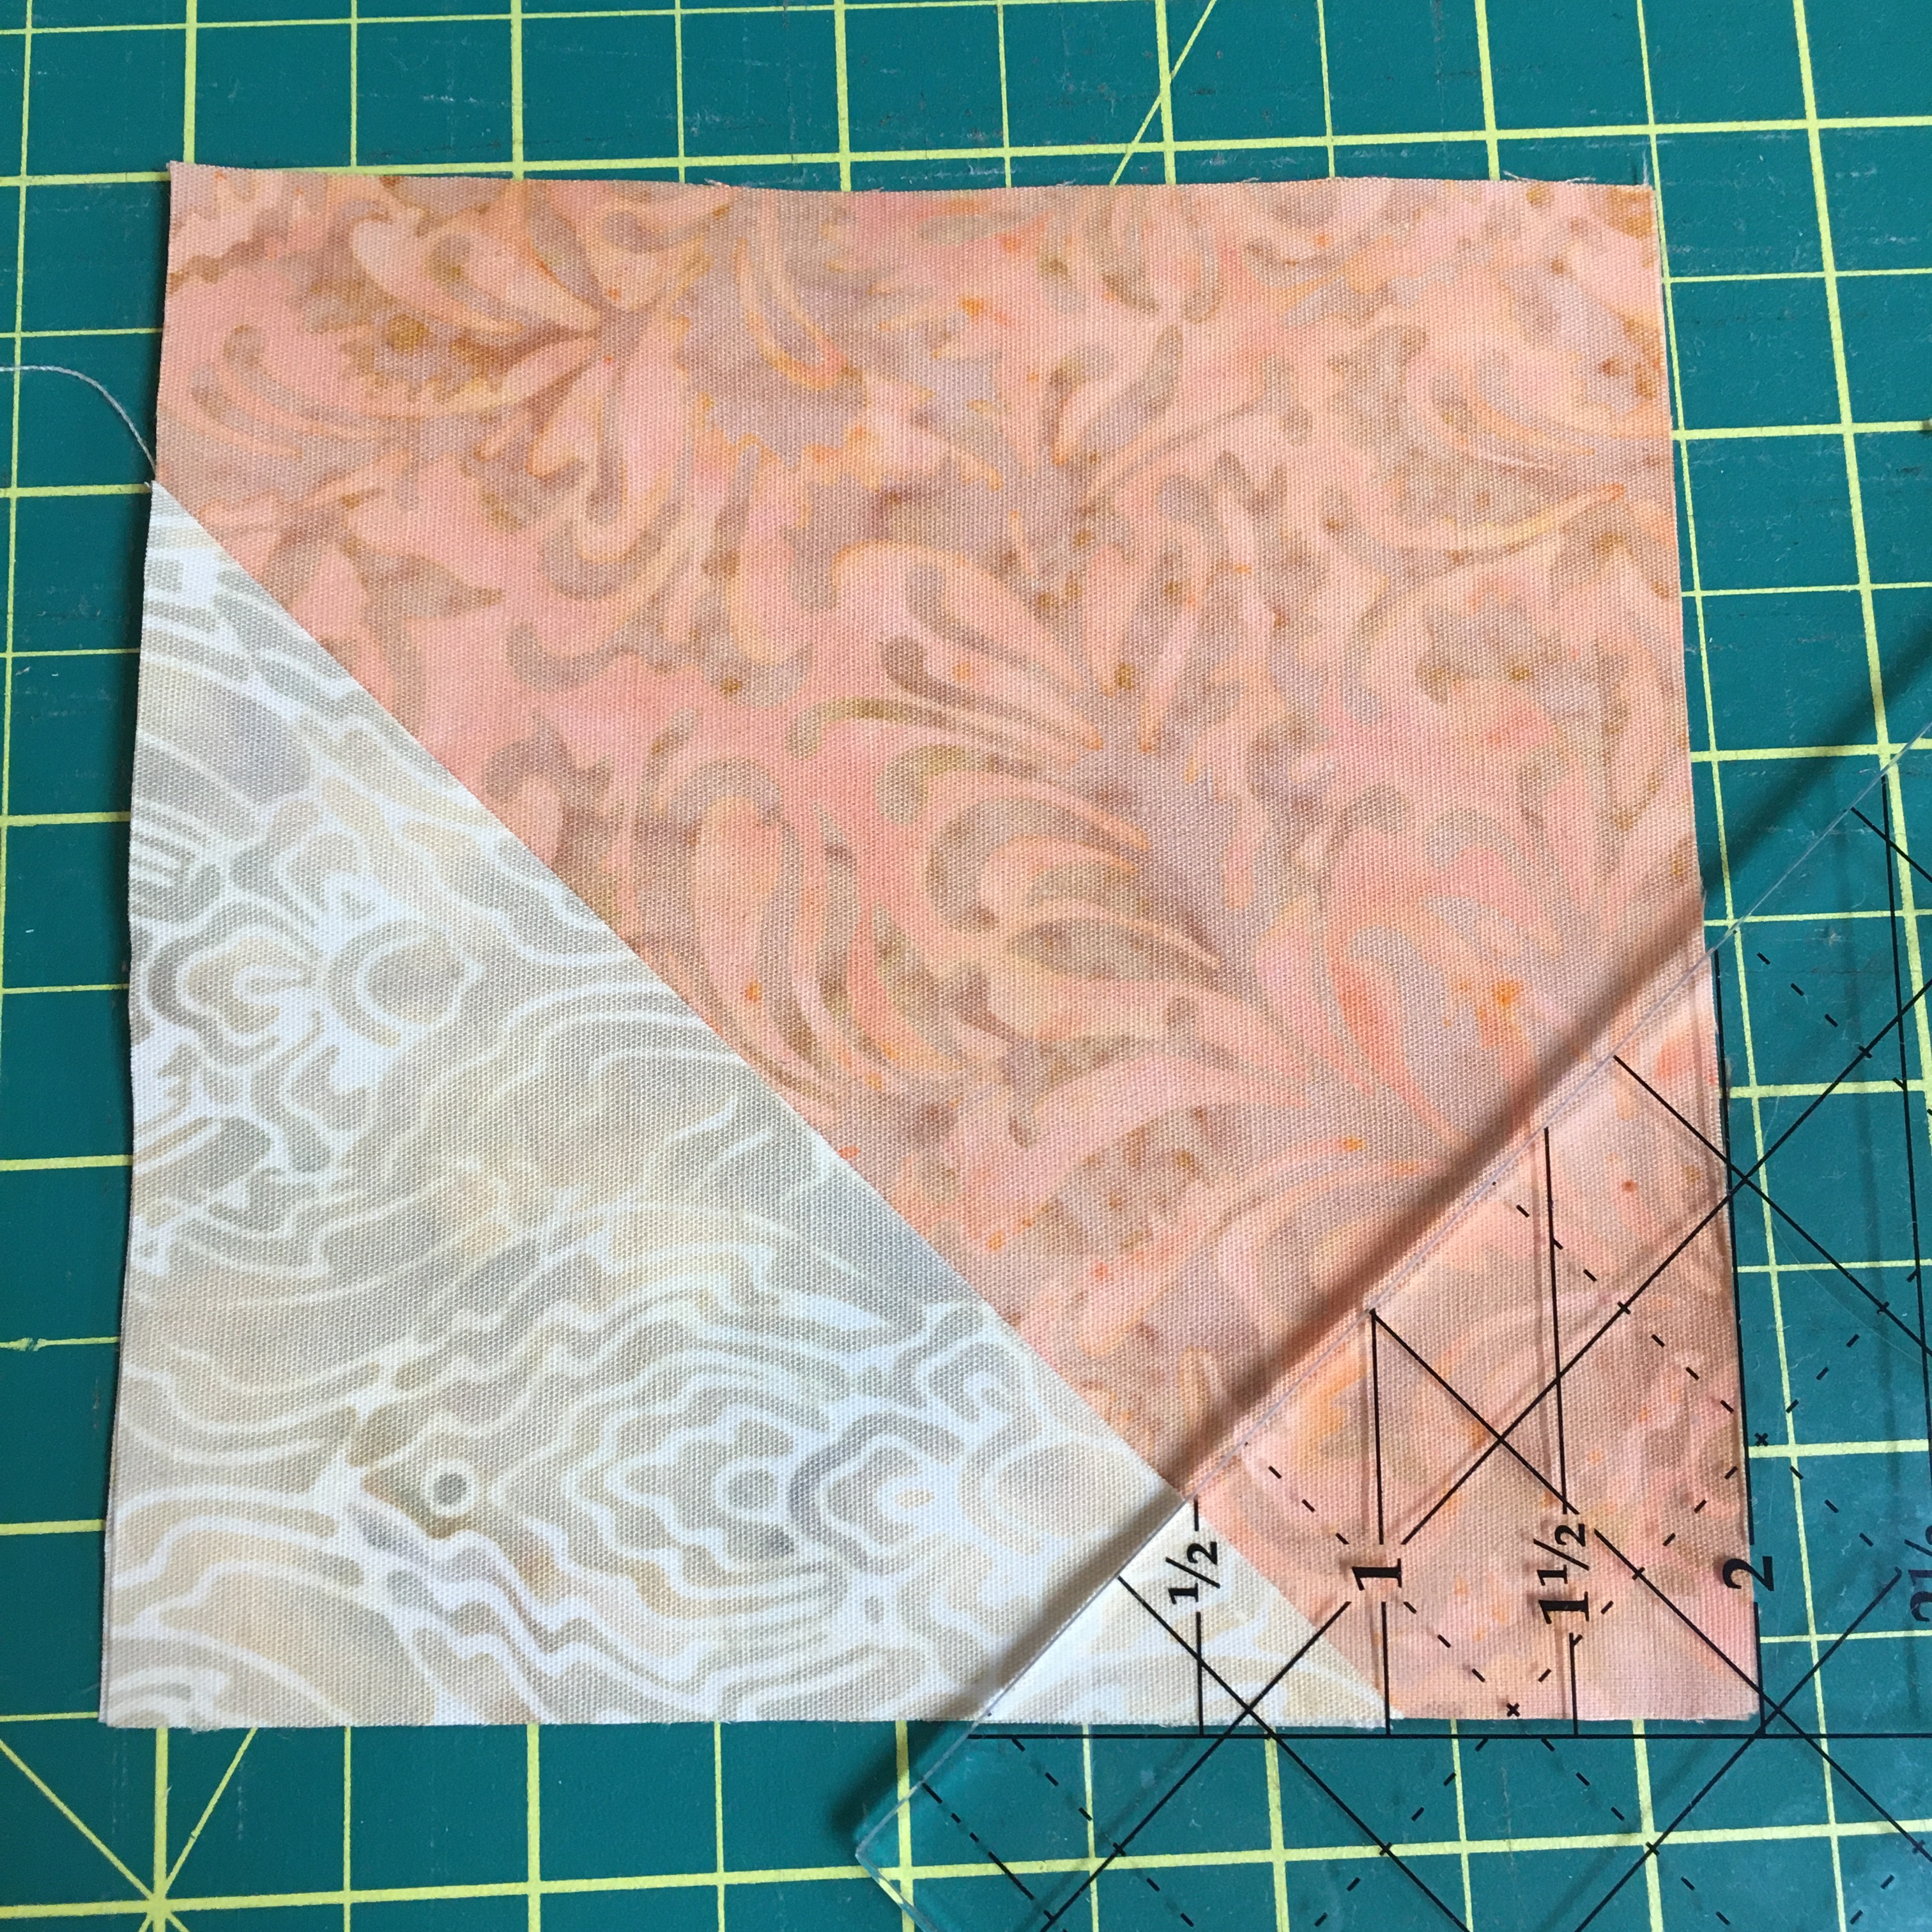
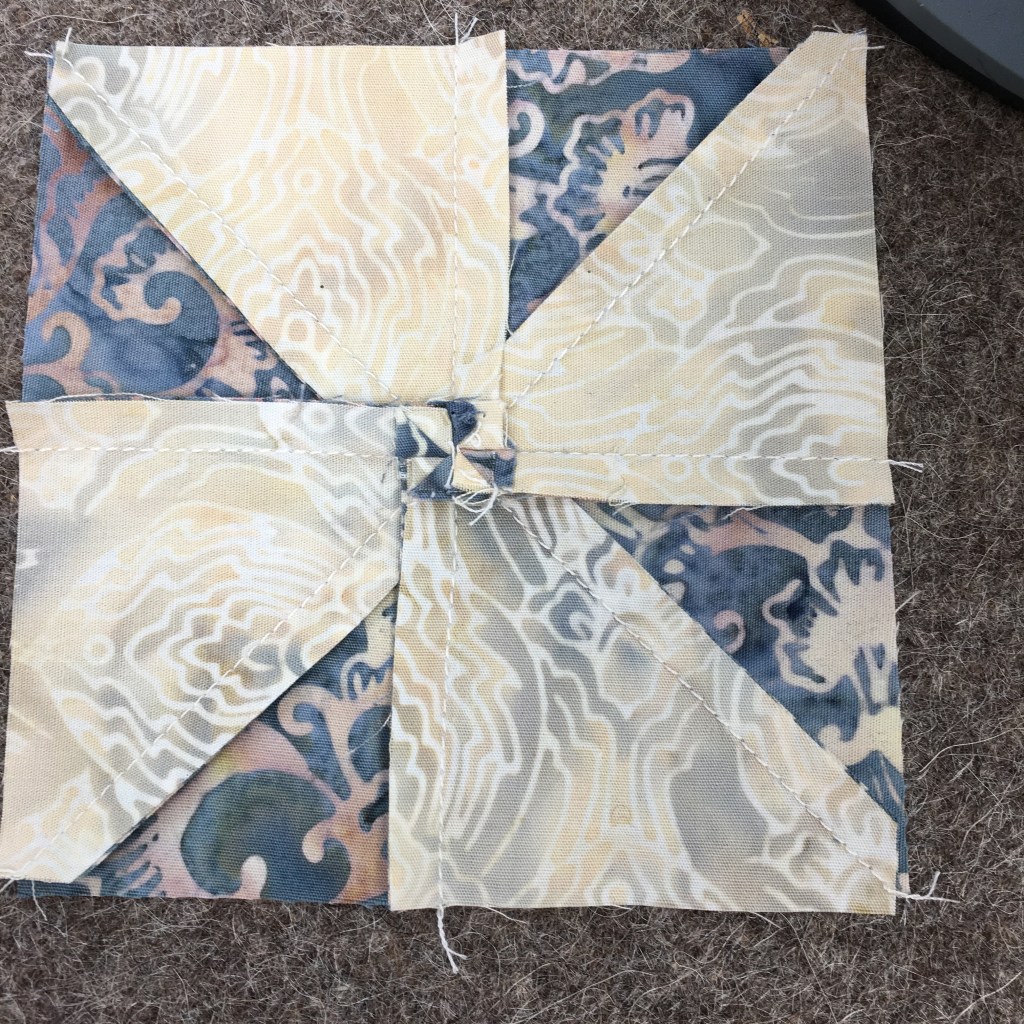
It was a LOT of fun to use the Studio 180 Corner Pop ruler to make this quilt! However there were a LOT of little triangles that were cut off the corners. They were all exactly the same size!
I HAD to do something with them! With no concrete plan in place, I used them as leaders and enders while I finished a few blocks, webbed the quilt and put on the borders.
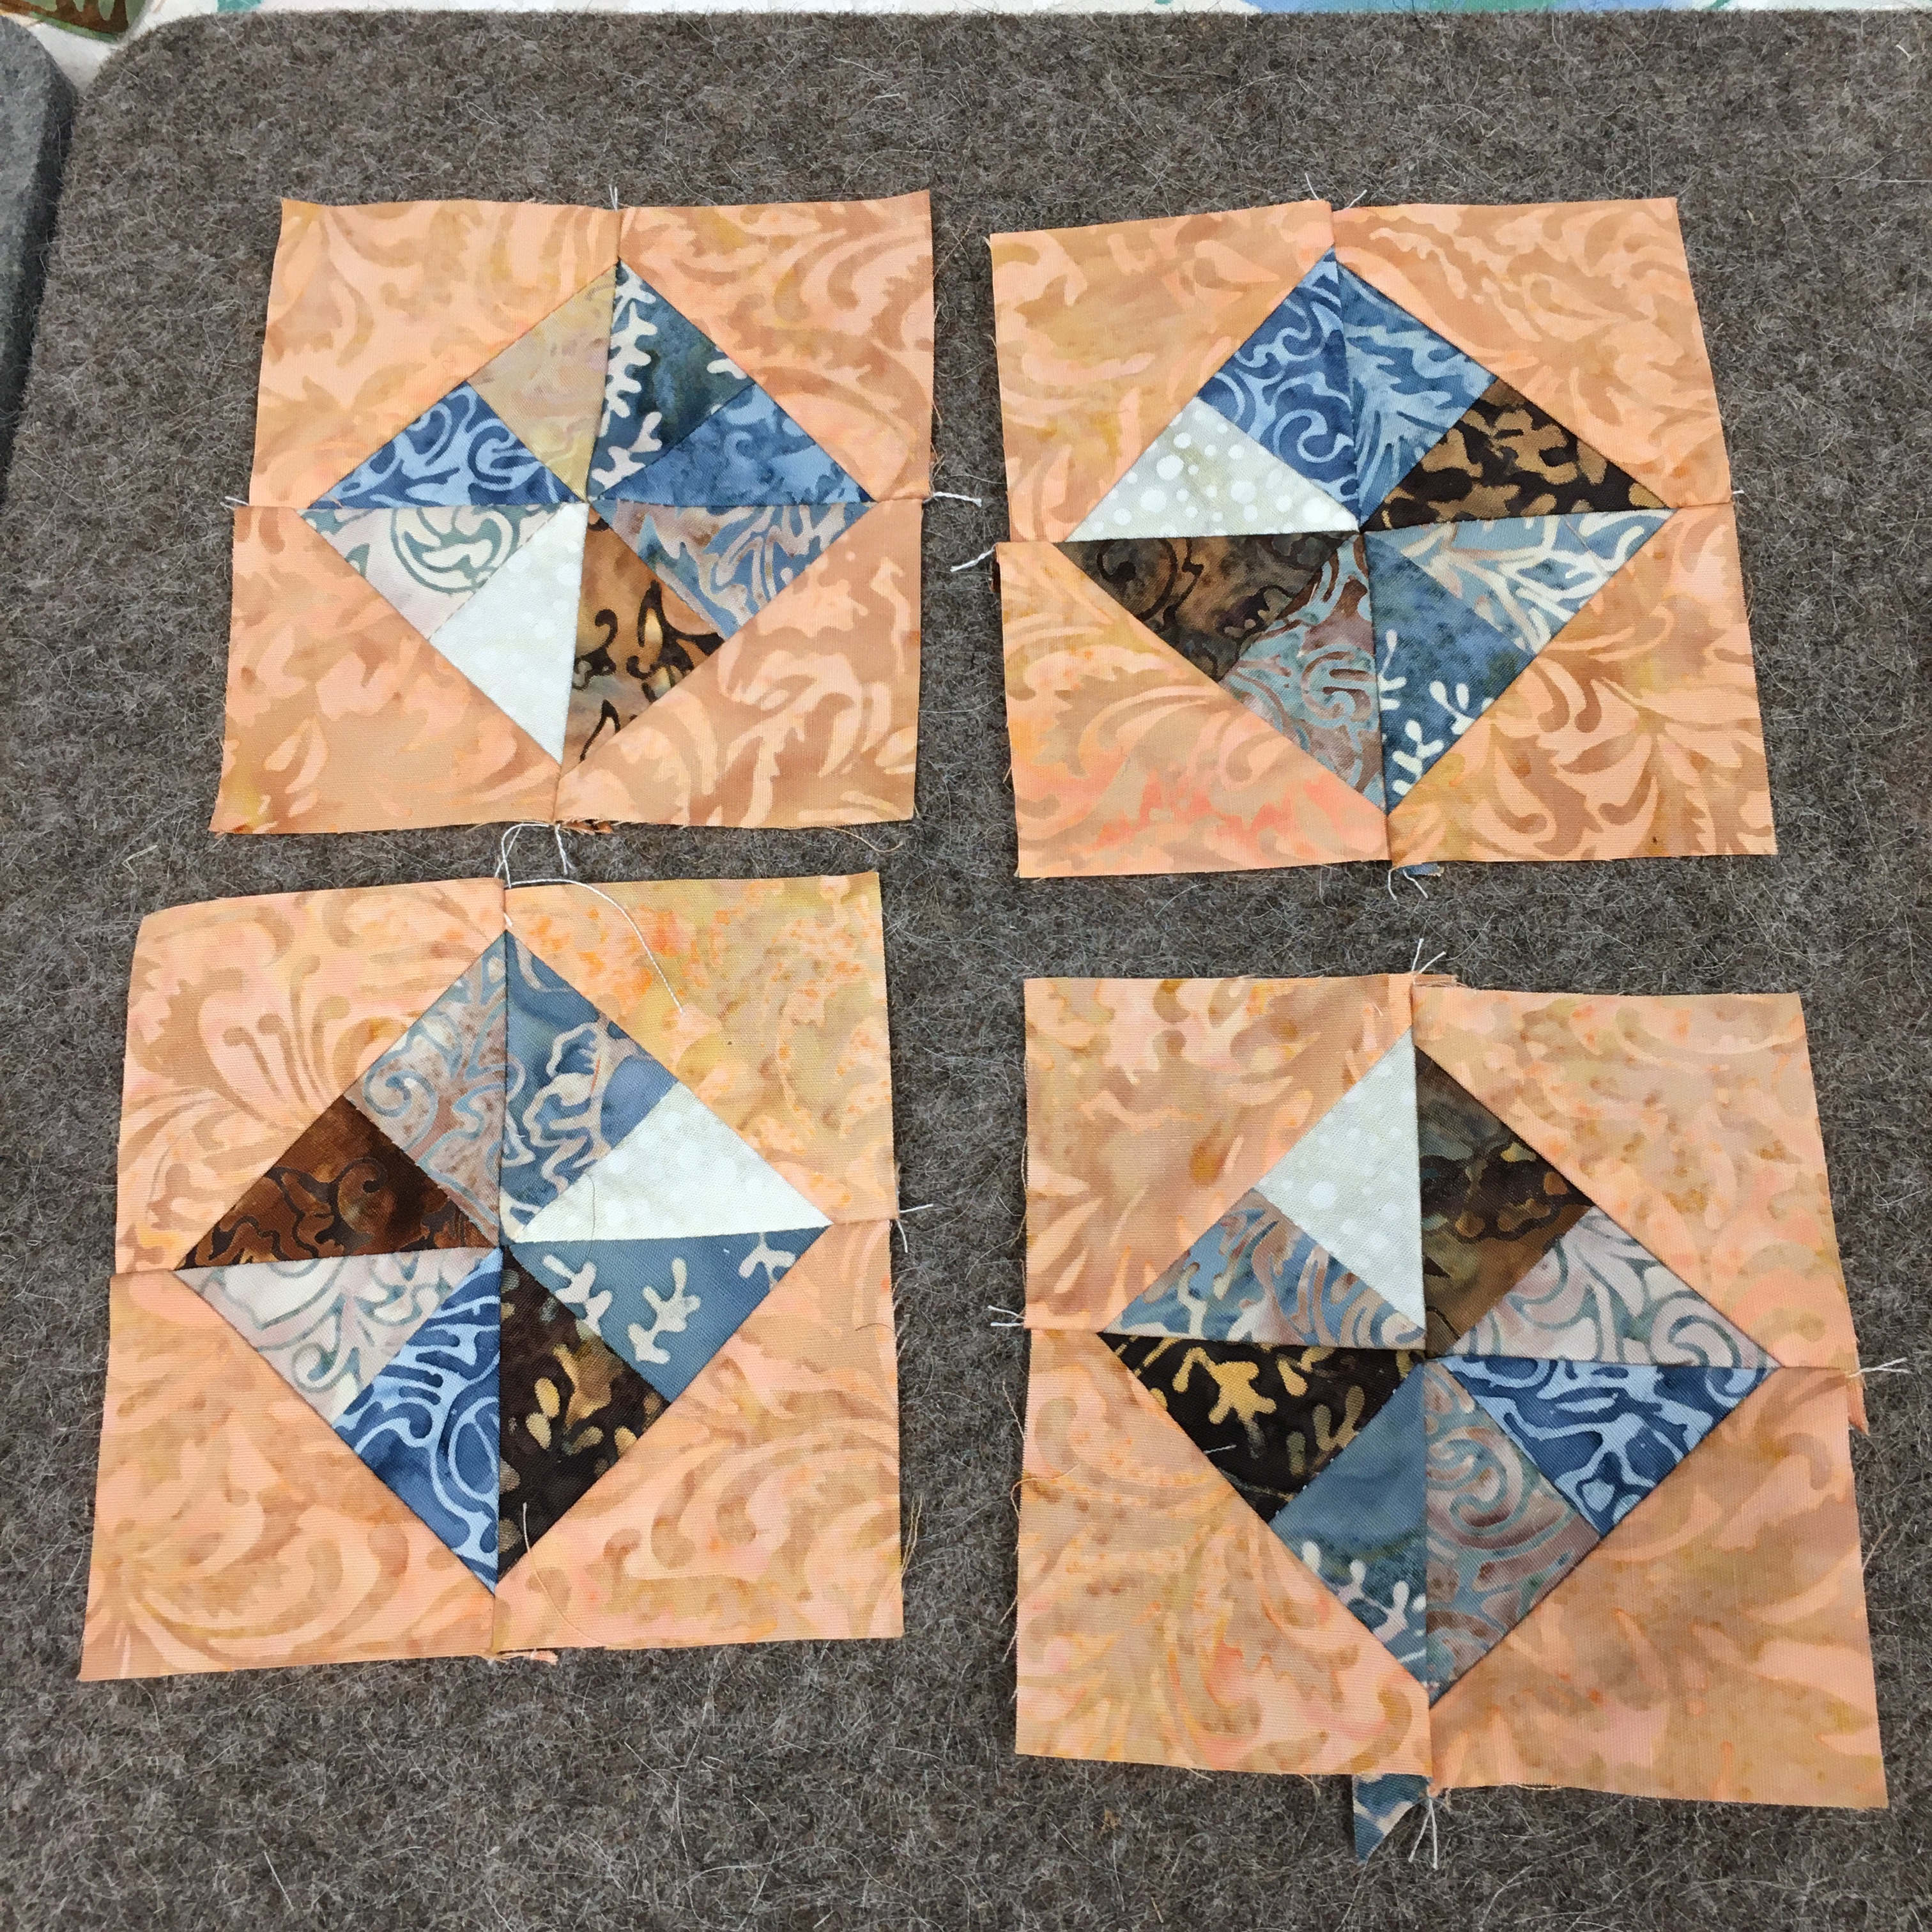
They became these little 3 3/4″ blocks, with 4 of them shown on my wonderful Prairie Spirit Alpacas Alpaca/Wool mat.
I set them on point with 3 3/4″ squares of Dots-Brown Brownie and used the same fabric for the setting triangles and the borders.
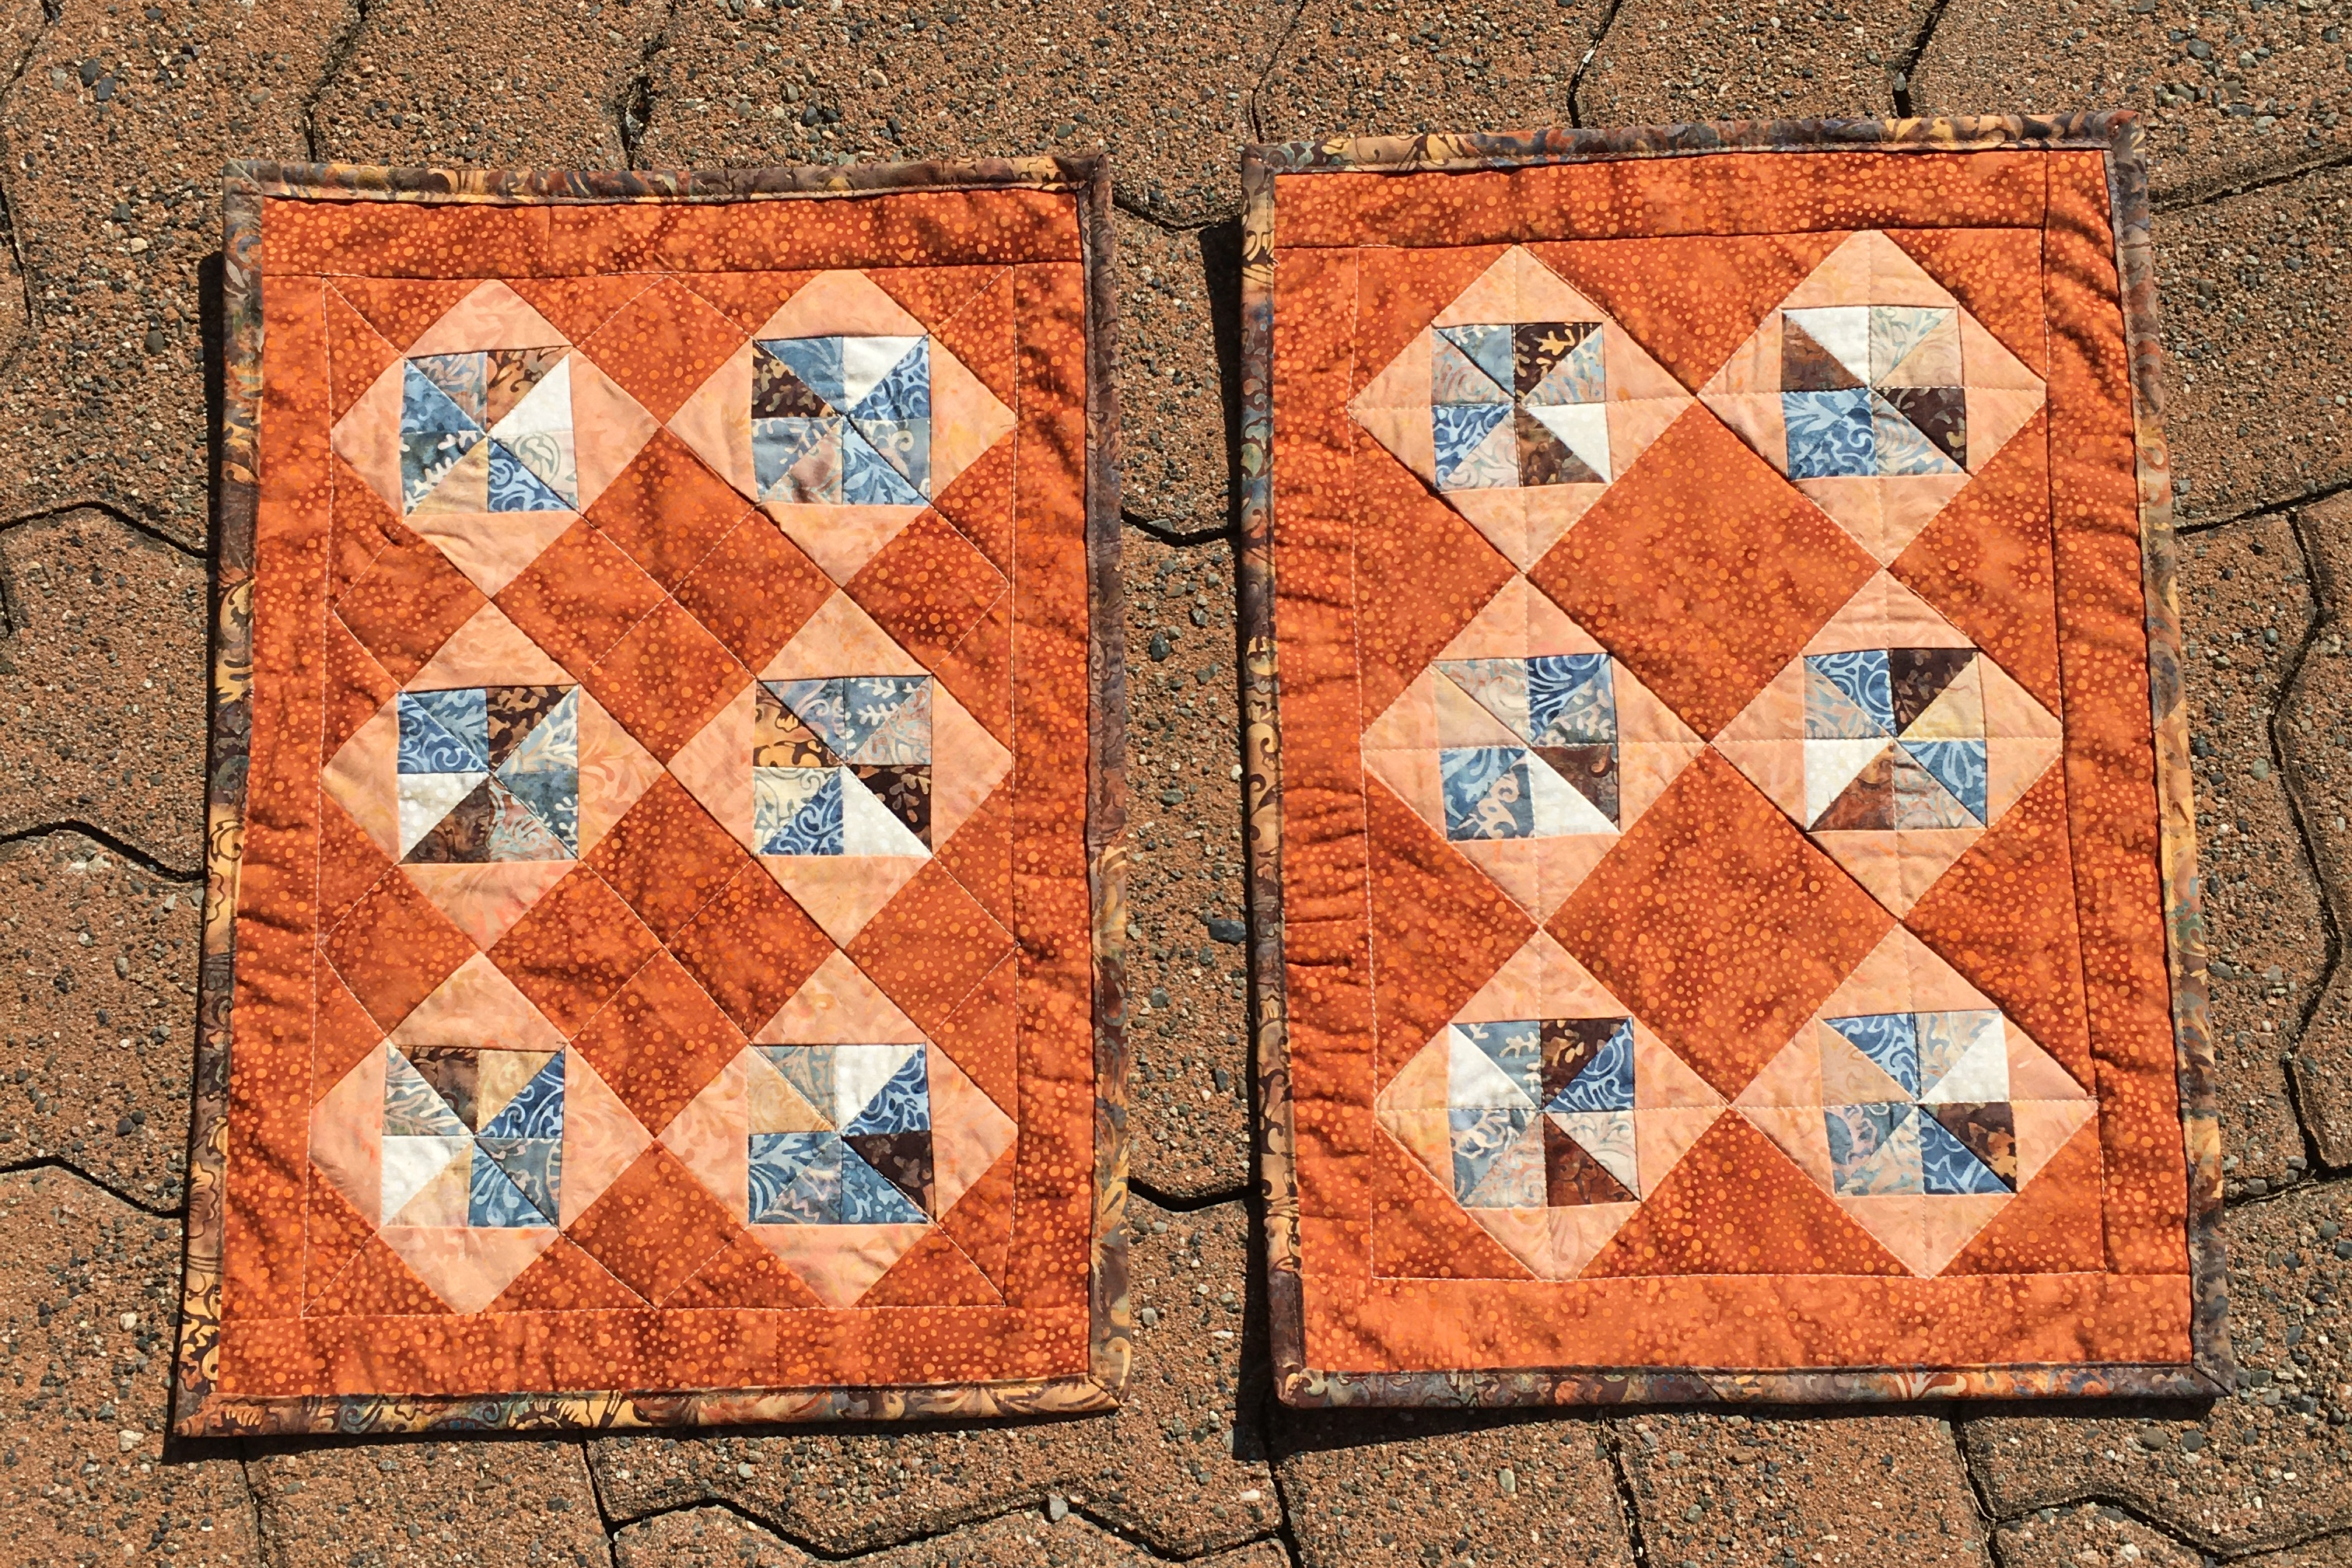
And they became 2 little table toppers that will be used on bedside tables.
Fabric: Island Batik, all from the Flourish collection. The light orange is Vertical Vine – Orange, the darker orange is Dots-Brown Brownie and the pinwheels are various fabrics from the collection. The binding is a combination of Vertical Vine-Multi Brown and Floral Leaves – Multi Brown.
Go to Island Batik’s blog to enter the Rafflecopter for your opportunity to win a fat quarter bundle of Honeycomb or Cheers! Click HERE. And, you can also see all of the quilts from this week’s hop!
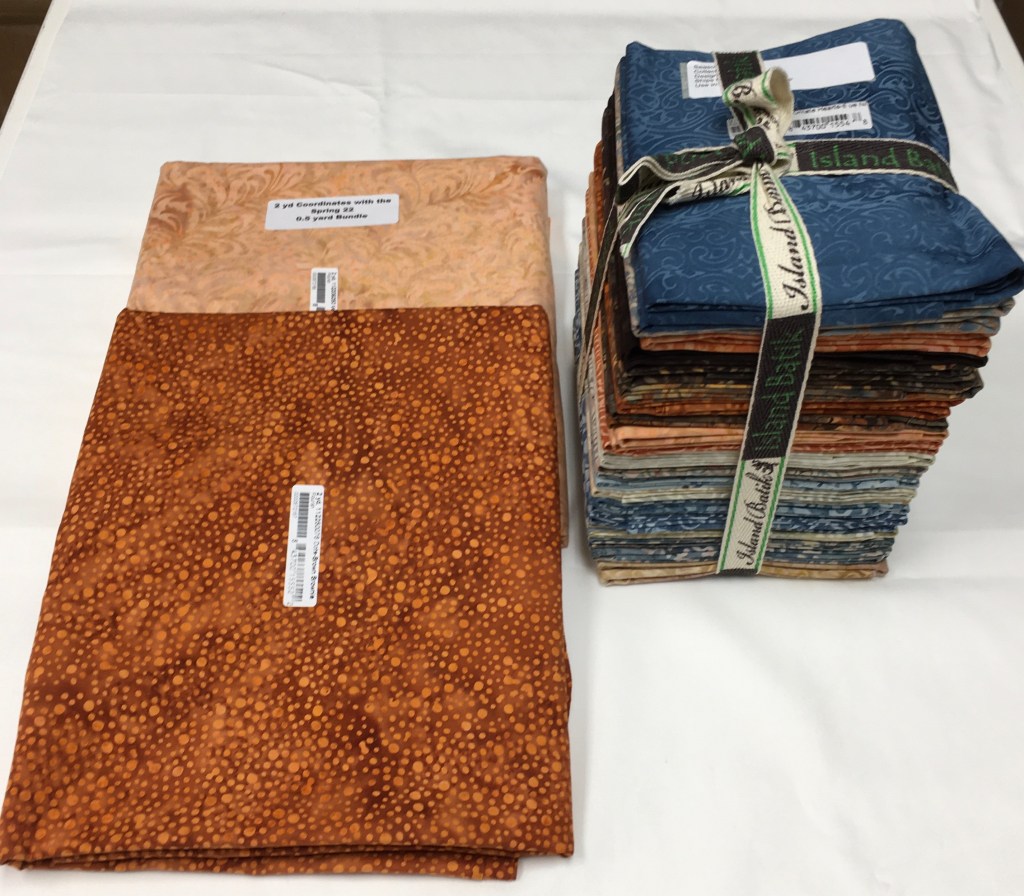
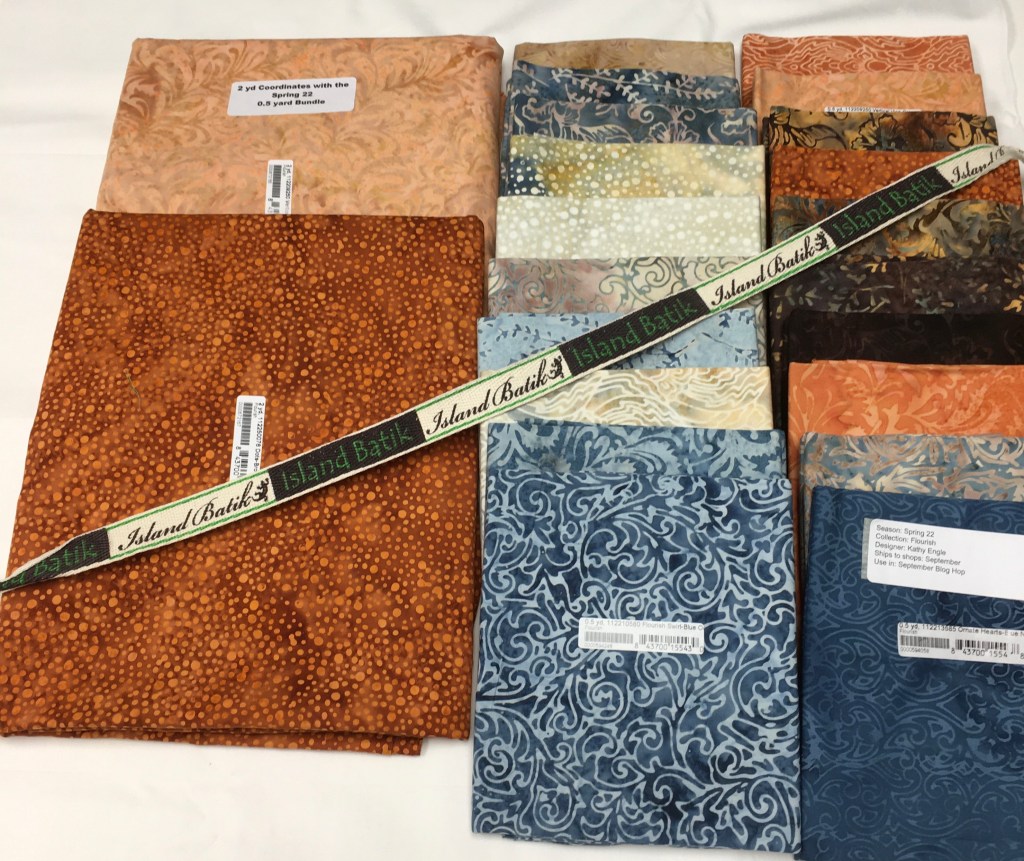
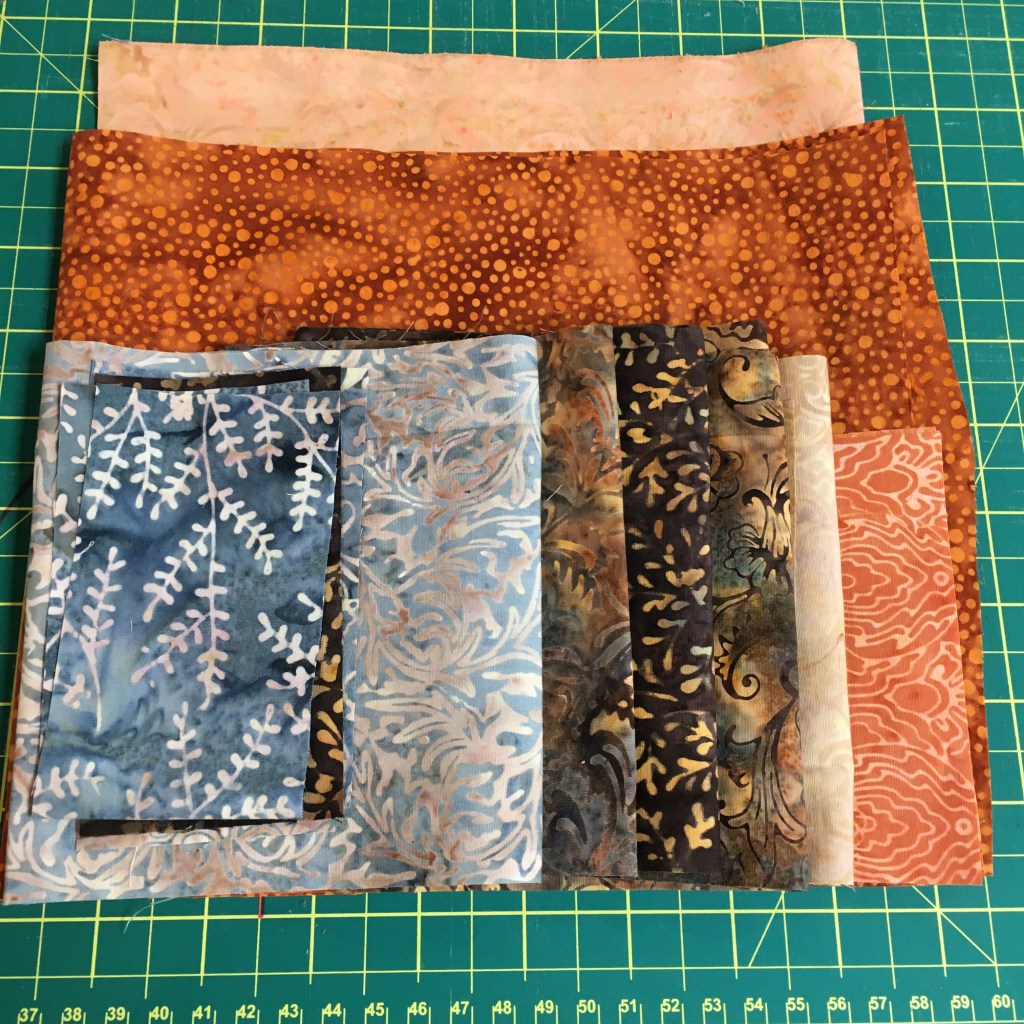
I received this fantastic fabric collection: Flourish by Kathy Engle, along with 2 yards of Dots-Brown Brownie and 2 yards of Vertical Vine-Orange
And the collection of 20 half-yard cuts of Flourish s to be paired with Studio 180’s Corner Pop tool.
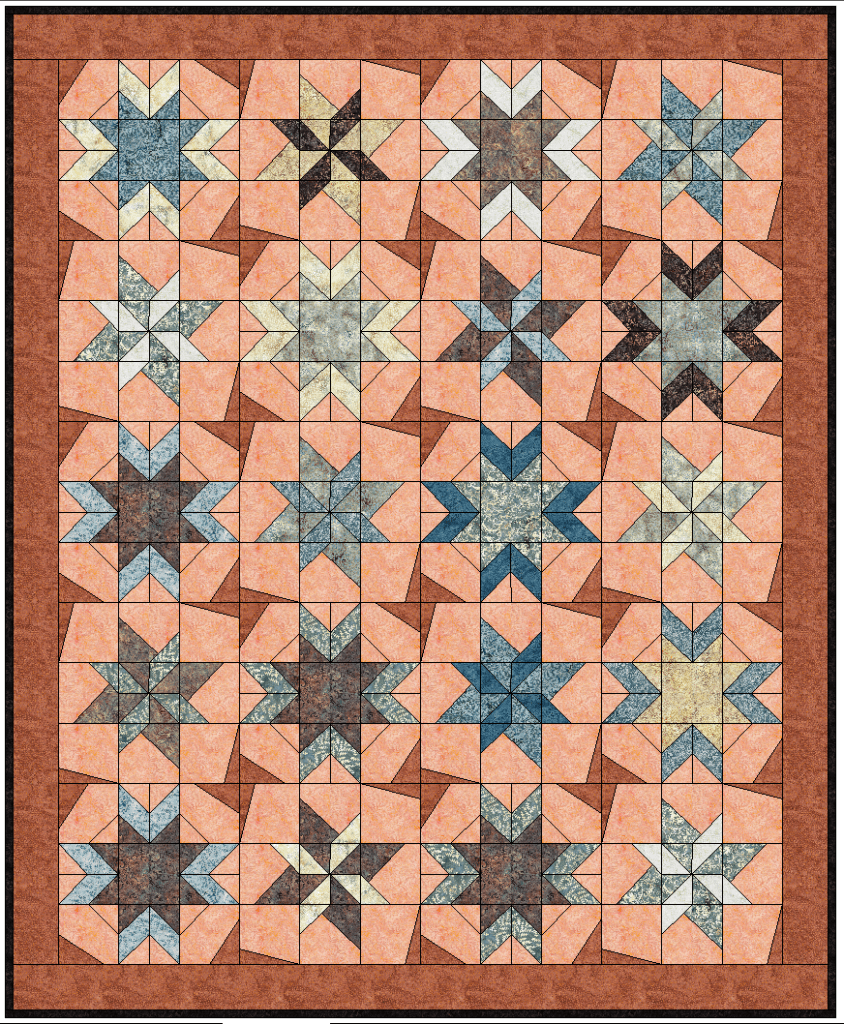
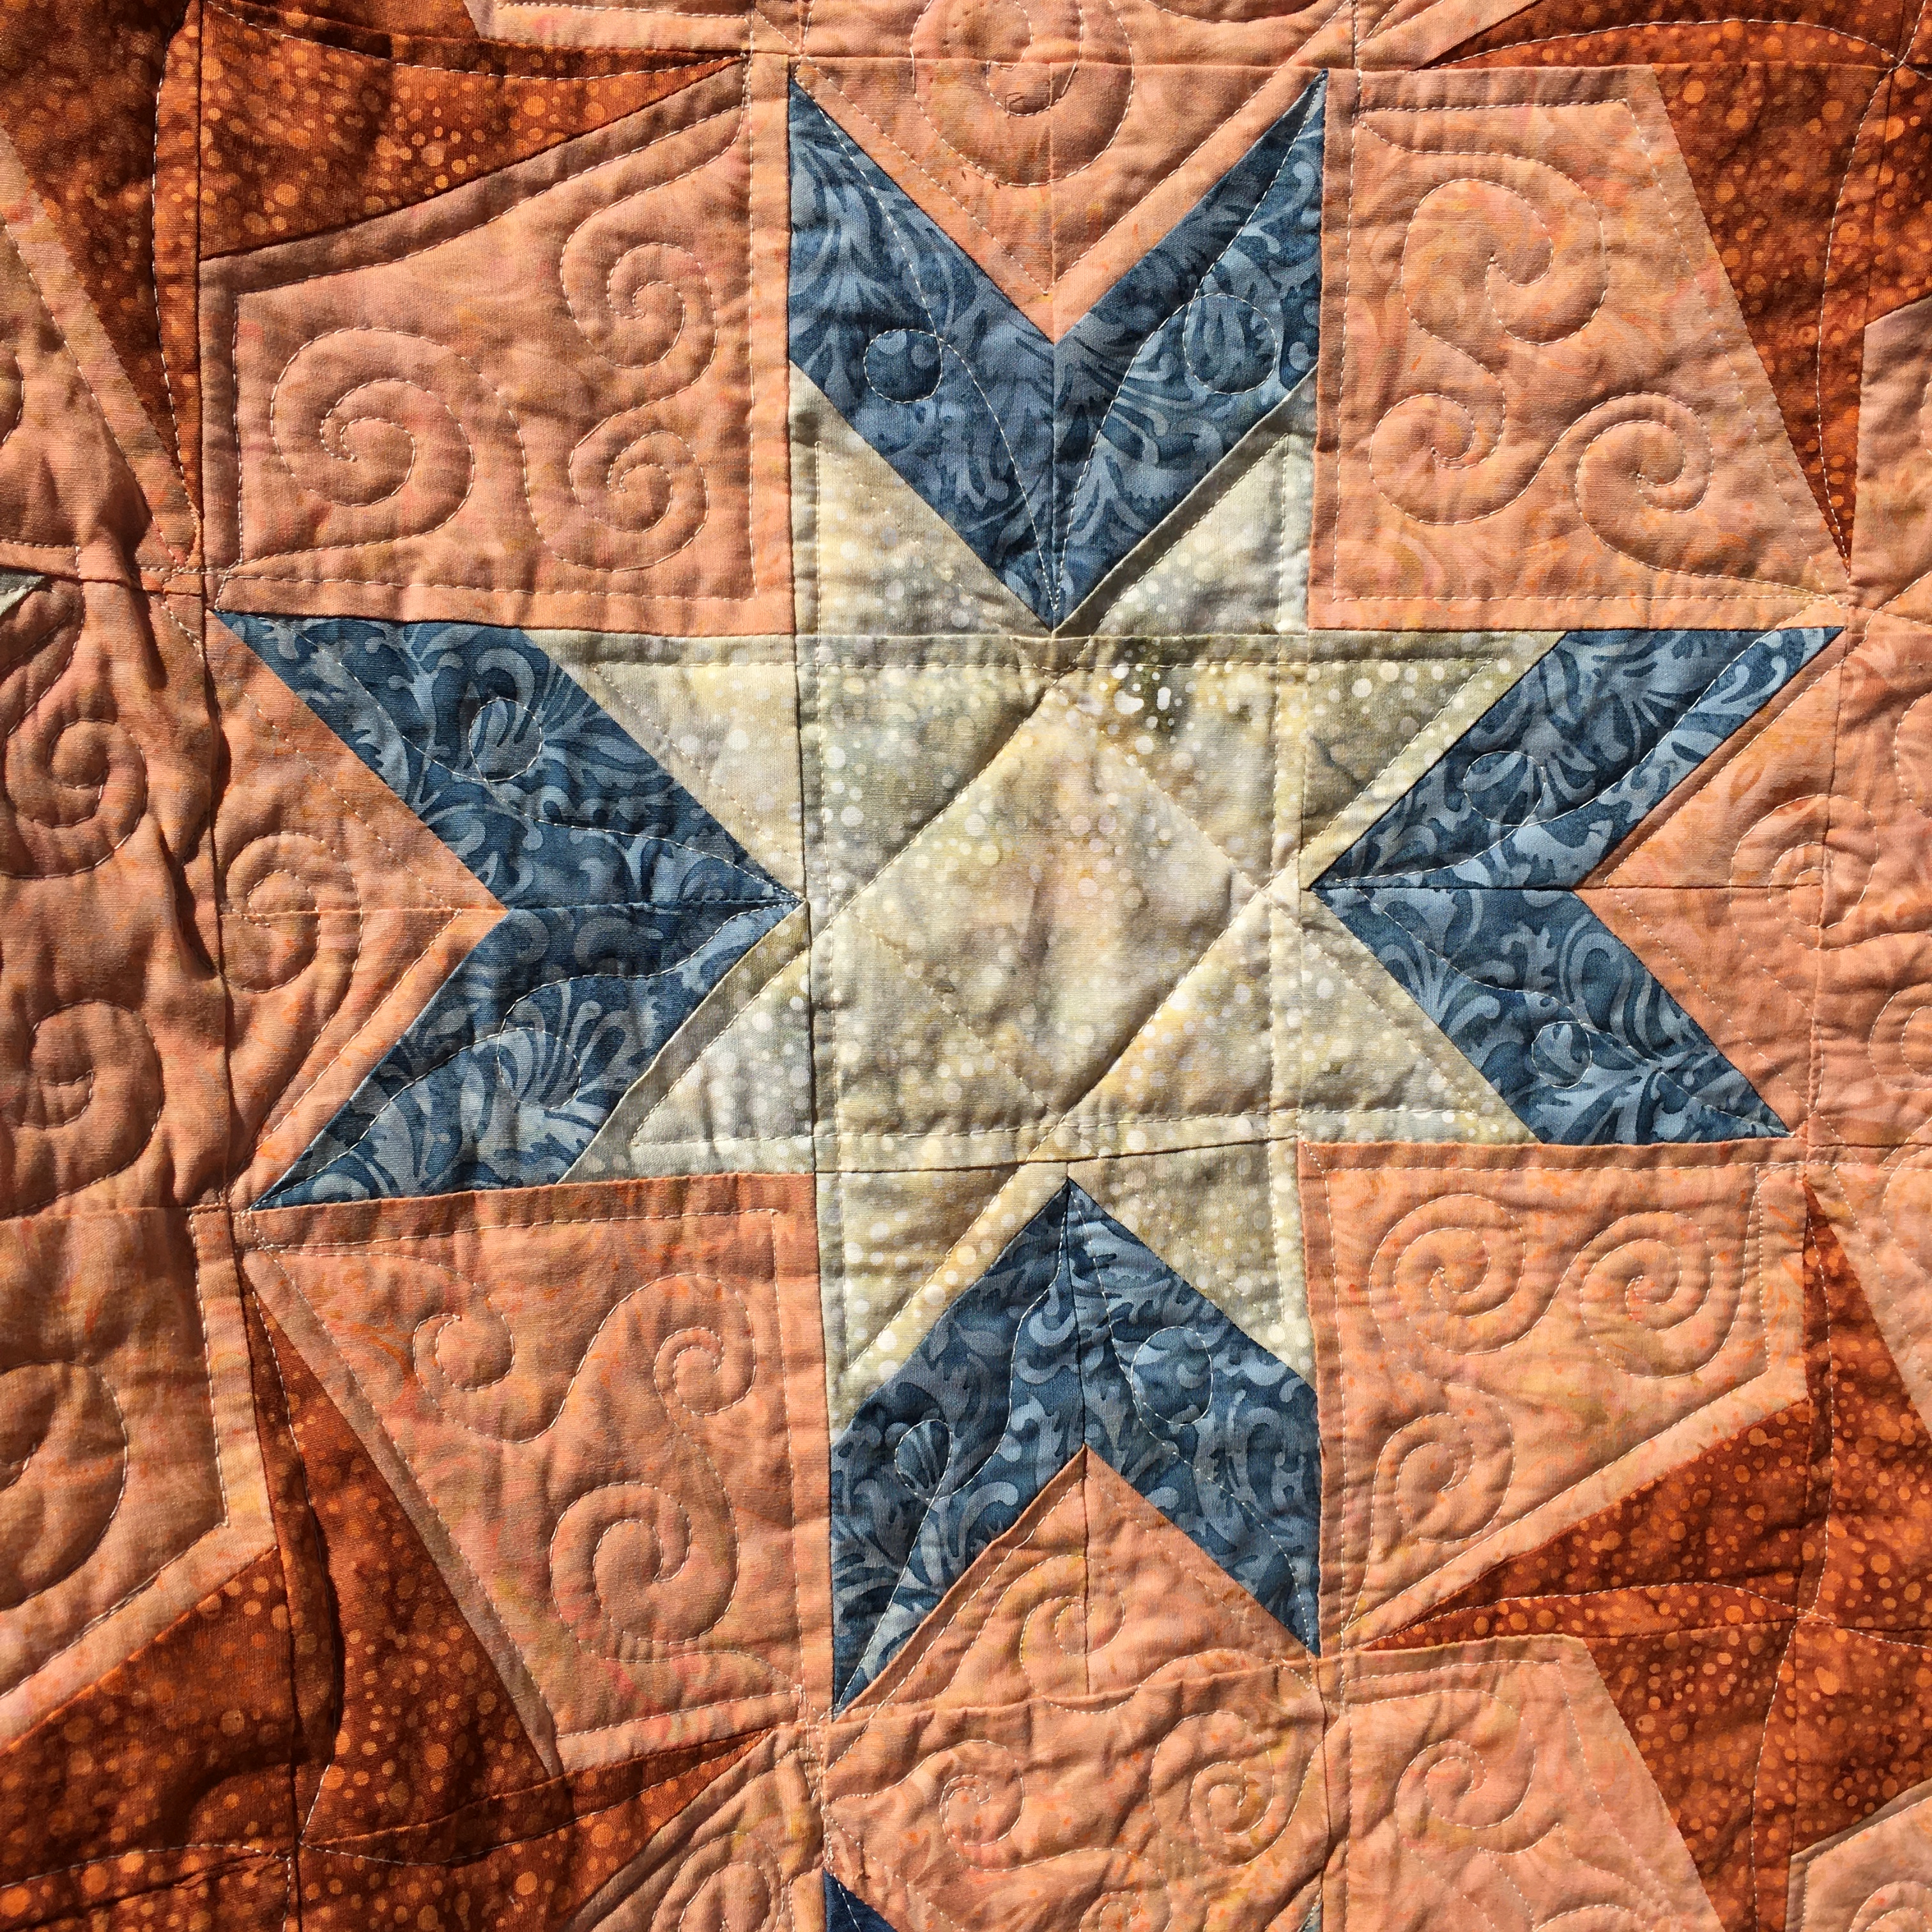
I browsed through the Studio 180 Blockbuster blocks for a block that used the Corner Pop ruler, plus some of the other Studio 180 rulers that I have. I found Blockbuster #52, Sparkler and Blockbuster #17, Salem Star. I drew the blocks in EQ, changing them slightly and came up with this quilt:
One requirement is that I use 30 units using the Corner Pop ruler! No problem!!! This quilt has WAY more Corner Pop units! The Salem Star has 160 Corner Pop units and the Sparkler Star has 80 Corner Pop units – for a total of 240 units!
And, of course, true to how I work, the colours in each block would change. This quilt used 18 of the 20 fabrics in this collection on the front. But, knowing how I work, I knew at this point, I would divide the blocks into 2 fabrics and go from there.
Before I started cutting, I visited online instructional videos at Deb Tucker’s Studio 180 Design YouTube channel to learn more about the corner pop ruler. I did not need to review the Tucker Trimmer video or the V-block video as I have used them several times!
I was so excited to get started making the 10 Salem Star blocks that I forgot to take any pictures! {groan} Let me tell you, there was a LOT of trimming, but I must admit, the points came together perfectly! And, if you know me at all – perfection is not my claim to fame!
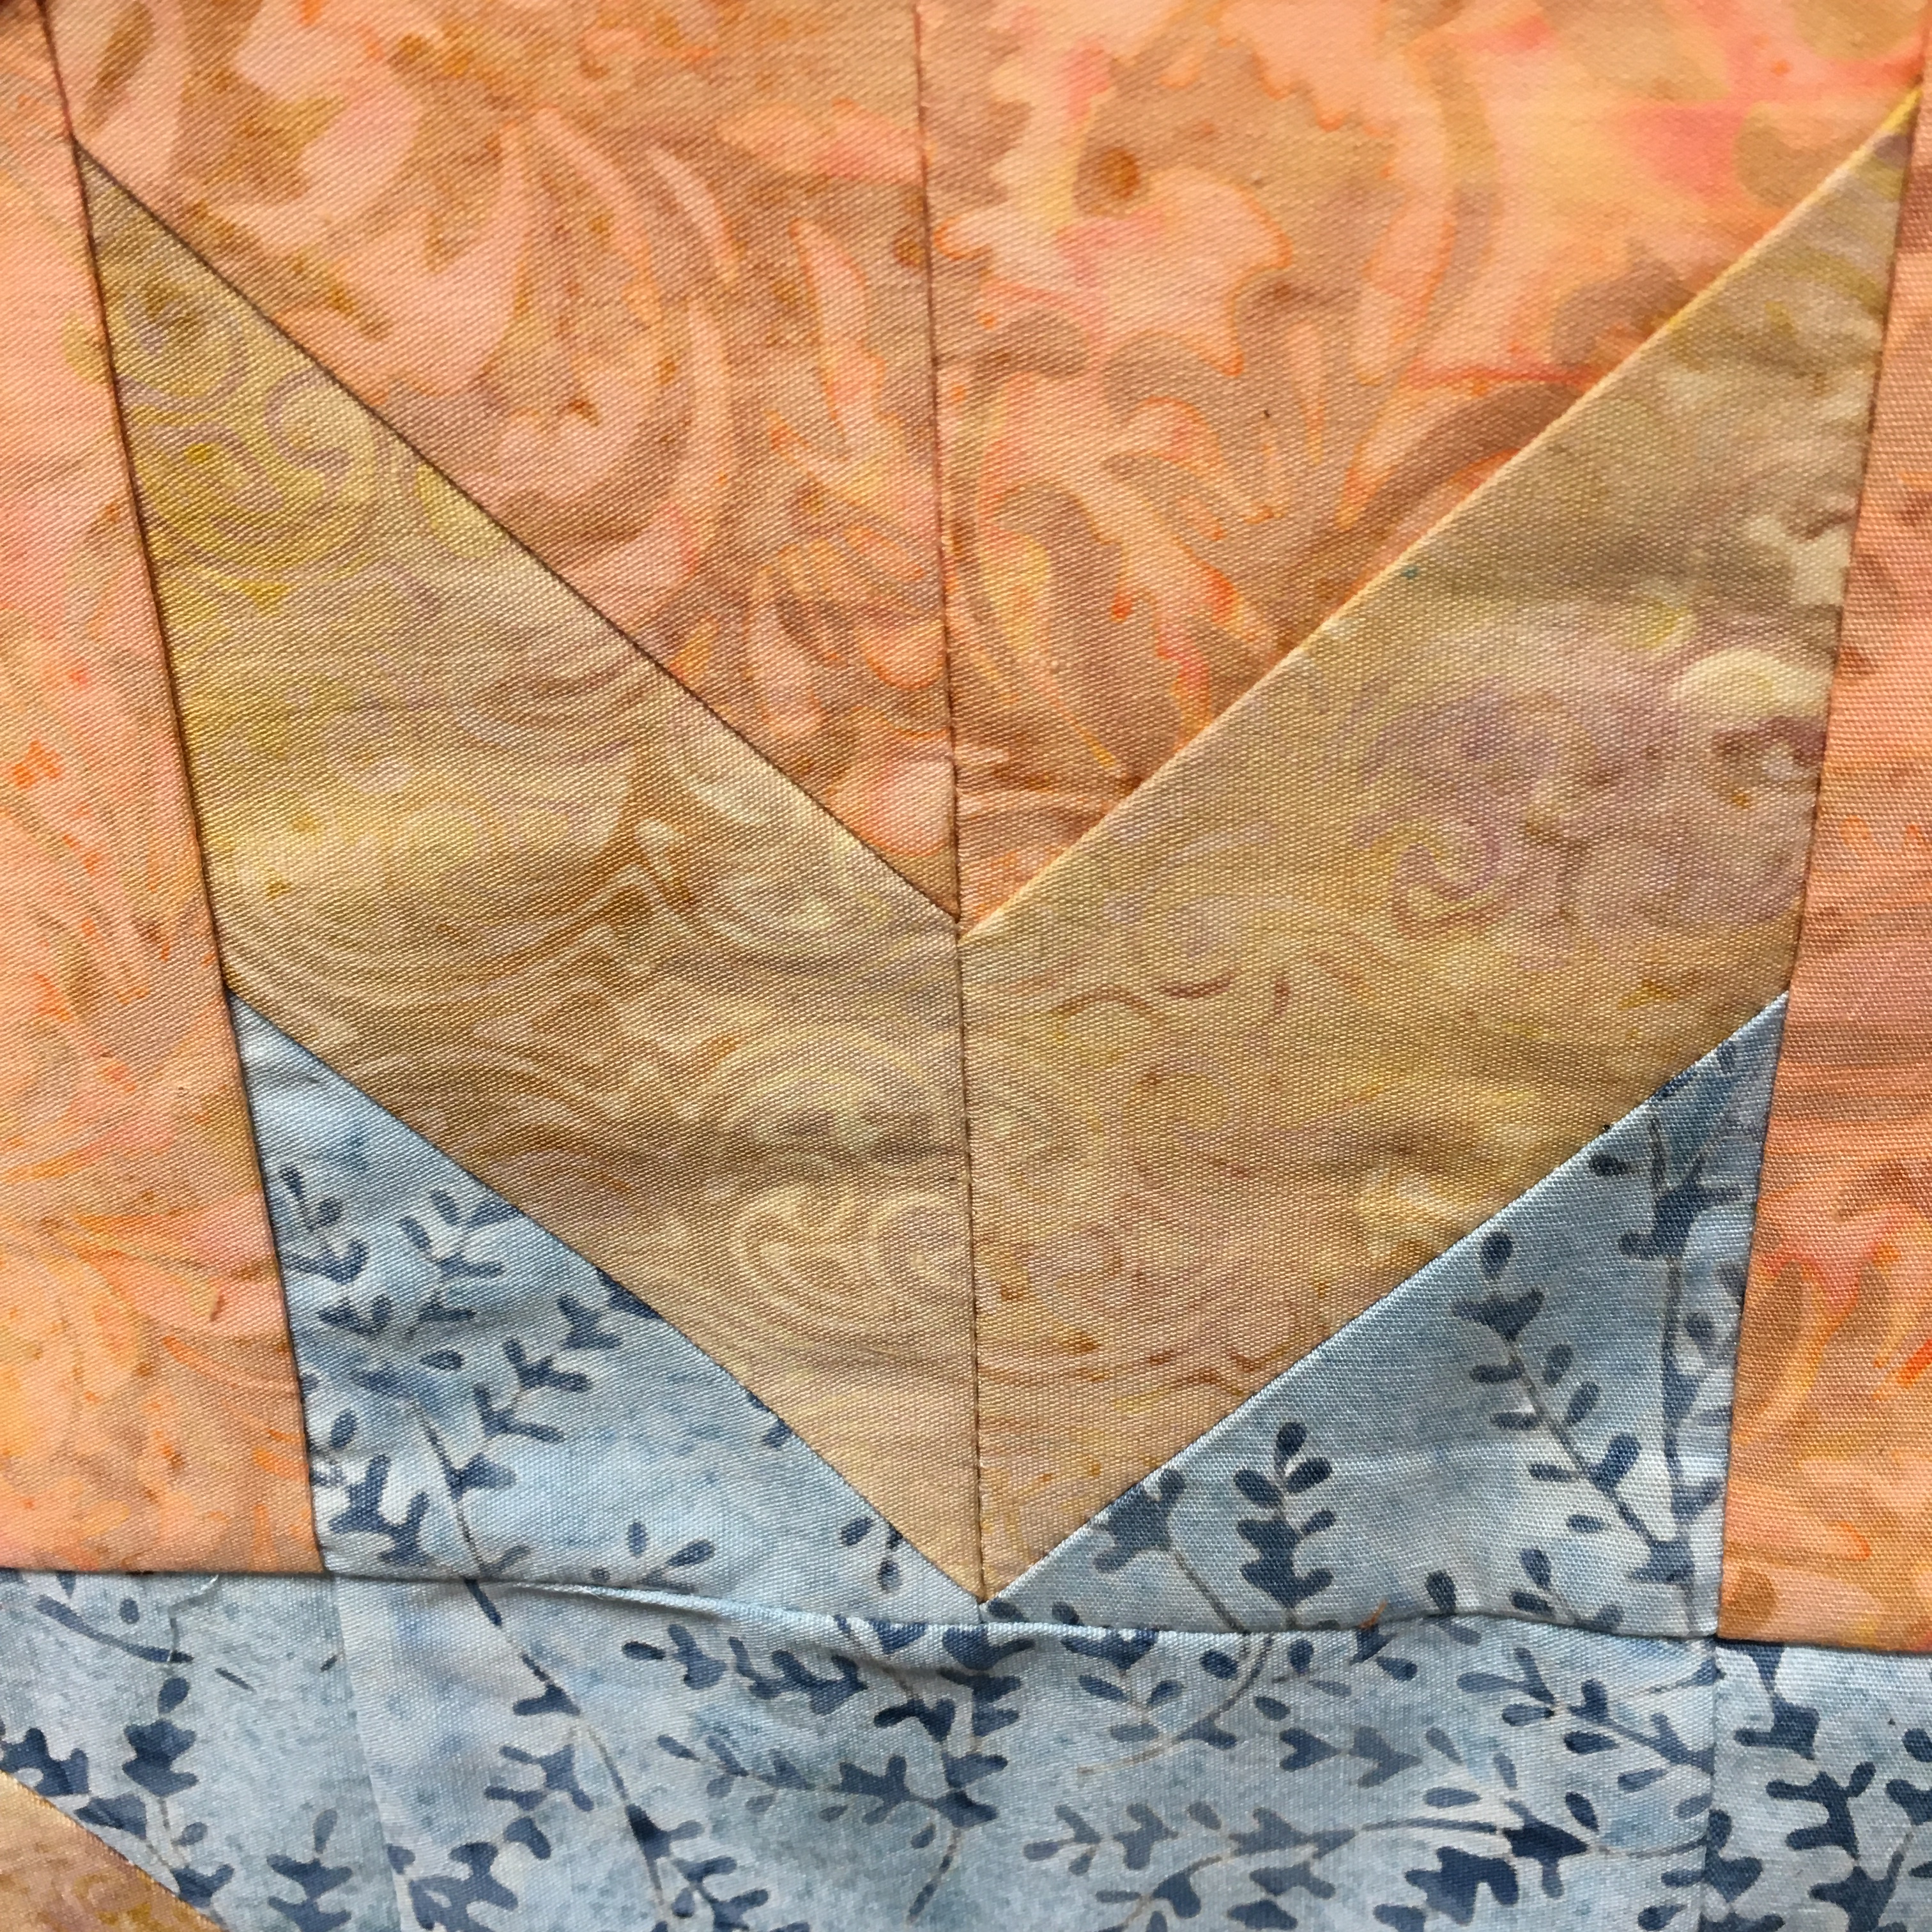
I used a lot of the Vertical Vine-Orange in each block, with Dots-Brown Brownie in the corners and the border.
Here’s the 10 Salem Star blocks completed:
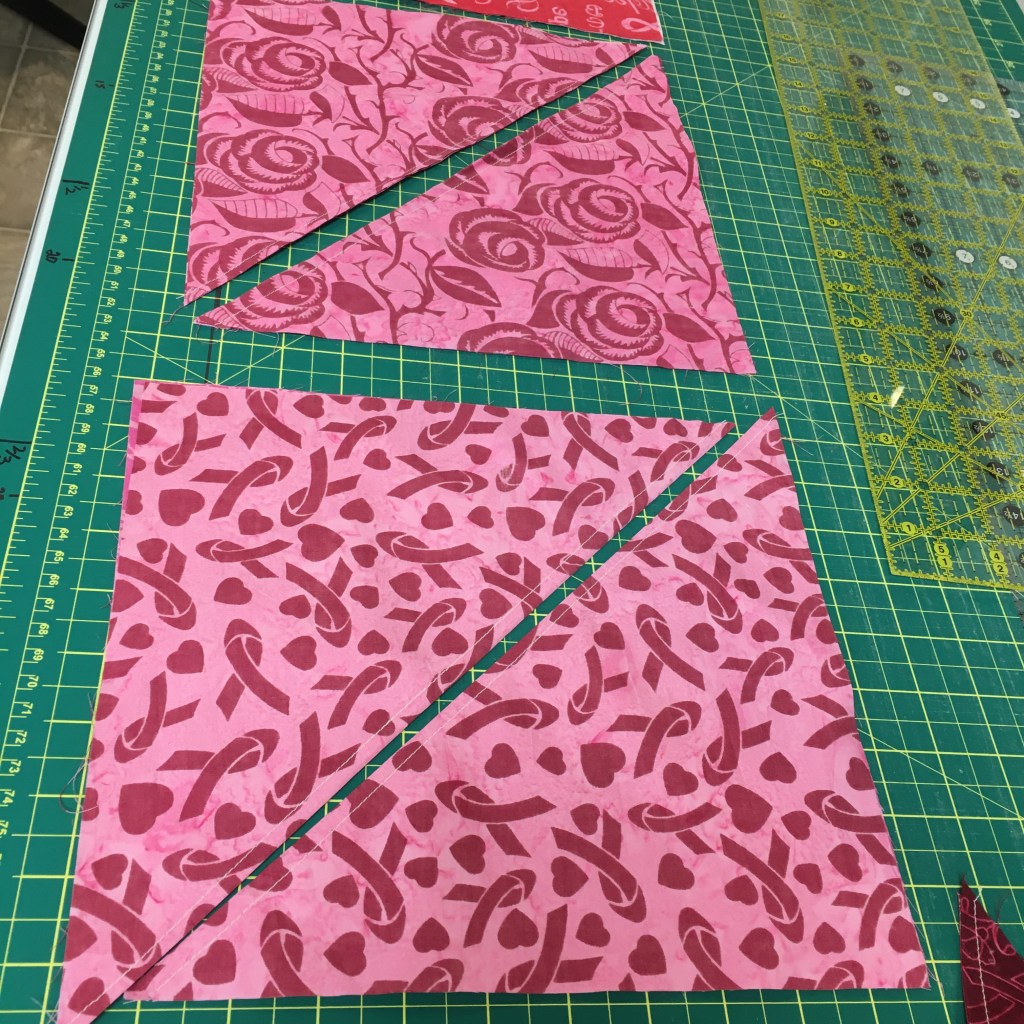
Here I am, using the Corner Pop ruler to cut the large corner of the Sparkler block. The Vertical Vine-Orange looks very faded in these to pictures.
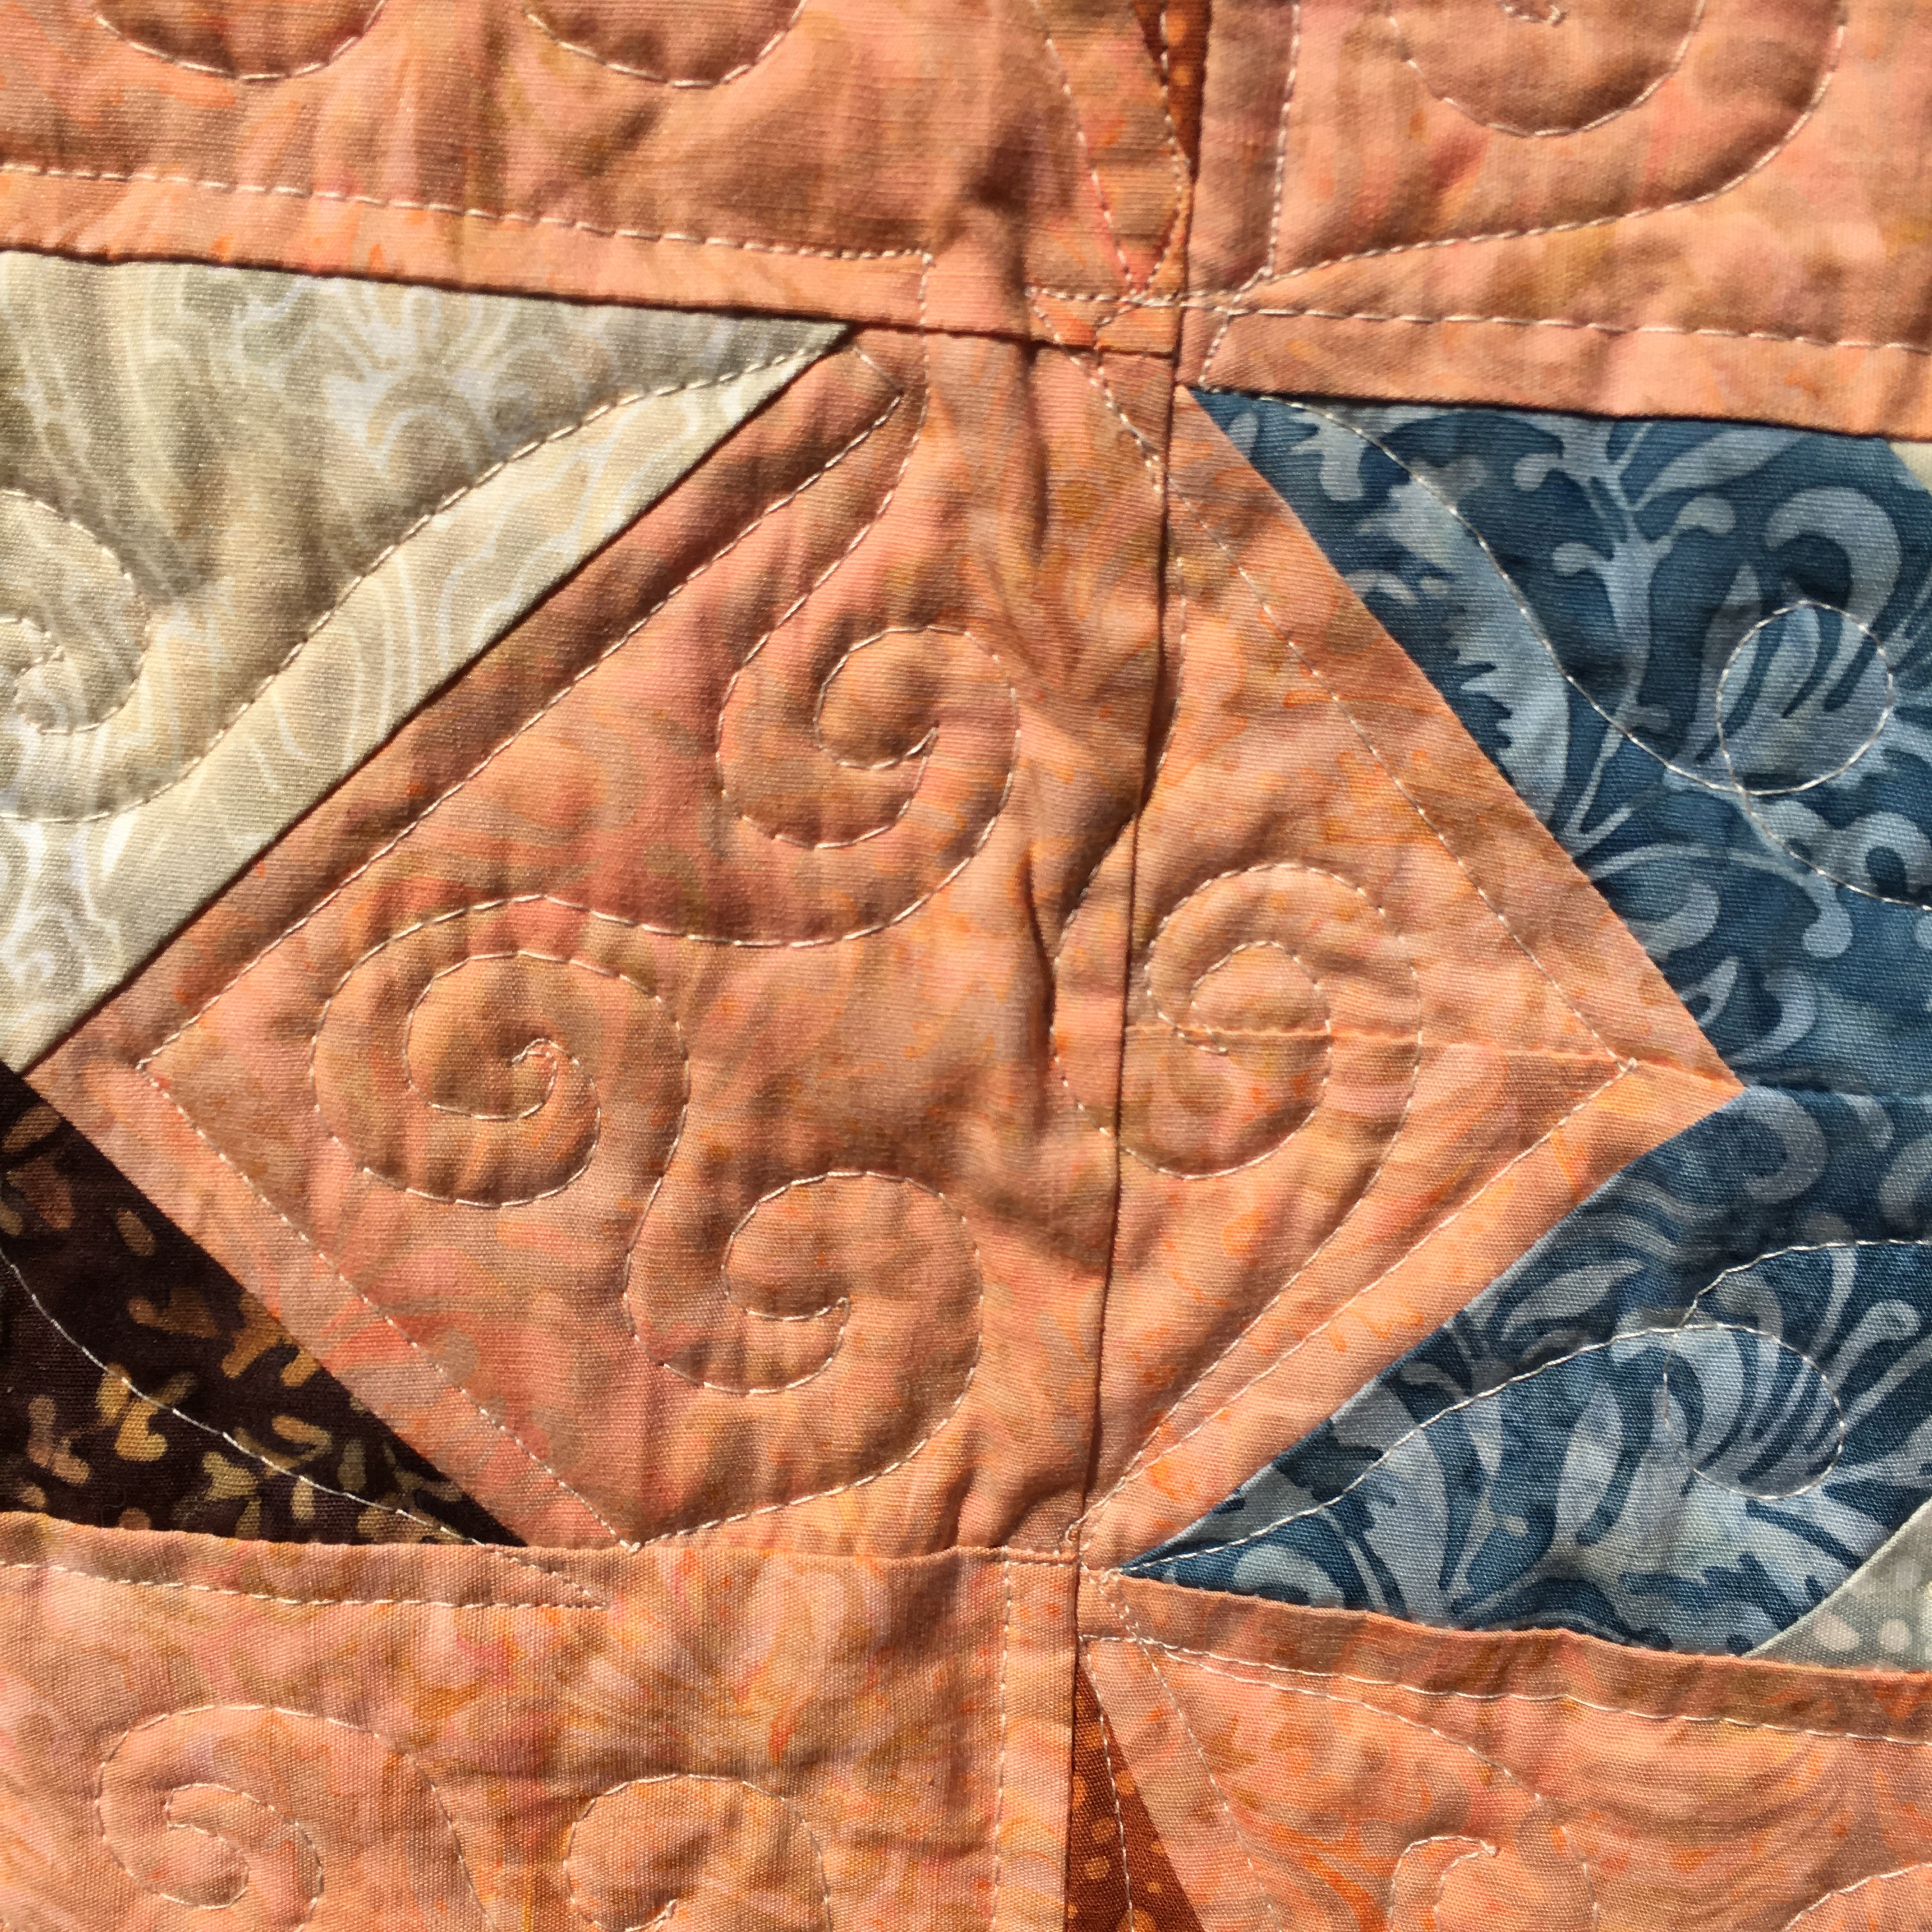
Here is the Prairie Spirit Alpaca / Wool mat making pressing the blocks perfect! Using the mat and trimming the blocks makes for perfect blocks! I’m amazed!
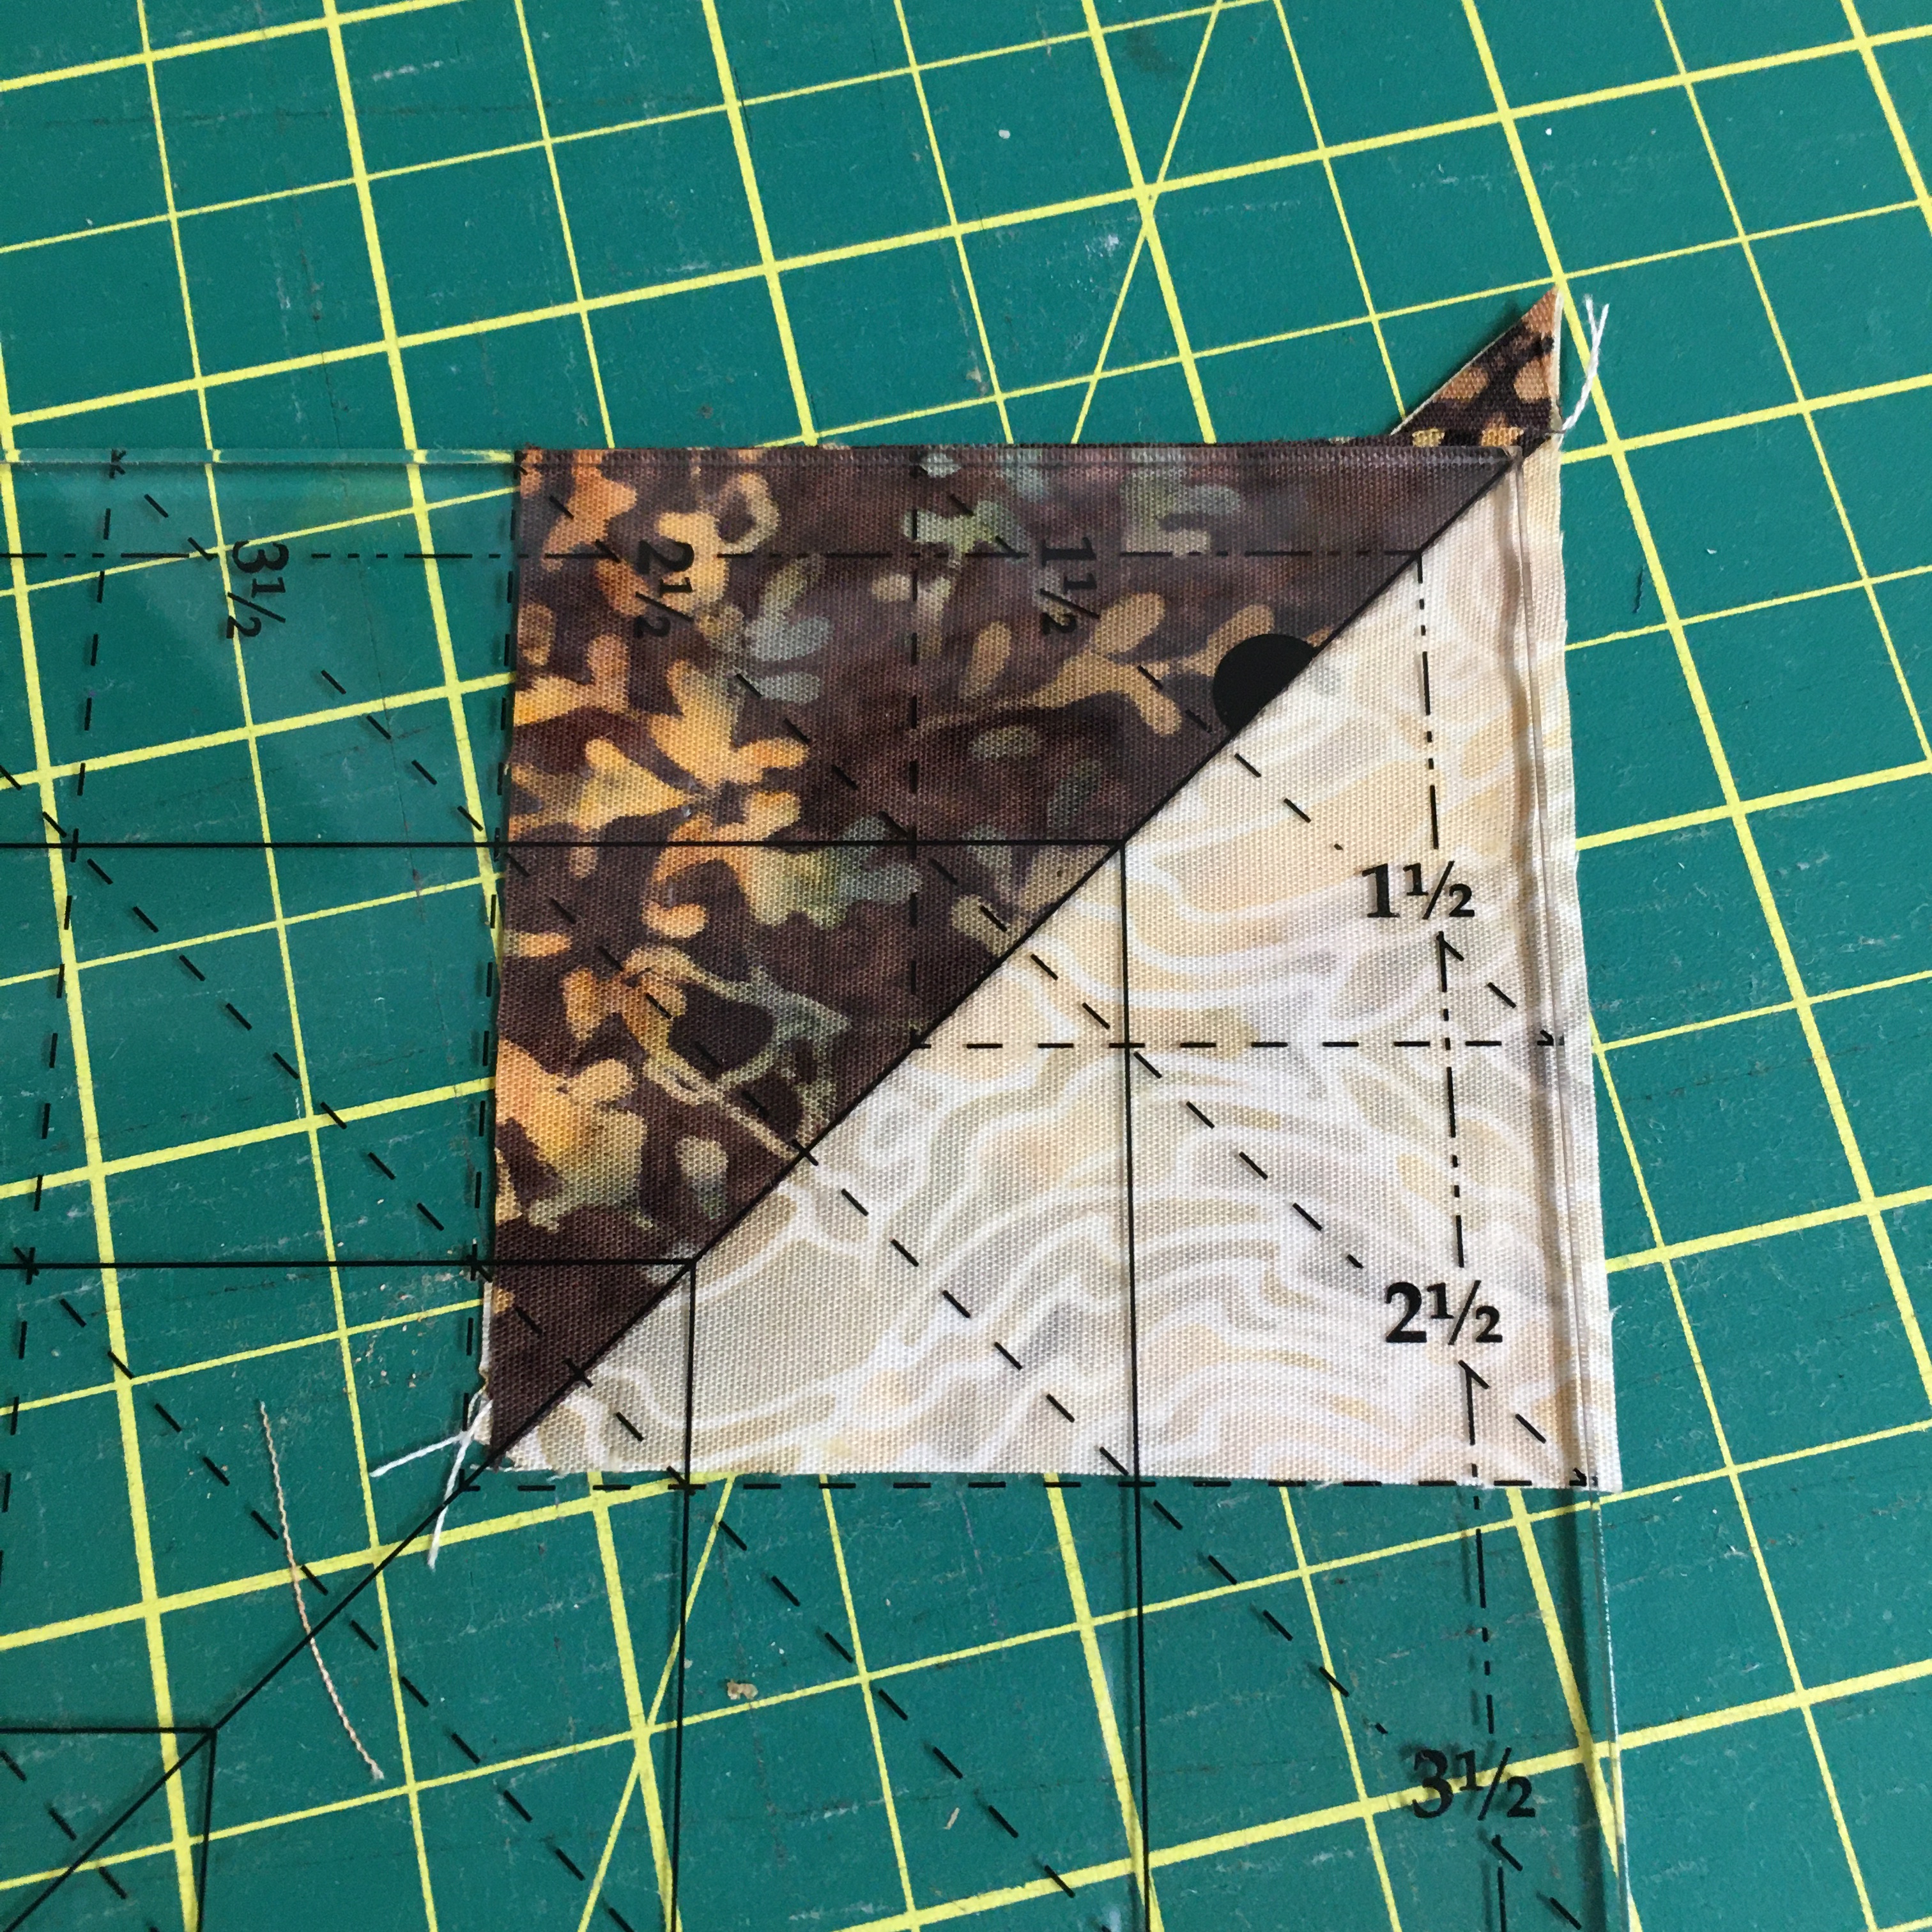
This picture shows a truer colour of the Vertical Vine-Orange. As well, it shows the completed corner using the V-block ruler. And pressing on the Prairie Spirit Alpaca/Wool mat = crisp seams!
The 2nd trim on this block … looks like I need to adjust the ruler just a smidge!
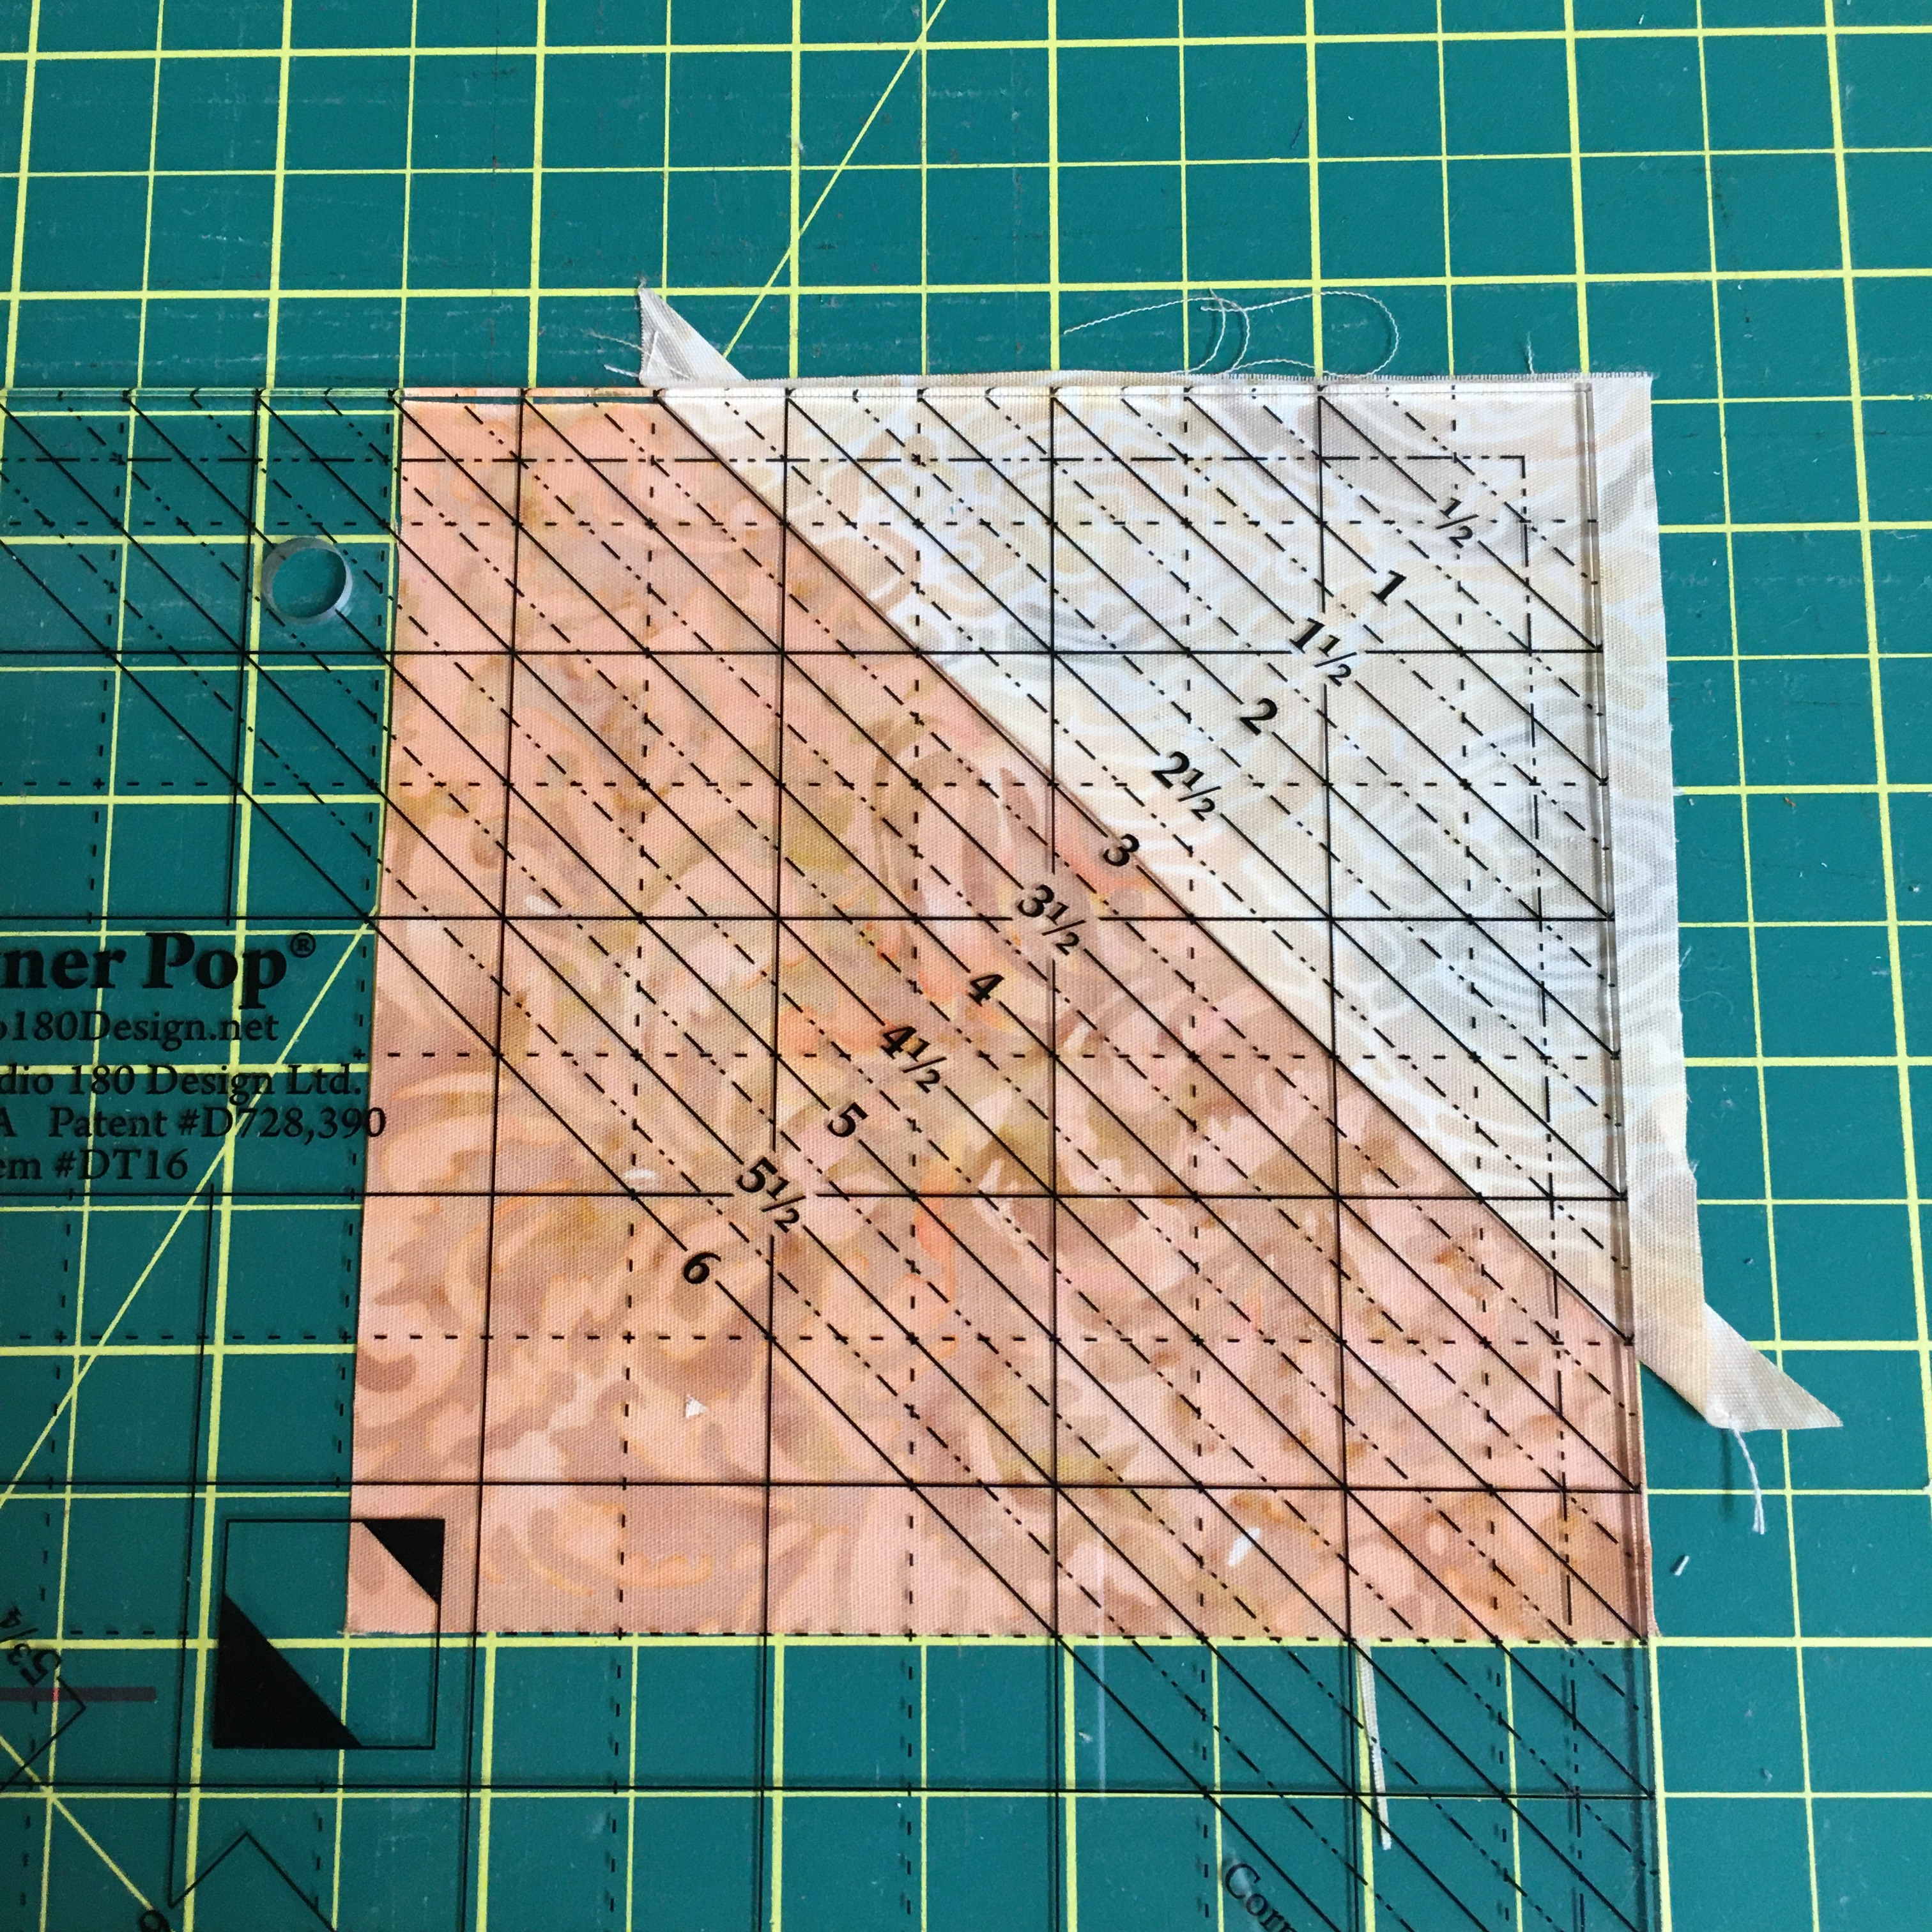
More trimming! The first picture is using the Tucker Trimmer ruler and the second picture is using the Corner Pop ruler.
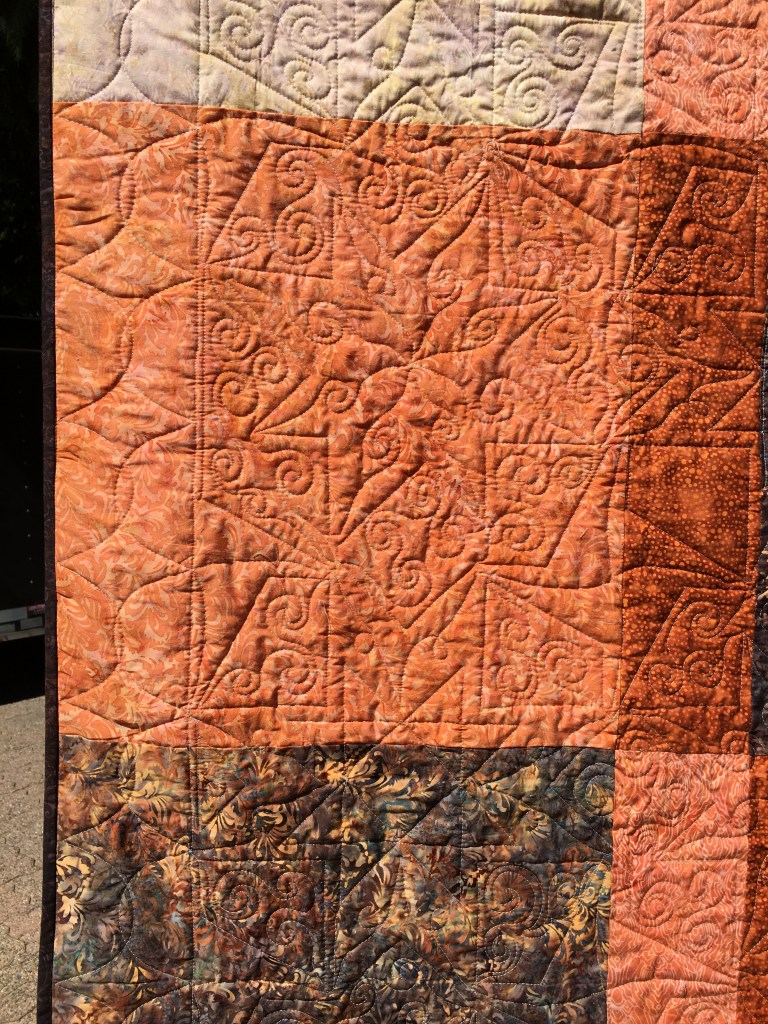
Swirling those centers of the pinwheel block. I love the look of the tiny pinwheels and I really LOVE the ease with quilting over that area without dealing with lumpy seams!
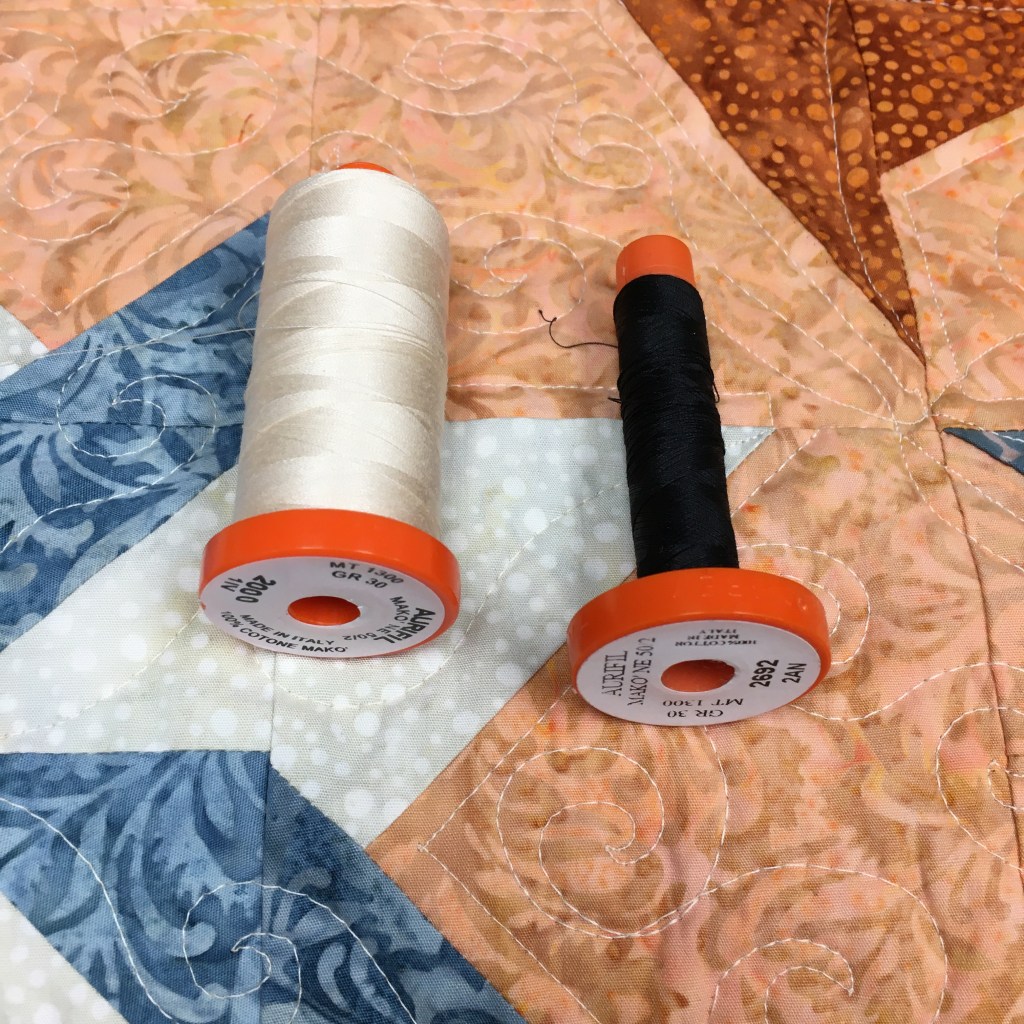
Here is a close-up of some of the quilting. All quilting is done on my domestic Janome M7.
Here is the completed quilt with Floral Leaves-Brown for the binding.
When I make Island Batik Blog Hop quilts, I attempt to use ALL 20 fabrics in the quilt. Well, there were a couple of orange fabrics that blended in too much with the background and corner triangles, so I used them on the back, with a few other fabrics from the collection!
Here’s a close-up of the quilting from the back:
A Give-away!
I’m giving away this little bundle of fabric that is left-over from making the quilt. If you live in Canada and would like to receive this bundle, leave a comment or email me. In your comment (or email) tell me what you might make with the fabric … At the end of the Blog Hop, I will put all of the names in a hat and my husband will draw the winning name.
This blog hop is to celebrate National Sewing Month. ?? National ?? the hosts are in the US and I live in Canada, so I’m declaring it International Sewing Month. Works for me!
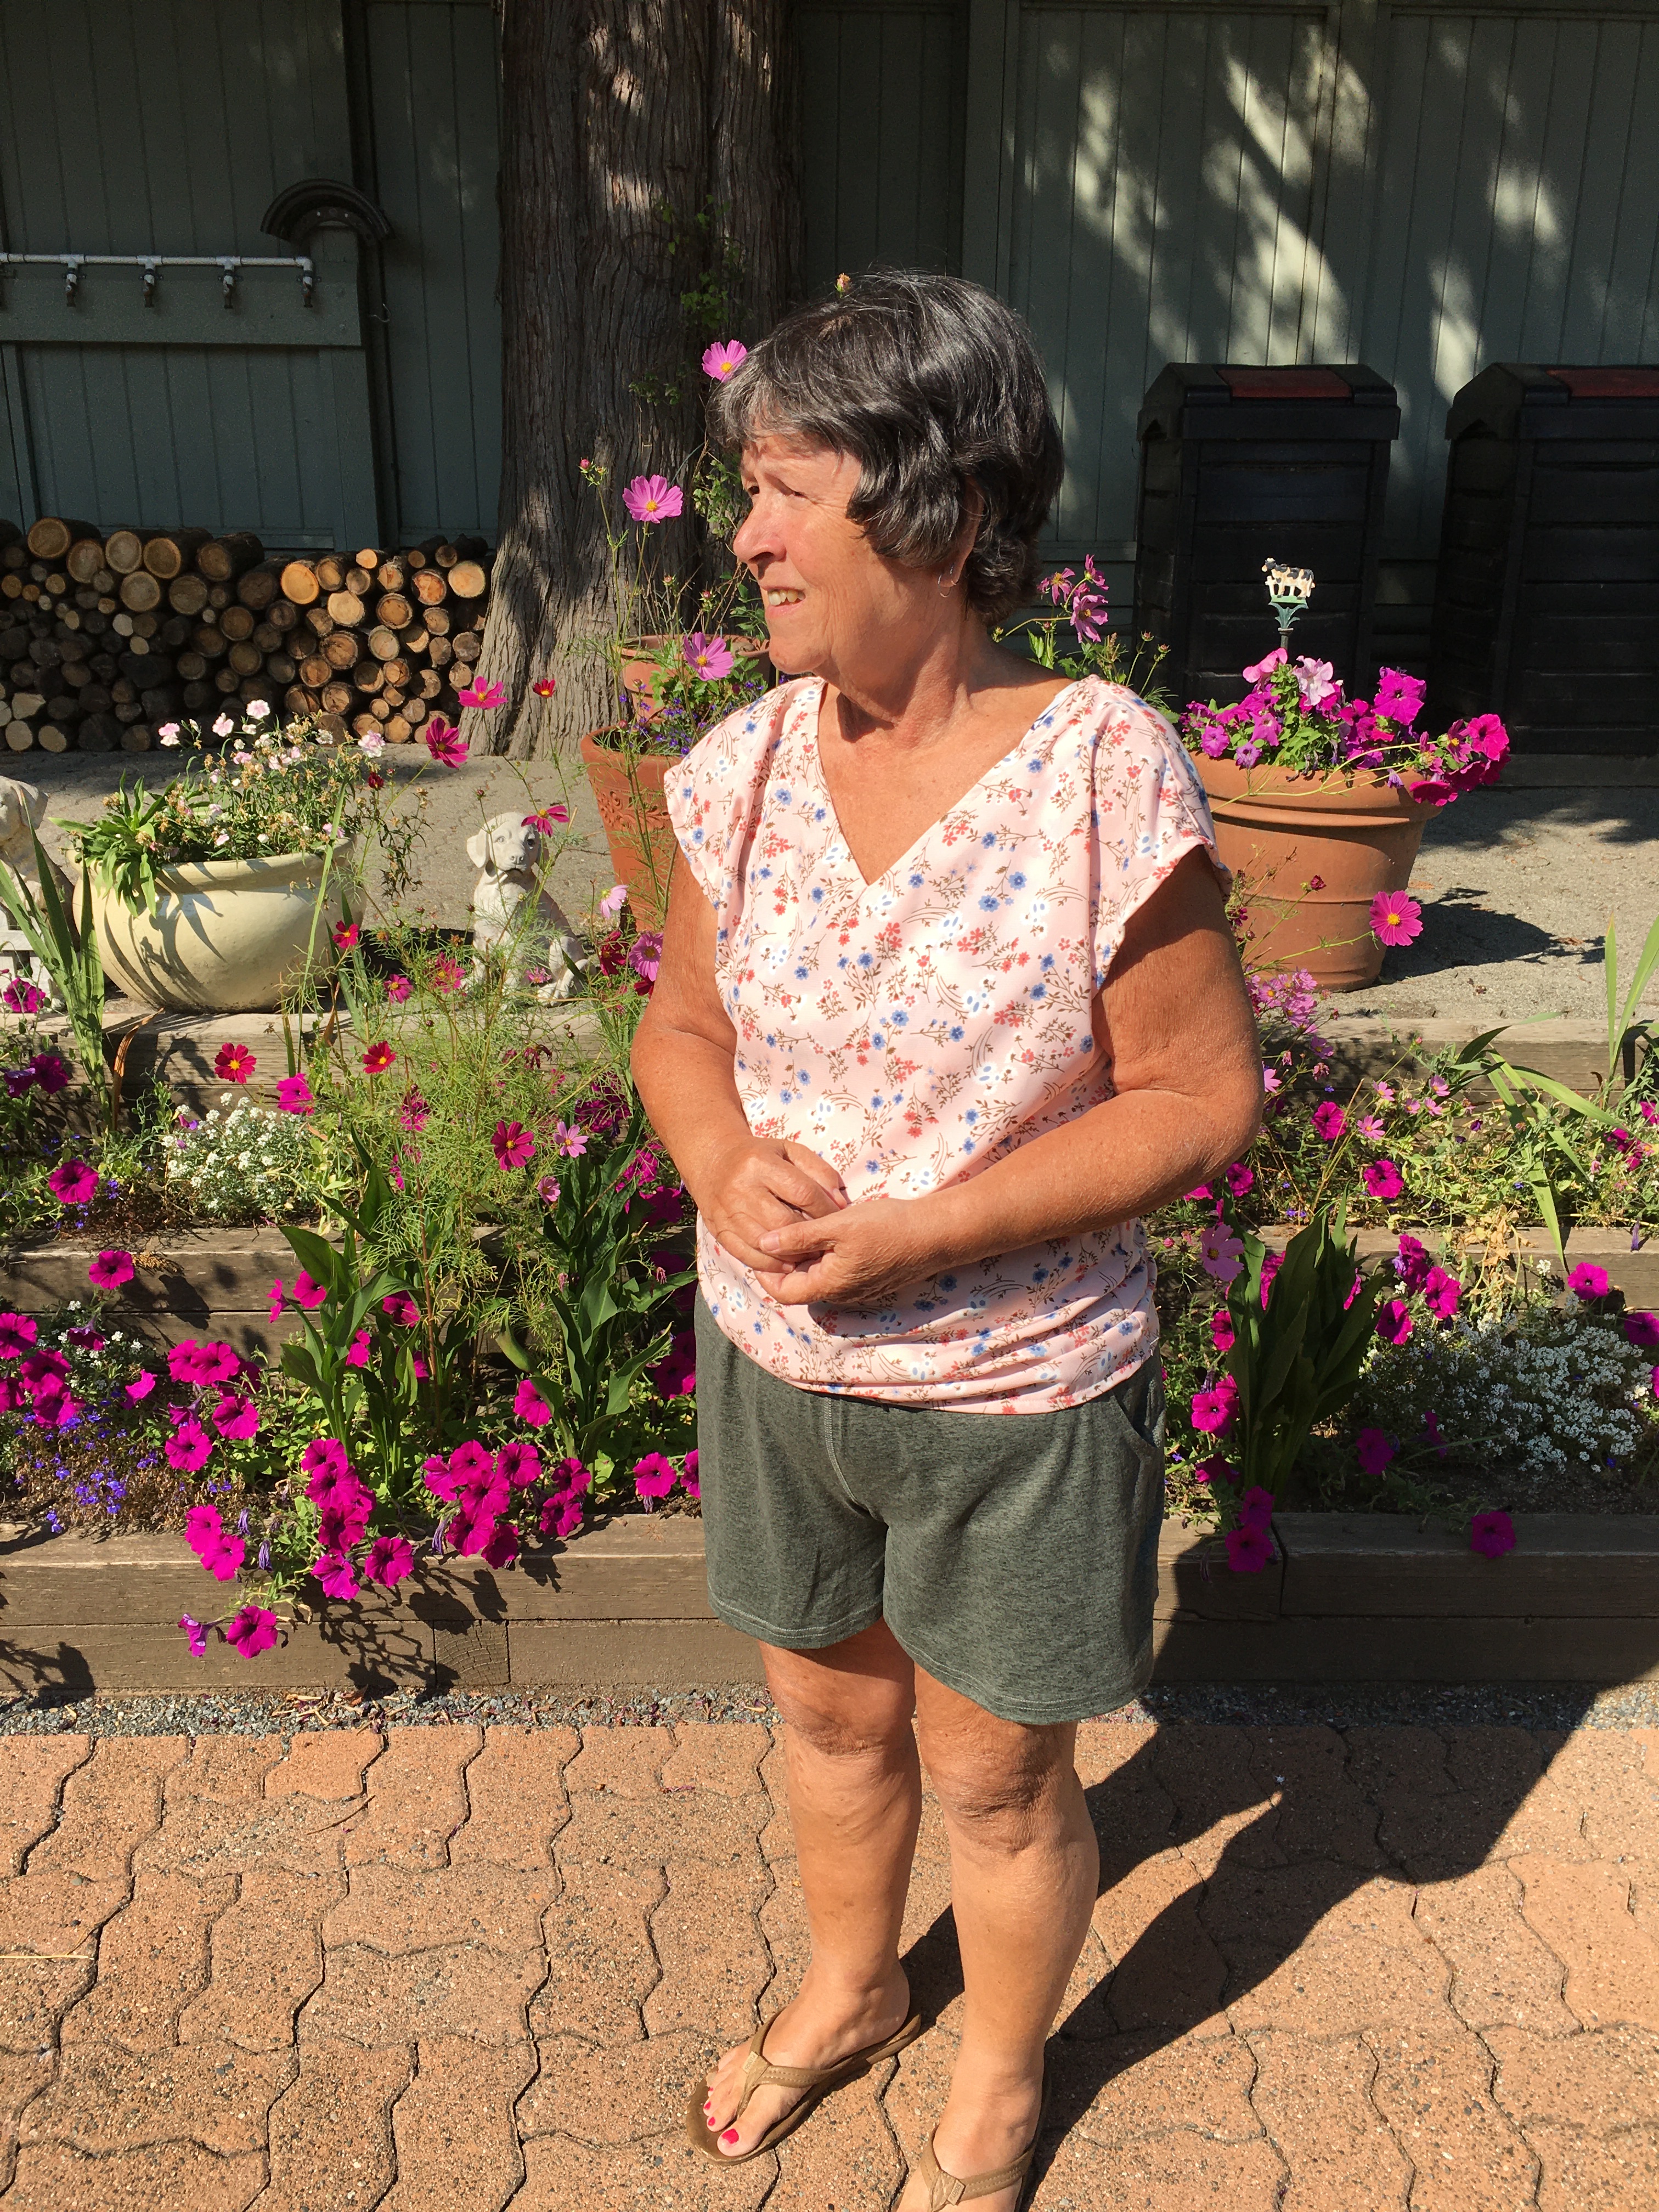
My mother taught me to sew at a young age. By the time I was in Grade 8 and taking Home Ec, I was pretty bored with making an hair kerchief and an apron. My next project was a skirt with a zipper in it. The teacher put the zipper in to demonstrate the insertion. When I got the final marks for the project, she gave me 2/10 for zipper insertion. WHAT???? Unfortunately, I had NO assertiveness skills at that time and didn’t argue with her. When it was time to choose courses for Grade 9, I definitely knew that Home Ec was one course I wasn’t going to take! By the way, I had the same teacher for cooking and was not impressed with having to make peanut butter and jelly sandwiches for our first project! Can you blame me?
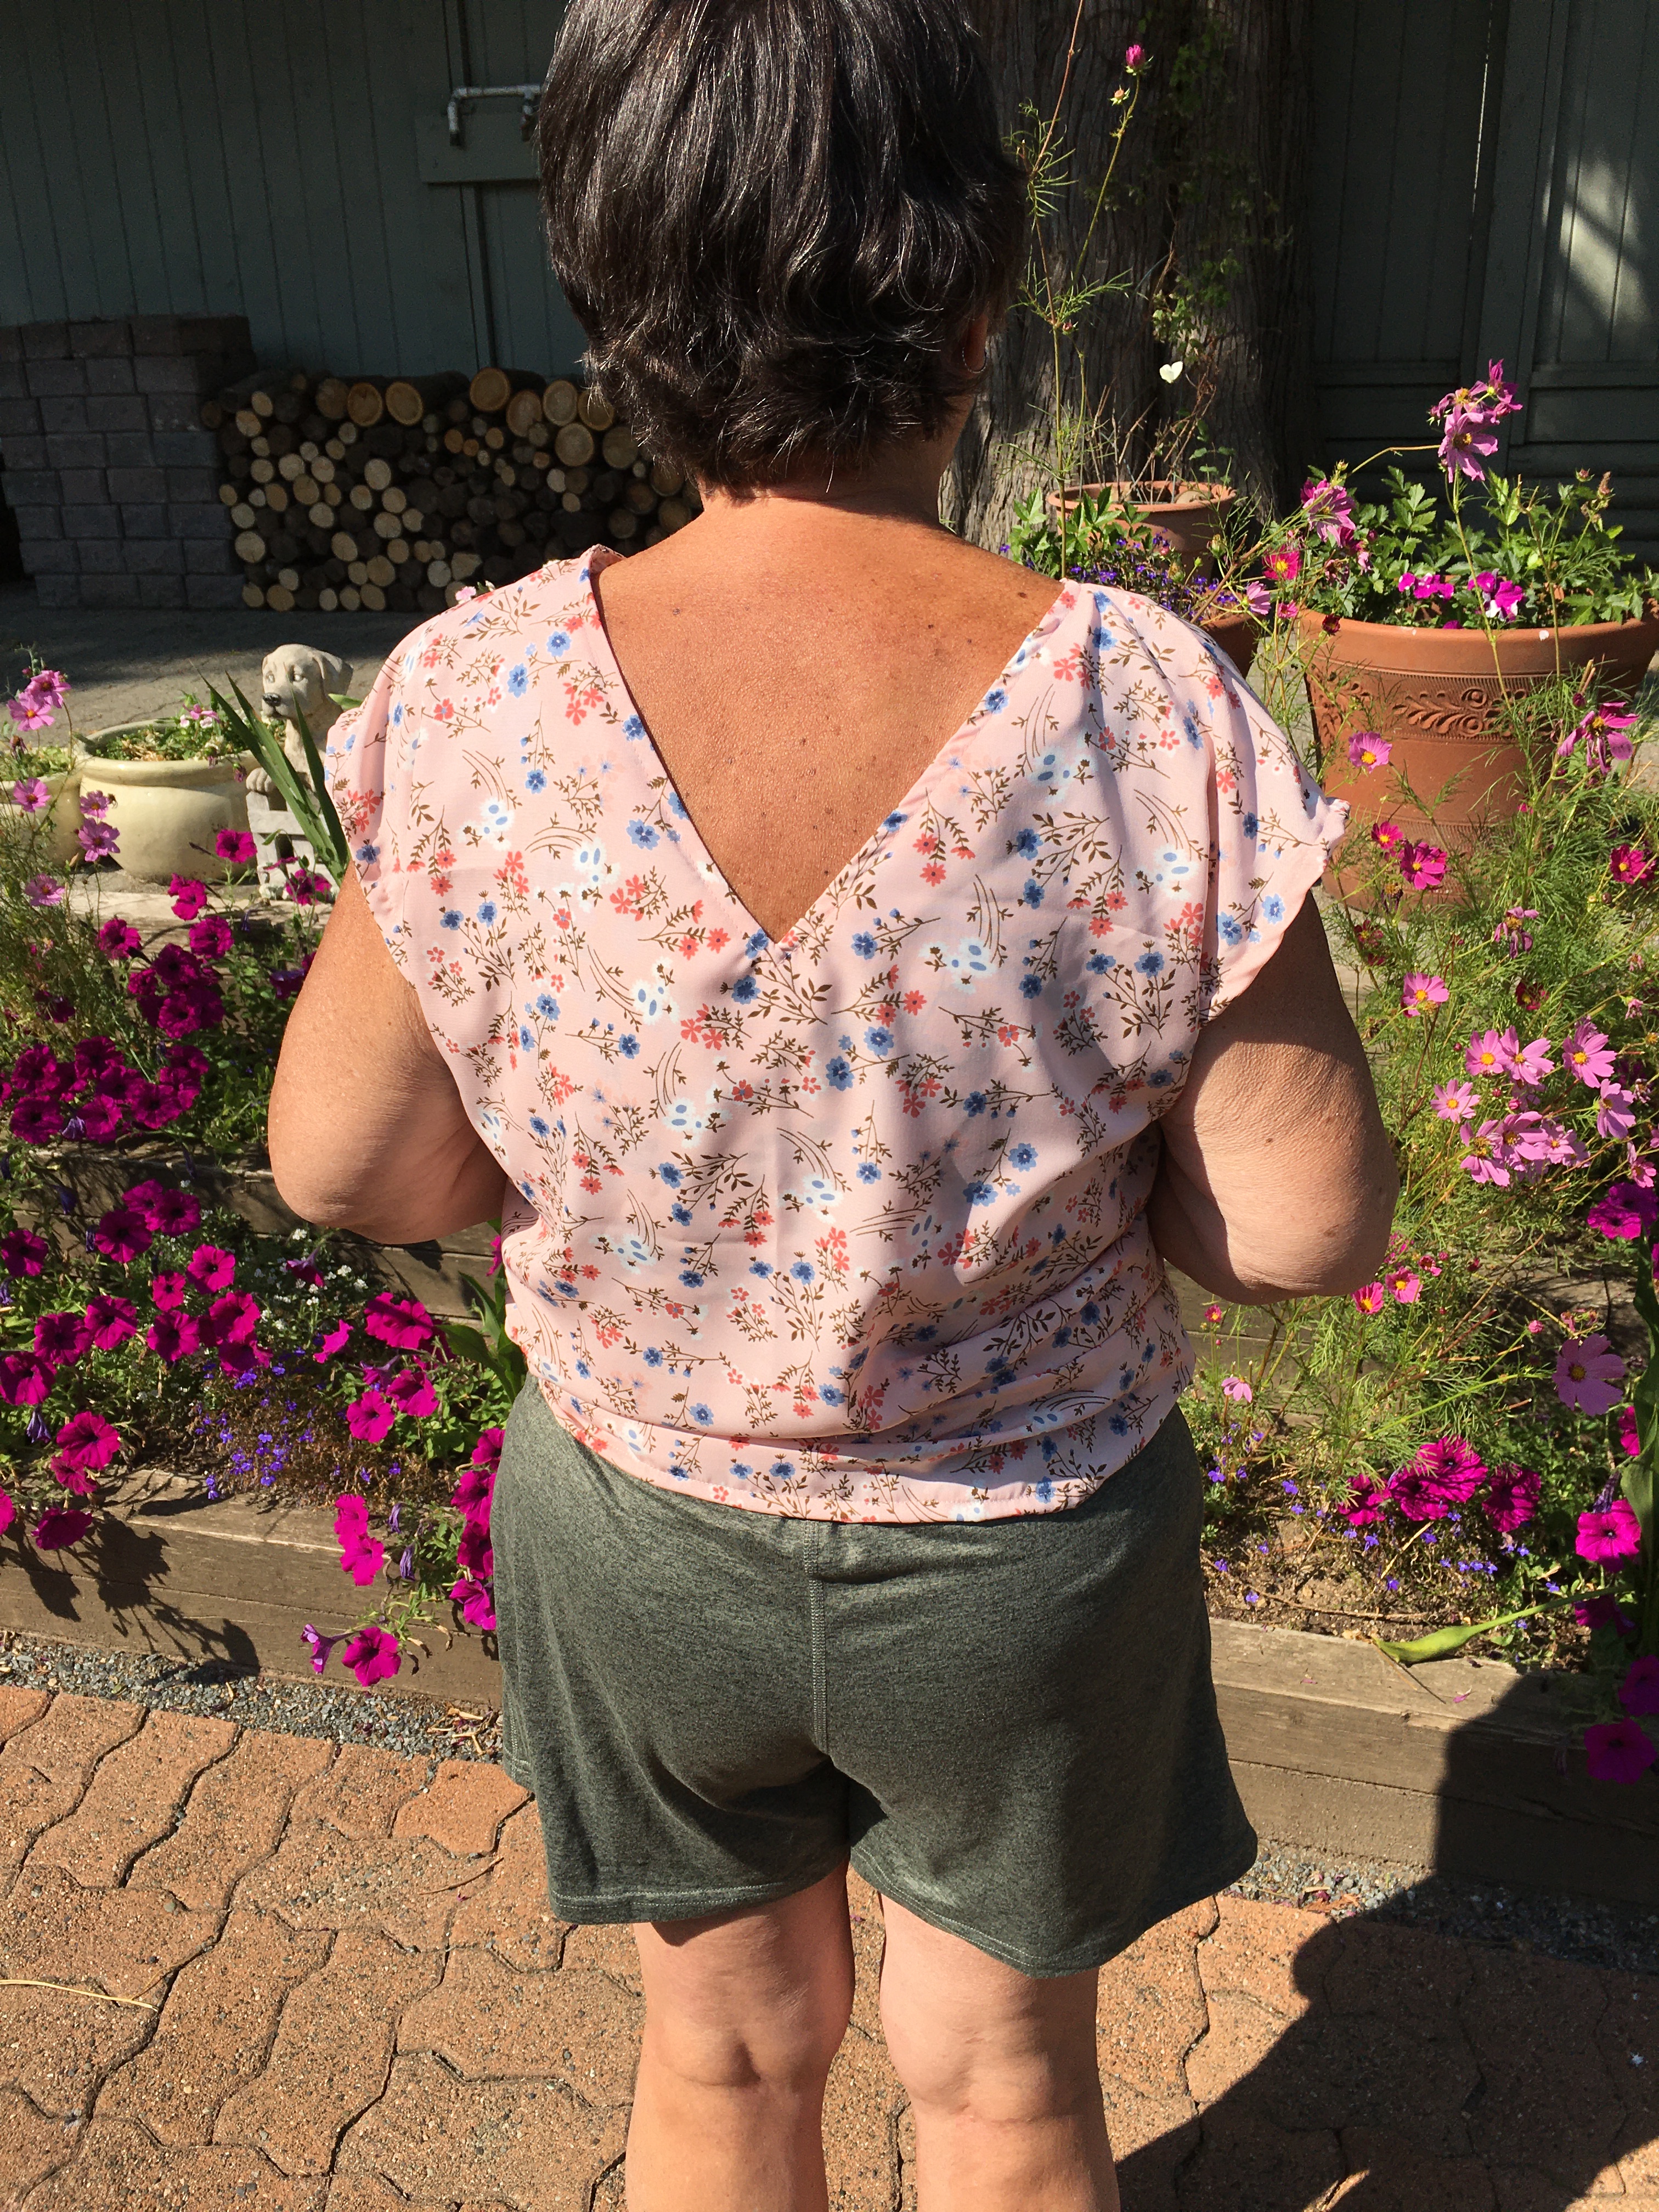
I made this V-neck top! It was a quick easy project! Even though I haven’t been sewing garments for a LONG time! It’s a nice cool top for the warm summer days!
There are PRIZES!
That’s right! Lots of prizes that you could win! Click on the Rafflecopter and follow the prompts!
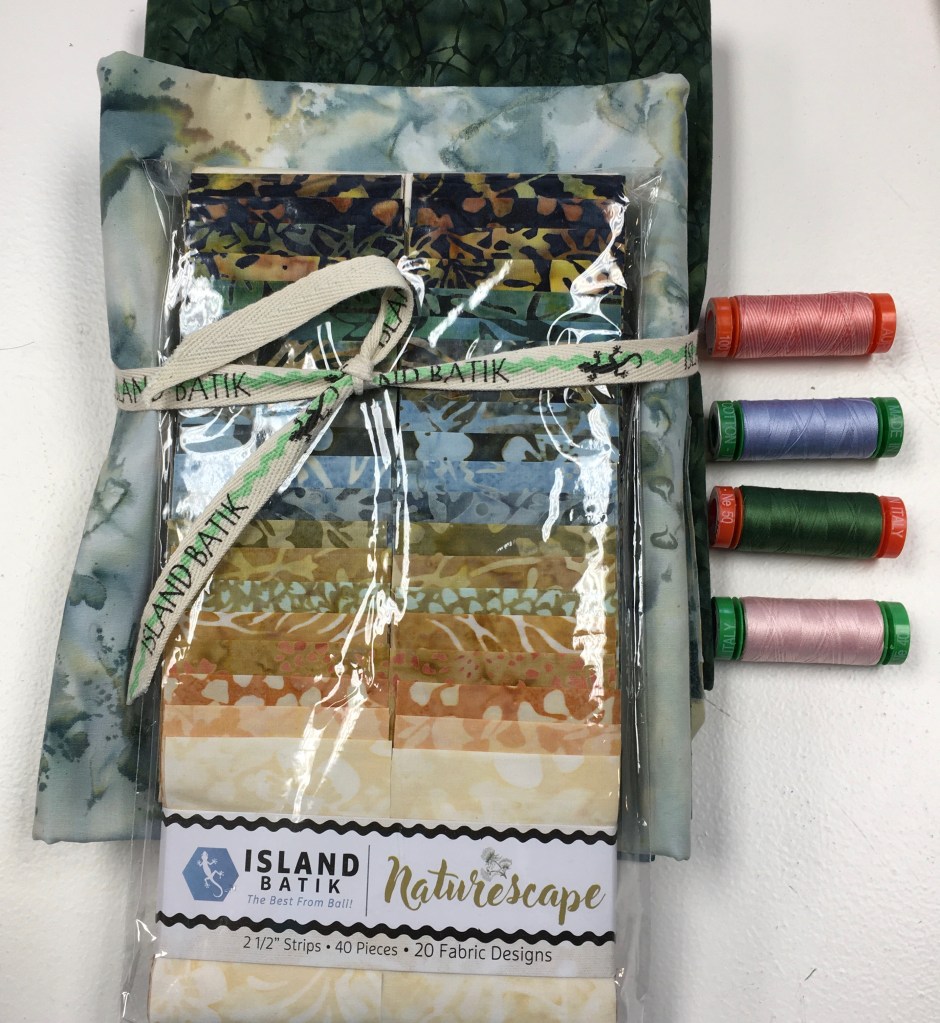
Look at this beautiful Naturescape pre-cut that I received from Island Batik! Along with 2 yards of Glacier and 2 yards of Large Netting-Pineneedle. PLUS, 4 spools of Aurifil Thread:
50 wt: #4250: Variegated Flamingo
50 wt: #2890: Very Dark Grass Green
40 wt: # 2410: Pale Pink
40 wt: # 2770: Very light Delft
I’m dreaming of what wonderful quilt I can design with these beauties!!!
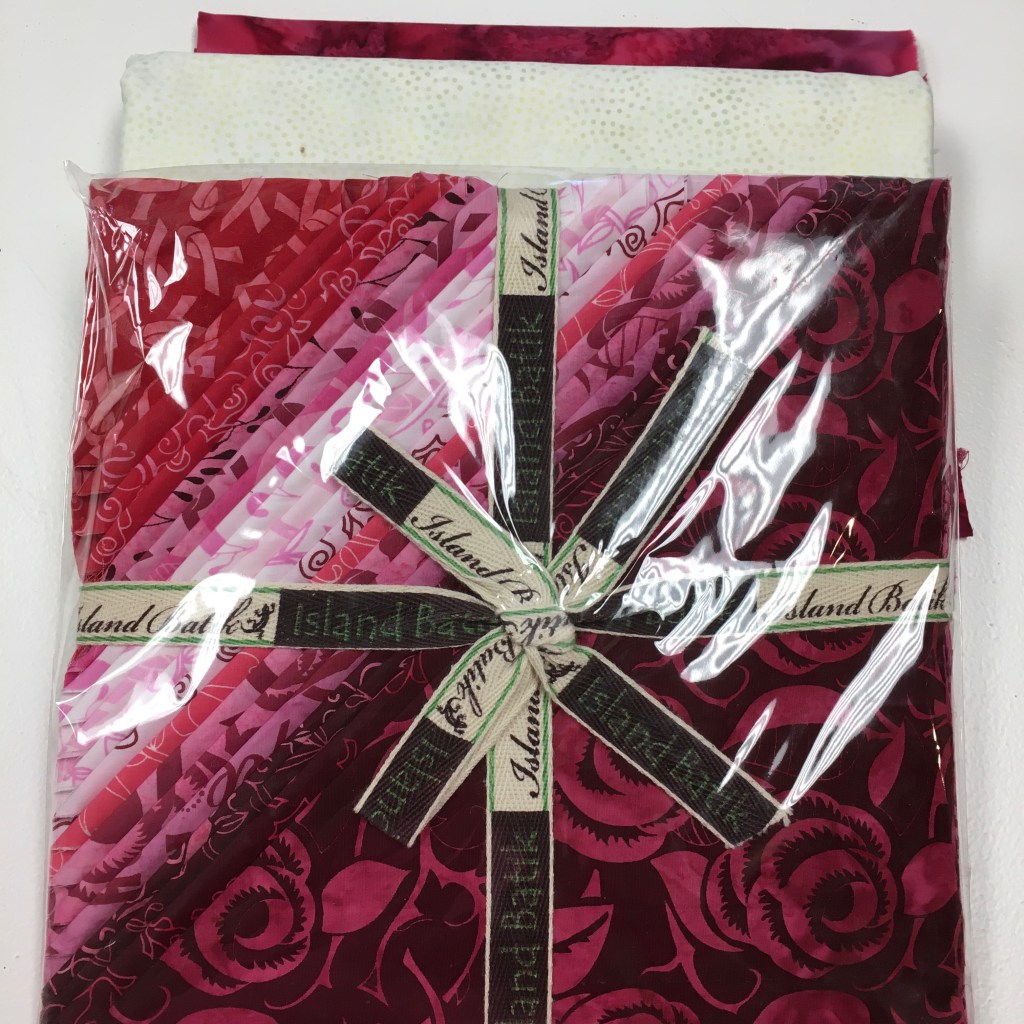
And, I also received this stack of fabrics “Positively Pink,” Breast Cancer Awareness with coordinating yardage for the Pinktober Blog Hop.
Kate, from Life in Pieces, is hosting “Stitching Stuff” and the goal is to sew for at least 15 minutes a day. I use Kate’s guideline, but my personal goal is to sew for 30 minutes a day. On those “blah” days, it does motivate me to sit at my machine and 30 minutes often turns into several hours. Thank you Kate for the motivation!
January – Aug: 209 / 242
Sept: 4 / 4
Total: 203 / 236
Percentage = 86%
Stash Report
Donna at Quilt Paint Create hosts a weekly linky party where you can display your stash numbers. This has really kept my stash from growing (somewhat!) Before I buy anything, I am always mindful of the fact that I need to report it on my blog … That sometimes stops me in my tracks!
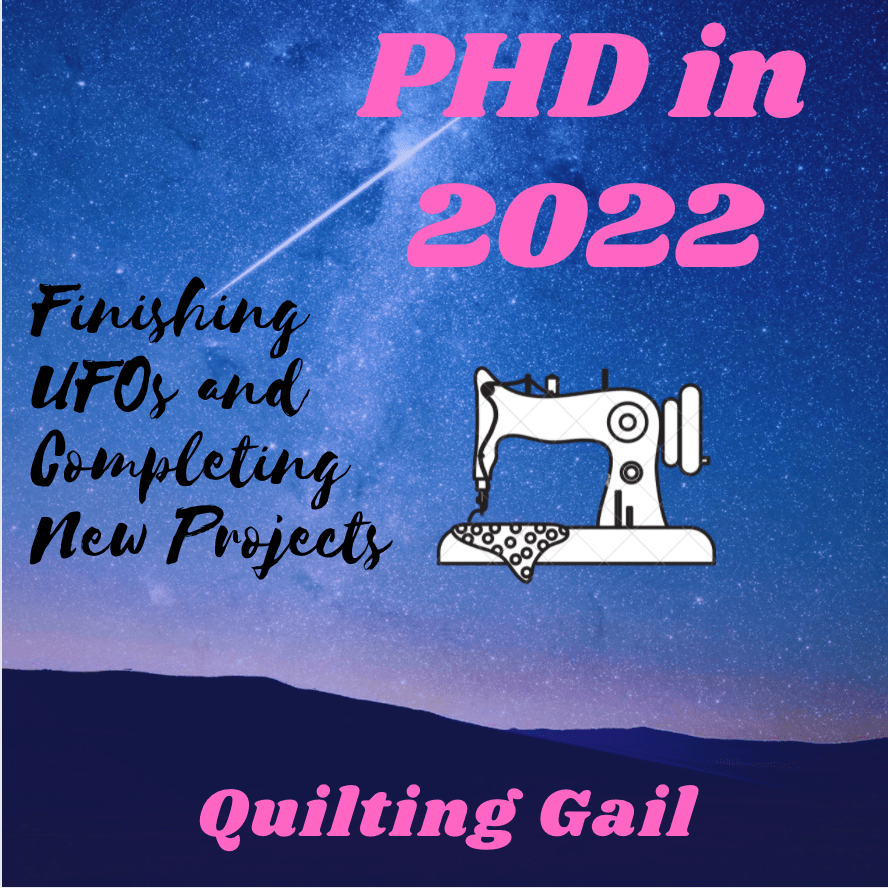
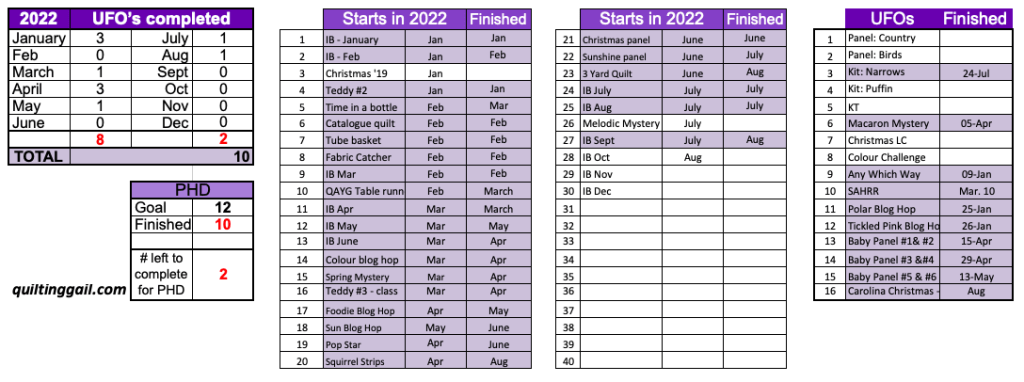
I saw this and immediately thought about PHD in 2022! For those of you that have joined me in this, I think we all know how many UFOs we have (or don’t know) and can feel overwhelmed. Well, as this meme says, Get Started! … and the rest will come!
August’s Accomplishments!
I finished one UFO this month. It was a UFO that was hiding in a closet where quilty things are not stored! Anyhow, it got quilted and it is a finish for August! Only 2 more UFOs to go … and a few starts in 2022 to finish and I’ll have my PHD in 2022!
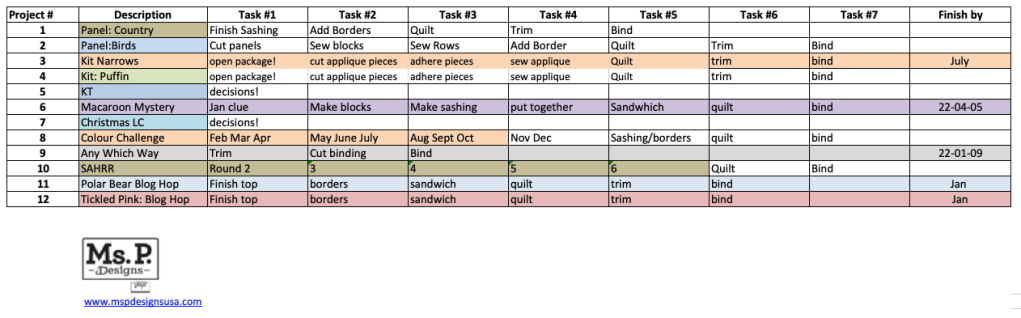
The Tally Sheets
Here is an Excel File for you to use (if you want).
This month, it’s Cinnamon! I LOVE Cinnamon … And these luscious fabrics from Island Batik just sing Cinnamon!!!
This pattern is free until the end of the month … so hurry … you can get it HERE: Patterns by Jen.
Here are all 8 of my blocks:
I don’t have a lot of “Cinnamon” quilts, but this one, using the Island Batik Evergreen & Pine collection is one that was made for the Island Batik catalogue. You can see it HERE. It’s the Fall/Winter 2021 catalogue & the quilt is called “In the Woods.” It is free motion quilted on my domestic sewing machine with Aurifil Thread and Hobbs Batting 80/20.
Stitching Time
‘
Kate, from Life in Pieces, is hosting “Stitching Stuff” and the goal is to sew for at least 15 minutes a day. I use Kate’s guideline, but my personal goal is to sew for 30 minutes a day. On those “blah” days, it does motivate me to sit at my machine and 30 minutes often turns into several hours. Thank you Kate for the motivation!
January – July: 185 / 218
August: 28 / 28
Total: 199 / 232
Percentage = 85%
Stash Report
Donna at Quilt Paint Create hosts a weekly linky party where you can display your stash numbers. This has really kept my stash from growing (somewhat!) Before I buy anything, I am always mindful of the fact that I need to report it on my blog … That sometimes stops me in my tracks!
I finished these projects since the last update:
the 3 yard quilt … 3 yards for the front, 3 for the back & half a yard for binding …
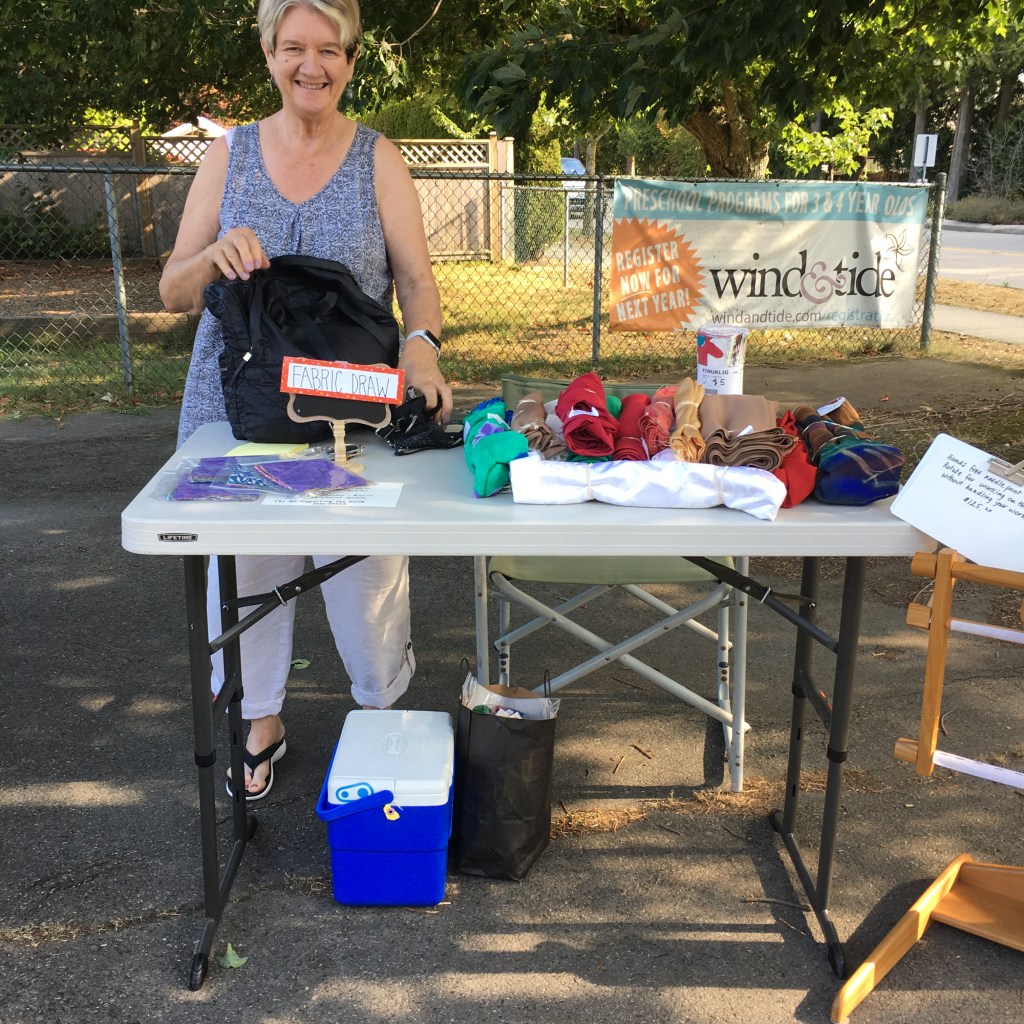
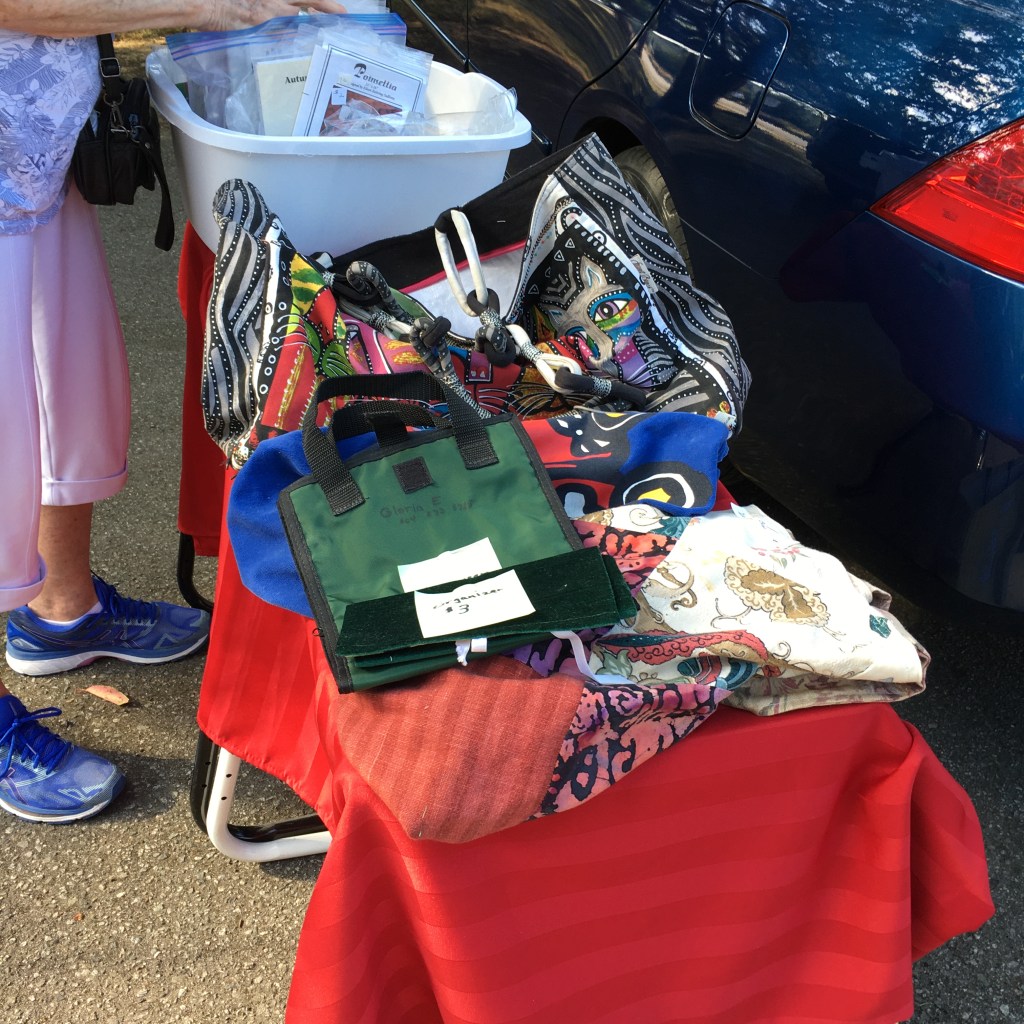
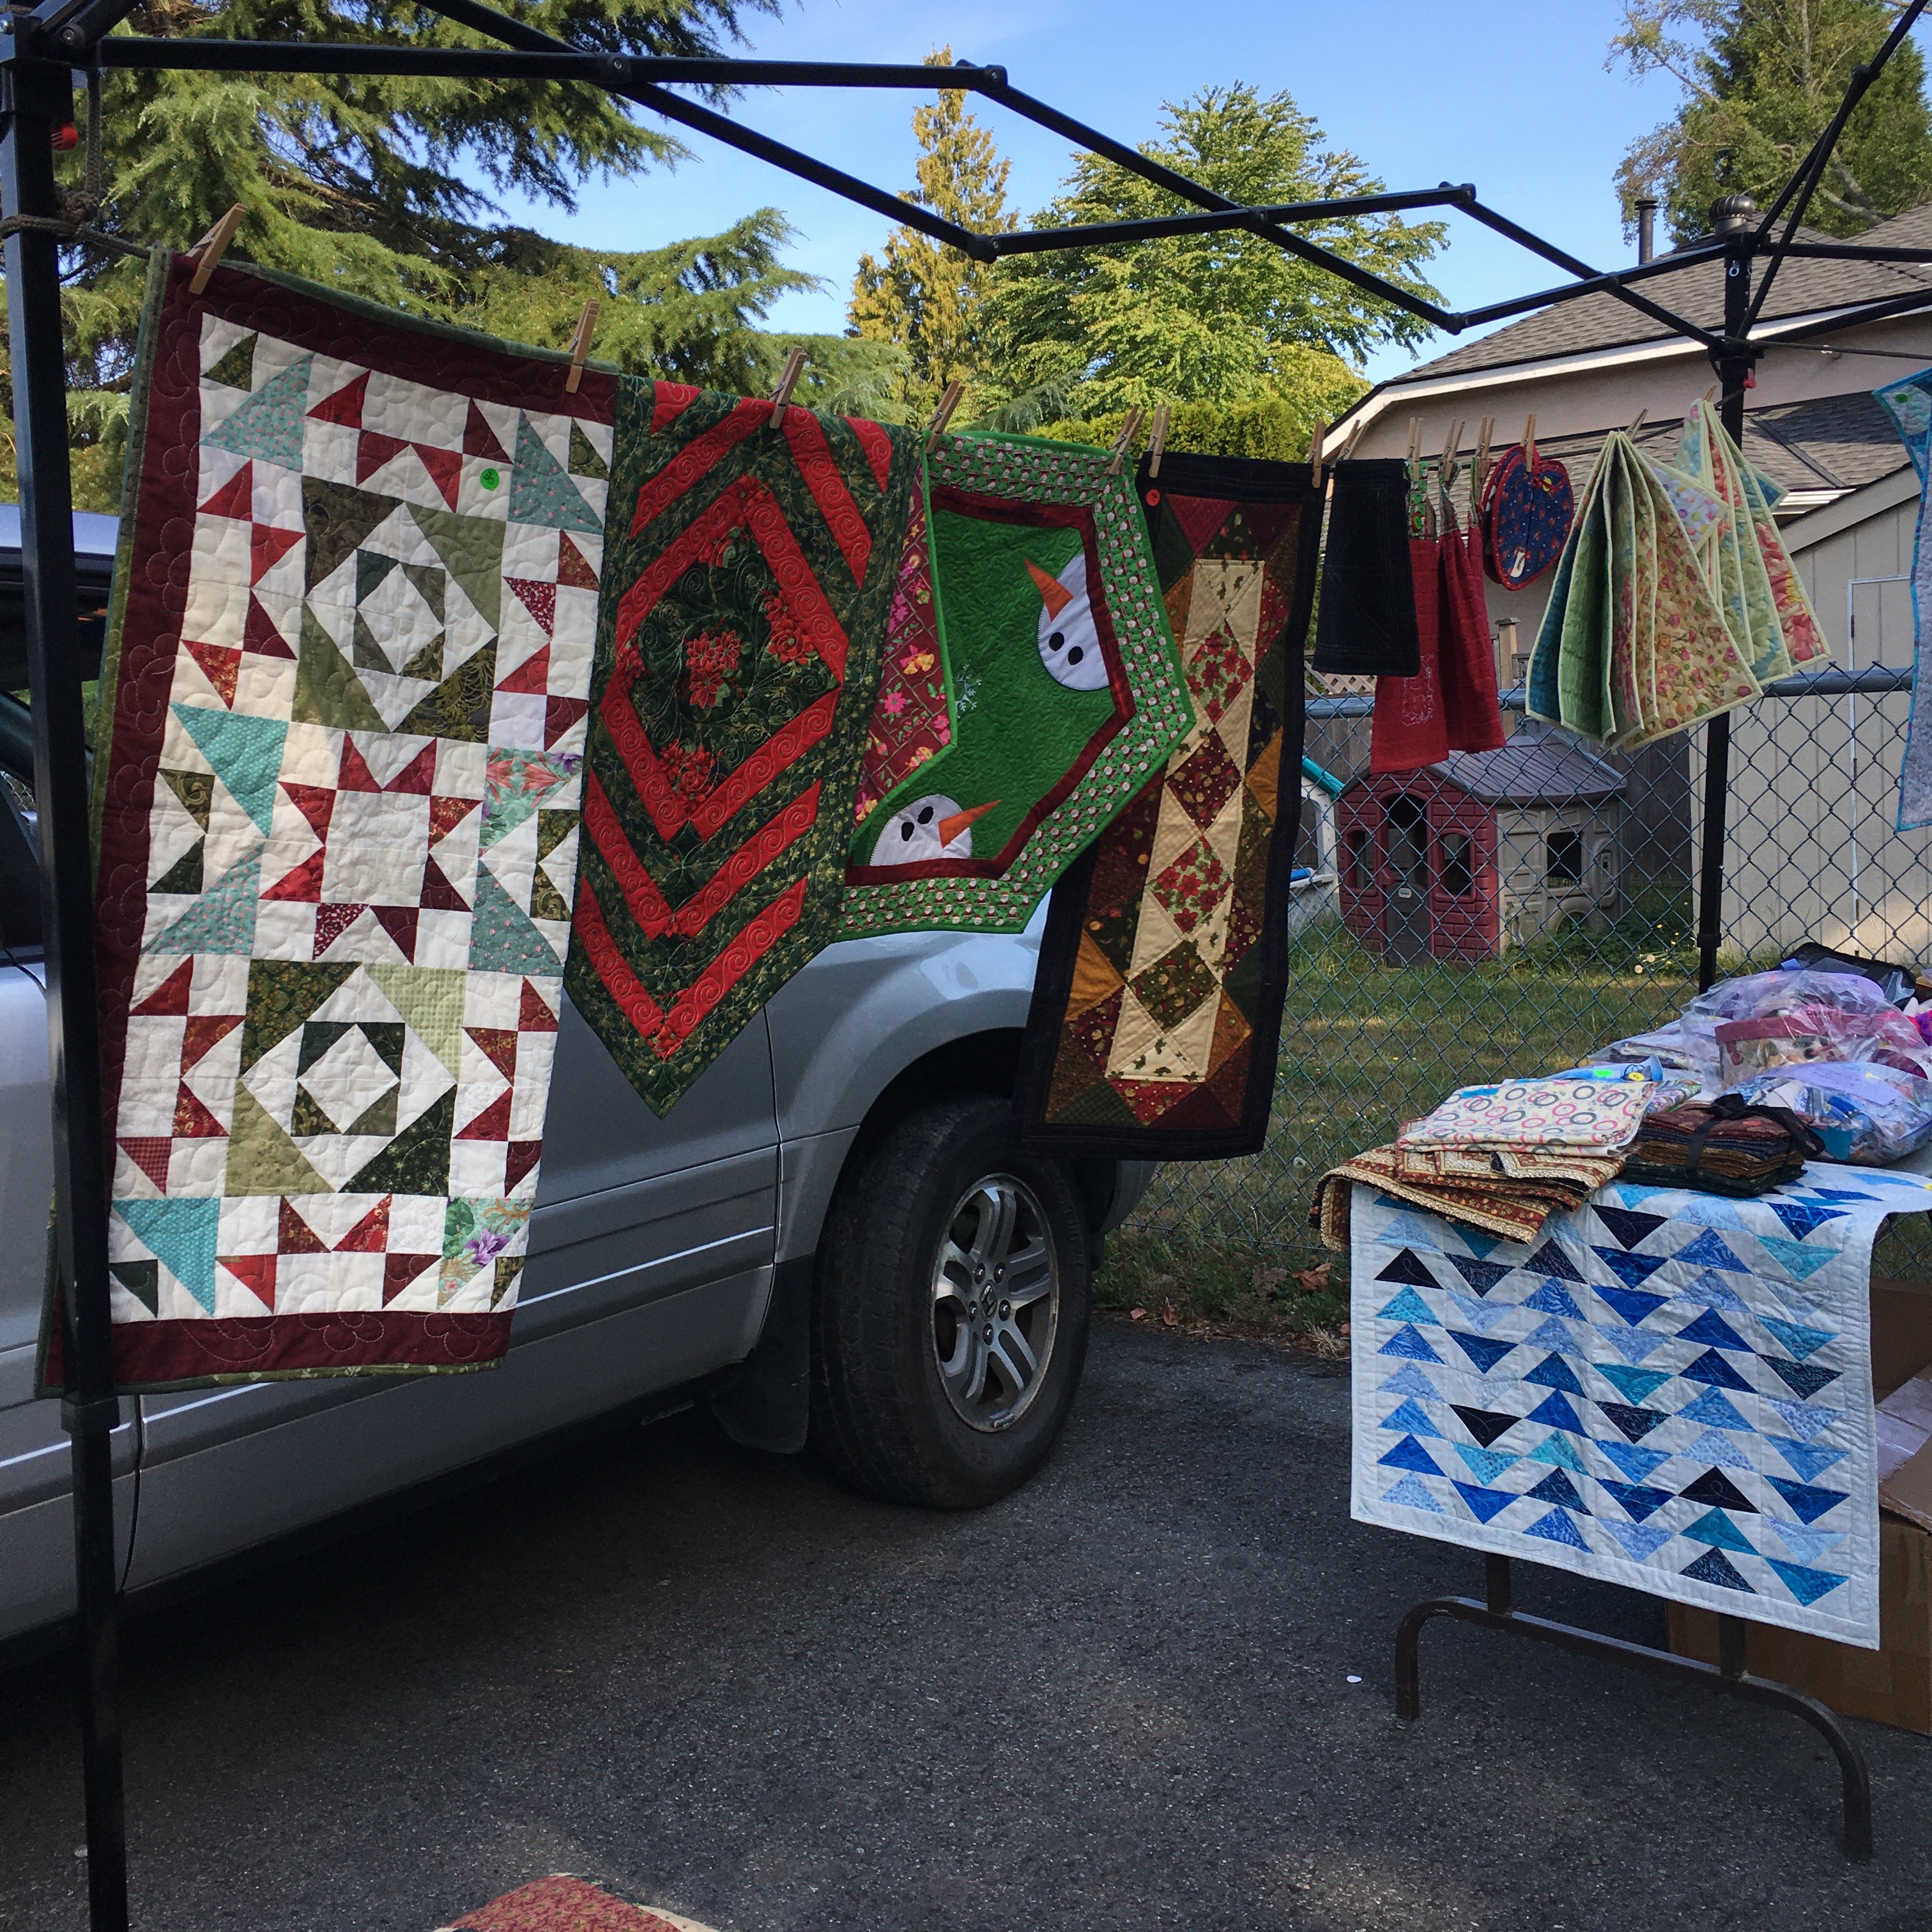
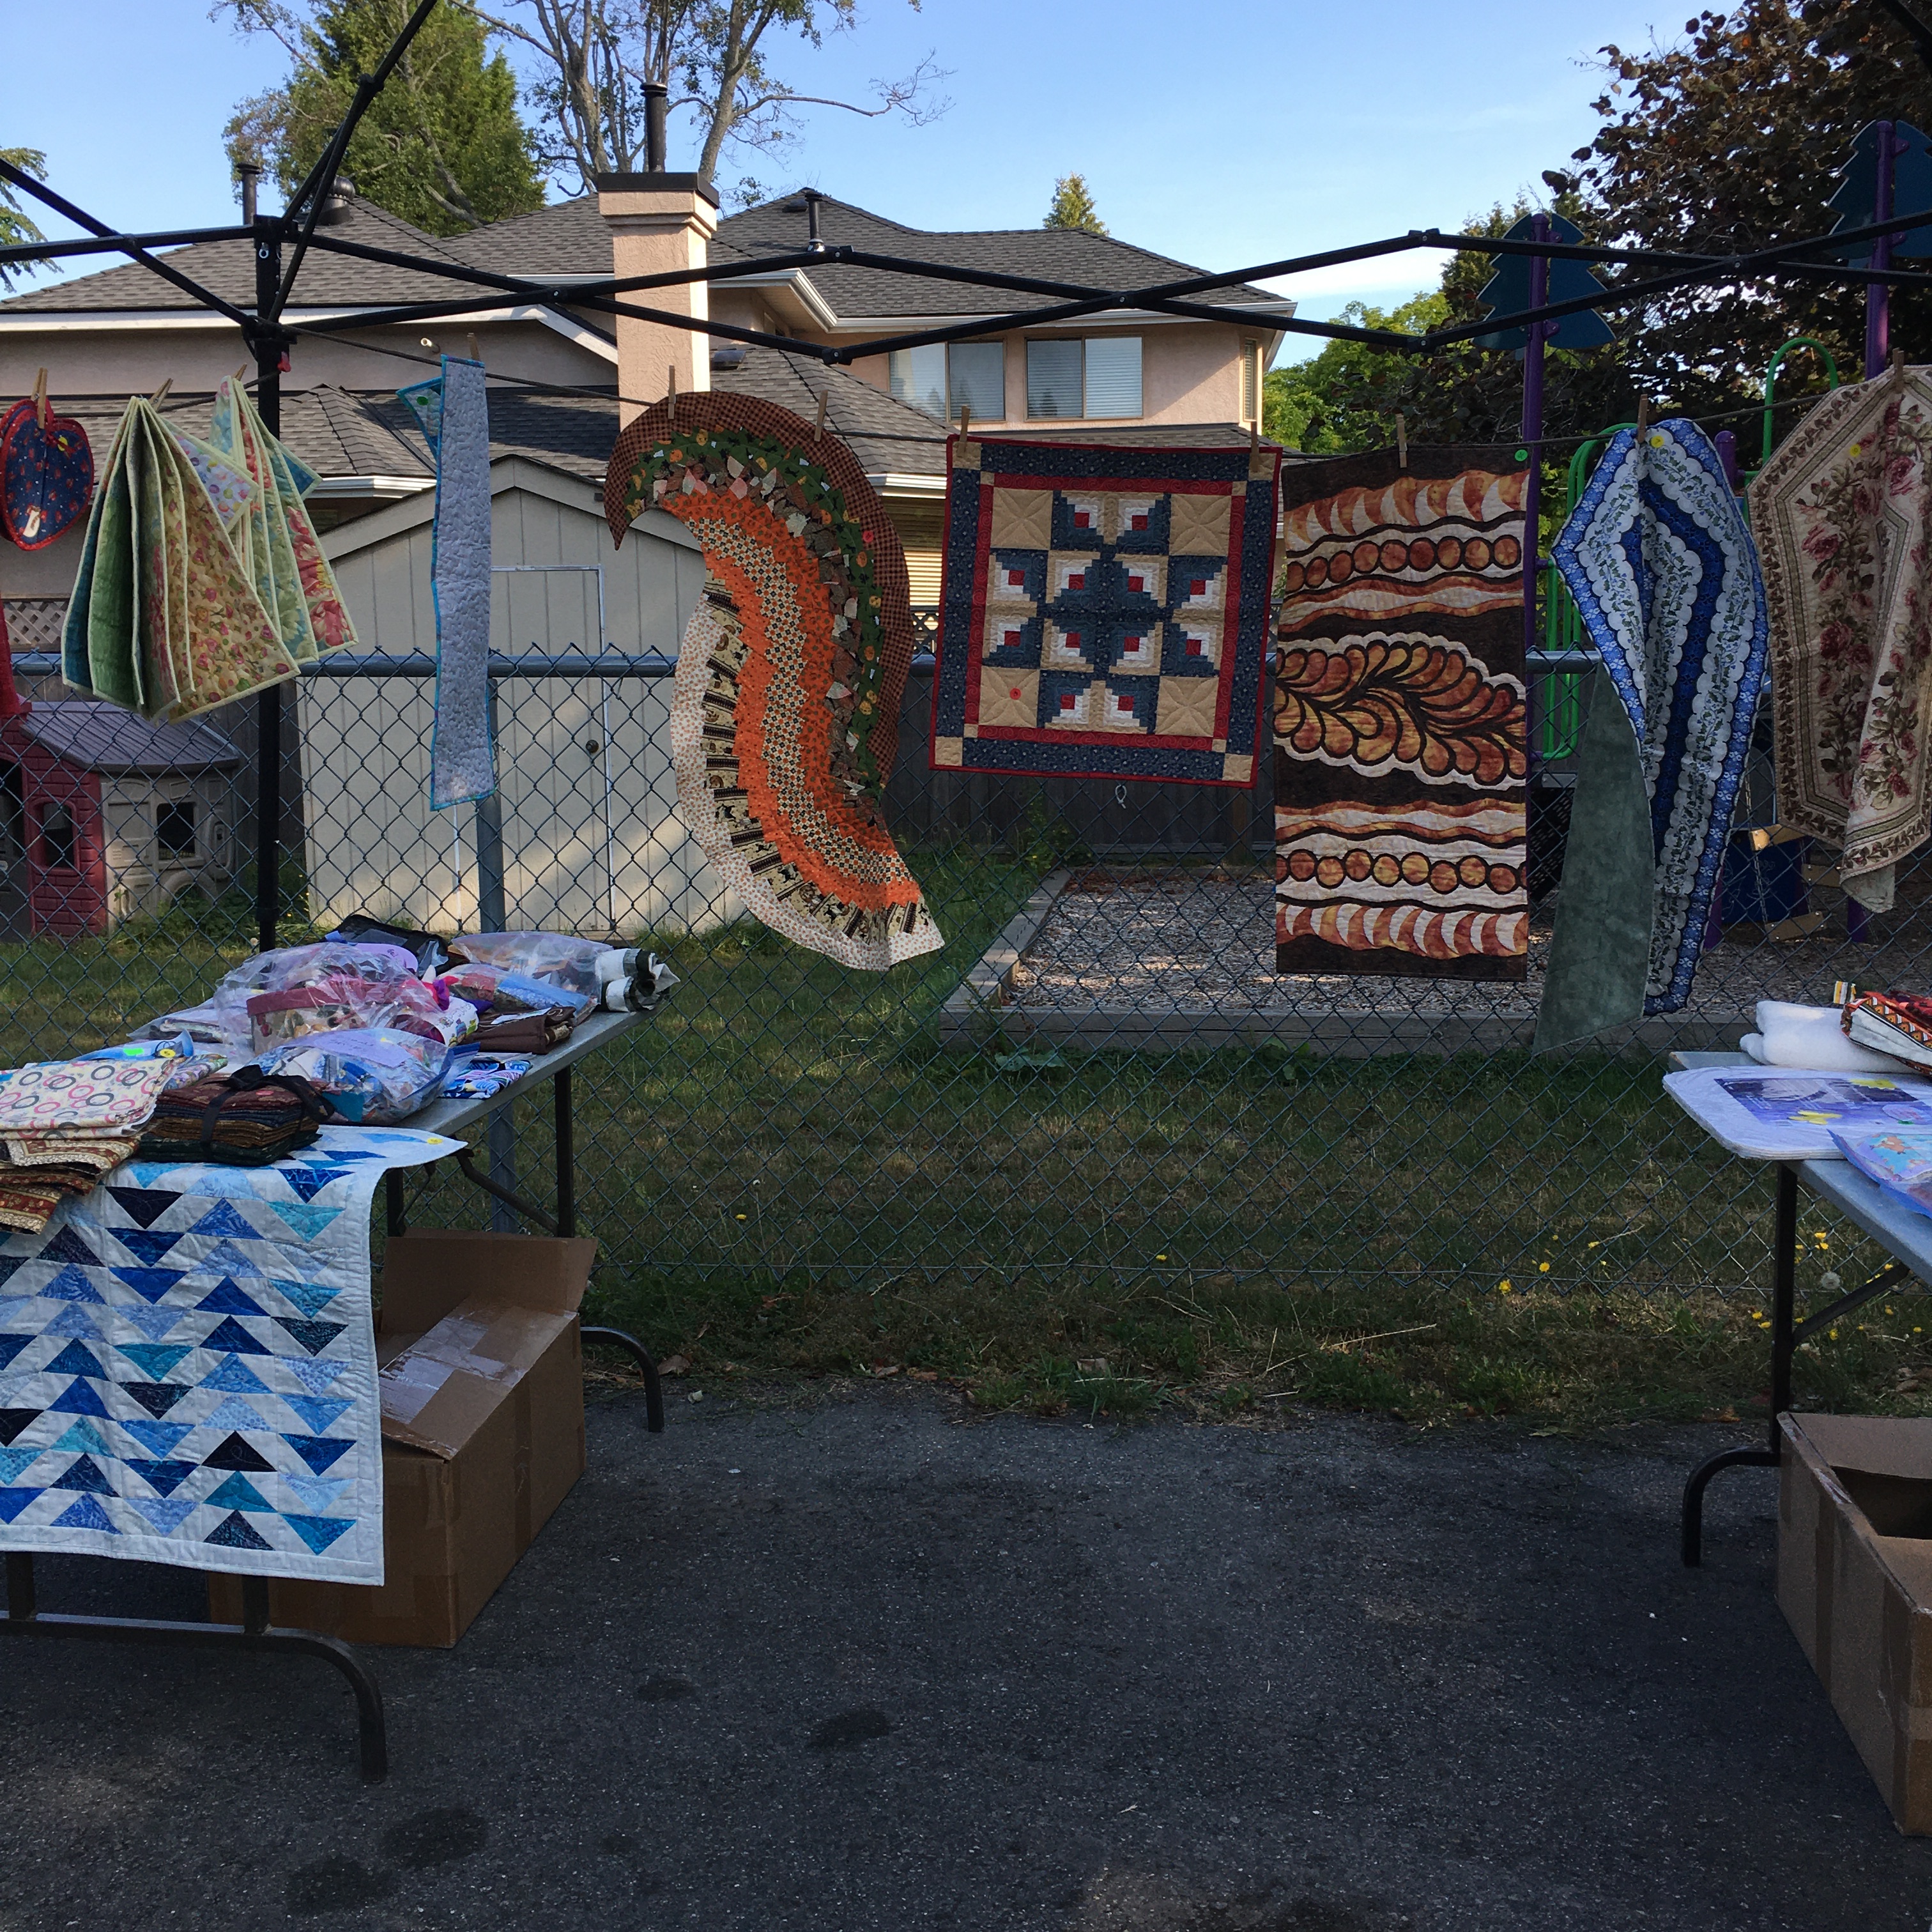
Last Saturday, our guild had a “Boot Sale” … or a garage sale. We met in the parking lot of a local church and spread out our items.
The guild had a lot of fabric spread over several tables. Here’s a picture of just ONE of the tables.
Our new vice President collected money from the guild sales and also helped some to renew their membership for next year.
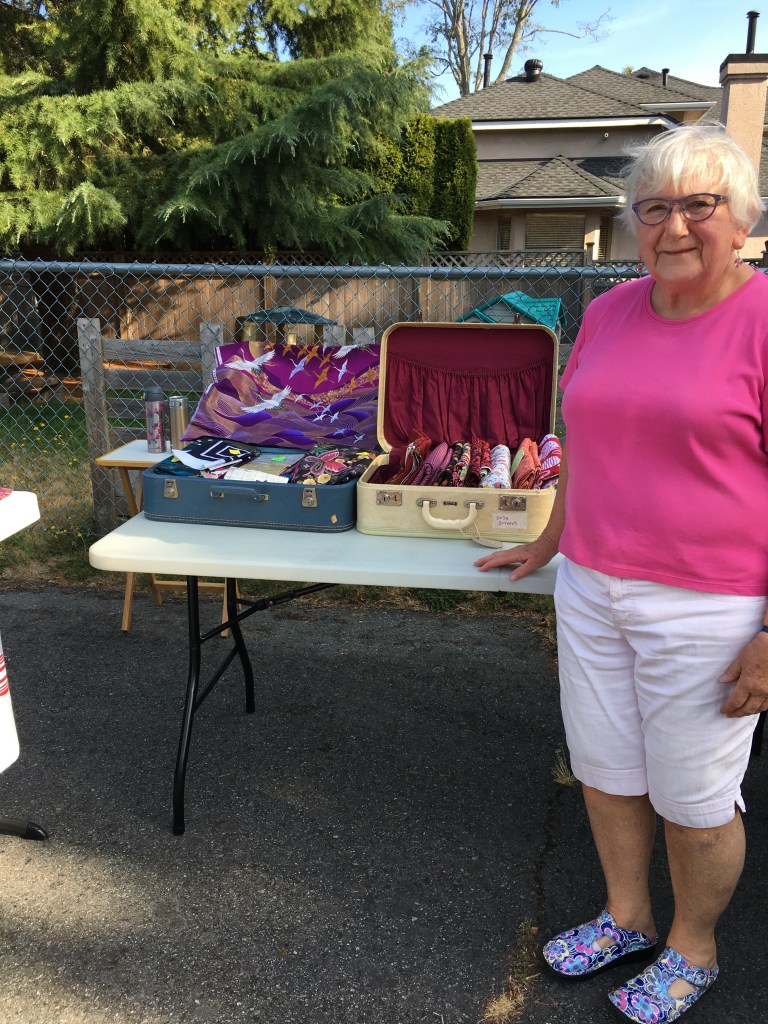
Don’t you LOVE the antique suitcases that Linda showcased her fabric in?
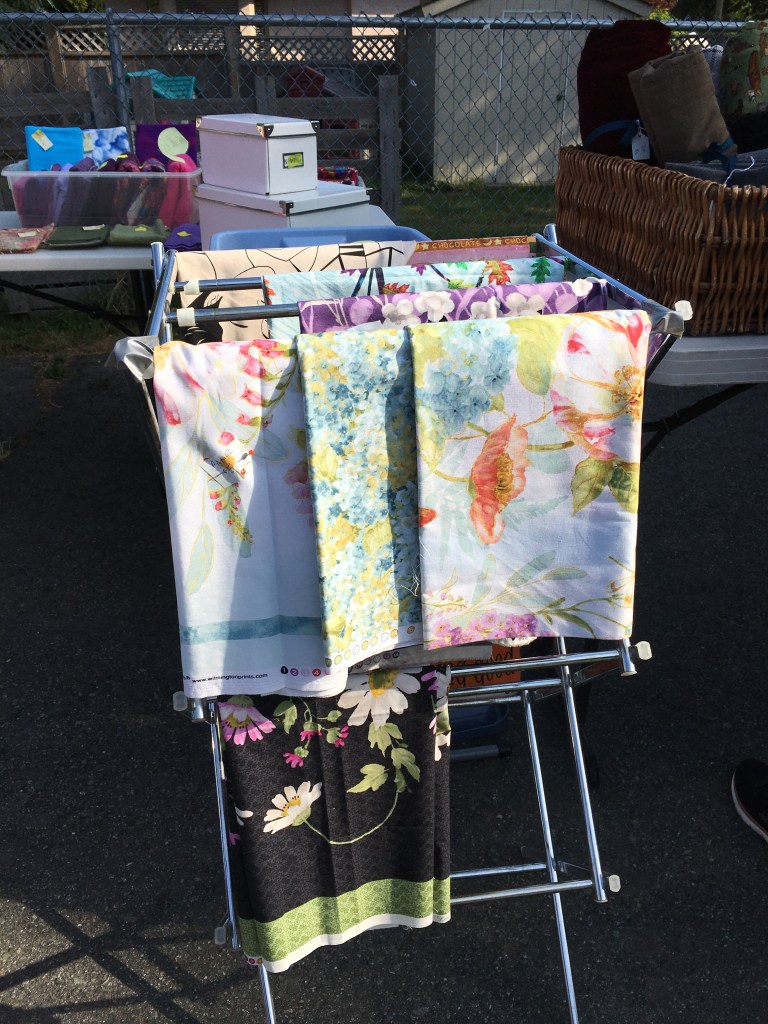
And a laundry rack for displaying beautiful fabric!
It was a beautiful sunny summer day, but you could buy a toboggan or winter quilts!
More treasures:
Guild Library books for sale:
More quilting gems!
And I sold a few of my smaller quilts, placemats and wall hangings.
A Recent UFO finish
This quilt was my most recent UFO finish! It was started in 2009, when I did Bonnie Hunter’s Carolina Christmas mystery quilt. These blocks were left-over and were sandwiched with Warm and Natural and tucked into a closet. Now, I haven’t used Warm and Natural for a zillion years … I’m sure I’ve gone through at least 5 full rolls of Hobbs 80/20, plus more Hobbs that I’ve received through Island Batik. When I quilted this a couple of weeks ago, I was reminded as to why I LOVE Hobbs batting so much!! The W&N has way more lint and it doesn’t quilt as smoothly as Hobbs 80/20. (Now – this is just MY opinion).
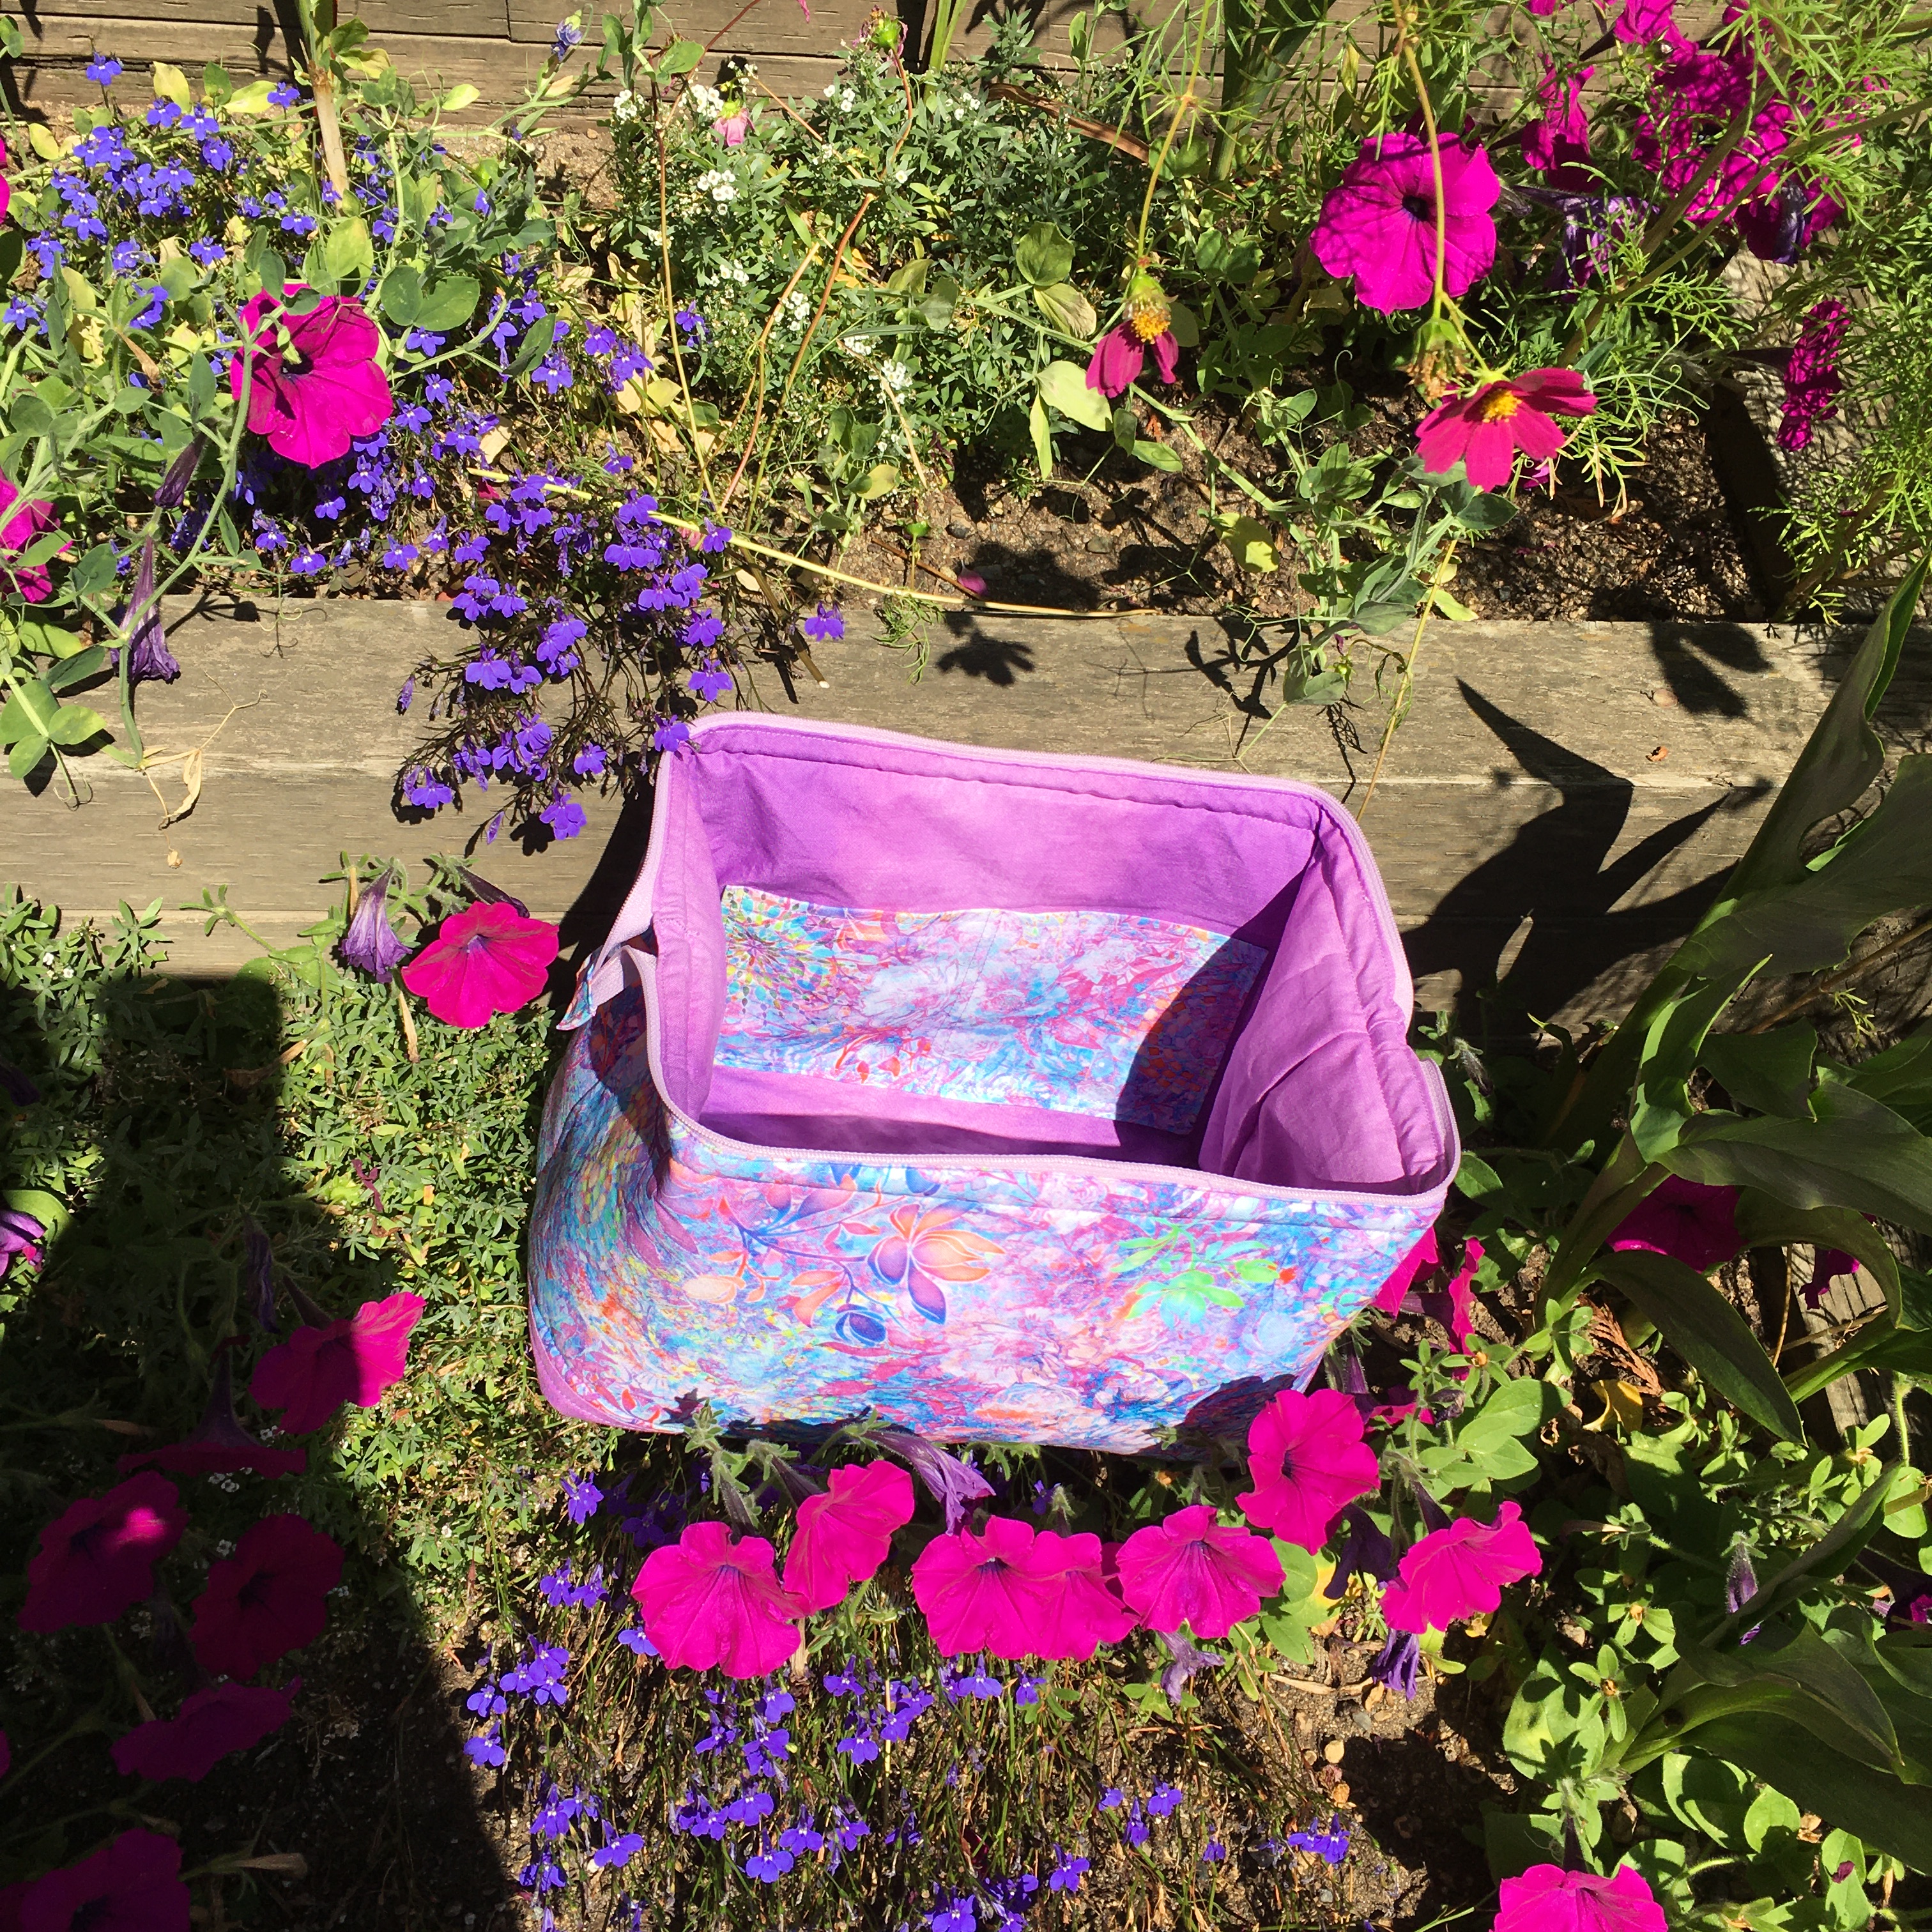
The Challenge: Create something to do with TRAVEL. Anything from places to go, to how you get there, and anything in between. Maybe even an alligator? You decide! The theme is really your own interpretation, surprise us!
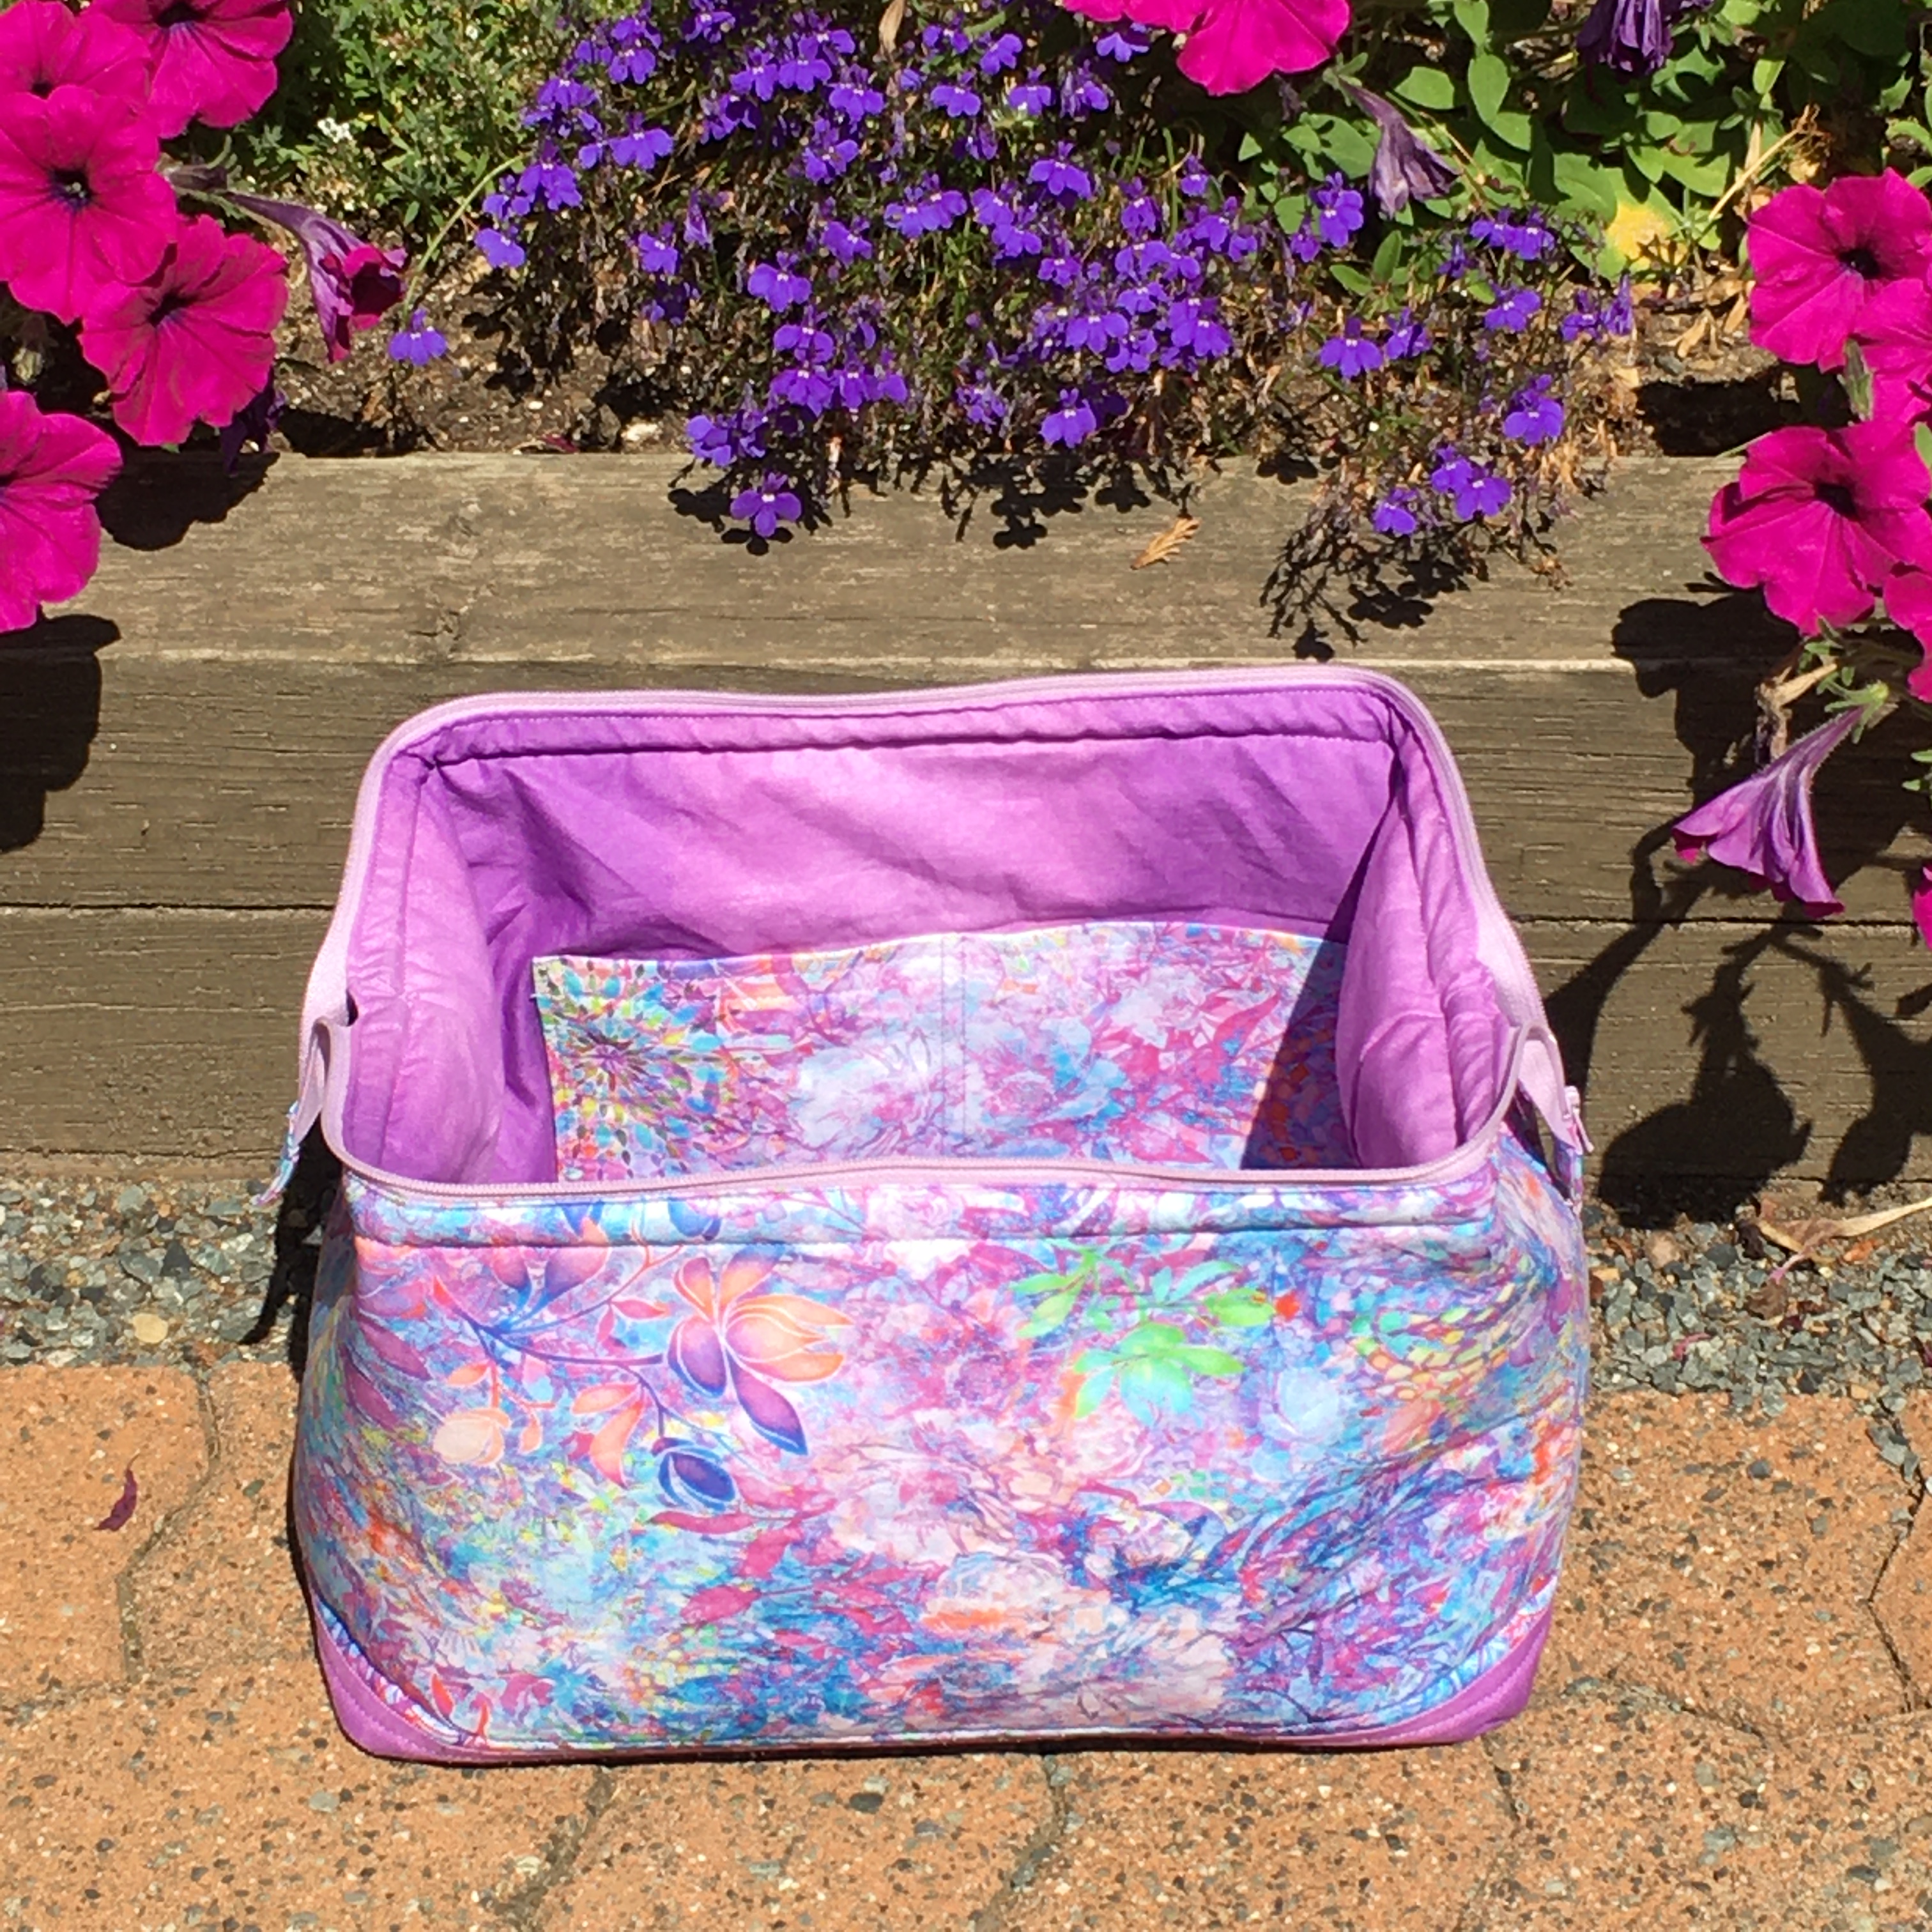
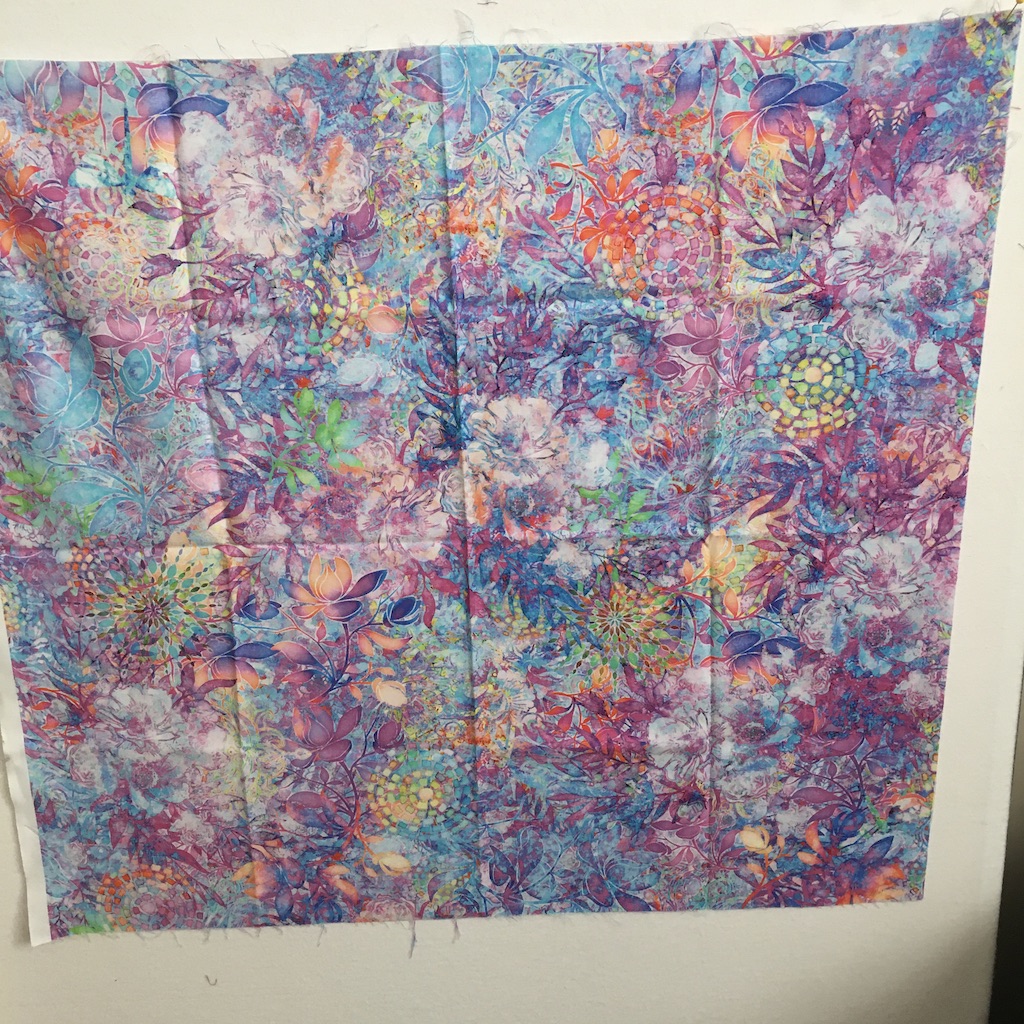
A few weeks ago, I told you that I was going to use this awesome fabric to create something for this blog hop:
However, a fat quarter was not enough fabric for me to make what I wanted … so I added an striped ombre mauve/purple fabric … and this is the creation:
It’s the large size Retreat Bag from Emmeline Bags. The pattern is free, but you need to purchase the wires if you want it to stand open. Here are the links to the Pattern and the Internal Wires – B.
I’ve made this bag several times … It’s easy to make (if you follow the instructions!).
Check out the other See ya Later Blog Hoppers!
Make sure you check out the rest of the blog hoppers to see what they made!
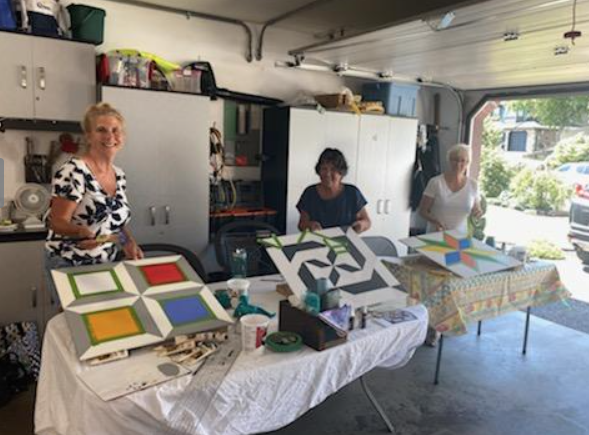
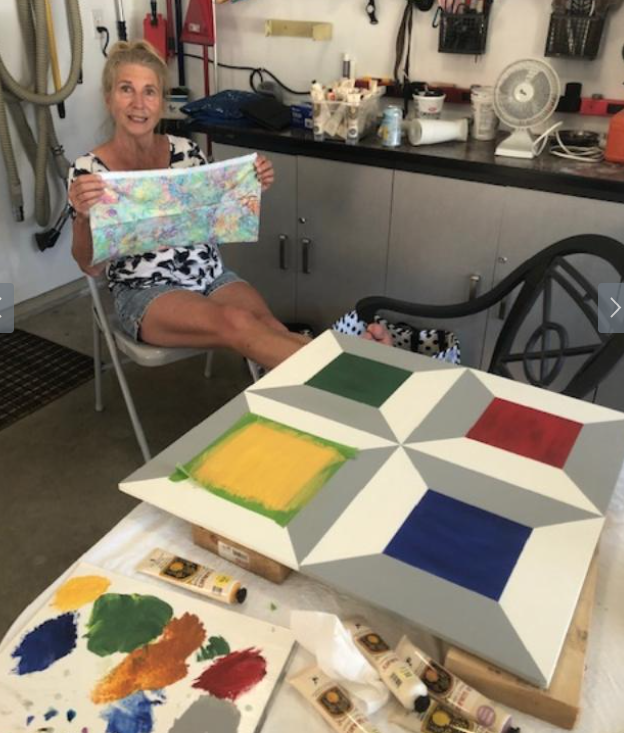
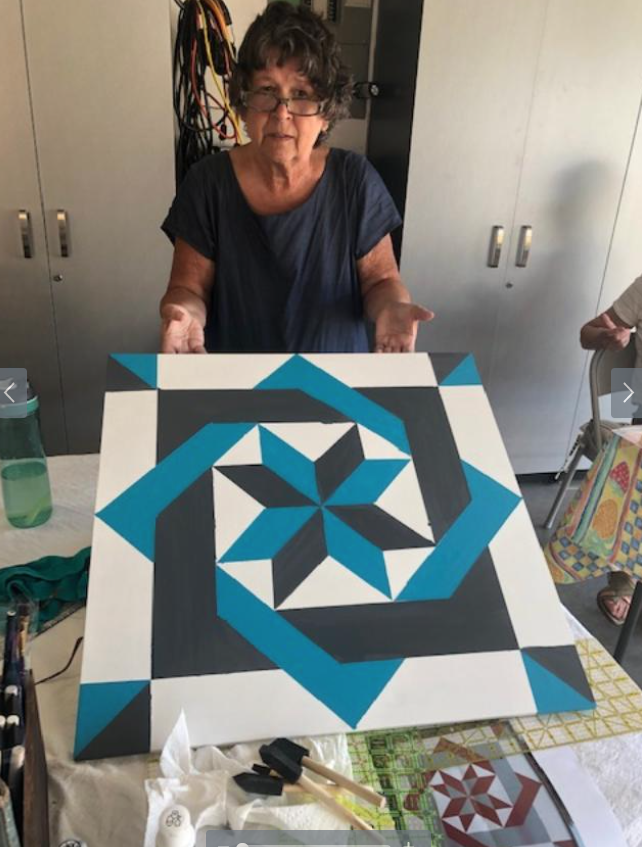
A bunch of us got together to paint some barn quilts. Our host’s husband (George) very kindly prepped all of the 2′ x 2′ squares for us. He even primed them and sanded them!!
Each of us picked a different pattern! It was fun to see the variety! We started out, using a pencil and marking our boards in grids. Then the painter’s tape was applied and the painting began!
Robin had taken a class, but the rest of us relied on Youtube! (grin!)
I forgot to take my phone, so the credit for these pictures goes to Robin, Judy and Linda!
Linda, Robin, Judy, Gail & Amy
Most of us used acrylic paints. I bought mine at Michaels. My husband coated it with a varathane.
I finished the 3 yard quilt. (Remember I started it when my cousin, Connie, was here visiting!)
I quilted it with Silly Moon “Beanie” rulers. (I LOVE their rulers). My plan was to do a Baptist fan over the whole quilt. Well, uh, I changed my mind and just did the Baptist fans in the border. On the rest of the quilt, I used the 4″ Beanie and did circles which made orange peels. I liked the finished look! Would you believe that the backing is actually a dark dark brown? It certainly doesn’t look like it in the pictures! I used Glide thread “wheat” and Hobbs 80/10 batting.
This quilt is from a pattern called “Dream Weaver” from the book “Quick as a Wink 3-Yard Quilts.” It was a quick and fun quilt to piece … however, when I went to put on the binding, I realized that the instructions called for 1.25″ binding. I obviously wasn’t thinking straight when I cut the red fabric for the binding. I ended up with strips of 1.25″ and I wasn’t about to make binding with it. And this quilt was definitely NOT calling for a flange binding! I didn’t have enough of the red fabric left, so I went to my stash and found the darker beige fabric. The moral of this story is to THINK about what you’re cutting and don’t just follow the directions!
Stitching Time
‘
Kate, from Life in Pieces, is hosting “Stitching Stuff” and the goal is to sew for at least 15 minutes a day. I use Kate’s guideline, but my personal goal is to sew for 30 minutes a day. On those “blah” days, it does motivate me to sit at my machine and 30 minutes often turns into several hours. Thank you Kate for the motivation!
January – July: 178 / 211
August: 14 / 14
Total: 192 / 225
Percentage = 85%
Stash Report
Donna at Quilt Paint Create hosts a weekly linky party where you can display your stash numbers. This has really kept my stash from growing (somewhat!) Before I buy anything, I am always mindful of the fact that I need to report it on my blog … That sometimes stops me in my tracks!
I finished the 3 yard quilt … 3 yards for the front, 3 for the back & half a yard for binding …
I taught a class at Essem Textiles on how to paper piece WITHOUT sewing on the paper.
They all worked on a Storm at Sea block. This was the block they had for inspiration: (made with Island Batik fabric, Hobbs batting and Aurifil thread was used for the quilting.)