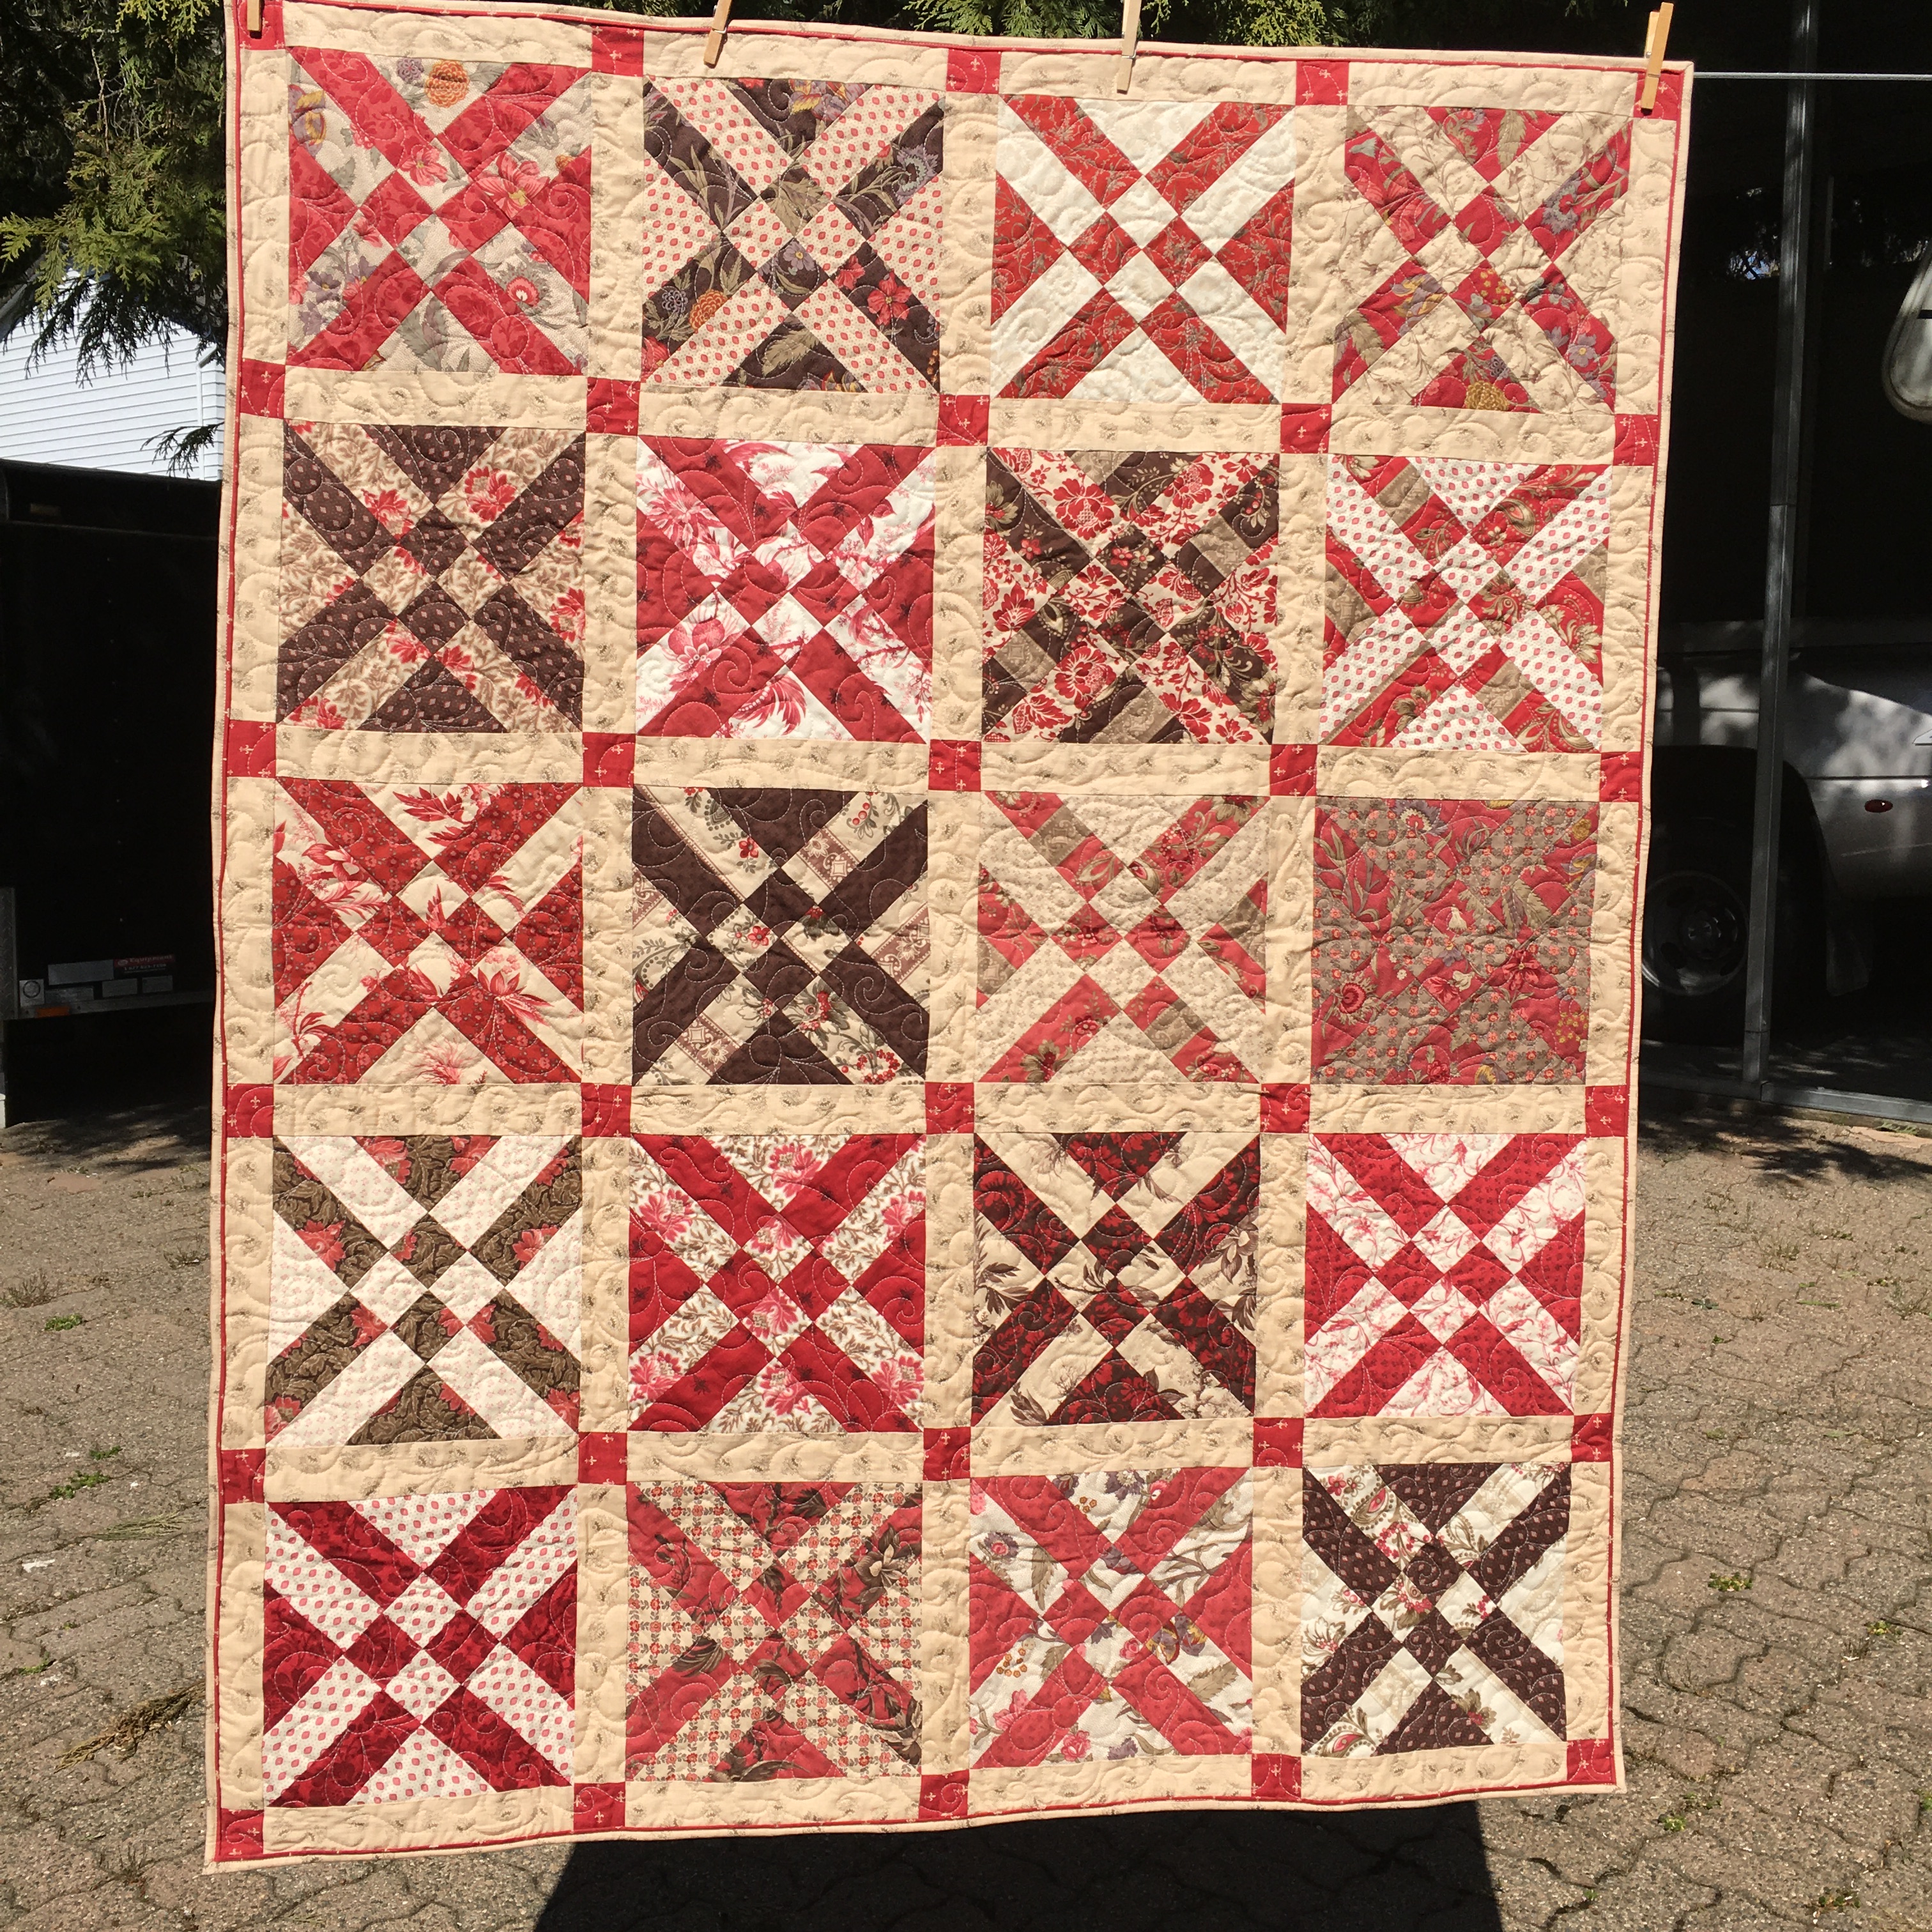
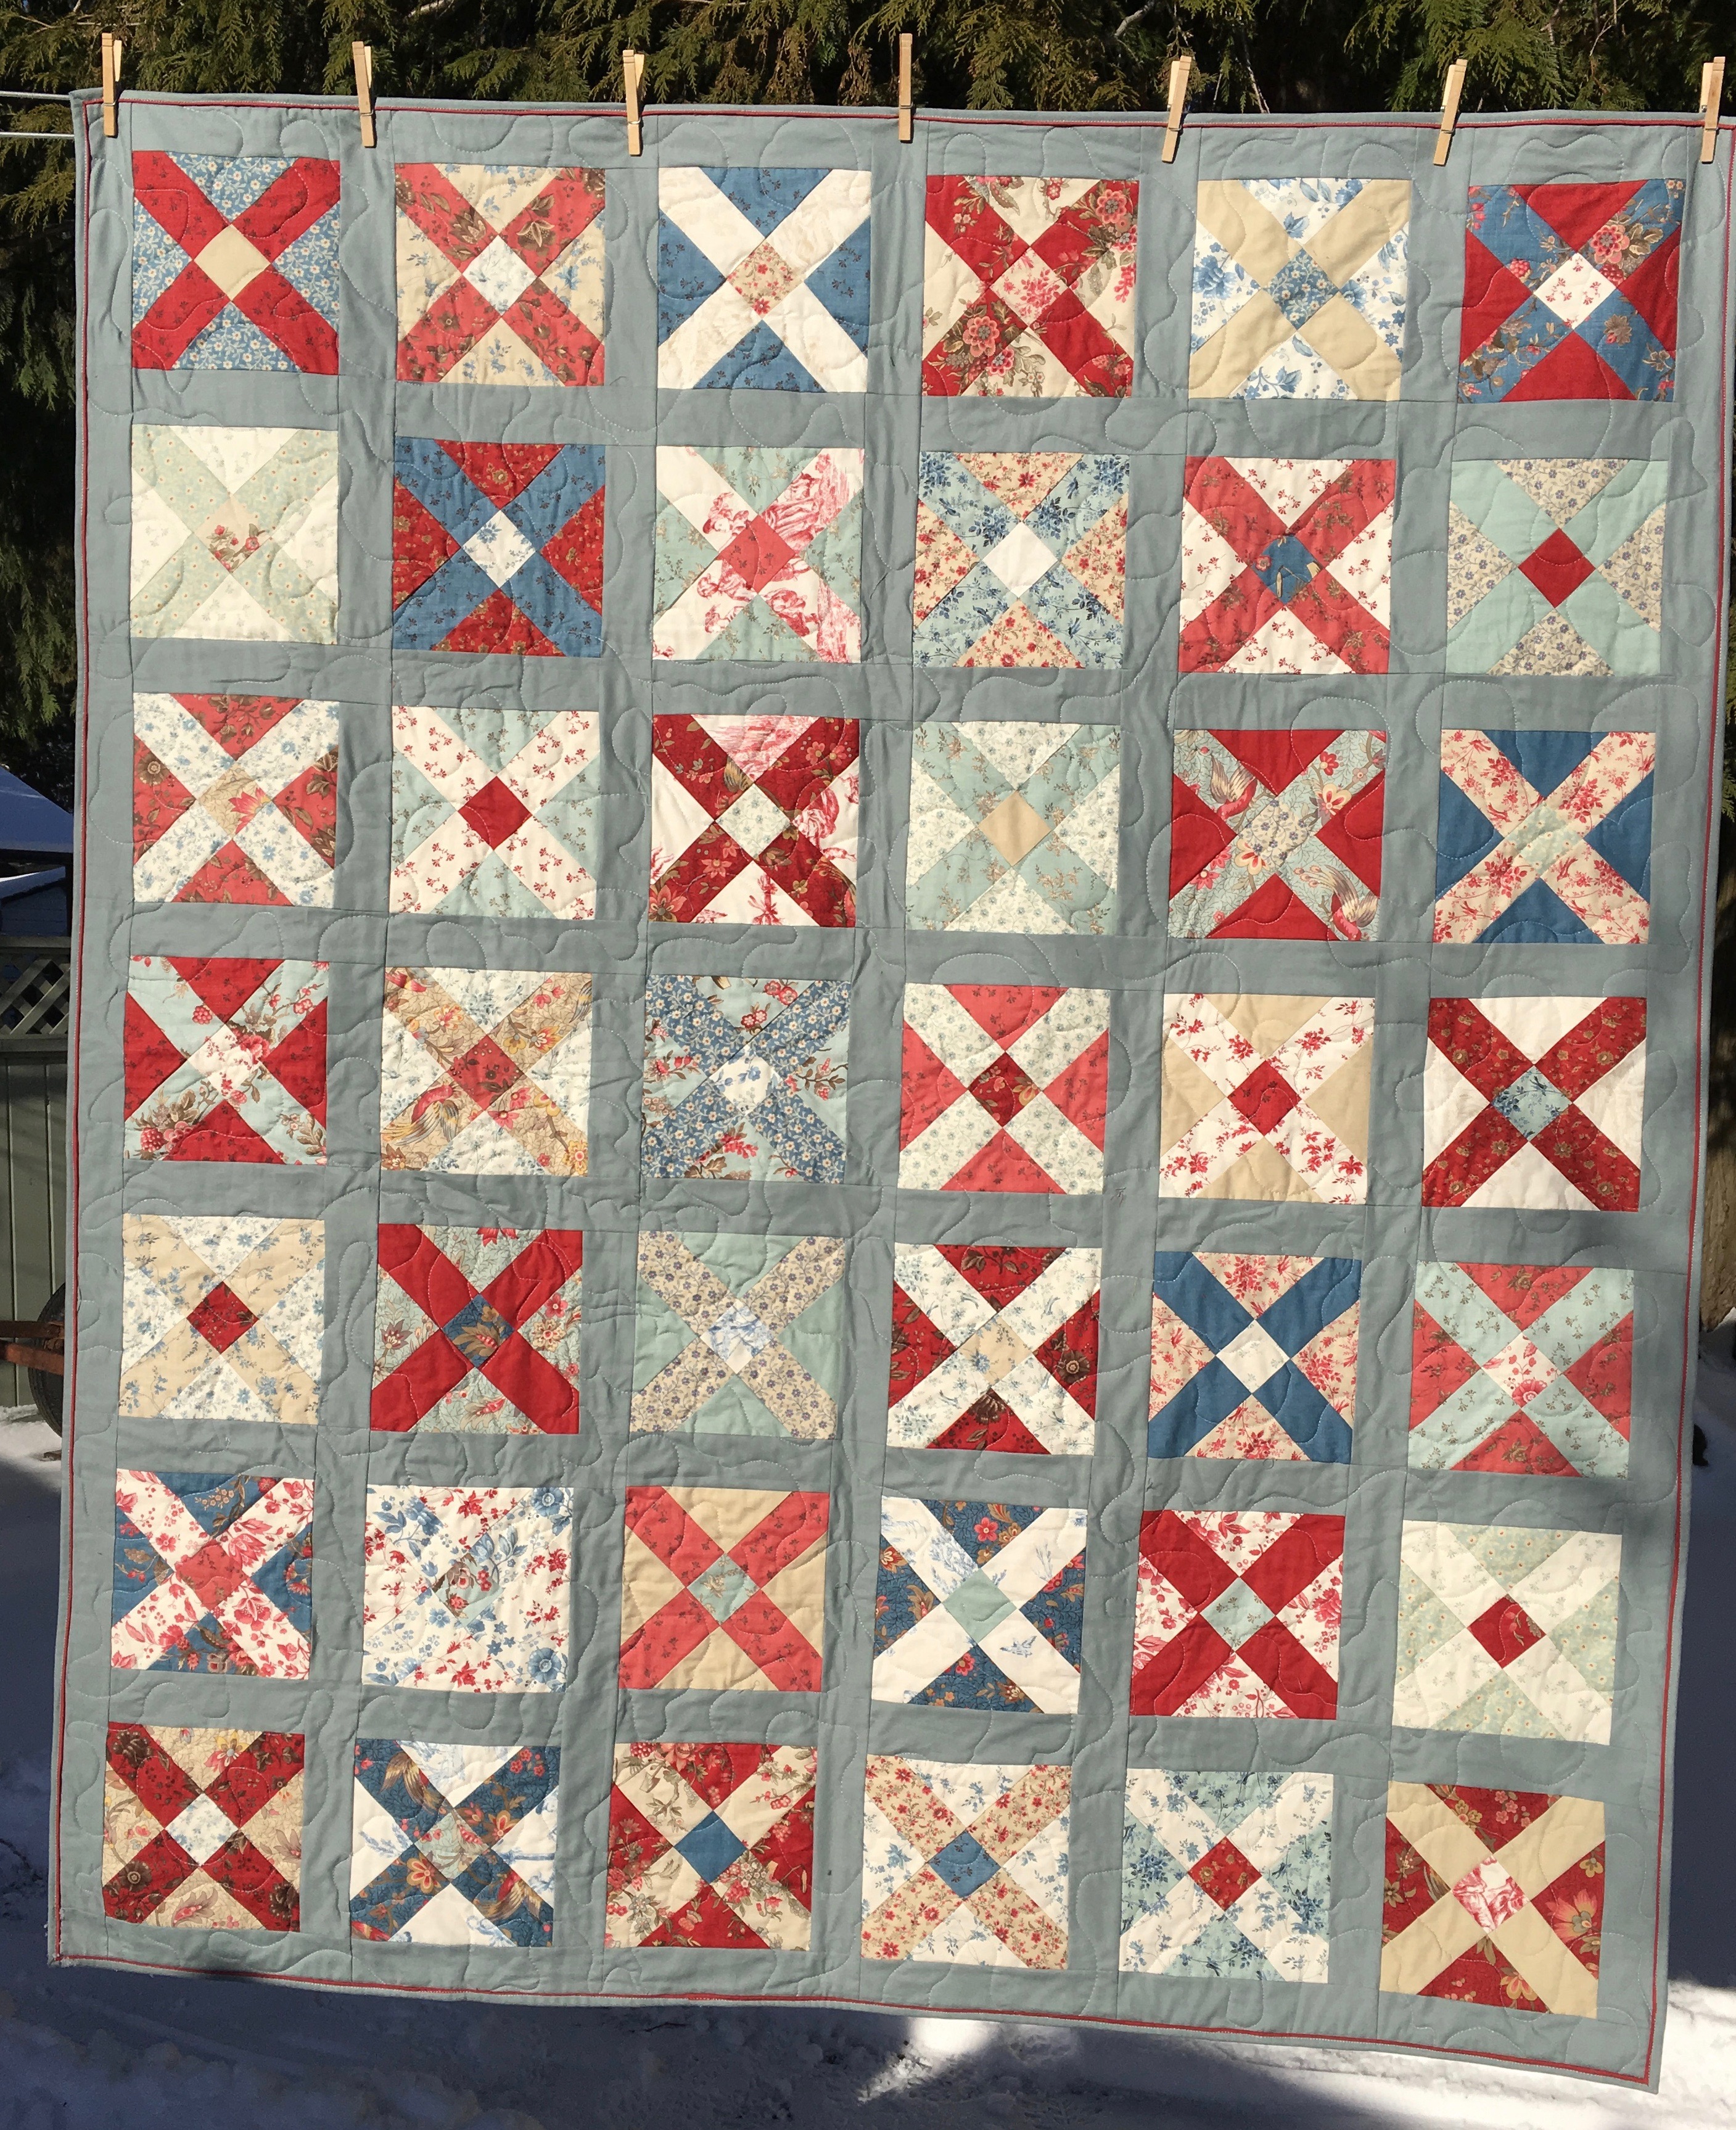
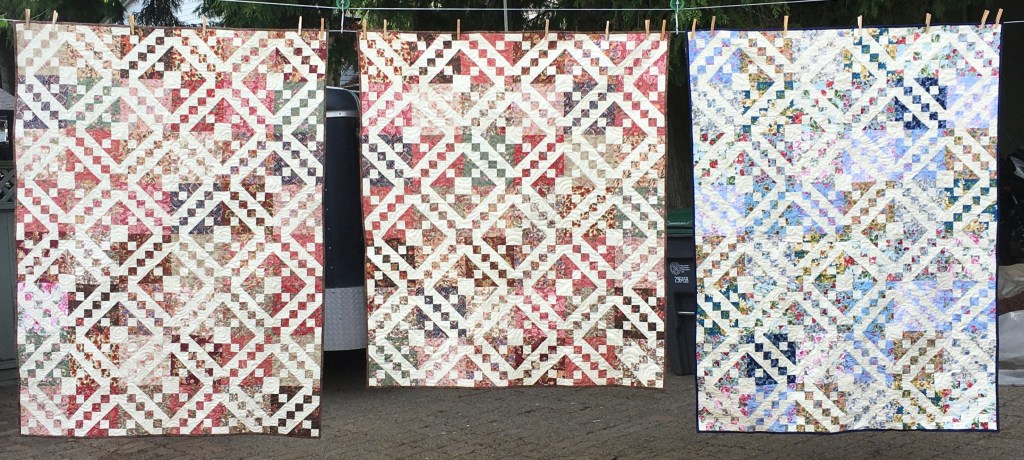
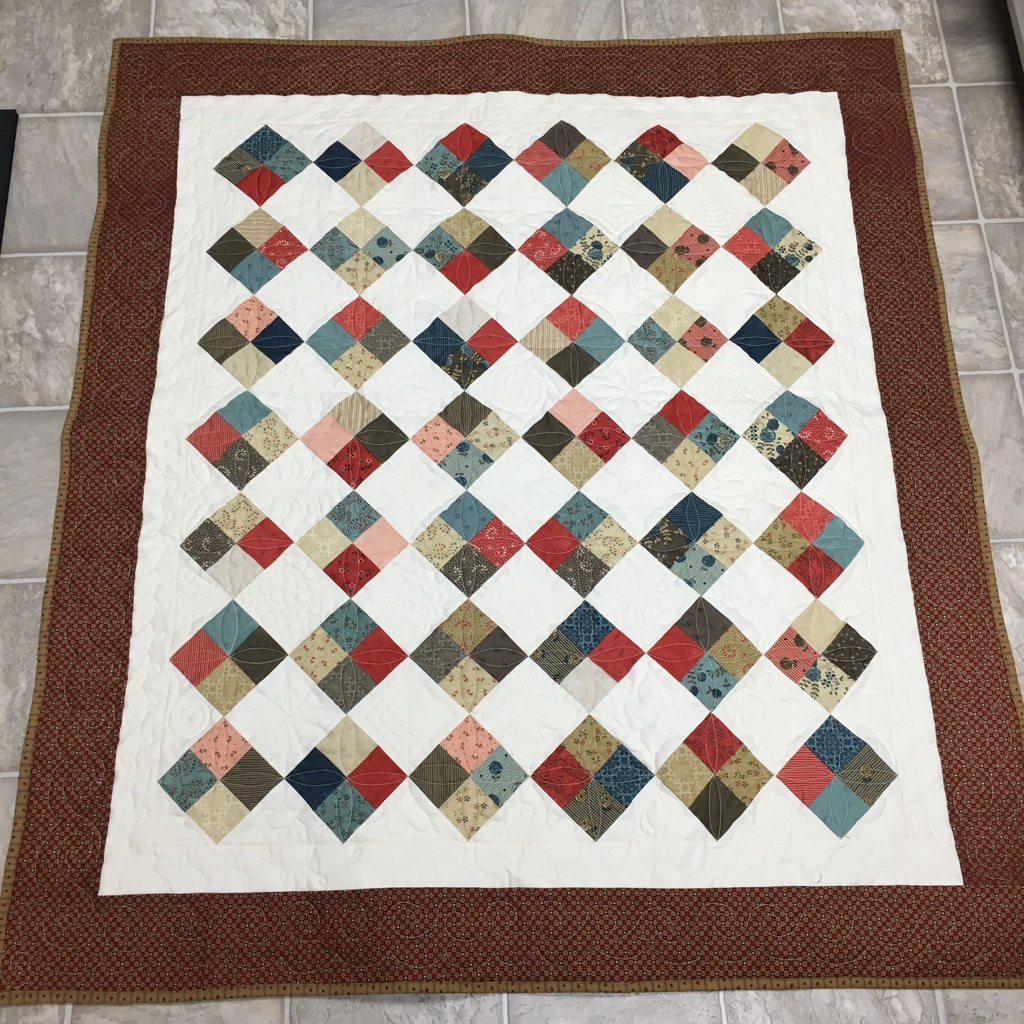
Last year, I made 2 quilts using layer cakes. Both were easy patterns, but I like how they turned out quite different.
These were both made with different French General Layer Cakes. One had browns and the other had blues in it. Of course, the different sashing also gives it a different look.
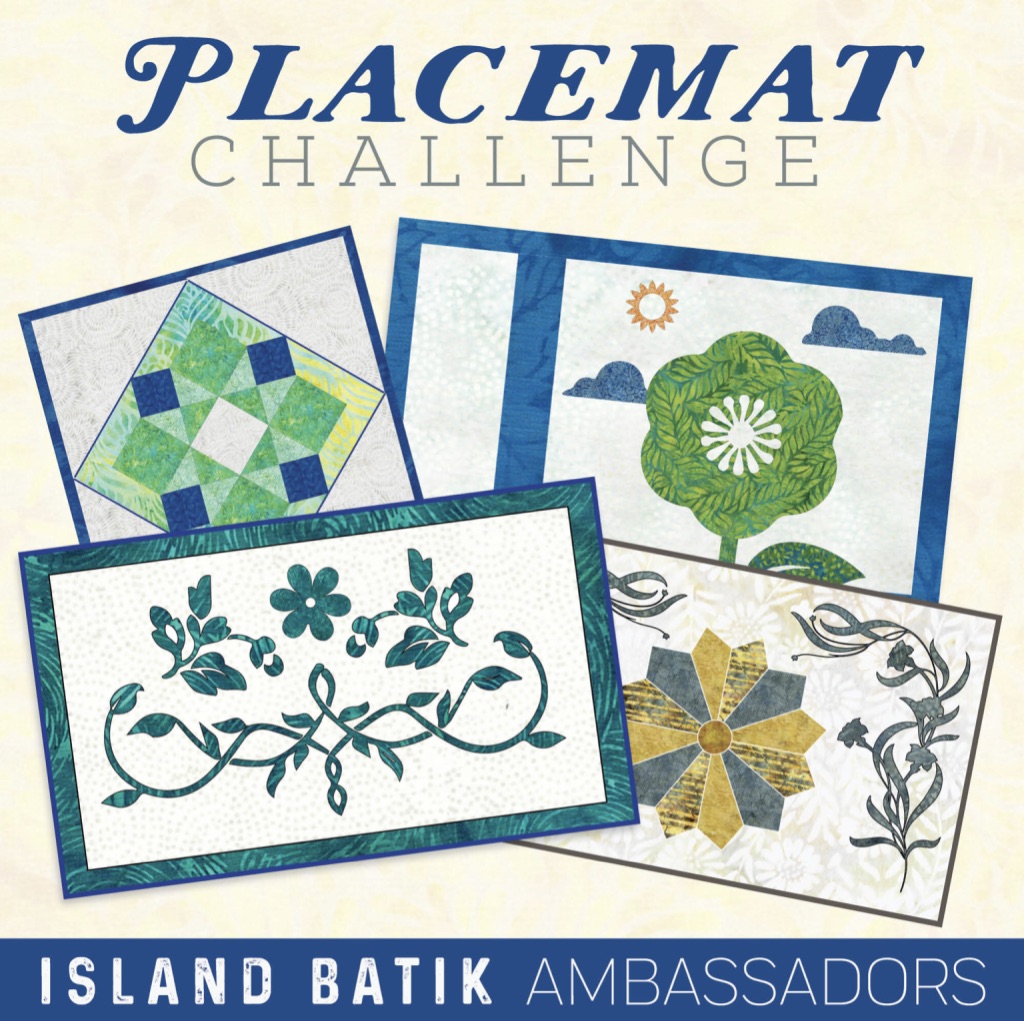
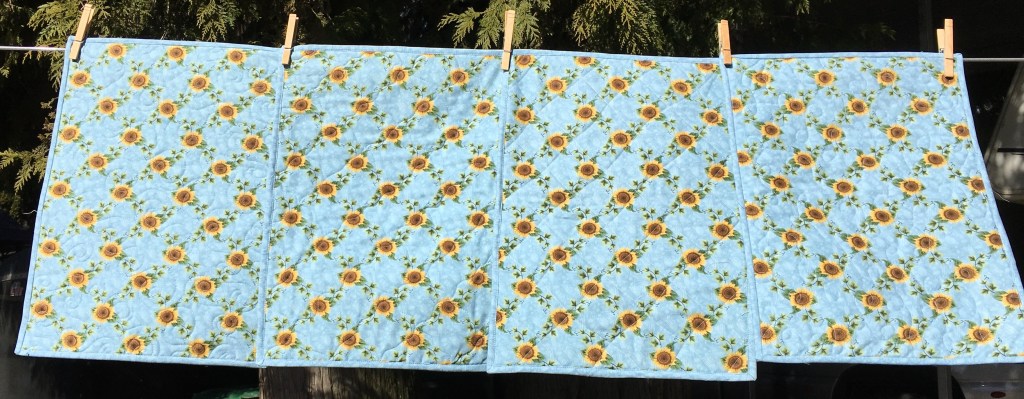
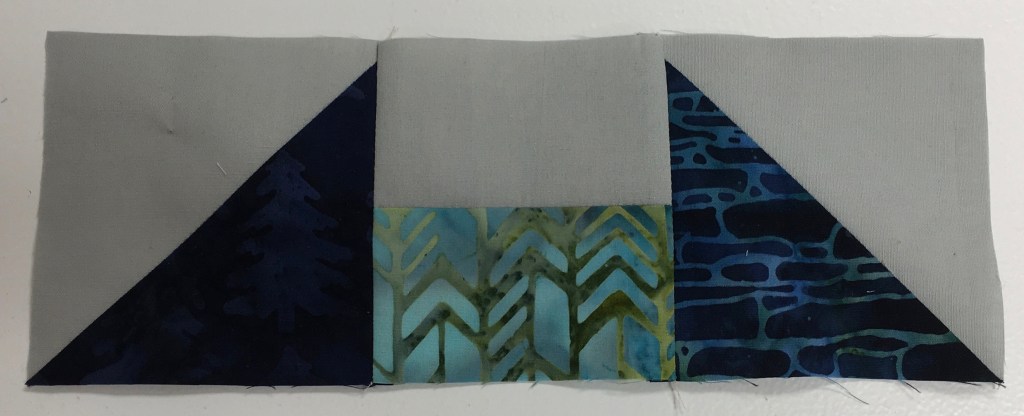
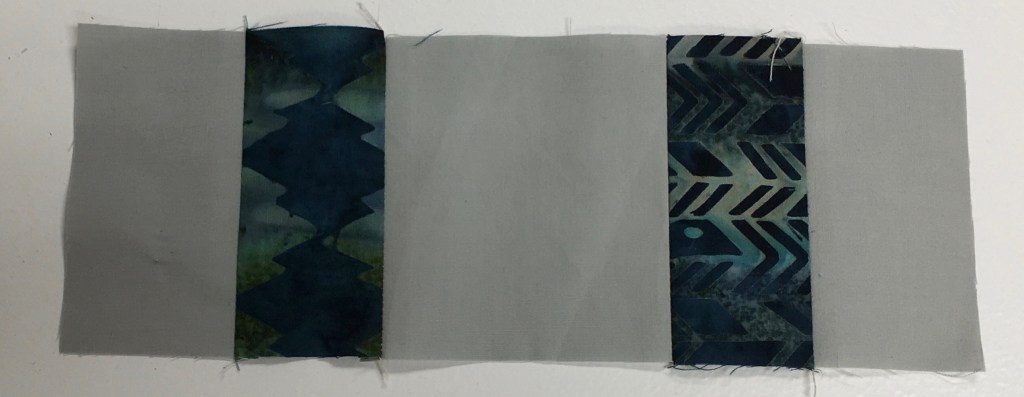
January’s Island Batik challenge is to make a set of placemats. My boxes from Island Batik had not arrived when I started to make these. I began by pulling out some blue stashbuilder bundles that I received last year. Stashbuilder bundles are 5″ wide by width of fabric. And the white with dots is a fabric from the Faded Blue Jeans collection. Blue is my favourite colour, so these placemats will definitely be loved and used!
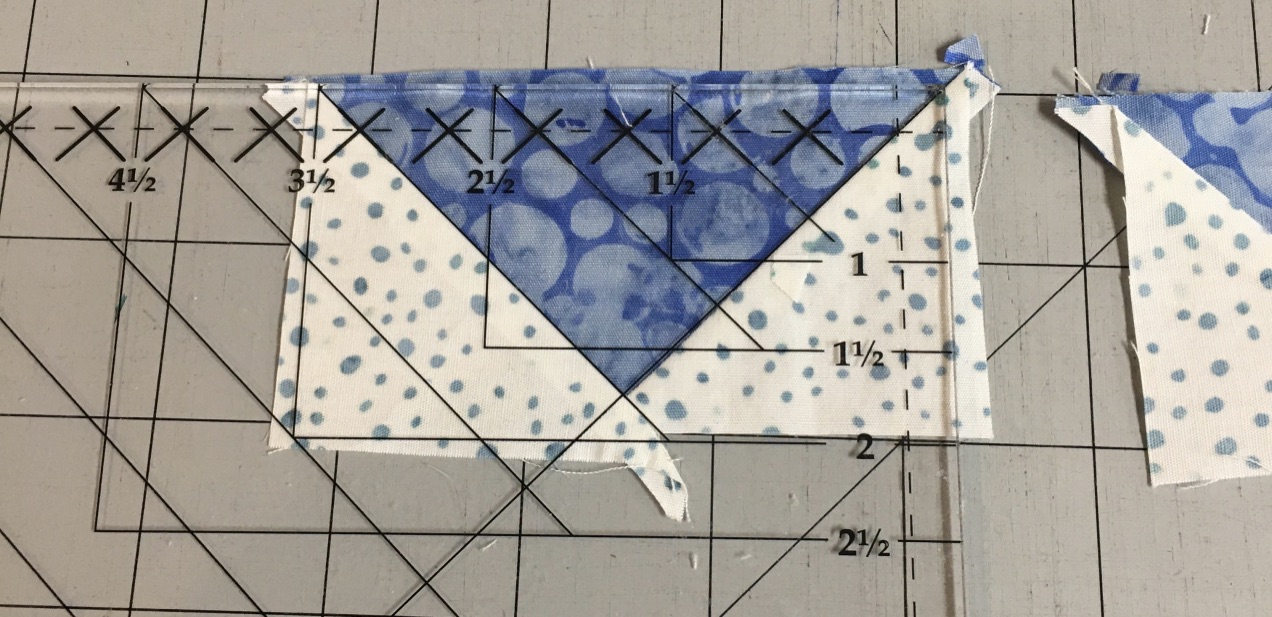
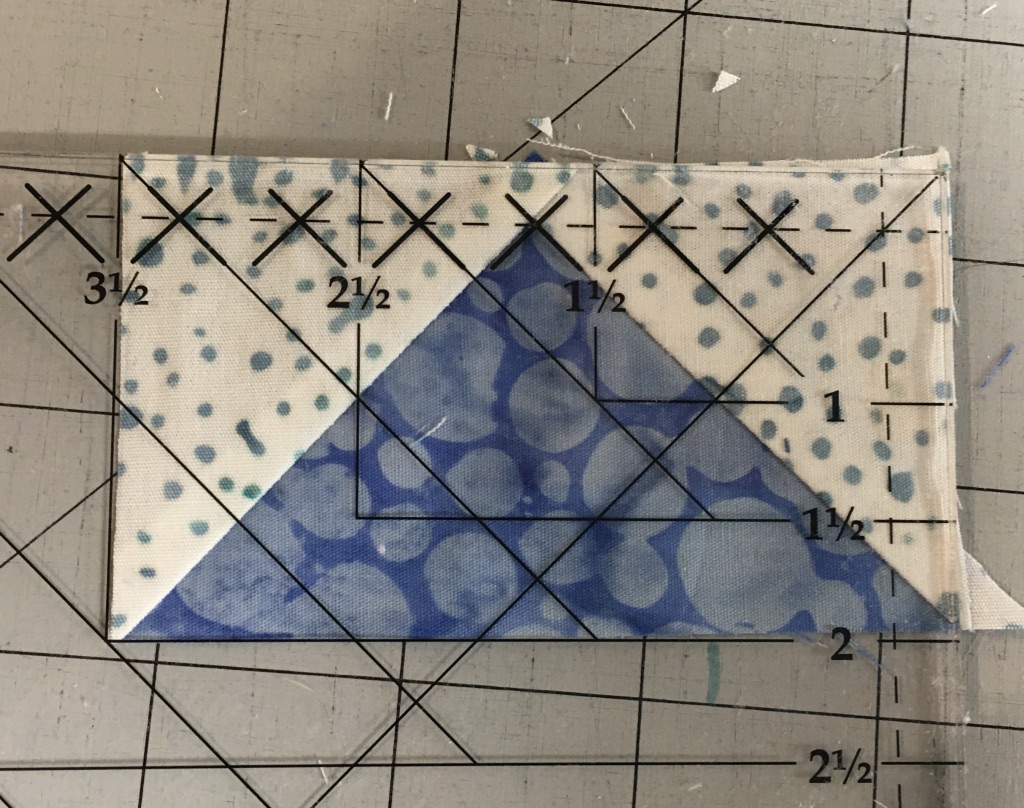
Last fall, I was able to purchase “Wing Clipper” (for making flying geese) at a quilt store in Edmonton. The Wing Clipper is a Studio 180 (Deb Tucker Designs. I thought this would be the perfect time to try it out. The stashbuilder strips are 5″ wide, so that limited the size I could make the flying geese. They ended up 1 ½” x 3″ finished in the table runner.
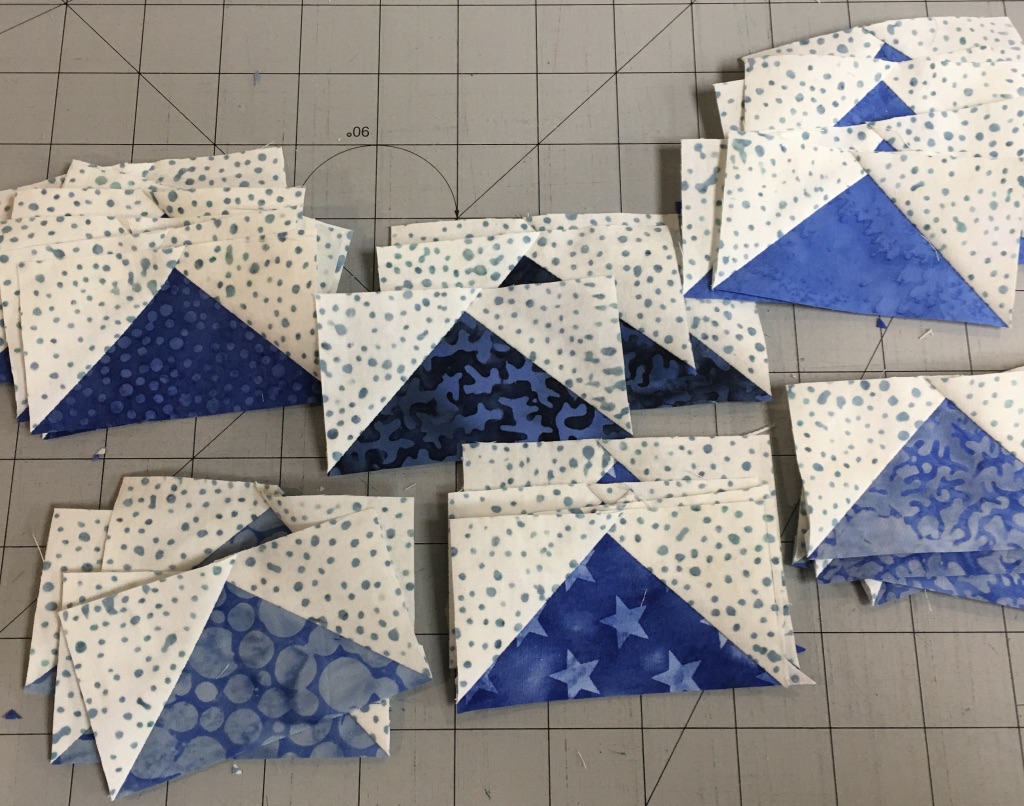
I LOVED using the Wing Clipper!!! Each and EVERY flying geese came out PERFECT!!! Or should I say “each flying goose?”) I’d say for this project alone, it was well worth the money!!! (And you all know that I’m NOT a perfect quilter!!!)
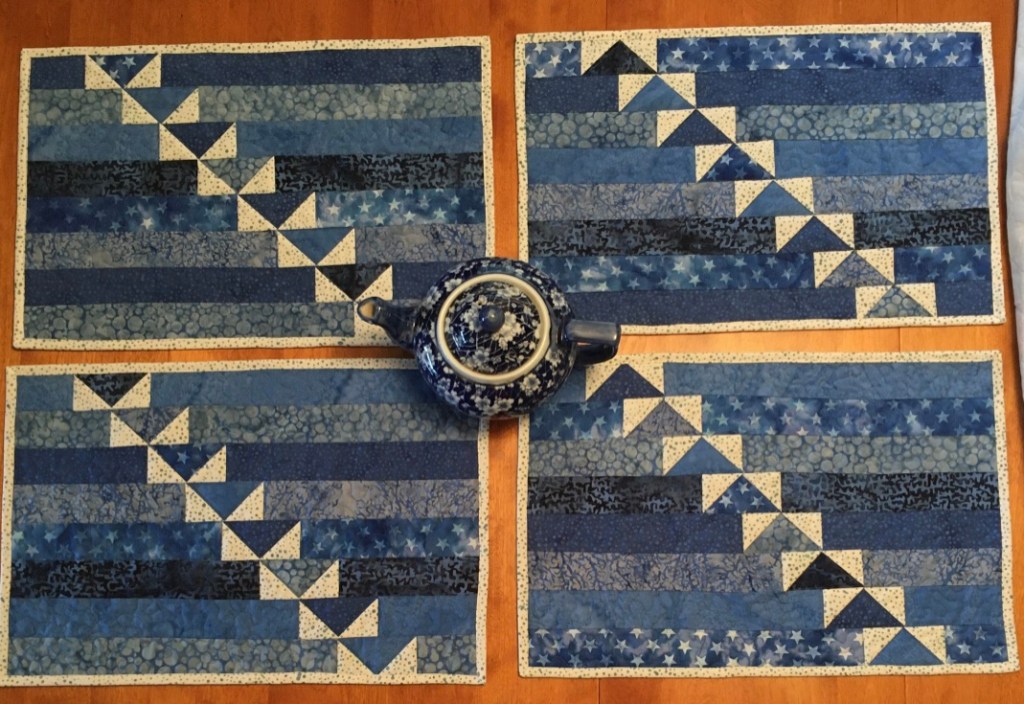
I added 2″ strips of fabric to each side of the flying geese … and these are the placemats!
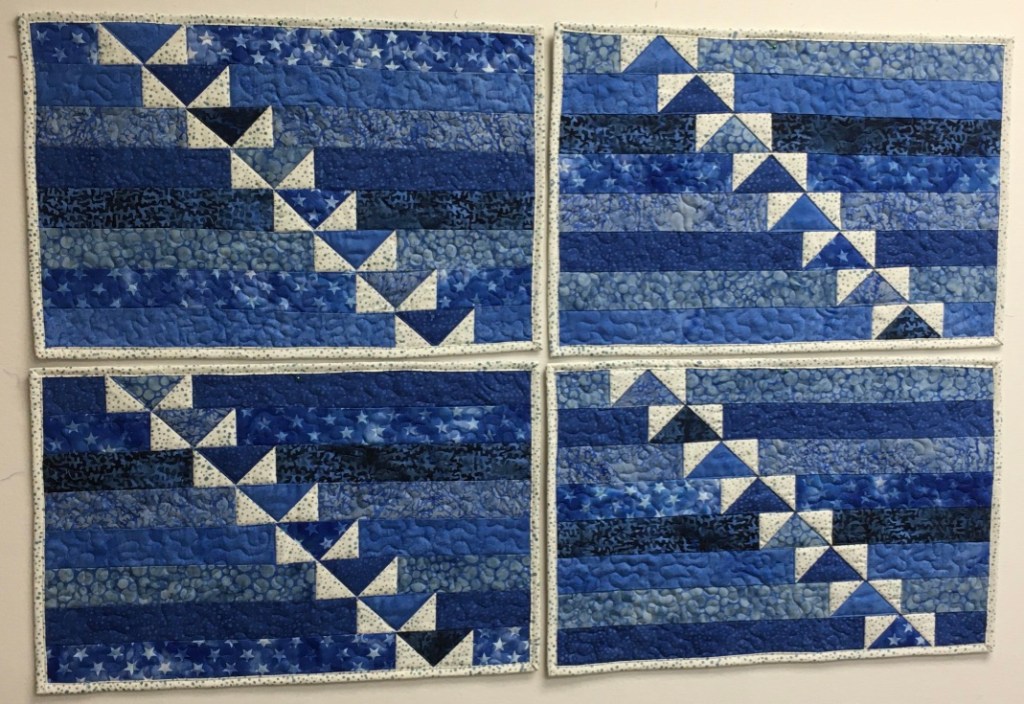
They can be placed with the geese heading up or heading down … which way do you like best? The picture below, taken on my design wall shows the true colour, better than the picture of them on my table (above.)
They are 12.5″ x 18.5″. Hobbs Thermore was used for the batting. It was quilted with Aurifil #1128 and the binding attached with Aurifil #2311, using Schmetz microtex Chrome 70/10. Why 70/10?? Batik is tightly woven and sometimes the larger gauge needles struggle with sewing batik fabric. My machine tech told me to use a smaller needle. SEW … I did and I was very happy!
Disclosure: The fabrics, thread, batting and needles were generously supplied by the following companies:
If you missed the previous post about this year’s SAHRR – you can see it HERE.
Today is the day were each of us shows you our centre blocks … Make sure you visit each of the co-leaders and see what their centre block is! And, it’ll be easier if you follow each of them! Here’s their links:
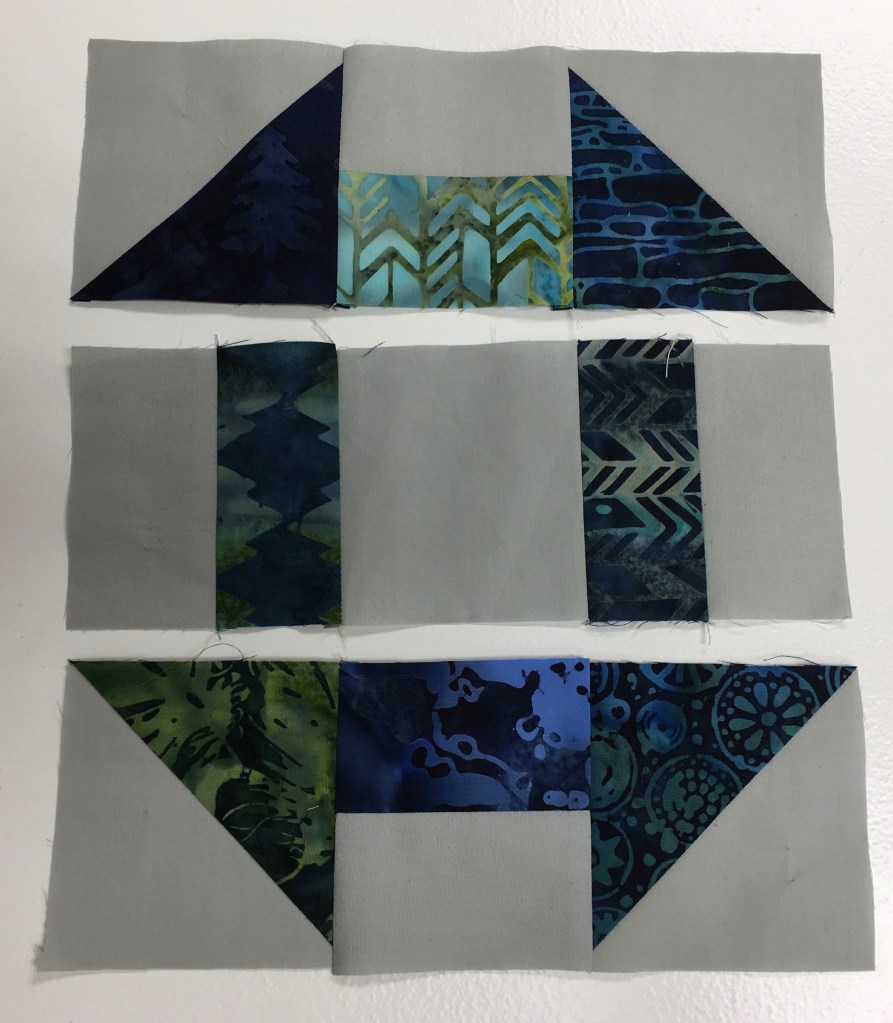
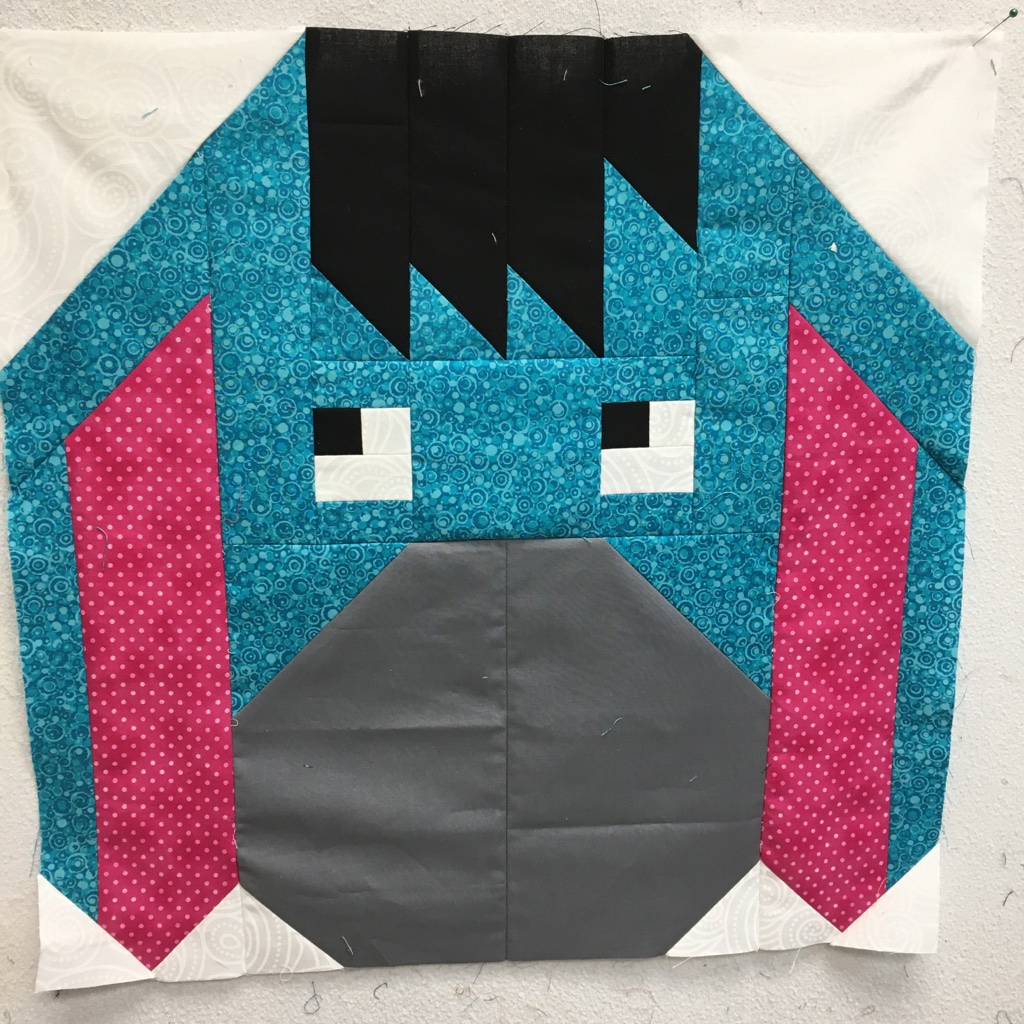
Here’s my Centre block: It’s called an Interwoven Star … The fabrics are Island Batik fabrics from the Ohana collection. It measures 9″ x 9″ and for it to fit with the next round, I’ll be adding a skinny white border around it.
I’ve been working on a few things … A few Zoom quilting days keep me focused! And steadily sewing away!
Design Wall
Piecing:
I’m still working on the SAHRR but can’t show you any pictures. Want to know more about the SAHRR check it out HERE. We start the reveal of our centre blocks tomorrow. So make sure you return and visit each of the SAHRR co-hosts!
AND … Hearts on Fire quilt just needs borders and the RSC21 Rainbow Scrap Challenge table runner needs to have a fabric pull!
Quilting:
January Island Batik project is almost done! Pictures to follow later in the week!
A Winnie the Pooh panel is in the process of being quilted. I thought I was done with the quilting – but there’s a few areas that need something.
Holiday Seclusion #1 Mystery was finished this week:
Here’s the list of participants in PHD in 2020 … and links to their blog posts where they tell about their success …
There may be more successful participants, but these are the ones I know about! Didn’t they all do a fantastic job! It’s not easy getting your PHD … especially in Quilting! There are so many new designs, patterns, techniques … the list goes on … and we want to try them ALL!!!
Anyhow … visit these awesome quilters and congratulate them!
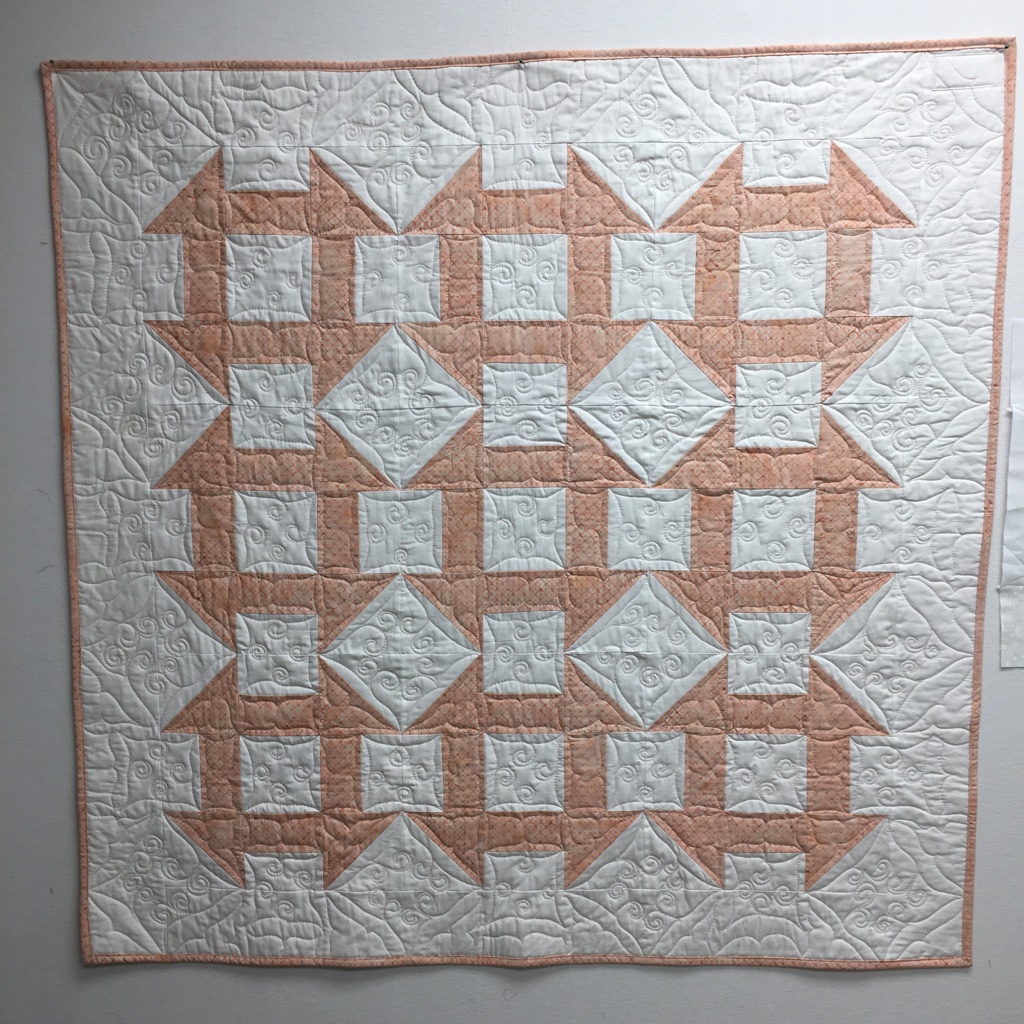
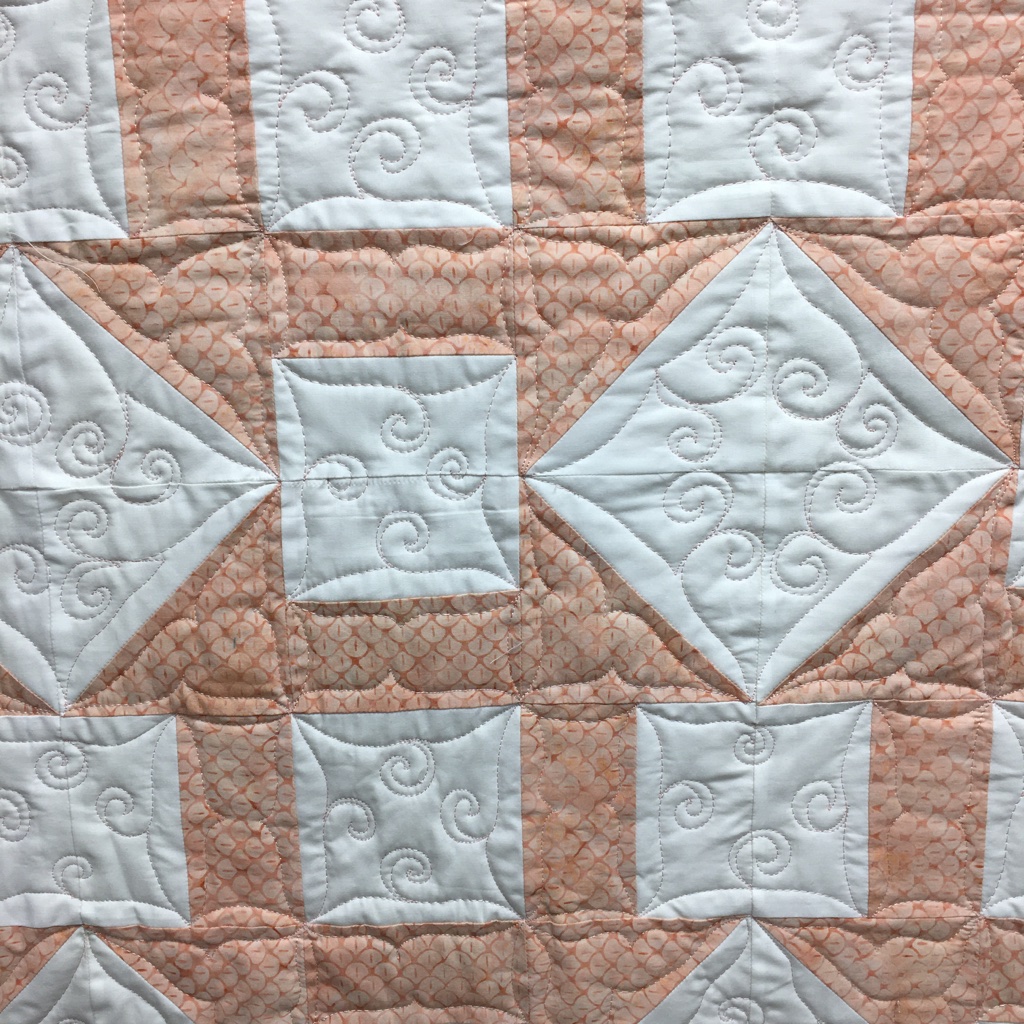
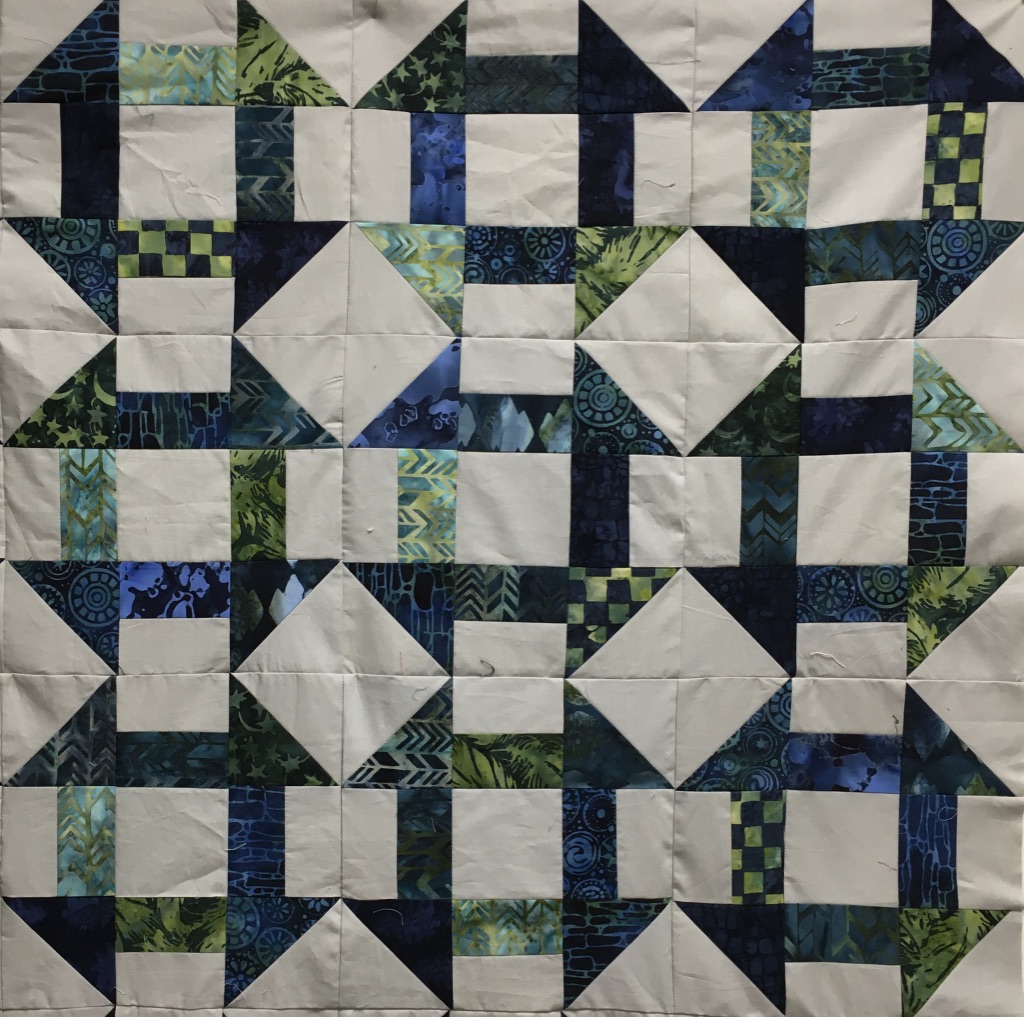
This was my 2 colour quilt for the Seclusion Holiday Mystery. I finished the binding while Zoom sewing with my sister and cousins on Sunday! It’s nice to have one finished so early in the year!
This quilt measures 42″ square. It is quilted with a light pink Aurifil thread. The fabric is Island Batik. The peach/pink fabric I bought years ago and the white is Island Batik solid. It is backed with the peach/pink fabric. There is no point in showing you the back because the quilting does not show at all.
Every Sunday or Monday, I give a recap of what’s on my Design Wall, a Stash Report, Stitchin’ Time, a “To Do” list and my PHD … SEW … here’s what’s happening in the studio and a summary of 2020.
Design Wall
Piecing:
First off, one person asked me how I was doing with Bonnie Hunter’s Mystery Quilt. The answer is simple. I’m not doing it this year. I felt that I had too much on my plate. I think this is the first time in 17 years that I’ve not done the mystery. In some ways I feel guilty for not doing it, but I also feel a great relief that I don’t have to sew like crazy to try to keep up! And, it’s also one quilt that isn’t on my 2021 UFO list!
I’m adding borders to the scrappy Holiday Seclusion Mystery. Borders are also being added to the guild mystery quilt. Sorry, no pictures. It’s a surprise for the guild mystery quilters.
My wish is that 2021 brings you a year of HEALTH and HAPPINESS as we quilt together!
2020 has come to an end … what a year it has been!
But I just want to focus on quilting … and how have you done with your PHD in 2020? Did you get at least 12 of your UFOs done and did you get all of your Starts in 2020 done? (All, except for those that carry over into 2021 or were started late in December.)
Here are the UFOs I completed …
Linky Party … not happening …
OOPS … I have too many linky parties happening at the same time and am not permitted to host another one at the same time (unless I pay for it … and I don’t make any money from this blog … and it already costs me $$$ to have a blog with lots of pictures) SEW …
If you were a PHD participant in 2020 – please email me with a link to your final PHD post and I’ll post the links at a later time. You have until Jan.7, midnight Pacific time to let me know. quiltinggail@yahoo.ca
Now I know you are curious as to what Clue #6 could be. You have the top together and the borders on, right?
Now … we don’t want to add this little quilt to our UFO list, do we? SEW …
Part 1
Make your label
Part 2
Layer or sandwich the quilt. The 2 colour quilt has Hobbs Fusible 80/20 batting. I’m loving the batting. There is absolutely NO shifting!
Part 3
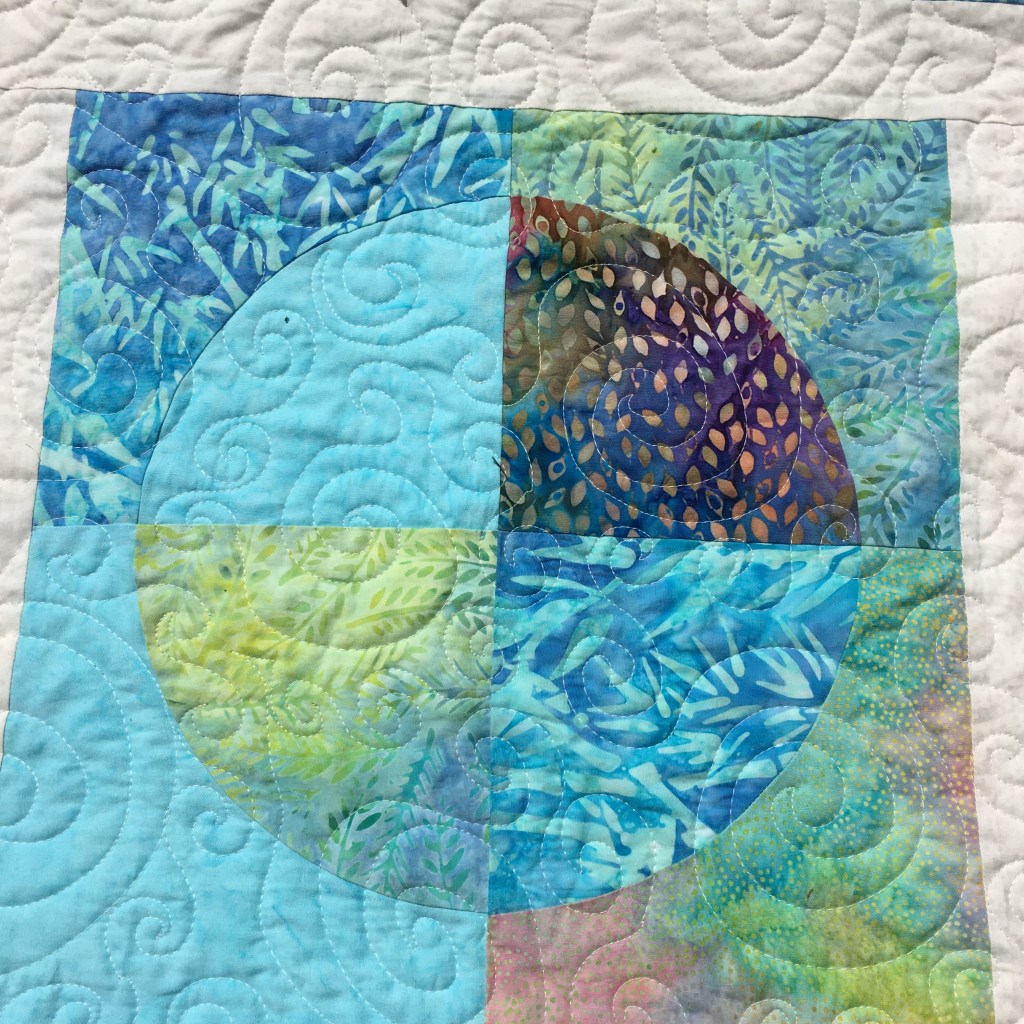
Quilt as Desired. Oh – I literally HATE it when the directions say that! I have to show you what I have done … And the quilting was totally inspired by Dorie Hruska’s book “Making Connections.” This book can be found at Dorie’s website: Forever Quilting! And I HIGHLY recommend this book!!!!
And a close up of the quilting:
Part 4: Confession #1
Bind the Quilt. OK … this 2 colour quilt is not bound … hopefully that will happen early in the new year!
Part 5: Confession #2
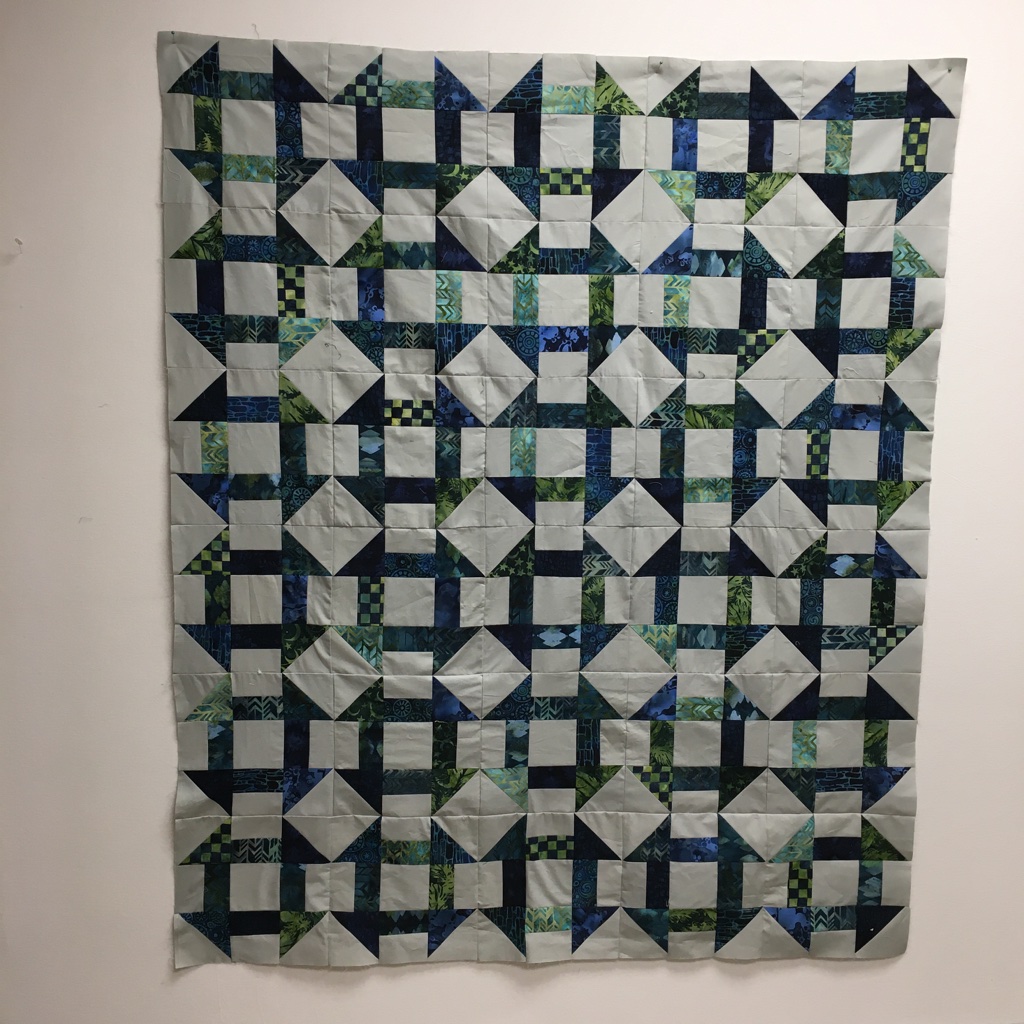
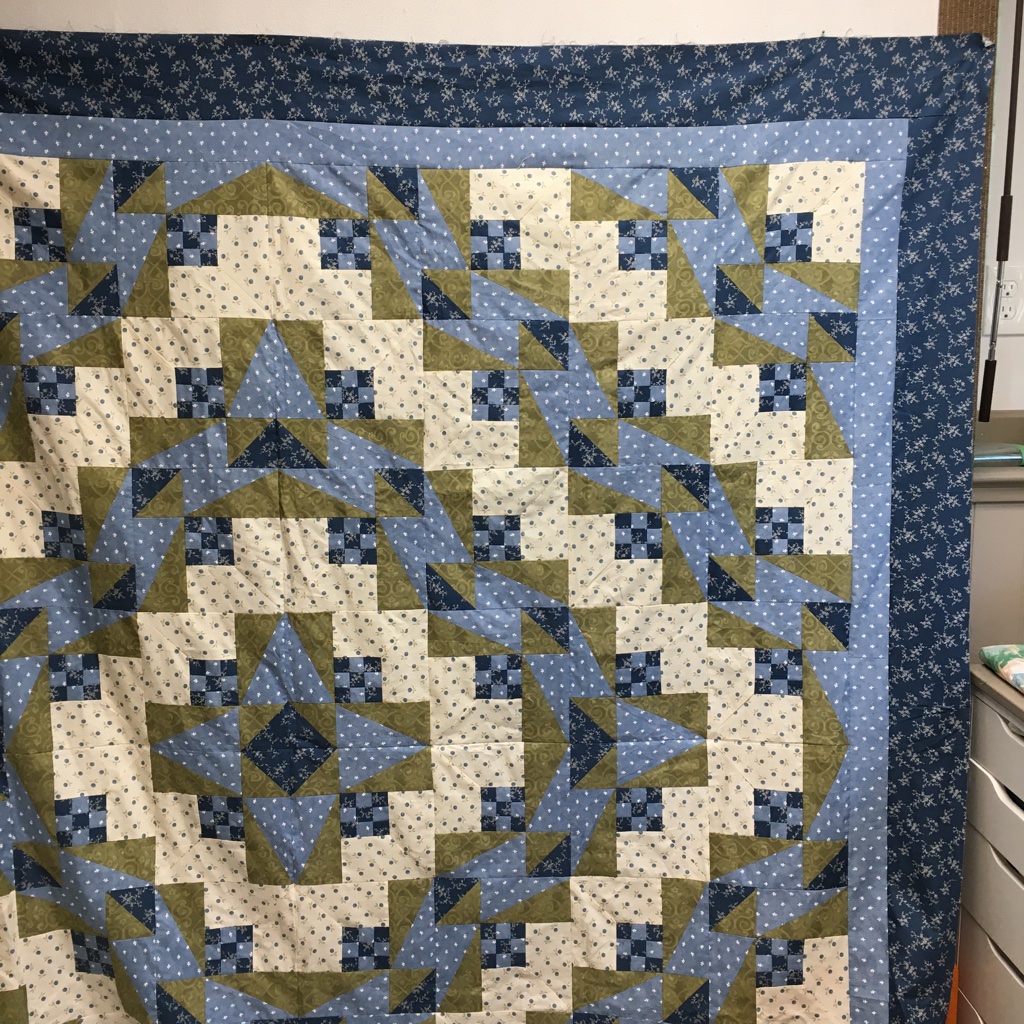
My scrappy version of the Holiday Seclusion Mystery does not even have it’s borders on. I decided to make it bigger. So this will be a UFO going into 2021!
Here it is without it’s borders.
Part 6
Add either your finished top or your finished quilt to the linky party: You have 3 weeks to finish your quilt and post a picture!
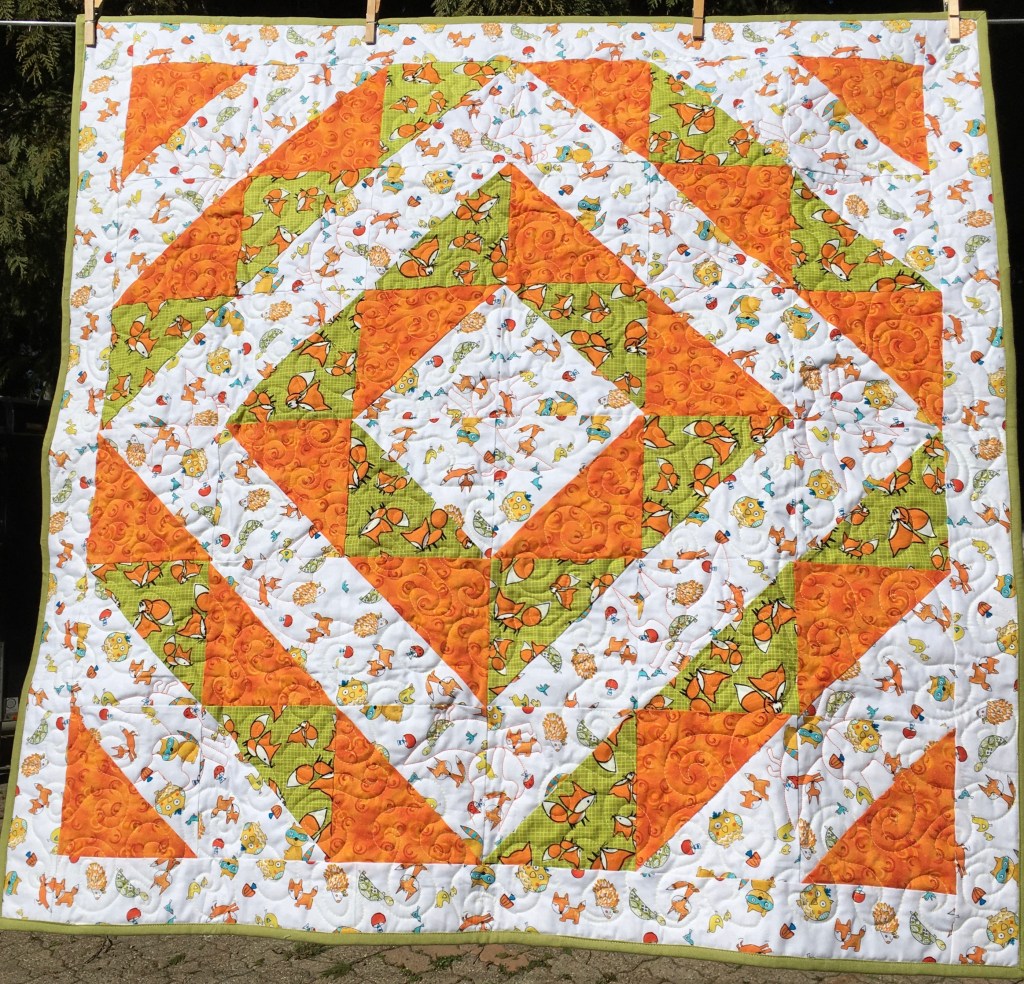
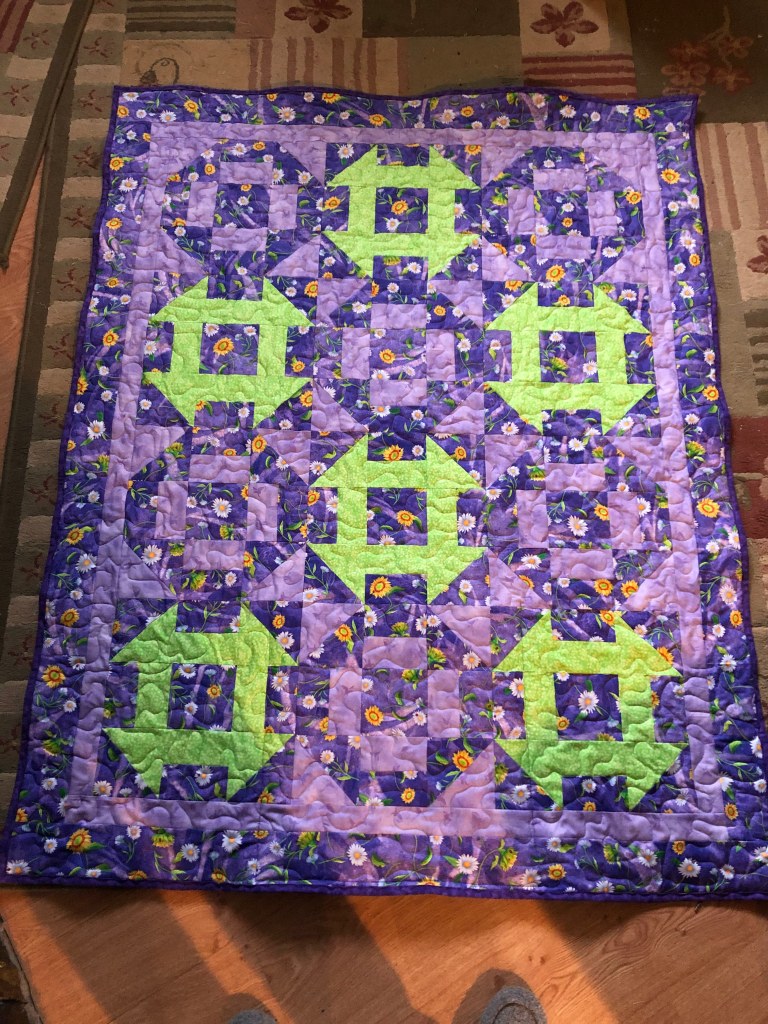
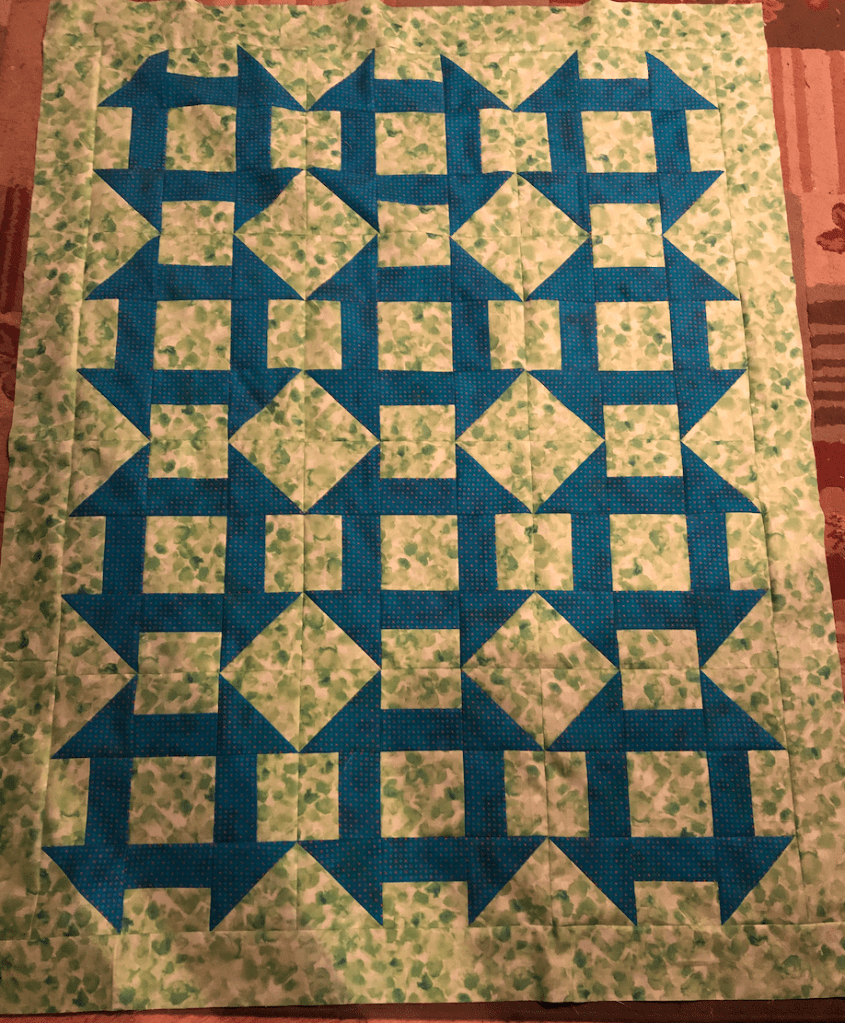
One of my pattern testers, Heather, took this pattern and she not only made it bigger, but she made it into a 3 colour quilt! Isn’t it fun? I love the lime green!
One who sleeps under a quilt is covered by LOVE!
Happy Quilting! Gail
Disclaimer … the Island Batik fabrics (for my quilts) were provided by Island Batik and the fusible batting was from Hobbs.
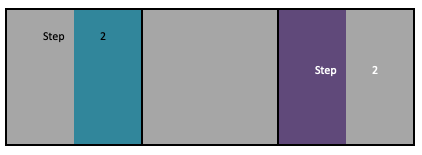
Assemble blocks. If you pressed according to the directions, the seams should nest nicely.
Make 9
Press towards Step 4 blocks. Hint: Place a pin in the top centre of each block
Place the blocks on a design board (or bed). As you lay out the blocks, pay attention to where the pins are. By doing this, your seams should nest nicely. (Provided you followed the pressing directions accurately).
up
side
up
side
up
side
up
side
up
Part 2:
Web the quilt blocks together. If you don’t know how to web a quilt, I have a tutorial. Click HERE.
Add the borders. For an easy way to measure and add borders, check out this tutorial HERE.
This is my scrappy Holiday Seclusion mystery … although I didn’t get the borders on today! But I hope you manage to!
Here is a picture of Heather’s quilt (she’s one of the tester’s). She decided she wanted it to be a rectangle, so she made 3 extra blocks.
Clue 6 is tomorrow
Come back tomorrow for the next clue!!! I know, I know, you’re thinking we’re putting the top together today, what more can there be?
Carla from Creatin’ in the Sticks is hosting this blog hop! It’s a one day blog hop … and all we have to do is fill in the blank for this statement:
My stitching resolution for 2021 is _____________________________.
Well, when I got to thinking about this statement, I thought:
do I fill in one word?
Or many words?
Do I talk about my lofty goals of reducing ALL my UFOs (highly unlikely)
Do I talk about what I’m going to try that’s new-to-me?
One word
Quilt
Can you think of another word that would fit? I can’t!
Many words
Another 365 days of planning, creating, sewing and quilting!!! Sounds good to me!
And Blogging … yes … many many words are in my blog posts …
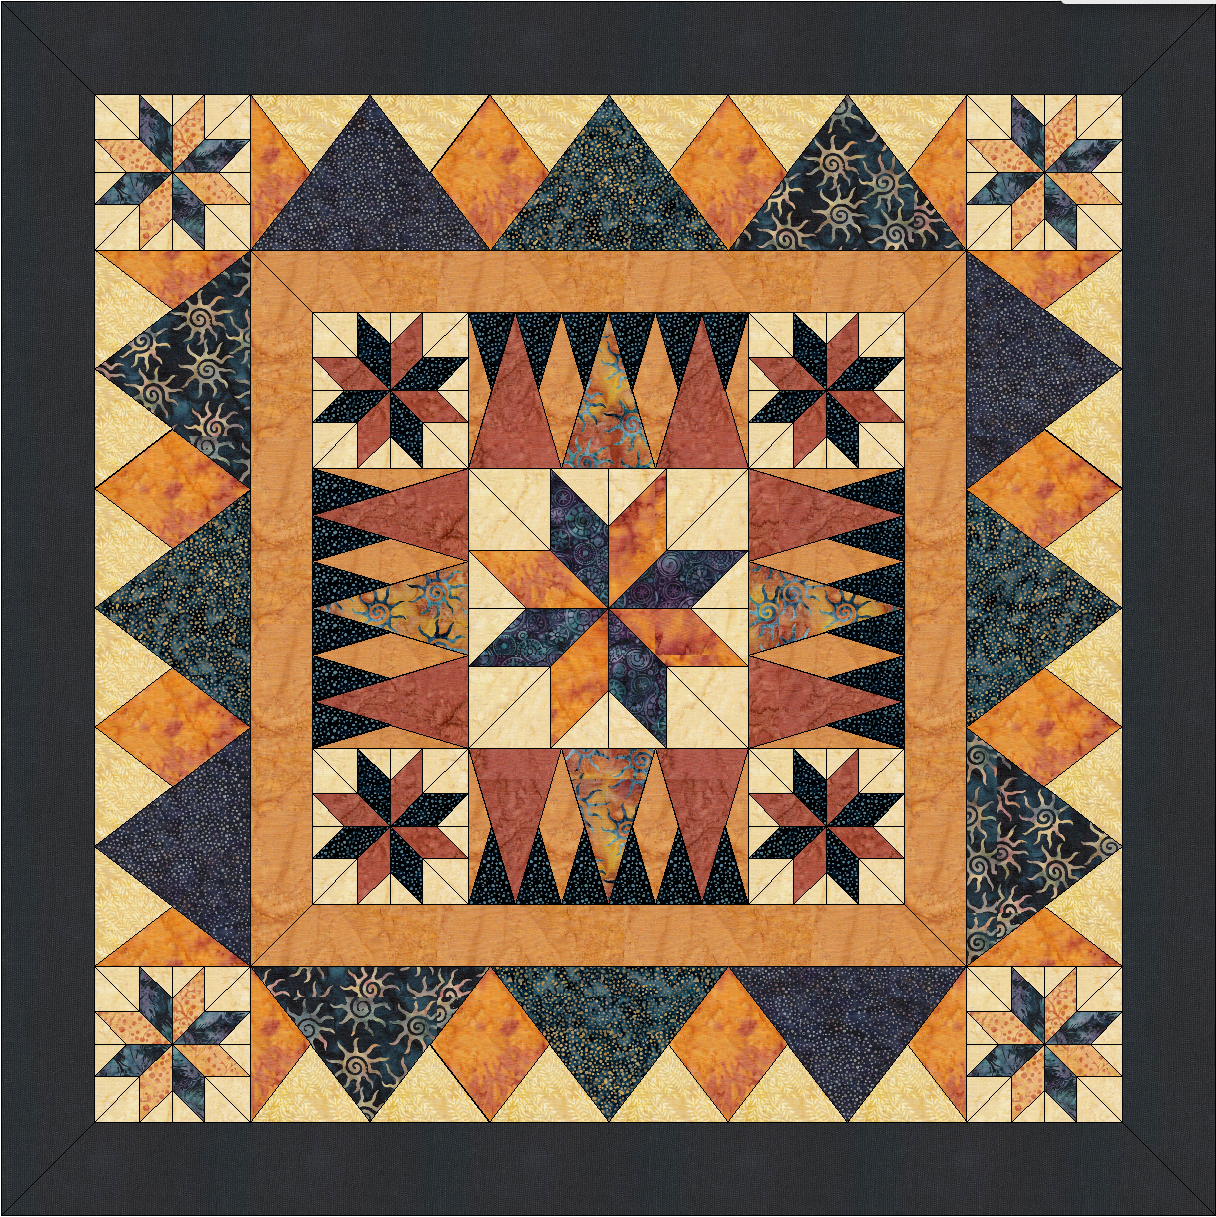
And continuing to designing EQ … here are some of the designs with Island Batik Fabric (and some of them did not come to be finished quilts …
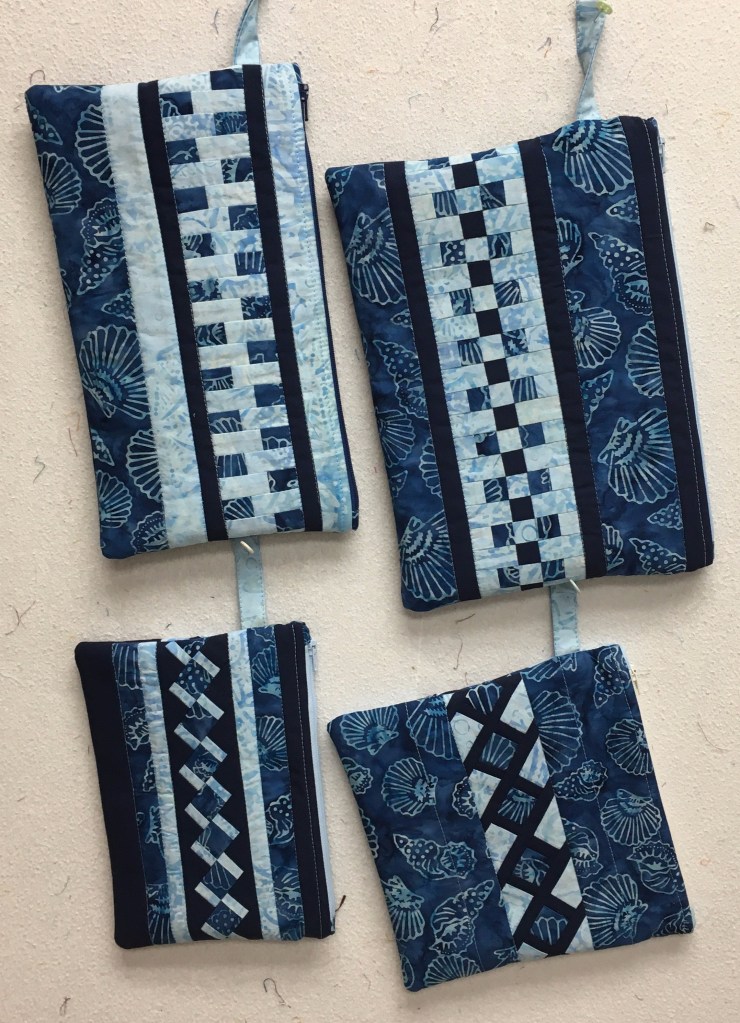
And also learning more about and designing with Artistic Digitizer. These 3 pouches were designed by me!
Lofty goals
Along with PHD in 2021 – which includes finishing 12 UFOs … and completing NEW projects … is it remotely possible that I could finish ALL my UFOs? Now that would be LOFTY! A Dream … but who knows what this year will bring?
Something New to Me?
I’m going to join in Joyful Quilter’s Rainbow Scrap Challenge. I’ve joined the “Table Scraps Runner Challenge.” Sew … each month, I will make a table runner or a table topper or a mug rug … with each of the monthly colours.
Here’s what Joy says about the challenge: In the interest of fairness to ALL tables, the rules will include quilted mug rugs. I know it’s a stretch from the standard table runner, but those of us who live in small homes may not have use for a larger quilted runner or topper.
SEW … are you going to join me in this challenge????
Blog Hop
Check out how other bloggers are answering the question:
My stitching resolution for 2021 is _____________________________.
Some of the projects were monthly challenges from Island Batik and are projects that I did on my own. Island Batik is very generous with their fabric, so there’s always extra available for other projects.
Island Batik is a wonderful, wonderful fabric line! I absolutely LOVE it!
Enjoy the eye candy!
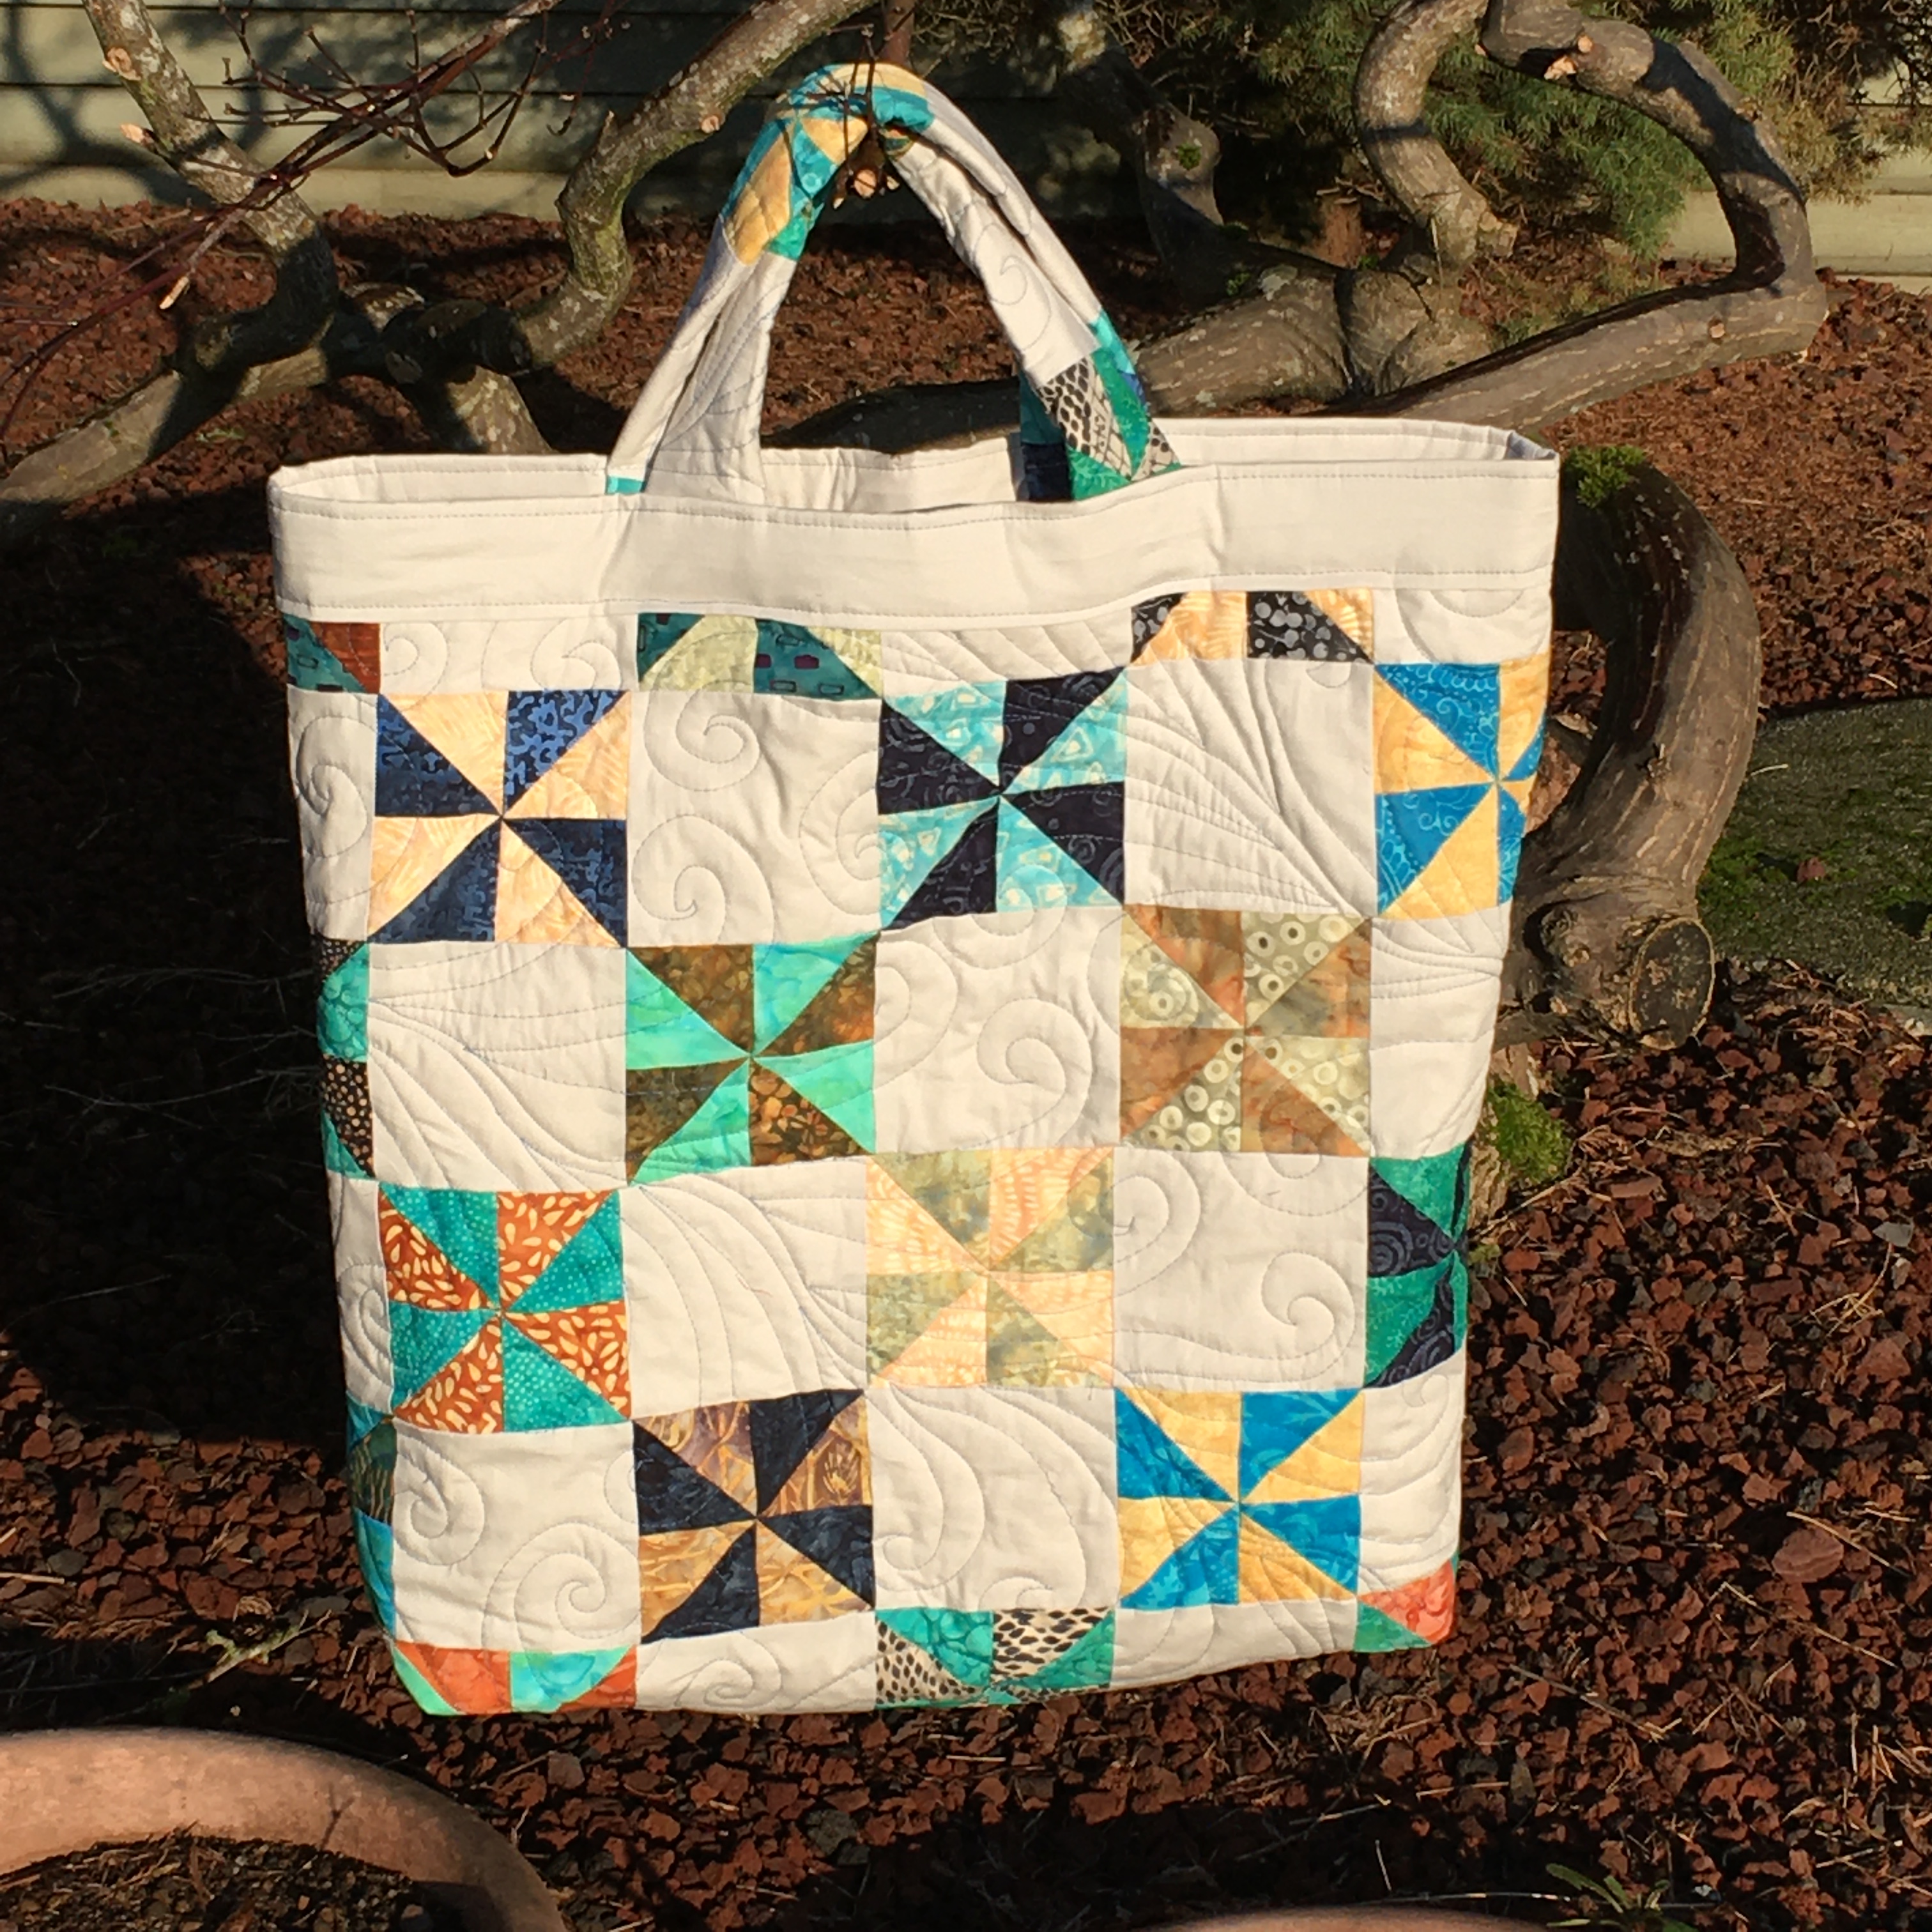
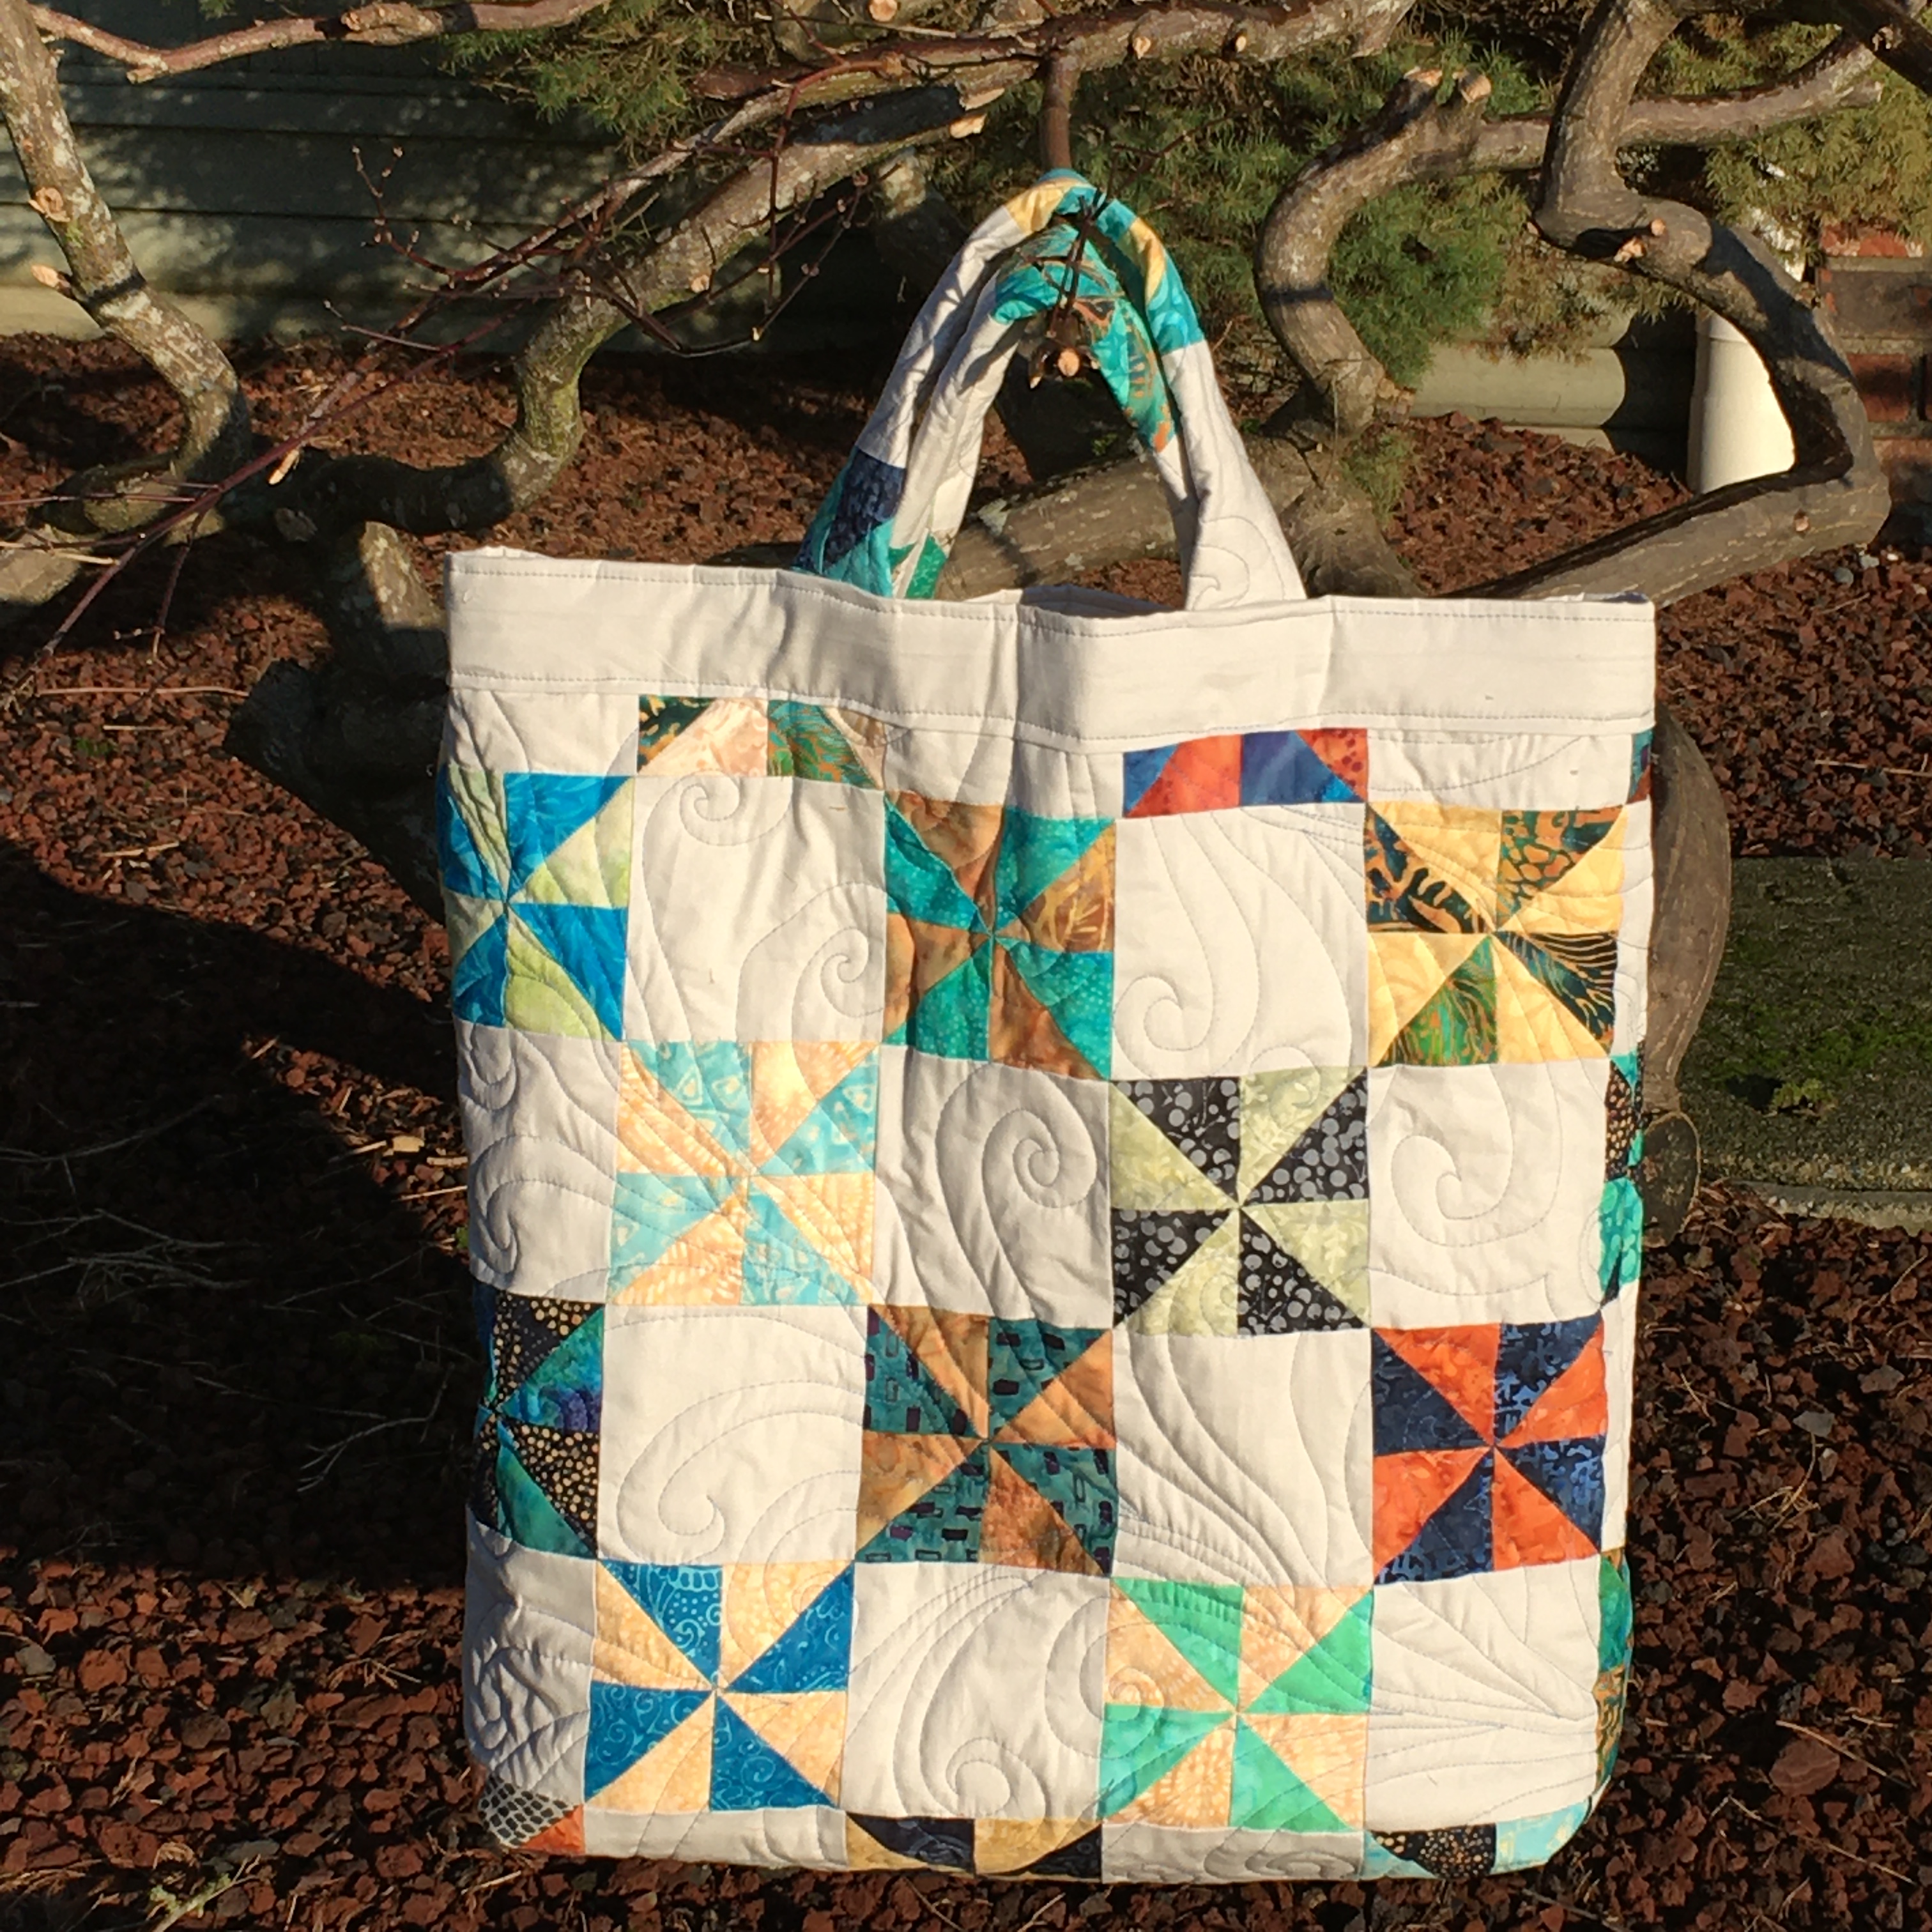
January
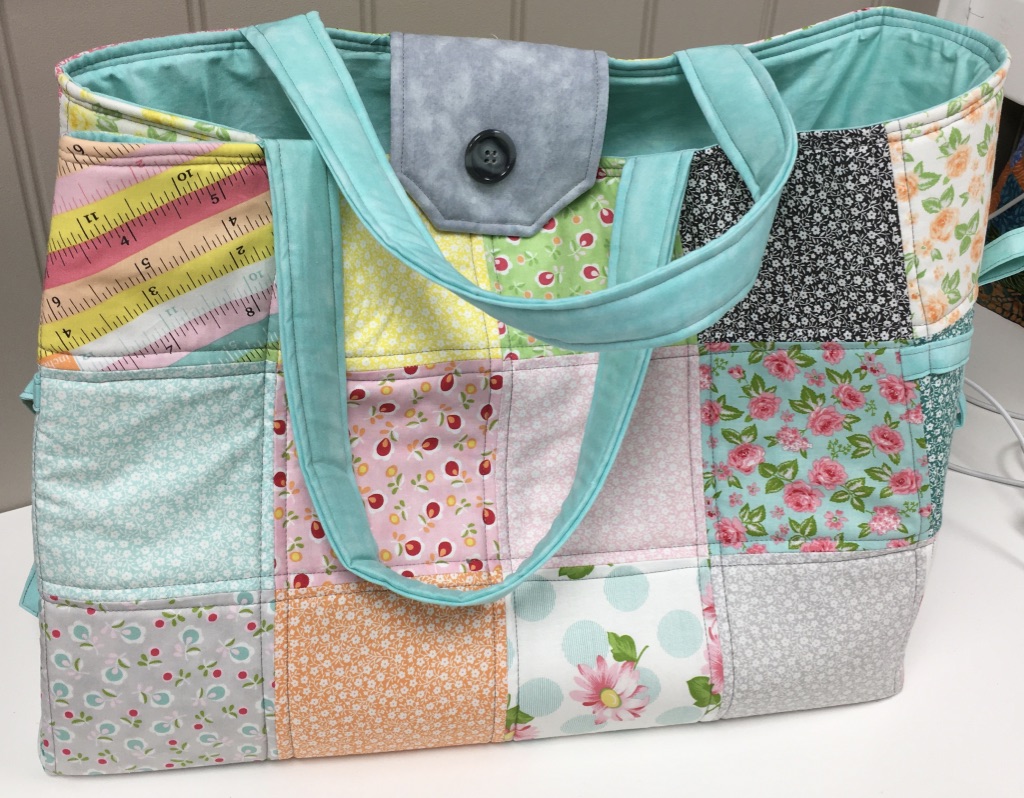
I started out making pinwheels, but wasn’t totally happy with them, so I made a bag for my AccuQuilt Go! Cutter. The picture shows the front and back of the bag. You can read more about it HERE. This was not my official entry for the Island Batik challenge.
18 Squares made in Step 2 (Coloured and Background)
Sew a HST onto each end of a Square from Step 2.
NOTE: Ensure that the points of the Coloured HST meet with the Coloured portion of the square. I won’t tell you how many I had to rip out and reposition!!!
This post is inspired by Cheryl at Meadow Mist Designs. We are encouraged to share our top 5 blog posts of the year. It’s up to us how we choose them. Oh, but it was SEW very hard to narrow it down to only 5!!! So much of my quilting is totally fun and I LOVE it. How to choose? How to choose? Scroll down and enjoy!
#1 Favourite Quilt Picture
The blog post with my favourite quilt picture is the one from February with the Island Batik Log Cabin Blog Hop. My husband and I went to a local park (Campbell Valley) and took a picture of the quilt with it’s reflection in the water.
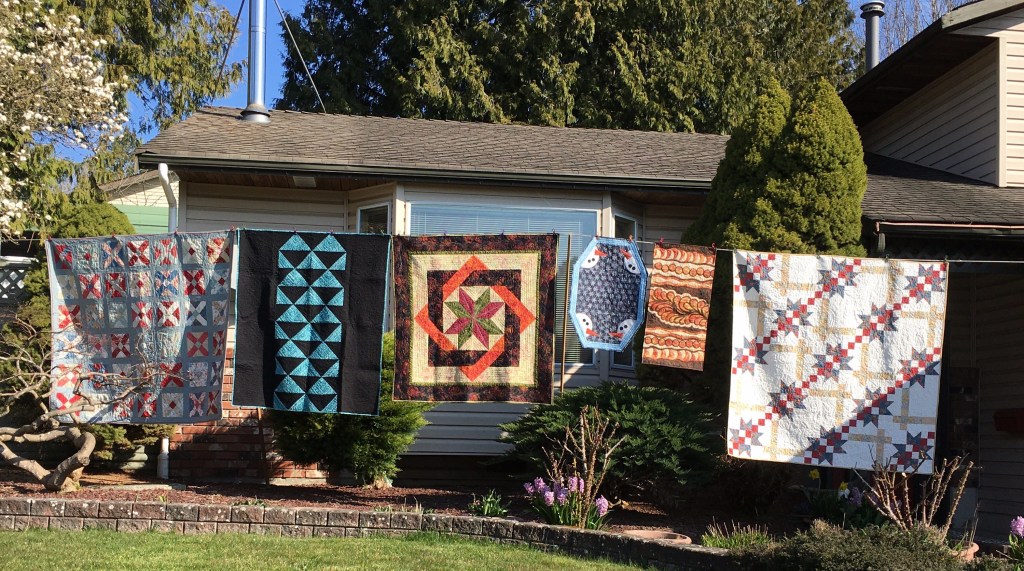
#2 My Proudest Quilting Accomplishment and a fun Pandemic experience
This POST talks about International Quilter’s Day and how we were all disappointed that we couldn’t quilt together. So many people hung quilts outside for others to enjoy!
The same blog post talks about how I learned to piece curves with CONFIDENCE! I took a workshop at the guild and used the Accuquilt die to cut out the pieces. I no longer have a fear of curves!
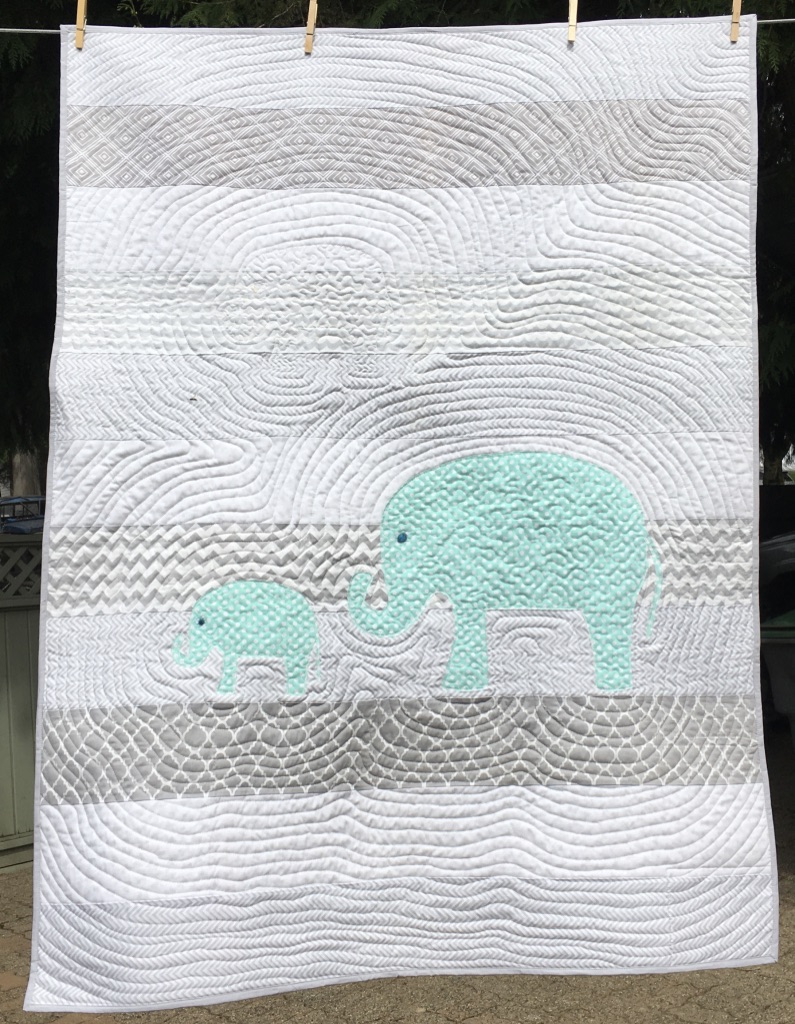
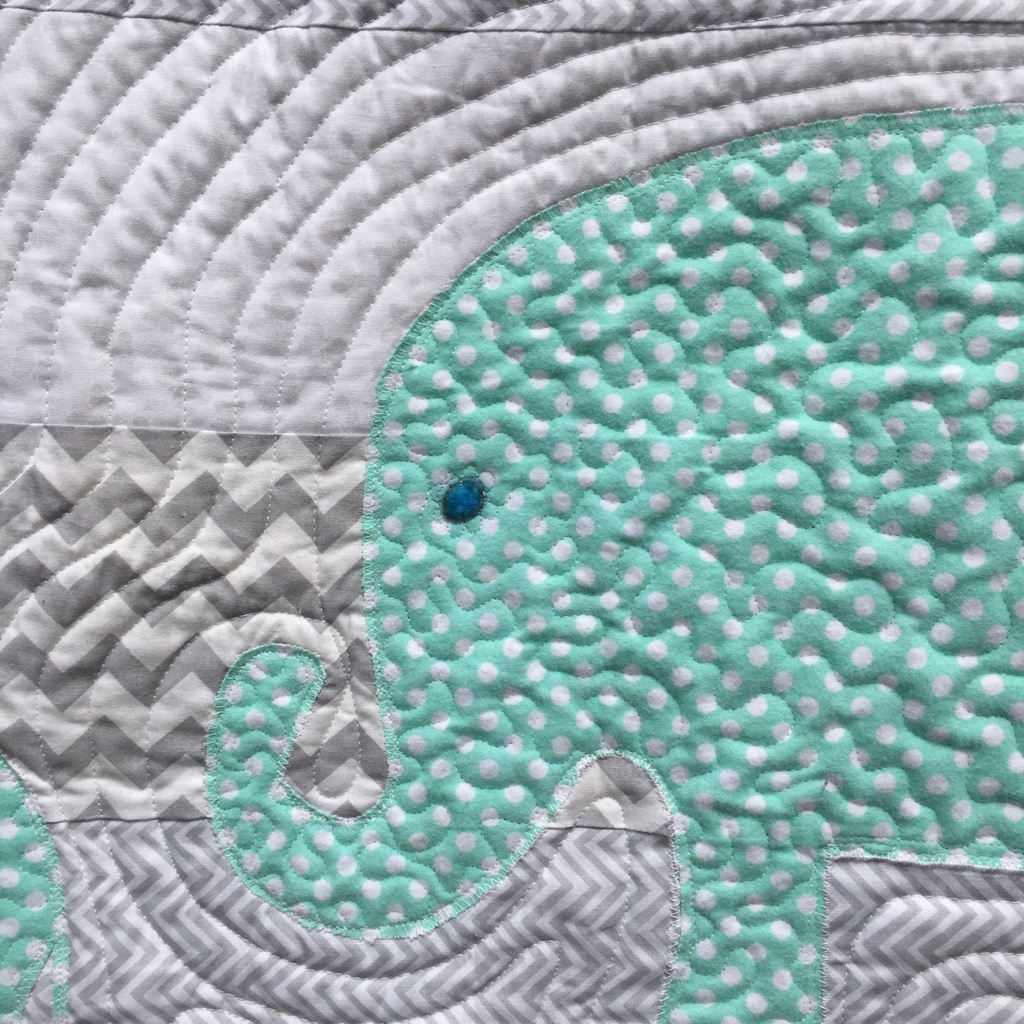
#3 Elephant No. 1
I love Elephants. A fun baby quilt got a lot of attention. This POST shows it’s finish,
I find it amazing that this simple quilt was loved by so many!!! But I must admit, I love it, too!
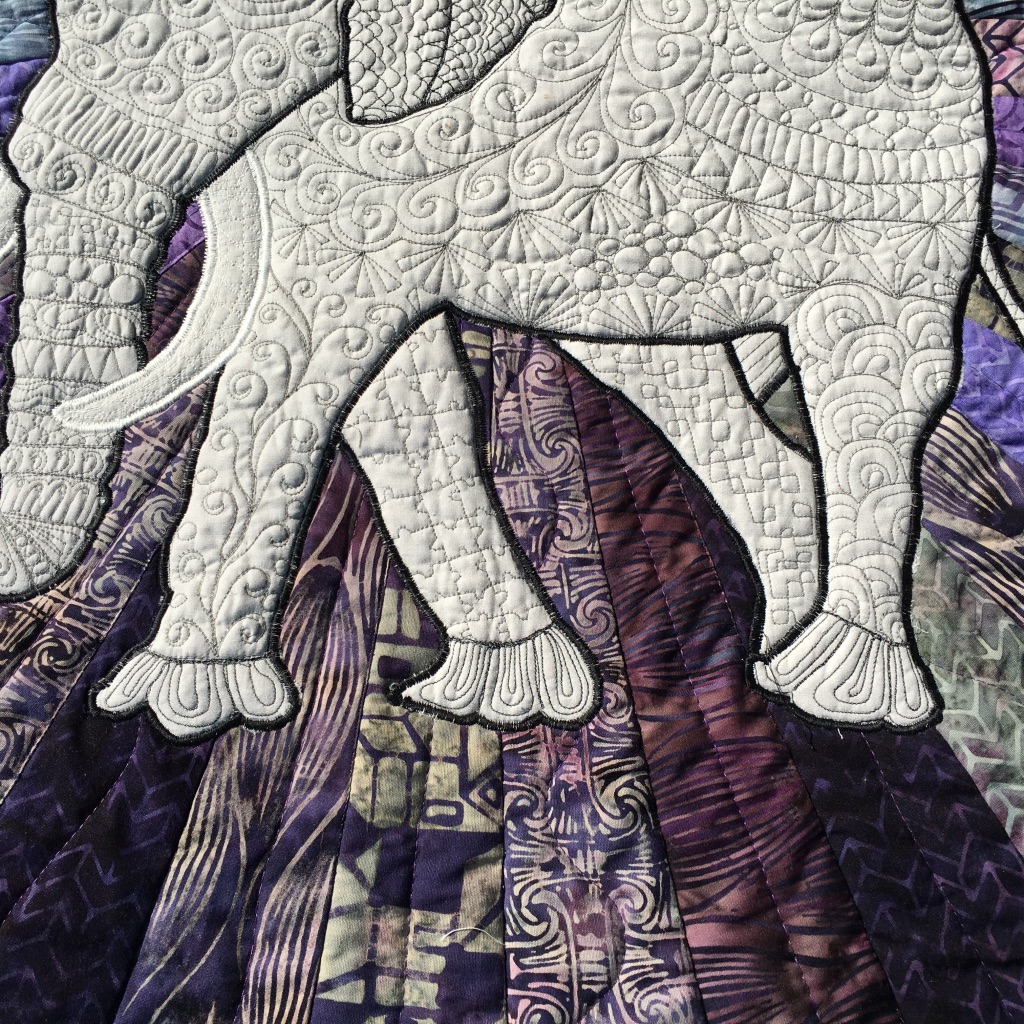
#4 Elephant No. 2 is quite different
This quilt took a LONG time in coming to it’s final being. It did sit for a LONG time on my design wall. However, when it was finished it was well worth the wait! Visit the post HERE.
Ellie the Elephant
Is quite different from the other 2. But I love her all the same.
#5 The most fun quilt a-long
The Winnie the Pooh Quilt-a-Long was a LOT of fun! And I ended up with the CUTEST quilt! Thanks to Lorna from Sew Fresh Quilts with the free pattern and permission for me to host the Quilt-A-Long. (You can access the pattern HERE.)
Make sure to visit Meadow Mist Designs and see what other quilters have chosen for their “Best of 2020!”
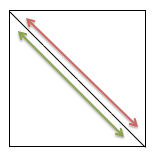
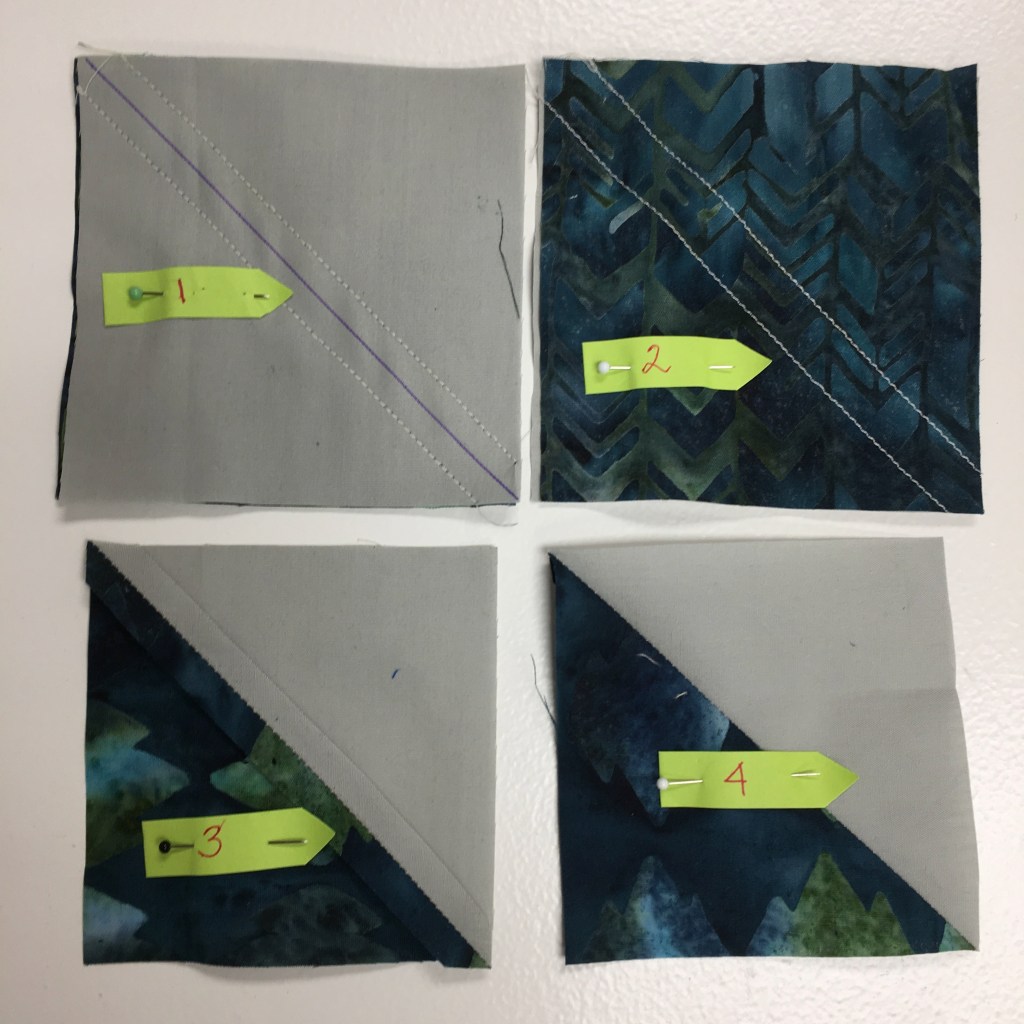
Mark a line down the diagonal centre (from one corner to the other) of either the background or the coloured squares. (Shown as the black line)
With right sides together, sew ¼“ from the centre black line (red line). Repeat on the other side of the black line (green line).
Cut down the centre line. This will yield 2 Half Square Triangles. See Picture #1 below: shows the line drawn down the centre with the sewing line on each side. Picture #2 shows the opposite side where you can’t see the line.
Press open. (Picture #3 below).
Trim to 4 ½” squares. (Picture #4 below)
Repeat this with the rest of the squares. You should now have 36 Half Square Triangles.
Merry Christmas to all my loved ones (AKA: family and friends and blogging friends!) May you have peace in your heart as we celebrate the birth of the ONE that truly LOVES us!
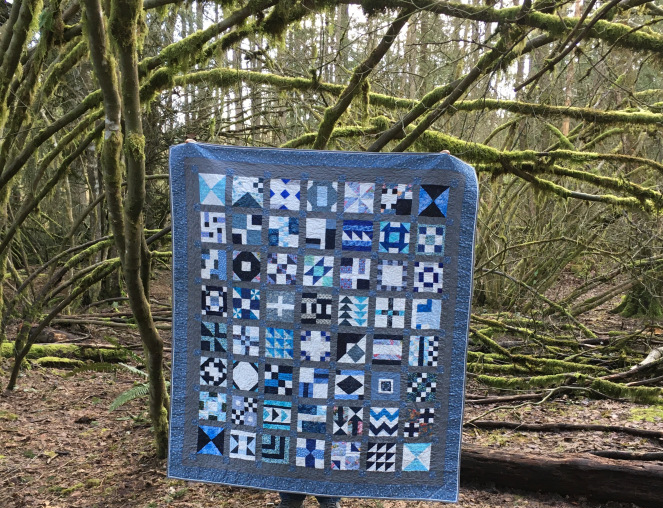
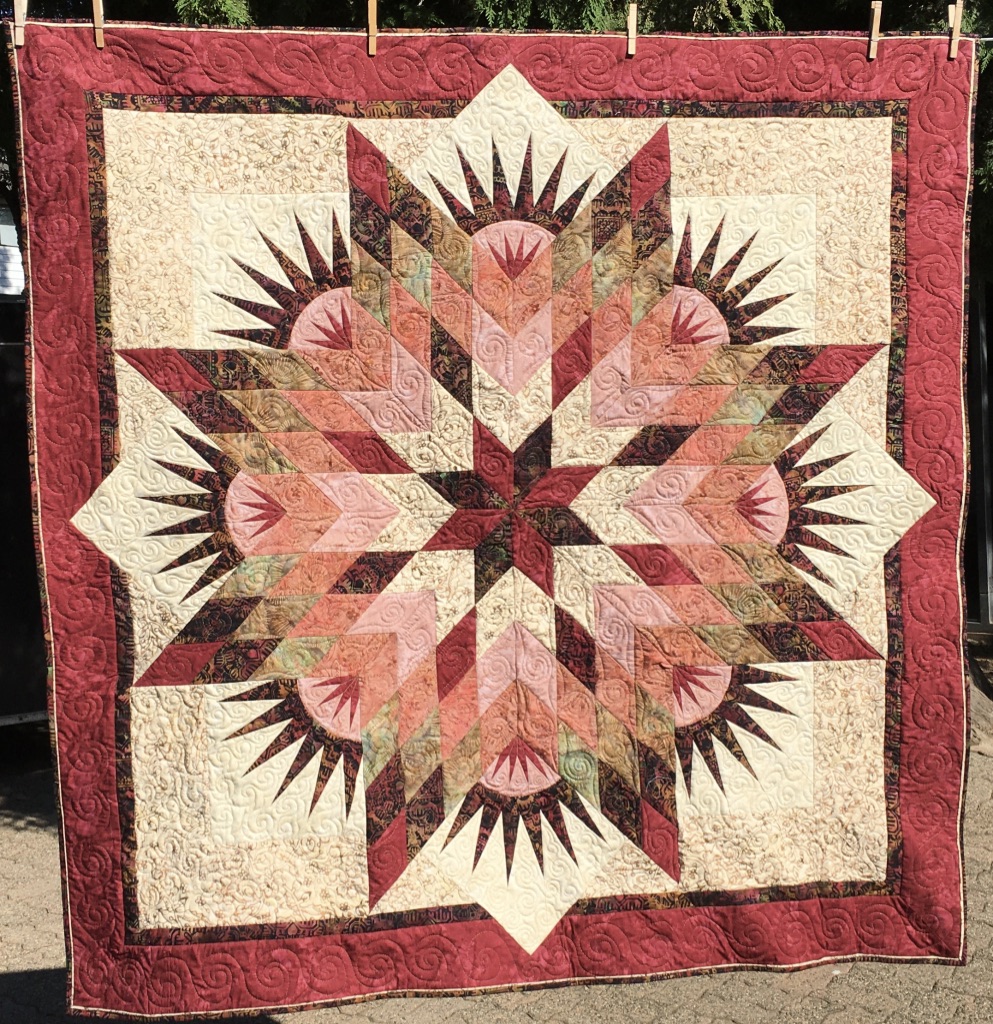
I think this wall hanging was made around 2006 or 2007. Enjoy your day!
Just so there is no confusion, I’m starting this post by giving you Quilting Definitions:
a PHD in quilting terms means Projects Half Done
UFO in quilting terms means UnFinished Objects
My own definition of UFOs for the PHD includes all projects started in December 2020 that are not complete by December 31.
Do you have 12 or more UFOs???
Do you feel like you’re drowning in UFOs???
Do the UFOs you have make you feel guilty???
Do you want to decrease the number of UFOs you have???
Do you want to make sure that your UFO list does not increase???
Join in the PHD in 2021!!!
Sew … what do you need to do???
List 12 UFOs that you’d like to finish next year. If you have more than 12 … that’s OK – we only need to know about 12 of them. (And if you want to change one UFO to another – that’s allowed).
put your UFOs on a blog post, an Instagram post or a Pinterest page
Keep track of your UFOs … some people like to list the steps left in completing the UFO
You MUST finish EVERY project you start in 2021 (with a couple of exceptions). By finishing EVERY project you do not add to your UFO list! These are called “Starts in 2021.”
Exceptions include:
Project is a “leader & ender” that goes until it’s got enough pieces to complete
Projects that are started in 2021 and can’t be finished in 2021 because
you don’t have all the steps to the mystery or the quilt
a project is started in December ’21 and there’s not enough time to finish in 2021.
Every month, link up and show us your PDH progress.
Again, link to a blog post, an Instagram post or a Pinterest page.
Here’s a link to an Excel sheet (2021 UFO Tally) that you can use for tracking your UFOs. You don’t have to use this sheet – but I’m offering it to you to get you started. This is what I use.
My list of UFOs is at the right. I have put a few aside and these are the ones that I want to work on in 2021. However, I might change my mind and pick a different one to finish. AND I sincerely hope that I do not find a single UFO as I go through my stash!!! On the right is my list of UFOs. I am aiming to complete 12 of them this year. I can’t show you a picture of the first 4 on the list, but there’s pictures of the the rest that I hope to complete.
With having 4 UFOs that were started in December added to the list, that brings my total of UFOs to 22. I’ll be happy to finish 12 of them.
#1 Stay at Home Round Robin … this was started this week … I know it won’t be finished by the end of the month … but it needs to be finished by the time the Stay at Home Round Robin is completed. You can read a little bit about it HERE. We’ll be giving you more information at the beginning of January.
#2 & #3 Holiday Seclusion Mystery … I have 2 in progress … one is ready to be quilted, the other is still being pieced. And obviously, I can’t show you a picture of them until later.
#4 Guild’s January Clue-Sew Mystery … currently being pieced … and will need to be completed by the end of the mystery in March.
#5 T-shirt quilt …. I’m not about to drag the bag out, but I have a zillion t-shirts from Echo Lake Bible camp and I promised to make a quilt with them. I’ve been promising for quite a while. Time to get it made, don’t you agree?
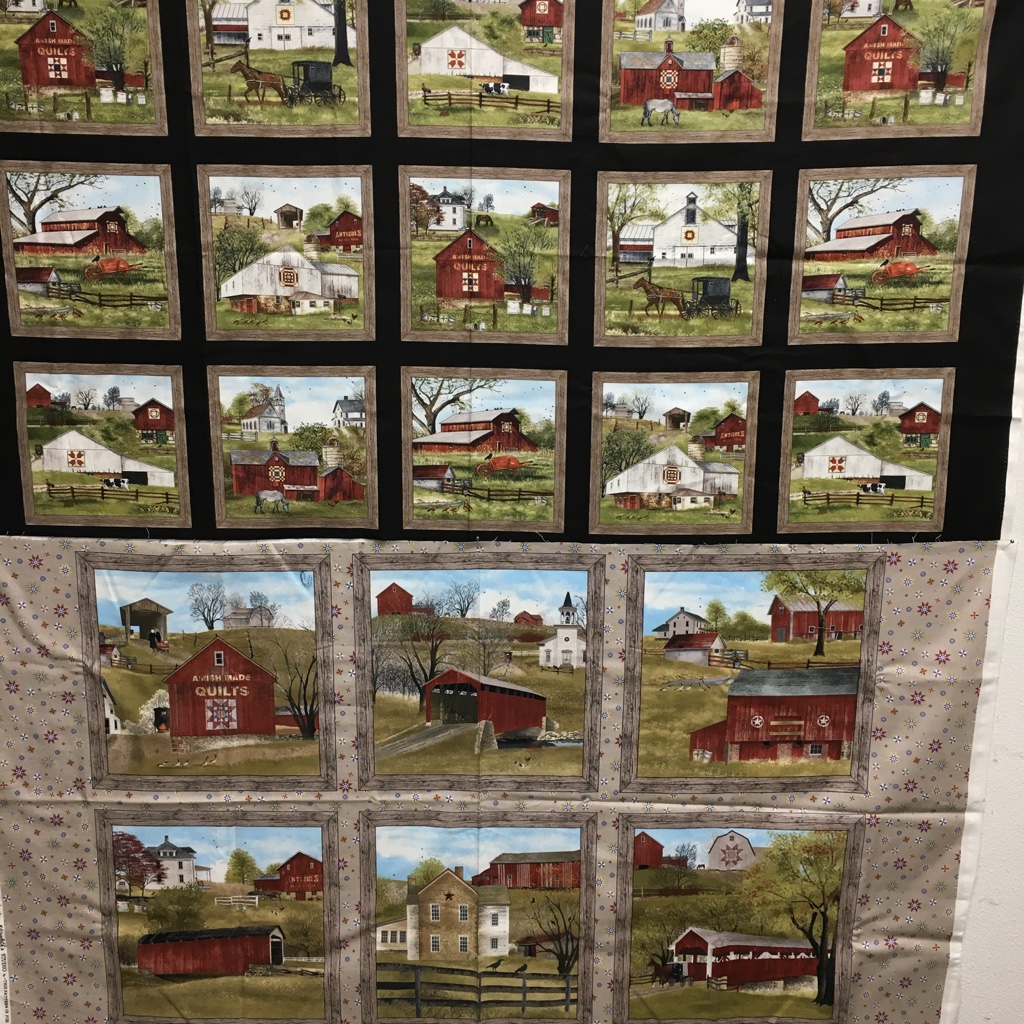
Next in line are the panels …
#6 These are 2 panels that I bought at separate times … one was bought in St. Jacobs, Ontario and the other was bought several years later in New Holland, Pennsylvania. I plan to combine them into one twin sized quilt.
#7 These are another 2 panels that I plan to combine into a single quilt. The date on one of them says “2004.” But I know that it was bought after that since I didn’t get back into quilting until late 2005.
#8 Birds … I made this into a small quilt for my aunt several years ago. I liked the panels so much, that I bought enough to make 2 quilts.
Next are the kits that are languishing … for too many years now …
#9 Town Table Topper
#10 #11 #12 These kits were bought in Newfoundland. Two of them include applique … which is not a favourite technique of mine. I’ve been often known to call it “CR-applique” … pronounced CRAP-plique.
Linky Party
You have until January 15, 2021 to officially join the PHD in 2021. Here’s the Linky Party to join. Remember, it can be a link to a blog post, Instagram post or a Pinterest page.