Here is my January 2020 Unboxing Video with all of the goodies I recieved this month!
Hobbs Batting
Monday, Monday …
Yesterday, I showed what I got done at the retreat and I just knew you’d want to see more details!
Ode to 30’s

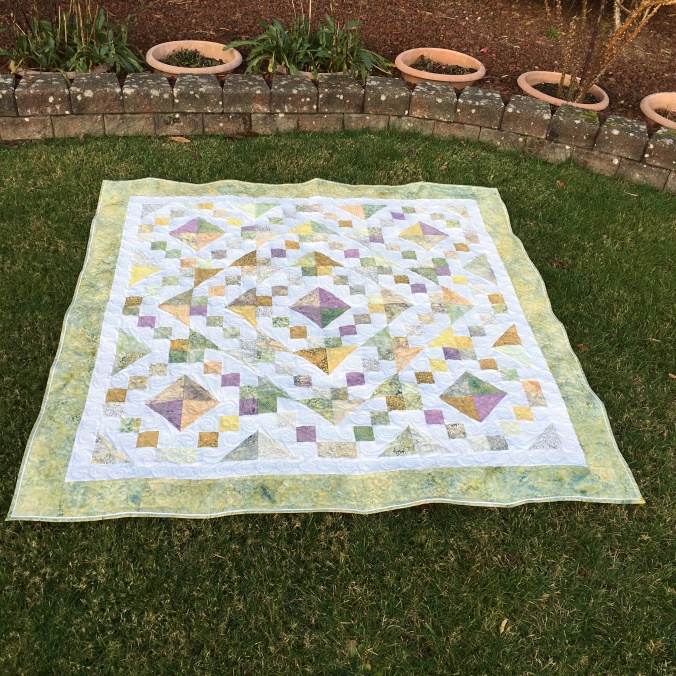
When I started this quilt … a long time ago … I wasn’t aware that there was a quilt genre called “30s.” I just picked the pink fabric (1st border) and picked out complementary colours.
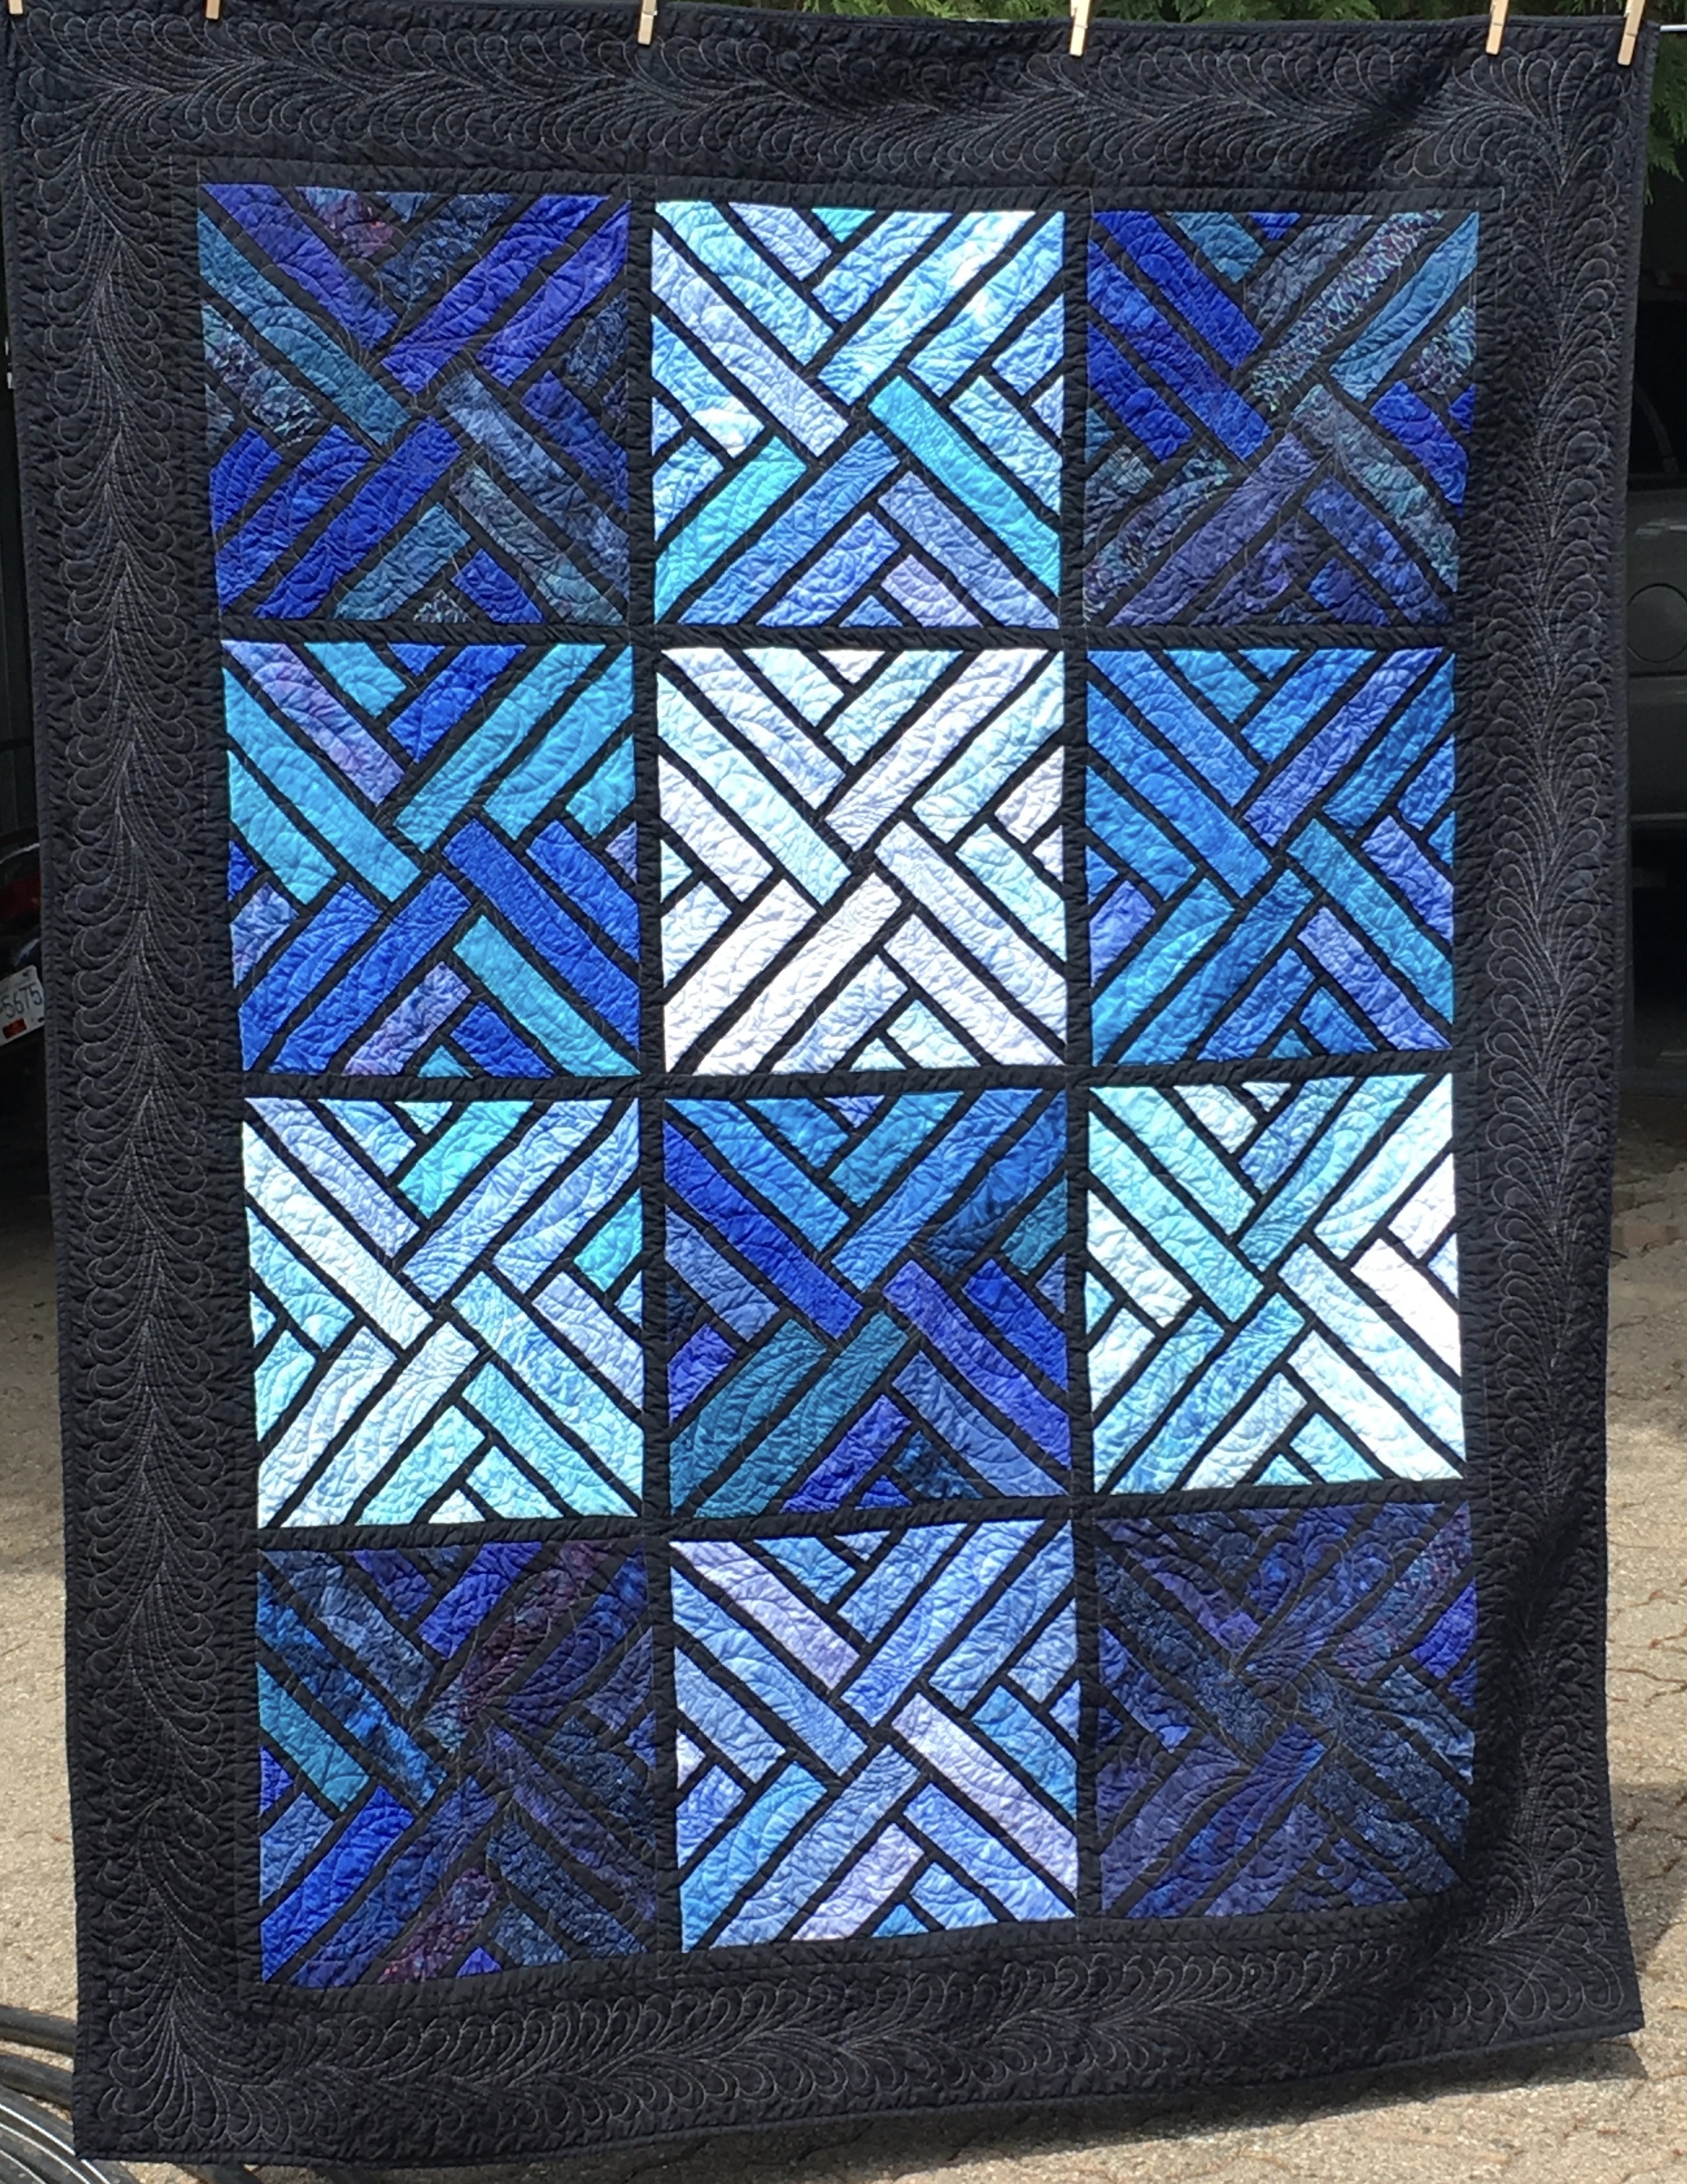
I did a diagonal backing on Ode to 30’s. I love how some of the blocks really shine through with the sun shining! When I made the back, I was tired of putting a stripe vertical or horizontal … I’d worry about it looking crooked. SEW, I made sure that the diagonal did not reach the corners … this way, if the diagonal was off a degree or 2 (or 10!), it wouldn’t matter. I think it worked!

Some custom quilting in Ode to 30’s … and some blocks just had an all-over motif in each block.
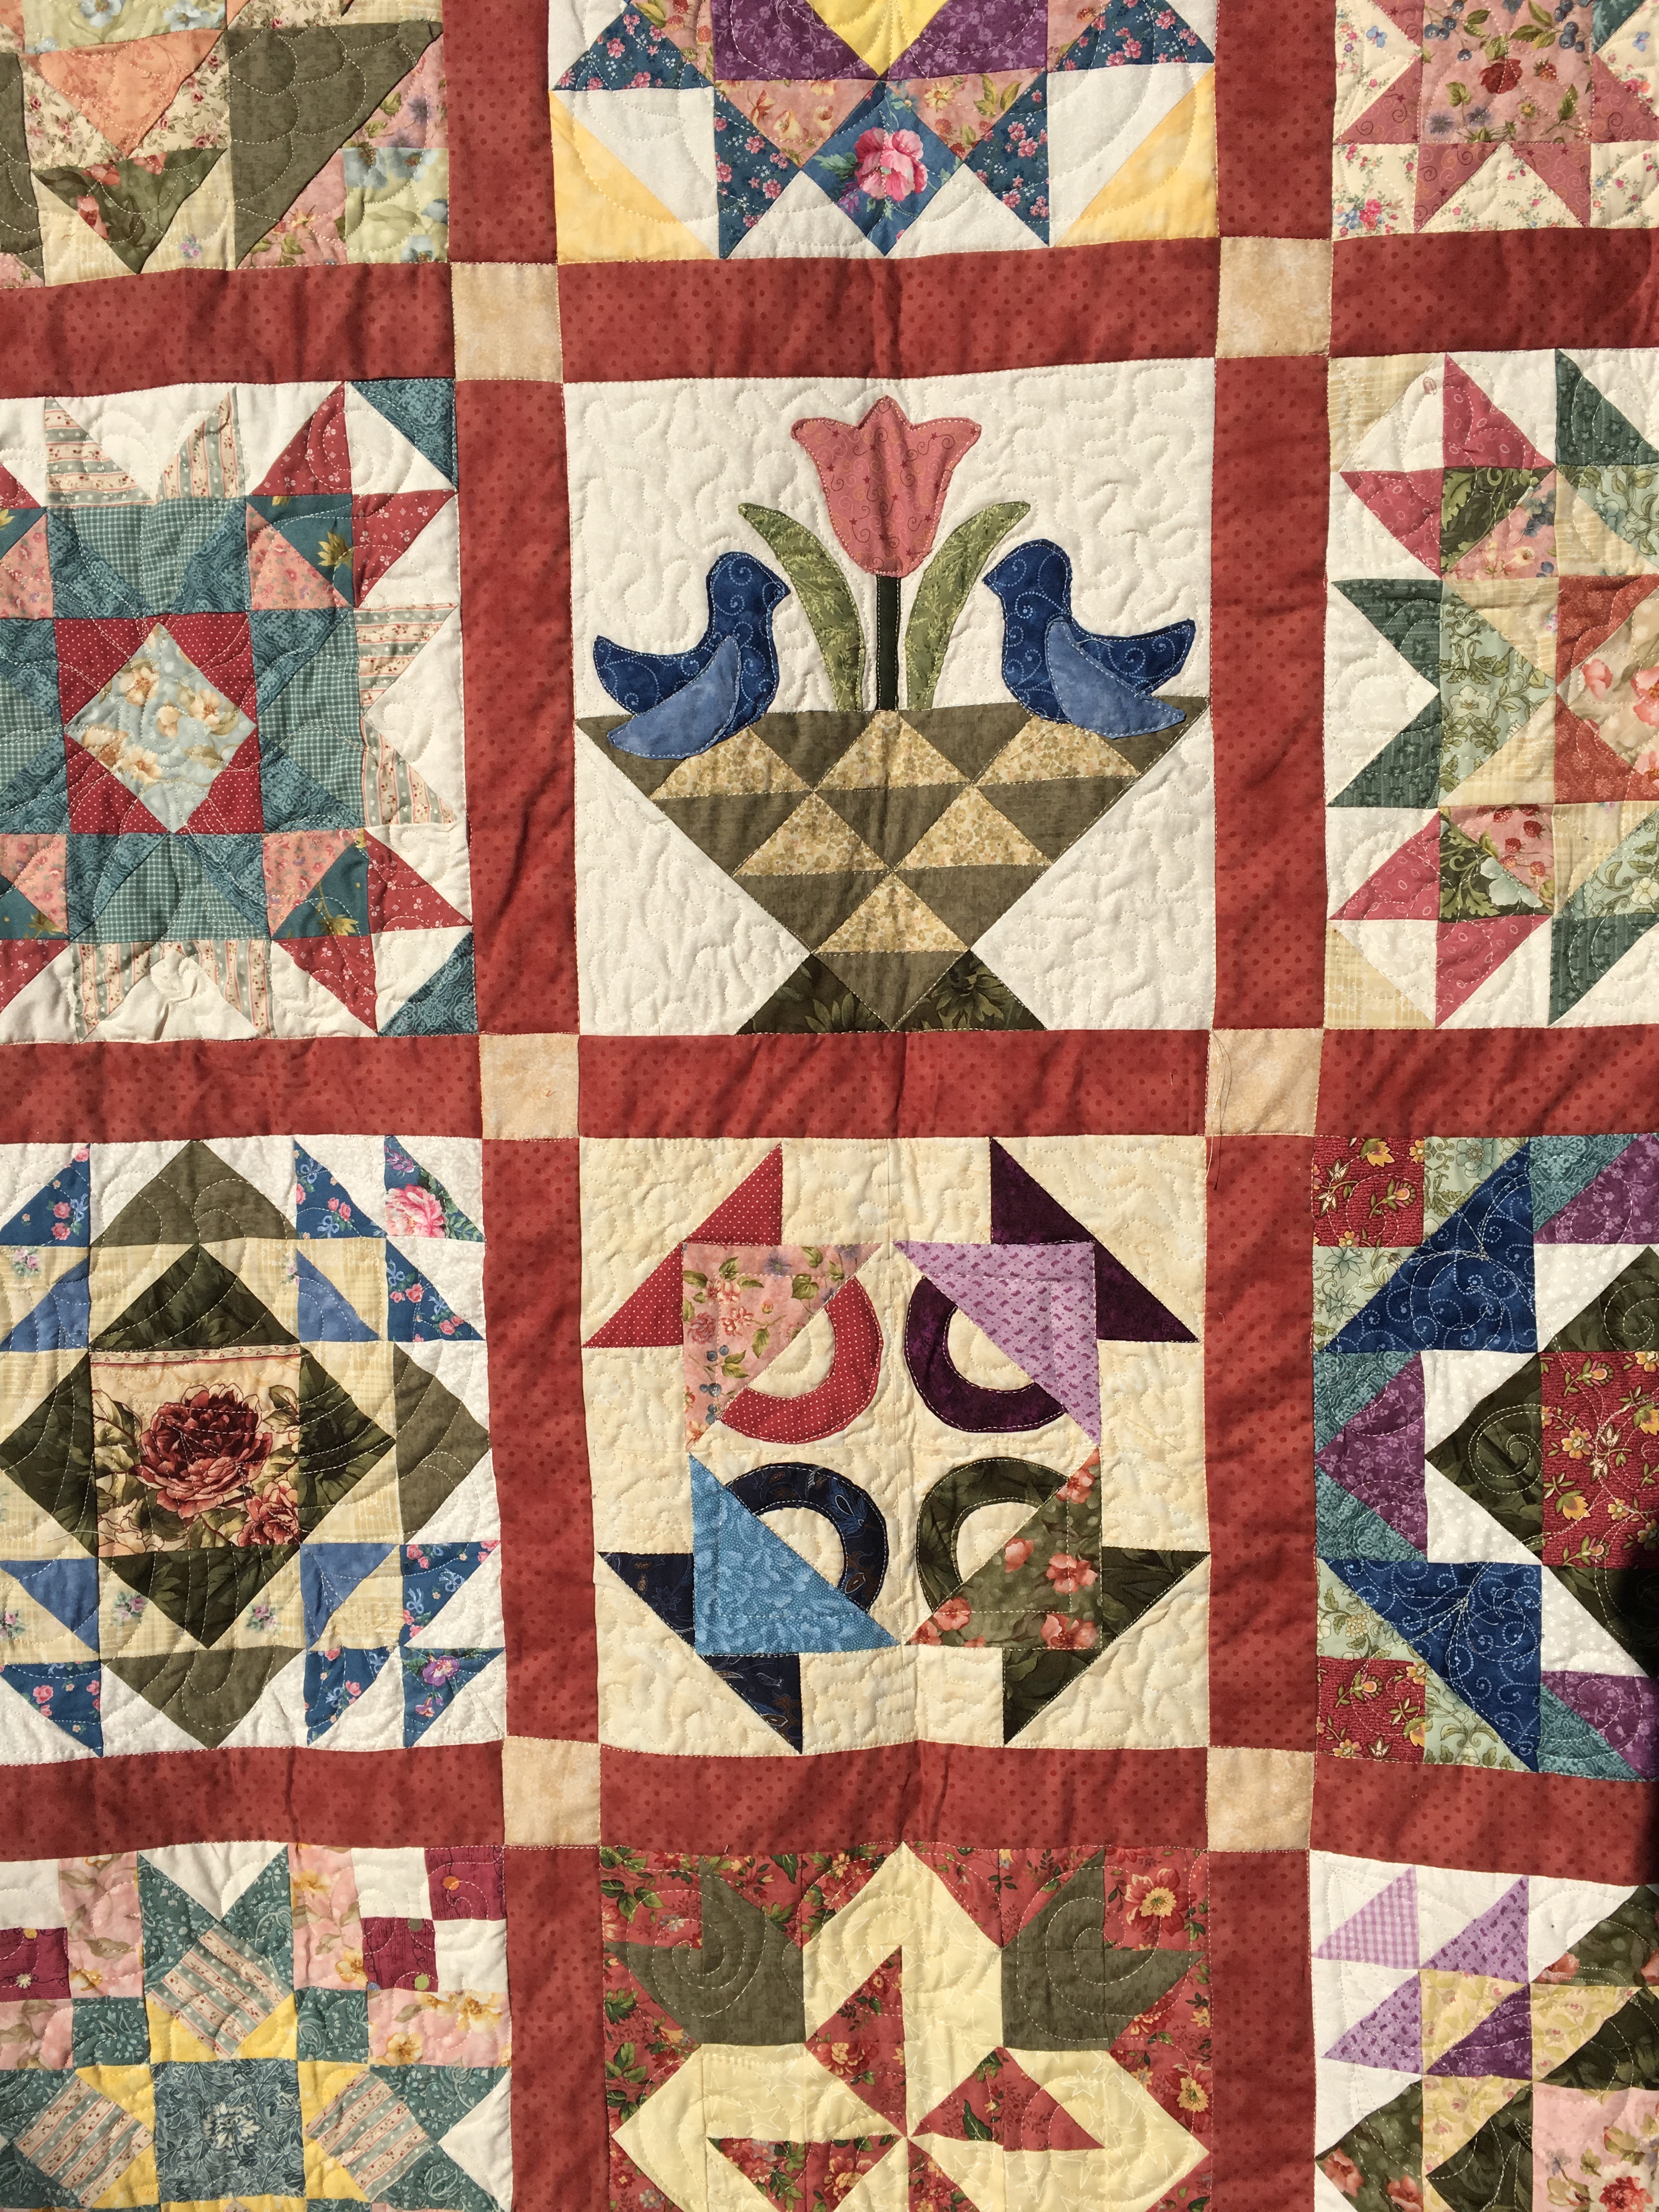
My husband loved the birds in the tree!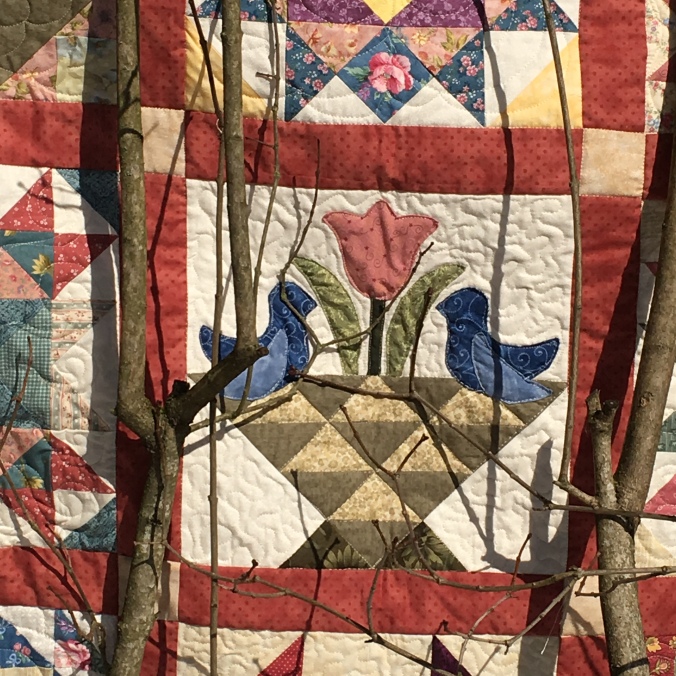
Details:
- 58″ x 66″
- Hobbs 80/20 batting
- Pieced with Aurifil thread
- Quilted with Glide thread
- Binding is 2 colour/flange binding (1¼” dark & 1½” light)
Design Wall
Piecing:
Summer Solstice: I did not work on this at the retreat. Pat, one of the other retreaters, helped me get my head around the lone star piecing, so I hope to make some progress on that this week!

Frolic: Bonnie Hunter’s Mystery: The reveal came out on Friday … I have some cutting to do before I can start putting the blocks together. I think I will like it when it’s done!
52 Blocks in 52 weeks: Need to make the last 4 blocks.
Quilting:
Hope to sandwich and start quilting Bento Box “Rag Log Cabin.”
TO DO
I’m linking up to Roseanne & Sue’s “TO DO” Tuesday. Their blog is “Home Sewn by Us.”
A Gladys Taber quote “Contentment is a list with half of it crossed off.”
This week my list is ALL crossed off!
Last week’s list:
- Finish Ode to 30’s √ done
- Work on
Bento BoxRag Log Cabin UFO √ done - Make Maple leaf block for Australia √ done
This week’s list:
- Sandwhich Rag Log Cabin
- Start Quilting Rag Log Cabin
- Make at least 2 “Frolic” blocks
- Make the last 4 “52 blocks in 52 weeks”
- Put “52 blocks in 52 weeks” on design wall and arrange
- Start the lone star portion of Summer Solstice.
Stash Report
The 2 finished quilts used 21 yards of fabric, plus ½ yard for the maple-leaf blocks for Australia. I did go shopping at the retreat but only bought zippers and a thingy-ma-jig to hold stuff at my machine. No fabric added.


- Fabric Used this week 21.5 yards
- Fabric Used this year: 21.5 yards
- Fabric Bought this week: 0 yards
- Fabric Added this year: 0
- Net Fabric used 21.5
- –
- Husband’s Purchases 0
Stitchin’ Time
- January 1-19 : 12 out of 19 100%
For more Stitchin’ Time, you can check out Kate’s blog: Life in Pieces

I finished 2 UFOs. And I’ve finished 2 of my 2020 starts. There’s another 2020 start for Island Batik that I’ve put in the sheet, but I actually haven’t started it yet.
If you are working on your PHD in 2020, be sure to link up to the mid-January linky party and show us your progress! (HERE)

One who sleeps under a quilt is covered by LOVE!
Happy Quilting!
Gail
*****************************
Linking to:
- What I Made Monday @ Pretty Piney Quilts
- Monday Making @ Love, Laugh, Quilt
- Design Wall Monday @ Small Quilts and Doll Quilts
- Moving it Forward Monday @ Em’s Scrapbag
- To-Do Tuesday @ Home Sewn By Us
- Colour Inspiration Tuesday @ Clever Chameleon Quilting
Lets Get Scrappy!
I LOVE Scrappy Quilts!!!
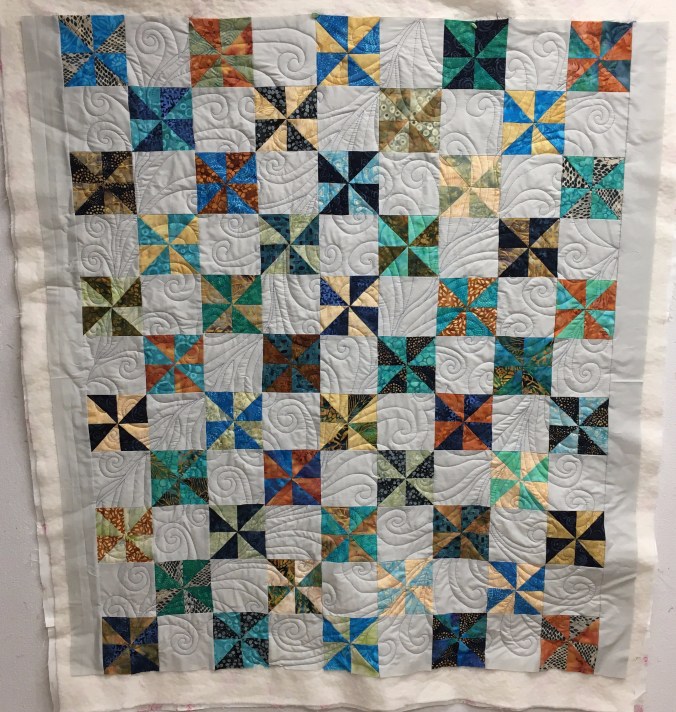
It was fun to go through my box of Island Batik fabrics and make a scrappy quilt. I wanted one that would cover my embroidery machine. I ended up making 2. The first one, I used my Accuquilt cutter and cut a zillion half-square triangles. I love that the triangles were cut perfectly and were SEW easy to so and made for perfect HSTs. However, I was not happy with the end result. With the great variety of scrappy pinwheels, it just ended up looking disjointed. Not something to make me smile when I walk into my sewing room … so it became a bag to keep my Accuquilt Go cutter in. You can read about it HERE.
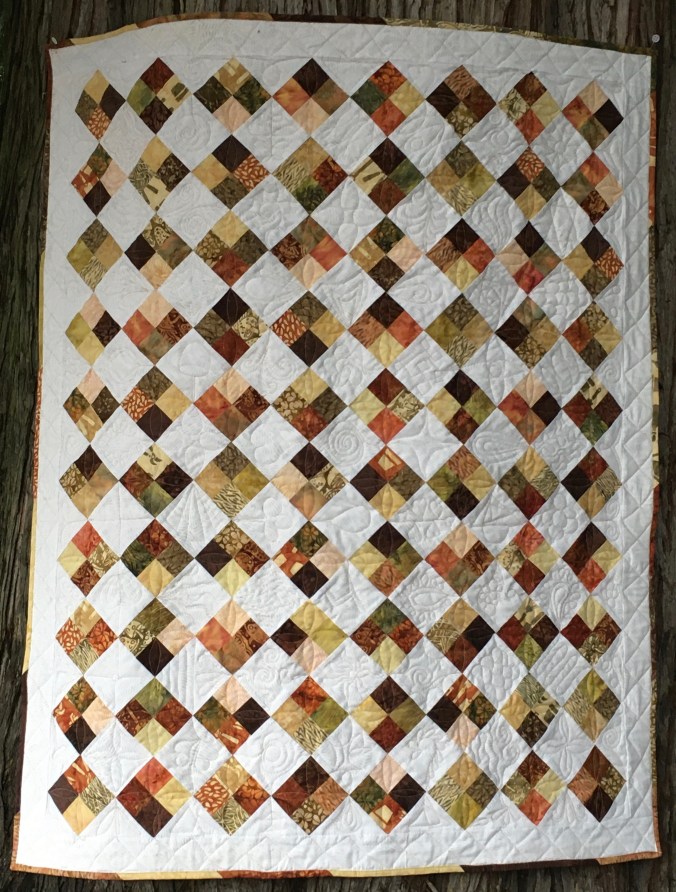
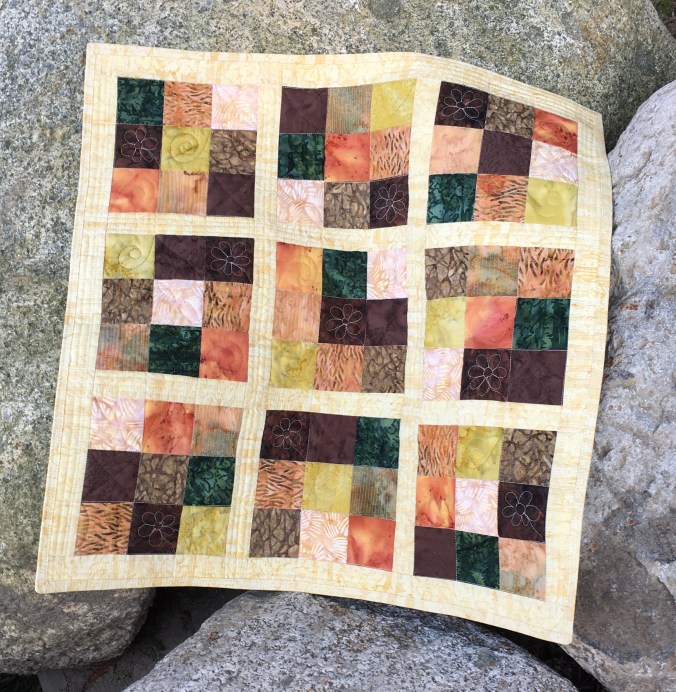
The 2nd quilt is one that I’m VERY happy with and will enjoy seeing it covering my embroidery machine! I used fall colours, many left-over from the “Soil and Seeds” collection that I used in a blog-hop quilt. (See HERE) And, I used other co-ordinating fabrics from Island Batik foundations, basics and stash buster bundles. The background fabric is “Coconut,” an Island Batik foundations neutral. I LOVE this neutral!
The 4 patch blocks are made with 2″ squares and end up being 3 ½” finished in the quilt. The batting is Hobbs 80/20. The binding is 2″ scraps, left over from making the blocks.
Sometimes mistakes happen
Oh yes, they do!
Most of you know that I absolutely LOVE scrappy quilts. Occasionally, I do sew a quilt with only a couple of fabrics, but for the most part, I love scrappy. A few years ago, I made a series of quilts with my Grandmother’s fabric. You can see them HERE. I used pretty much all of the fabrics, without much consideration to colour. The only rule was that 2 squares of the same colour couldn’t go next to each other. There was every colour in the rainbow, shades, tints and tones and they all got mixed up together. In my opinion, all of the quilts turned out just fine.
Then came the Island Batik January’s challenge to make something scrappy! I smiled and smiled. I knew I wanted to make a cover for my embroidery machine and it would just be a small quilt, not shaped or anything. I have scraps from all the Island Batik projects that I made last year. I decided to make pinwheels. I used my Accuquilt Go to cut the pinwheels (talk about accurate!) and was mostly happy with each pinwheel. Individually, they looked pretty good. They all went well with the Island Batik grey solid. Then, when I put them together, it was blah. Like yuck! gross … ULK!!! Not something I’d like to look at every time I walked into my studio!
I quilted it with blue thread (Aurifil 1128), hoping that would add some cohesiveness. It helped … a little … but … Not doing it for me. ULK!!!
When I compared this to some of the quilts I made with Grandma’s fabric, I realize that in each of the blocks (some were the same size as the pinwheels in this piece) that the colours were all mixed up together. In this piece, there isn’t the mixed variety … each pinwheel is only 2 colours. My conclusions are that: 1. If I’m going to do scrappy pinwheels, I need to stick to a certain theme or colour. 2. Scrappy quilts work best with lots of variation and a solid, or calm piece, to pull it all together.
It’s LEARNING … and I’m just fine with that!
When I was looking at this quilt, I was wondering what I could make with it. I had said on the blog that I had started Secret Project #1 – so, I couldn’t just ignore it and hope that it would disappear. It was a project started in 2020, and therefore, needed to be finished in 2020. And, I couldn’t wimp out on my PHD in 2020! Especially this early in the year!!!
I have always fought with the bag that the Accuquilt cutter came in because it just fits and there isn’t a lot of wiggle room. AND, to top it off, the bag ripped when I pulled it out to use it to cut the pinwheels. An AH-HA moment happened. This piece would be come a bag for the cutter. A perfect solution, don’t ya think?
Here it is … and I’m thinking that it doesn’t look too bad as a bag. And the Accuquilt Go fits in it with ease!


This is NOT my official Island Batik scrappy project for January but it is a completed project. It did use Island Batik fabrics, cut with the HST Cube 8″ Accuquilt die, Aurifil thread and Hobbs 80/20 batting. I had labelled this Secret Project #1.
There is still time
to join in PHD in 2020!
If you want to decrease your UFOs … and not make your UFO list any bigger, Join me for your PHD in 2020! Check out this blog post for details … and scroll WAY down for the linky party so that you can join in! You can join in on the PHD in 2020 until Jan. 14. Then on the 1st and 15th of each month, there will be a linky party for you to show your progress.
Now, you don’t have to have a blog to join … you can use Pinterest (start a separate board) or Instagram … post the direct URL in the linky party and you’re IN! Come and join us!
I was Featured
By Jeniffer at Inquiring Quilter with This POST about 2 works in progress. Thank you to Jennifer for hosting the Wednesday Wait Loss. By the way … it’s worth going to her blog to see all the wonderful works that are featured this week.
Disclaimer: The products featured in this Blog post were given to me by Island Batik, and their co-sponsers Aurifil, Hobbs Batting & AccuQuilt!
One who sleeps under a quilt is covered by LOVE!
Happy Quilting!
Gail
*****************************
Linking to:
- Midweek Makers @ QuiltFabrication
- Wednesday Wait Loss @ Inquiring Quilter
- Happy Needle and Thread @ My Quilt Infatuation
- Andrée / Free Motion Mavericks @ Quilting & Learning – What a combo!
- Put your Foot Down @ For the Love of Geese
- Can I get a Whoop Whoop? @ Confessions of a Fabric Addict
- Finished or Not Friday @ Alycia Quilts
- Sherry @ Powered by Quilting
- Michelle @ From Bolt to Beauty
- Off the Wall Friday @ Creations – Quilts, Art, Whatever
- Peacock Party @ Wendy’s Quilts and More
- TGIFF @ Slice of Pi Quilts
My Best of 2019
Cheryl of Meadow Mist Designs is having a Best of 2019 Linky Party!

It’s HARD to choose just one quilt that is my favourite for this year! SEW … as you can see, I chose 8 of them. I finished many many more, but these 8 are my favourite! Well, there’s probably a few more that are also my favourite … but I figured I needed to limit the number!


You can see the original posts for the quilts by clicking on the quilt name. All but the first quilt, Good Fortune, used Island Batik Fabrics (you can see all the Island Batik quilts HERE.) Good Fortune was made from my stash and was a Bonnie Hunter mystery. All of the quilts used Hobbs batting … 80/20 or wool … Aurifil thread was used in each project. Each quilt was quilted on my domestic sewing machine – Janome 8900.
- Good Fortune
- Accuquilt Baby Quilt
- Make it Modern
- Fractured Paint Box
- Quilt of Valour
- Child’s Play
- Pumpkin Applique
- Island Batik 3D challenge
Friday Finish or Not
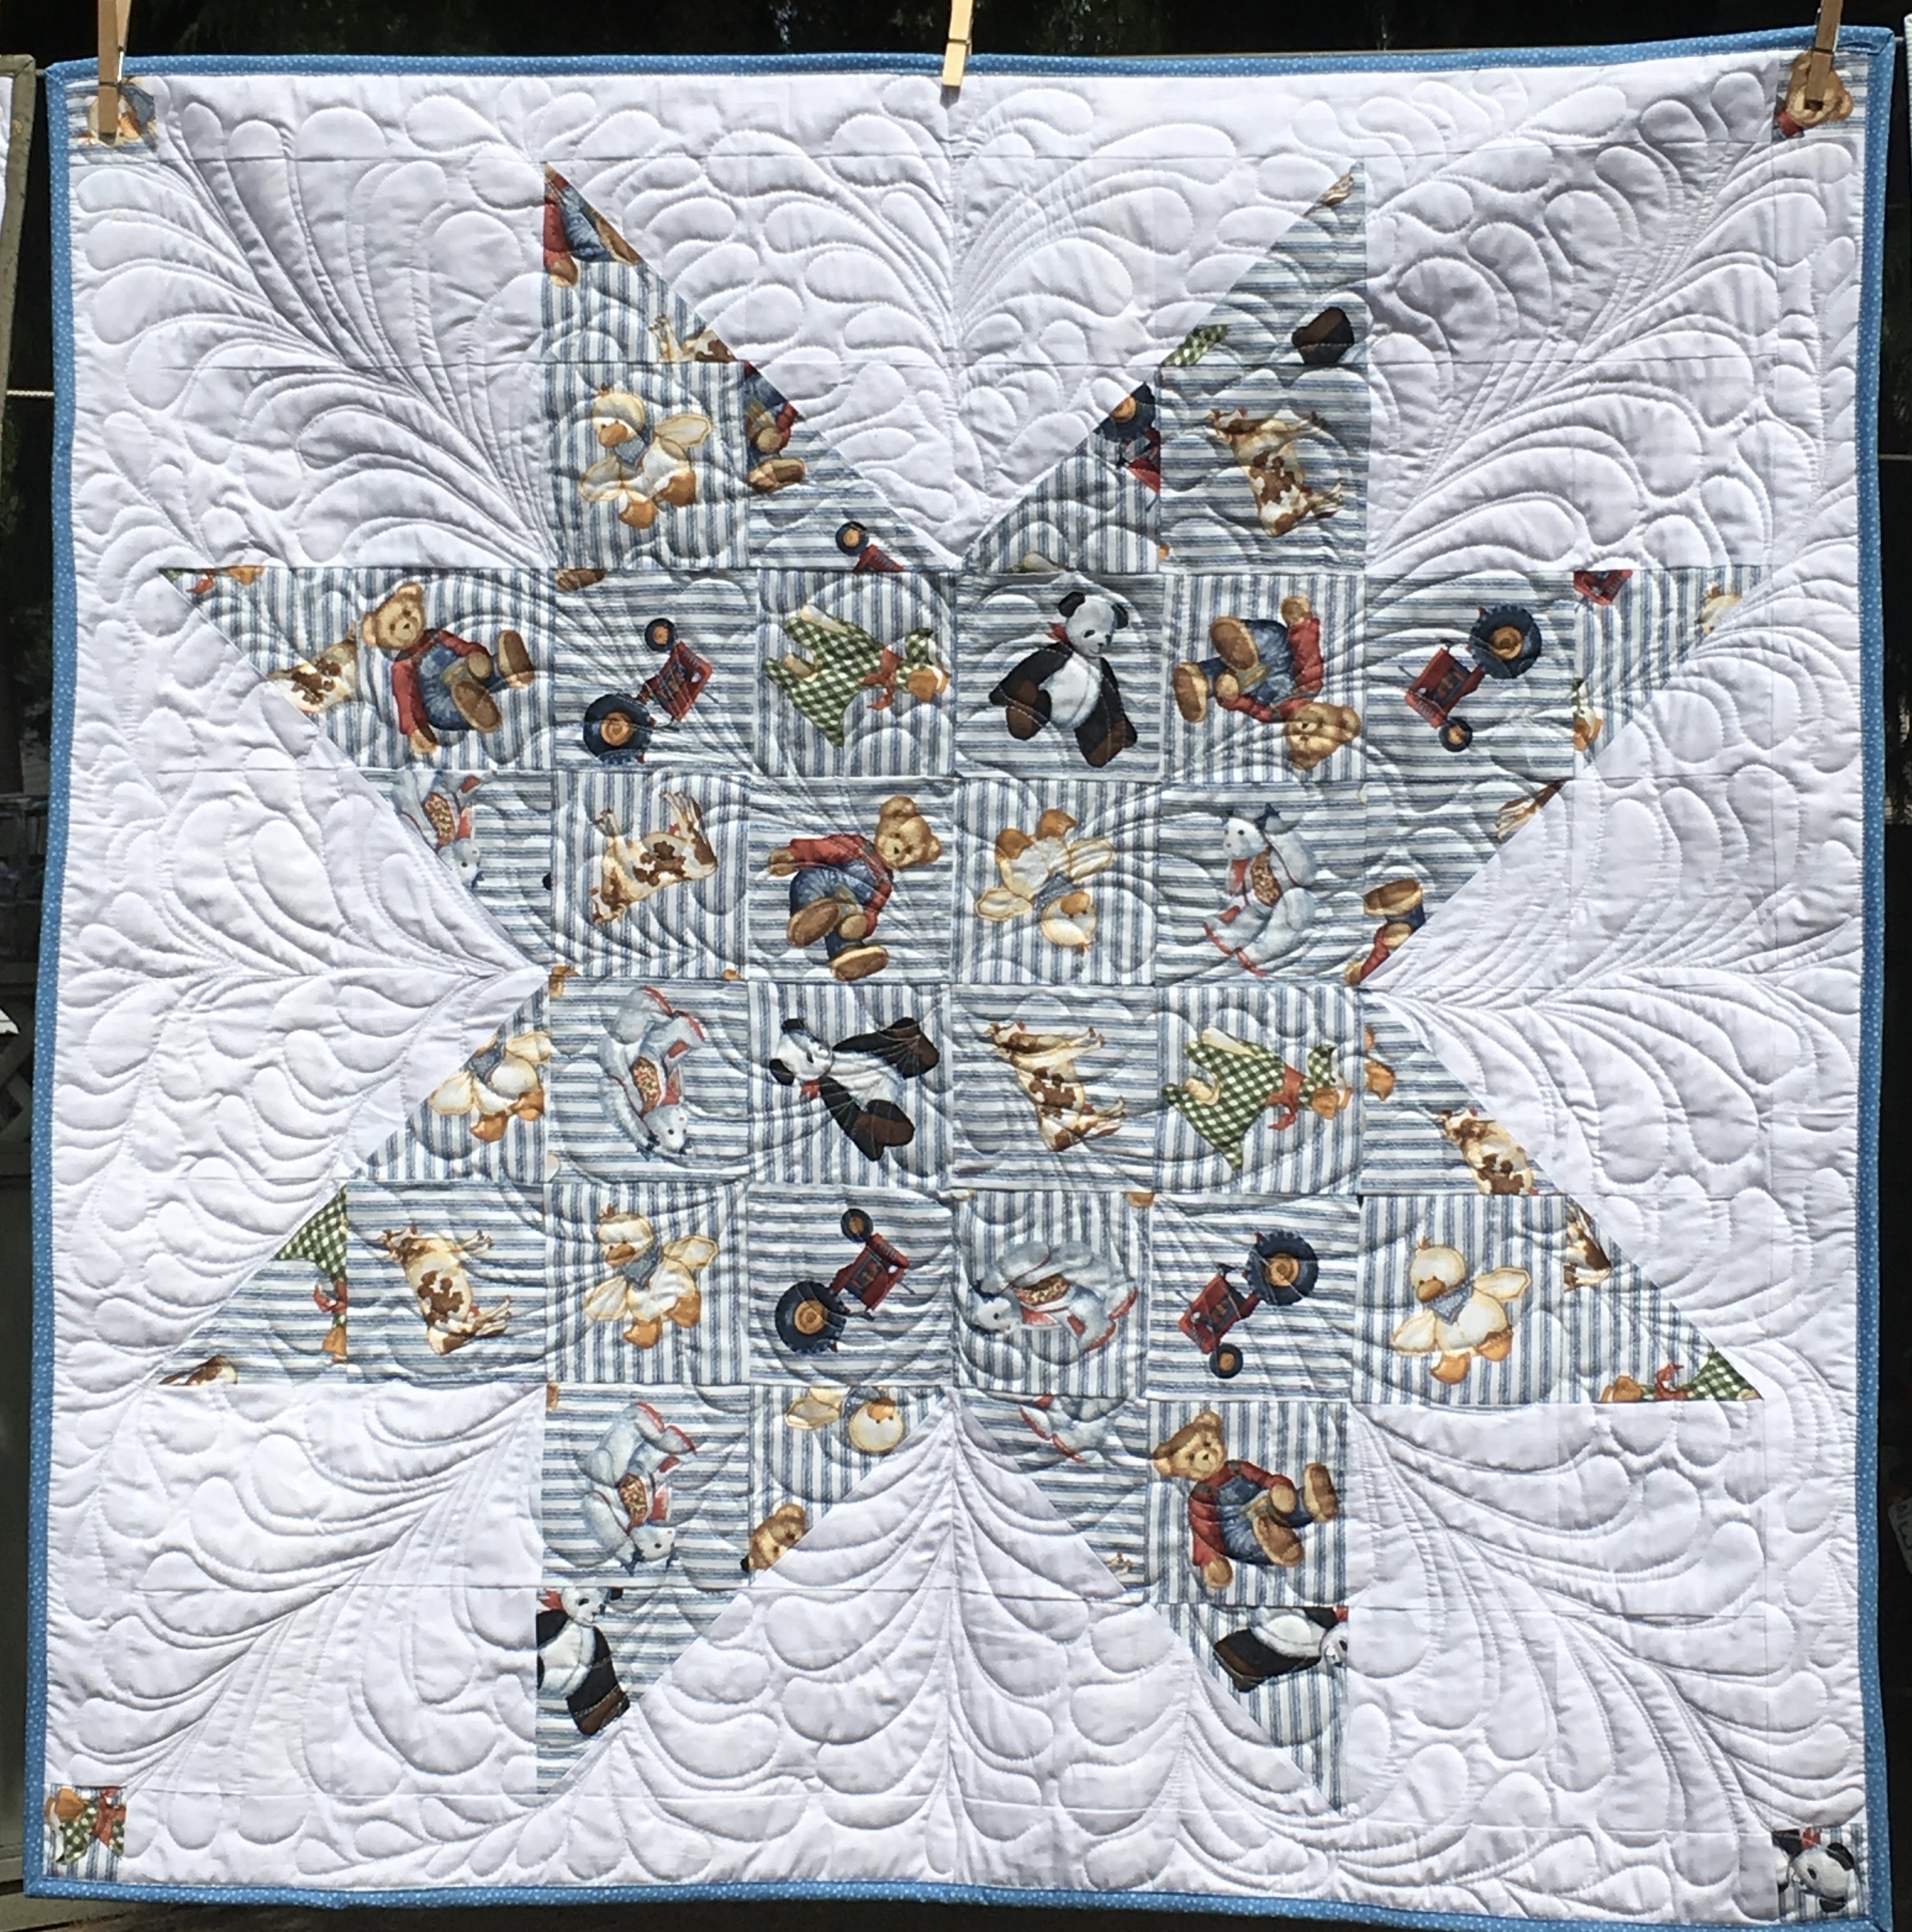
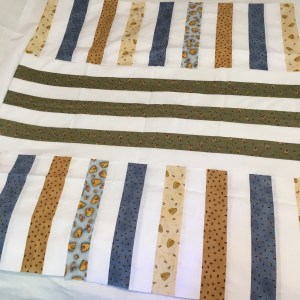
I have no finishes this Friday, but the quilt below is ready to be quilted. I used the left-over fabric from a baby quilt I started in November. I was able to cut most of the 5″ squares from the left-overs … I was a few squares shor … mostly because I cut some at 4.5″ instead of 5″ 😦 … sew … I took the pieces that were too small and pieced a bunch of them together and then cut those pieces 5″ square. It will work. This is a pattern where you sew the blocks straight, do a few big cuts, rearrange the big cuts and you have a quilt that is on point. Missouri Star has a YouTube Video that shows basically how to make this. It’s pretty easy!
This quilt will also be donated to the guild.

 This is the quilt that had the left-overs that I used for the above quilt. There were 2 fat quarters that I did not use in the original quilt … one was a mini panel with the blocks of animals and the other was the white /with leaves that is on the outside of the quilt … it was a perfect place to use these fabrics up!
One who sleeps under a quilt is covered by LOVE!
Happy Quilting!
Gail
*****************************
Linking to:
- Midweek Makers @ QuiltFabrication
- Wednesday Wait Loss @ Inquiring Quilter
- Andrée / Free Motion Mavericks @ Quilting & Learning – What a combo!
- TGIFF @ Anja Quilts
- Can I get a Whoop Whoop? @ Confessions of a Fabric Addict
- Finished or Not Friday @ Alycia Quilts
- Sherry @ Powered by Quilting
- Michelle @ From Bolt to Beauty
- Off the Wall Friday @ Creations – Quilts, Art, Whatever
- Peacock Party @ Wendy’s Quilts and More
Island Batik Projects – 2019 Review
What a YEAR!!!
This has been a year of growth for me as a quilter. Becoming an Island Batik Ambassador has been a highlight of my year! Thanks to the monthly challenges, I stepped outside my comfort zone and made things that I NEVER would have. As well, a short photography class helped me go beyond my “quilt on a clothesline” photos!
Island Batik provided all of the fabrics for the quilts and projects this year. My heart is over-filled with gratefullness for their generousity and that of the co-sponsers (Aurifil, Hobbs batting & Accuquilt). I was totally spoiled this year by being an Island Batik Ambassador!
I am also grateful to my fellow Island Batik Ambassadors! They offered a ton of support and encouragement. Not to mention the plethora of ideas that flowed … it’s been a fun year!
February: Magnificent Mini
The first challenge for the year was to make a mini. I wasn’t sure what to do … My love of fall colours and the desire to make something I would use, lead me to make this Suduko mini quilt. For more details, go HERE.
On the huge boulders on the side of our yard.
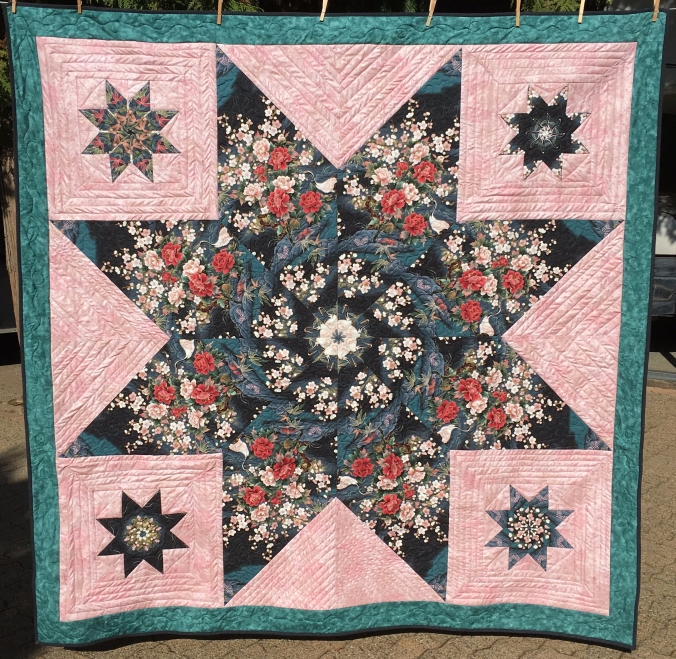
March: Vintage Re-Imagined
What happens when you have beautiful fabric, an idea and EQ7? Stars on Ice became the reality of that dream. See HERE.
April: Accuquilt Baby Quilt
All ambassadors received an Accuquilt cutter and dies. I used the 8″ cube dies to make this beautiful baby quilt. See HERE.
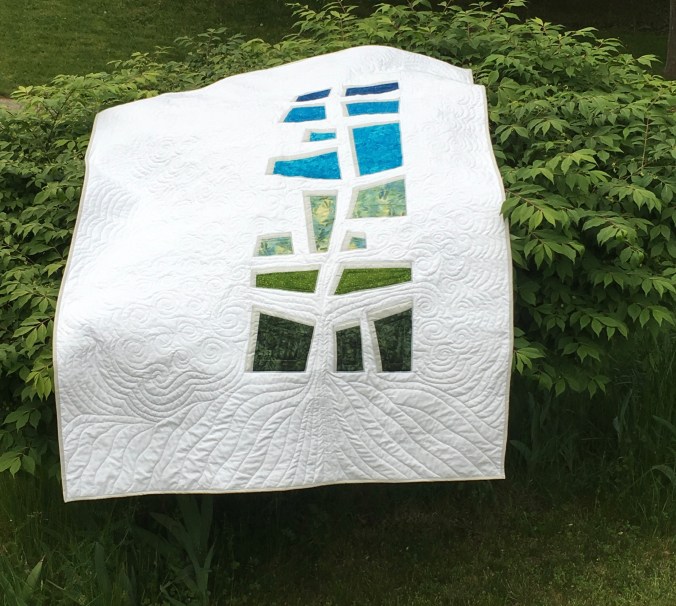
May: Make it Modern
Me? Make a modern quilt??? Find out more about how it came about HERE.
Christmas RAPPing
This table runner was made for a Blog Hop celebrating the book “Christmas RAPPing” by Margaret Brewster Willingham and Nan Baker. You can see the blog post HERE.

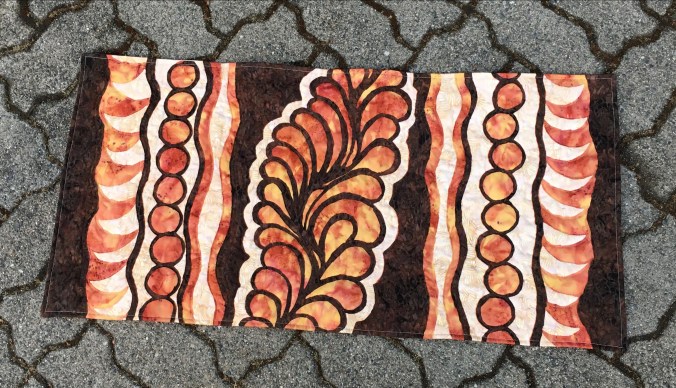
June: Try It
We were challenged to try a new technique … sew, I used one of Angela Walters quilting tutorial series and this table runner was born. See HERE.
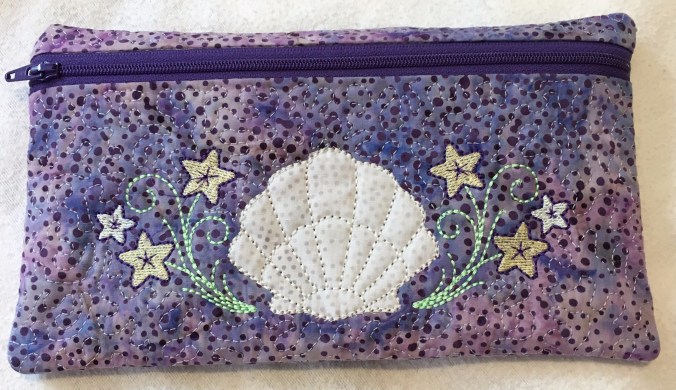
A Zipper Pouch
This little zipper pouch was made with my embroidery machine, using an AnitaGoodesign pattern. For more details see this POST.
July: Artsy Fartsy
I do not do Artsy-Fartsy … I’m a more traditional quilter. However, this project was enlightening. I remembered how to do some simple embroidery stitches … and with it being “Artsy-Fartsy” I didn’t need to worry about it being exact. You can read about it HERE. This bag was made for travelling and I used it on my month long trip to Europe & Africa.


Quilt of Valour
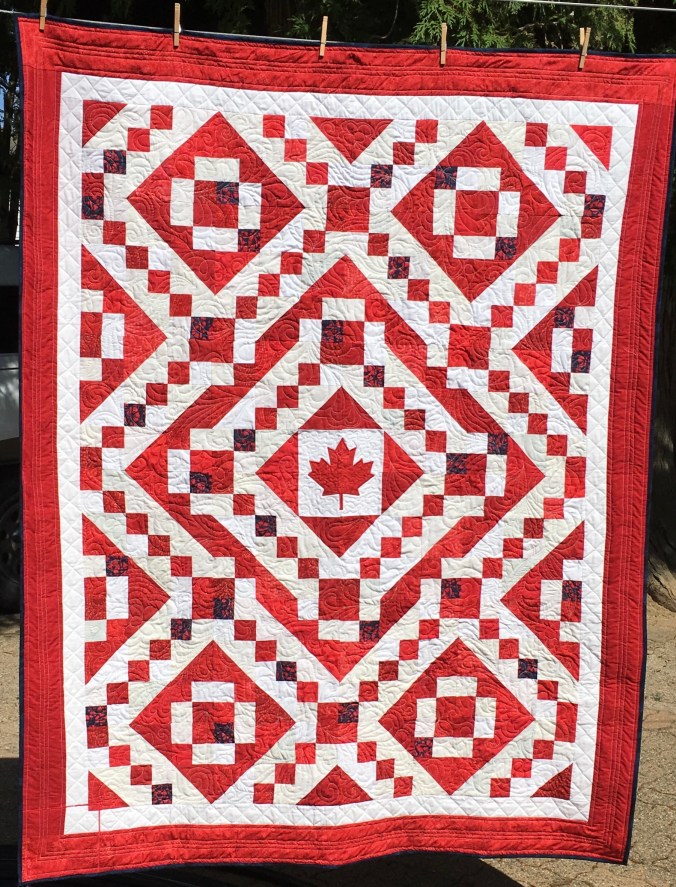
One of my fellow Island Batik Ambassadors organized a group of us to make Quilts of Valour out of a wonderful line of fabric called “Freedom.” It had lots of red, white & blue fabric. Since I was making one for a Canadian veteran, I just wanted to use the red and white. I did have to dip into the blue fabric for a few squares (scattered randomly) and the binding. It is my own pattern. Read more about it HERE.
August: Beat the Heat
This was made for a blog hop. The line is “Soil & Seeds.” I loved the line and wanted to be able to showcase each fabric. This quilt was perfect for that. For more details, see HERE.

September: Child’s Play
This quilt used the Accuquilt Die “Cleopatra’s Fan.” It was an intimidating block for me to make: it had CURVED piecing. However, I did learn that with the die, the pieces are cut perfectly and sewing the curves was not all that difficult. It was fun to design the butterfly. Except for the antenna, the butterfly was cut with the Accuquilt 8 ” Cube dies. You can read about the post HERE.

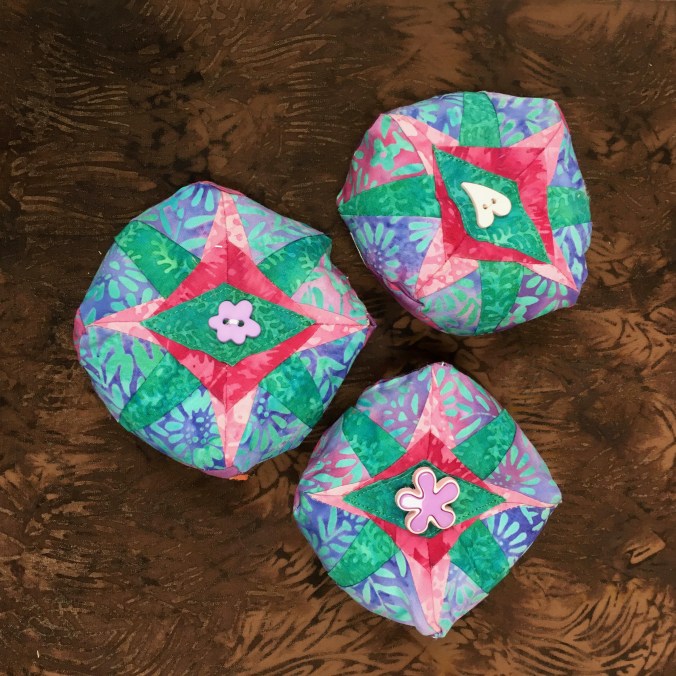
Biscournu Pin Cushions
These little pin cushions were made with the “mistake” blocks from making the Christmas Rapping table runner (May). I think they are so stinking cute! And a fantastic way to use up those orphan blocks. For more details see HERE.
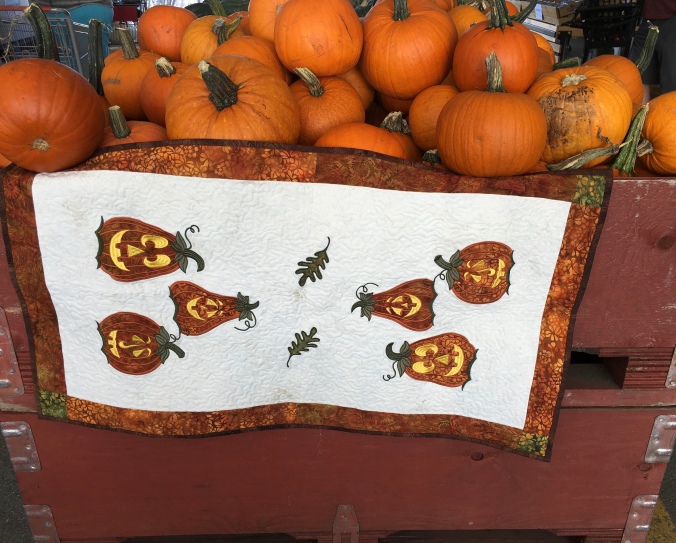
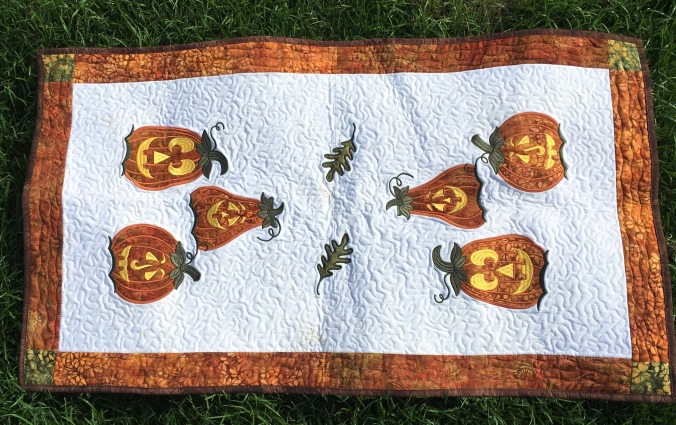
October: Top it Off – using Applique!
Nothing says “October” to me more than pumpkins. I had some great orange fabric, a great background fabric, my embroidery machine and this table runner fell into place. For more details, see HERE.
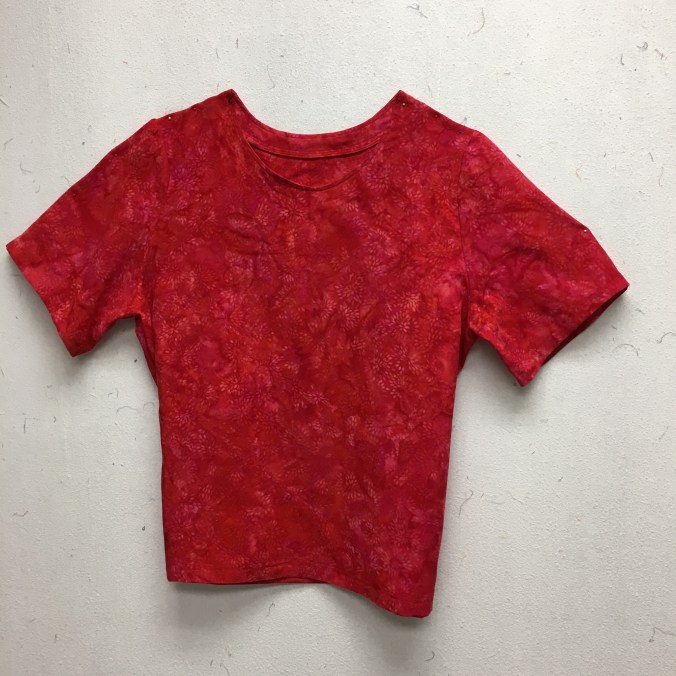
Island Batik Rayon
I needed new clothes … I had an ancient T-shirt pattern, I had this beautiful rayon fabric … SEW this top, which fits me perfectly, was made! Check it out HERE.
November: Tool Time
We needed to use our favourite tool. My favourite is the Tri-rec ruler … and the Shape-cut ruler … and … a zillion other tools that are necessary for my quilt making … Visit THIS BLOG POST to see a video on how I used these tools.
The Tool Time Mistake
I forgot to take pictures as I was making this quilt. And it can easily be made with the Accuquilt Go, 8″ Cube dies. See HEREand HEREI love how this quilt used the same fabrics as the quilt above, but with a white background instead of black. It certainly gives the quilts a very different look!
Randy the Rhino
Many fellow Ambassadors made various “Funky Friends” for quilt market. After my trip to Africa, I just HAD to make the Rhino! See this POST for more details.

December: 3D Challenge
This quilt pattern has always spoken “3D” to me. It was the obvious choice for a quilt! See HERE for more details!

Sewing Machine Cover: 3D Challenge #2
I needed to make sewing machine covers for all of my machines. I used the extra fabric from the 3D quilt to make this serger cover. To find out how I did it, go HERE.

Snowman Table Runner
You can call it a squirrel, you can call it a DrEAMI, but I’m calling it DONE. Check out the details HERE.
Alice Alpaca: 3D Challenge #3
Alice was fun to make! See this POST for more details!

Disclaimer: The products featured in this Blog post were given to me by Island Batik, and their co-sponsers Aurifil, Hobbs Batting & AccuQuilt! And the Patterns for the Stuffed Animals were from Funky Friends.
One who sleeps under a quilt is covered by LOVE!
Happy Quilting!
Gail
*****************************
Linking to:
- Midweek Makers@ QuiltFabrication
- Wednesday Wait Loss@ Inquiring Quilter
- Andrée / Free Motion Mavericks@ Quilting & Learning – What a combo!
- Put your Foot Down@ For the Love of Geese
- TGIFF@ Home Sewn by Us
- Can I get a Whoop Whoop?@ Confessions of a Fabric Addict
- Michelle@From Bolt to Beauty
- Off the Wall Friday@ Creations – Quilts, Art, Whatever
- Peacock Party@ Wendy’s Quilts and More
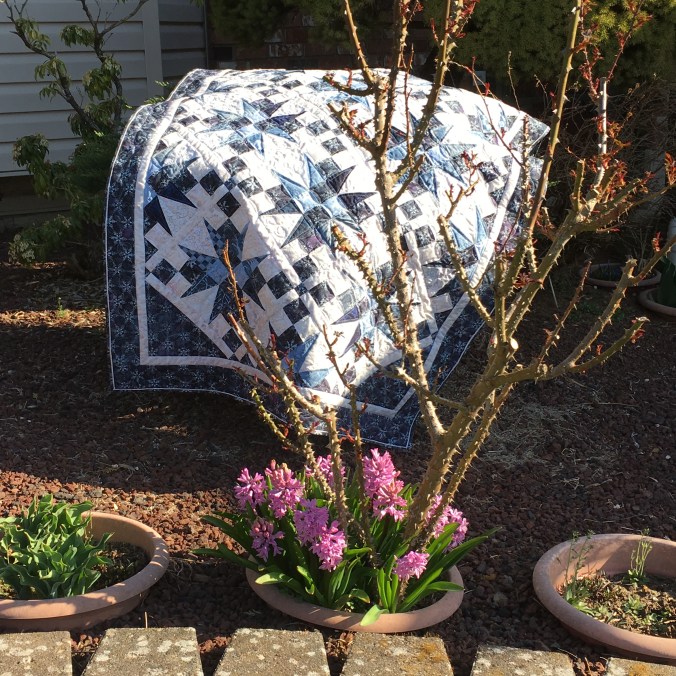
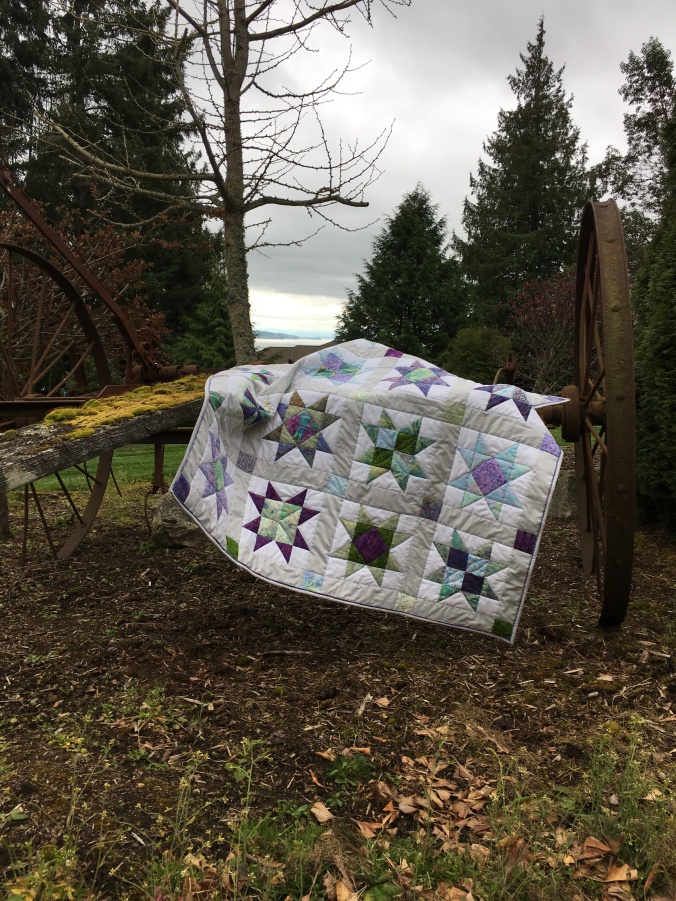
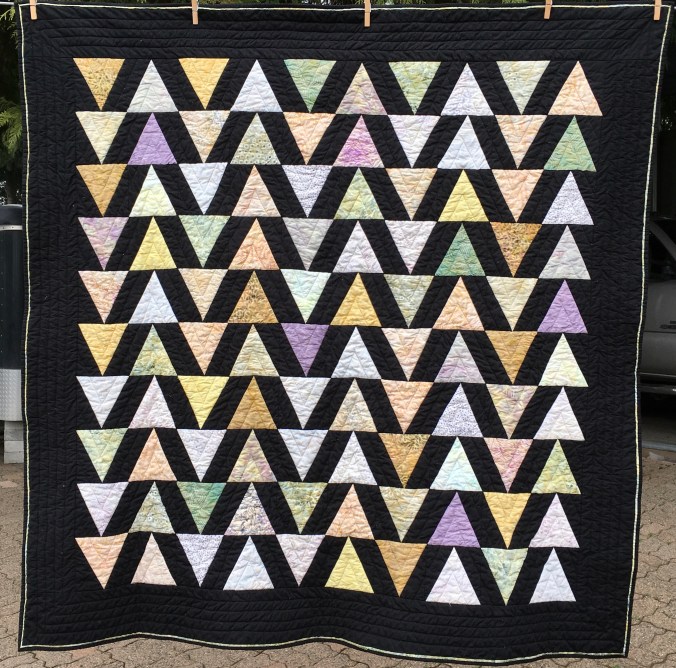
Smith Mountain Morning is DONE, done, DONE!!!
I started this quilt while at a workshop with Bonnie Hunter at Camp Arnold in 2015. I’ve been working on it pretty steady for the last few months. I made it bigger than the pattern … it is 89″ x 89″

 I did graffiti quilting, using Aurifil #2000 and just over 9 bobbins! It took me quite a while to quilt it! I used Hobbs 80/20 for batting! I’m almost through the roll that I bought a year ago!
This is my 13th UFO for this year! Now, as soon as I get 3 little baby quilts completed, I will have acheived my PHD in 2019!
PHD in 2020?

I’ve been asked if I’m going to do the PHD in 2020 … The answer is YES YES YES!!!
I have a ton of UFOs still left to do – so, I’m going to continue doing this. It certainly helps me to complete old UFOs and with finishing all the new starts, I don’t add to my UFO list. Win-win, wouldn’t you say? I’ll be posting more about this in the near future! In the meantime, gather up your UFOs and be ready to join in the fun!
One who sleeps under a quilt is covered by LOVE!
Happy Quilting!
Gail
*****************************
Linking to:
- Muv / Free Motion Mavericks @ Lizzie Lenard Vintage Sewing
- Put your Foot Down @ For the Love of Geese
- Can I get a Whoop Whoop? @ Confessions of a Fabric Addict
- Finished or Not Friday @ Alycia Quilts
- Sherry @ Powered by Quilting
- Michelle @ From Bolt to Beauty
- Off the Wall Friday @ Creations – Quilts, Art, Whatever
- Peacock Party @ Wendy’s Quilts and More
- TGIFF @ Storied Quilts
3D Challenge #2
I posted about Challenge # 1 HERE.
Island Batik did not say we needed to do 2 challenges this month … this was my choice. Especially since this project is also 3D. And, since I need to make sewing machine covers, this just made sense to me!
A Squirrel, a DrEAMI … it’s done
I’ve been dreaming, drooling, admiring and wanting to make this cute table topper from Vicki’s Crafts and Quilting!
 And I needed a new table runner for my coffee table … it was time for the pumpkins to be retired for the year. What’s a gal to do … it was obvious … it started easily with pulling fabric … and then it sat for a day … and then I started to make the first cut … and then the second cut … and before I knew it, it was almost done … SEW then I had to finish! And finish I did!

3D Challenge #1
 When this challenge was first mentioned, it sort-of indicated that it was to be something 3D … so I got to thinking … bags, sewing machine covers … oh the possibilities. Then, in late September, a quilt was indicated. Something with a 3D effect. I knew exactly which quilt to make and which fabric to use!! Continue reading
Monday update
Tool Time
This month, half of the Island Batik ambassadors were involved in the “A Piece of …” Blog Hop and the rest of us were challenged to use our favourite tool and make a quilt. I started out with one idea and made the top. However, I had forgotten to take pictures of me using the tool with the Island Batik fabric. Now that was plan dumb!!! So – that quilt got put aside and I changed my tool and design. I did use EQ to plan both quilts. That was tool #1. Continue reading
A Friday finish!!! :-)
Yes, you read that correctly! I have a finish. YEAH!!!!
Top it Off
October’s Island Batik challenge is “Top It Off.” We were told to create a holiday themed table runner or table topper that includes appliqué. Well, you all know how much I love applique (NOT!!). However, with my Janome 500E embroidery machine, applique has become SEW much easier!
Webbing a Quilt
In the spring, at our guild, I demo’d how to web a quilt. They asked me to provide written instructions. Well, that proved extremely difficult for me. SEW … as I was webbing my demo quilt for the Baby Quilt Marathon, I decided to do a video. You can see it on YouTube HERE. The quilt in the video is below.
Artsy-Fartsy with Aurifil Thread

At first I was Scared
This challenge scared me! I’m not an artsy-fartsy quilter. I don’t do “art.” The challenge directions were: Use any fabric art/non-traditional quilting/sewing/thread painting technique using 3 Aurifil thread weights. Oh me, oh my … what to do? I literally had NO idea. None at all. I was wondering if I could skip this challenge? Perhaps pay someone to do it for me? no … that’s not my style … I couldn’t live with the guilt!
Inspiration
Then, I was looking at a crazy quilt hanging in a sewing machine store and it hit me!!!
R-e-l-i-e-f !!!
YEAH!!! Suddenly, I knew what to do. I would do a crazy quilt block, embroider it with at least 3 weights of Auriful thread, make it into a little bag and call it done! What a relief to have a plan!
And, thankfully, I had the perfect fabric left-over from my Christmas RAPPing table runner. (see HERE). Along with pieces from the Island Batik Stash Builder bundles.
In April, we travelled across the country, which meant a few LONG plane rides. I quickly made my crazy quilt blocks, sewing them onto Hobbs 80/20 batting. One was partially embroidered on our trip.
Here is the first block

Happy Canada Day!!!
July 1
Is Canada Day! And the start of:
Earlier this spring, Jennifer Strauser. an Island Batik ambassador, reached out and asked if any of us would like to do a Quilt of Valor. I said, “yes,” provided I could do a Canadian one. The answer was “yes!” SEW, I knew I would be using only the white and red fabrics. We were all sent a stack (like a layer cake) of red, white, and blue fabric. Along with yardage: a solid white, 2 reds and 3 blues. It was a bit of a challenge to use just the red and white in the package. I did end up using one navy with red poppies on it. Also, I needed to use a red fabric from a stash builder bundle and some white=ish fabric left over from my “Stars on Ice” quilt.
Here is a picture of the stack from the Freedom line:

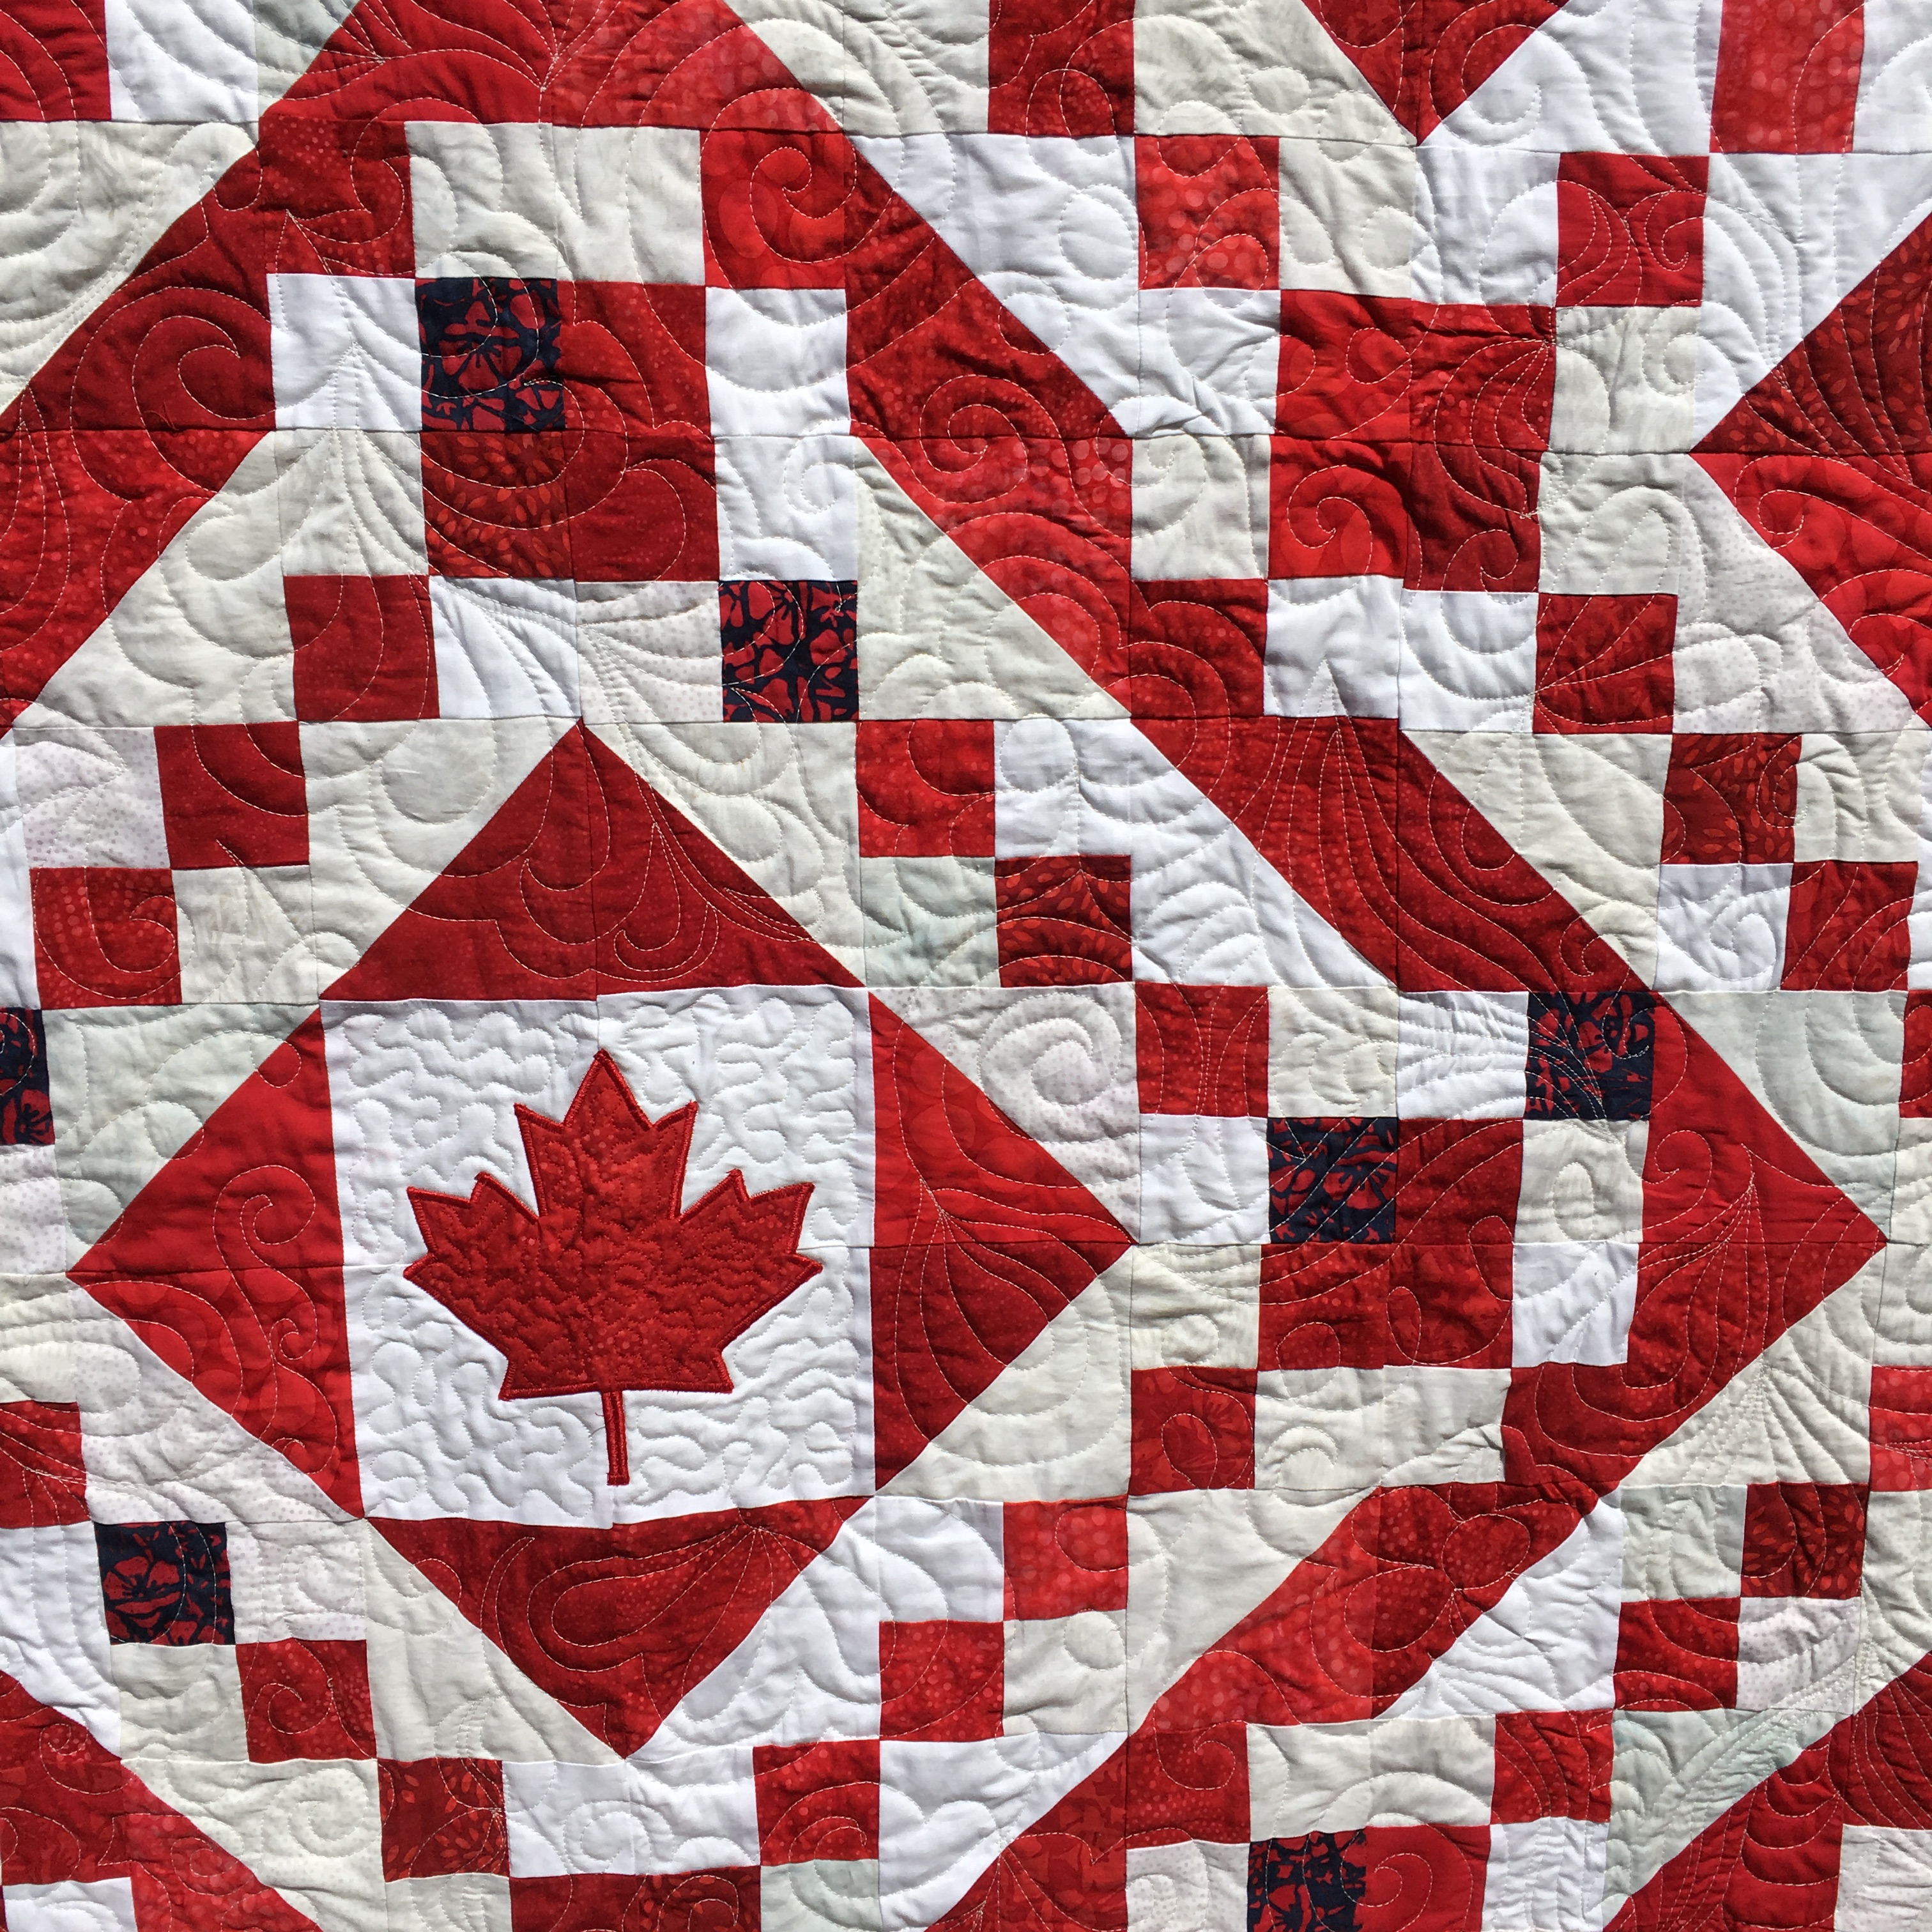
This quilt is my own pattern “Ivan’s Diamonds” and I’ve made it several times. You can check them out HERE, HERE, and HERE. Although, this is the first time I’ve put a maple leaf in the middle. I used the Artistic Cutter to cut out the Maple Leaf.

The quilt will hang in the Quilt of Valour display at the Ladner Car and Quilt Show in August. After that, Lynn, our guild’s Quilts of Valour volunteer, will deliver it to a representative from Quilts of Valour and it will eventually be presented to a past or present member of the Canadian Armed Forces who is ill or injured as a result of their service to Canada.
Here is a close-up of the centre of the quilt. This picture shows the true colours better than the above picture. It is grafitti quilted with a light grey, Aurifil #2600 and Hobbs 80/20 batting. I did bind it with a dark navy as there was not enough red fabric left for binding.
Visit the other blogs in the hop.
Today it’s
Becca Fenstermaker — Pretty Piney
Denise Looney — For the Love of Geese
Gail Sheppard — Quilting Gail You are already HERE! 🙂
Tomorrow, July 2
Pamela Boatright — Pamela Quilts
Anne Wiens —Seams Like a Plan
Wednesday, July 3
Bea Lee —Bea Quilter
Carla Henton — Creatin’ In the Sticks
Thursday, July 4
Emily Leachman — The Darling Dogwood
Joan Kawano — MooseStash Quilting
Jen Strauser – Dizzy Quilter
Friday, July 5
Steph Jacobson — Steph Jacobsen Designshttp://Dizzyquilter.com
Leah Malasky — Quilted Delights
Anja Clyke — Anja Quilts
Maryellen McAuliffe — Mary Mack Made Mine
Disclaimer: The products featured in this Blog post were given to me by Island Batik, and their program partners: Aurifil, Hobbs Batting & AccuQuilt!
Happy Quilting!
Gail
Baby Quilt Marathon … starting … soon
A few blog posts ago, I mentioned that I have 3 UFO baby quilts and 2 new baby quilt starts. A couple of readers suggested that I have a Baby Quilt Marathon and get those little quilts done!
SEW … that germinated a few seeds and got me thinking … What would a Baby Quilt Marathon look like?
According Merriem-webster, one of the definitions of a marathon is an endurance contest. It can include an event, an activity or requiring concentrated effort.
Typically runninmarathons can be around 26 miles or 42 kilometres.
Now, I know that I can not sit at the sewing machine for 26 hours, let alone 42 hours … SEW … I decided that I can concentrate on these baby quilts for 26 hours … over the space of 2 weeks. That’s less than 2 hours a day. I can do that! And so can YOU!
SEW … are you going to join me? All you need to do is keep track of your hours and make a concentrated effort to work on baby quilts and get them done!
OK OK …. so you don’t have 5 baby quilts that you need to finish? … that’s OK … you can work on whatever project you want. But it has to be a concentrated effort to a goal of finishing the project.
What happens if you don’t sew for 26 hours in 15 days? Absolutely nothing. But you need to make an honest effort to do so.
When people run marathons all sorts of things happen. I did a half marathon several years ago (before my back became nasty about it) and I was SLOW!!! My son text me when I was about the 1/2 way mark and said he was finished!!! That made me a bit mad, but also made me determined to finish. Some people that were running didn’t finish … but at least they tried. That’s all that I will ask of you … that you try! 🙂
I won’t show you all 5 of the baby quilts, but I will show you one of the new starts … I have started to add borders.
One who sleeps under a quilt is covered by LOVE!
Happy Quilting!
Gail
A UFO is done, done DONE!!!
Try It!
Try It!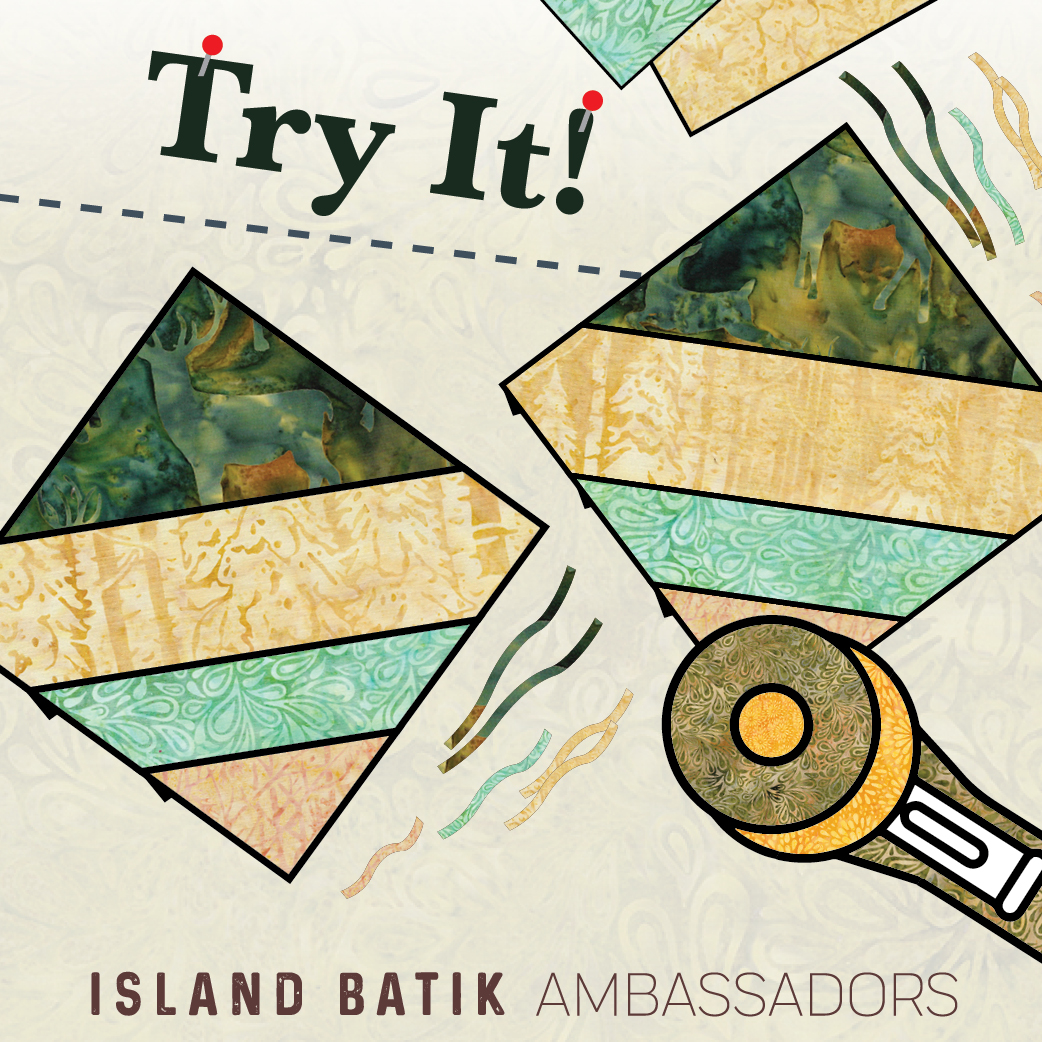
The Island Batik challenge for this month is: “Try a Technique” Challenge. Oh, lots and lots of things to choose from!!! I had been wanting to try Angela Walter’s “Free Motion Challenge, Layered Quilting.” Sew, that became my project!
Angela Walter’s
